I am having such fun with this month’s block play. Tara Faughnan gave us a whole packet of patterns that included much more than recognized log cabin forms–we also got triangles and a big hexagon. I am still playing with these patterns. (Tara uses a foundation piecing method where the template patterns printed on regular typing paper can be reused over and over.)
I noted some time back that Tara takes her small “play” blocks and mounts them on stretched canvas frames. I was intrigued…
So, what emerged for me was a really fun–and at times frustrating–learning curve. I ordered 10-inch square canvas frames, a hand-held stapler, and, eventually some felt for the back and some little sawtooth hangers.
Here’s what happened:

The hexagon was just totally scrappy, made from my strips to try out this pattern, and I will make another one as it was so fun.
I quickly learned that I needed a bigger size outer block than a 12.5 inch square to make the corners square up nicely. (There are online videos showing how to do the corners–indeed, how to do the whole process.) Something like a 14-inch square is better for me.
And, I discovered that my cheap stapler…had to go. And that maybe the staples I was using were too large, too long. The length of a staple is called its “legs.” I adore tools, as many of you probably recognize, so I purchased an electric (battery driven and rechargeable) stapler, but have not tried it yet. I also got a smaller staple. The stapler is all charged and ready to go.
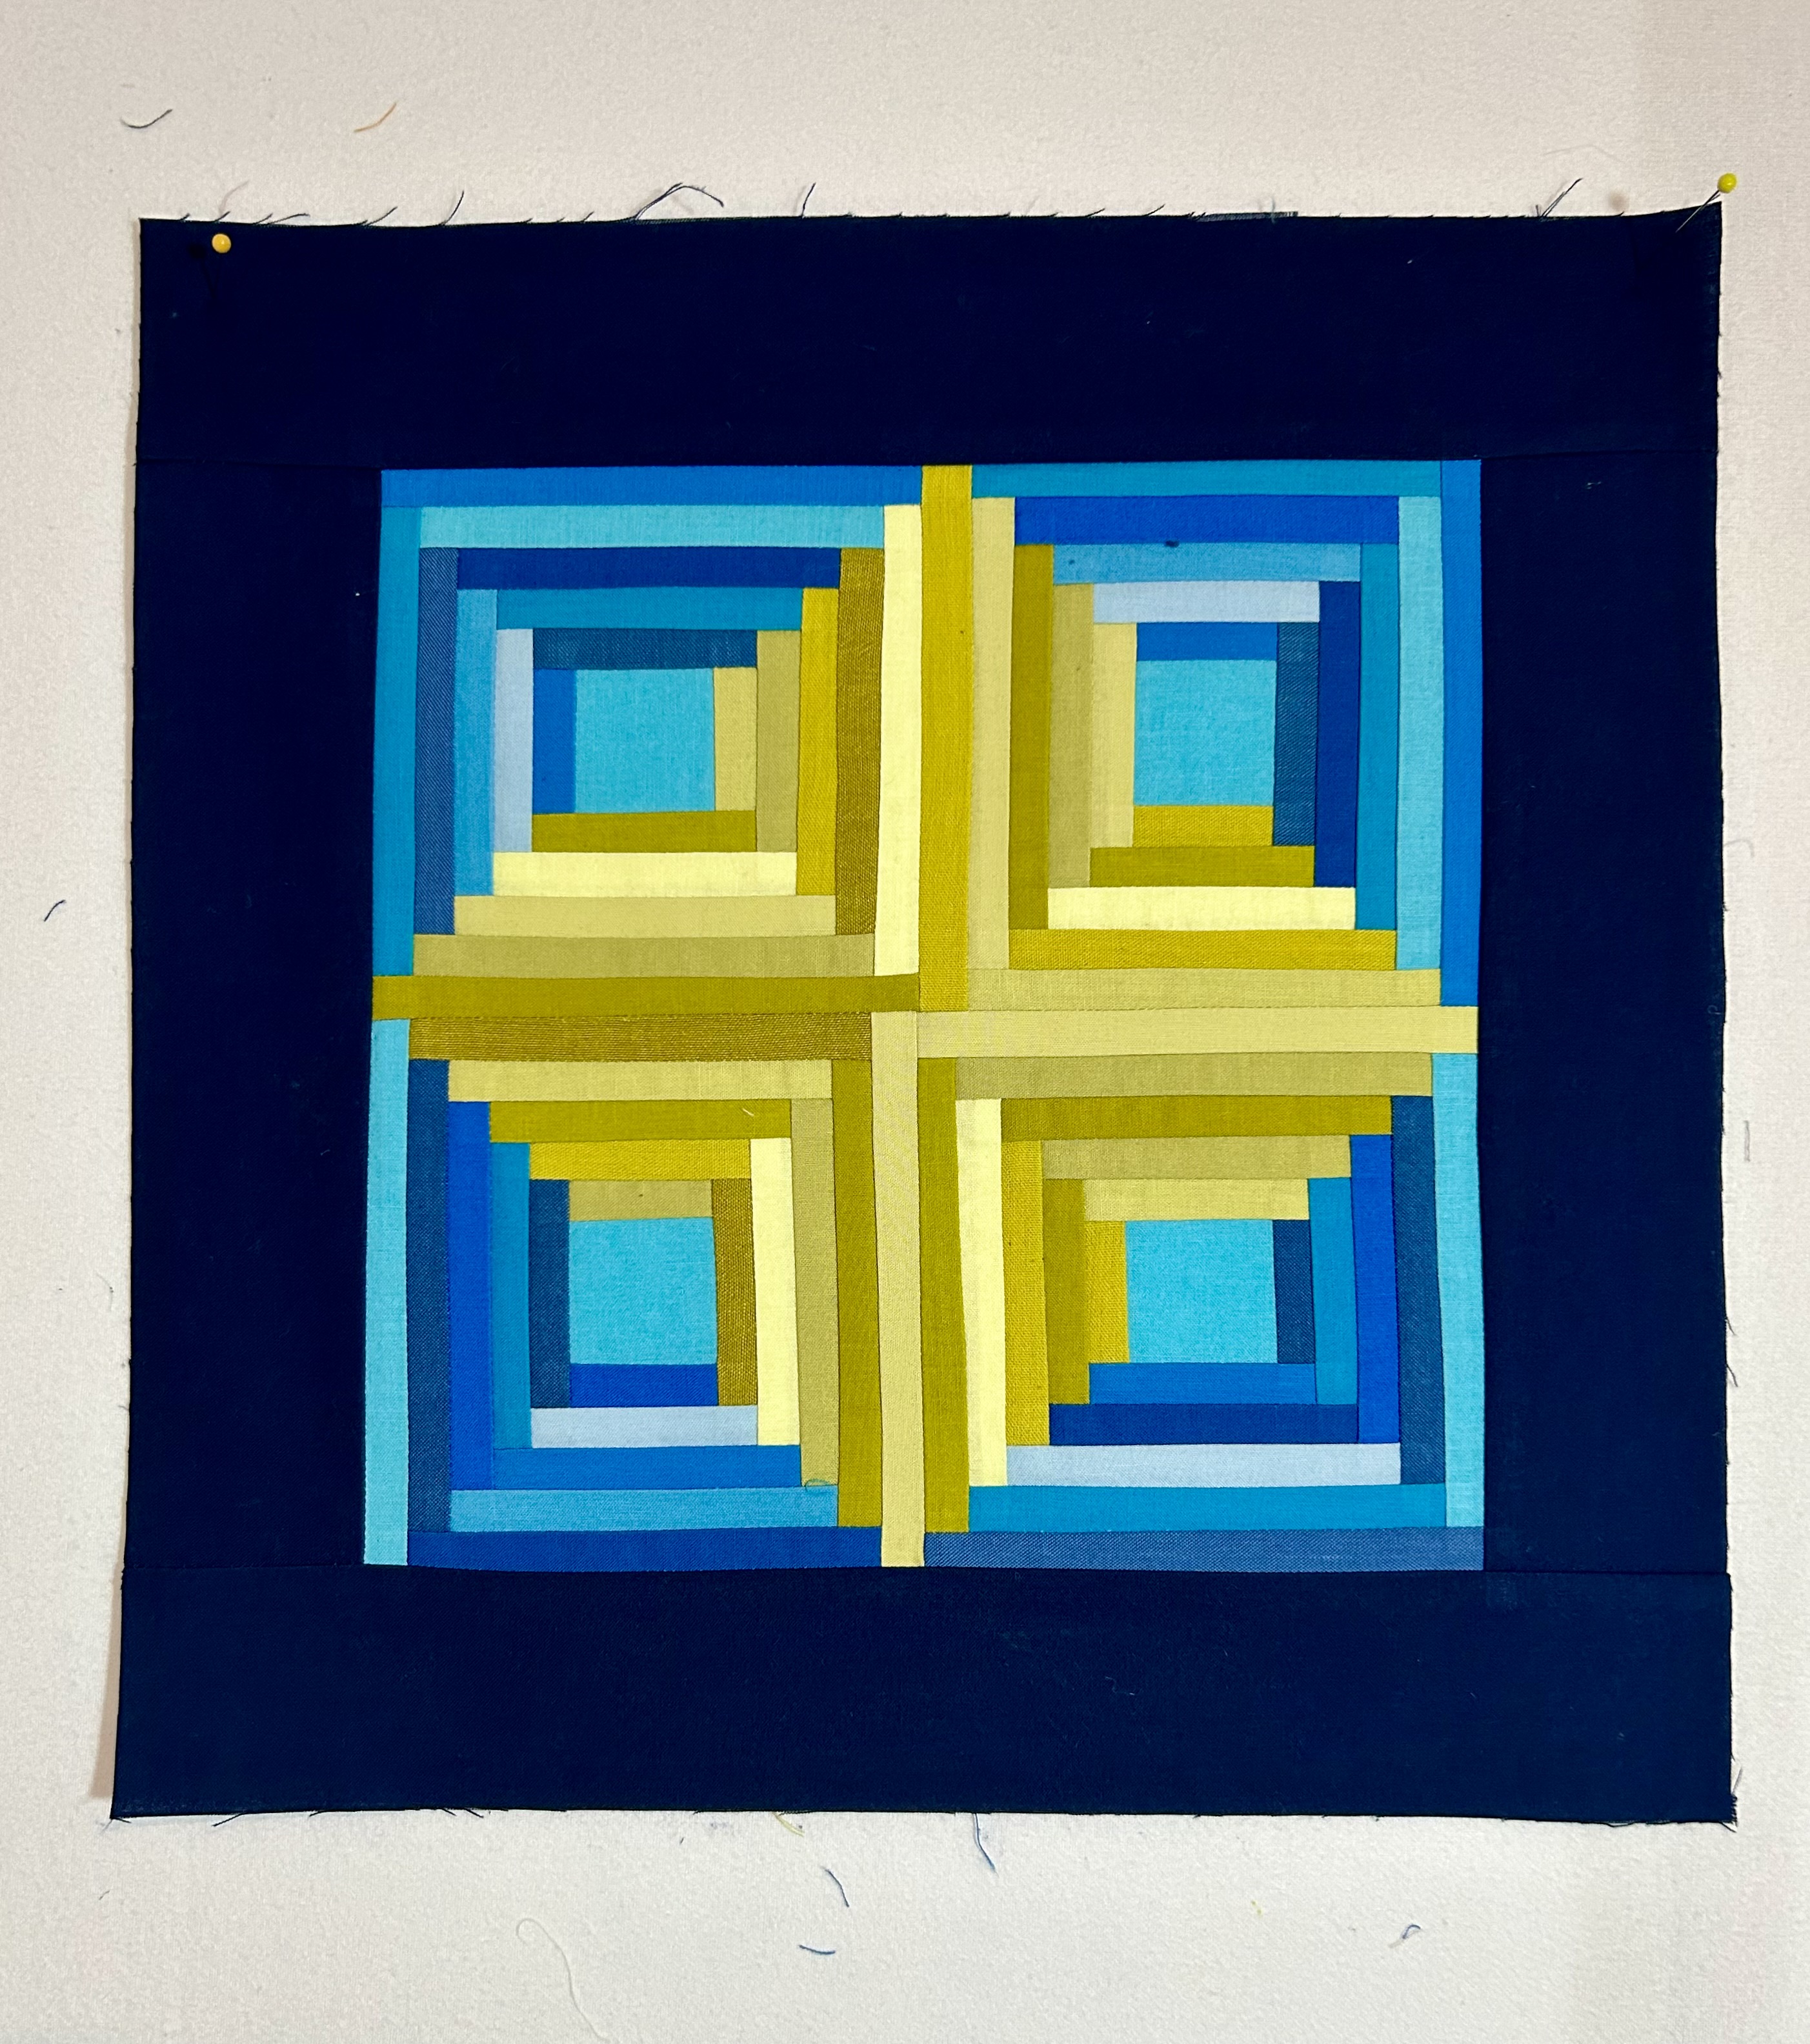
For this block–which needs its dark blue border–I ordered some 12-inch canvas frames. And I can’t wait for them to come. Maybe today. (This block is made from the palette that I pulled for this month. And, yes, the yellow green fabrics featured uses Kona pickle as its key color.)
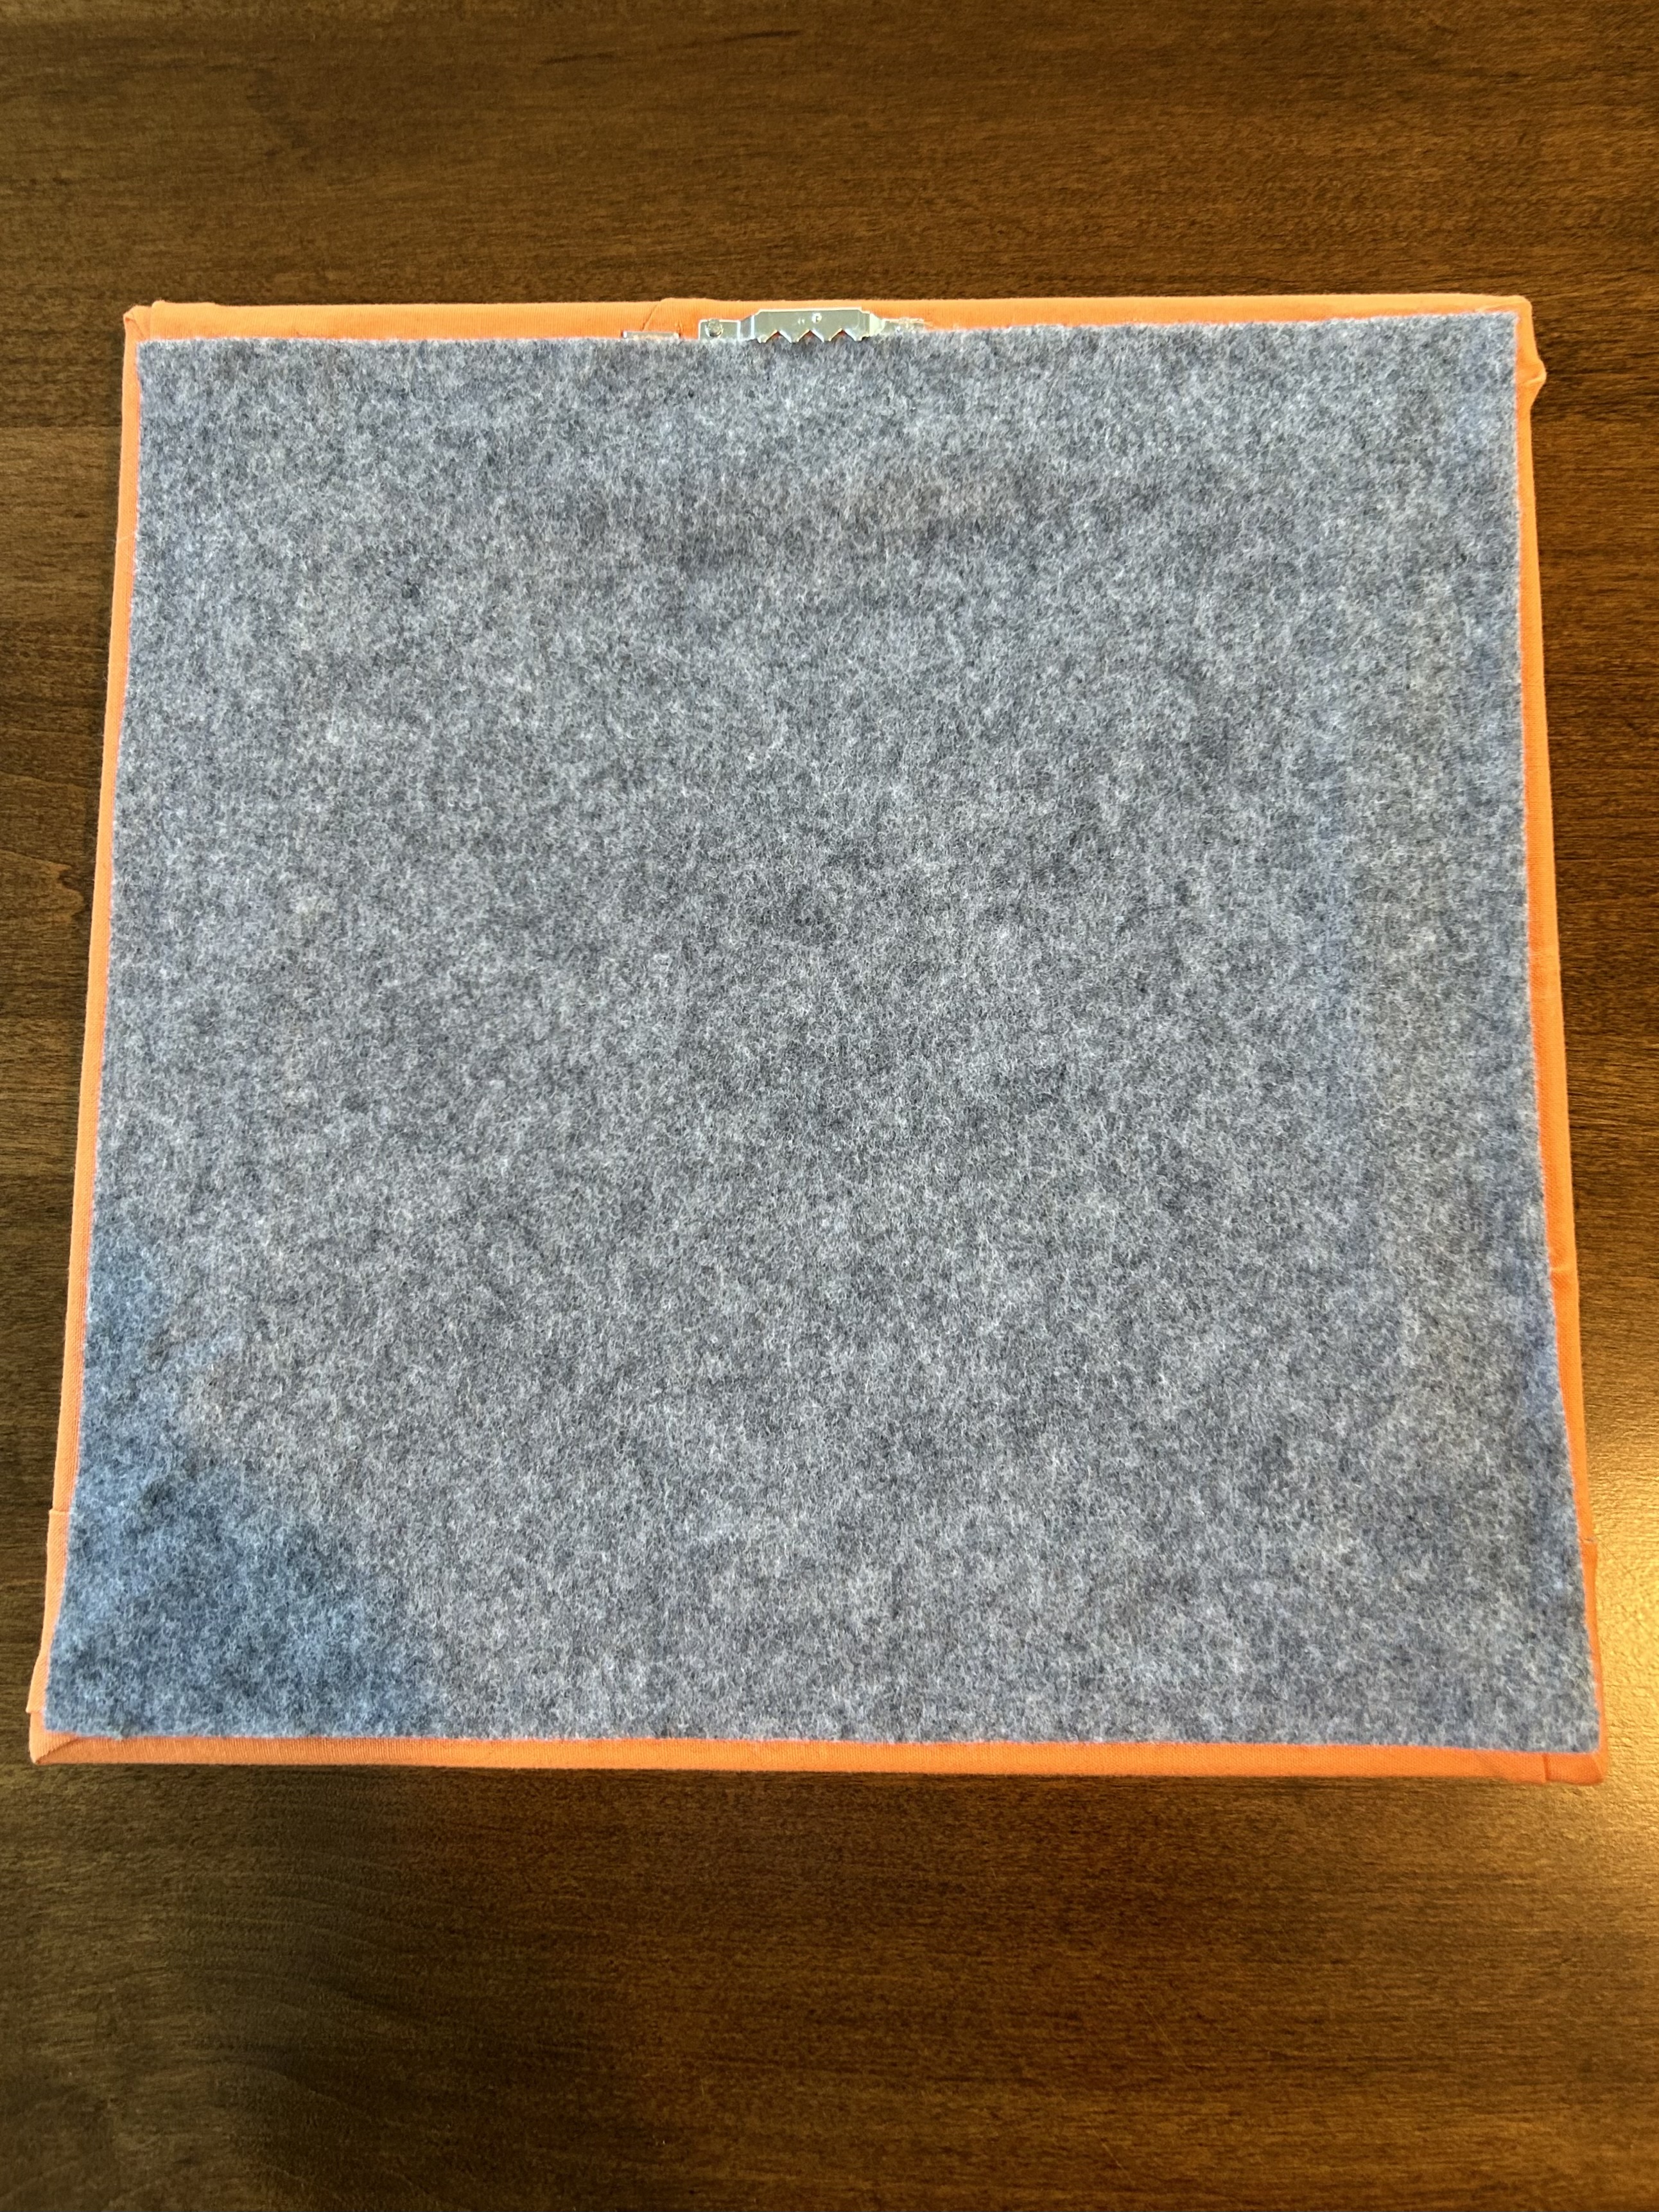
I wanted the backs to look nice, so that was a learning curve too. The trick is to get a wide enough felt backing (glued down) so that the sawtooth hanger still can work and so that the felt covers more of the back.
I redid the borders on the hexagon block so that it had wide enough pieces to go around to the back without struggling and stretching–which can throw off the alignment on the front. But this felt could have been cut wider. It was my first try. I glued it on the edges with a strong “tacky” glue–the same one I use for rope bowls to stabilize cut rope ends. (Note that the fabric on the left bottom corner is closer to being an almost perfect fold–which should run next to the edge of the canvas.)

This one is better:
Nailing the tiny nails into the sawtooth was an issue–until I used a pincher type pliar to hold that tiny nail until I got it started. (That pliar is also good to pull a staple if needed, along with a screwdriver thin enough to pry out the staple.) And I taped the sawtooth center to hold it steady while I nailed.
Now, I am waiting for the 12-inch canvases to arrive (along with more 10-inch ones). And I’m still sewing blocks. More on those later.
For this block, I made a tiny quilt and hung it in the front hall. I just used the leftover grey strips to make it–and try out this pattern. It’s kind of funky–and I like “kind of funky.”

But…hmmm. For these long skinny log cabin types, what about a rectangle frame??? I love the neat look of these blocks on stretched canvas.
And won’t they make nice little gifts?

I love your new artwork. You do some of the neatest things. I always look forward to seeing what you are doing.