Months ago, the Charleston Modern Quilt Guild challenged members to “make the Churn Dash block modern.” The reveal was at our meeting last week, and members outdid themselves with their creativity.
Here’s my effort. The Churn Dash block is a 9-patch block, so I made 9 blocks, using the three elements in the Churn Dash block, to create each of the blocks below. And I had a super good time doing it too. The quilt is now a big 9-patch.
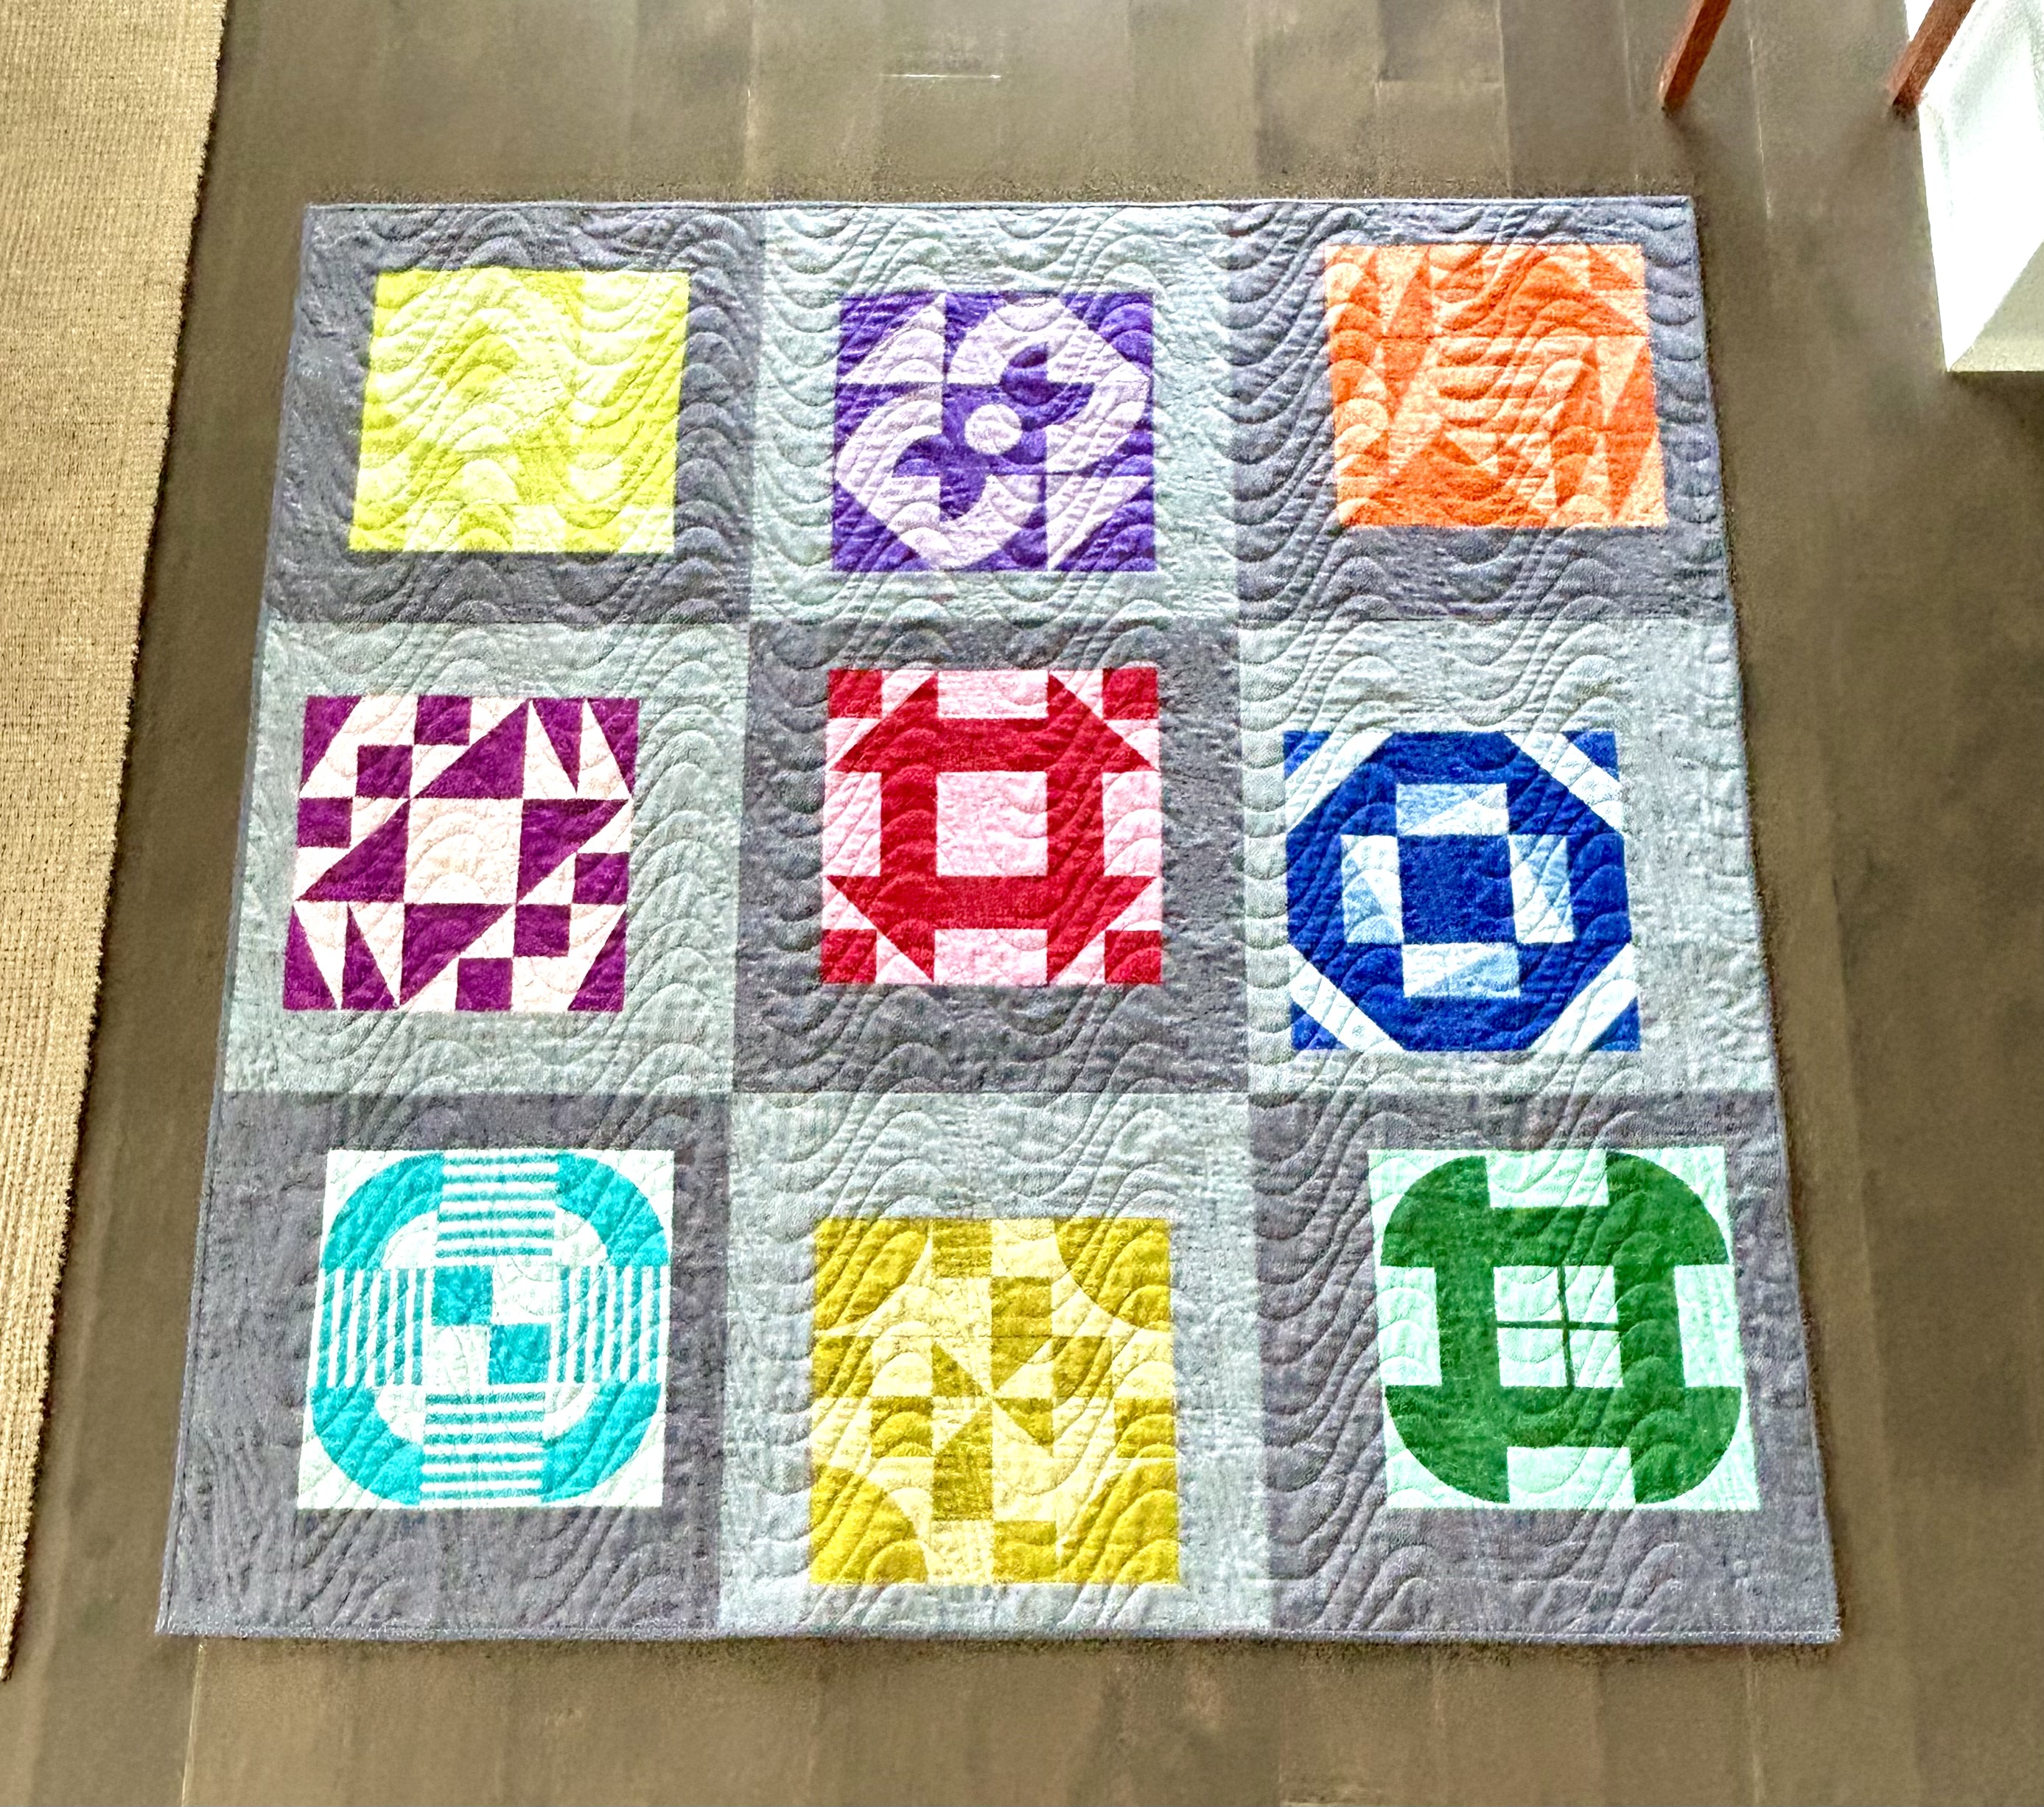
The Churn Dash block is actually fairly simple: it has a center square, 4 corner half-square triangles, and 4 sets of 2-color rectangles that surround the center square.
The red block in the middle is the closest block to the original. I used the Cat’s Cradle ruler to make the four corner pieces that alter this original block unit. The extra square at the corner is part of the Cat’s Cradle half-square triangle ruler construction. (Thanks you Rick Sanchez for demonstrating this ruler to me.)
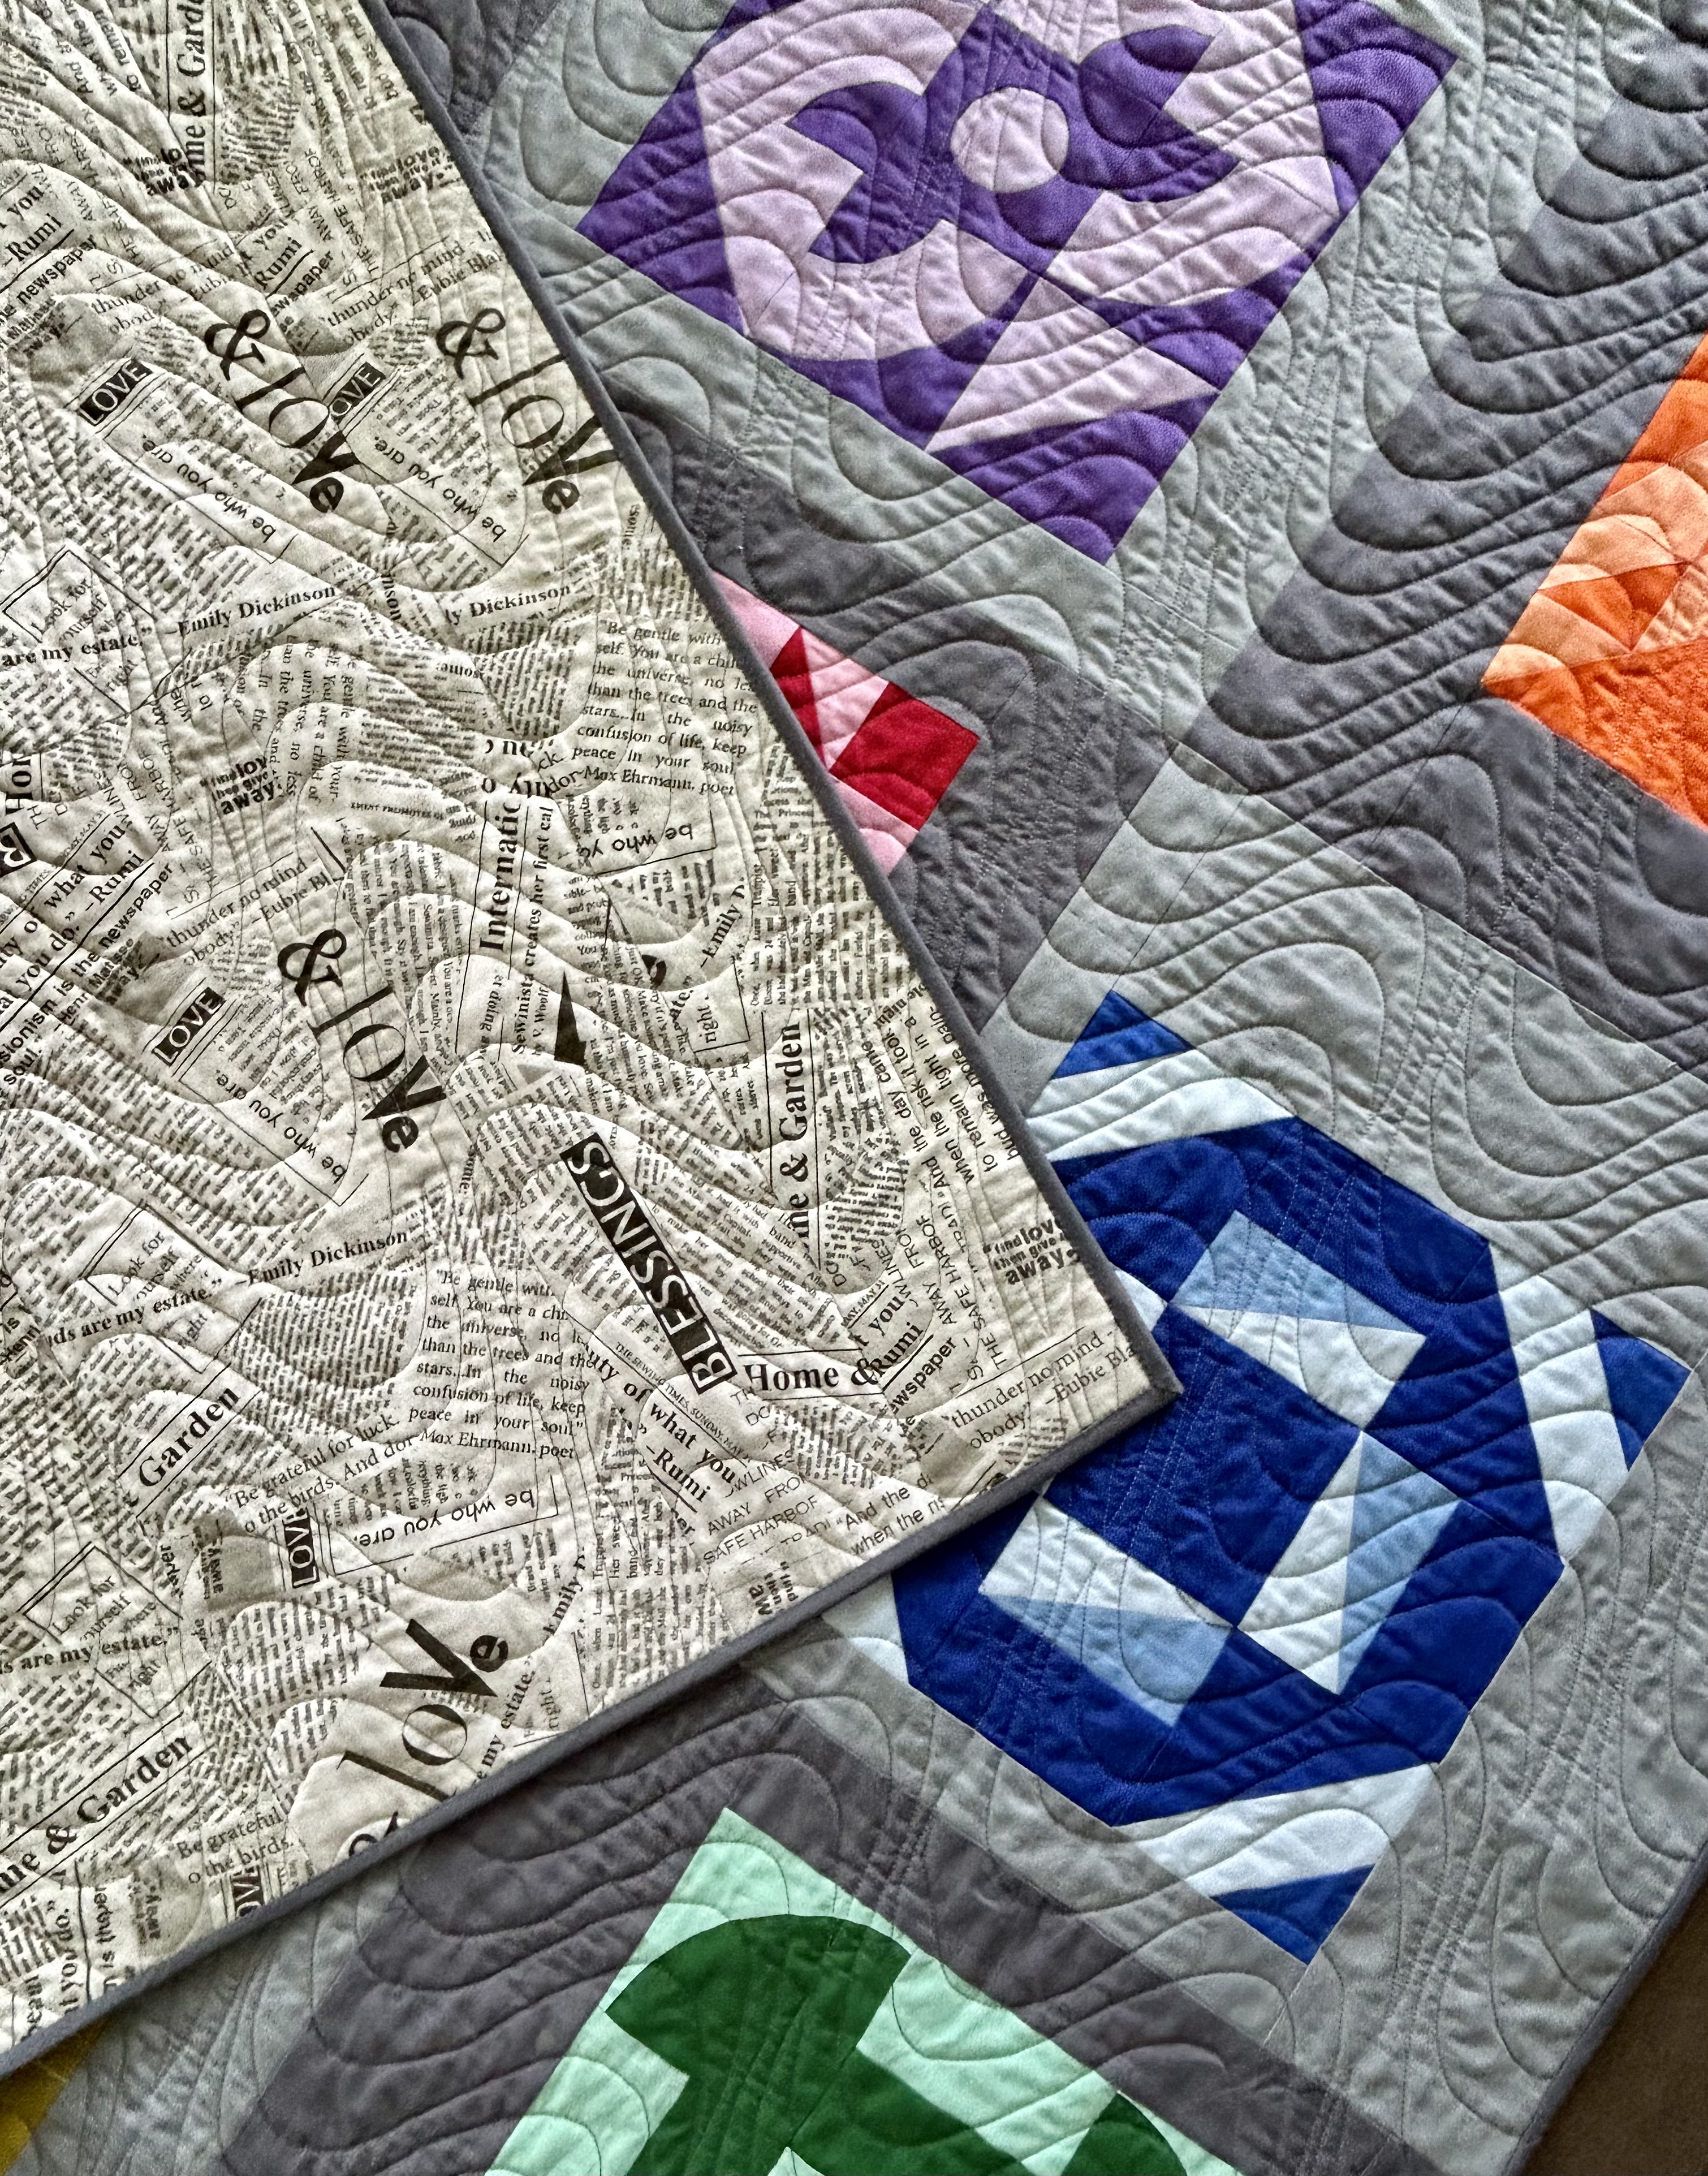
Here’s the backing, before I go on. The pantograph is New Wave, from Willow Leaf Designs, sold at Urban Elementz. But I had it made a bit larger than the regular one. (Thanks Urban Elementz.) (And thanks to longarm Canadian quilter Wendy Currie for suggesting this pantograph.). I quilted with a medium grey cotton thread from Signature. The larger panto version was trickier to use as it has a long, long stretch in one place that demands total concentration and steady hands and the need to be bodily positioned to make that sweep without pausing.). Still, you don’t really notice my bobbles unless you are super picky–the panto just blends everything together in its intensity. It provides beautiful texture.
Now I want to talk briefly about my other 8 blocks that surround the center. *The blocks discussed will be below the text.
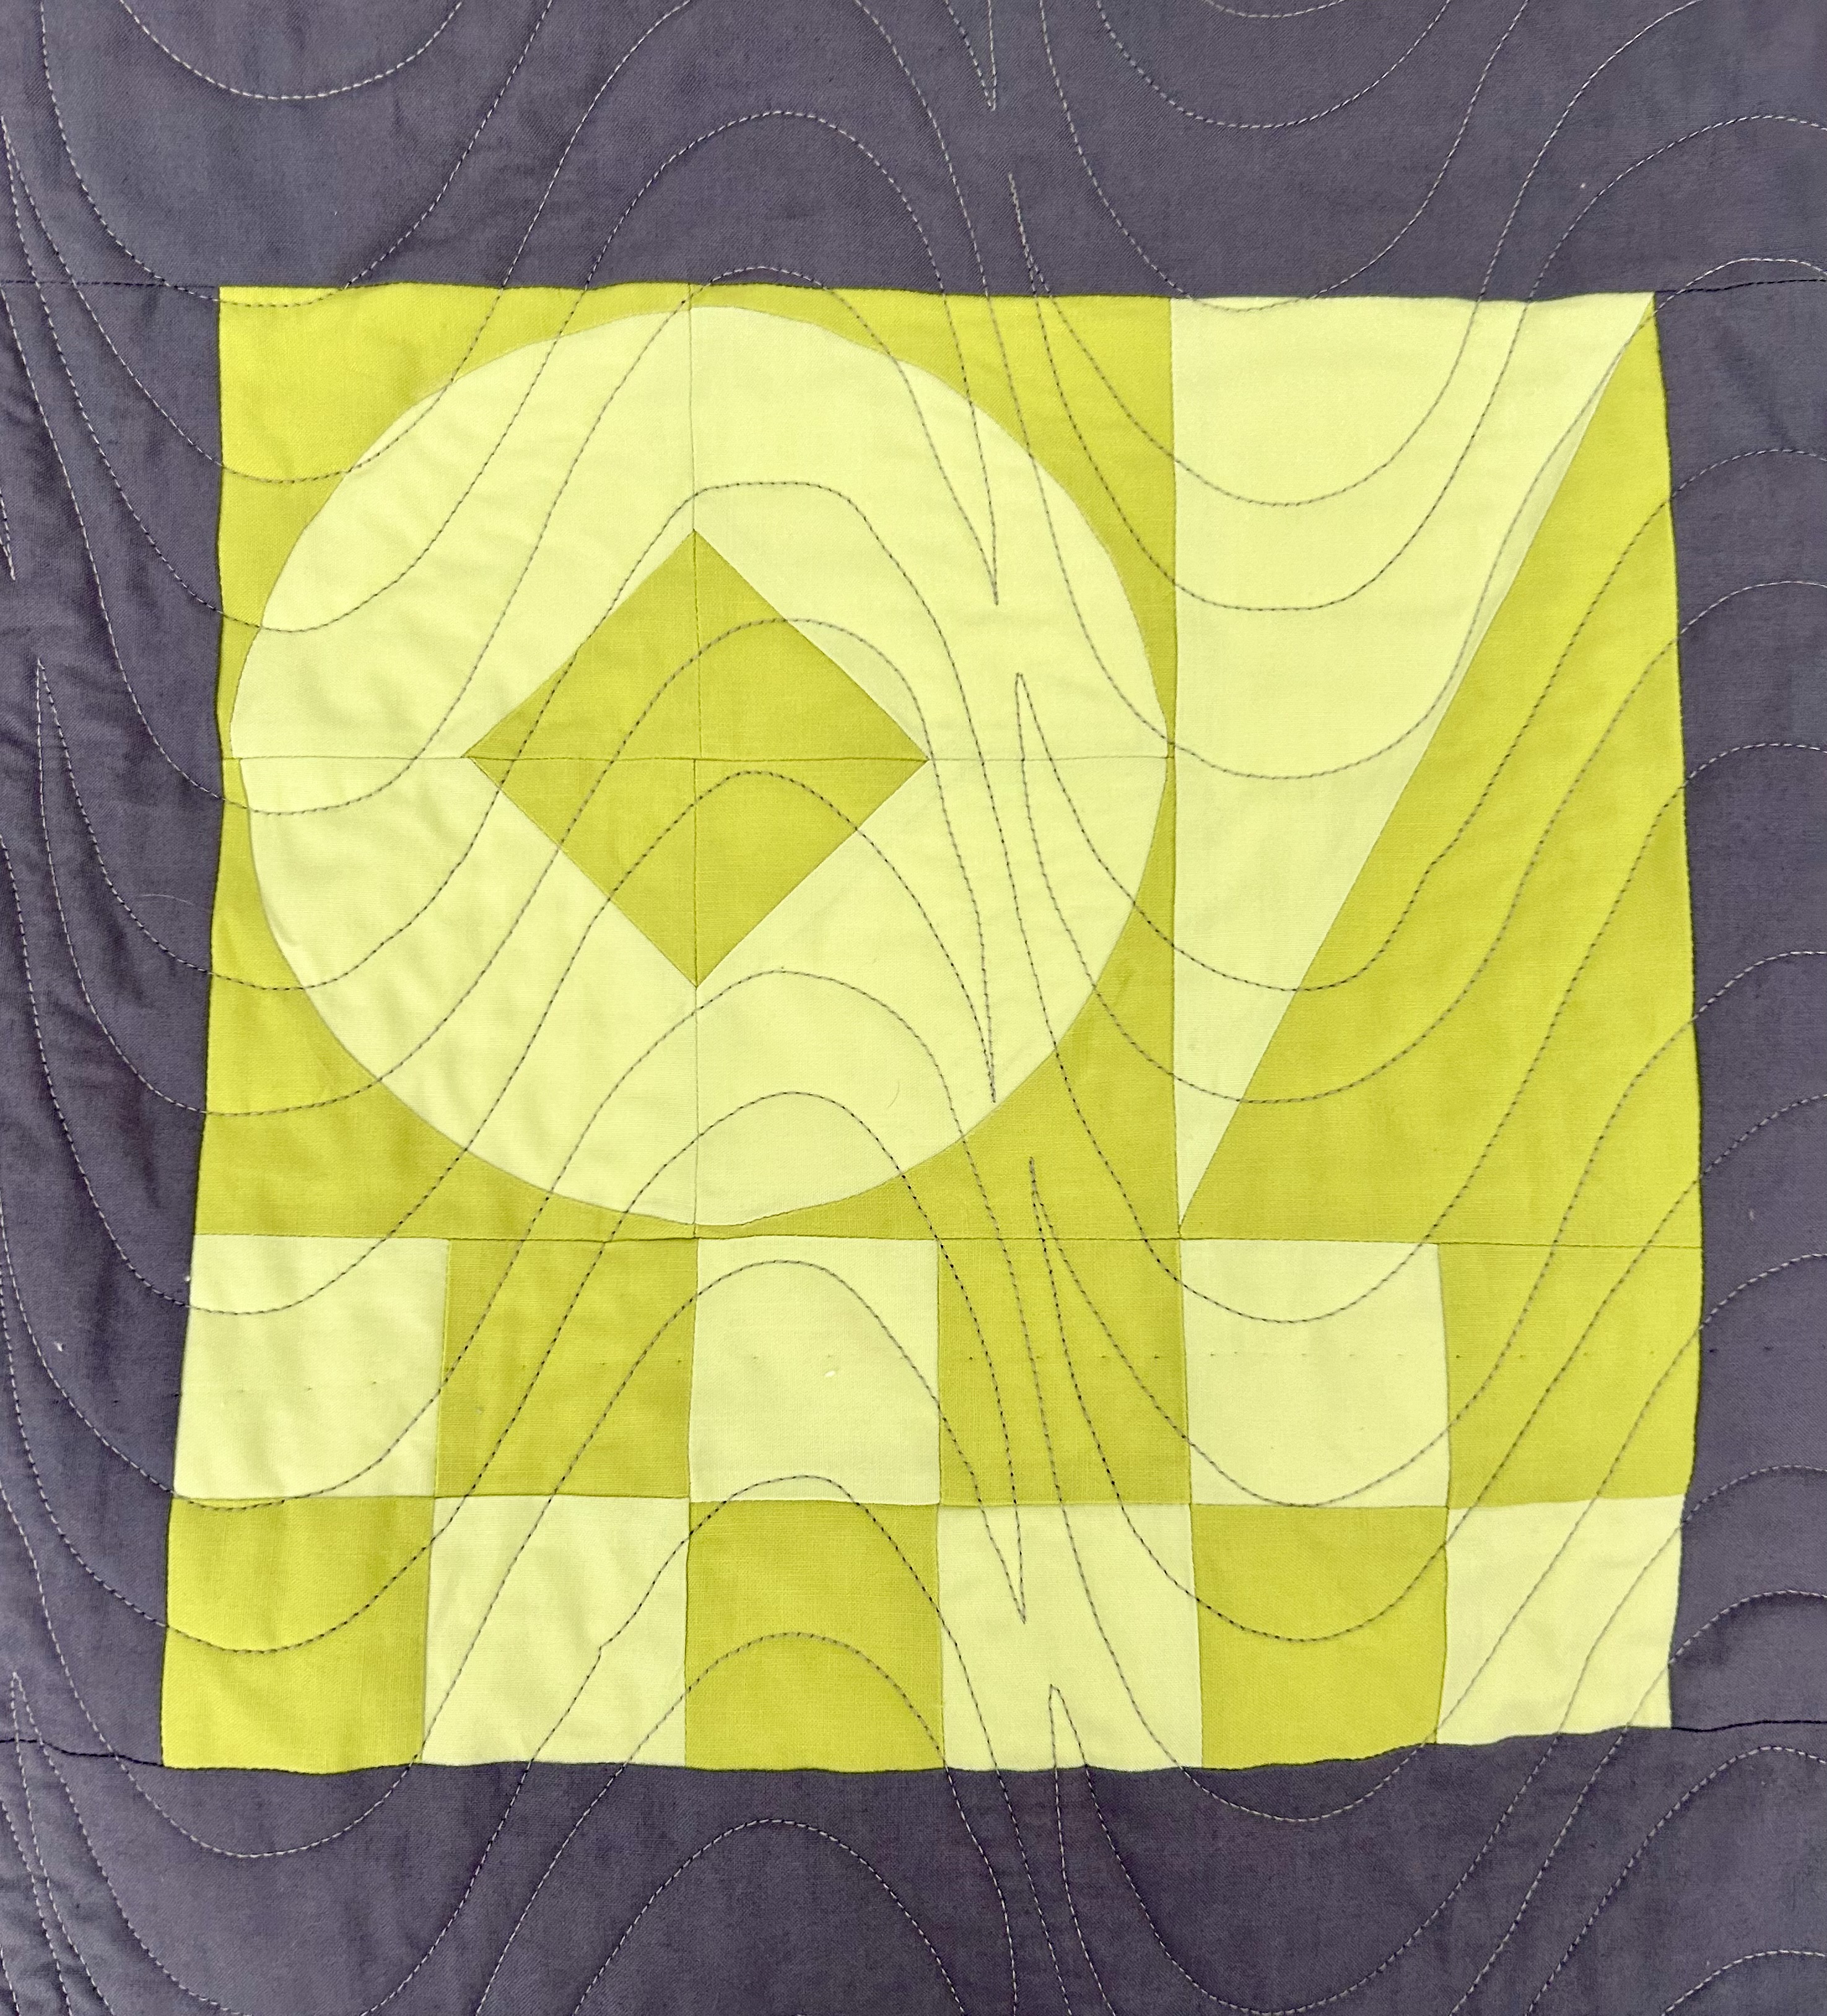
As I went along making these blocks, I got bolder with regard to moving the three elements around the space. But this block–the last one I made–is the only one that moved the center square to another location. This center combines the 4 corner half-square triangles, now made using a riff on the curved Drunkard Path block, due to the addition of a center piece. Putting 4 of these curved blocks together makes the circle with the square in the middle. (I learned this block in my Blocks 1 online class taught by Tara Faughnan last year.) The large half-rectangle triangle represents the regular 2-color side rectangles. I used the Hurty ruler to make all the half-rectangle triangle blocks I used (Latifah Saafir). The strip of 4-patch blocks basically just rounds out this block as the 3 Churn Dash units are already present in the other two pieces of this block.
Below, the corner half-square units are intact, and the center has a circle in the middle (inset circle method learned in my Blocks 1 online Tara Faughnan class last year). The side rectangles have become curved. But, what a cool block this is! I love it. And I love that it came along inside some play time.

Below, the corner half-square triangles are the Cat’s Cradle version, and when combined, they form a larger triangle. The center square is striped, and the 4 side units are now half-rectangle triangle units combined to make a bigger statement.

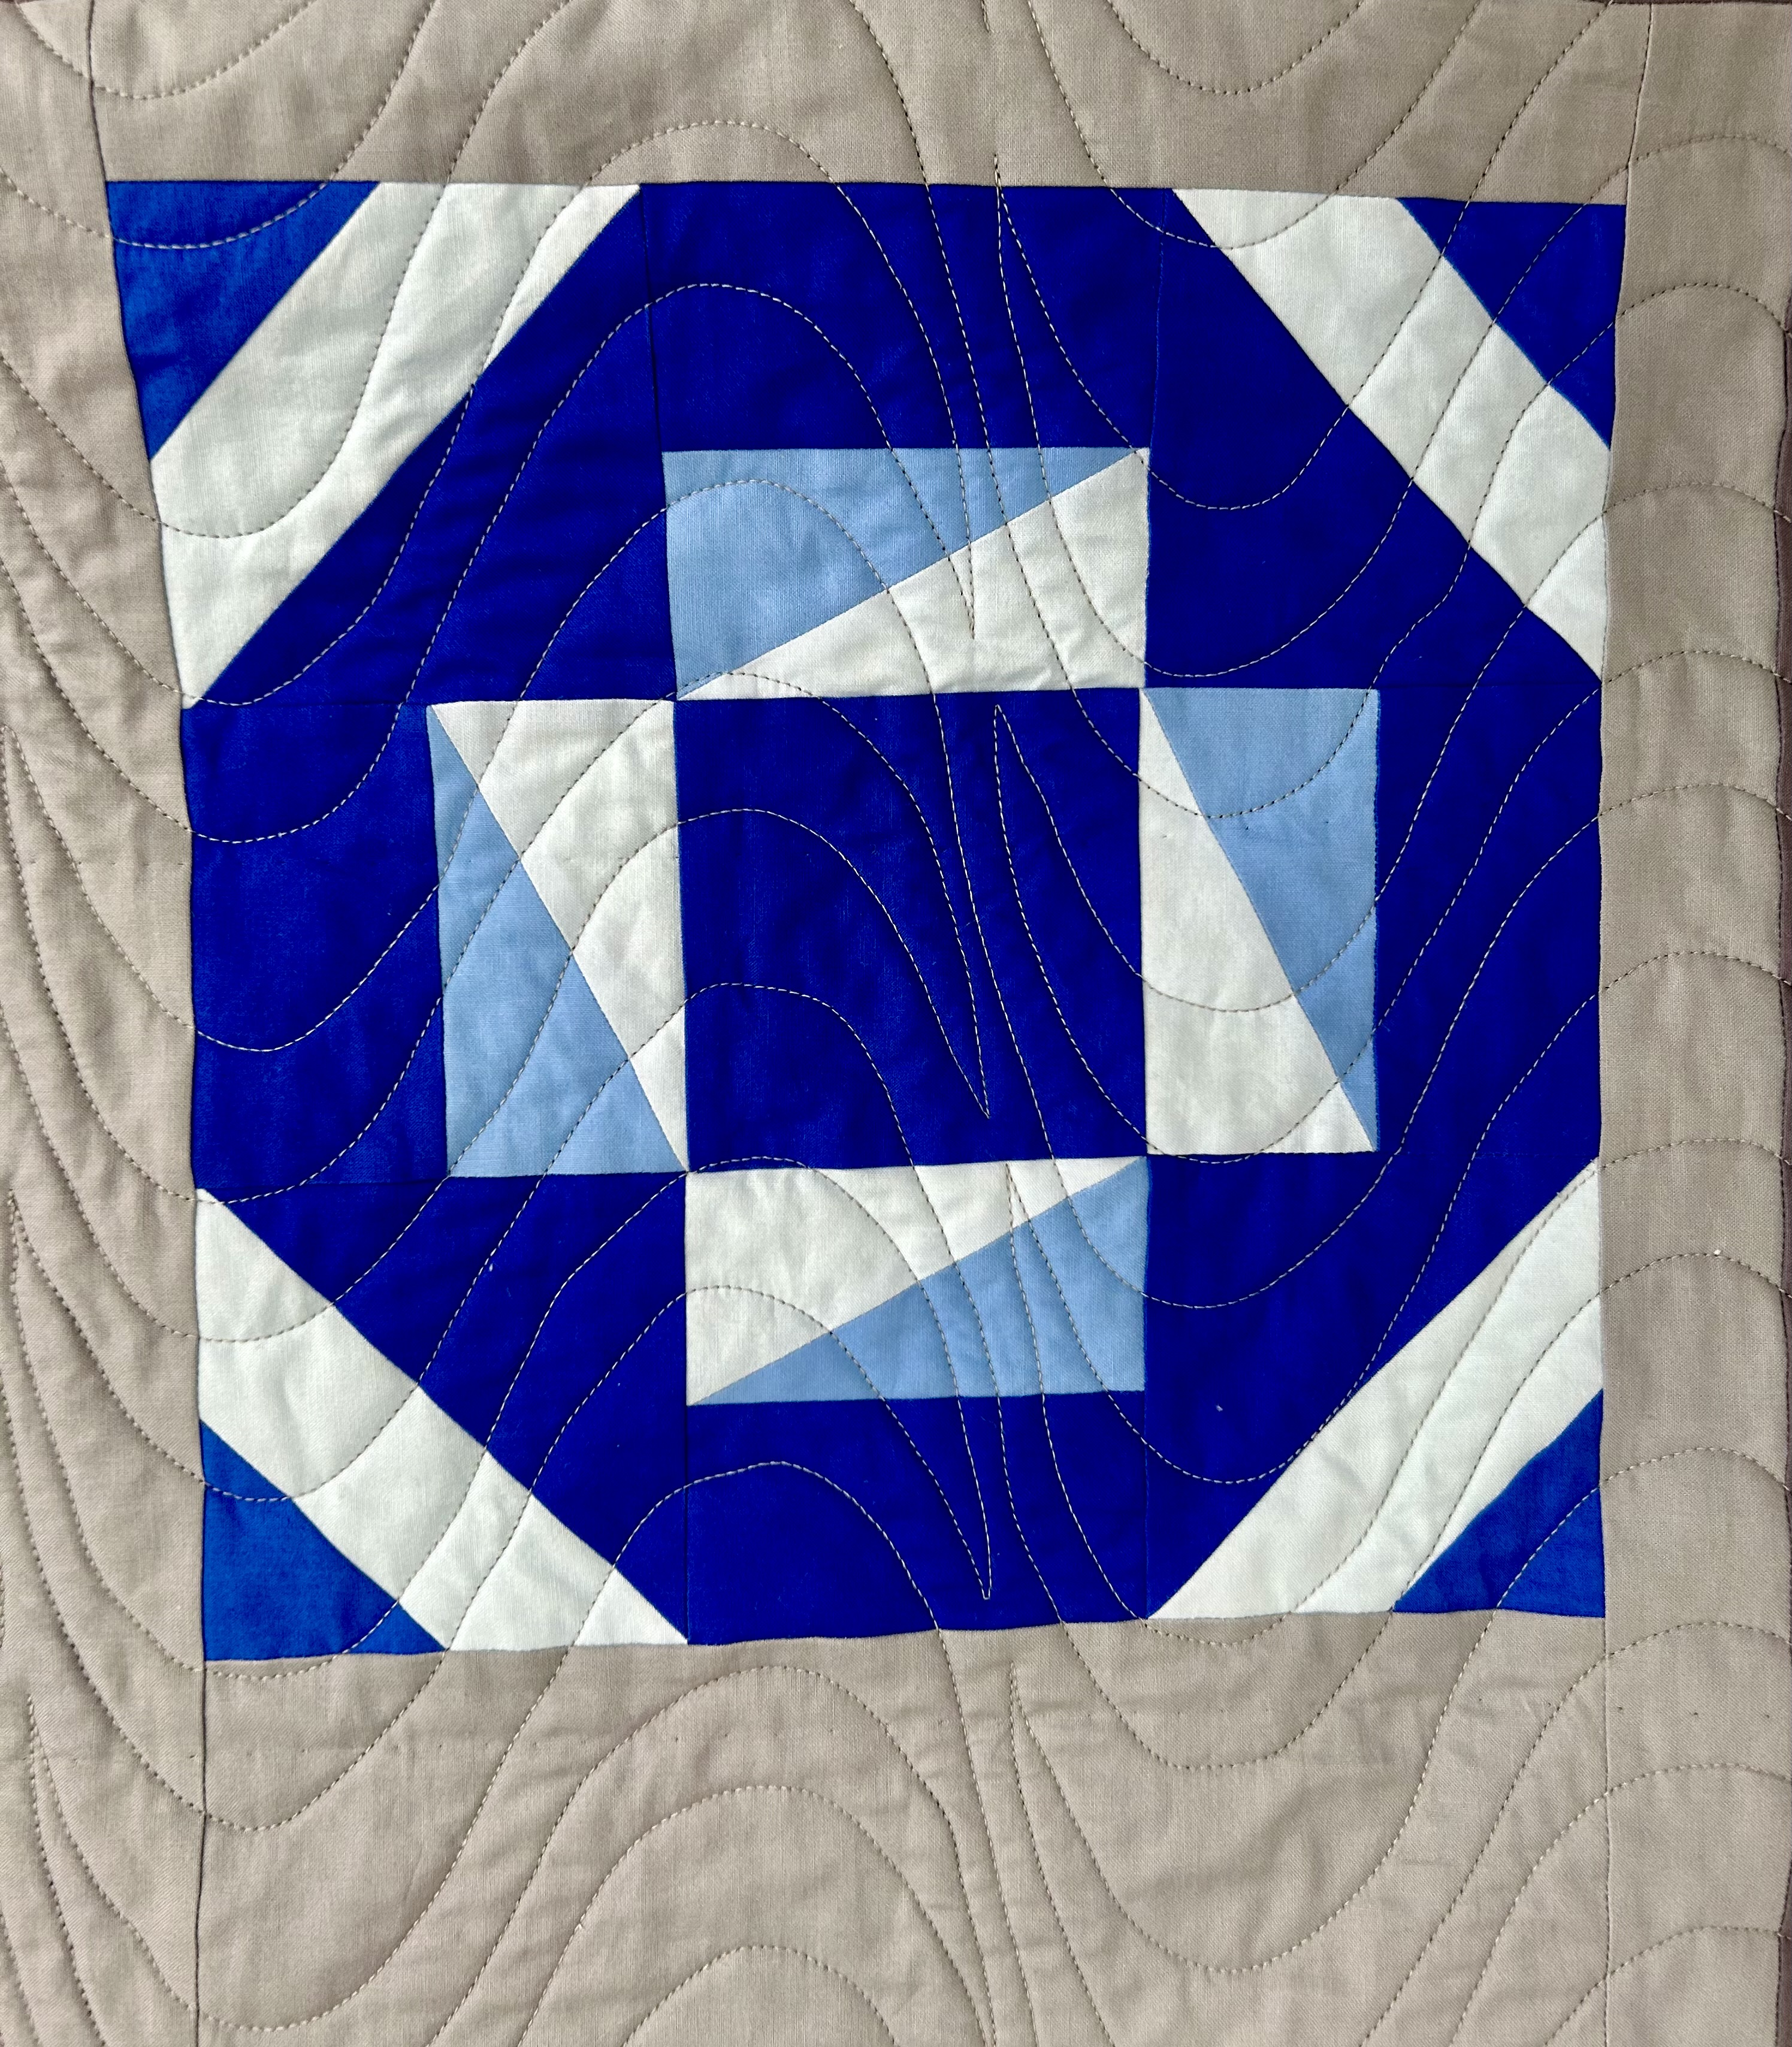
Below is a simple block. The corner half-square triangles are cut with a stripe. And the side rectangles are now half-rectangle triangles set with a regular rectangle (dark blue) that surround the plain center. In this block I added a third color–the lighter blue.
Below, the Cat’s Cradle half-square triangles surround the center. Two corners are two half-rectangle triangles, and two corners combine a half-rectangle triangle with two squares, a dark and a light square that work to make the little strip of dark squares.

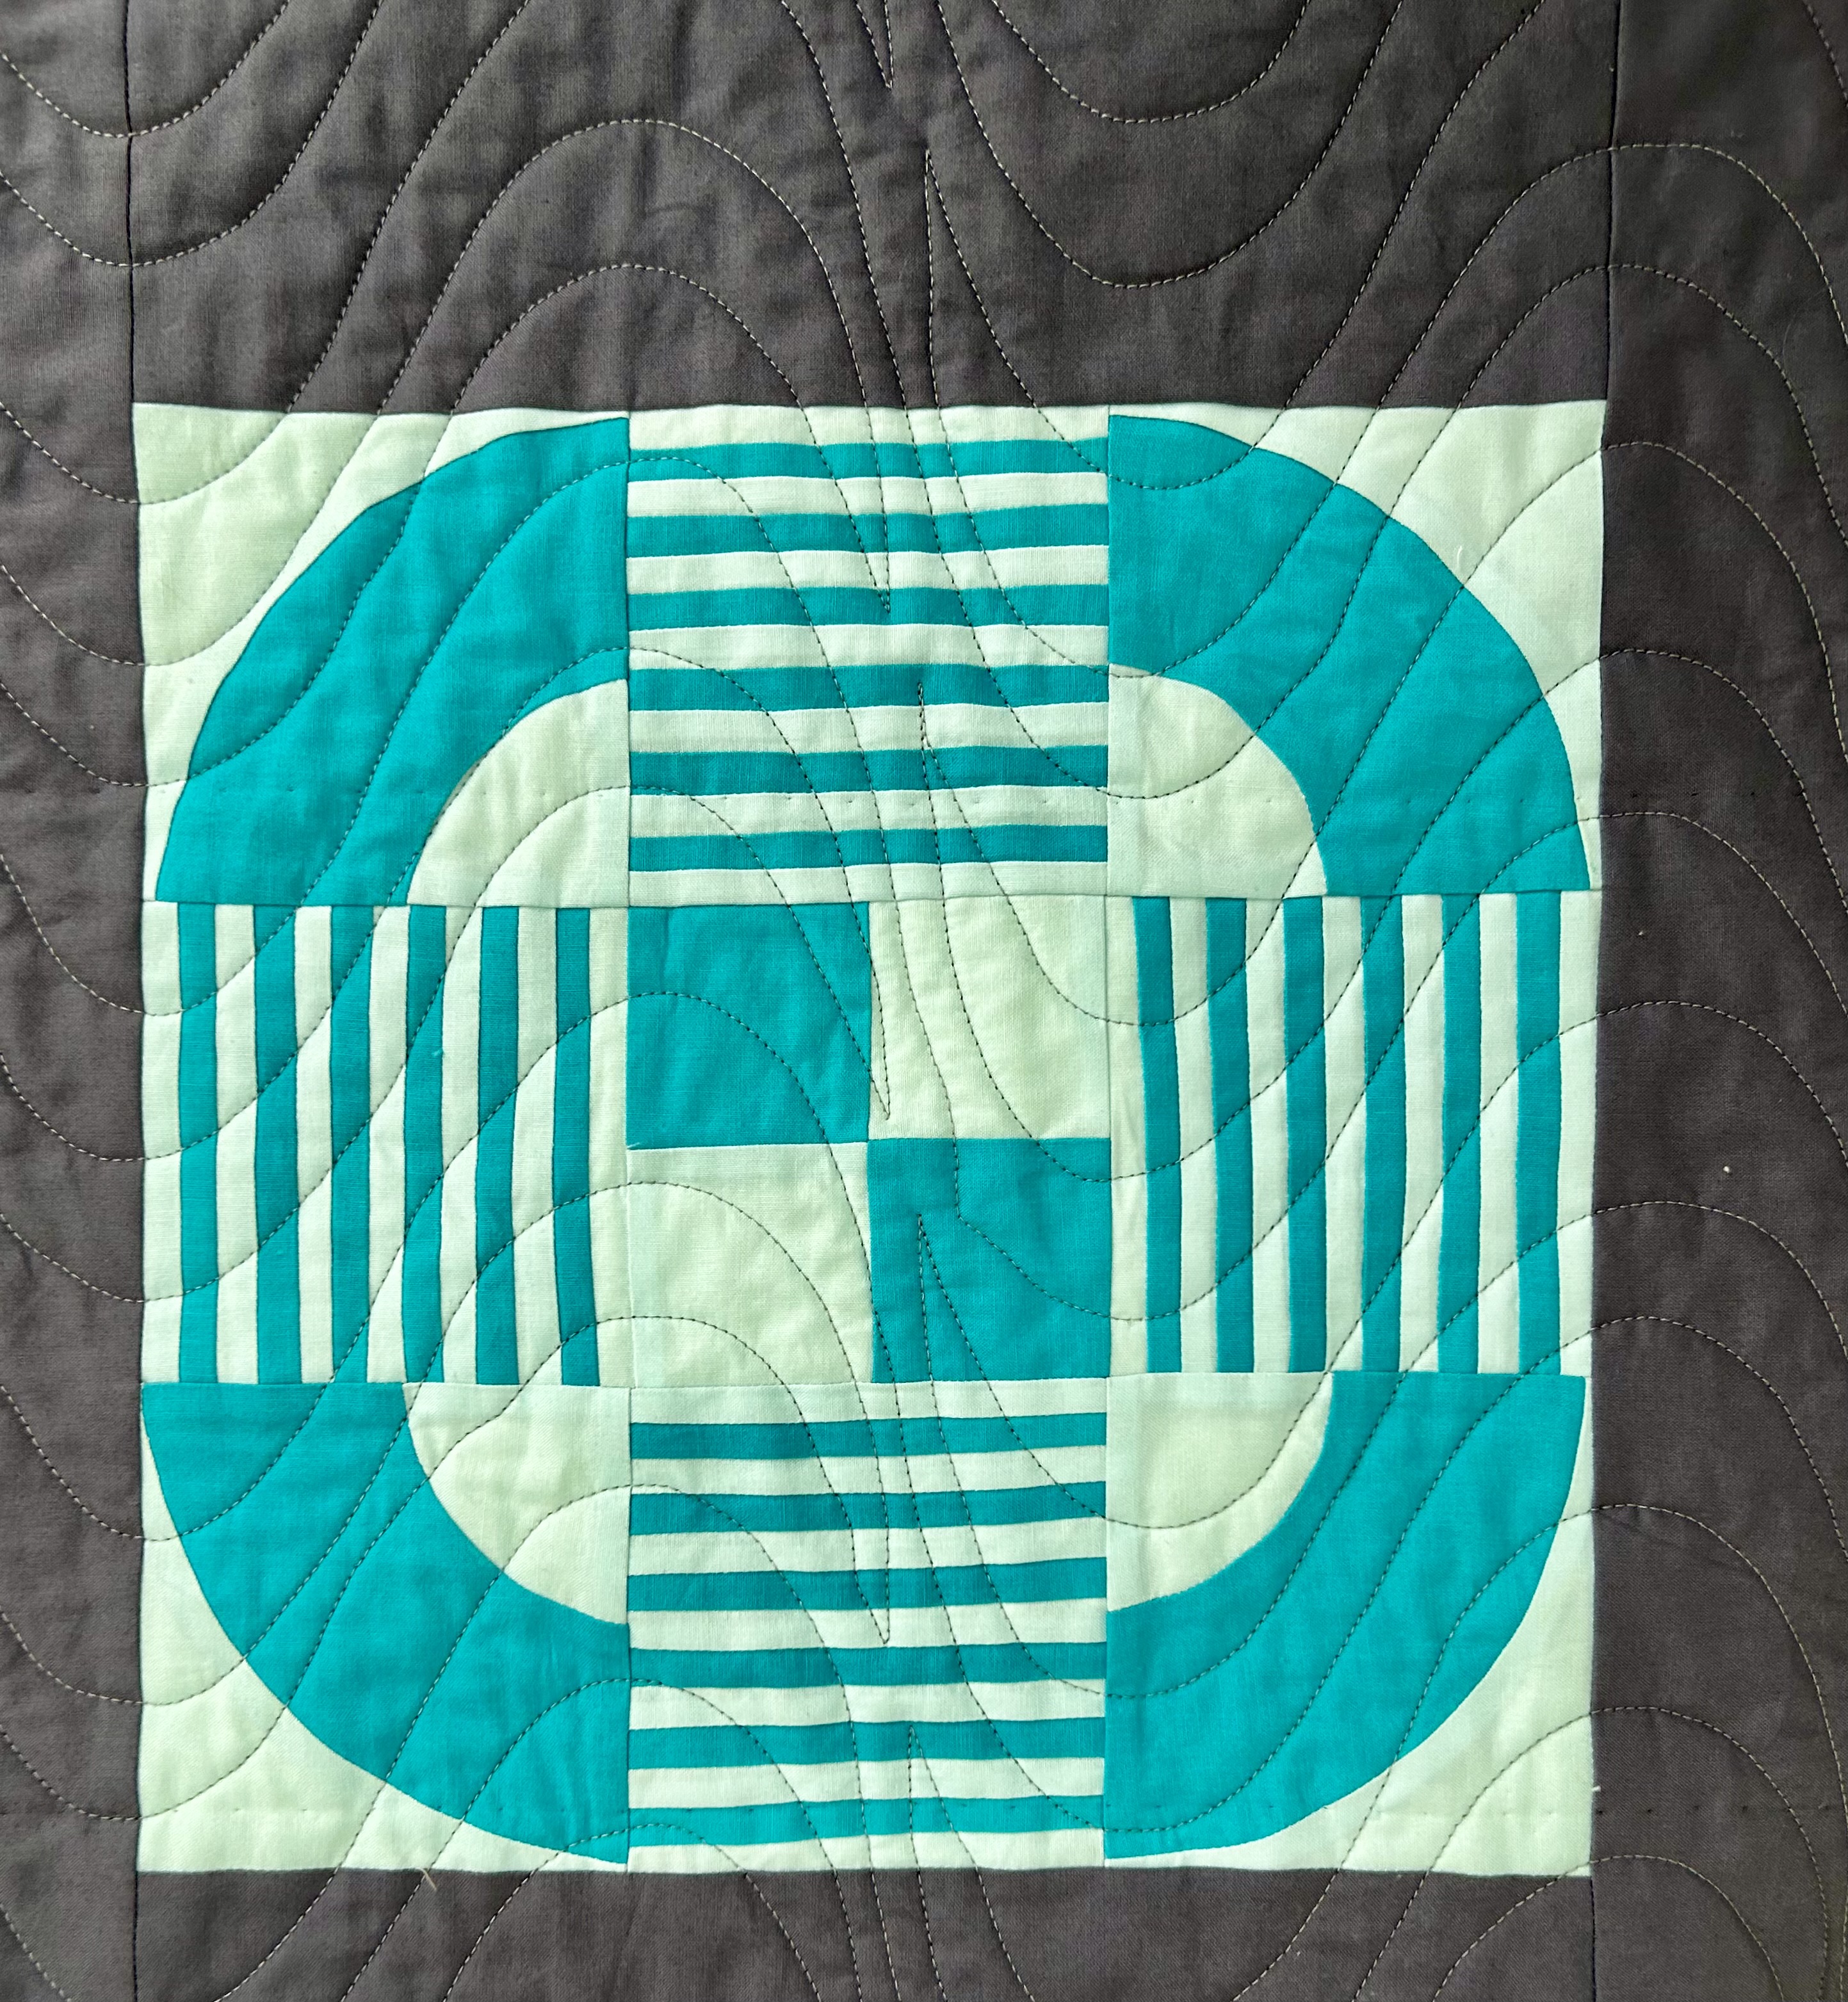
Below the center is a 4-patch block. The side rectangles are now stripes, and the corners are the curved block I’ve been using.
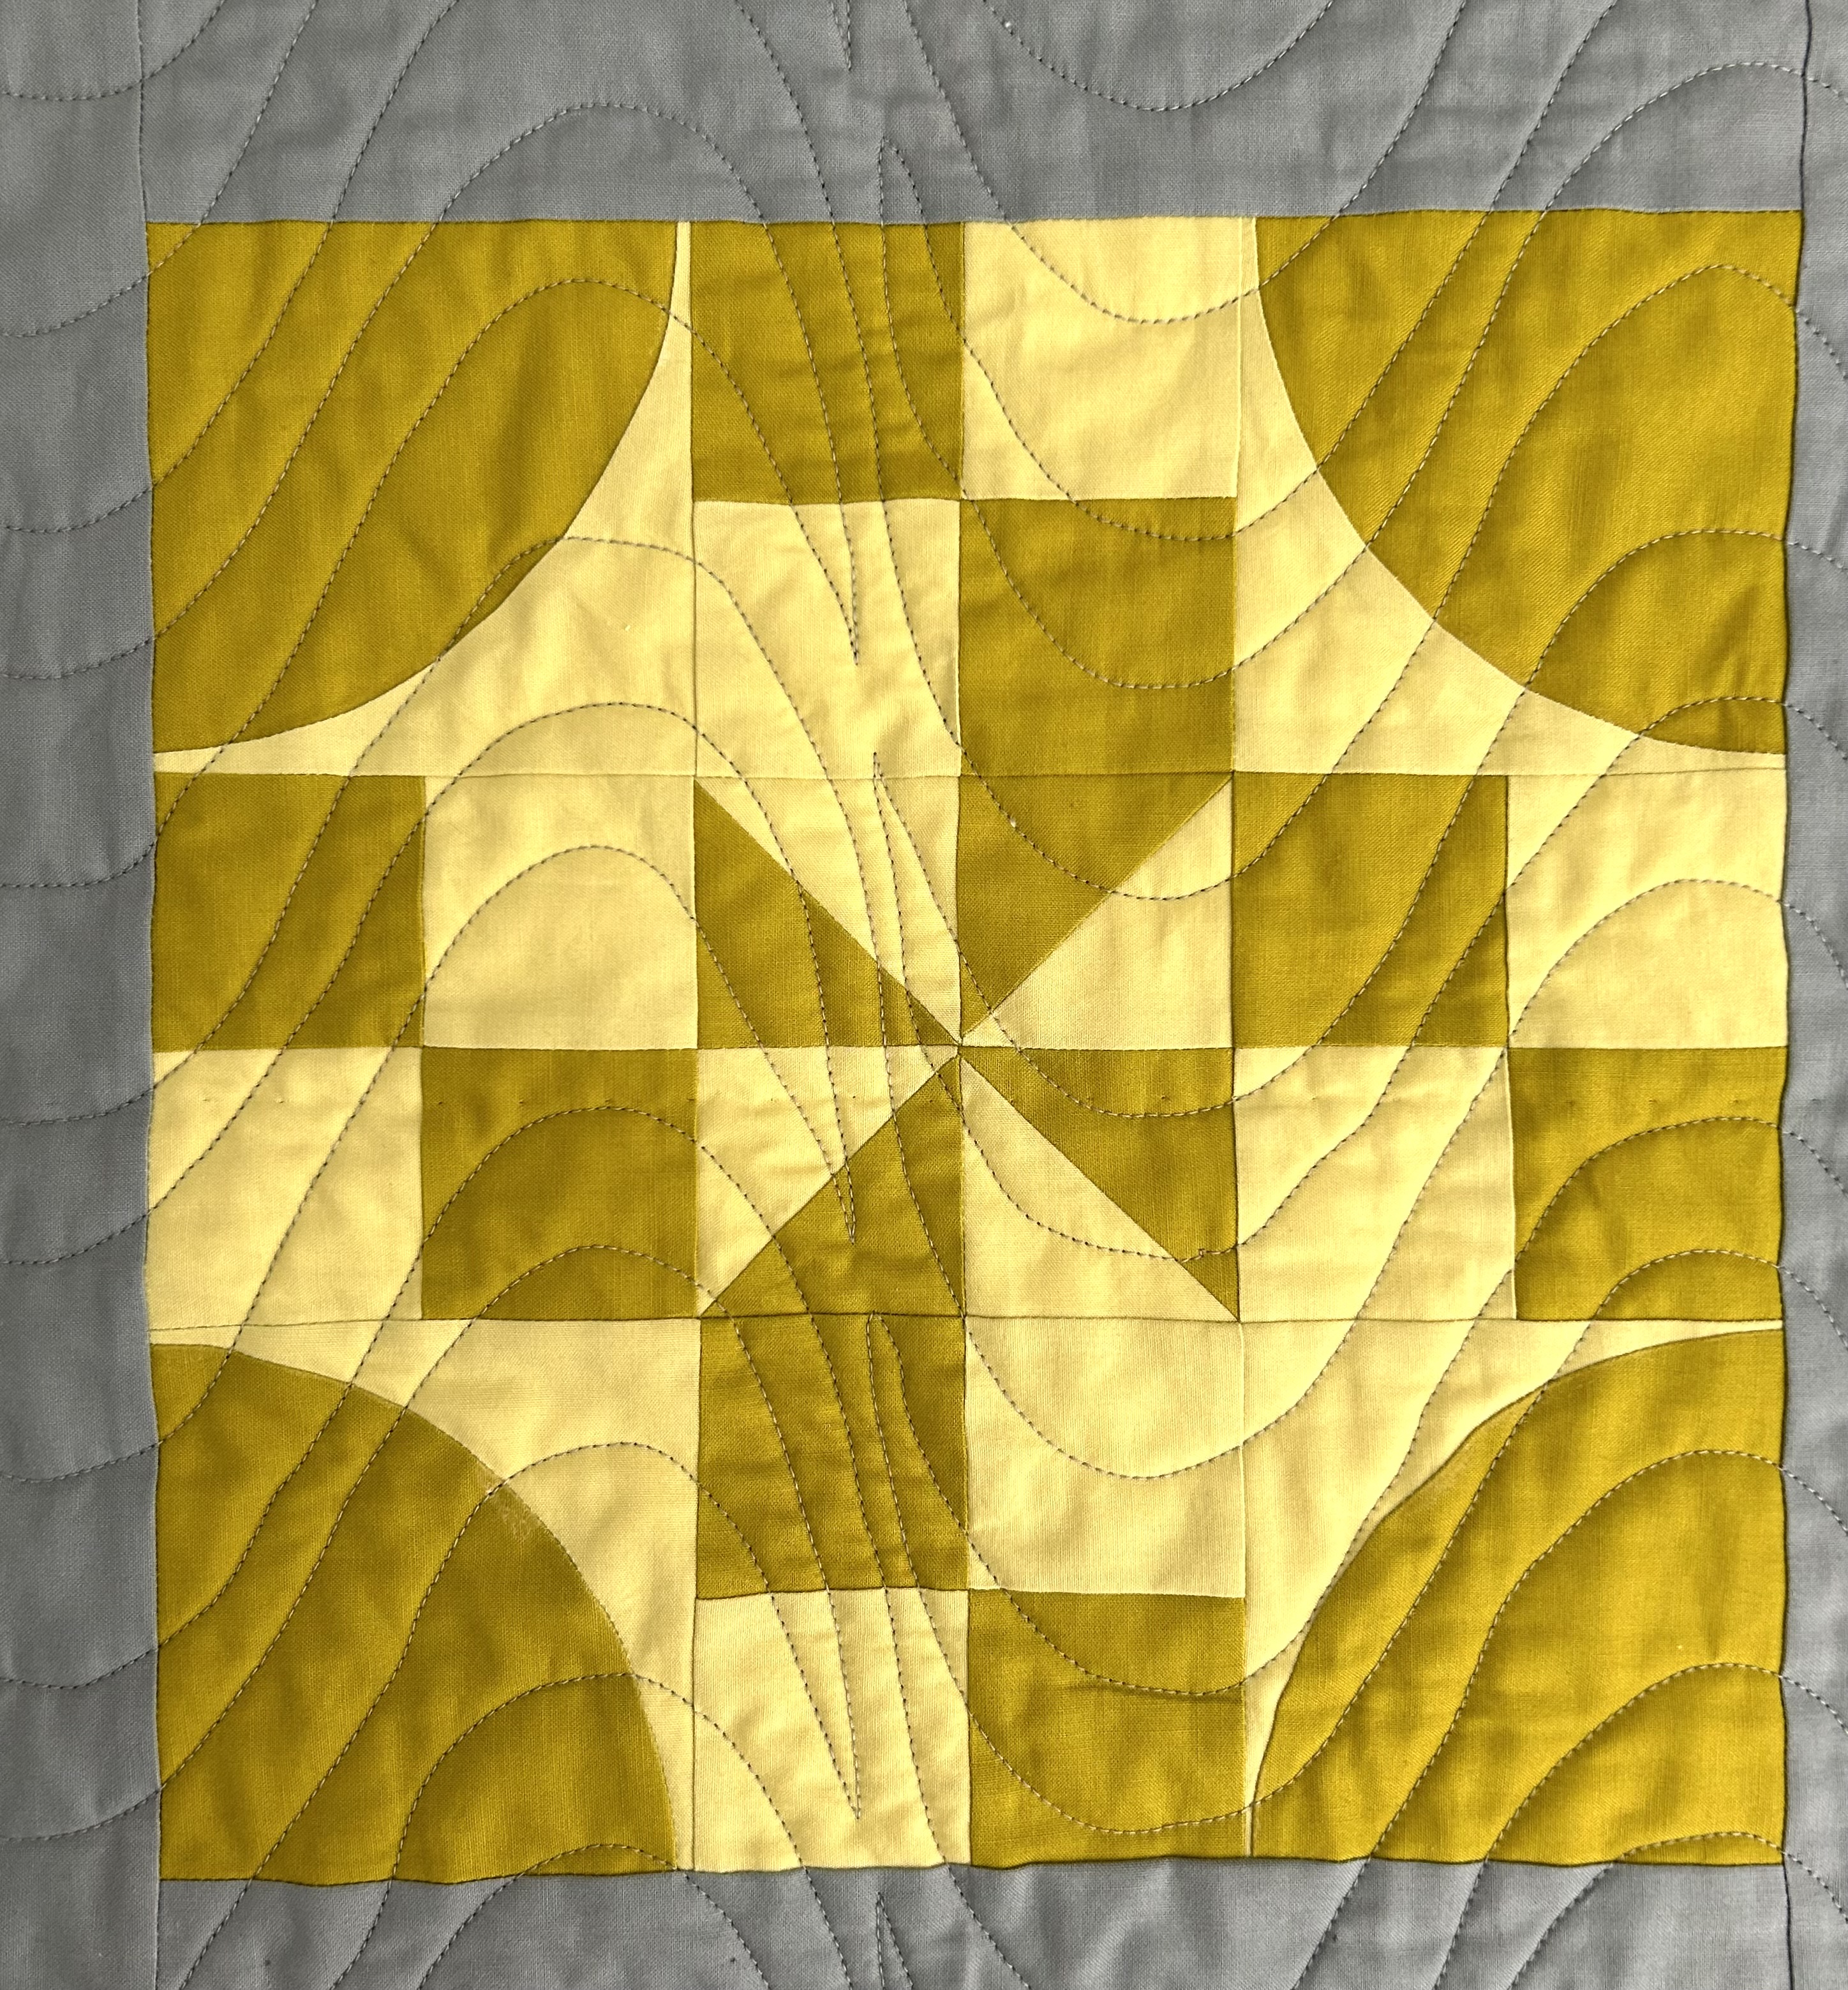
Below, there are more curves. The center is a pinwheel. The corners are the curved Drunkard Path blocks. And the side rectangles have become a 4-patch block. Hmmm. this block would make circles if you put 4 of them together.
Below, more Drunkard Path units are on the corners, the side rectangles are intact, and the center is split into parts with the addition of the small strips that break it up.

I am now wondering how some of these blocks would work out if used butted up next to each other. But that’s a project for another day.
And I will say that I could not have made these blocks without having taken Tara Faughnan’s online Blocks 1 class last year. AND, that I’m learning even more with the play of this year’s Block 2 class.
