The Design Wall Projects

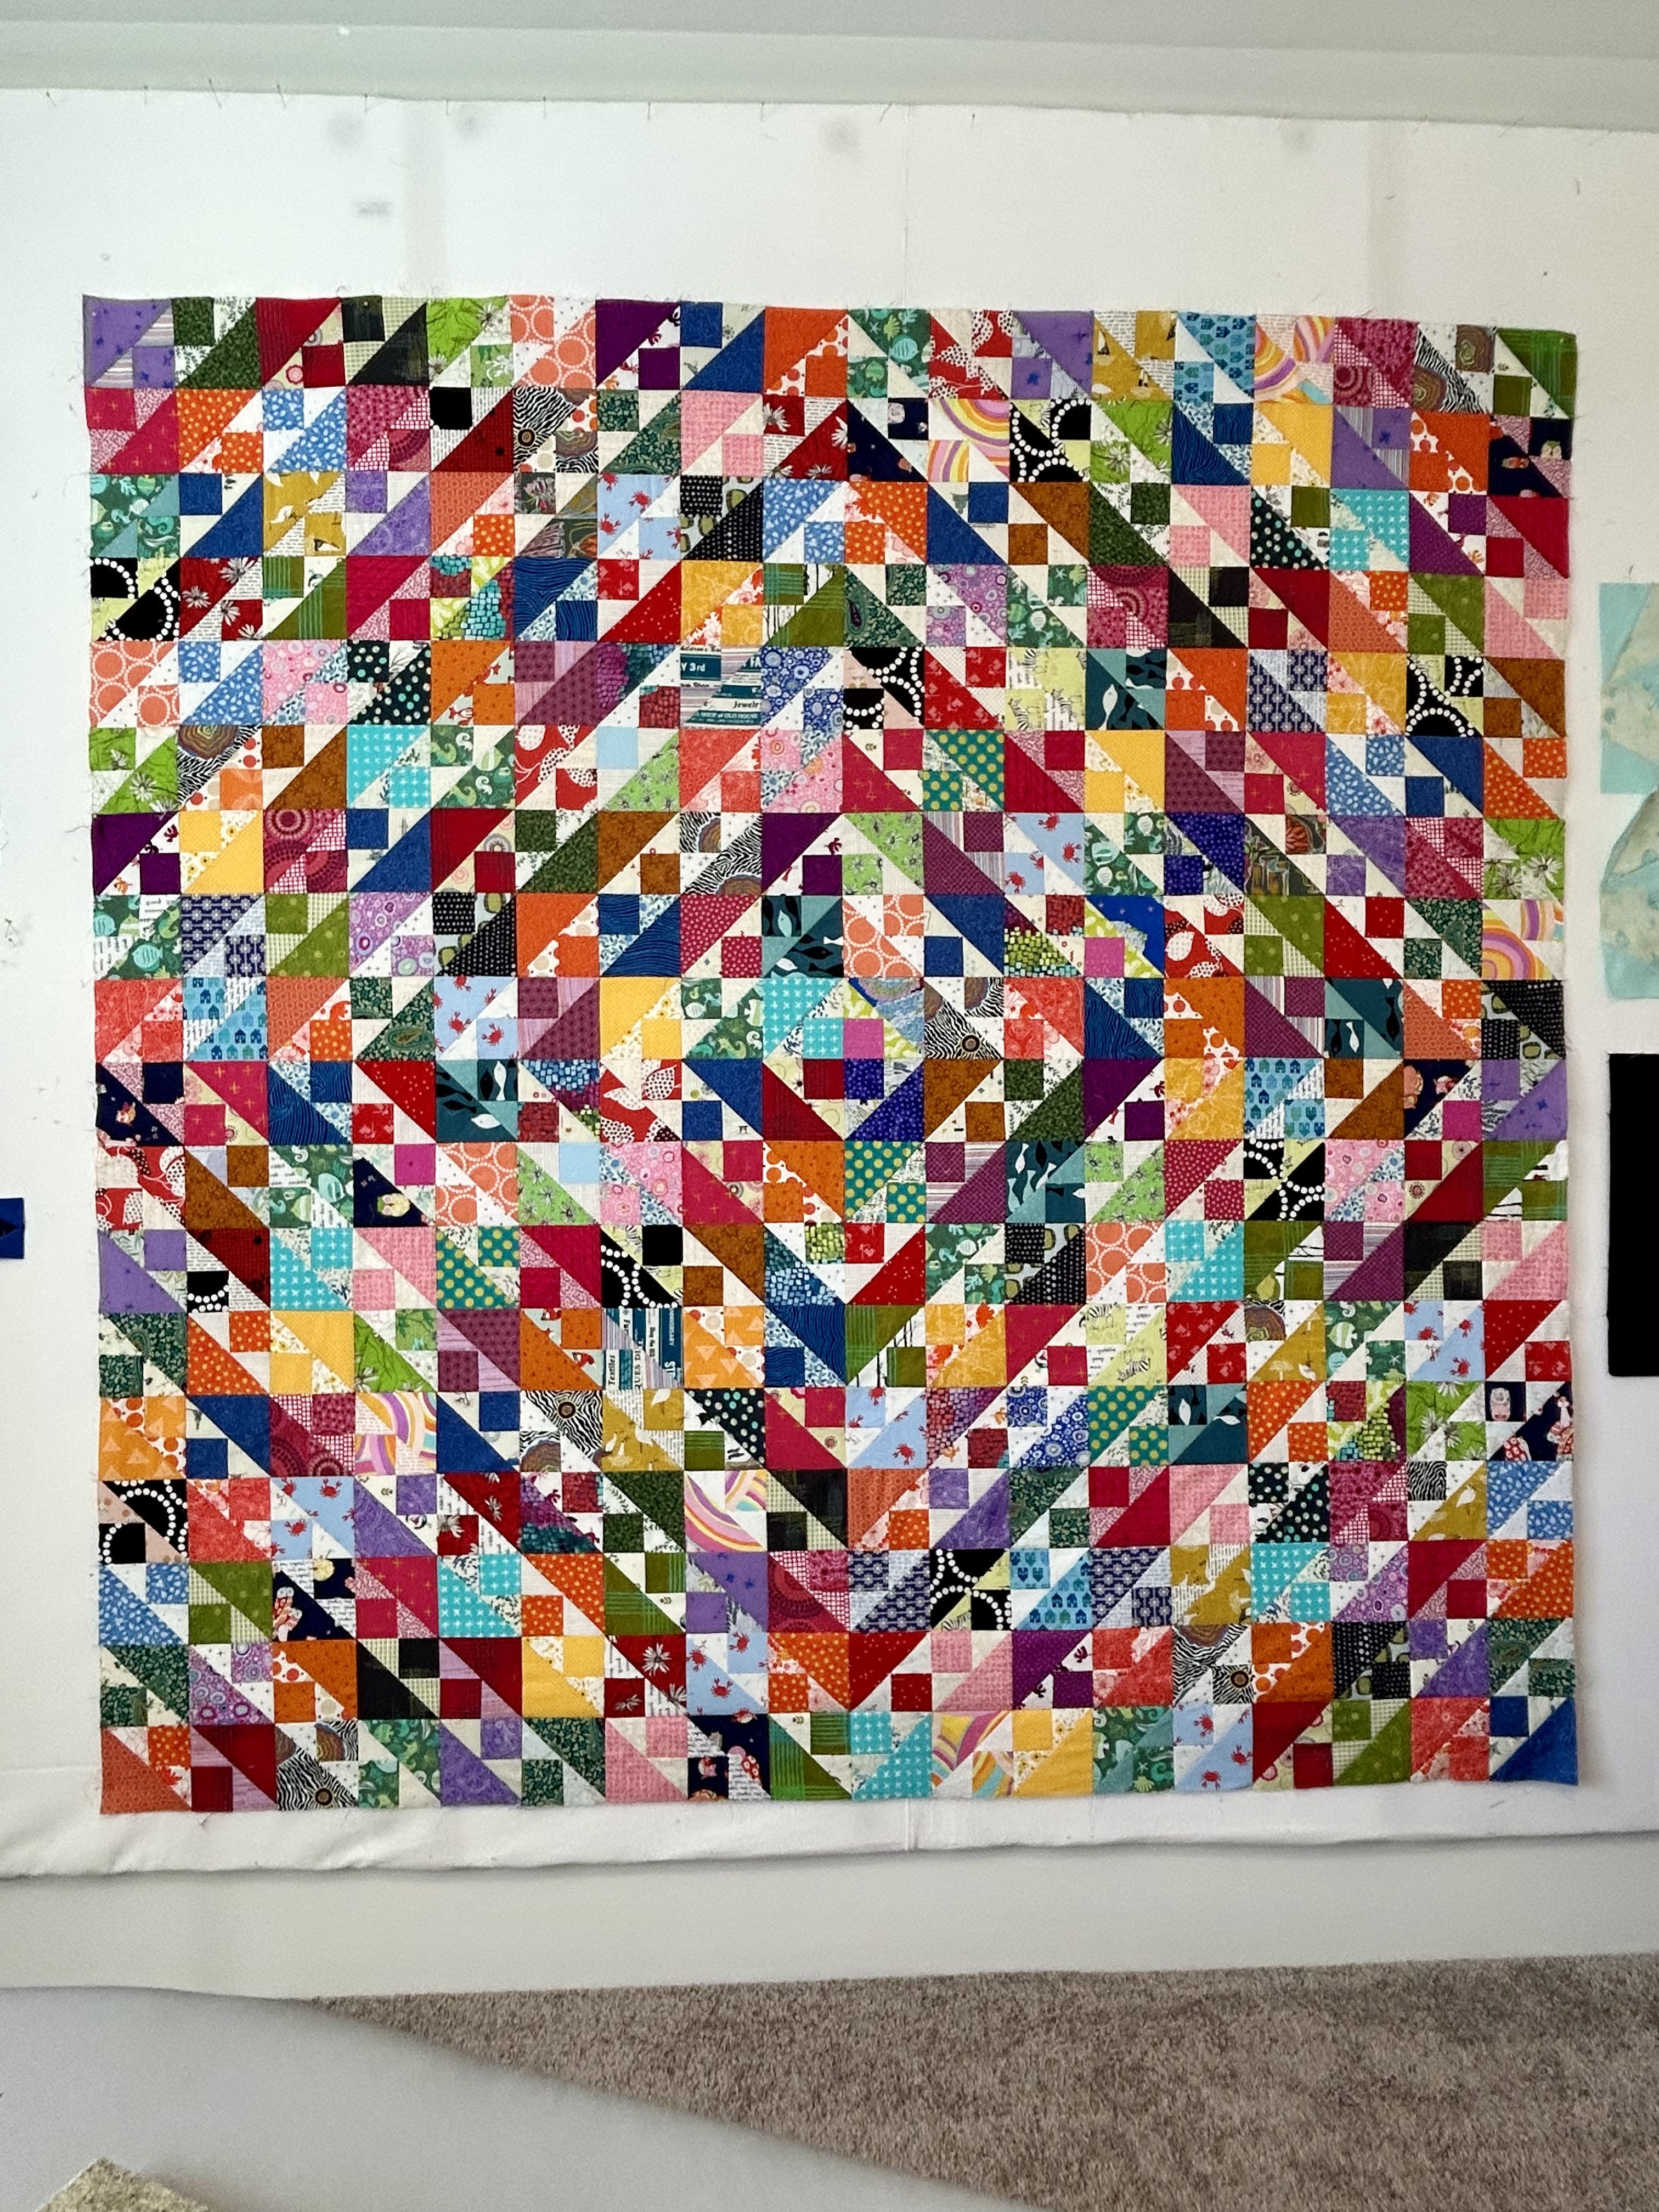
The Cat’s Cradle 4-inch block quilt is off the longarm and trimmed and bound. Yeah! Handwork for nightime sewing. Watching a tv series makes me so restless if I don’t have handwork to occupy my hands. I am about halfway done now.

This quilt needs a name. Maybe something like “Ripples.”

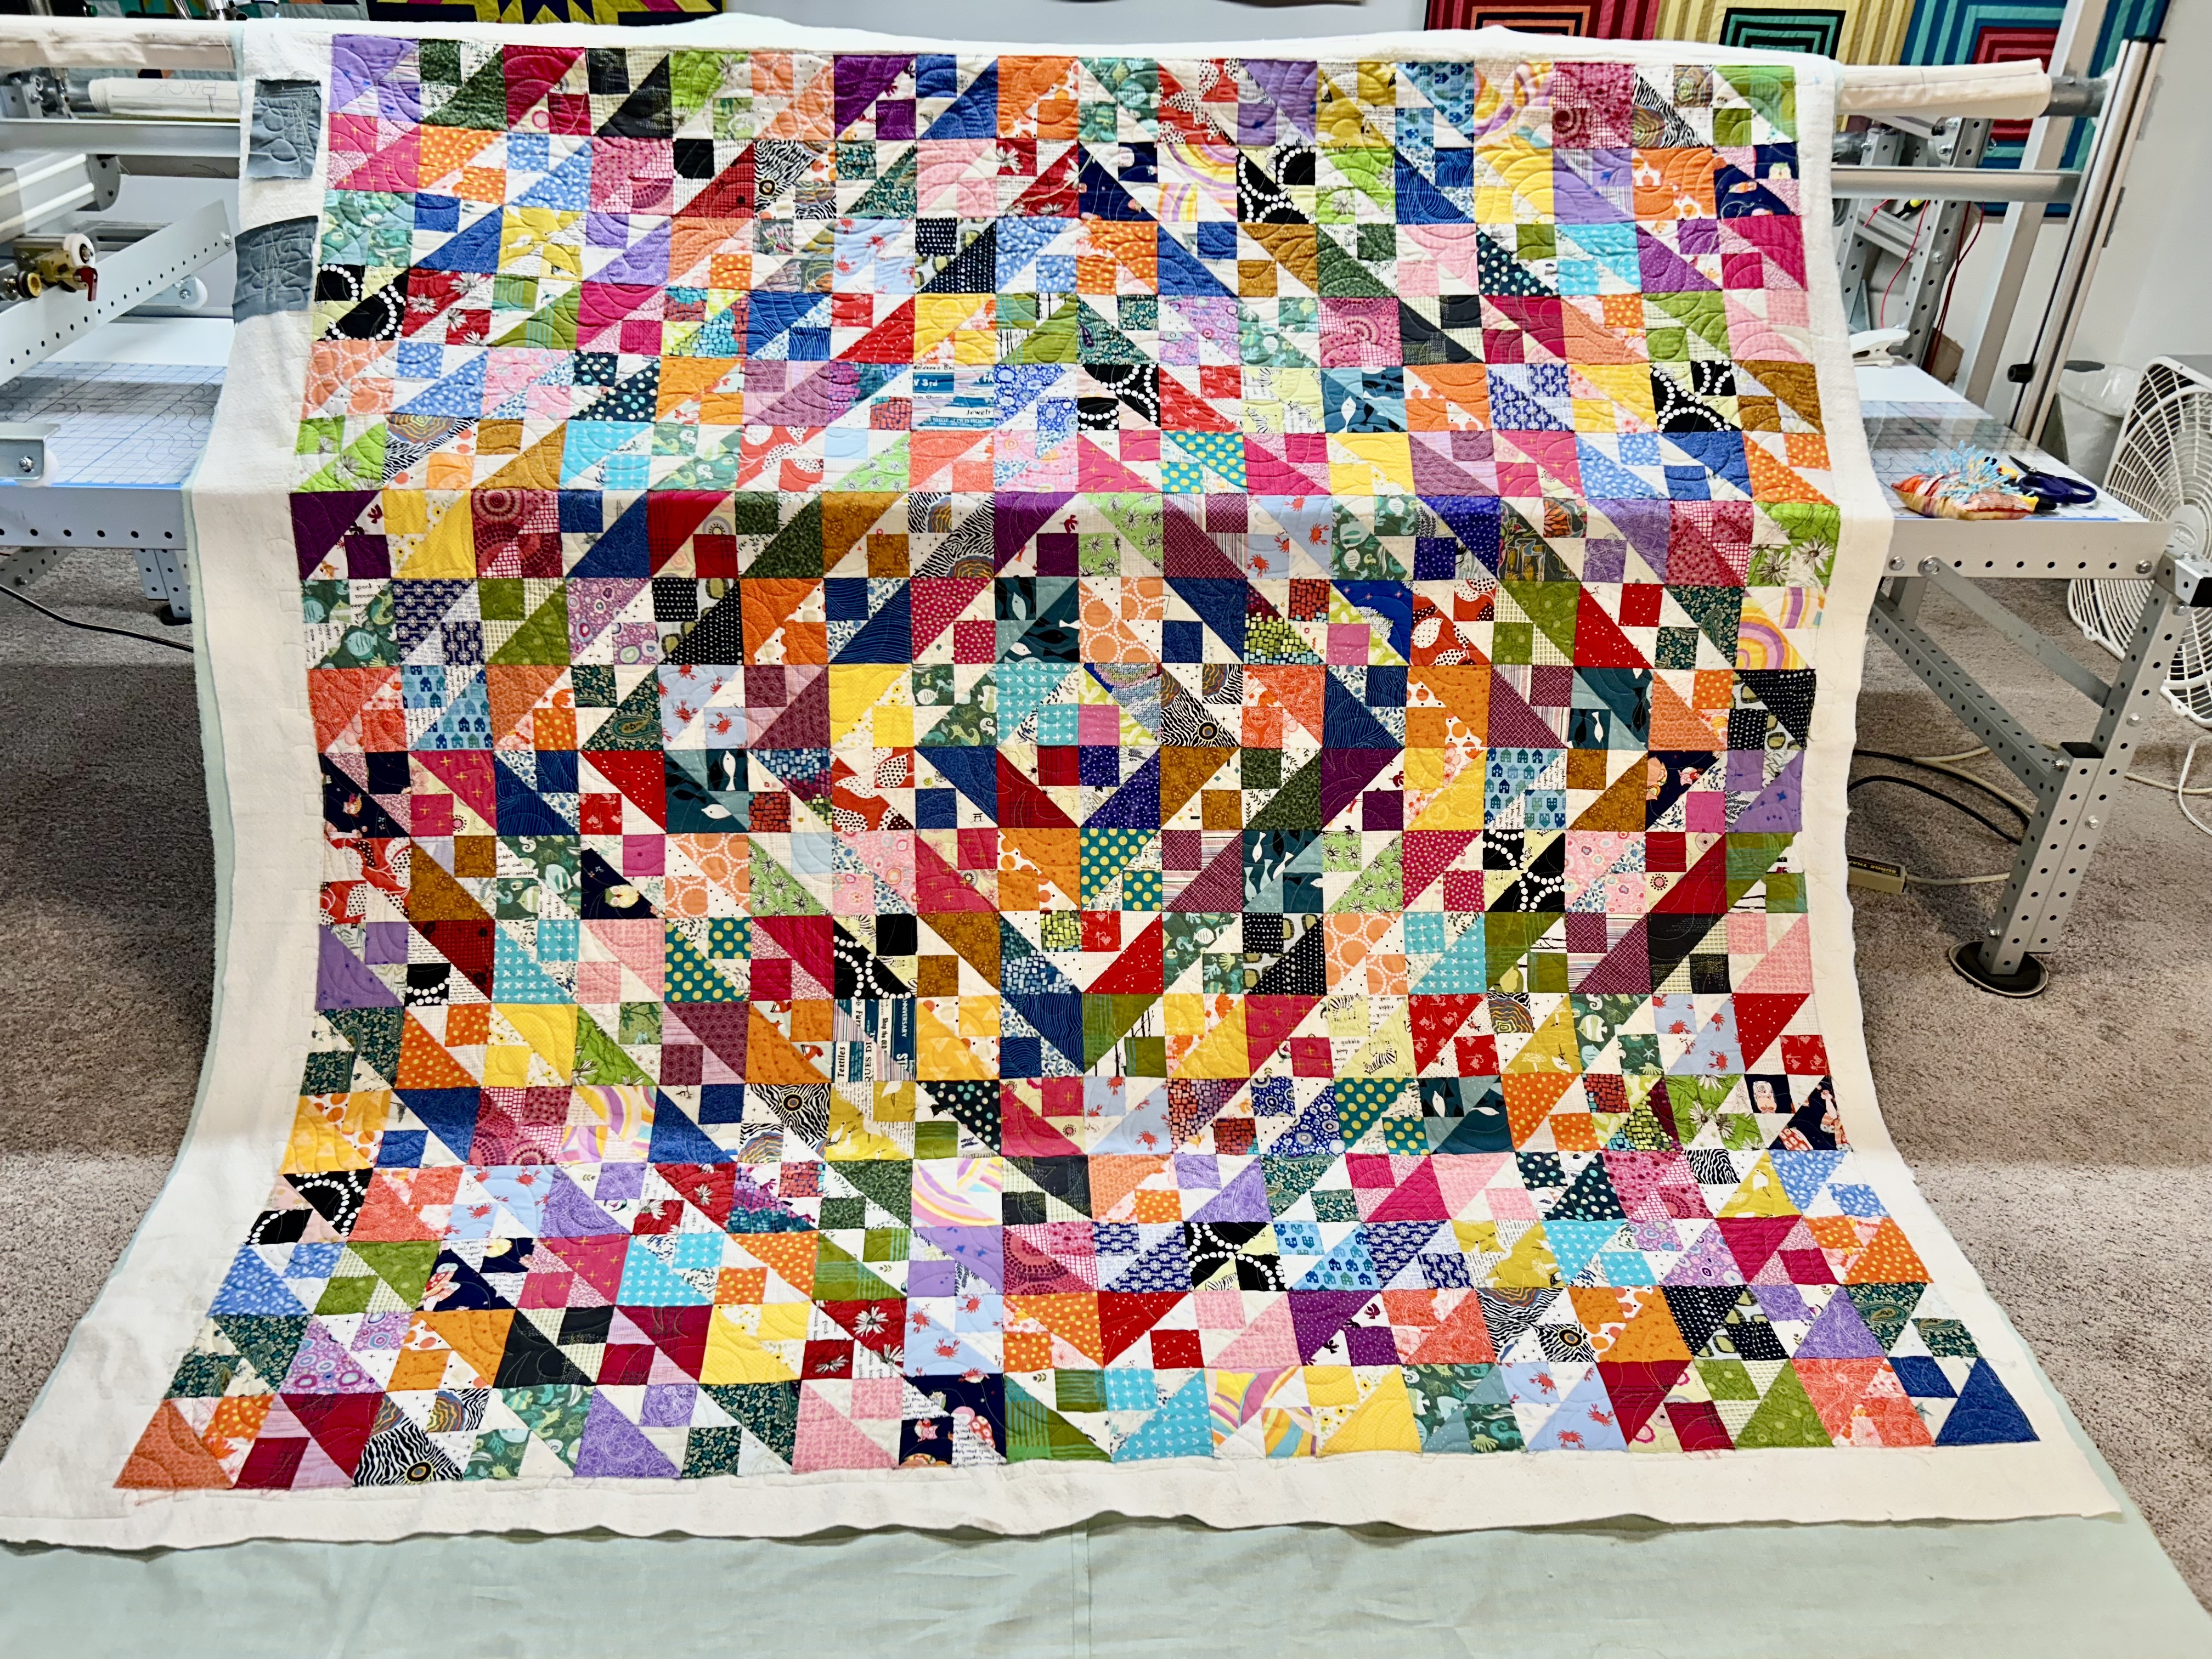
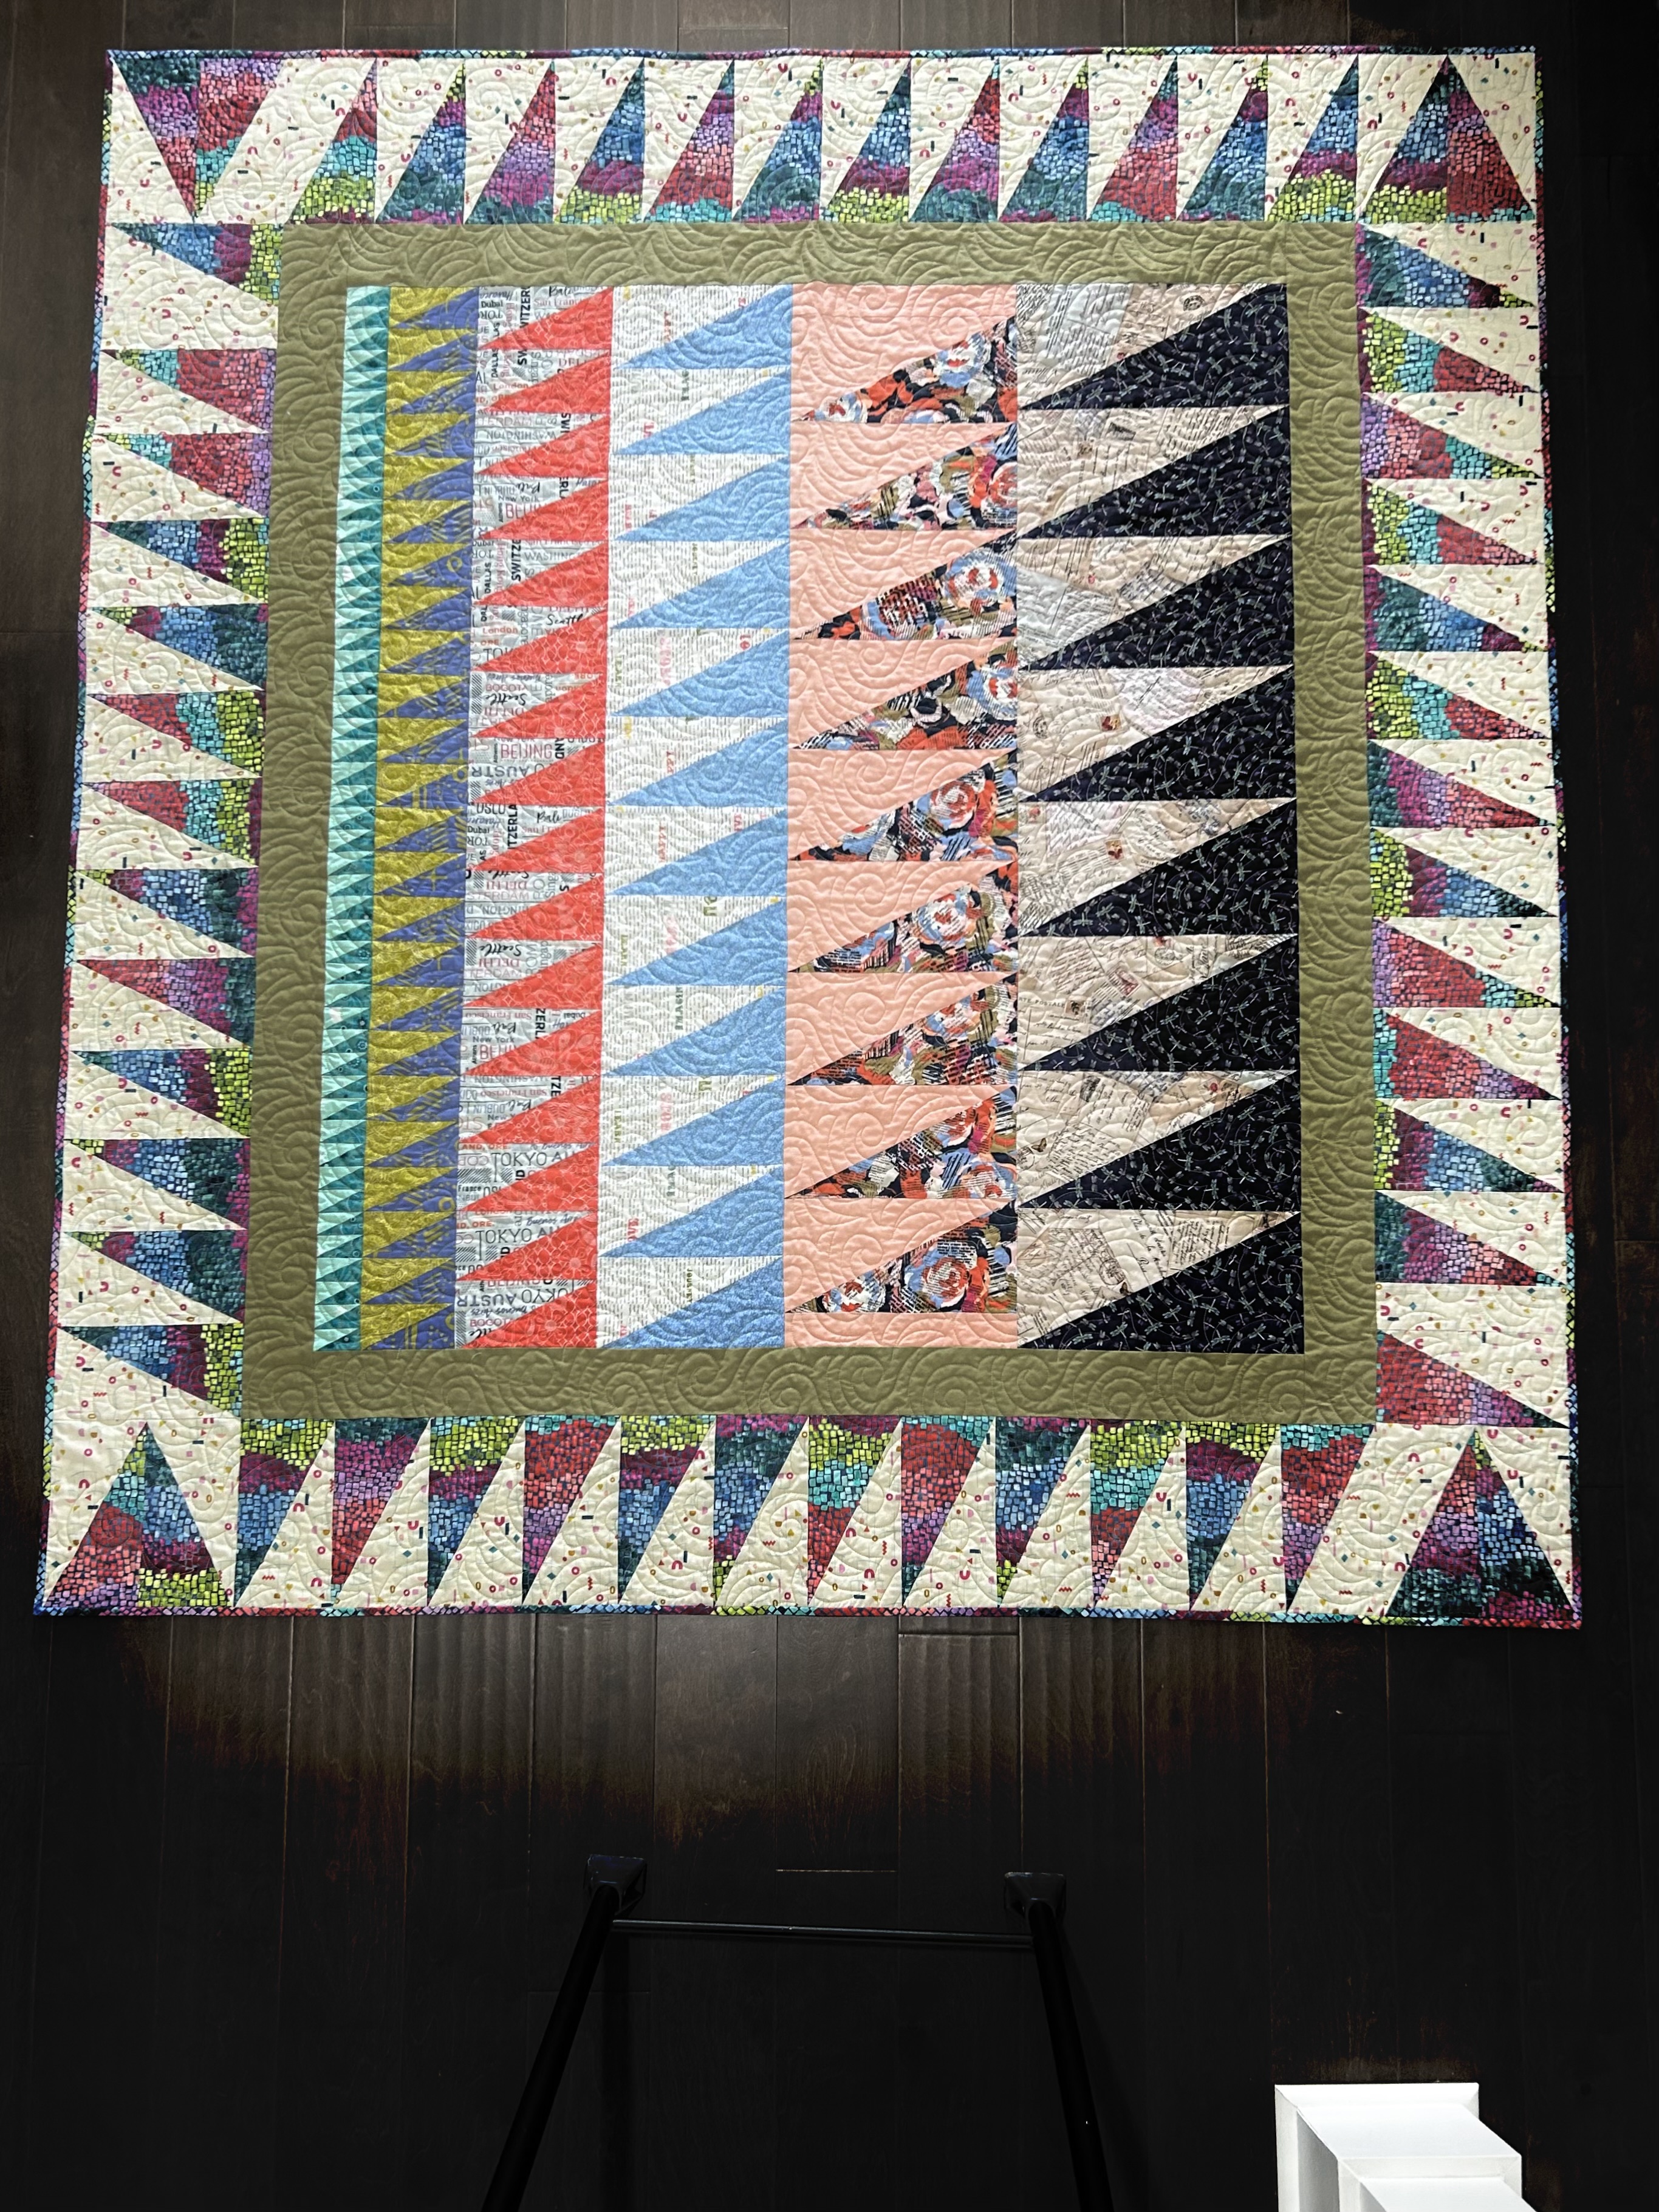
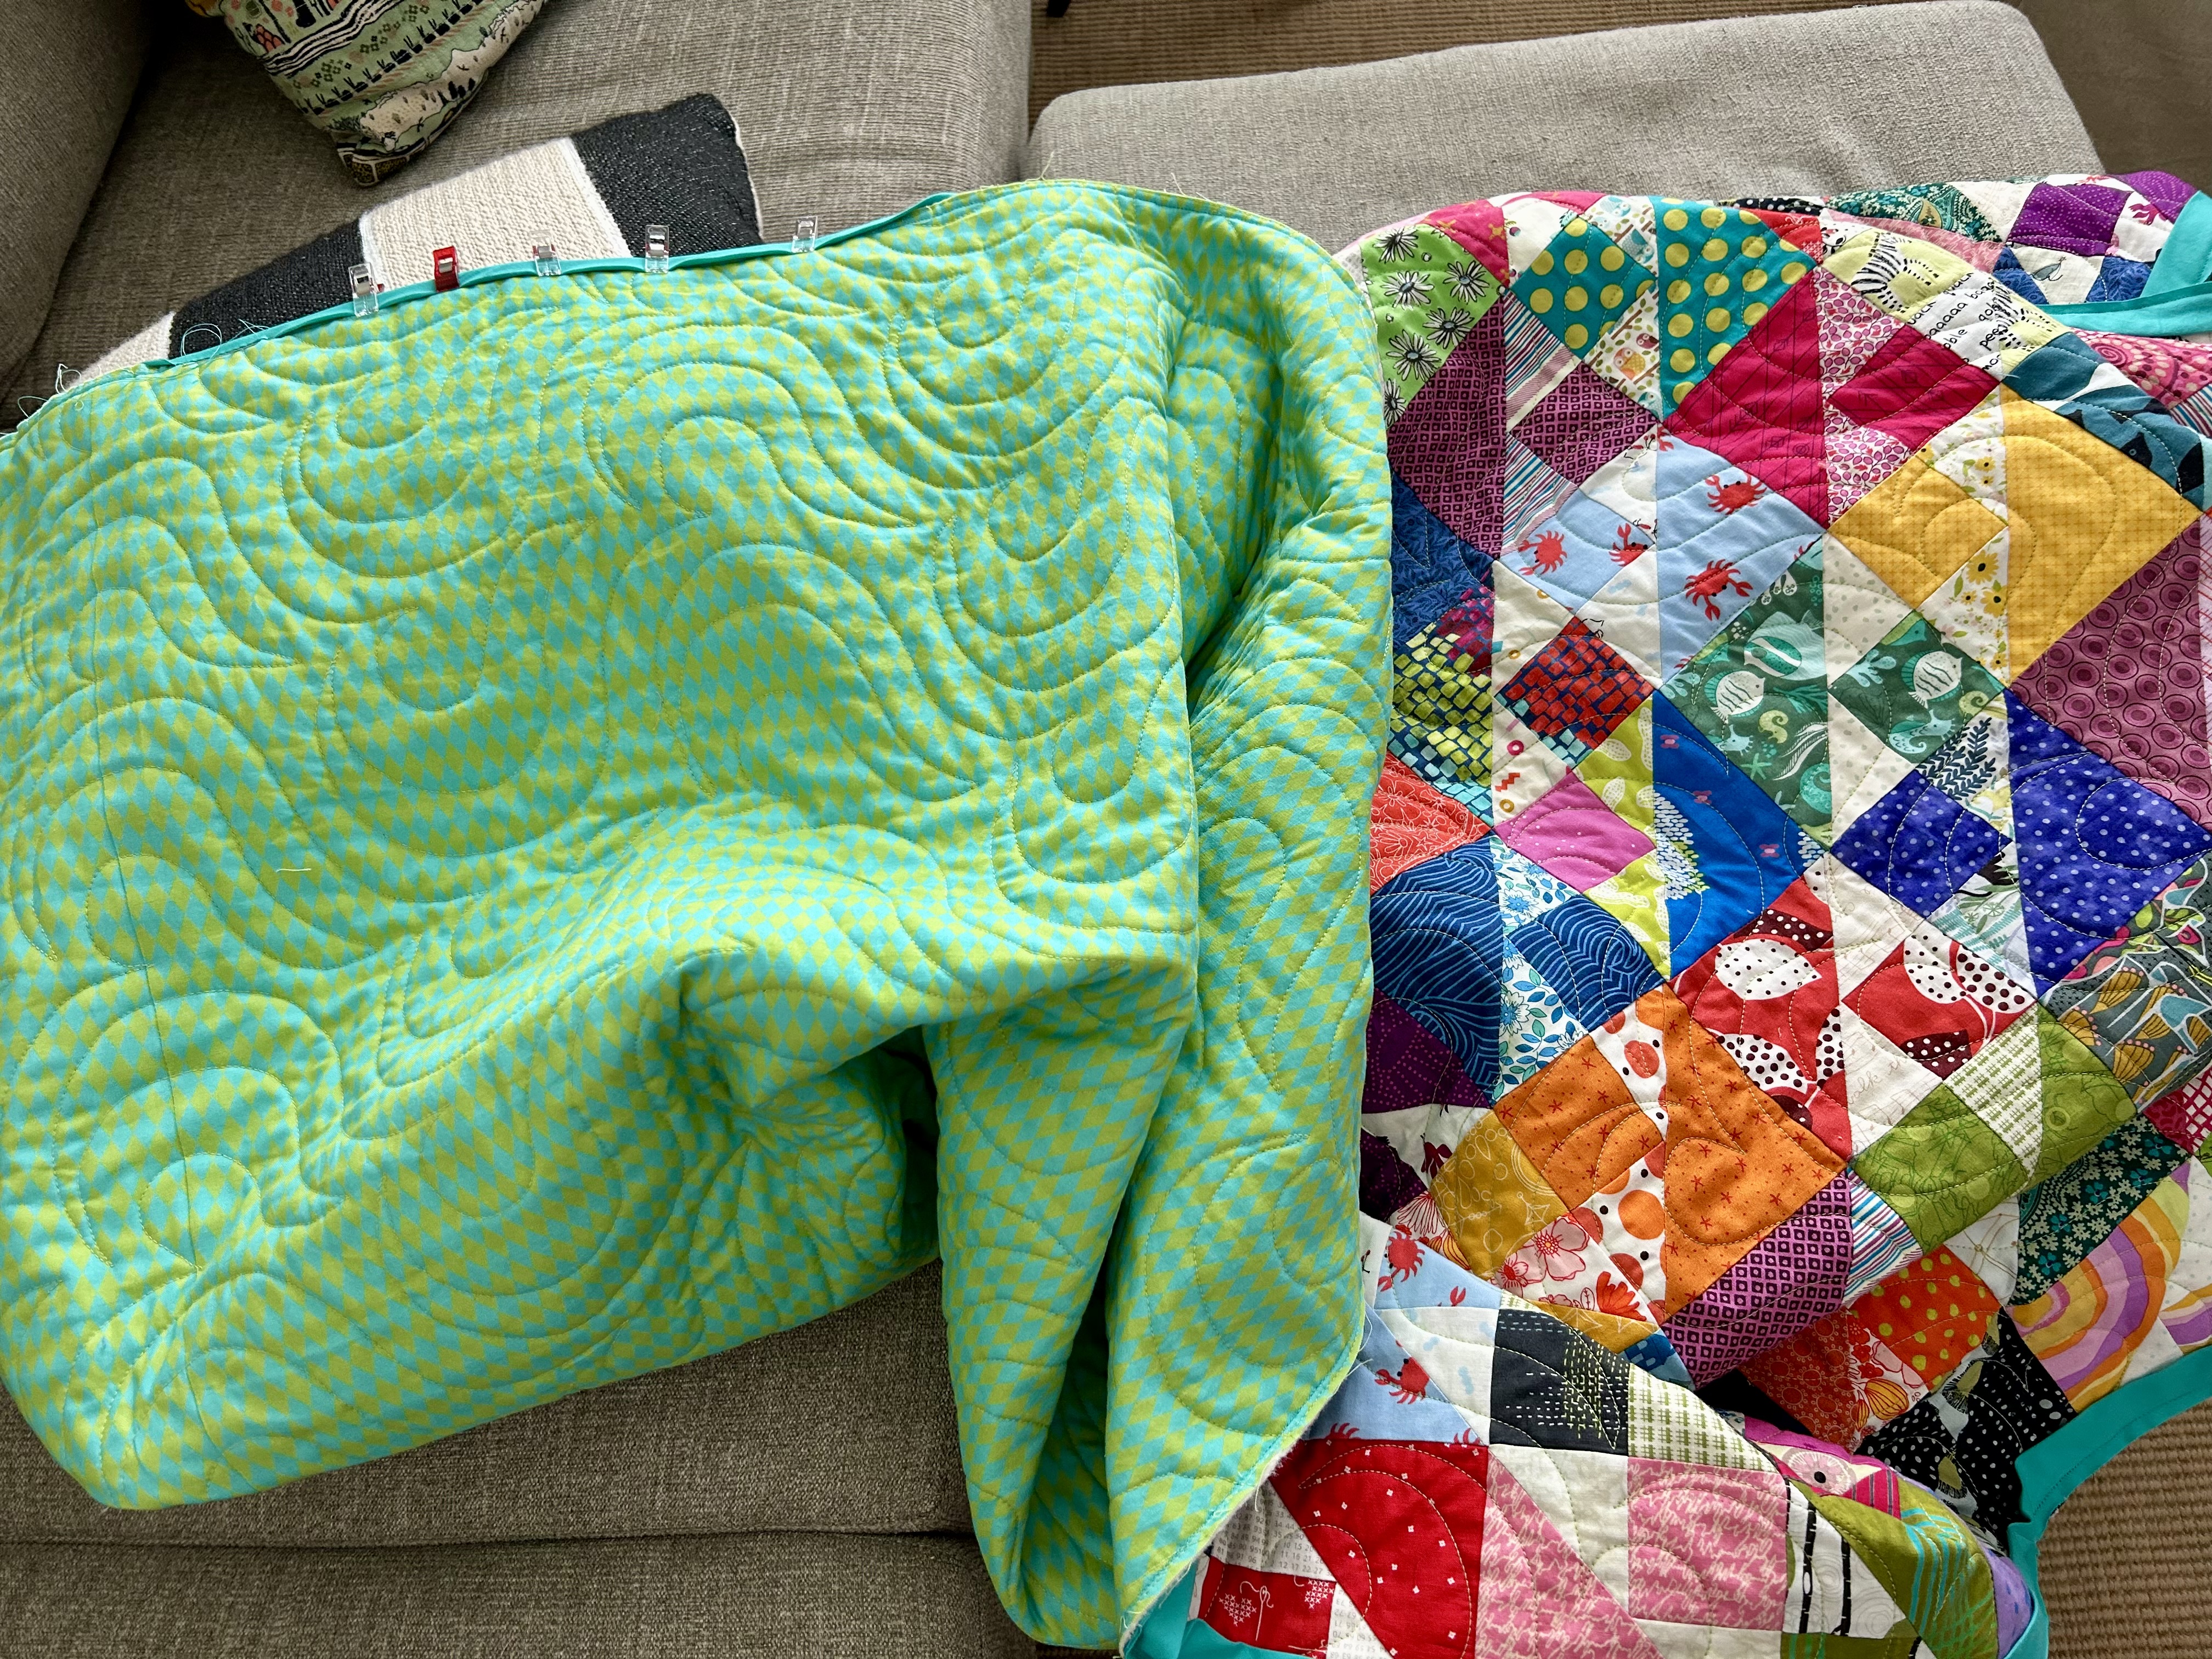
I am really loving the lime/aqua backing for this quilt. And the “Bayside” panto laid down lovely texture without taking away from the business in this quilt.

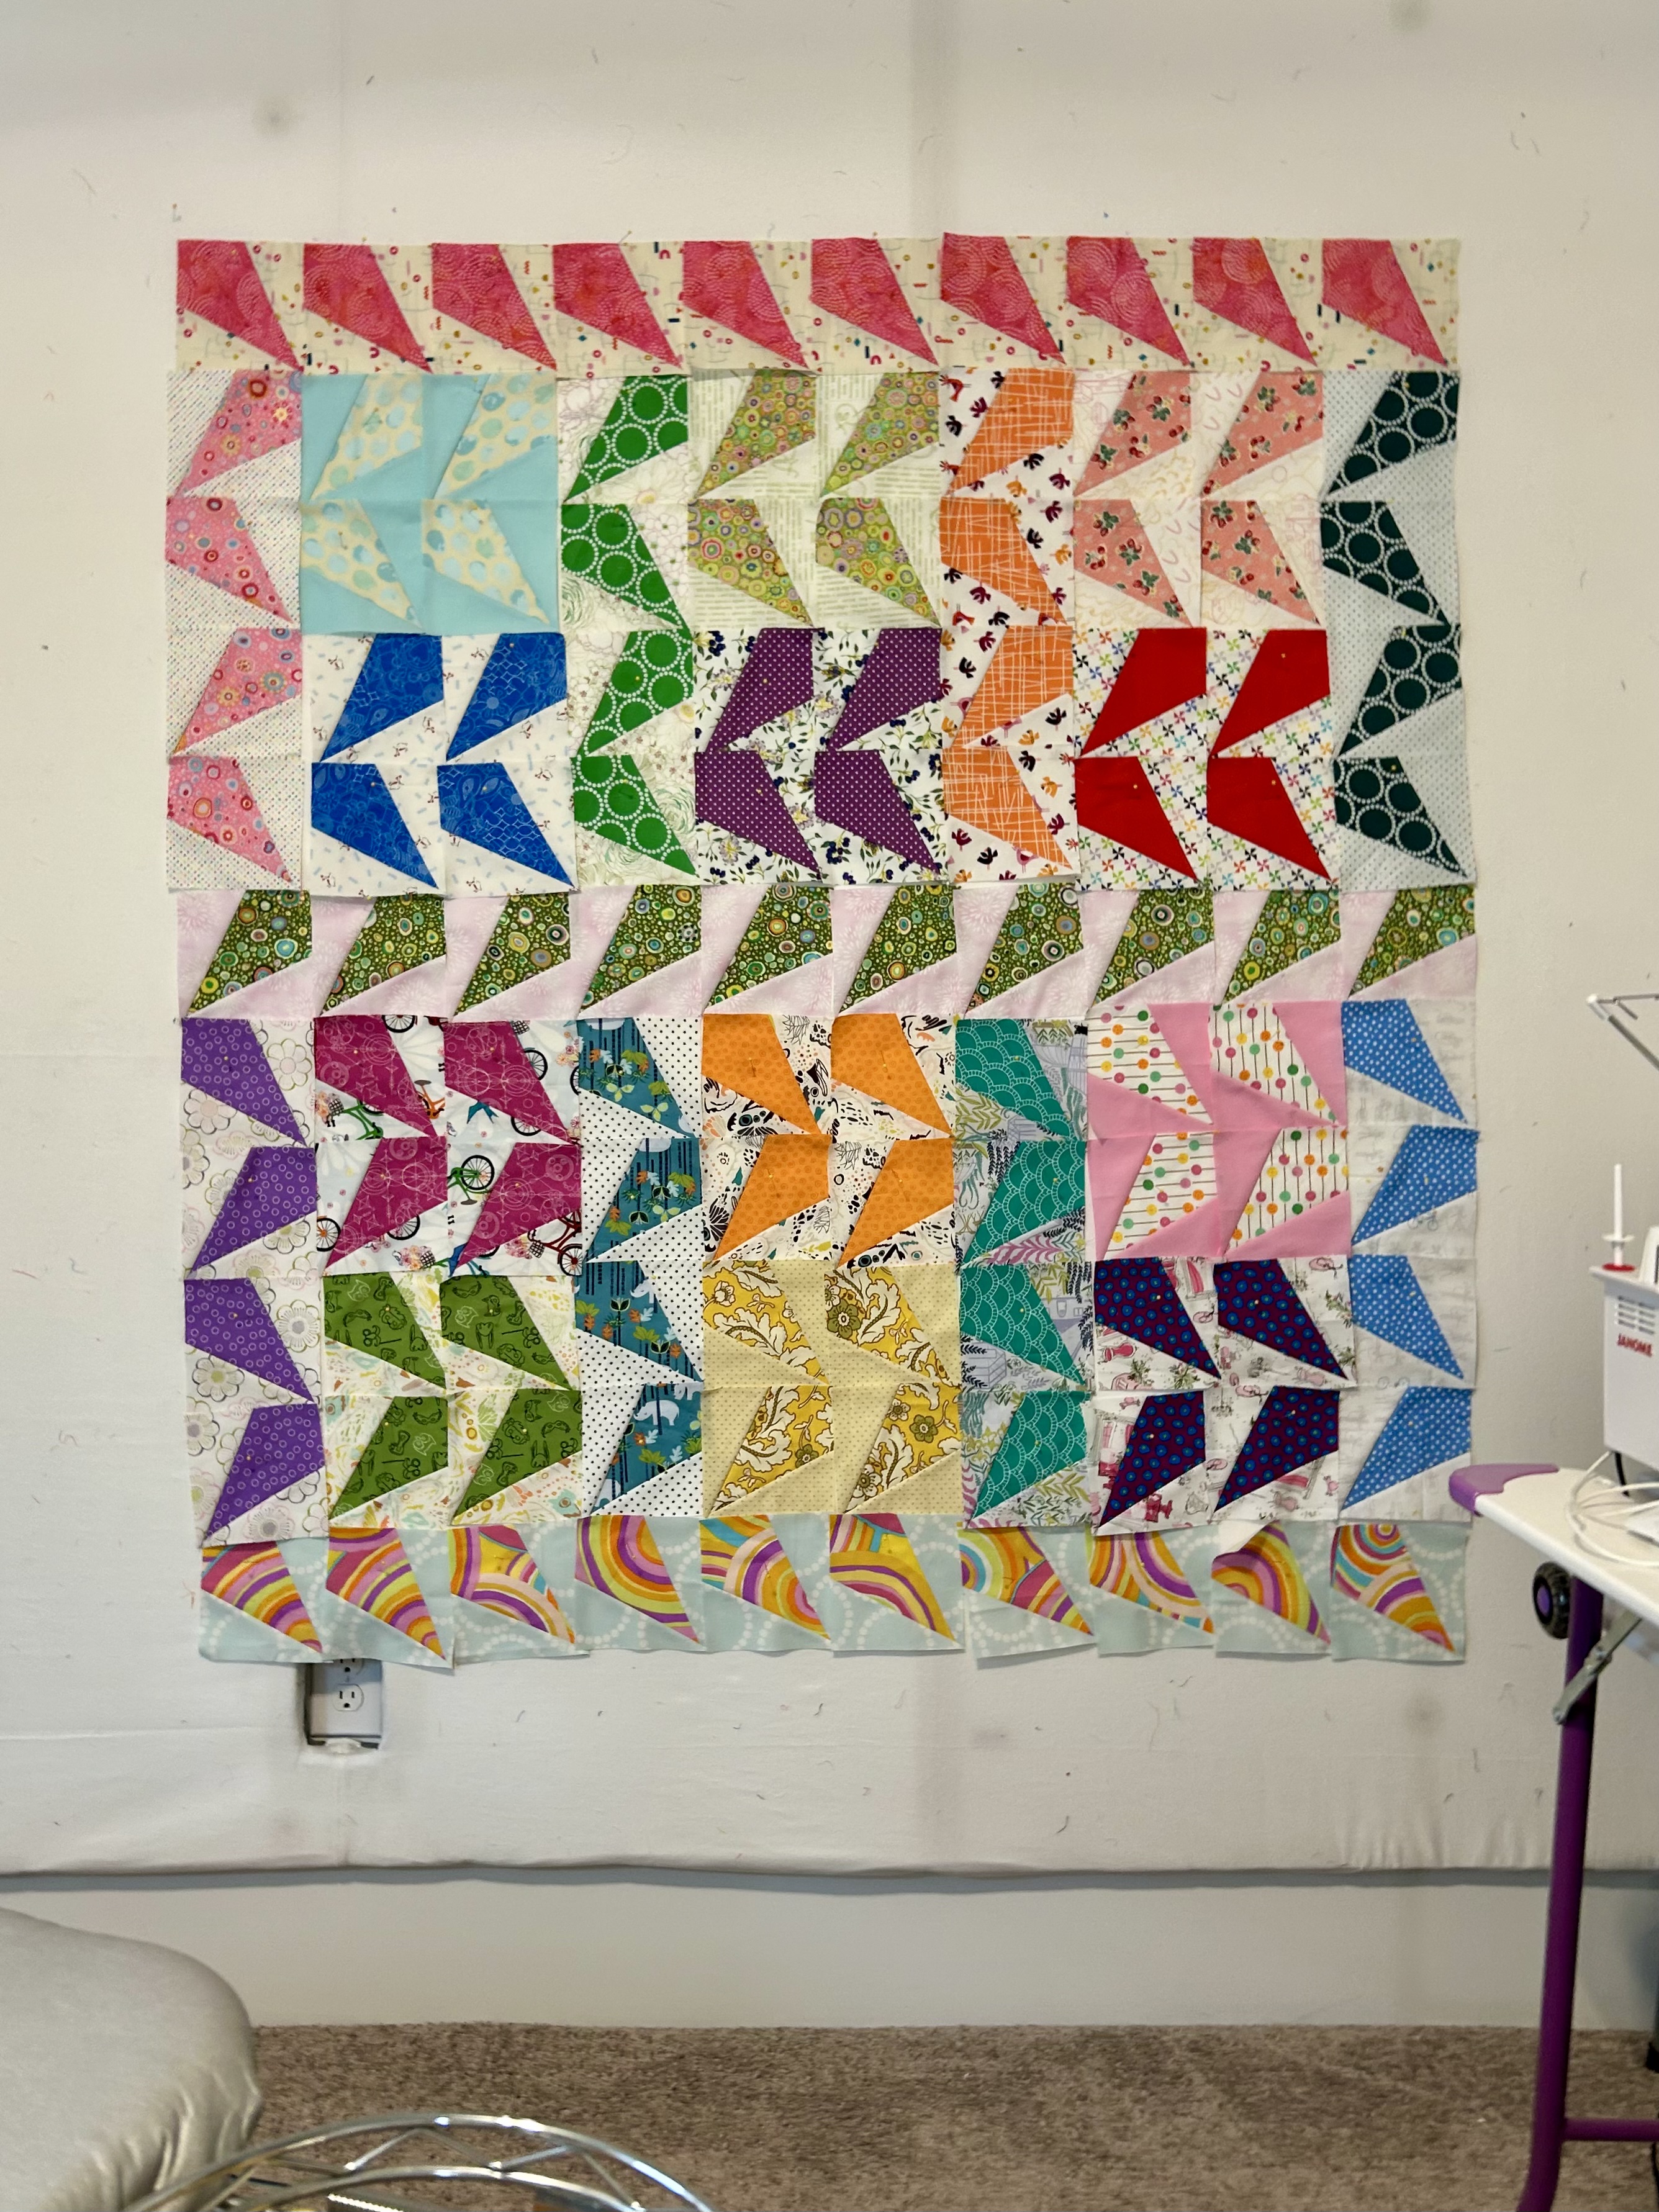
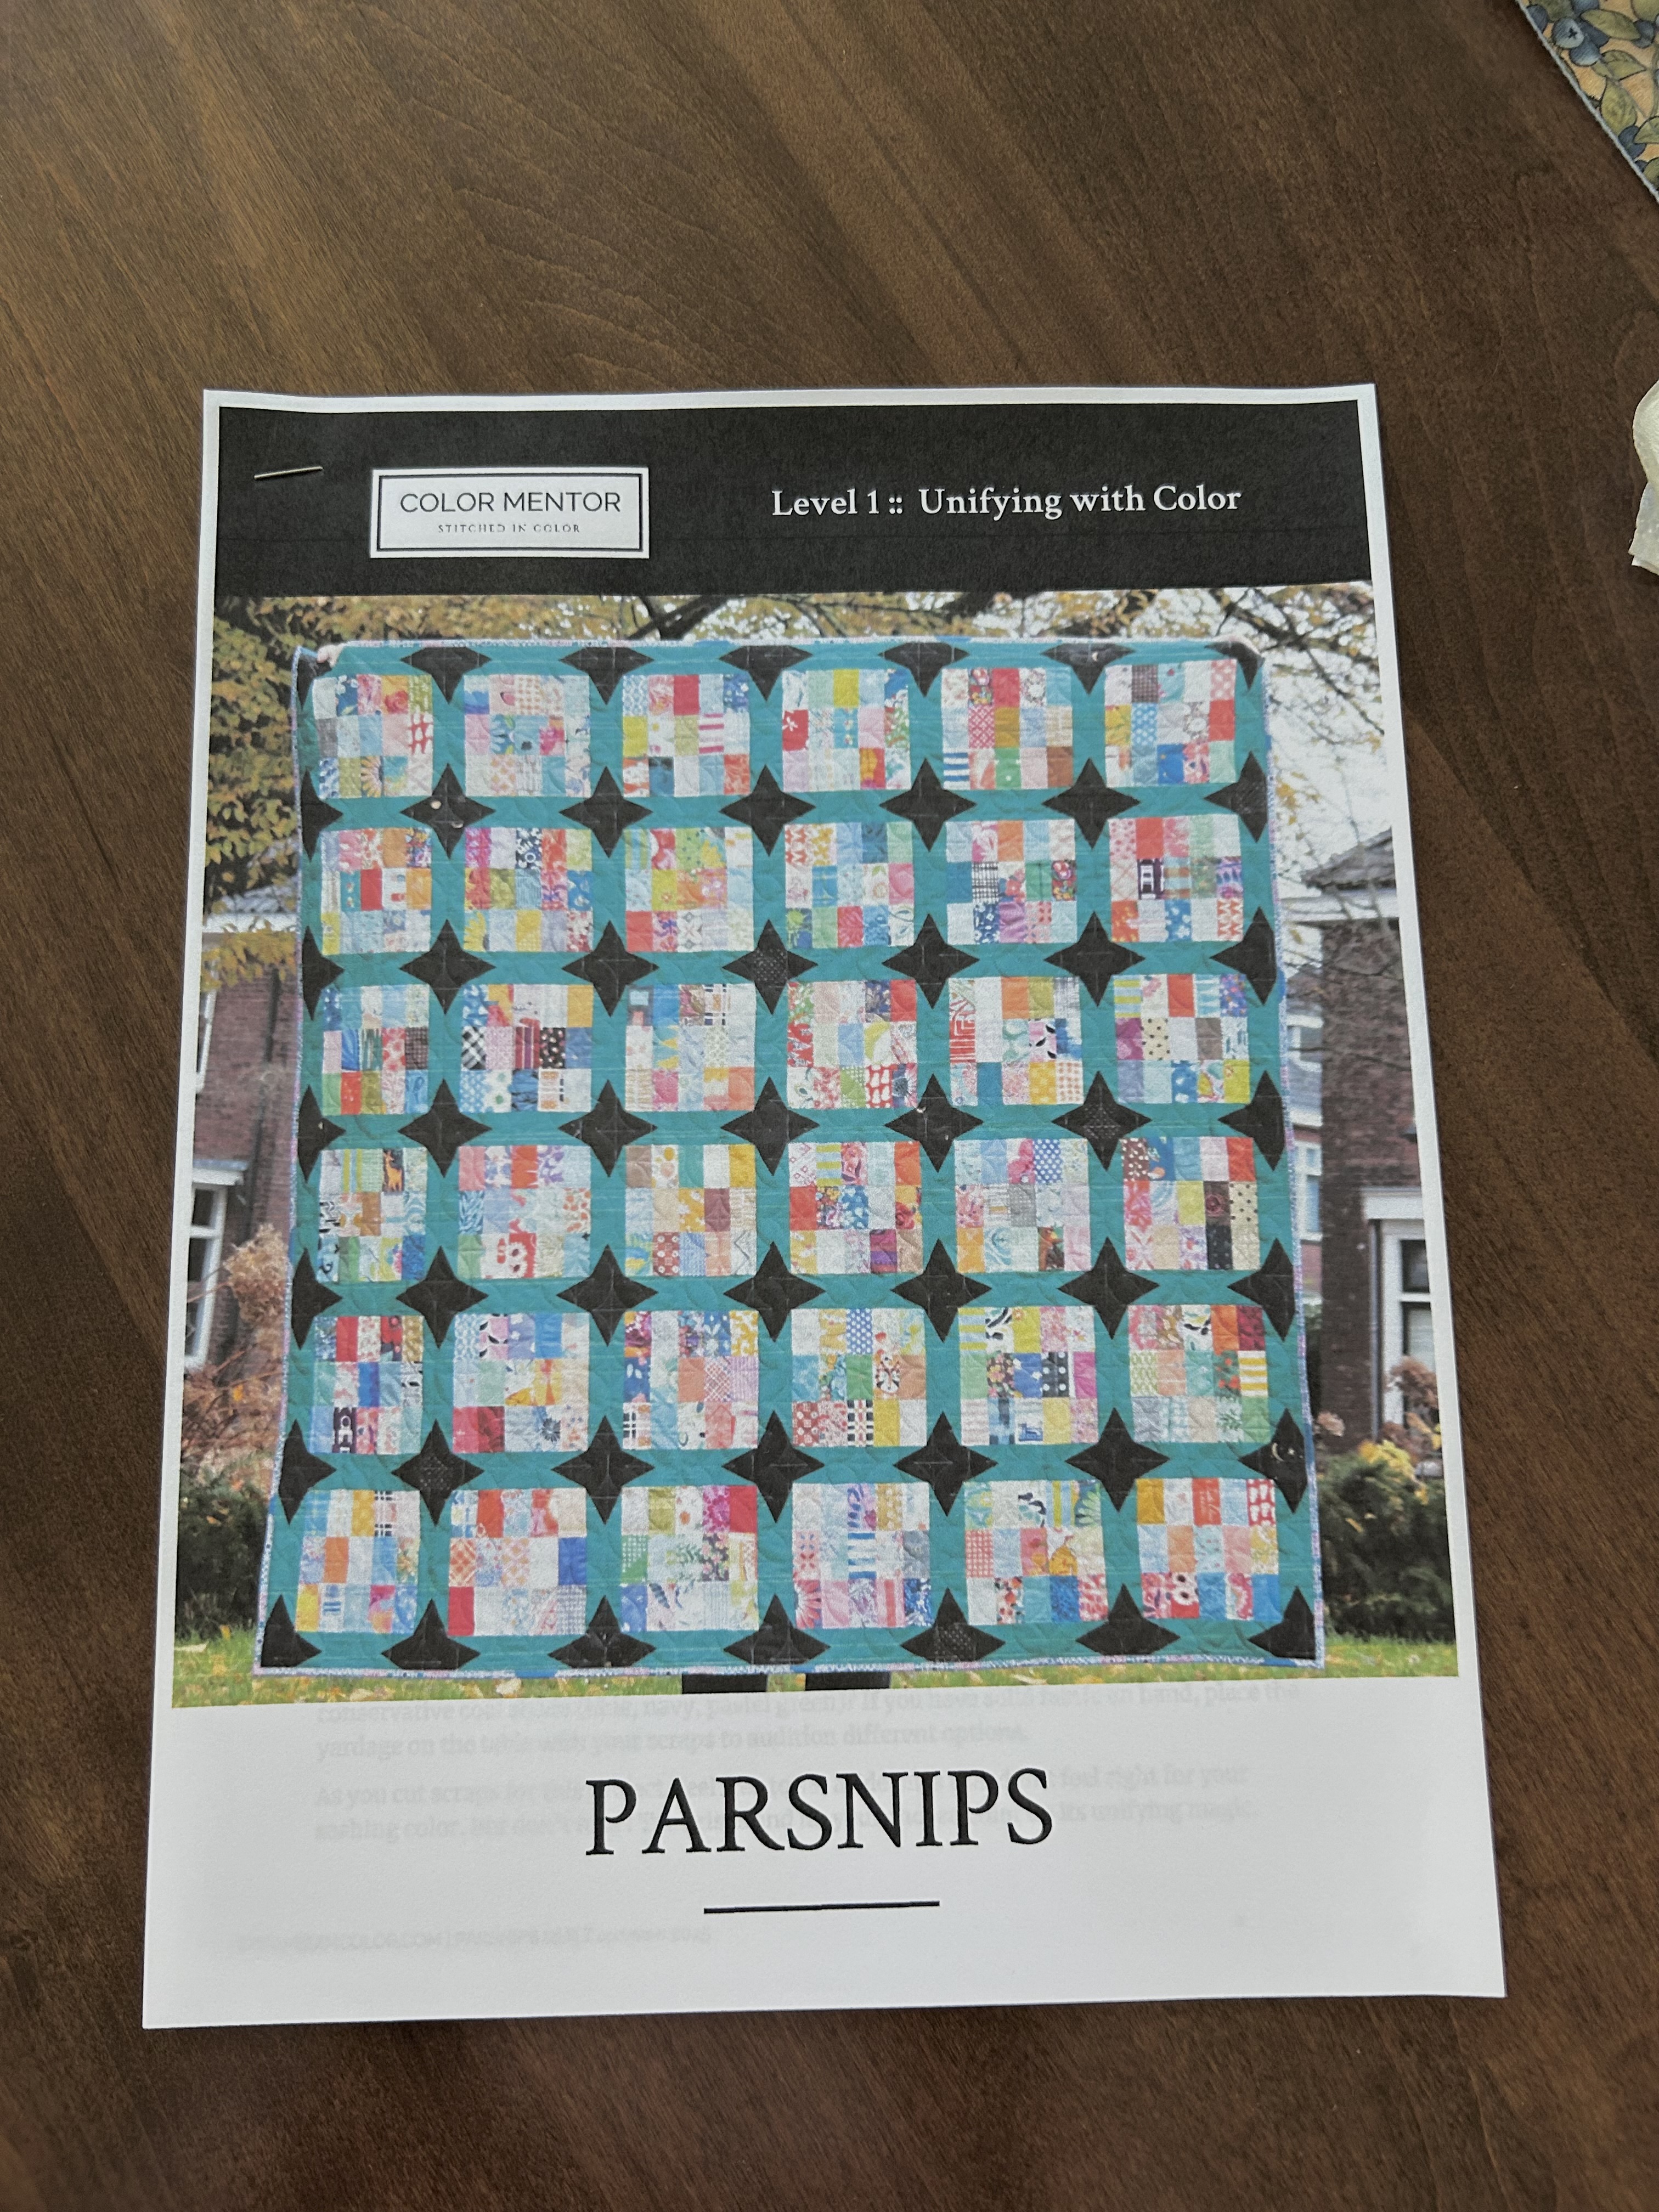
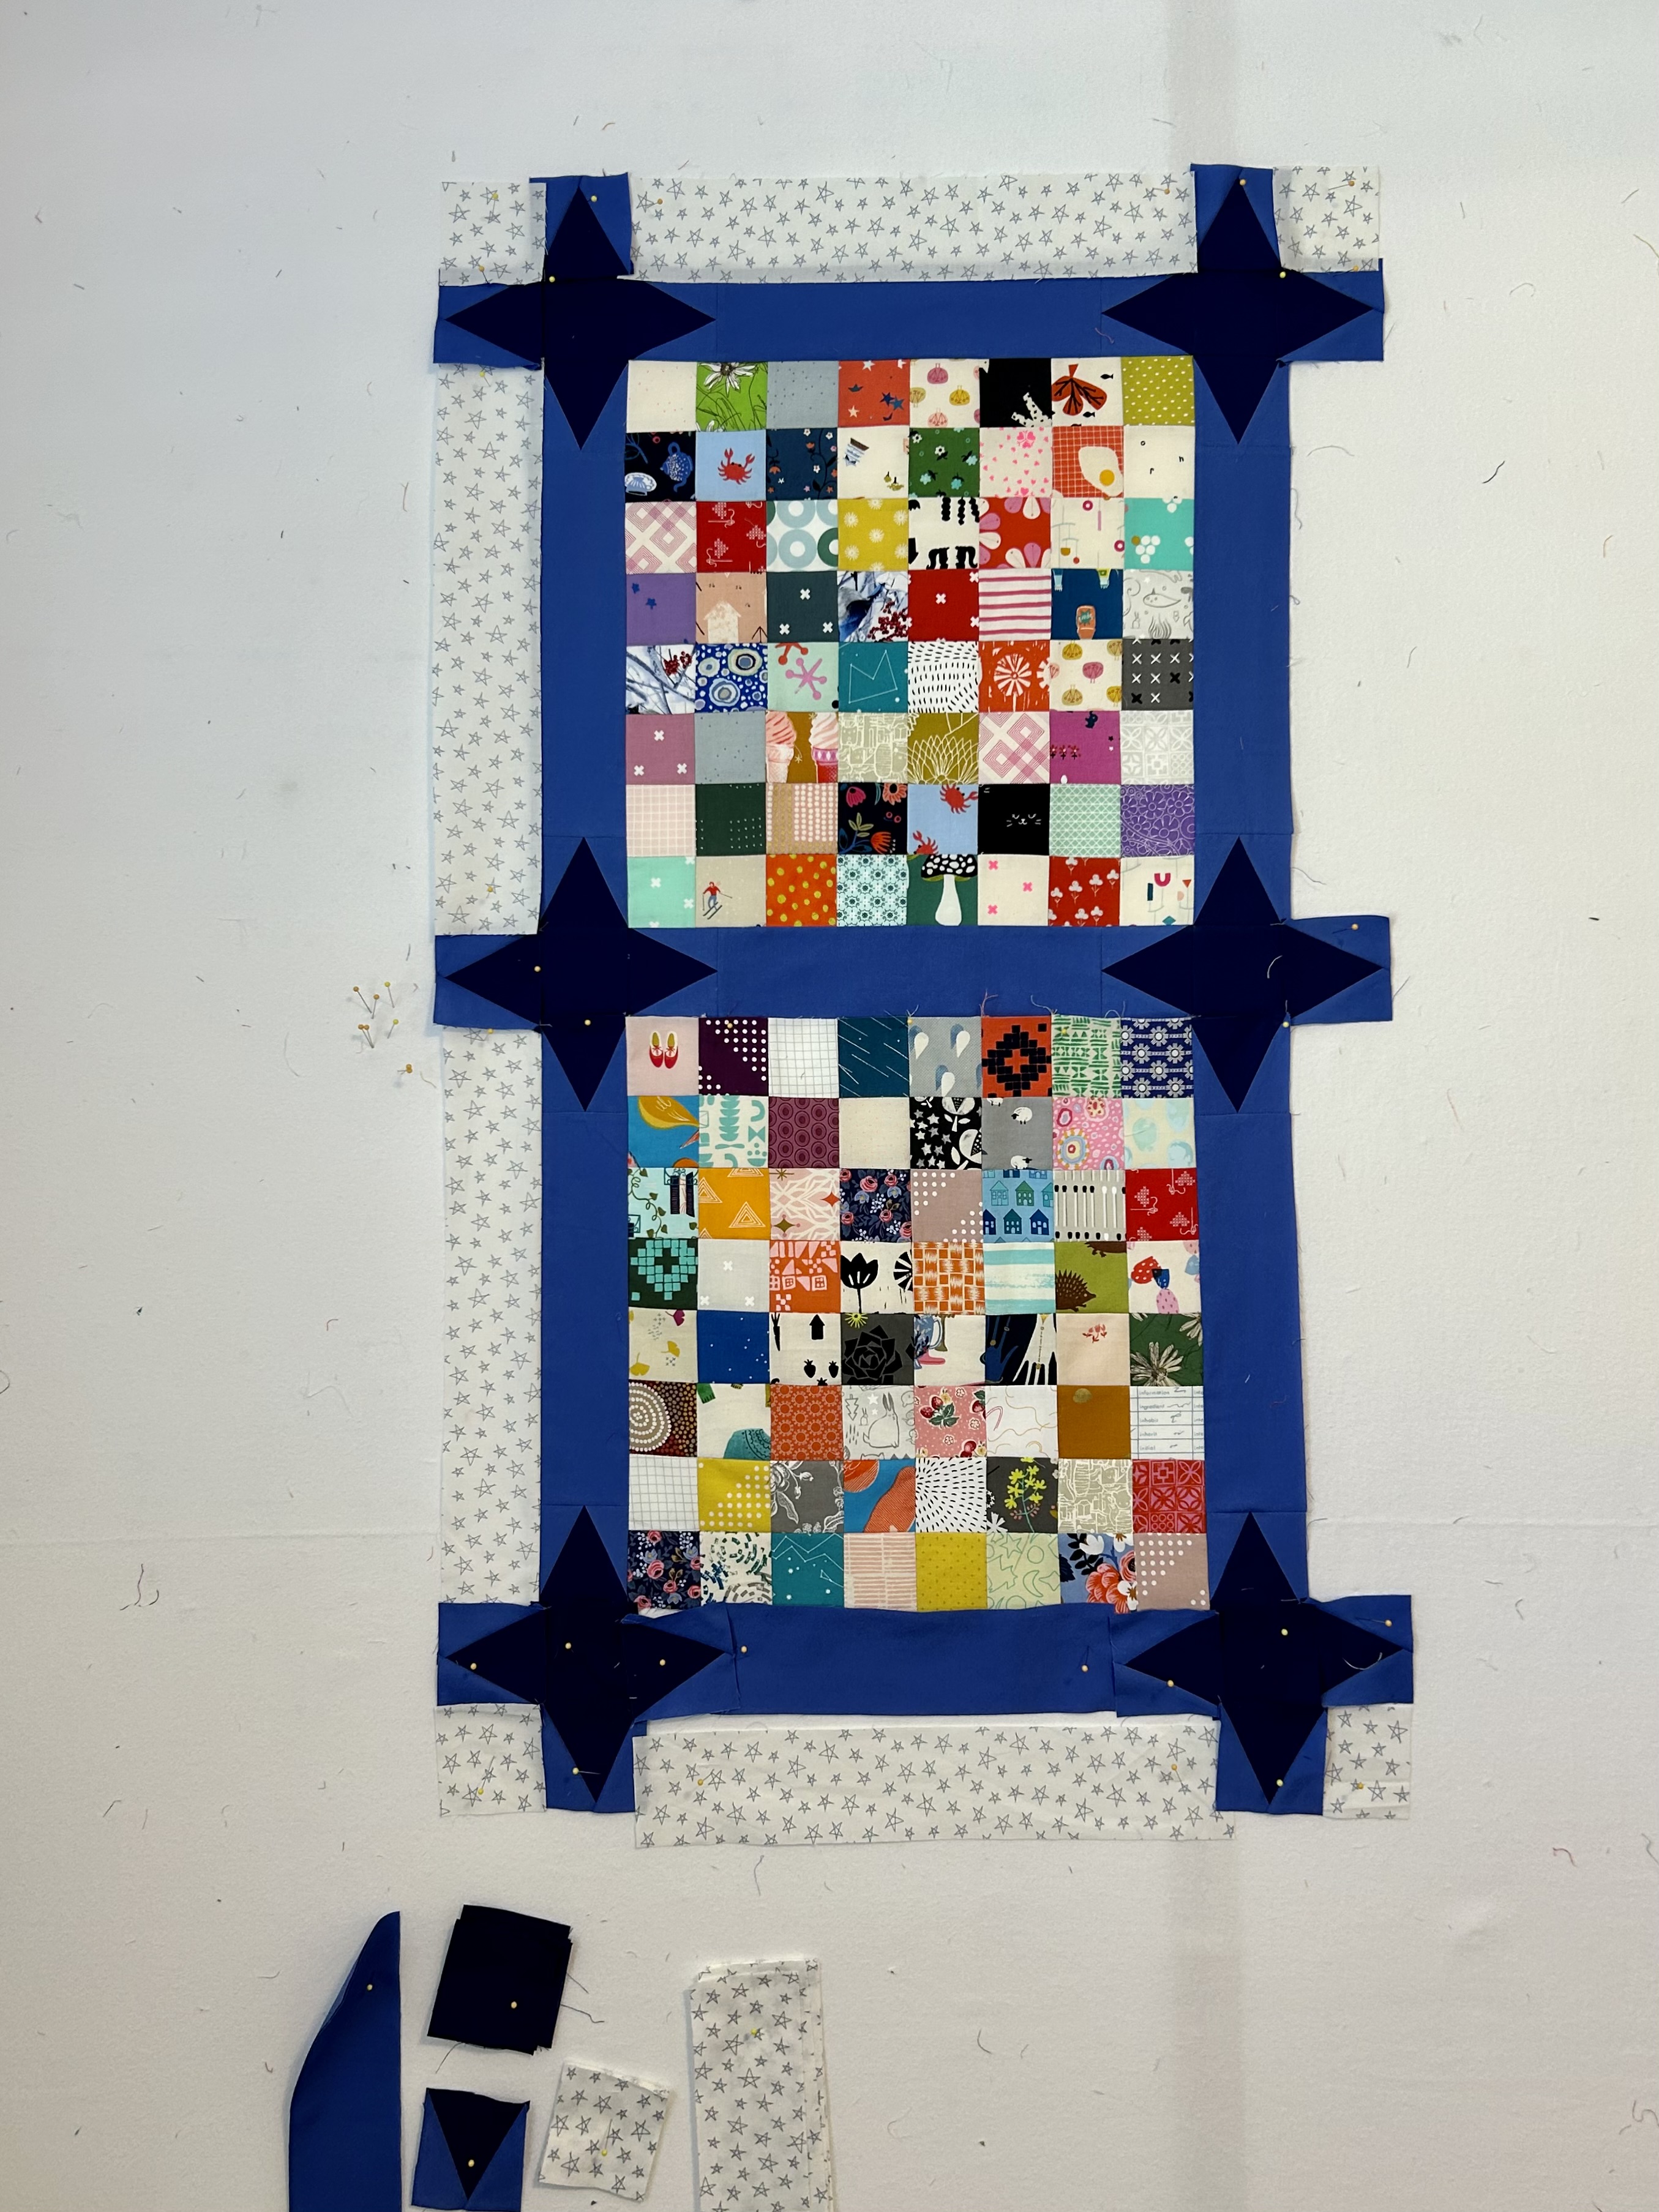
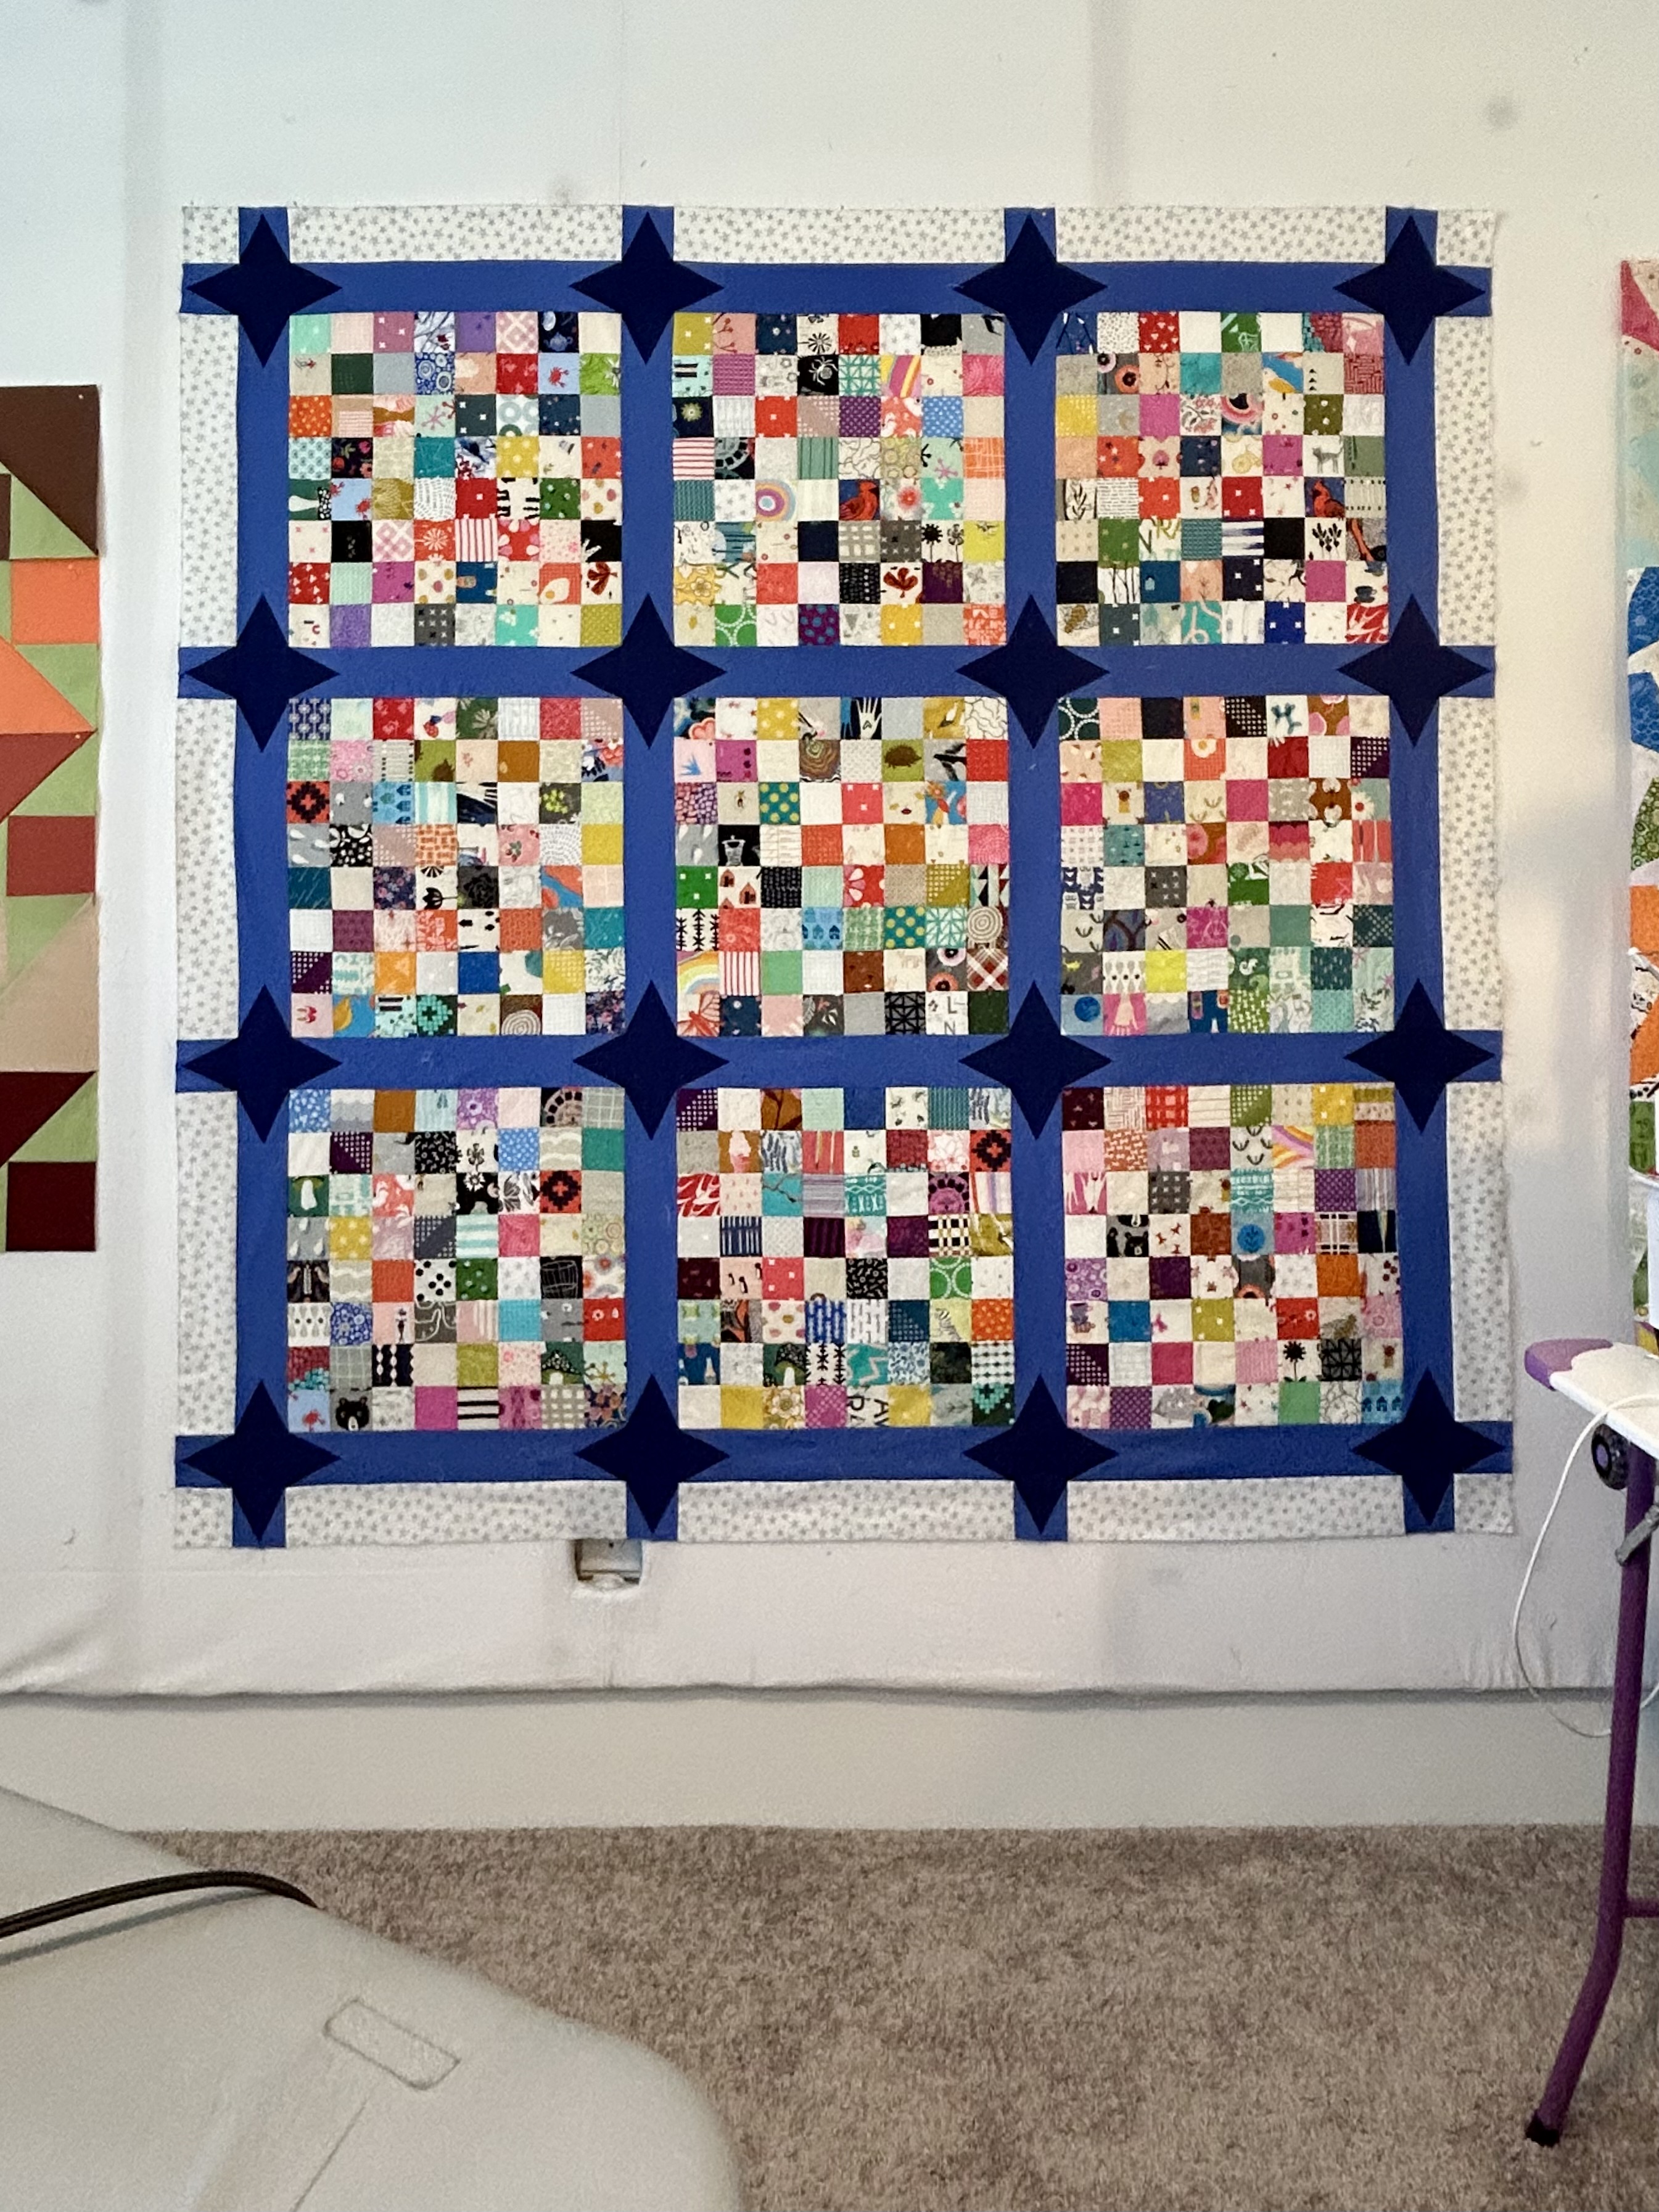
“Parsnips” (Stitched in Color blog sewalong) is done and waiting to be quilted. I have a wow! backing for it. I’m using my bin of 2 1/2-inch cut scraps for this quilt rather than the adorable rectangles Rachel Hauser used. My blocks are larger than Rachel’s and I made the sashing 1/2 inch wider to compensate. And I added that neutral border so I could have the sashing stars go all the way to the edge.

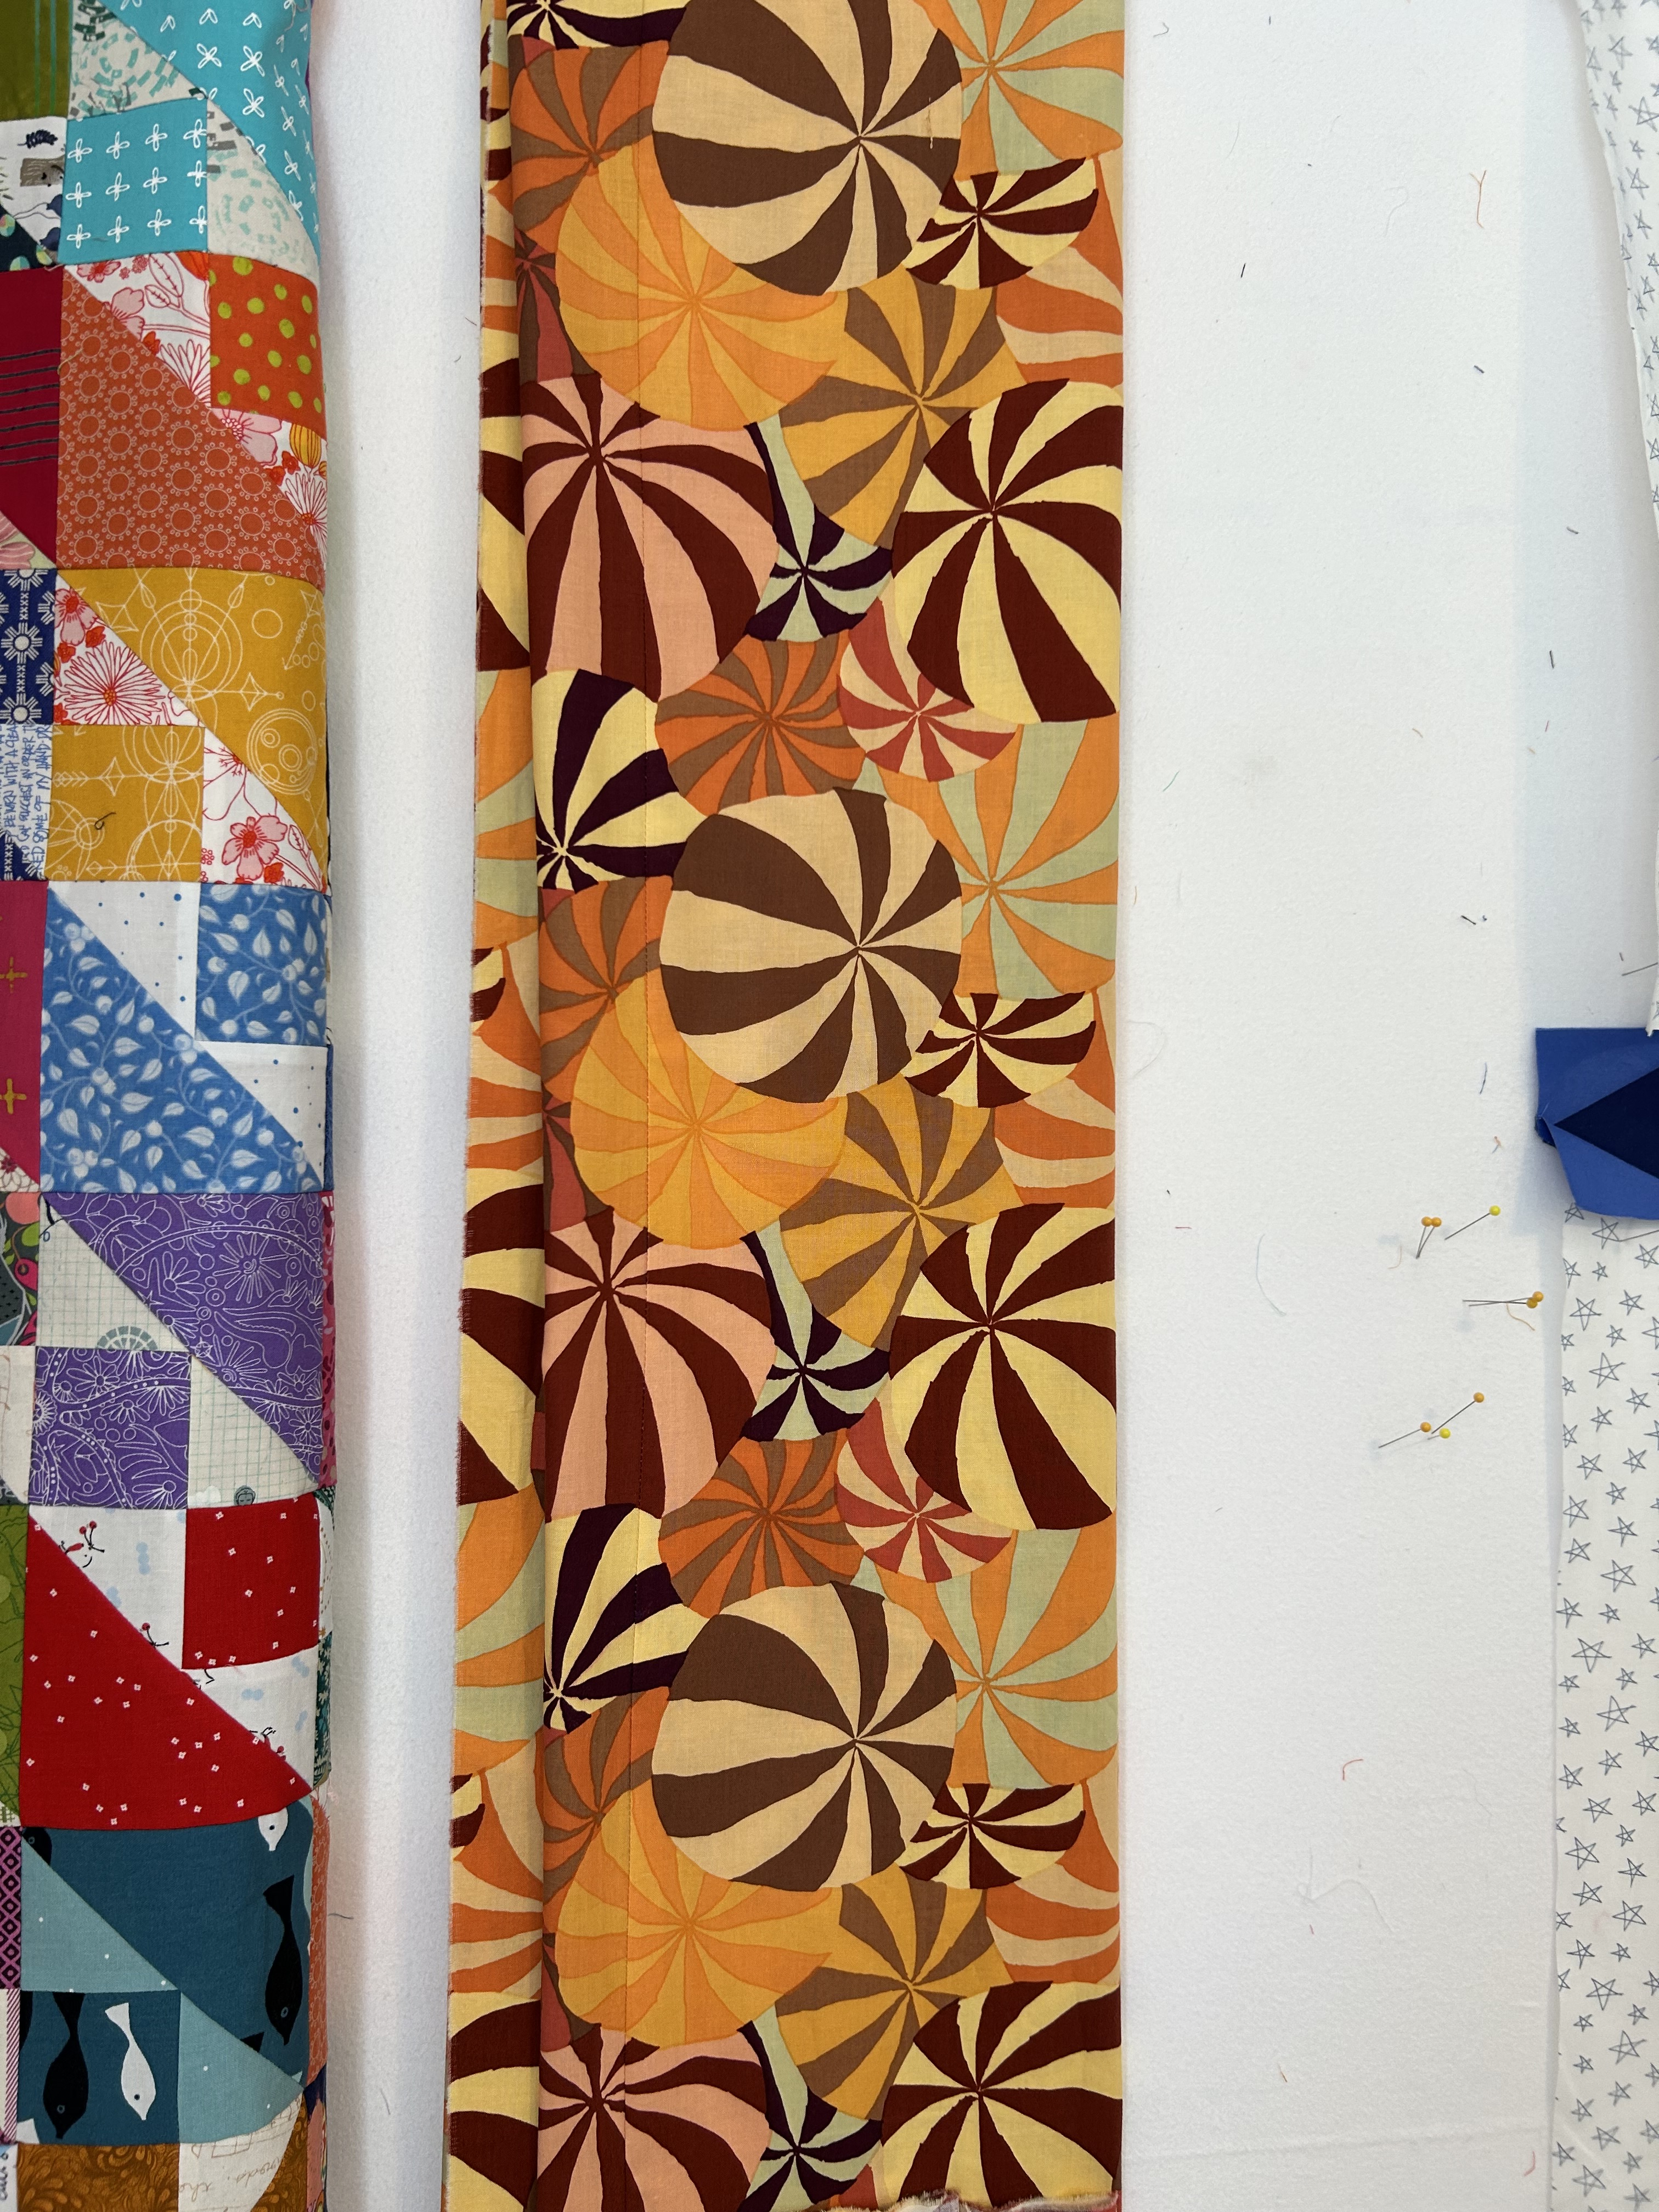
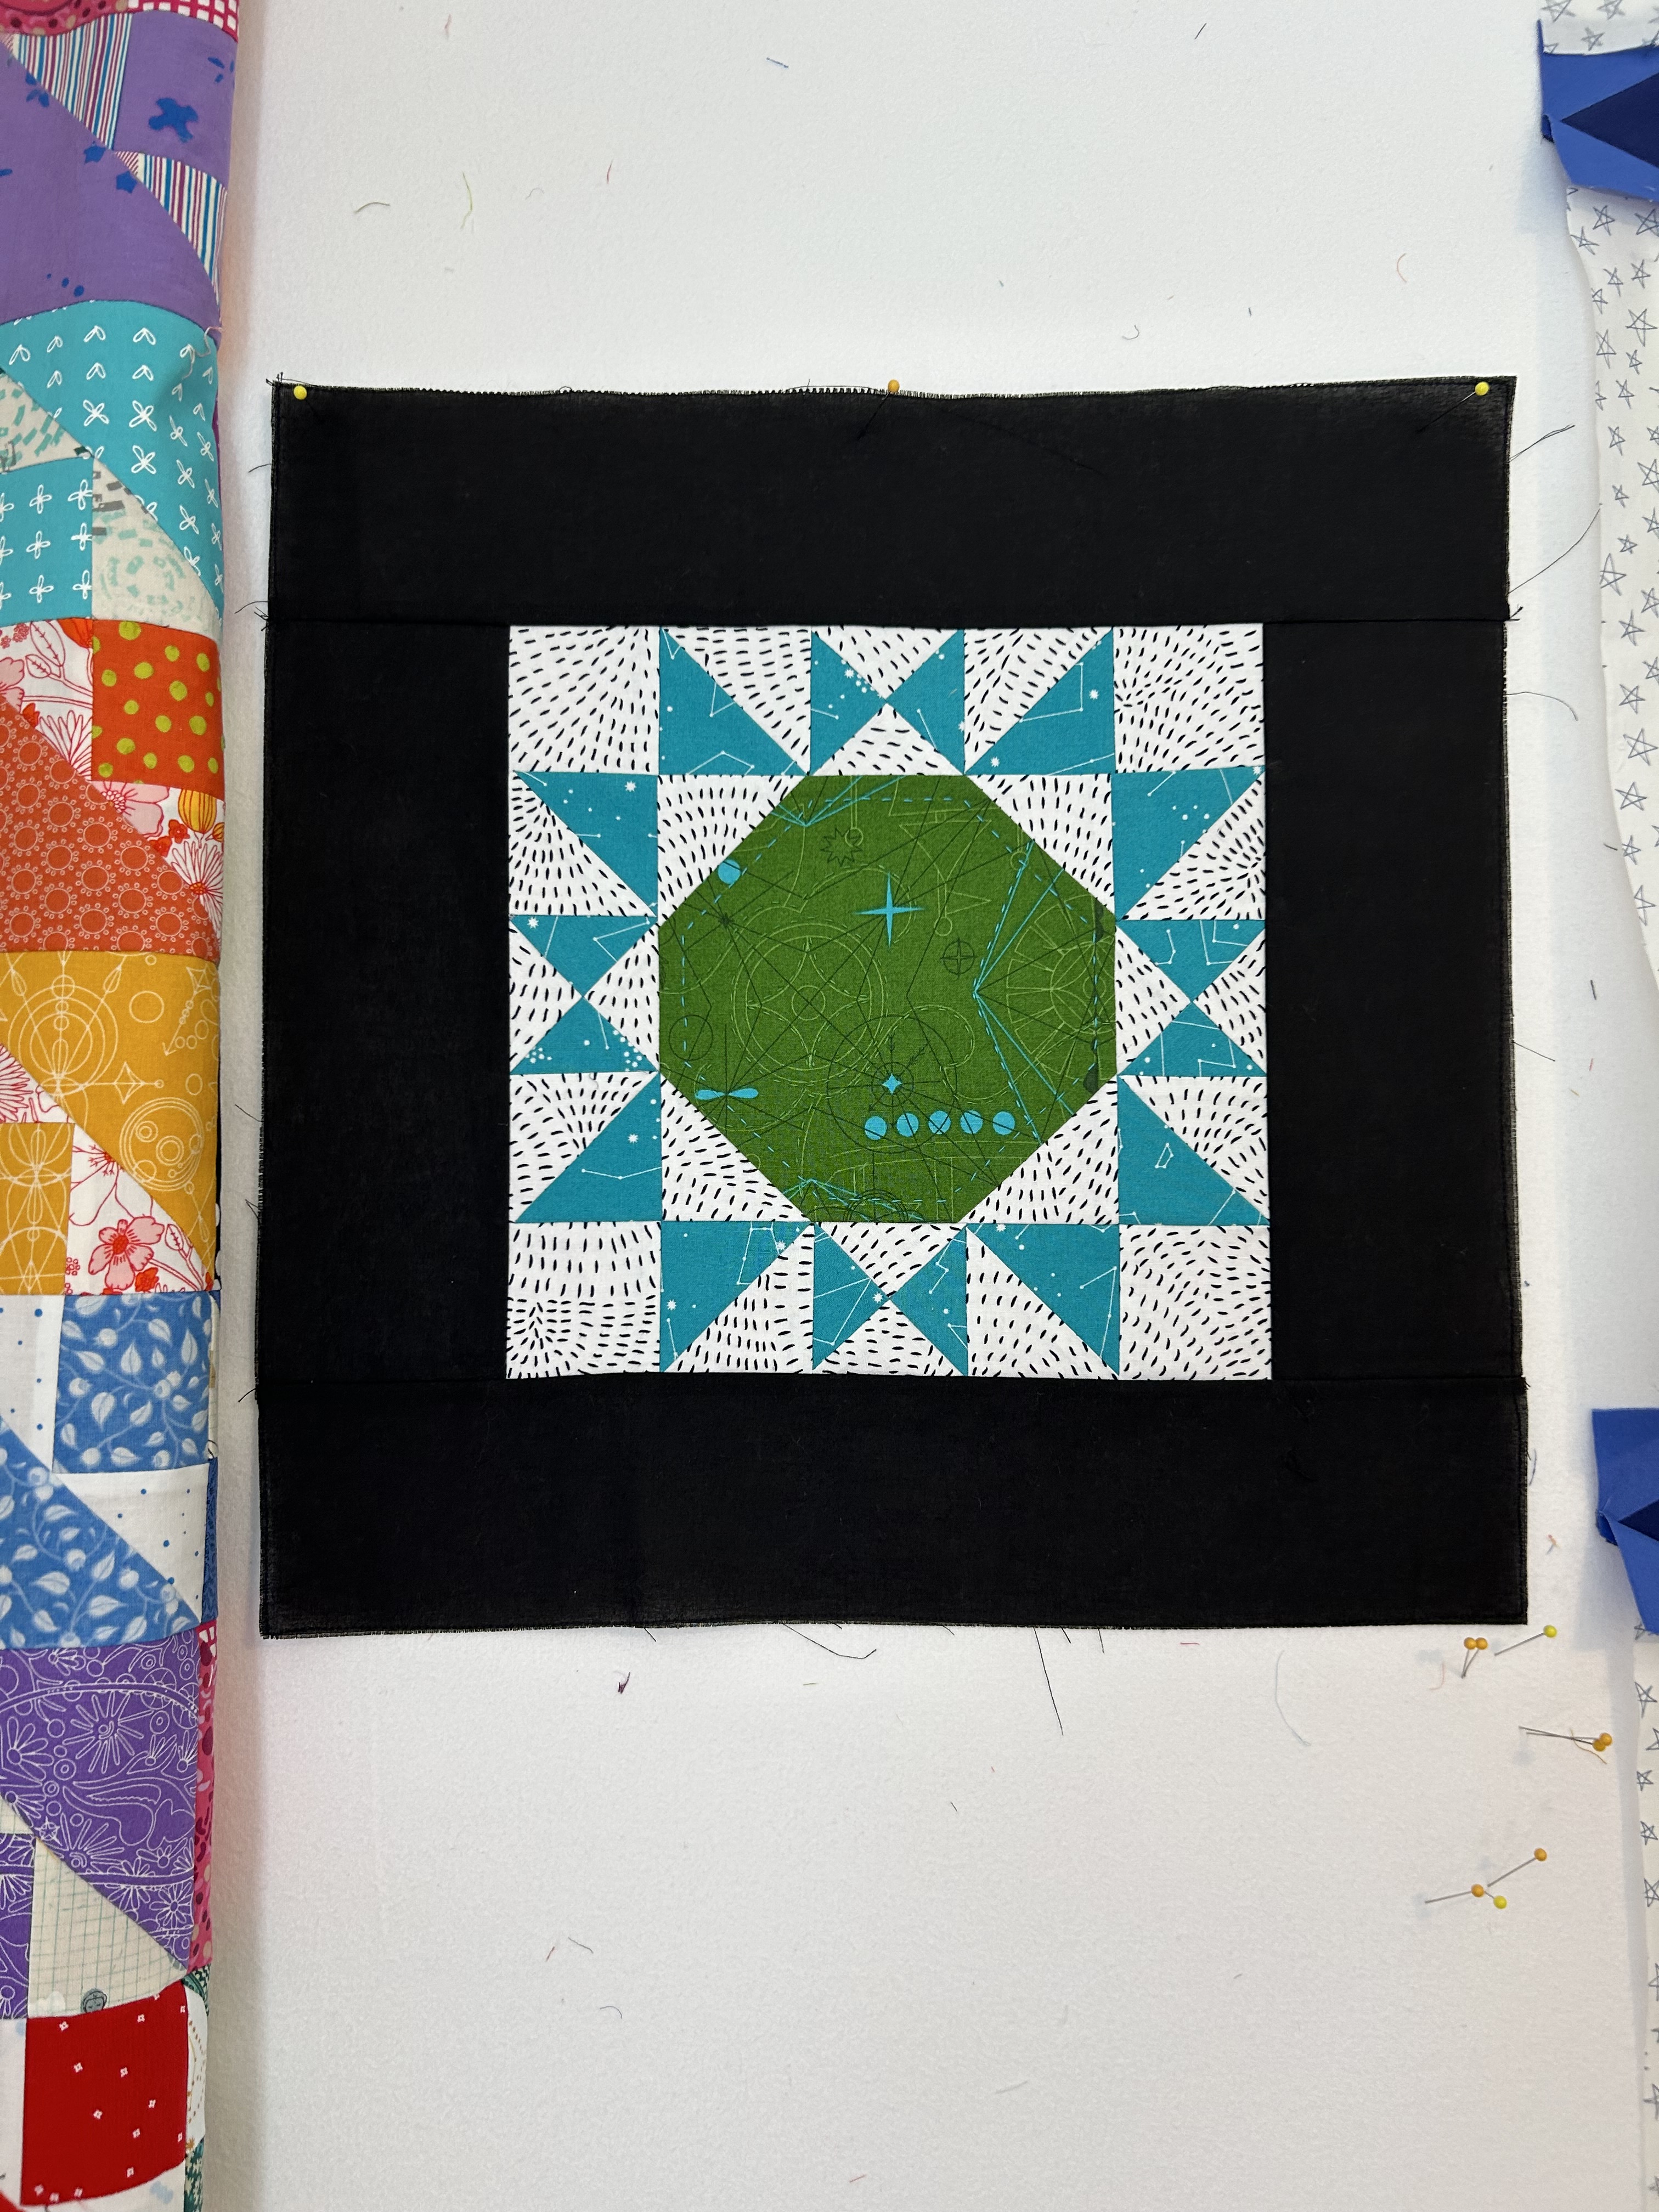
The blocks for the new 8-inch Cat’s Cradle top are done, though I may still be moving them around. I chose solid colors that are in the old Kaffee Fasset fabric to the left of the design wall, which I bought about 20 years ago. I think using the green that’s in the fabric is working really well for the strips that form. I think I have enough of that lucious dark, dark brown for a binding.

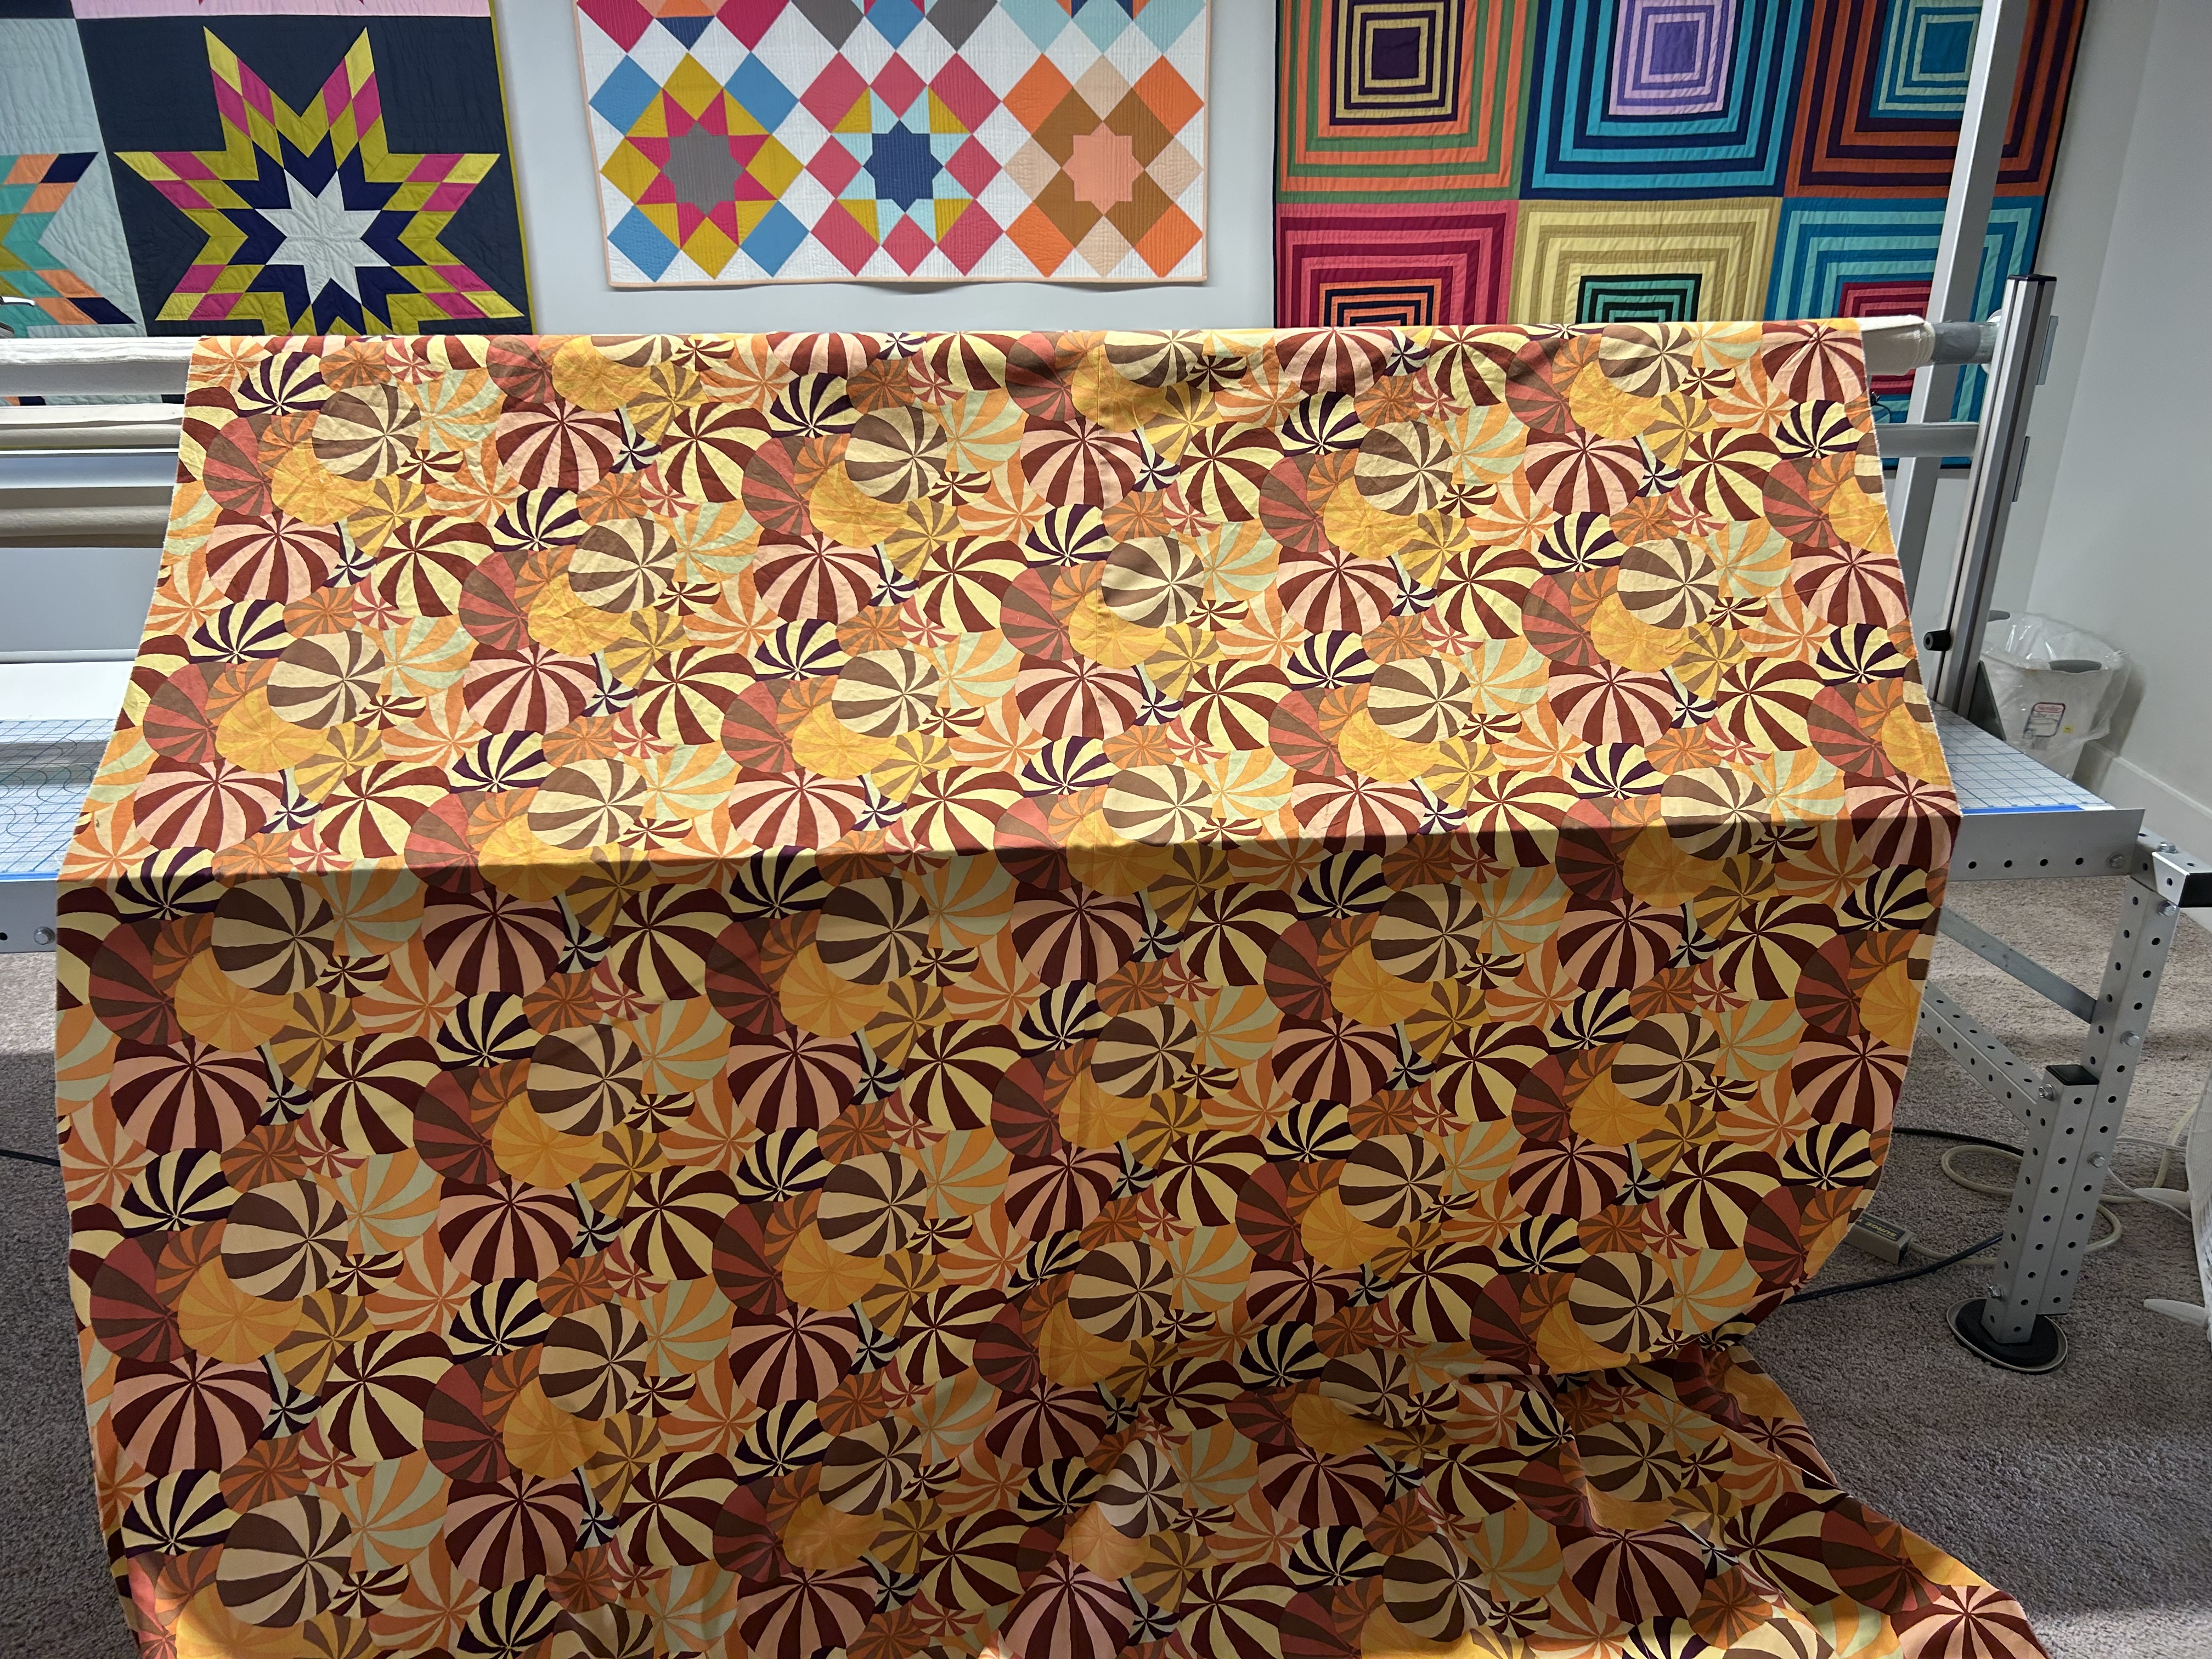
“Kites” is now on the longarm and has the cutest Tilda fabric for its backing.

And so it goes…

A granddaughter is graduating high school this morning, so I’m off to help her celebrate.

“Big Slice” Quilt is Done

I am so happy with this 60-inch lap quilt–made using this block from Tara Faughnan’s Blocks 2 online class. I also used the palette she designed for this project, but added a few extra colors from my own stash.

Tara often gives us many designs using the block idea of each month, and she did this time as well. Different designs varied the number of slices in the curve and the corner block (from a solid square to this checkerboard). One variant that intrigued me was a spiky version, which I tried out and put on stretched canvas. (I don’t think I’m done with this spiky version yet…)

I wasn’t thinking jade green when I went to find a backing, but it’s perfect. And I quilted in a jade thread, which also worked well on the front.

I quilted with the pantograph “Bayside” as I wanted nice coverage and texture without overwhelming the quilt top.

So for now I’m all finished with the Blocks2 projects for this year. And I have to decide whether or not to take Blocks 3 next fall. I probably will, as these past two years have really enriched my quilting projects in all sorts of ways, to include learning lots of new quilting methods.

A Fun Saturday Event

This past Saturday I facilitated the Charleston Modern Sit and Sew to help interested members install their quilt work on stretched canvas. We meet in a terrific room, courtesy of the Five-Eighth Seams quilt store (which also carries other types of fabrics and holds informative classes).

There was a great turnout, and many went home with beautiful projects completed and ready to hang. I in no way got all the projects captured with my camera, but here are a few. Hopefully there will be a group shot at our next meeting.

Beautiful!

Just look at this smile! Success and such a fun block!

My rechargeable staple gun held up to the morning’s challenge without needing recharging.

Look how pretty!

A stunning rectangle block turned out to be so pretty.

We had piles of batting and felt, lots of glue, and lots of laughter.

The morning flew by, but here are my two finished pieces. A funky house…

…and an elegant starry block I made to see how it would look in a quilt.

I am so happy I learned how to make this project and could share that info with others.

The Design Wall

…is filling up again!

On the left is a very old Kaffe Fasset print I bought many years ago at a sale in Maine where a fabric store was closing as the owner was retiring. And because it is an old KF print, it has sturdy fabric, not the sheer fabrics the market gives us today, fabrics that require starching to even cut them properly. LOL, no more on that rant this morning.

I was thinking of using this fabric for the Cat’s Cradle quilt top next to it as I’m trying to use up stash fabrics, but these two critters are fighting. I’m going to use this old KF print for a backing for another 8-inch Cat’s Cradle quilt top that uses solid fabrics in the colors in this print. I’m VERY happy with how the match of my two cut pieces matched up with the method I use. See the seam on the left? (I blogged about matching prints some time back.)

And now, the 4-inch Cat’s Cradle top is on the longarm.

And you can see this fabric actually has lines of pattern running lengthwise. I didn’t really notice that at first.

I’m excited about this new 8-inch Cat’s Cradle project with these unusual colors (for me). And I think I have collected enough of these colors for this new quilt now.

My online quilt project from Rachel Hauser of Stitched in Color is coming right along. I am using 2 1/2 squares from those stored in my 2 1/2-inch square bin, and I’m loving the blue sashing and the darker purple/blue (Kona “Nightfall”) for the triangle star block. I added a neutral outside border so I will have full stars on the border. Right now these squares are in the leader/ender category.

And I’m sewing together the Kites in this top. I like the movement with this arrangement. The long lines of one color are functioning as sashings–as are the single blocks that separate the double blocks. I found an adorable backing (a Tilda print) for the backing. This quilt will be for a girl, thus all the pink.

Below is the block I’ll use to show my Charleston Modern members who come to tomorrow’s Sit and Sew how to mount a quilt on stretched canvas. I did some very subtle hand-sewing on the green center, which added just a little texture.

My changing design wall shows how my quilting rolls along. And it is so much fun.

It’s Magnificent Magnolia Time

This is a picture of what is called a “Gem” magnolia. It stays small and is ideal for planting in subdivisions where one of the big magnolias–which grow very tall and have spreading, big, lovely crowns–would overwhelm small yards. Note that Magnolia blossoms are very fragrant too.

On a big regular magnolia, the blossoms would be bigger. But look at this pretty bloom, which is surrounded by more buds.

This tree of my back neighbor’s was planted 2 years ago, and it is loaded with blooms this year.

Seeing blooming magnolia trees reminds me of way back in the day–I was in high school–when I was maid of honor for a treasured first cousin’s wedding in rural Virginia. I flew from Omana, Nebraska, and was met at Dulles airport in northern Virginia (just west of DC) by the bride’s father, who flew me to their home in Lovingston, Virginia, (near Charlottesville and Lynchburg to the south).

My cousin carried a single magnolia blossom in the wedding that took place in a beautiful and old rural Episcopal church.

Memories…

My 4-Quilt Series is Done

This past winter I worked on making a series of quilts using Latifah Saafir’s Hurty ruler (which makes half-rectangle triangle blocks sized 12 inches down to 1 inch). My goal was to use materials from my stash, with the exception perhaps of some backings if warranted. I do like plain backings for busy quilts.

Each of these quilts has its own blog post entry. But I thought it might be nice to see them in one place–to see the design progression I made–in the order of making.

In “Arrowheads” I wanted to play with the design that gets created when the left or right angle cuts in the half-triangle meet and form an “arrowhead” triangle shape. See the upper right corner for an “arrowhead” triangle. I organized the blocks to make that fat triangle on a diagonal line from top right to bottom left. In places, these “arrowhead” triangle are more subtle than others.

In “Diamonds” I wanted to play with the long triangle that forms when you combine 4 of these half-rectangle blocks. In places I made diamonds, yes, but I didn’t want a quilt of all diamonds. So away from the center of the quilt, I often just used the half of a full diamond block. I also made some diamonds and long triangles in much lighter fabrics, to vary the rhythm.

In “Dancing Hourglass Diamonds” I used the “hourglass” rectangle triangle block I discovered in this year’s Tara Faughnan’s online Blocks 2 class. Once the rectangle triangle block is made, one cuts block on the diagonal and combines the parts with OTHER cuts. Note that you have to have all left or all right cuts on the Hurty ruler for these diagonal cut pieces to line up.

I made some solid little diamonds to pull the eye around the quilt, but take a moment to gaze at the quilt to see what happens–magical bigger diamonds form to join the dance around this quilt.

I was thinking of a red or green border and found this blue leftover in my stash–from a wideback used in another quilt. The minute I laid it next to the quilt top, the quilt started singing. Out loud. Insistent. Who knew?

In “Gradations” I played with the range of sizes available in the Hurty Ruler. I chose sizes that would add up to creating a downward row of 48 inches–in order to make a center with the darker color in this block oriented to the bottom on its side. This center sat on the design wall for several months until I ordered the fabric used in the border triangles and on the back.

A nunber of people have asked me for the name of this fabric: It’s “Pixie Petals in Sapphire,” made by Coming up Roses for Moda (fabric 39788/13).

There may be one more in this series one of these days as I just realized that by mainpulating color, you can make a straight line with this block.

Hmmm…

The Bees in the Tree Issue

I thought it might be nice to give you an update on the bee issue in this tree.

DIL Tami Enright is the co-founder and Director of THE BEE CAUSE. (There is a good online site to that group.) So that’s where I went for information. Tami sent me to a local beekeeper for guidance, after noting that perhaps a beekeeper could use available hormones to encourage these bees to move.

BUT, the beekeeper noted that while that strategy might work, the tree is likely FULL of honey–in a place that is virtually impossible to reach–so other bees would find this site and move into the tree.

So there are two options left to manage this situation.

One is to have a beekeeper, who is dressed for protection, cover the entrance permanently with a mesh that prevents the bees from entering or leaving that space. Yes, the colony would die, but no other colony could get established in that tree.

The other is to just leave the colony alone. And that action will depend on the wishes of the two adjacent homeowners (one of whom are new owners and have not moved in yet) and our HOA. The tree is in the middle of the two houses and likely on HOA-owned land.

The sidewalk is not far away, so other neighbors and neighborhood walkers are afraid of the bees. Note that bees don’t really attack unless someone gets right up close to their nest. I don’t know how close the mowing happens… Or if a curious child might wander too near the bees. So I don’t want to totally discount these fears.

I also don’t know if perhaps that big Live Oak is now hollow and poses a risk. Live Oaks are highly prized here–they are so emblematic of this coastal area, with their huge spreading moss-draped crowns. BUT, my family just this past week had to cut one of these trees as it was hollow and was no longer safe. Inside at the bottom was a racoon nest full of babies!!!

Yes, the babies were relocated gently to a pine-straw nest made in nearby woods, and the mother retrieved them as soon as things quieted down in the area.

Is there anything cuter than a baby animal?

New Sewalong From Rachel Hauser And A Kite Block

Rachel Hauser of the Stitched in Color blog is starting a new online sewalong, starting May 11th. Rachel is predominately a scrappy quilter, and I love her work. You may recall I did her “Scrap Cabin” quiltalong some months back–as I fell in love with her border for that quilt.

Well…

Her new sewalong features her quilt “Parsnips”–which has a sashing treatment with which I also fell in love. Her green sashing color is much more intense than I could get my camera to capture from the front of her downloaded pattern.

Here’s a better picture of how she used colors:

Rachel used rectangles, but I have a bin that has a ton of 2.5-inch squares, so I’m going to use squares.

And I was guessing the size of her sashings before she released her pattern, so mine are just a bit bigger. I’m using my “Tri Rec” rulers to make my triangle sashing blocks, but Rachel has included templates in her pattern.

I’m sewing together my squares as a leader/ender project for right now. And I’m adding an outer neutral border so I can have the whole of these cute stars along the edges. My block of squares measures 16 inches and I’m sewing it in 4 pieces. I don’t know yet how big I’ll make this quilt.

Clearly I’ve never met a ruler I didn’t like. I recently saw an involved quilt that used the kite block, and I was so intrigued that I ordered the recommended 5-inch version.

In the process of trying out the ruler–it’s awesome–I seem to have started a quilt using a kite block. I’ve drawn a plan now and am cutting out more sets of 4 blocks.

I really like the movement in this arrangement and will use the single rows as if they are sashings. I already see where I want to move that light blue single row–I think it needs to be a block on its own and there need to be more blocks with light kites and stronger outside pieces. And that’s how my quilting goes…

The 4-inch Cat’s Cradle quilt top is done, ironed, and pinned to the design wall while it waits for its backing and for its turn on the longarm–which gave me the design wall room to play with Parsnip and the kites.

This quilt needs a name. Right now, I have no idea…

And I will say I’m not done at all with playing with these Cat’s Cradle rulers. There are so many different settings in the “Cat’itude” little book by Deb Heatherly.

This week is flying by so fast…

Now I need to stop and get “Big Slice” done and off the longarm. But that means I need to stop playing, which is always so hard for me to do.