First, I DID go back and take apart the first quilt in this series so that I could fix the blocks that were reversed. And can I just say that I NEVER, NEVER, EVER want to have to do that job again. (Many thanks to longarm quilter Wendy Currie for walking me though how to go about making this repair and for the encouragement to go ahead and risk doing it. Wendy lives in Thunder Bay, Canada, and we connected online years ago. She knows me well, for sure.)
Fixing the two blocks was possible I think because they were on the edge of the quilt. If they were more to the center, I don’t think I could have taken them out with the batting and backing in place and the longarm quilting done. Fixing blocks in the center would have required taking apart the quilt from the flawed row to the bottom edge. As it was, it took me THREE days to complete this task: unsewing the longarm stitches, removing the two blocks and resewing them in a very tight space, loading the quilt back on the longarm without using sturdy pins that could have harmed the quilt top (I used bull clips), lining up stitches with the pantograph, requilting, then burying LOTS of threads, and then sewing the binding back in that area.
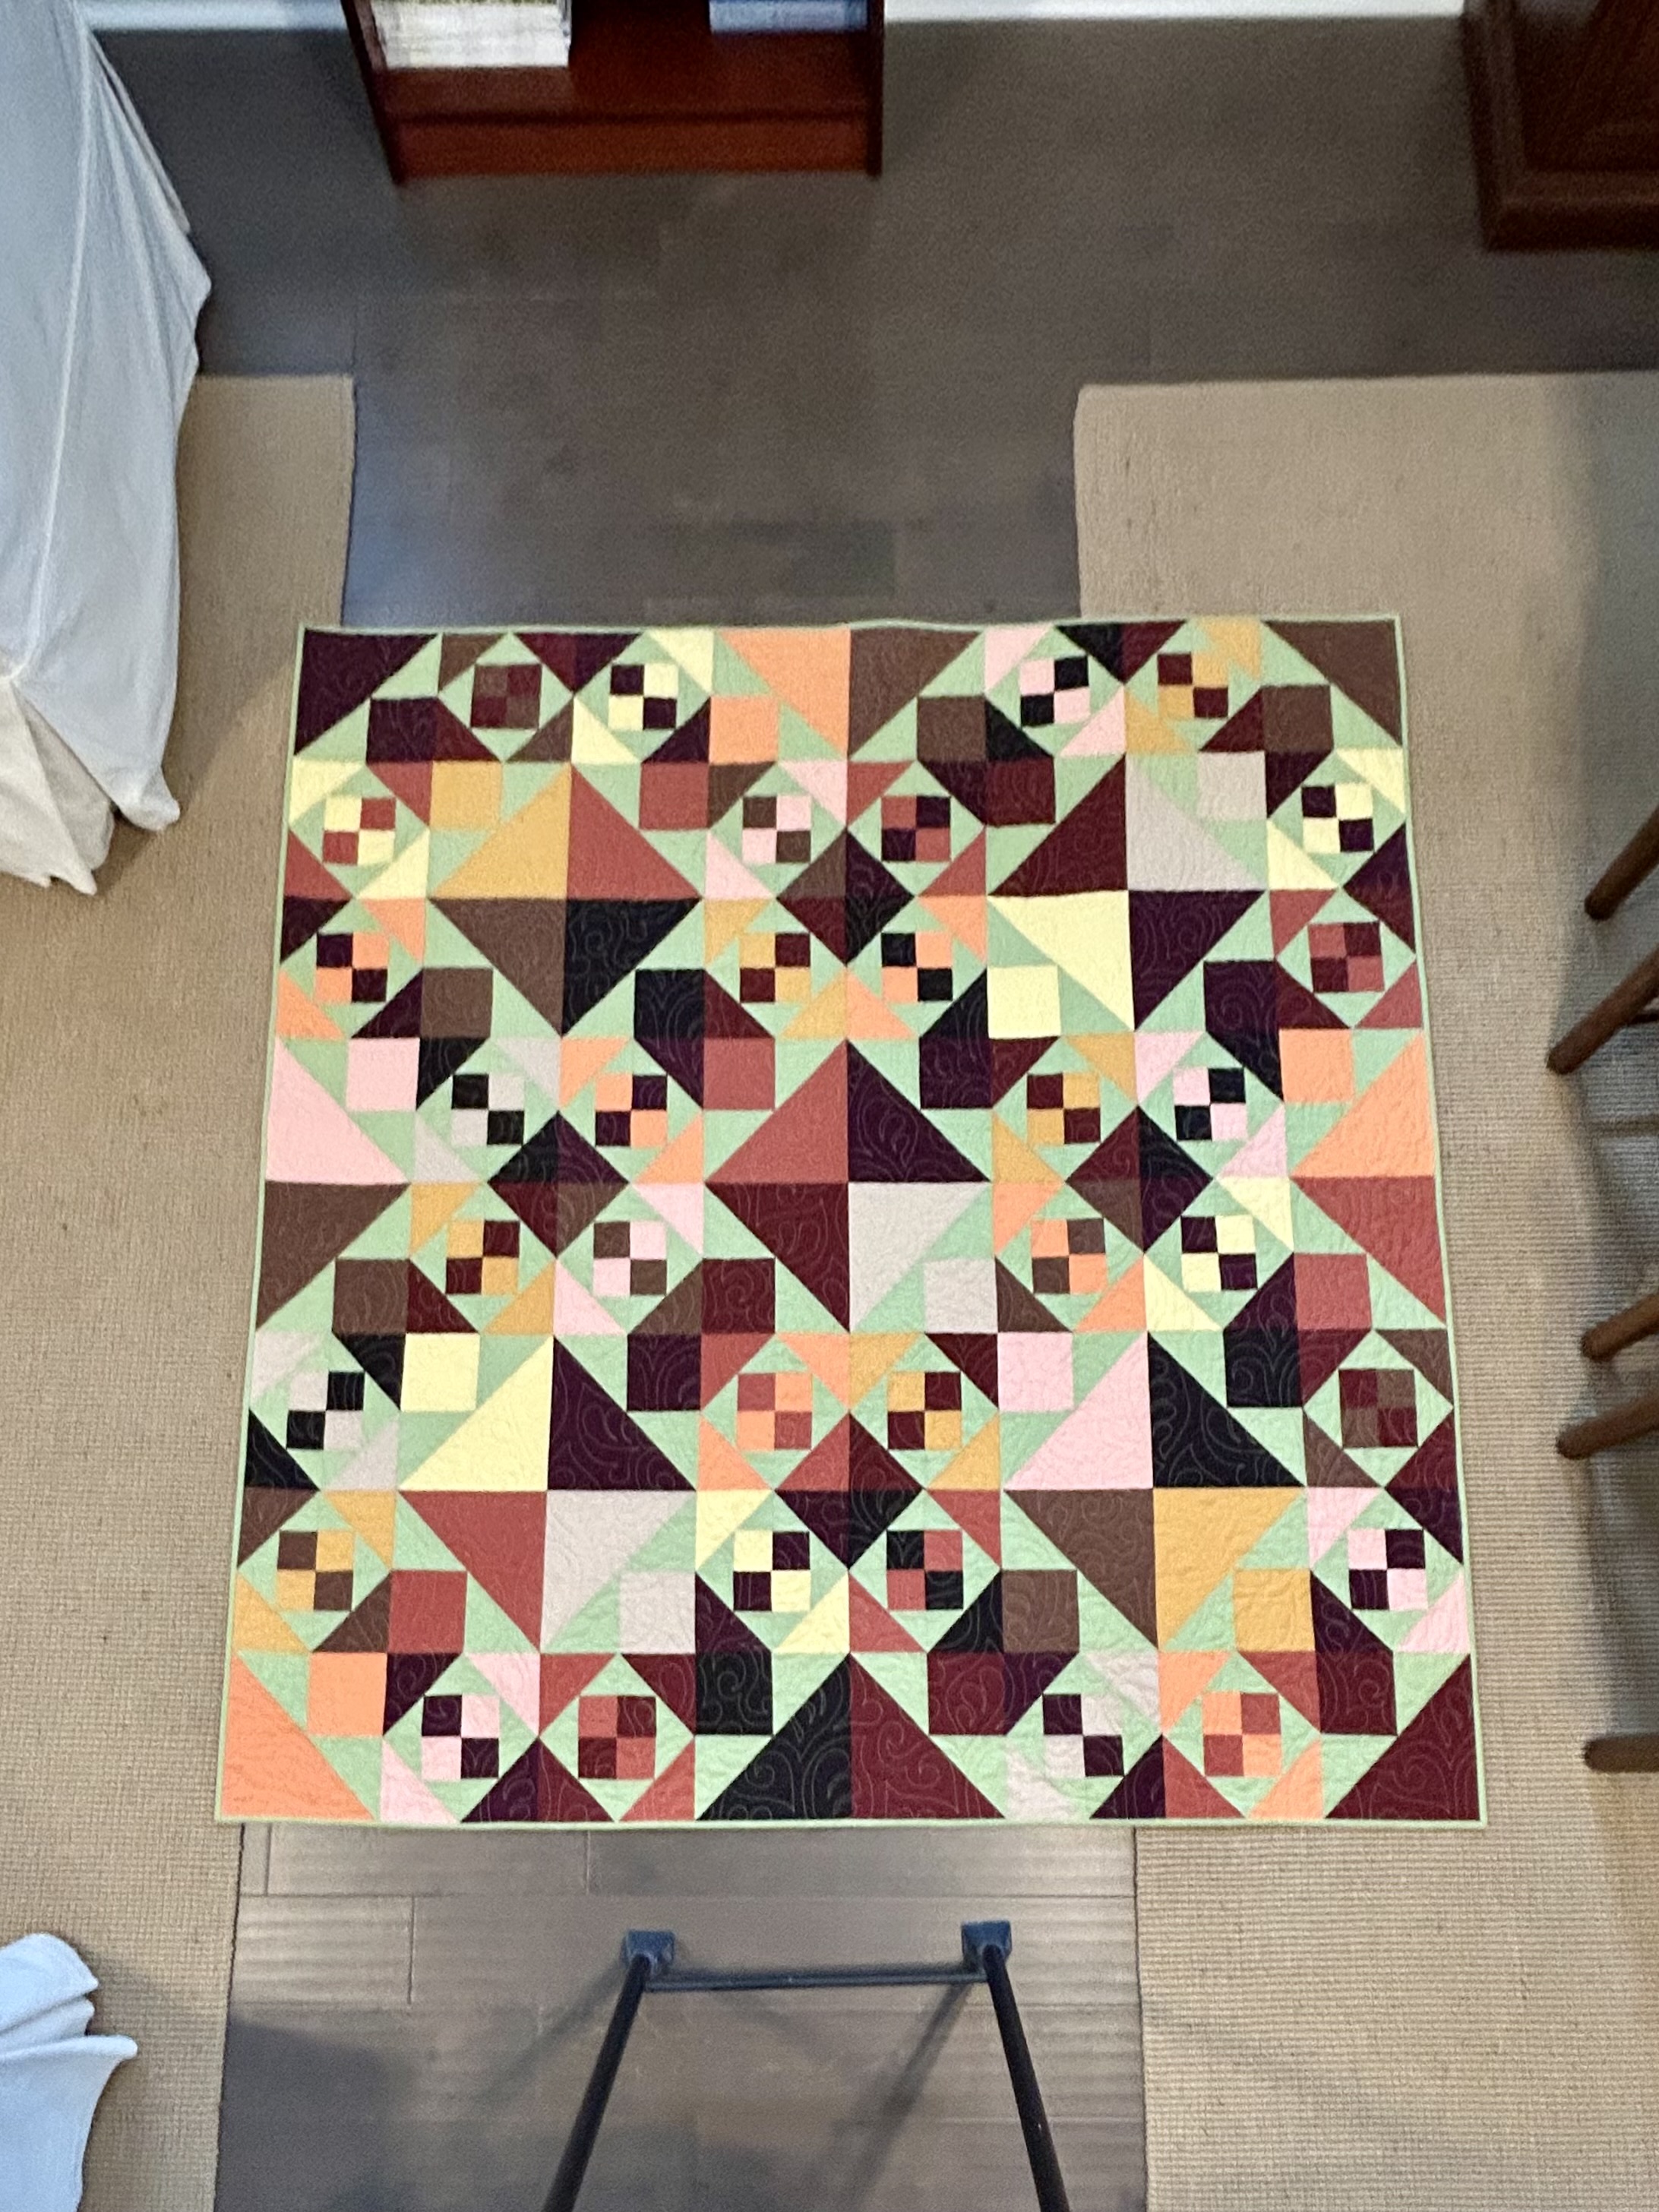
So, here’s the first quilt in my series, “Fall’s Splender.” To remind, this series started with wanting to use the Cat’s Cradle big ruler again and the palette I put together using a Kaffee Fasset fabric I bought on sale at least 15 years ago. It is Beach Balls, and comes in varying colorways. Looking at it years later, I thought it looked like the colorful fall winter squashes so common in New England in the fall. Eventually I researched the fabric and found it wasn’t squashes at all.

Now I’m happy and feel like I can gift this handsome quilt happily. I let this issue simmer for weeks and weeks until I knew I could not live with it, even if I ruined the quilt trying to fix it.
To remind, here’s the fabric that generated this quilt series. (The pink in this photo of the quilt front is actually a quiet salmon like the color in the backing.). And, LOL, I still think these are squashes and not beach balls.

The pantograph is Check and Chase by Lorien Quilting. The cotton thread is a warm gold from Signature threads.
I have the small and large Cat’s Cradle rulers, and I wanted to see if I could combine using them in a quilt. Oh yes, I could! Here’s the second quilt: “Spring’s Song”–made with 4-inch and 8-inch blocks created by the Cat’s Cradle rulers. The small one stops at 4 inches, and the large one at 8 inches. (If you try something like combining these blocks, press all of your seams open.)
Mercy! I love this quilt! I can see all sorts of other combinations to use based on what I’m seeing here. This kind of creative play is what I most enjoy in quilting.
Here’s the backing, which I had in my stash and which produced the name and the spring green cotton thread color from Signature threads. I LOVED the spring green of the trees in Maine, which made them look all soft and fluffy. The pantograph is Arcadia from Patricia E. Ritter.

And here’s “Summer’s Solstice”–also made with the Cat’s Cradle rulers using 4 inch and 8 inch blocks. I had thought to use the small blocks like sashing between the large blocks, but that didn’t work for me as it was way too busy.

And here’s its gorgeous backing–“Shooting Star” designed by Anna Maria. (It isn’t this pink and has lots of the rich green/brown that is in this palette and more of the orange shades.). The thread color is a warm brown from Signature threads, and the pantograph is Garden Frills Too.

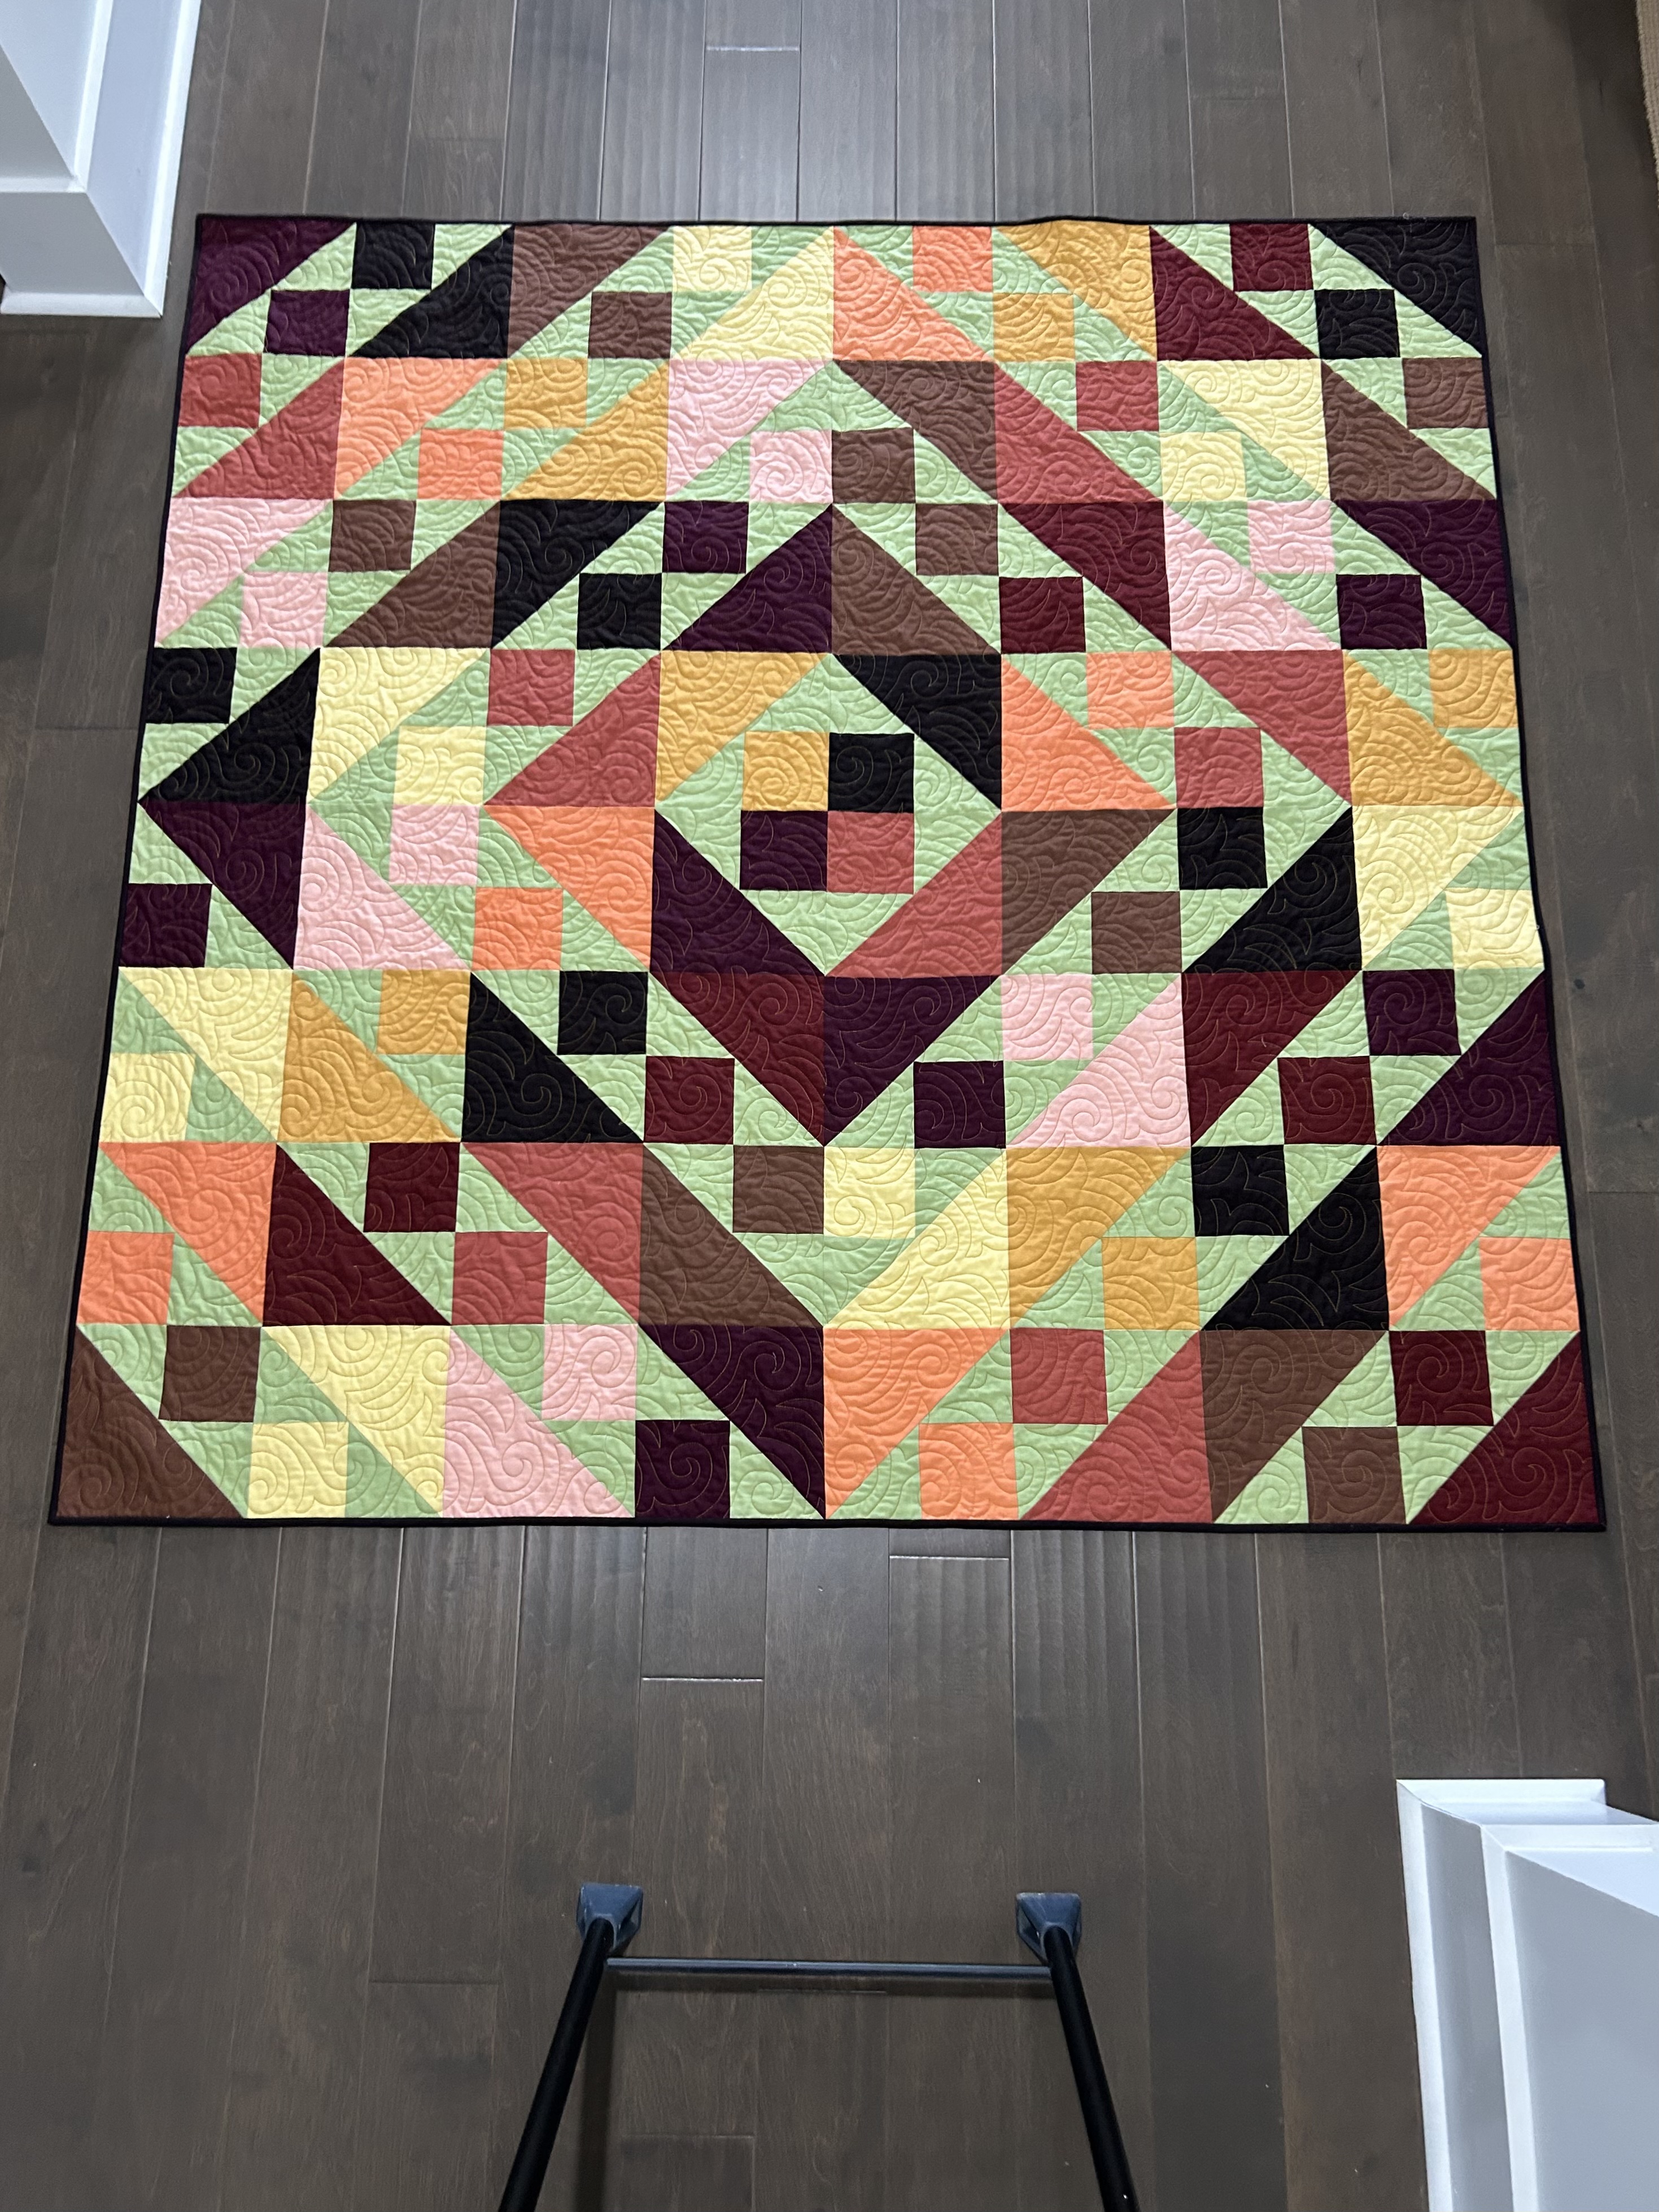
These quilts are all 64 by 64, which makes a nice lap size, so here’s a pic to give you a sense of the size:

So, now I am done with this series and will put this palette away. But I’ll be using the rulers again, especially the large one. These 8-inch blocks make quick and easy graphic donation quilts that are a perfect size.
And finally, here’s a picture of the first quilt BEFORE I fixed it. Look to the bottom left, third row up.
No, no, no…
I hope I don’t make a mistake like this one twice in almost 30 years of sewing quilts. And the mistake I made was sewing rows and putting them on the ironing board to join to the previous rows on the ironing board, which prevented me from seeing the two reversed blocks. Usually I put sewn rows back on the design wall before sewing chunks of rows together so I can see the whole pattern.
To sew fast, sew slow.
