Rachel LaBour of the “Stitched in Color” blog recently shared this idea for scrappy quilts. The block parts are 6 inches finished (cut at 6.5 inch squared), so this block will make a big 12-inch block. I think it may be perfect to use up several piles of bigger scraps I have (smaller than a fat quarter) and need to use. That’s a “yeah” for me! I don’t really want to cut these pieces into smaller squares as I already have BINS of squares.
This block idea can be made into either an “x” or a “circle” format. But these blocks don’t link up so need to be made in separate projects. I suppose you could use sashing to separate them, but the secondary patterns would be lost.
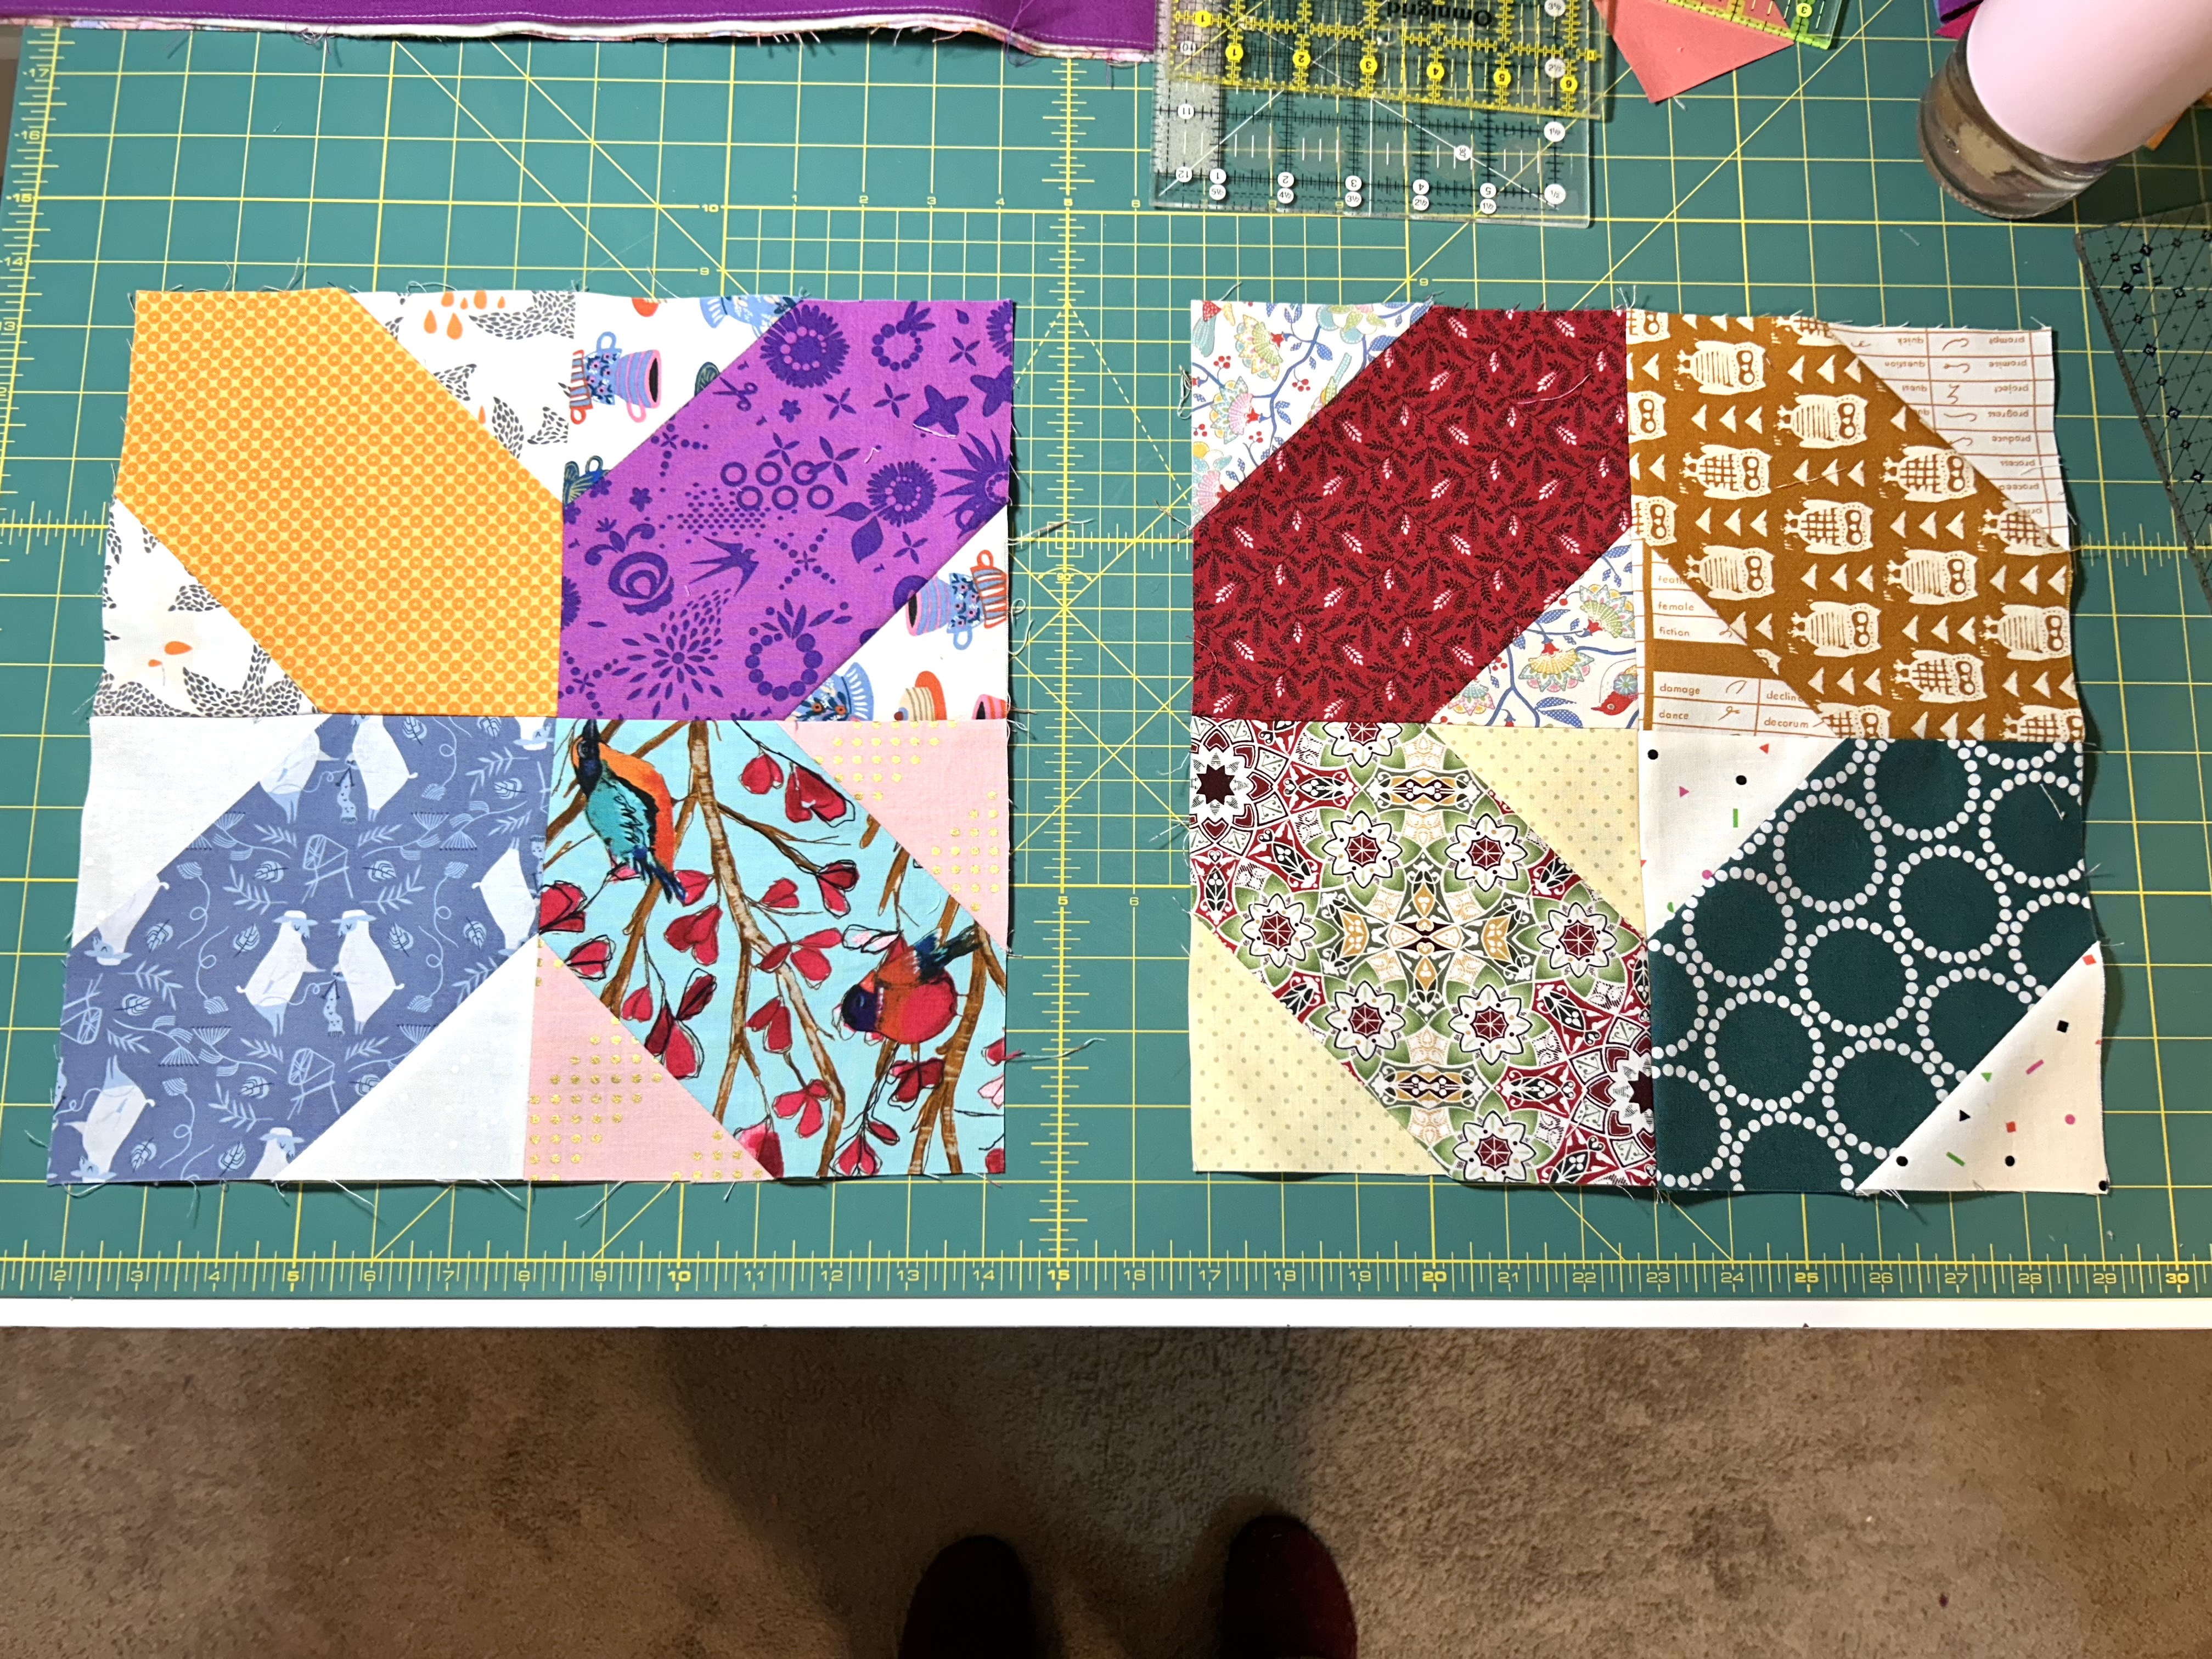
The block is easy and quick–from cutting to sewing. So I’ve been playing with the “x” one as a leader/ender project and with the goal of making a donation quilt.
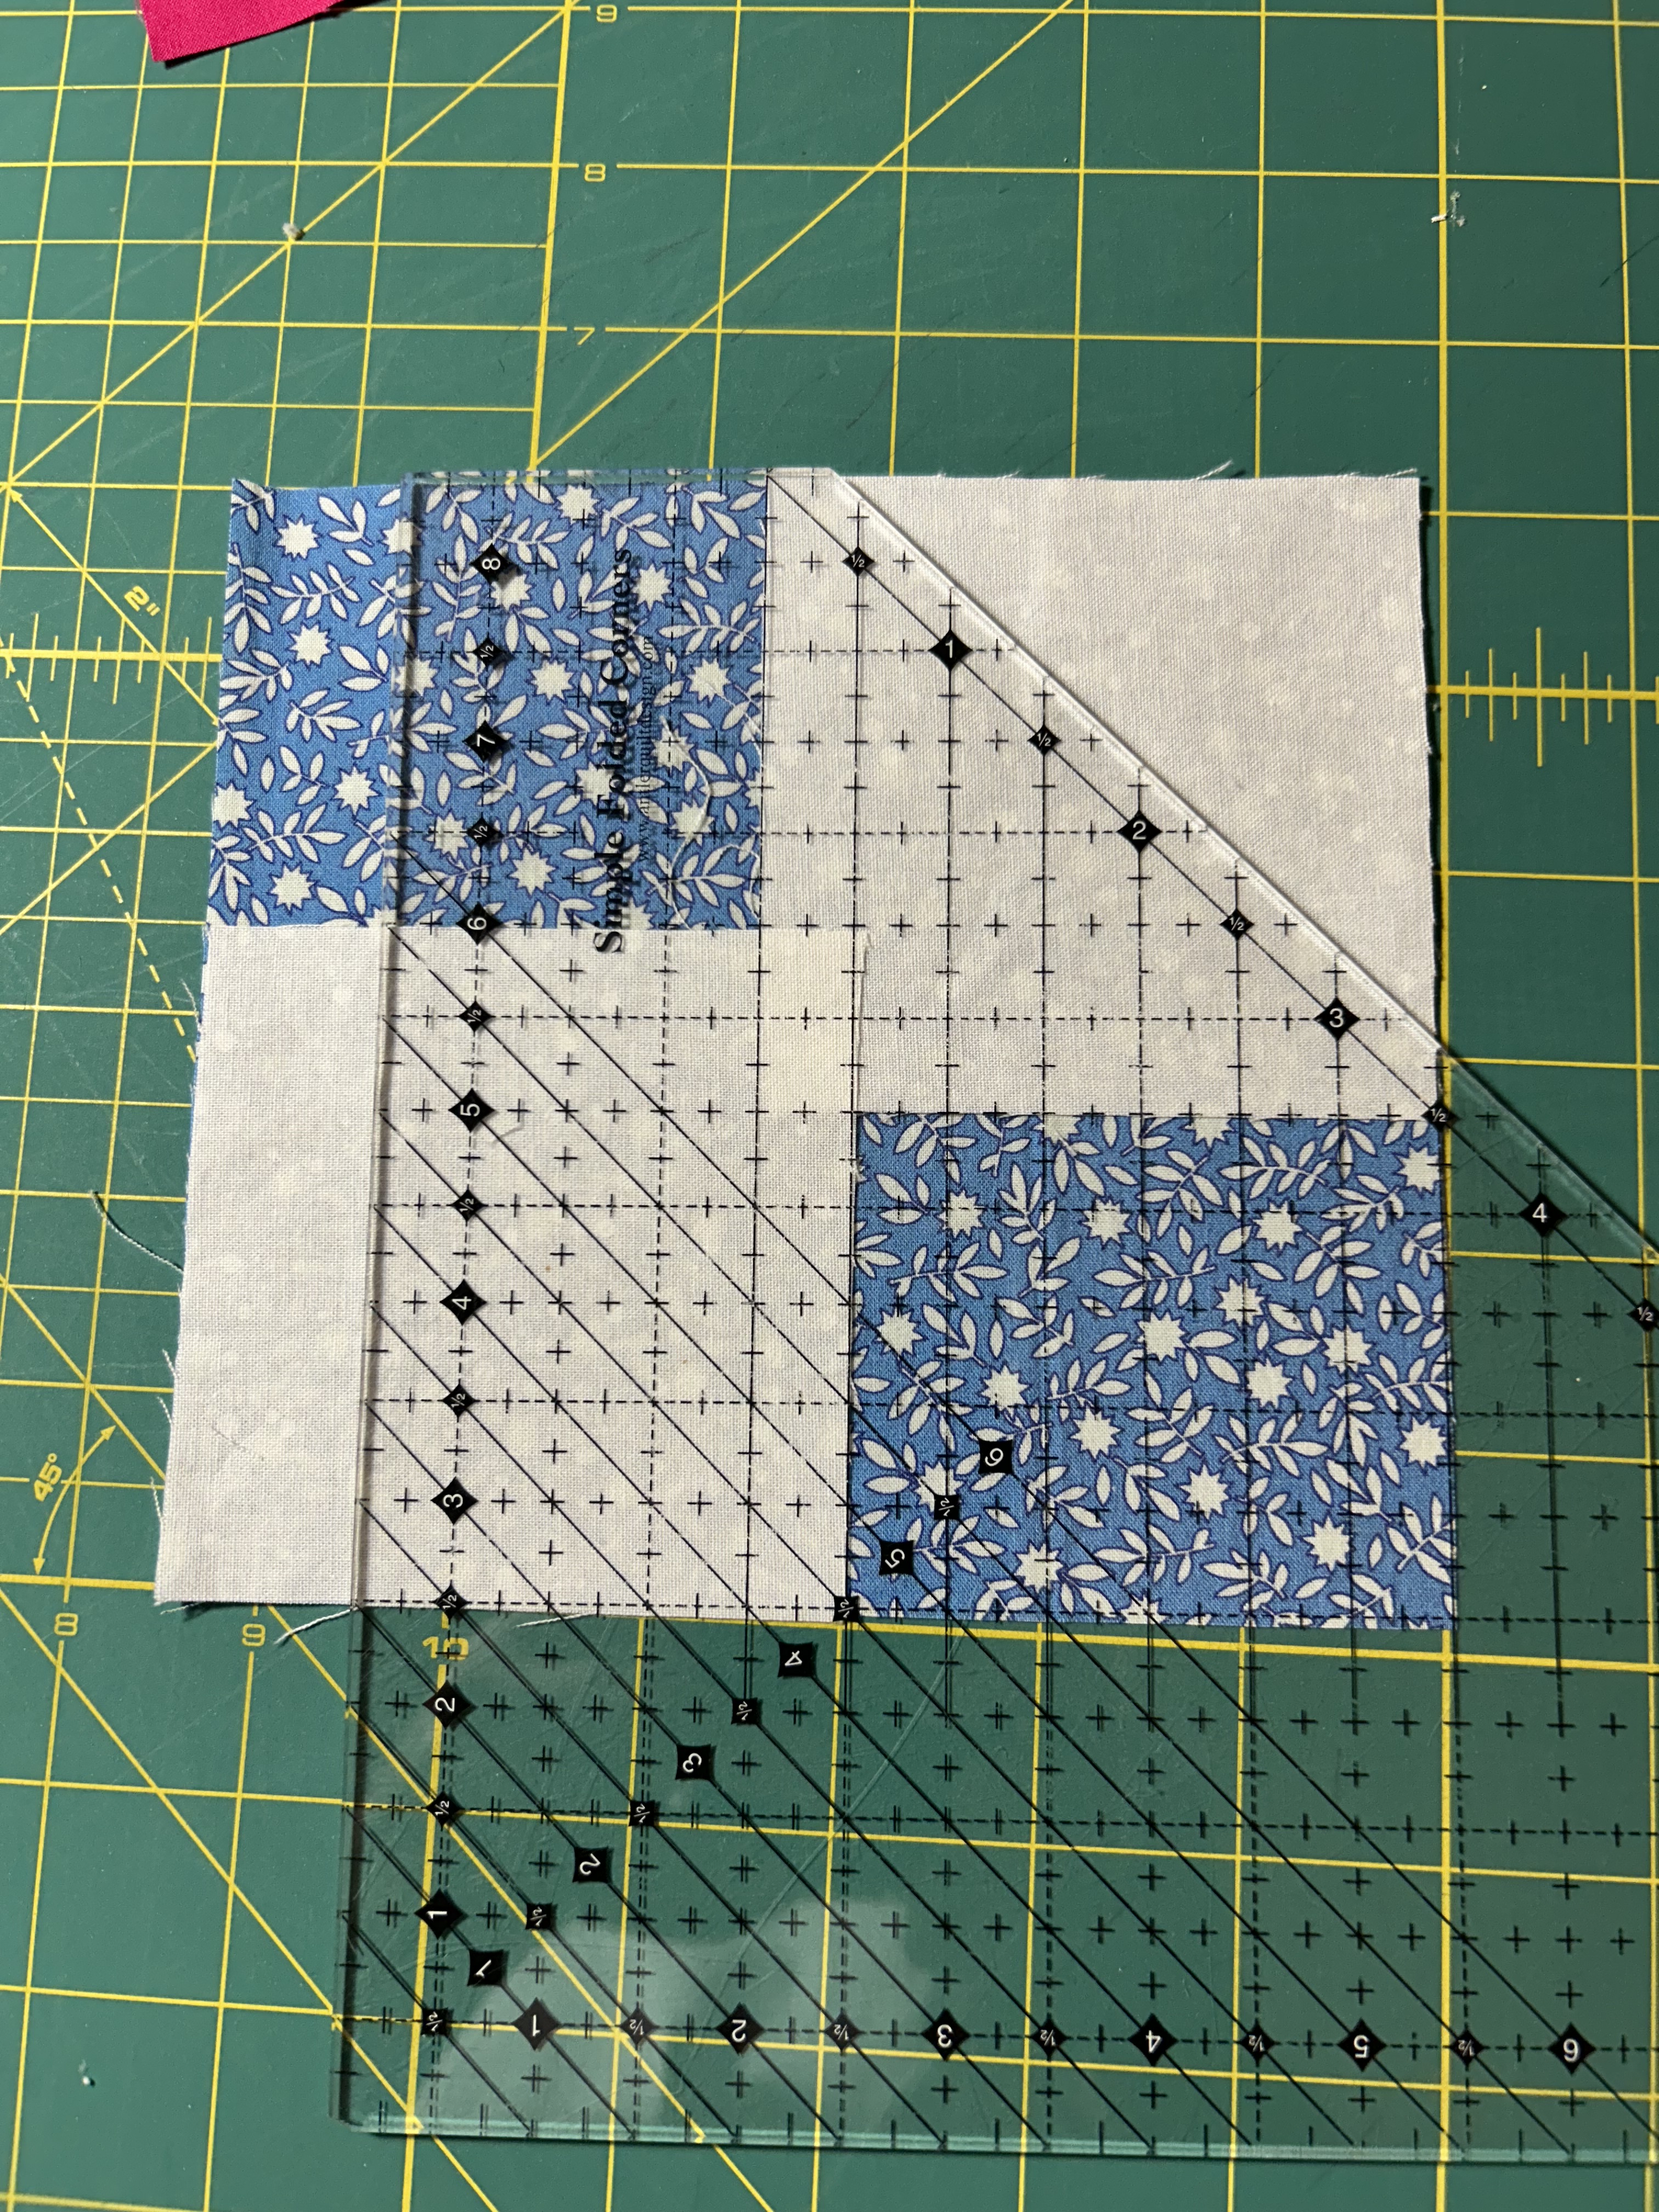
I’ve been using a Simple Folded Ruler to cut the corners from 3.5-inch squares placed at diagonal corners–which means I do not have to draw a sewing line on these squares, sew, then trim. (As I said above, I have a whole bin of 3.5-inch squares including this one in neutrals.)
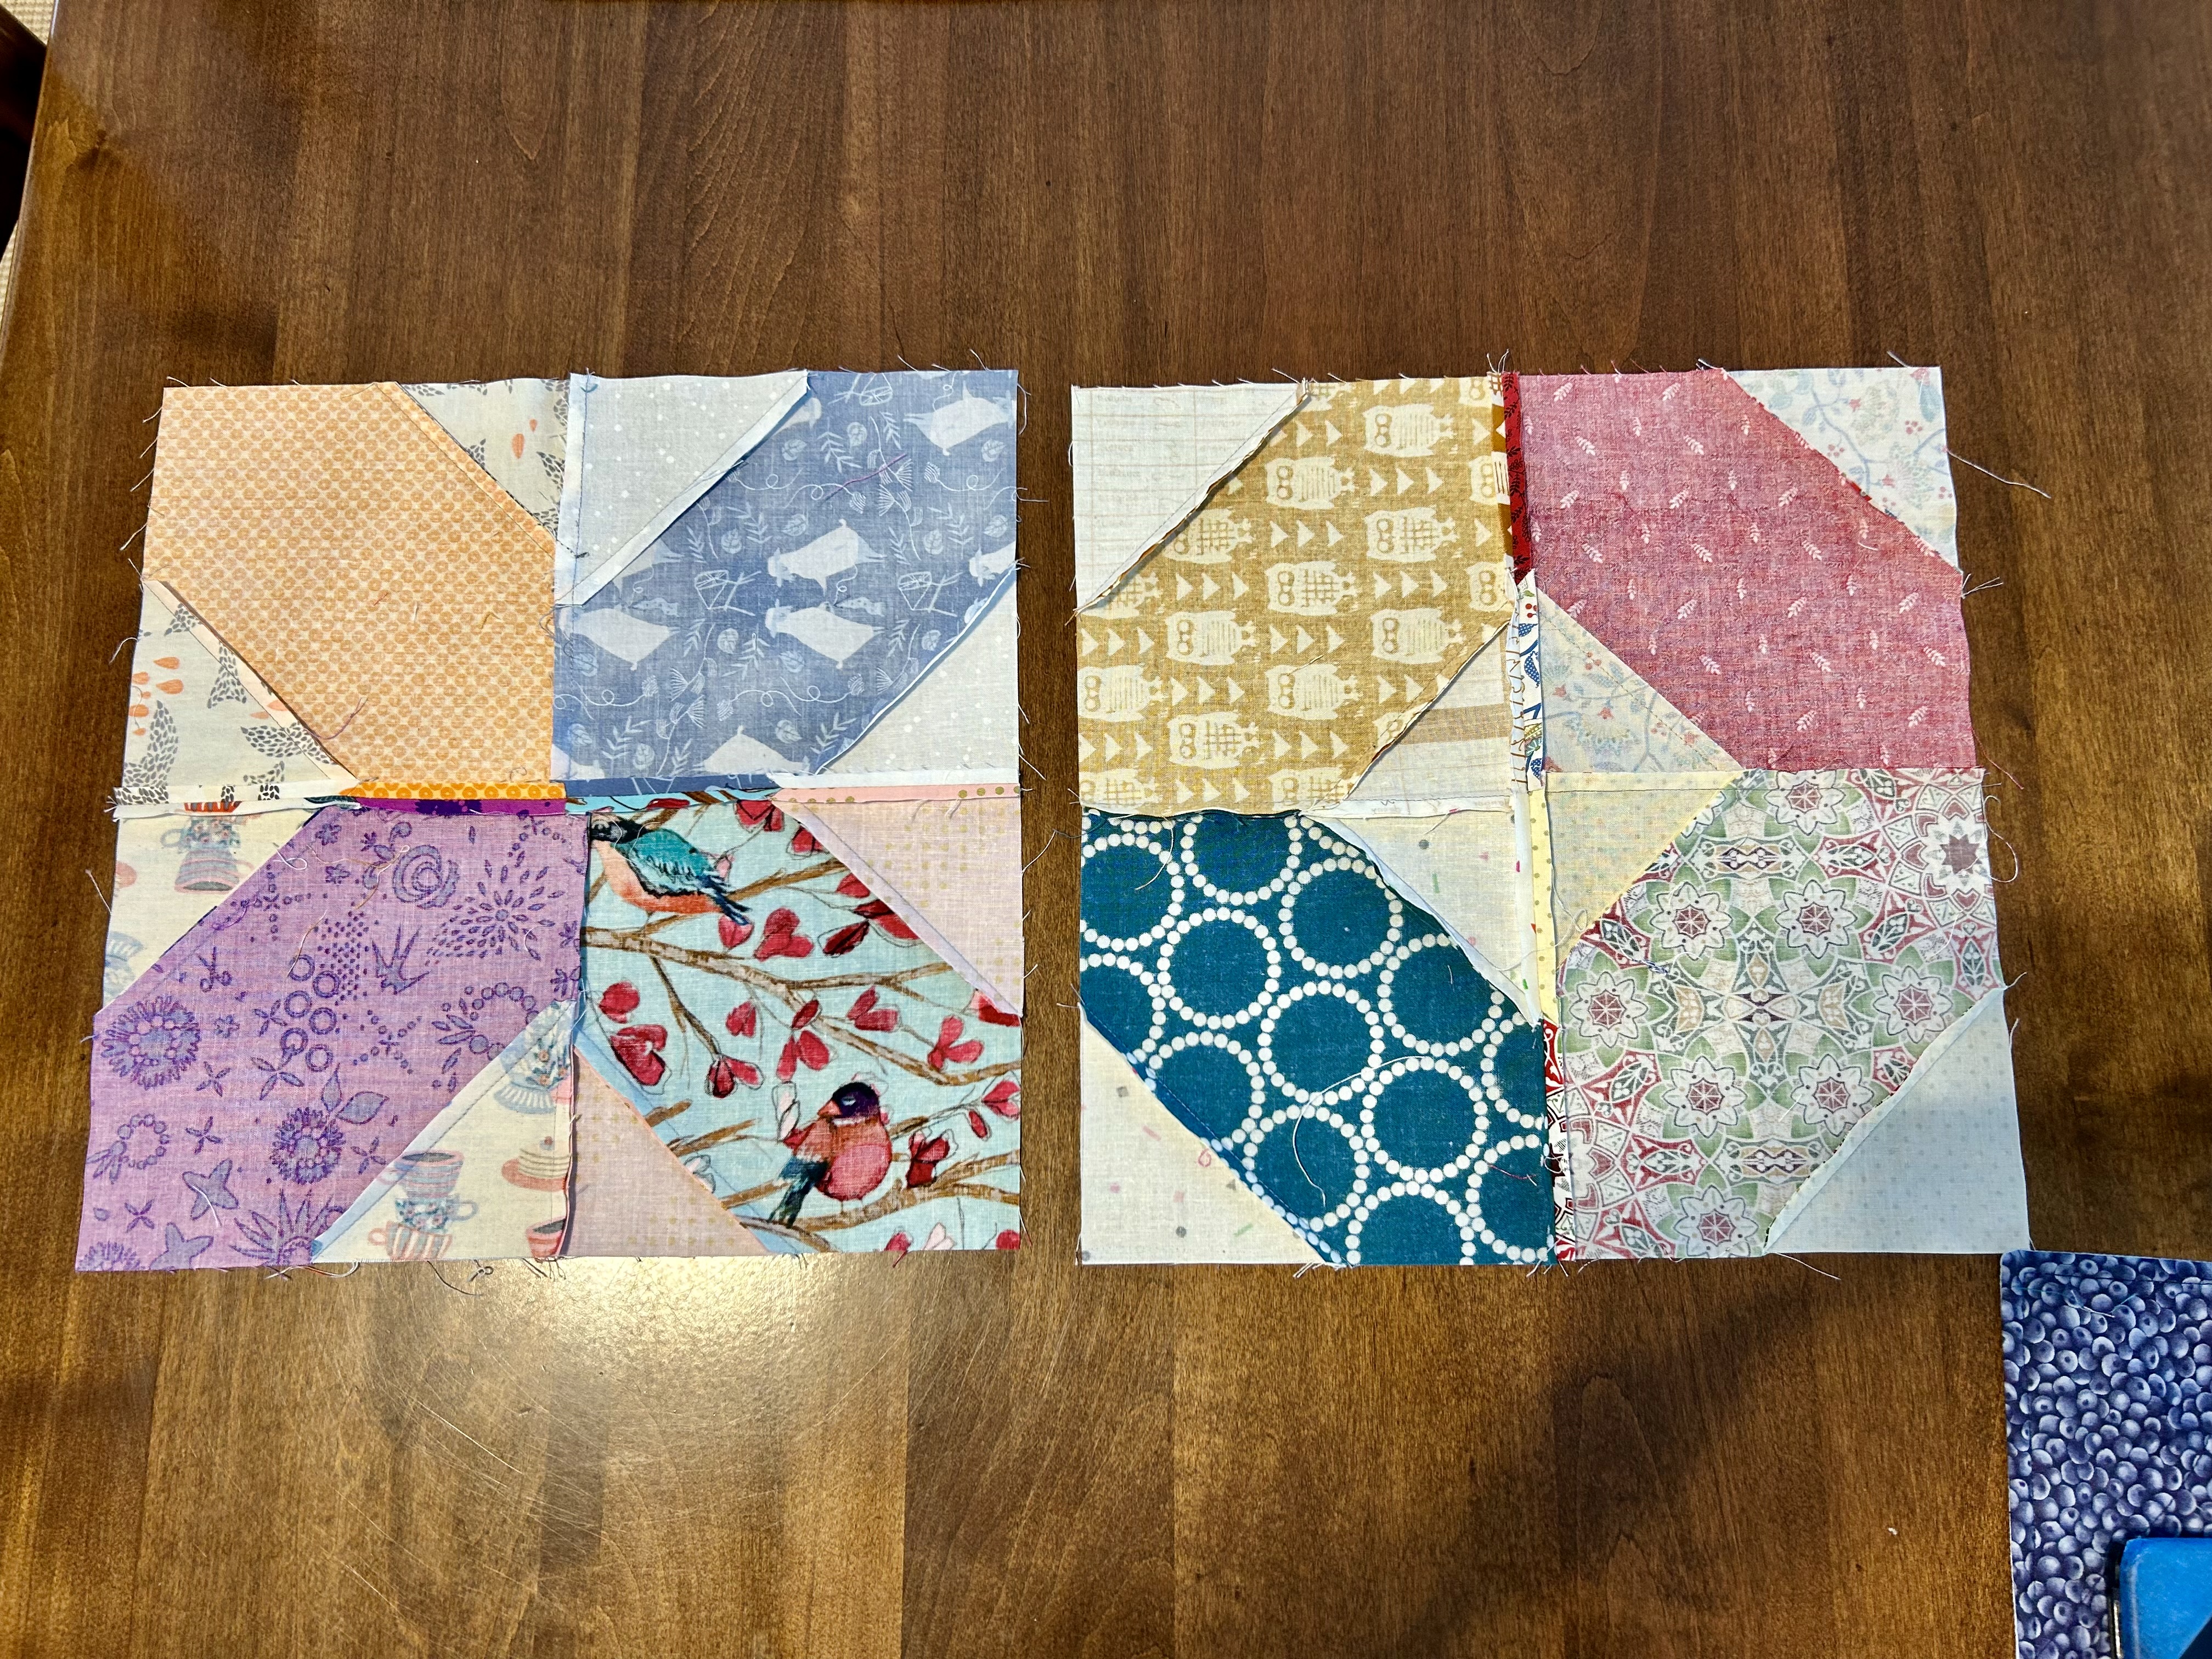
I turned my blocks to the back to figure out how best to press them so the 4 sides would go together with seams butted. The “x” and “circle” blocks would have different pressing. The “x” block works to press in a circle, but the “o” block works to press 2 blocks out and 2 blocks in. Here’s a picture to help you. I think one could move these blocks around when sewing blocks together to line up the seams so they butt–which might change any placement orientation you wanted to have in terms of fabric pattern.
And then there were TWO:
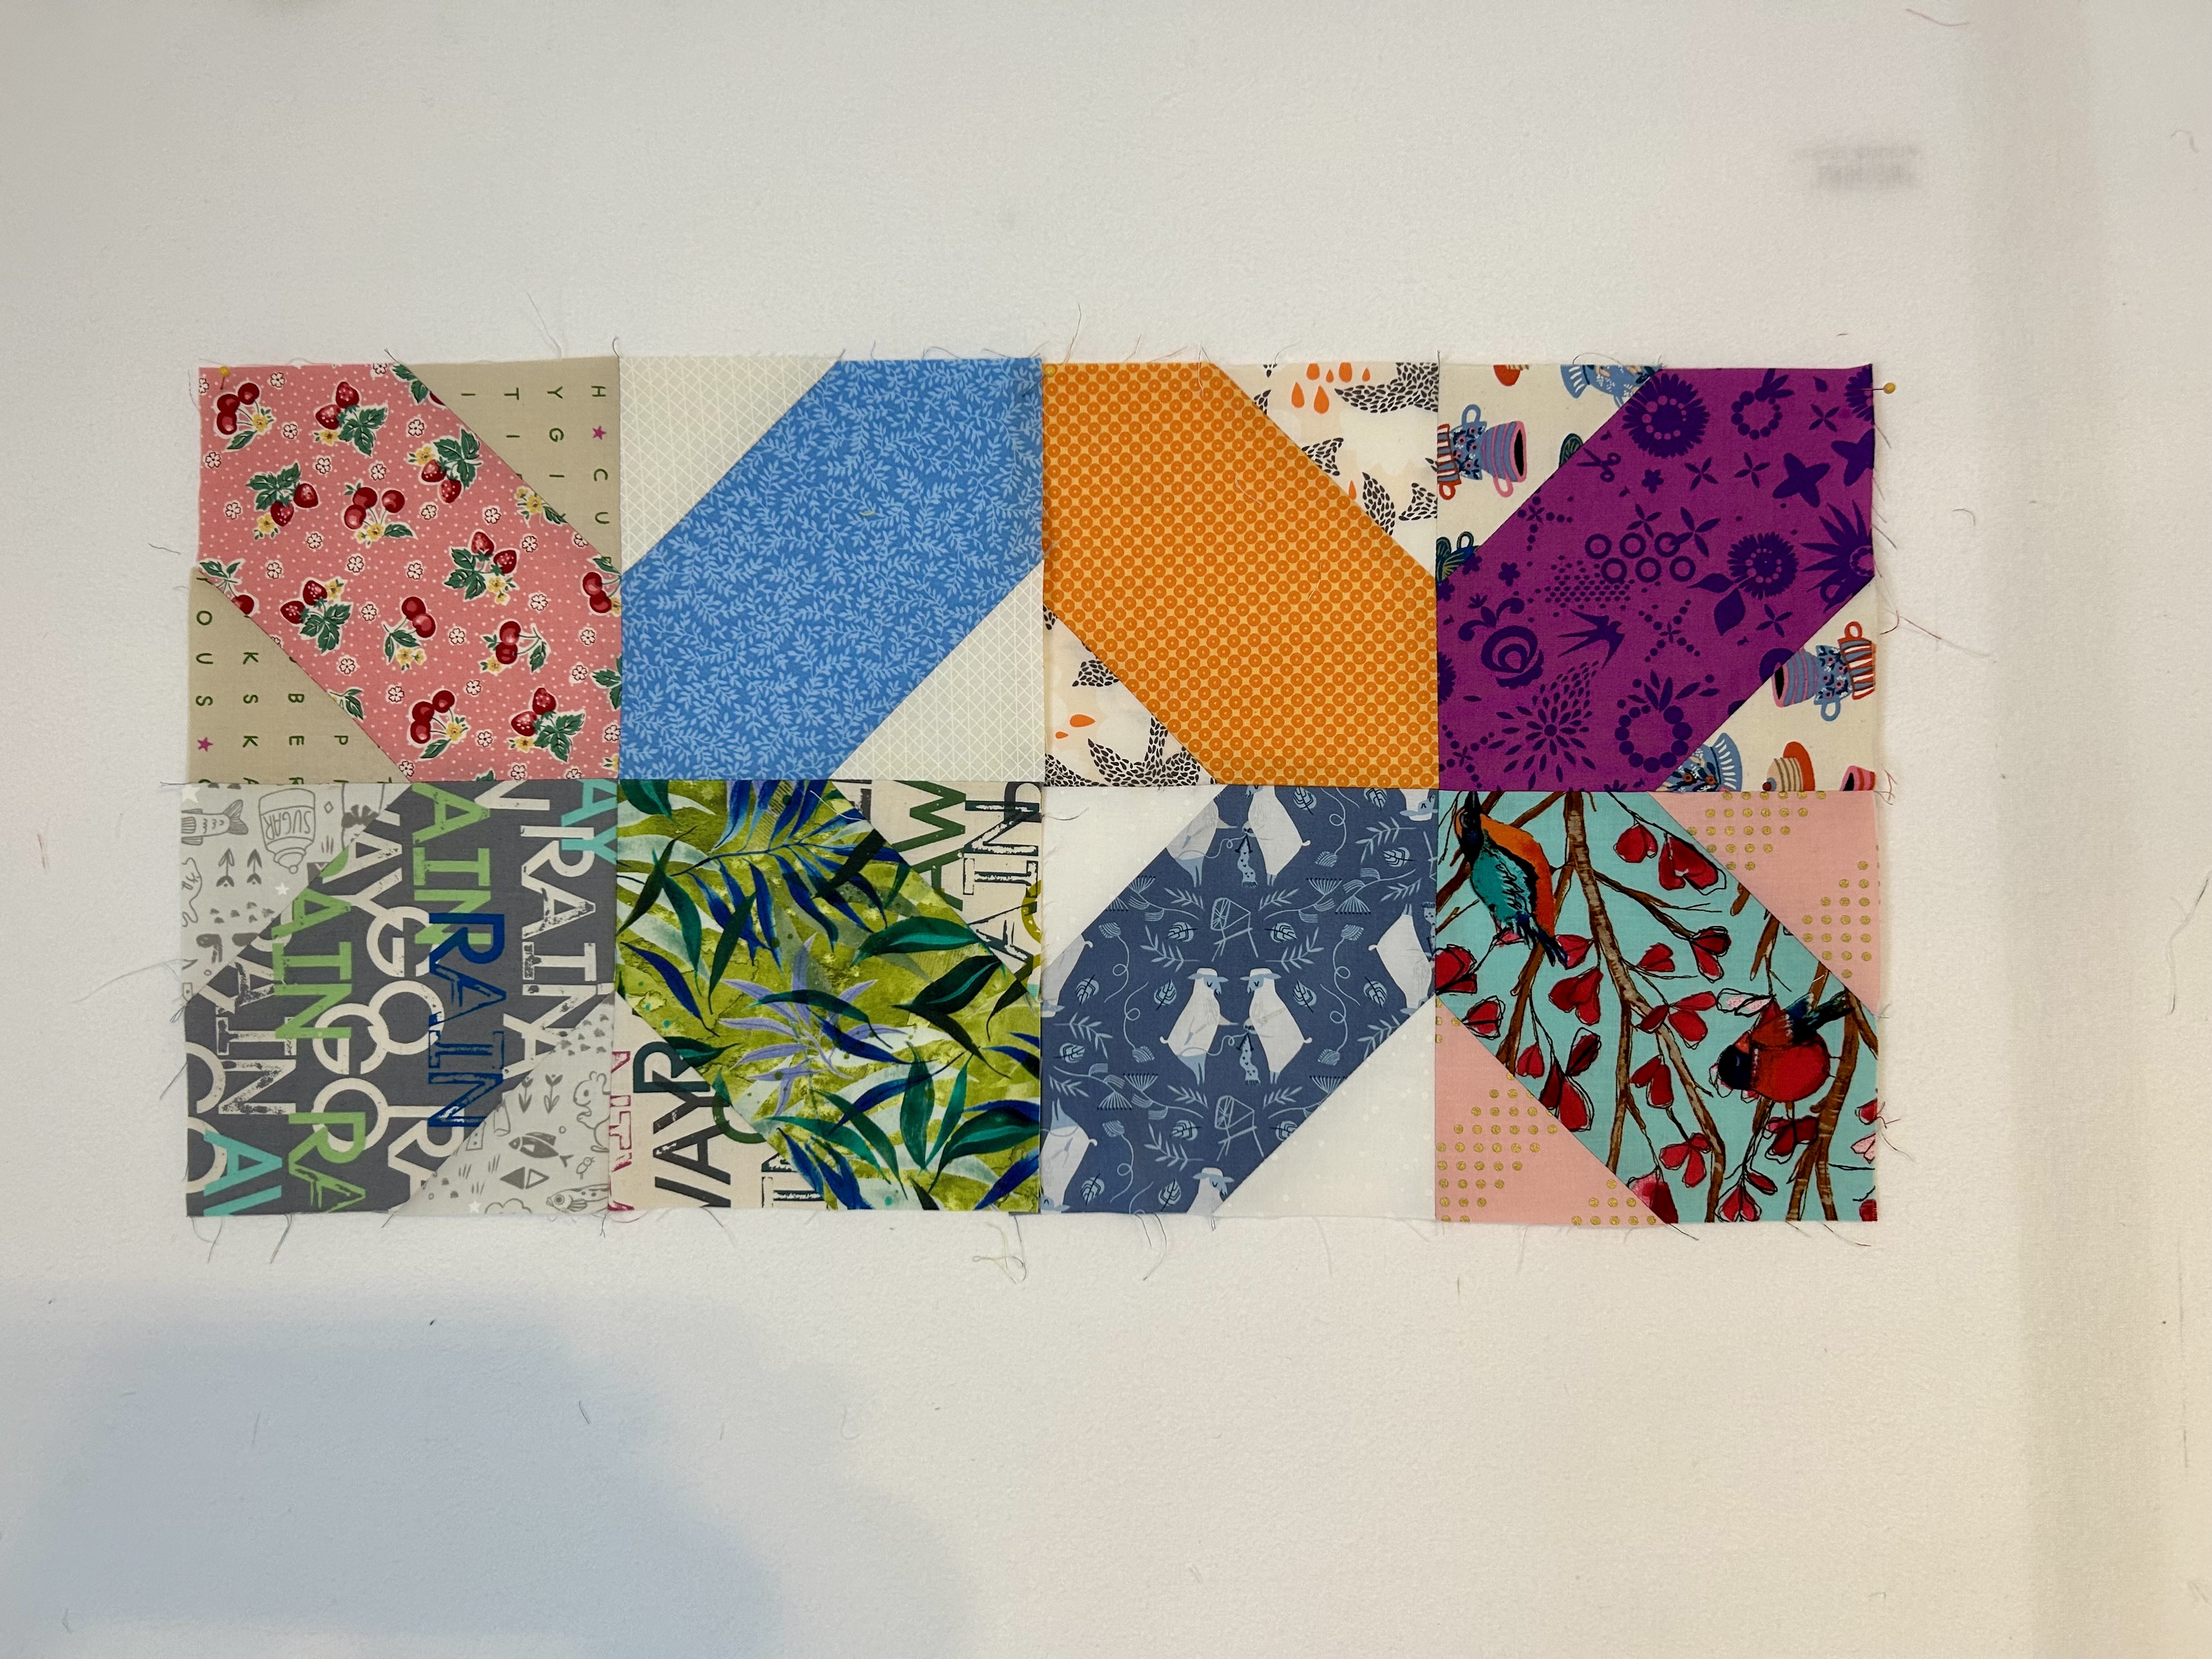
Blocks are not likely to stay in this position, of course. Thinking 5 across (60) by 6 down (72). But…

Too many triangles for me!
The triangles are sewn on as squares and then trimmed. You don’t cut or sew triangles.