…for a blog leader asking for help with Rachel LaBour’s “Spinny” quilt.
I do not want to upstage Rachel’s pattern, so those who want to make this quilt need to buy her pattern for directions. Rachel’s pattern prices are very reasonable, and you would be supporting her awesome design talent and ability.
I am currently making blocks as leader/enders that I set up.
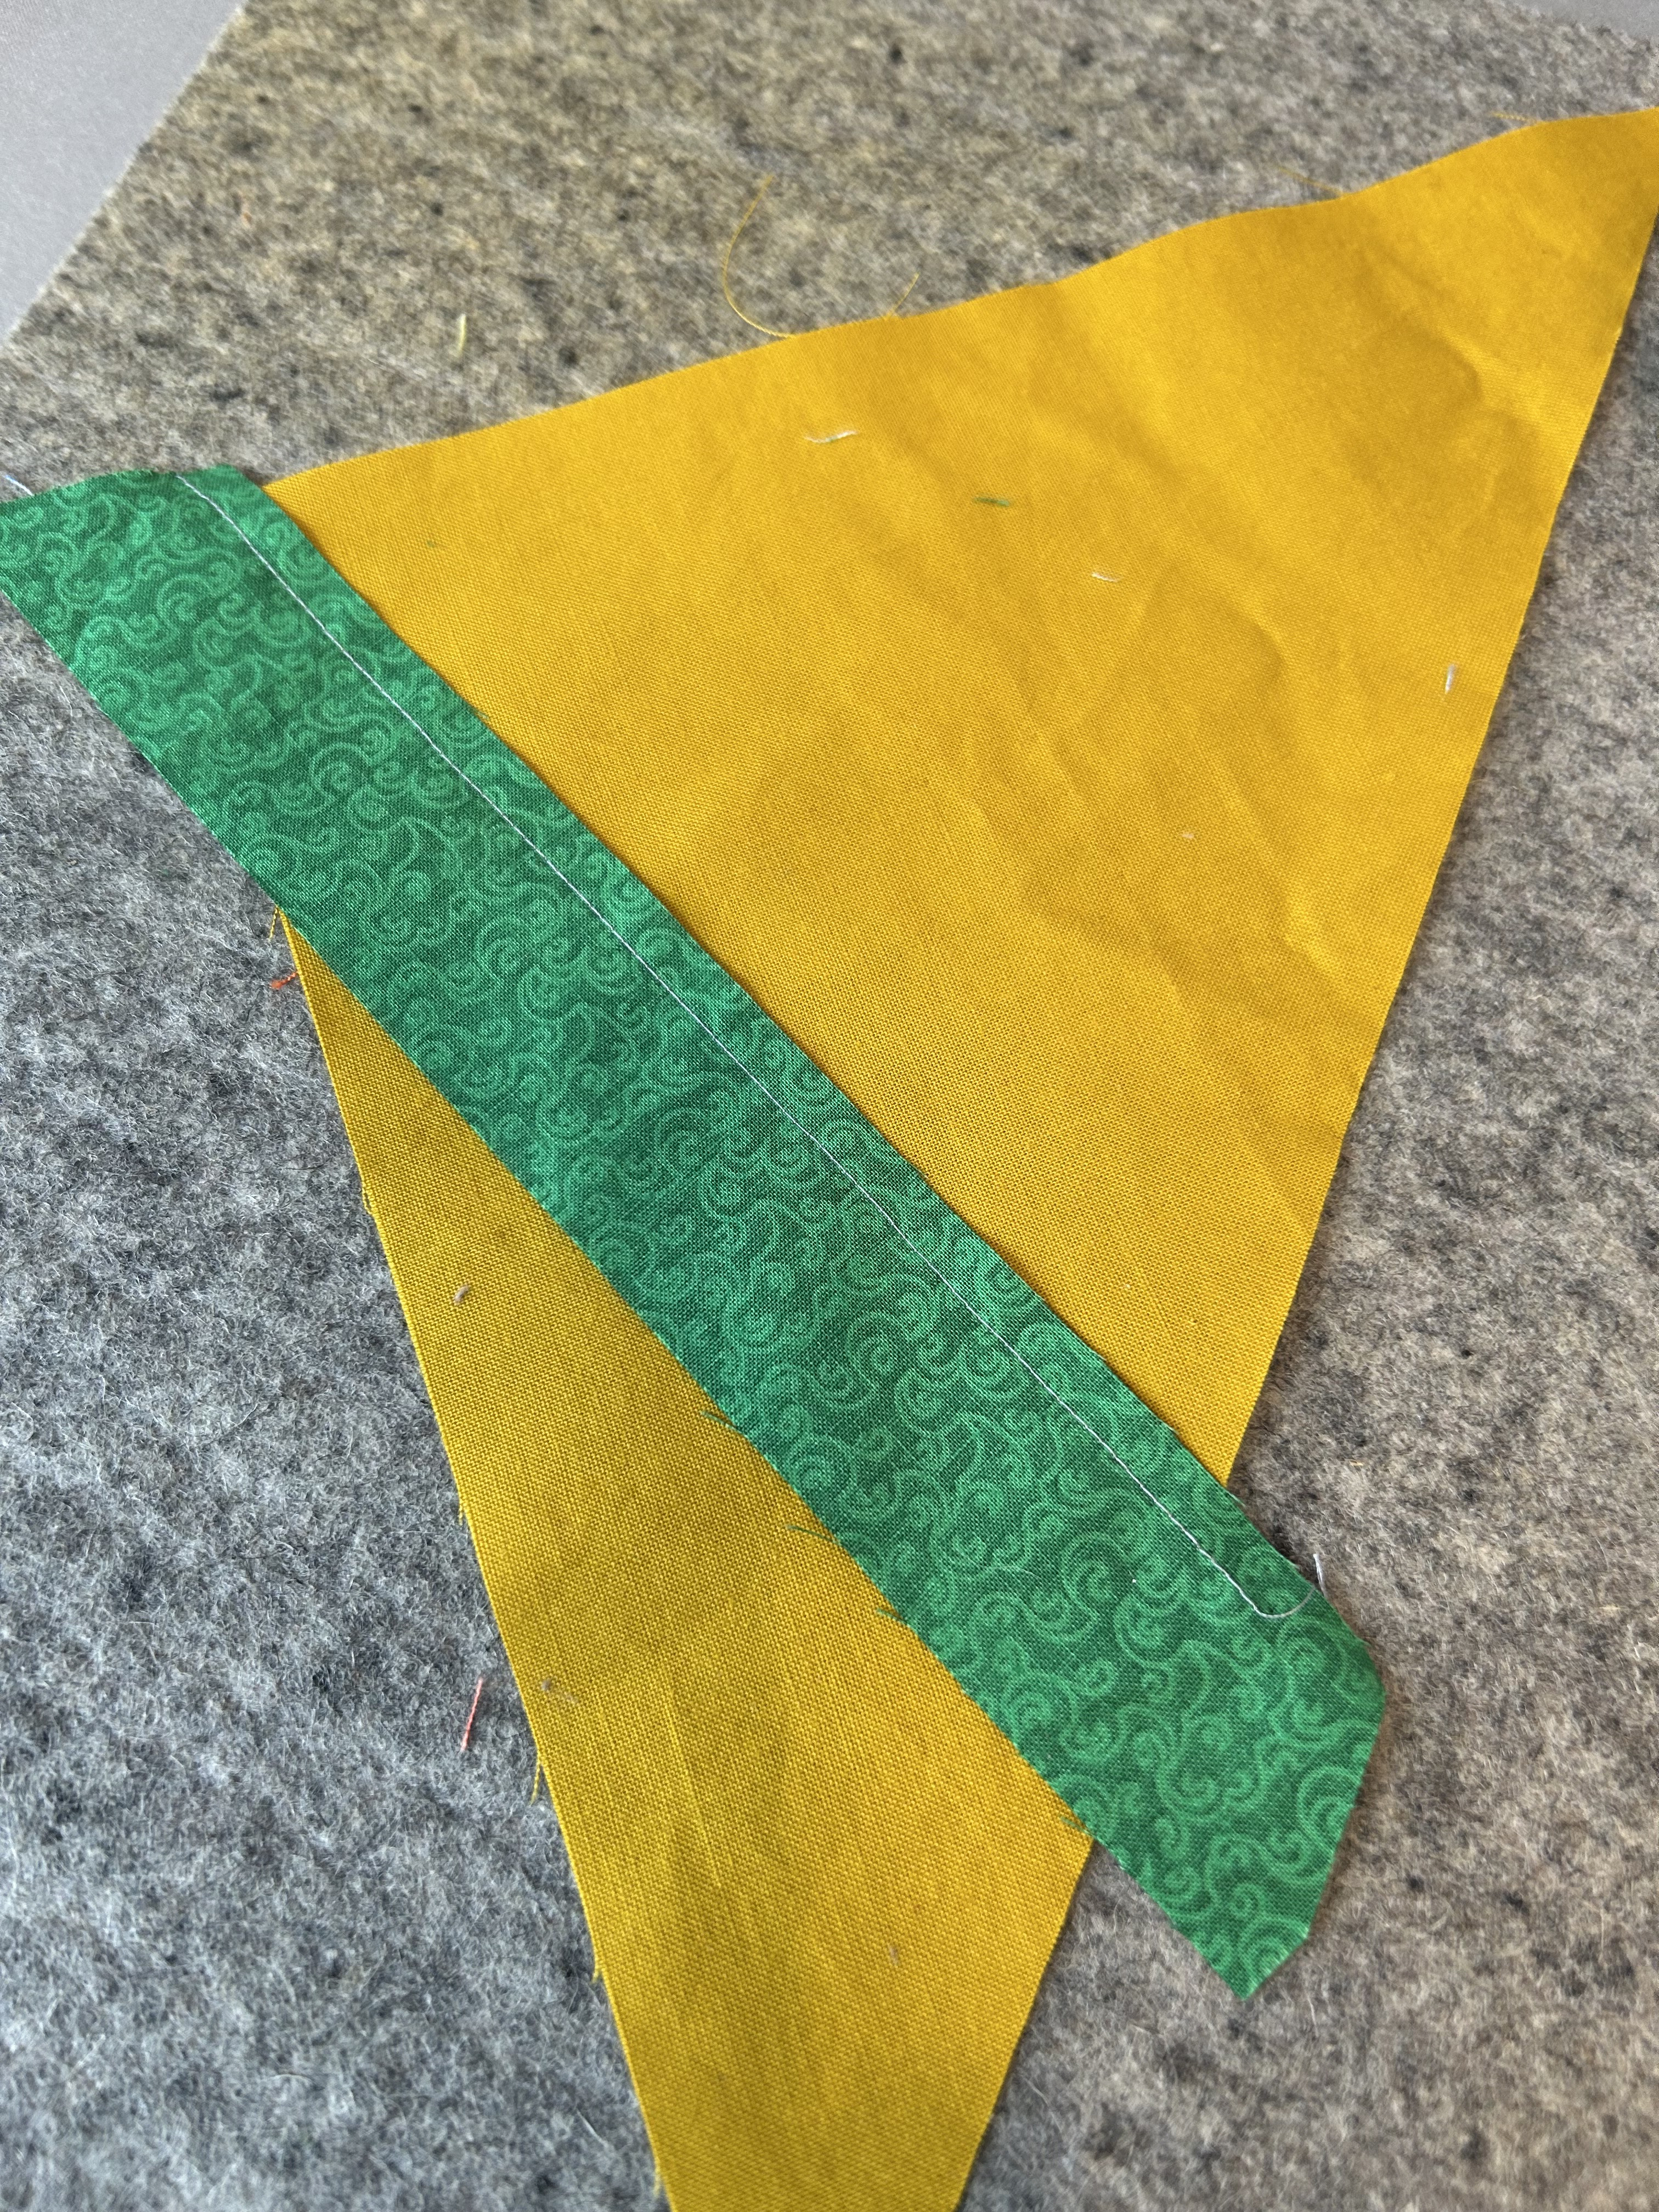
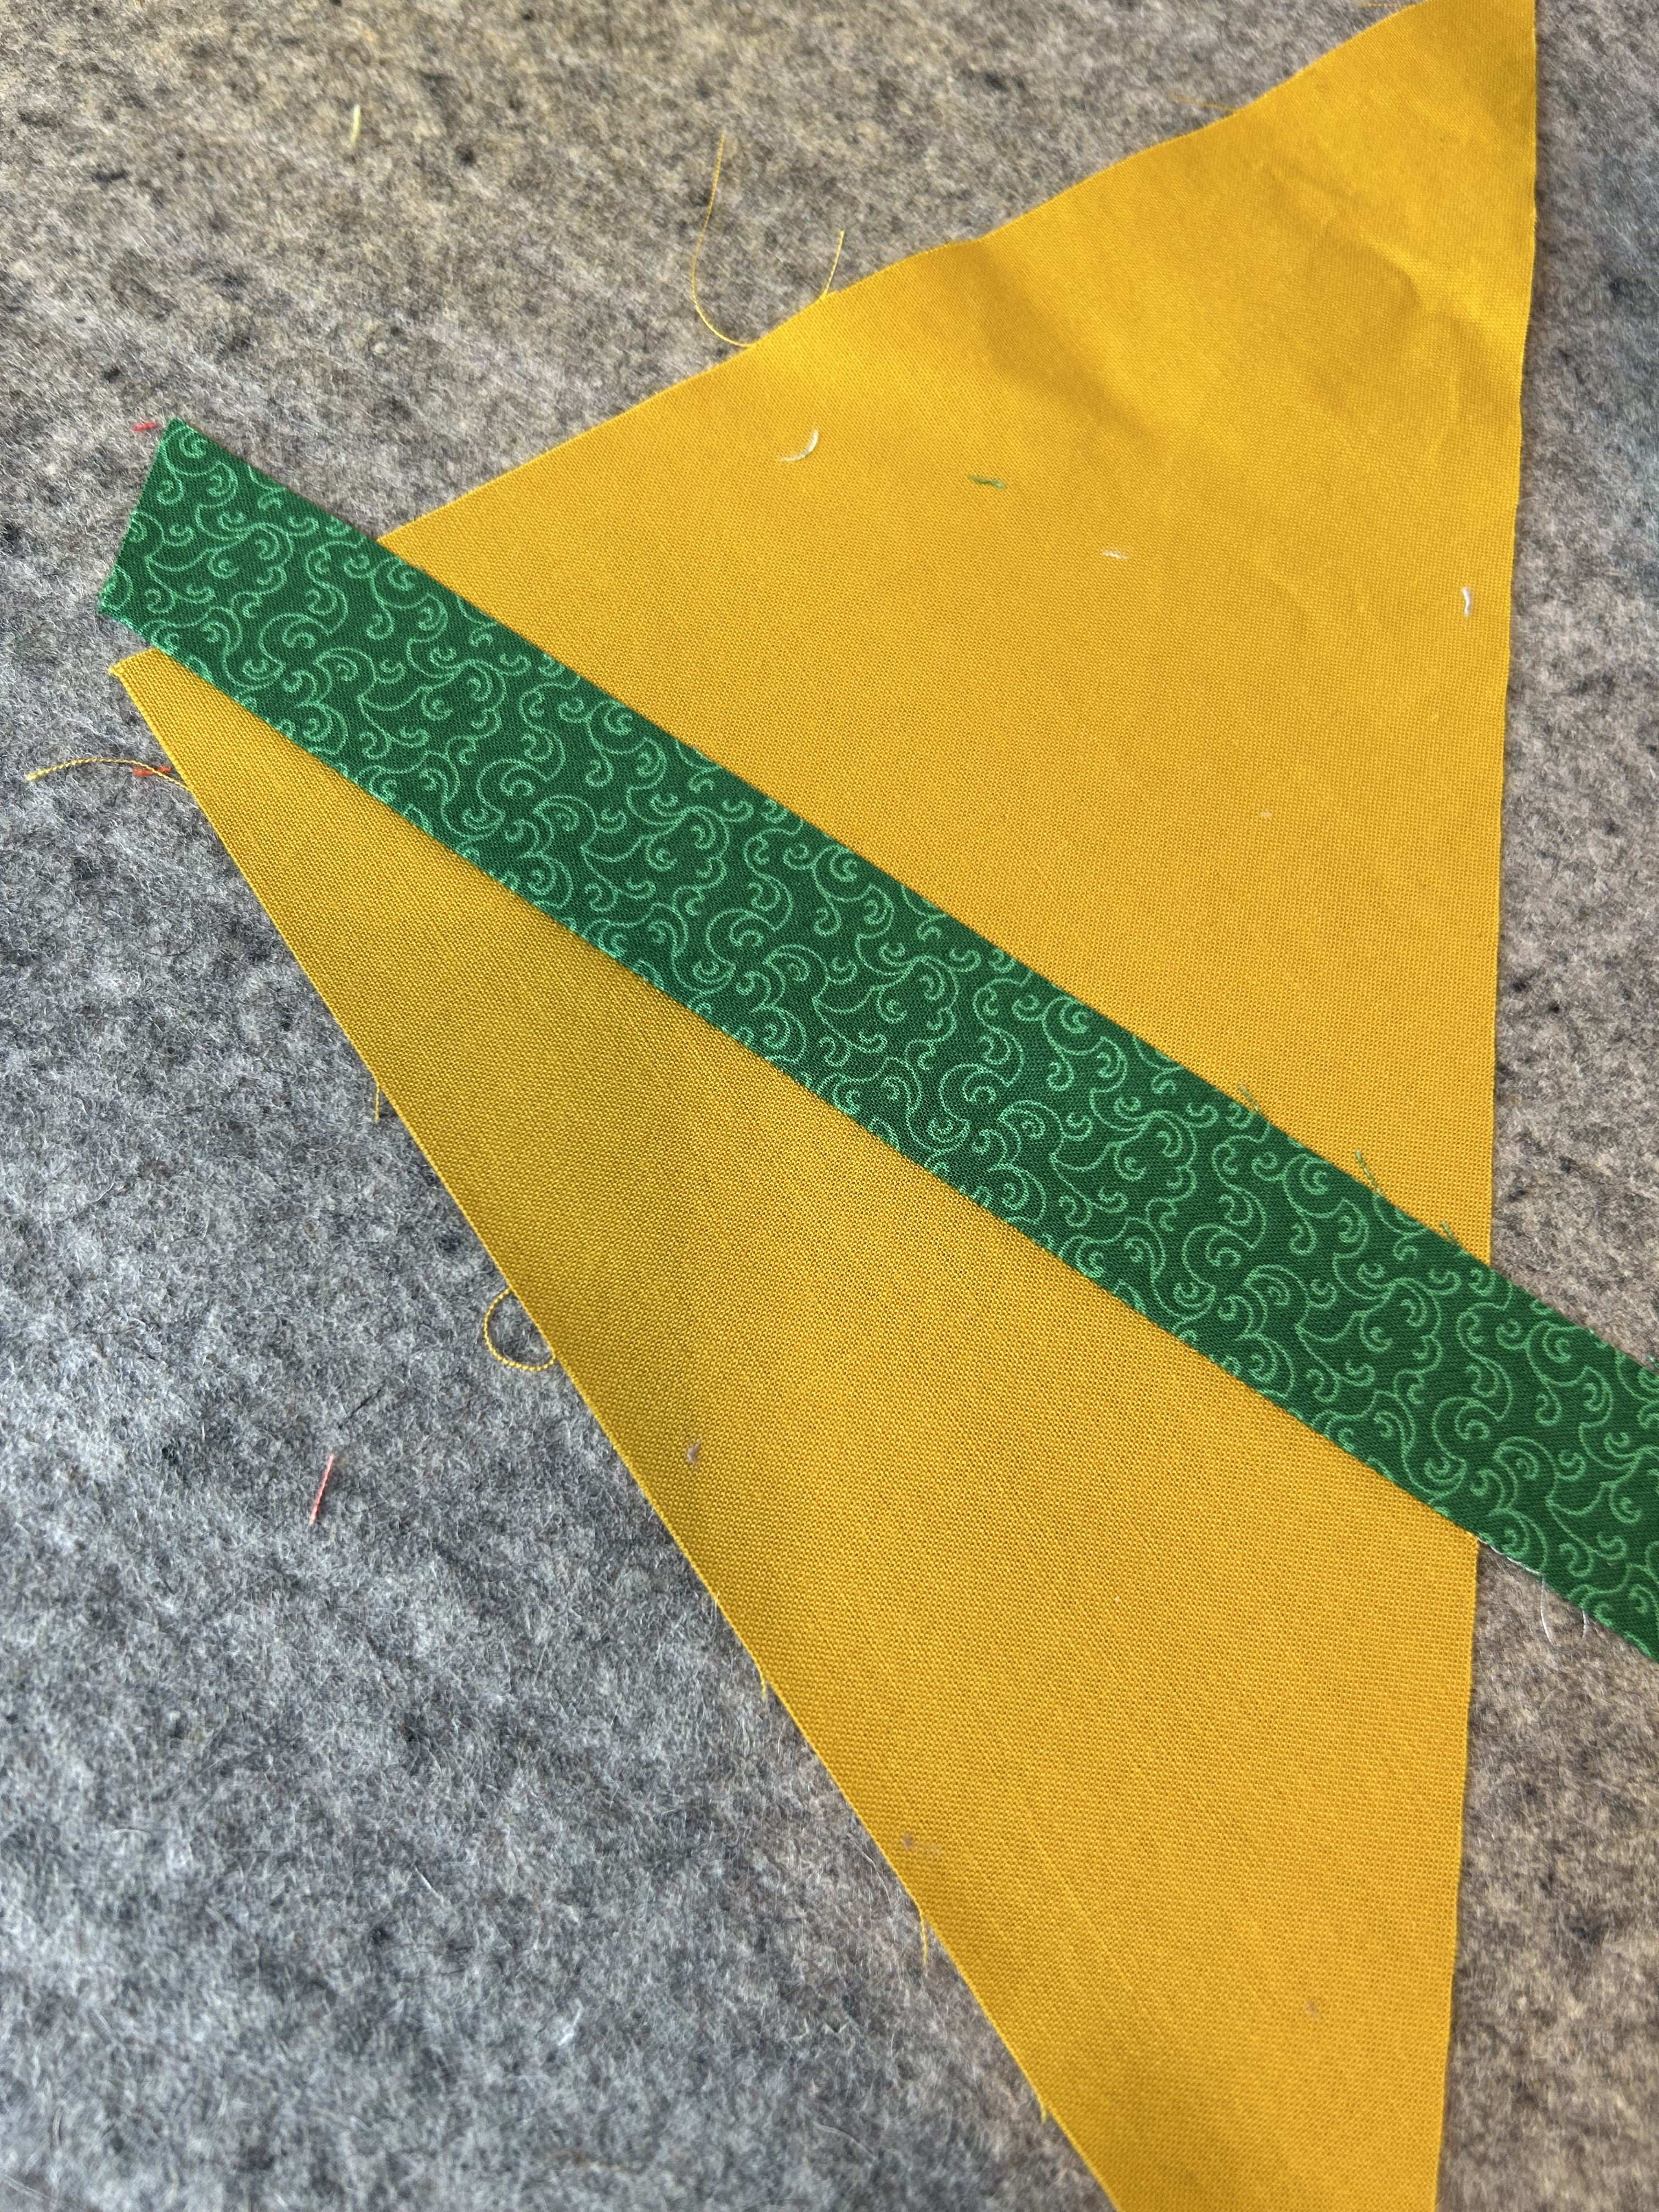
Lay a strip on the starting line you have marked
Iron your first strip down.
Lay your next strip along the edge of the first strip.
Iron second strip after sewing, and so on.
This method is a basic form of strip piecing, and it is very useful to know.
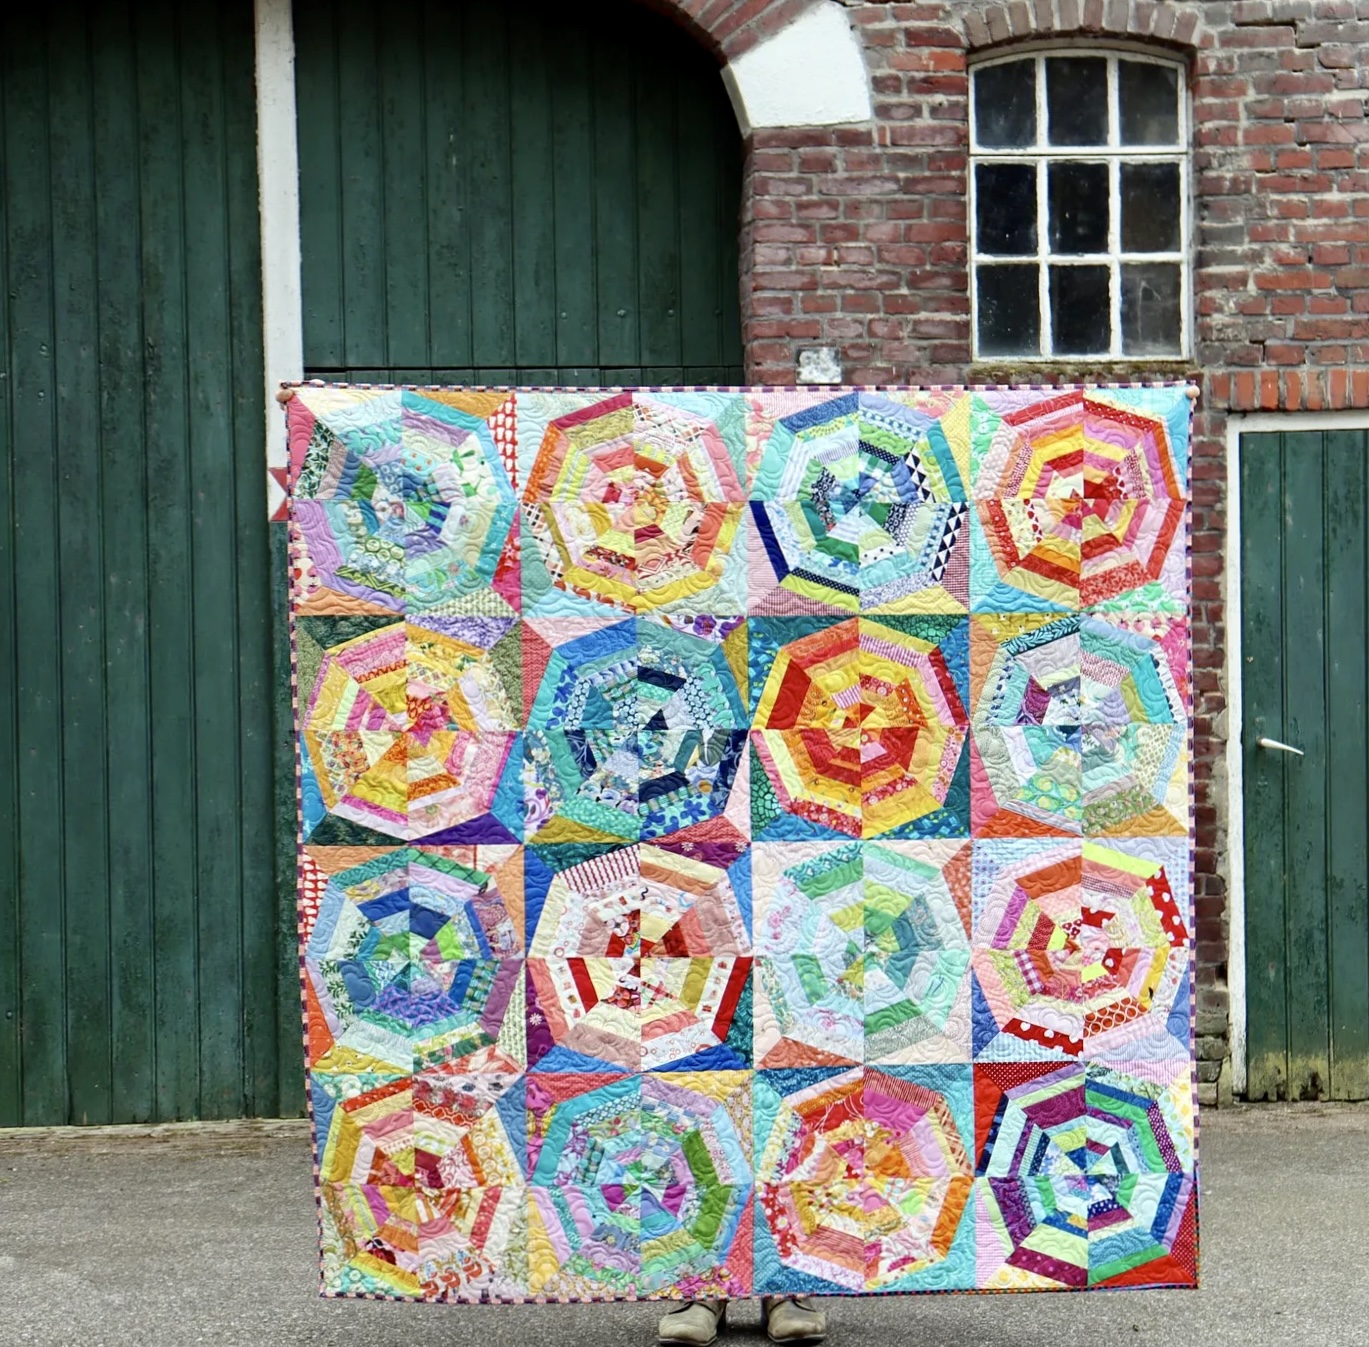
I loved Rachel LaBour’s “Spinny” quilt when she showed it to her substack readers. She designed the block for her local fellow quilters and each made two blocks for this donation quilt. The blocks are cool centers with warm borders, or warm centers with cool borders. Rachel organized the blocks, quilted the quilt, and bound it.
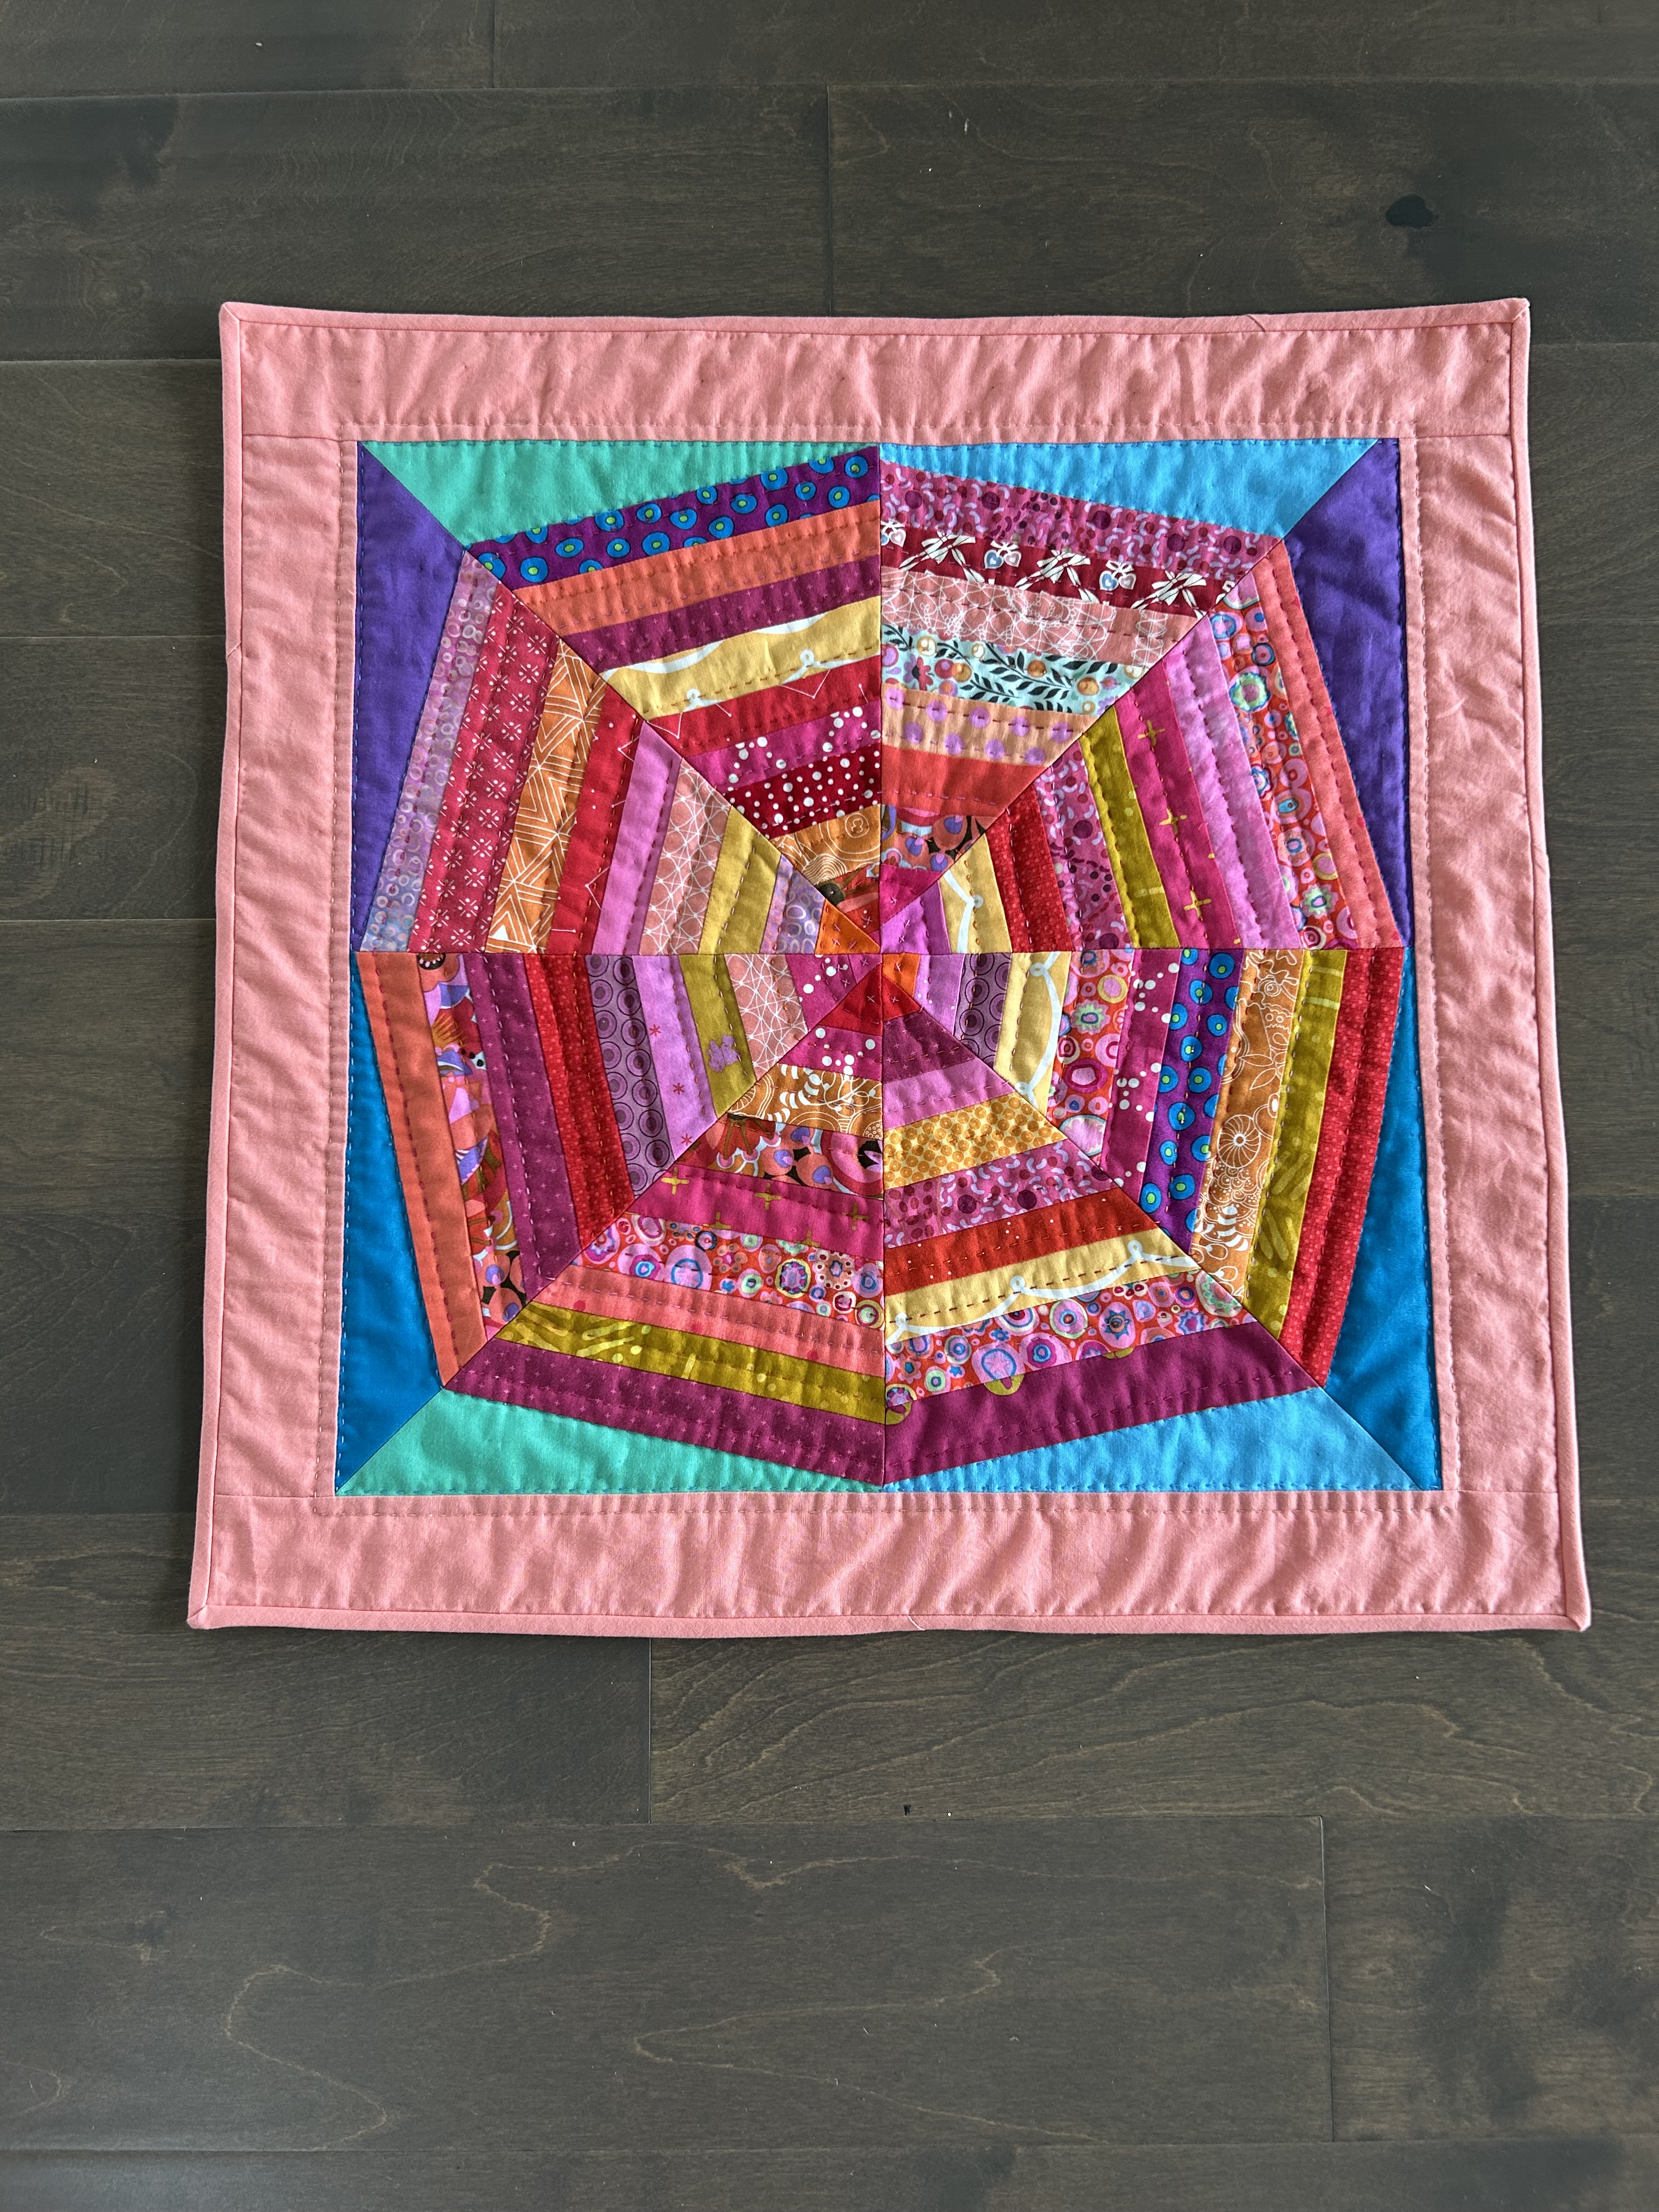
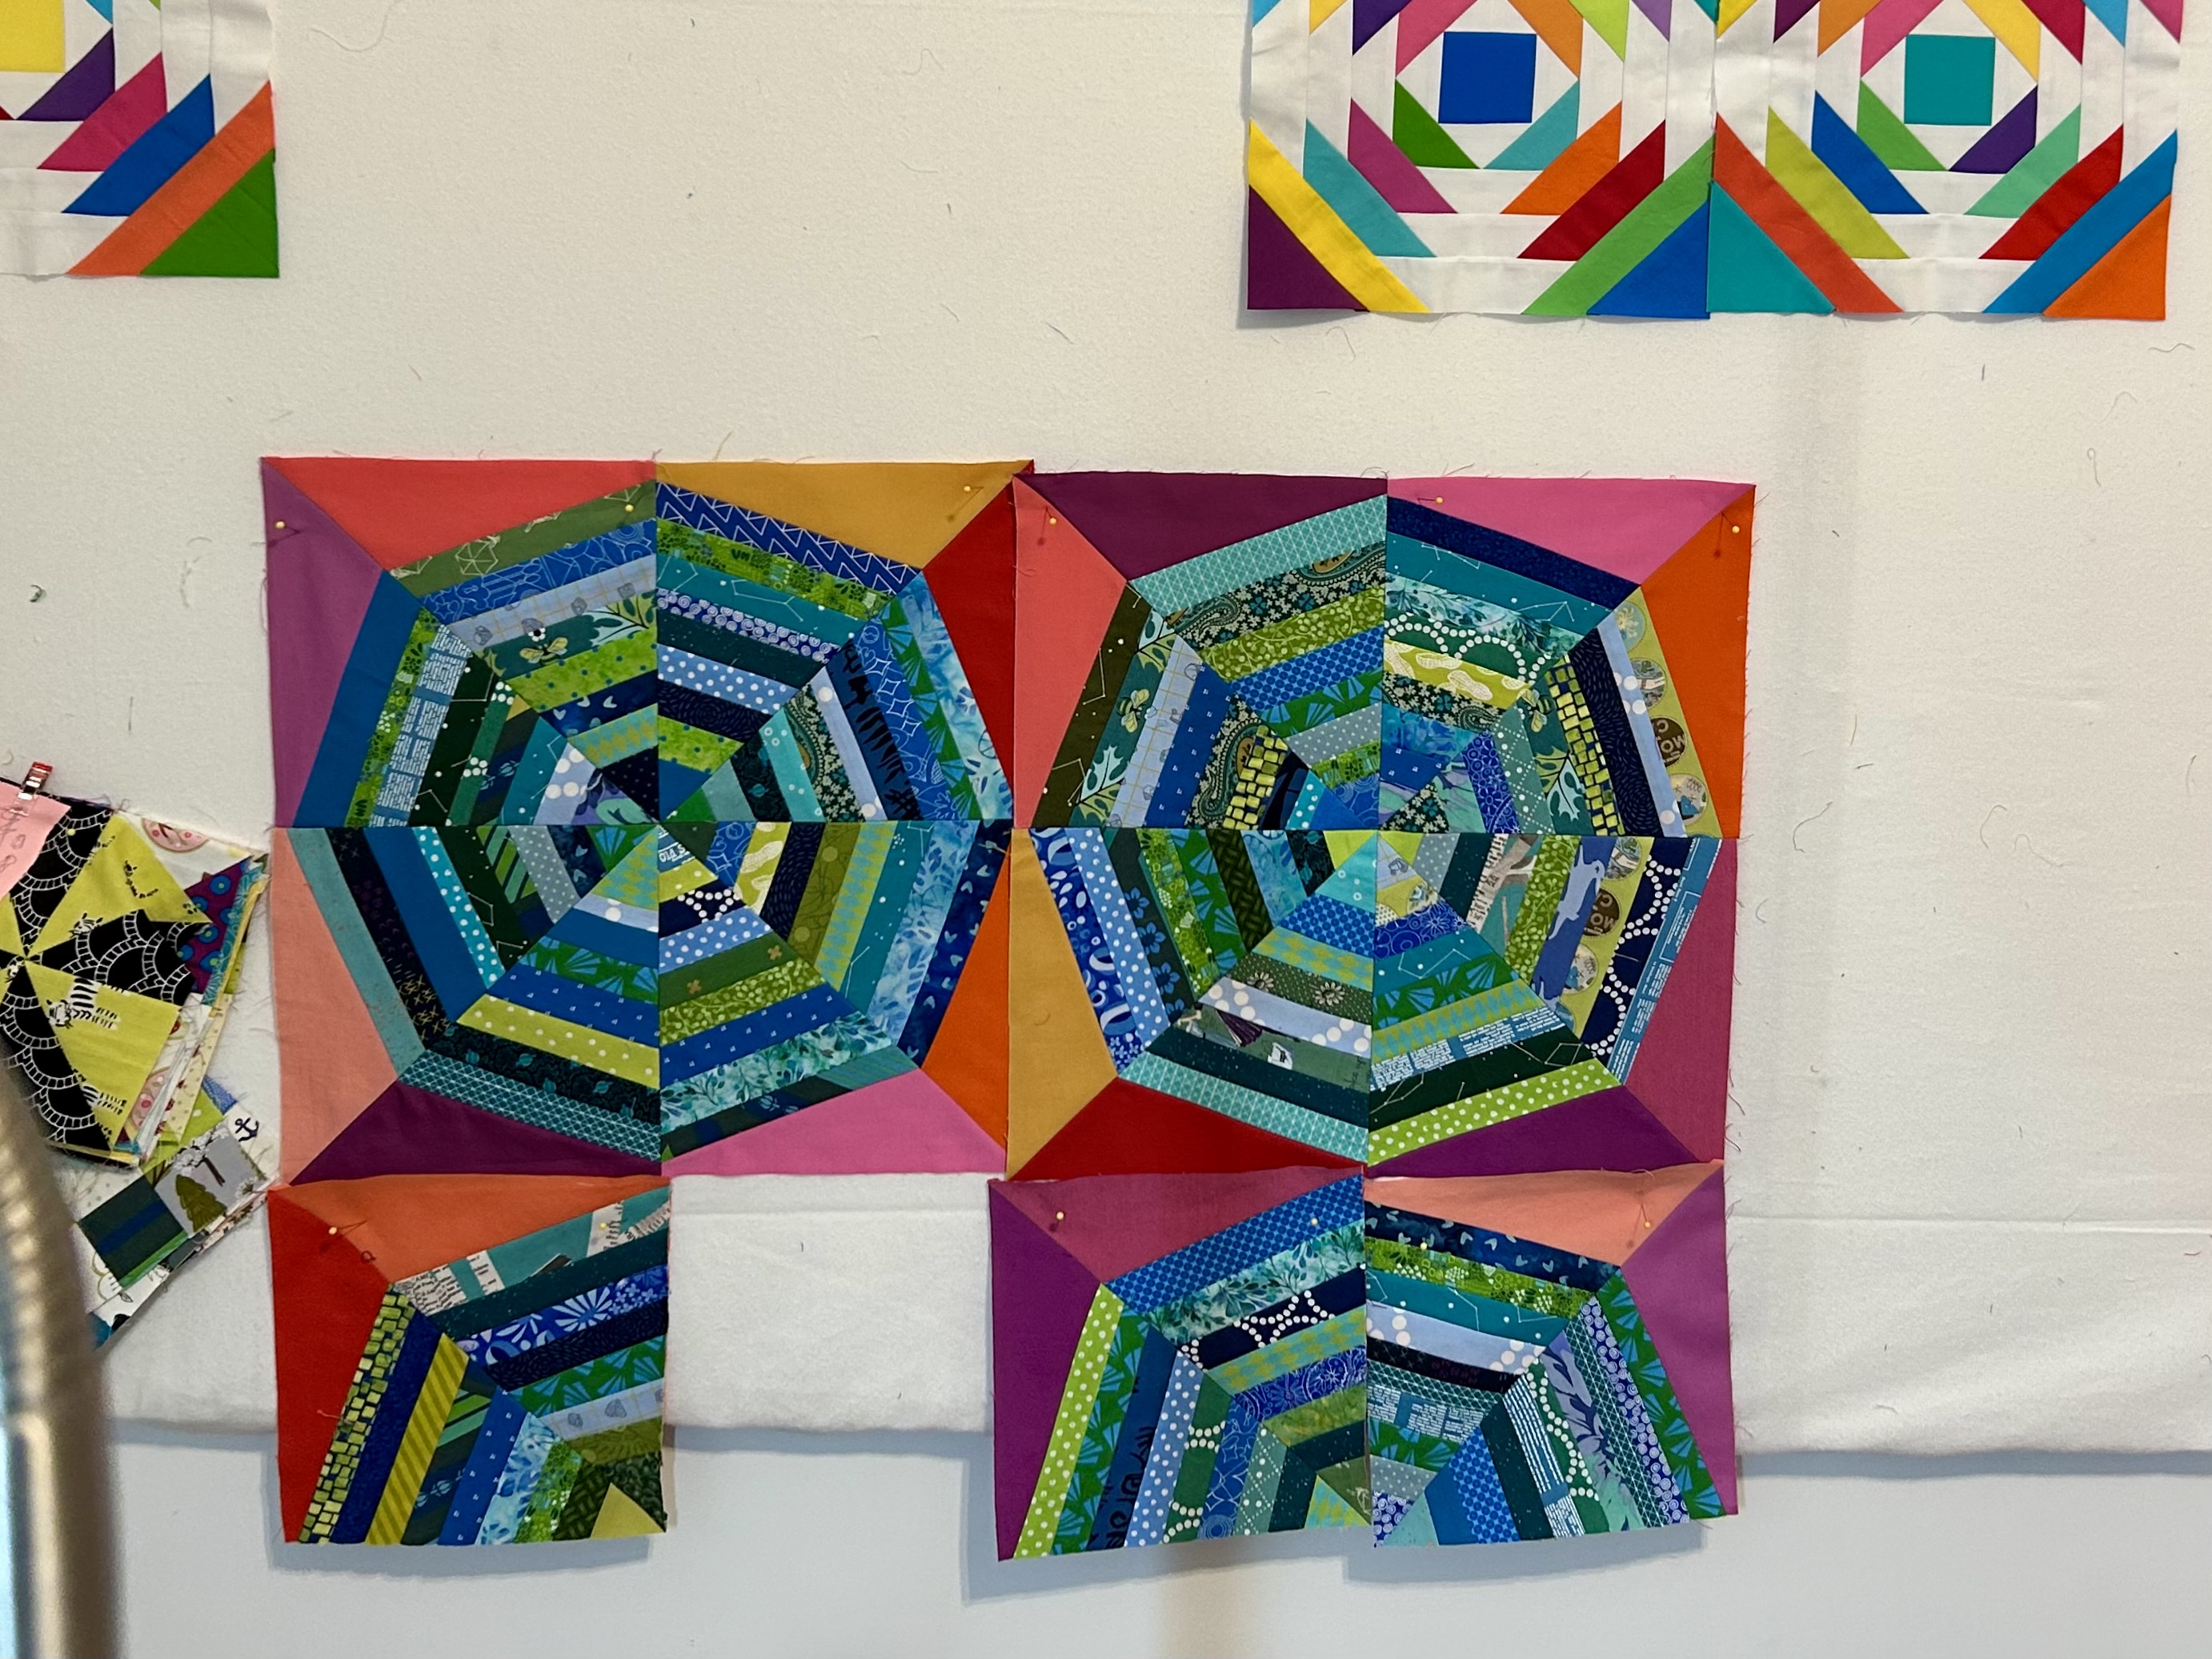
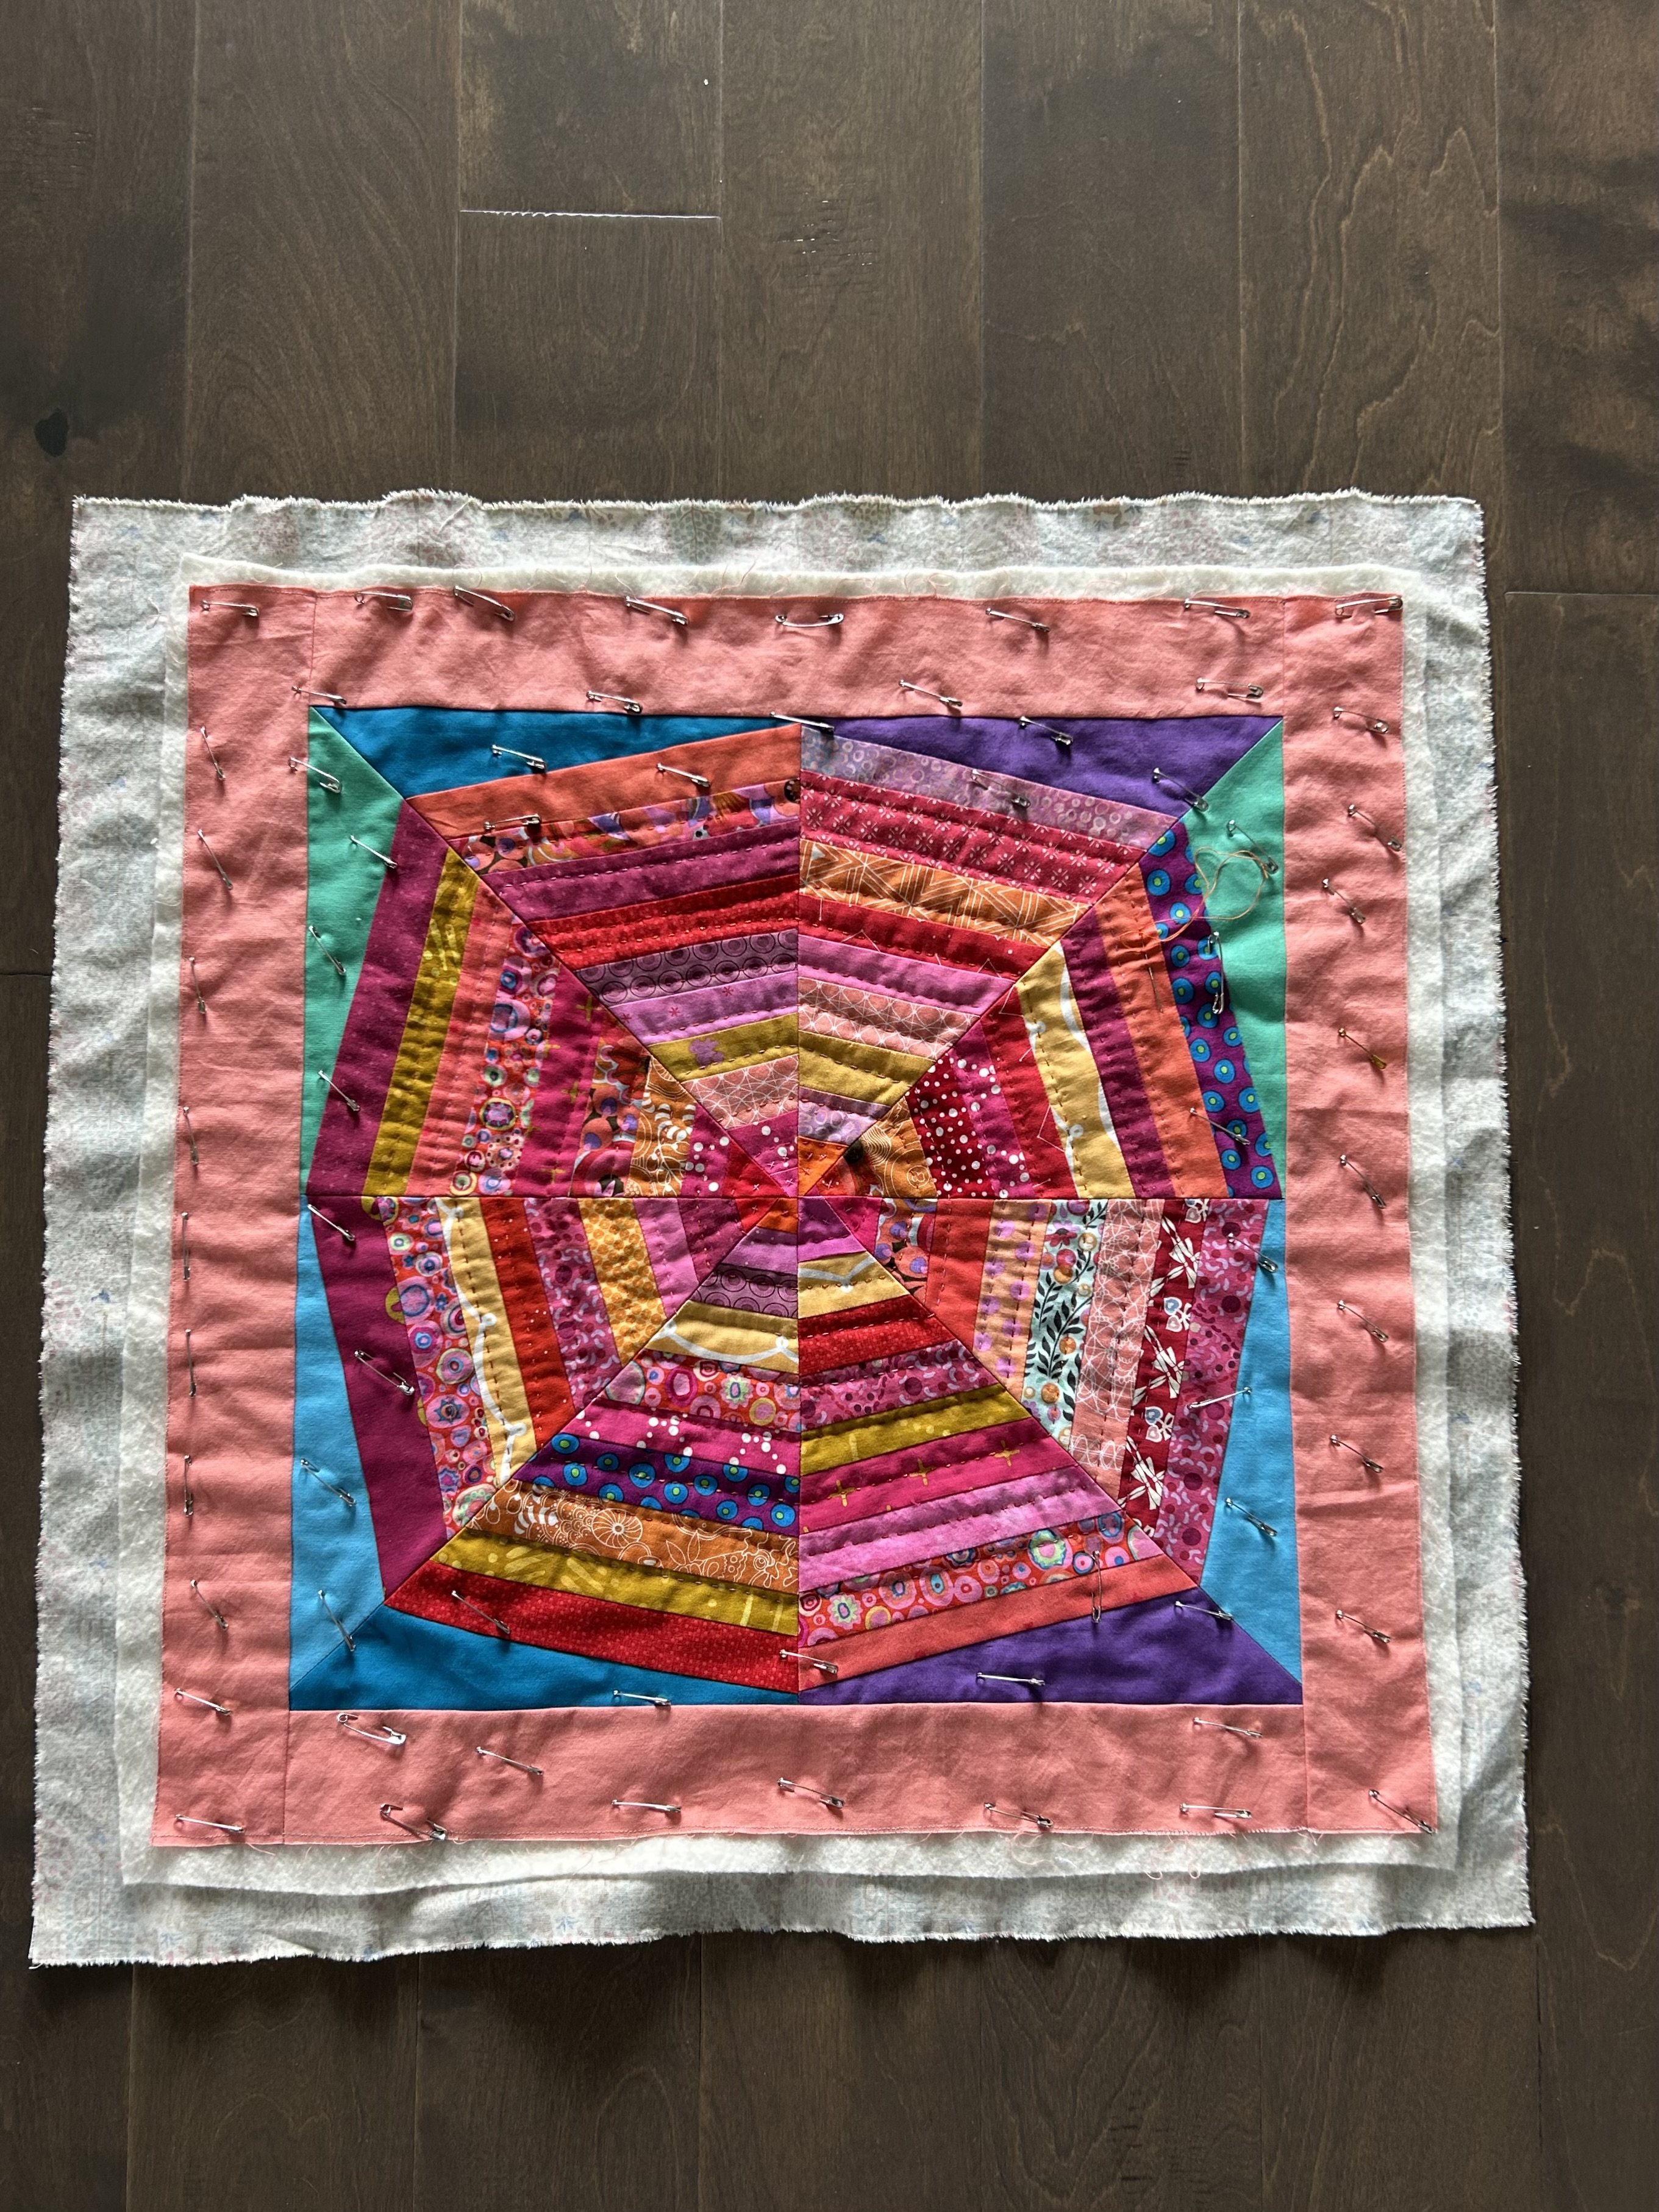
While I was waiting for her to release her pattern, I tried to guess her measurements. My trial experiment below is a warm center with cool edges. It is WAY bigger than Rachel’s block, but I liked it as a table topper, so I hand quilted it and installed a border. Voila.
I made some trimming mistakes before Rachel released her pattern. I lost some of the pointy centers as I didn’t keep the 45 degree line on my ruler along the diagonal seam of each quarter block. Shhhh… Don’t tell. It’s so pretty, and I hand quilted it. Some glittery thread was involved here and there.
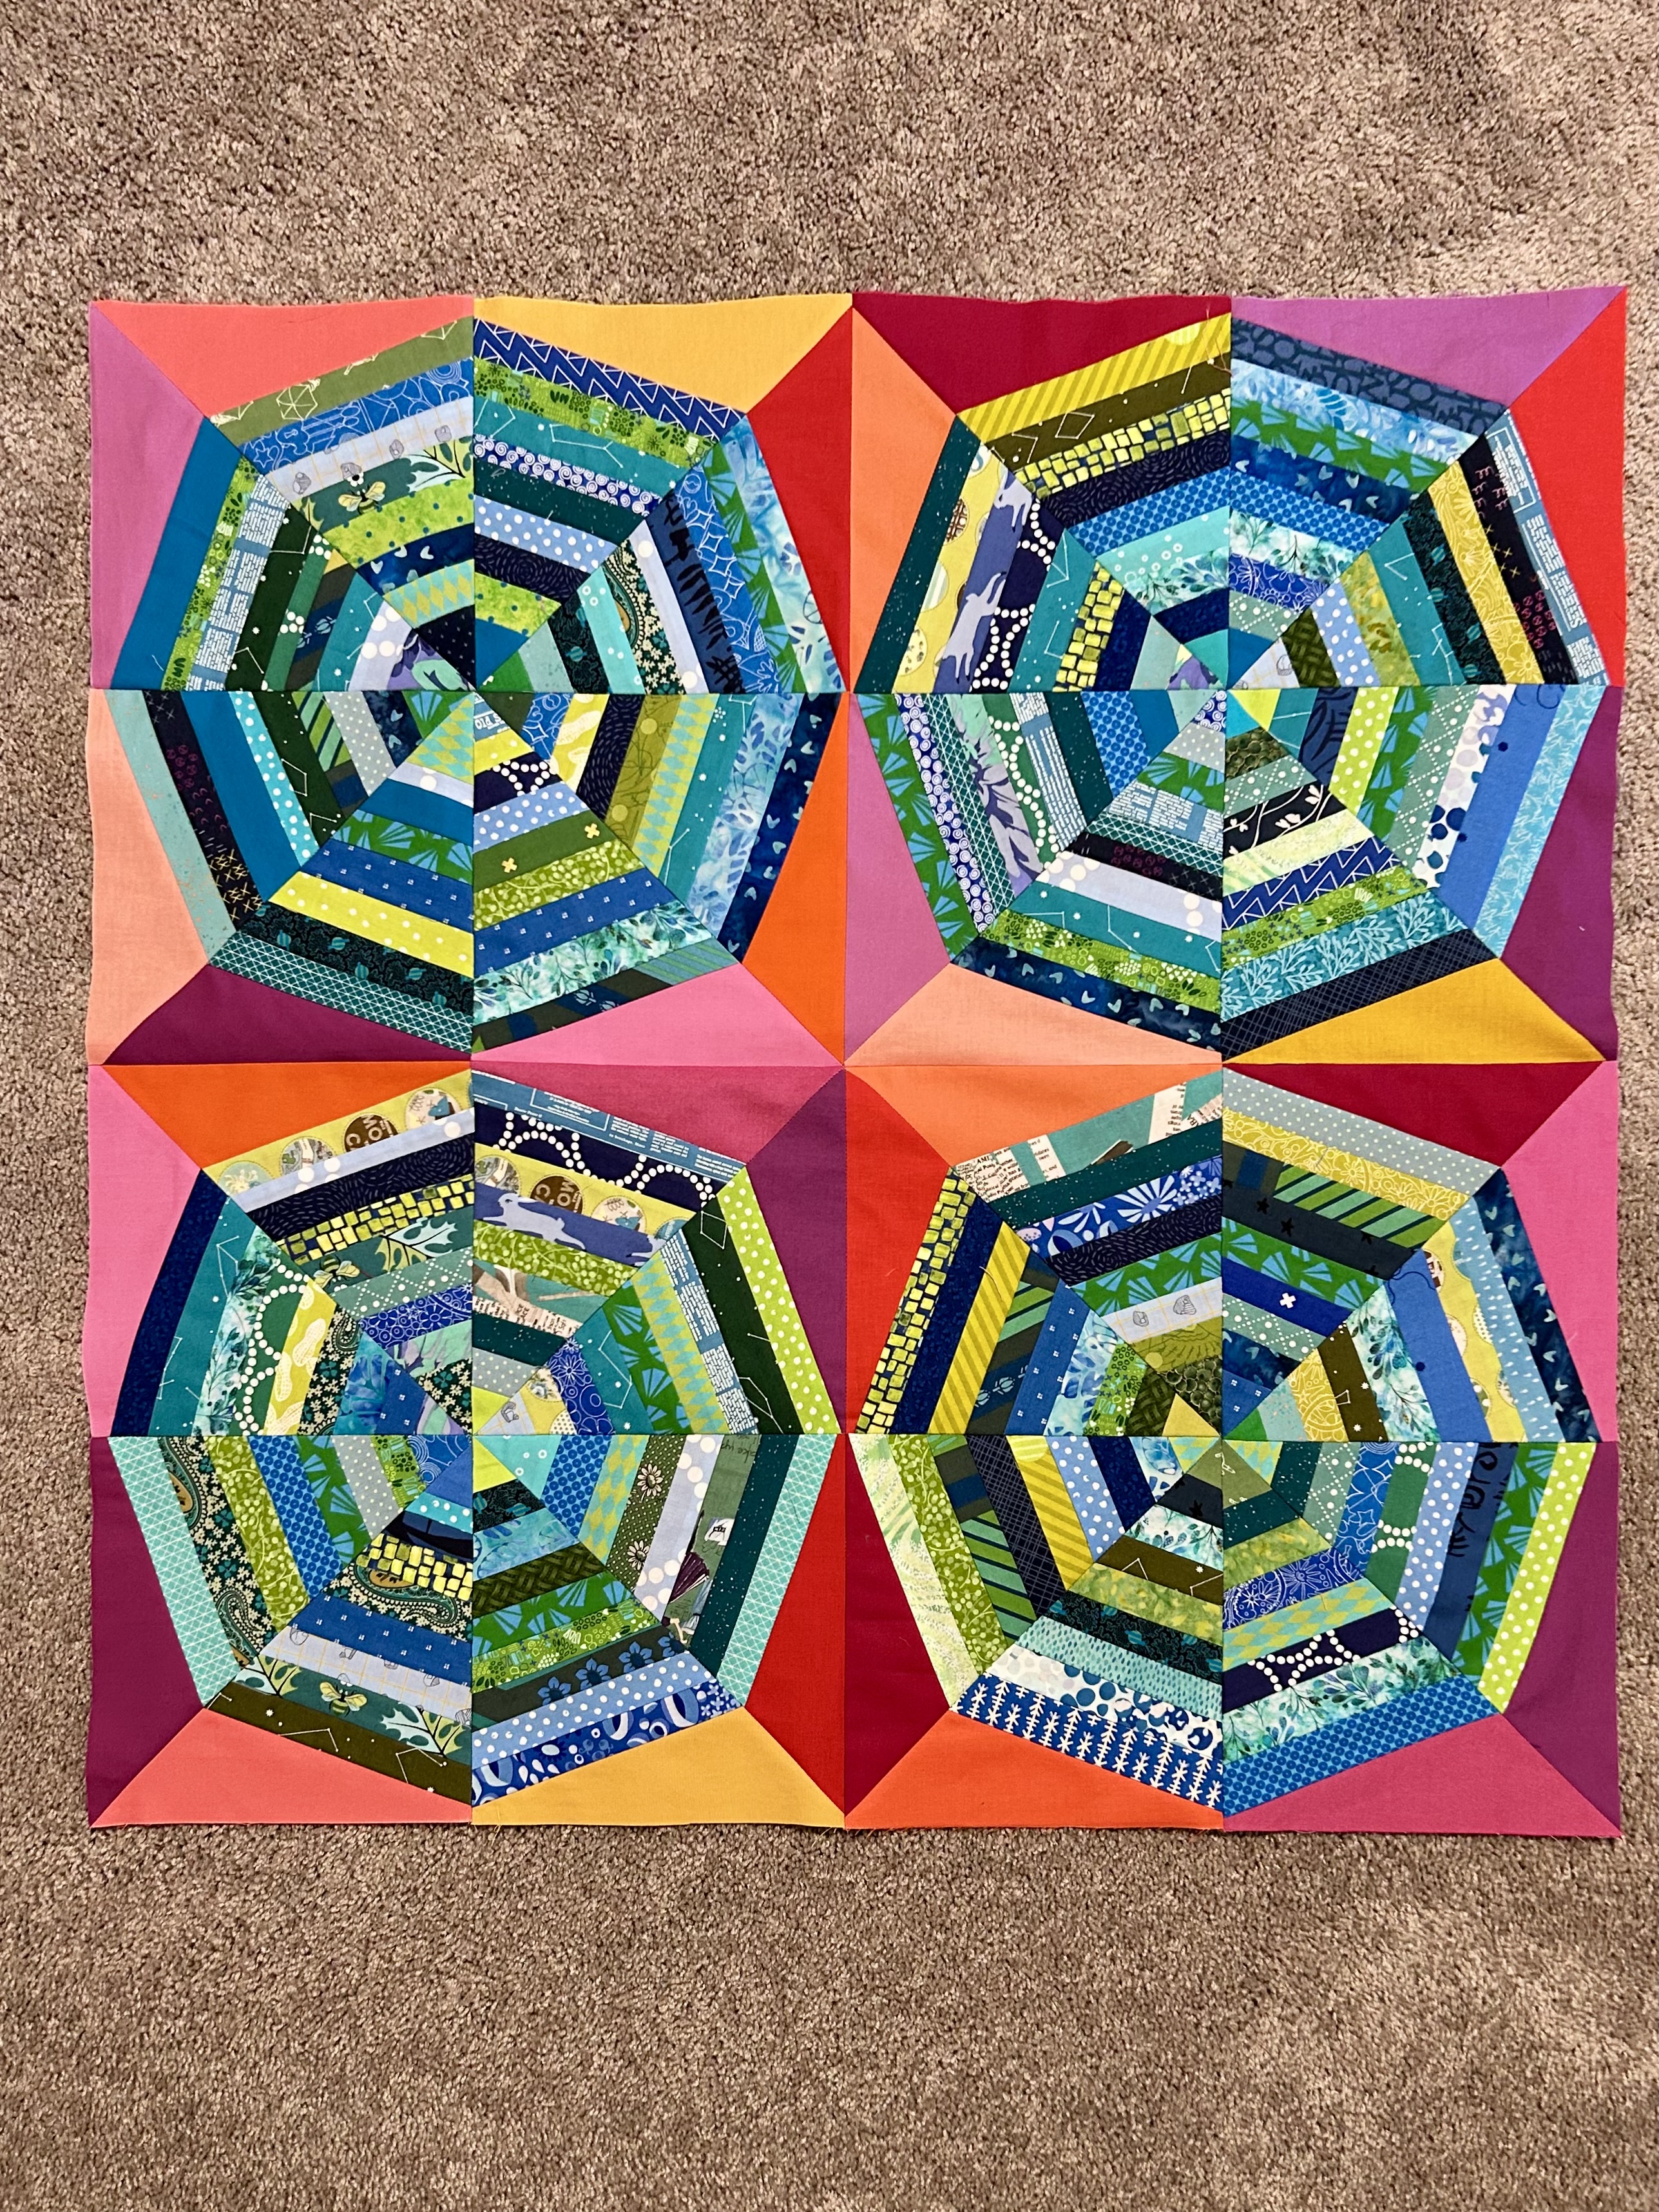
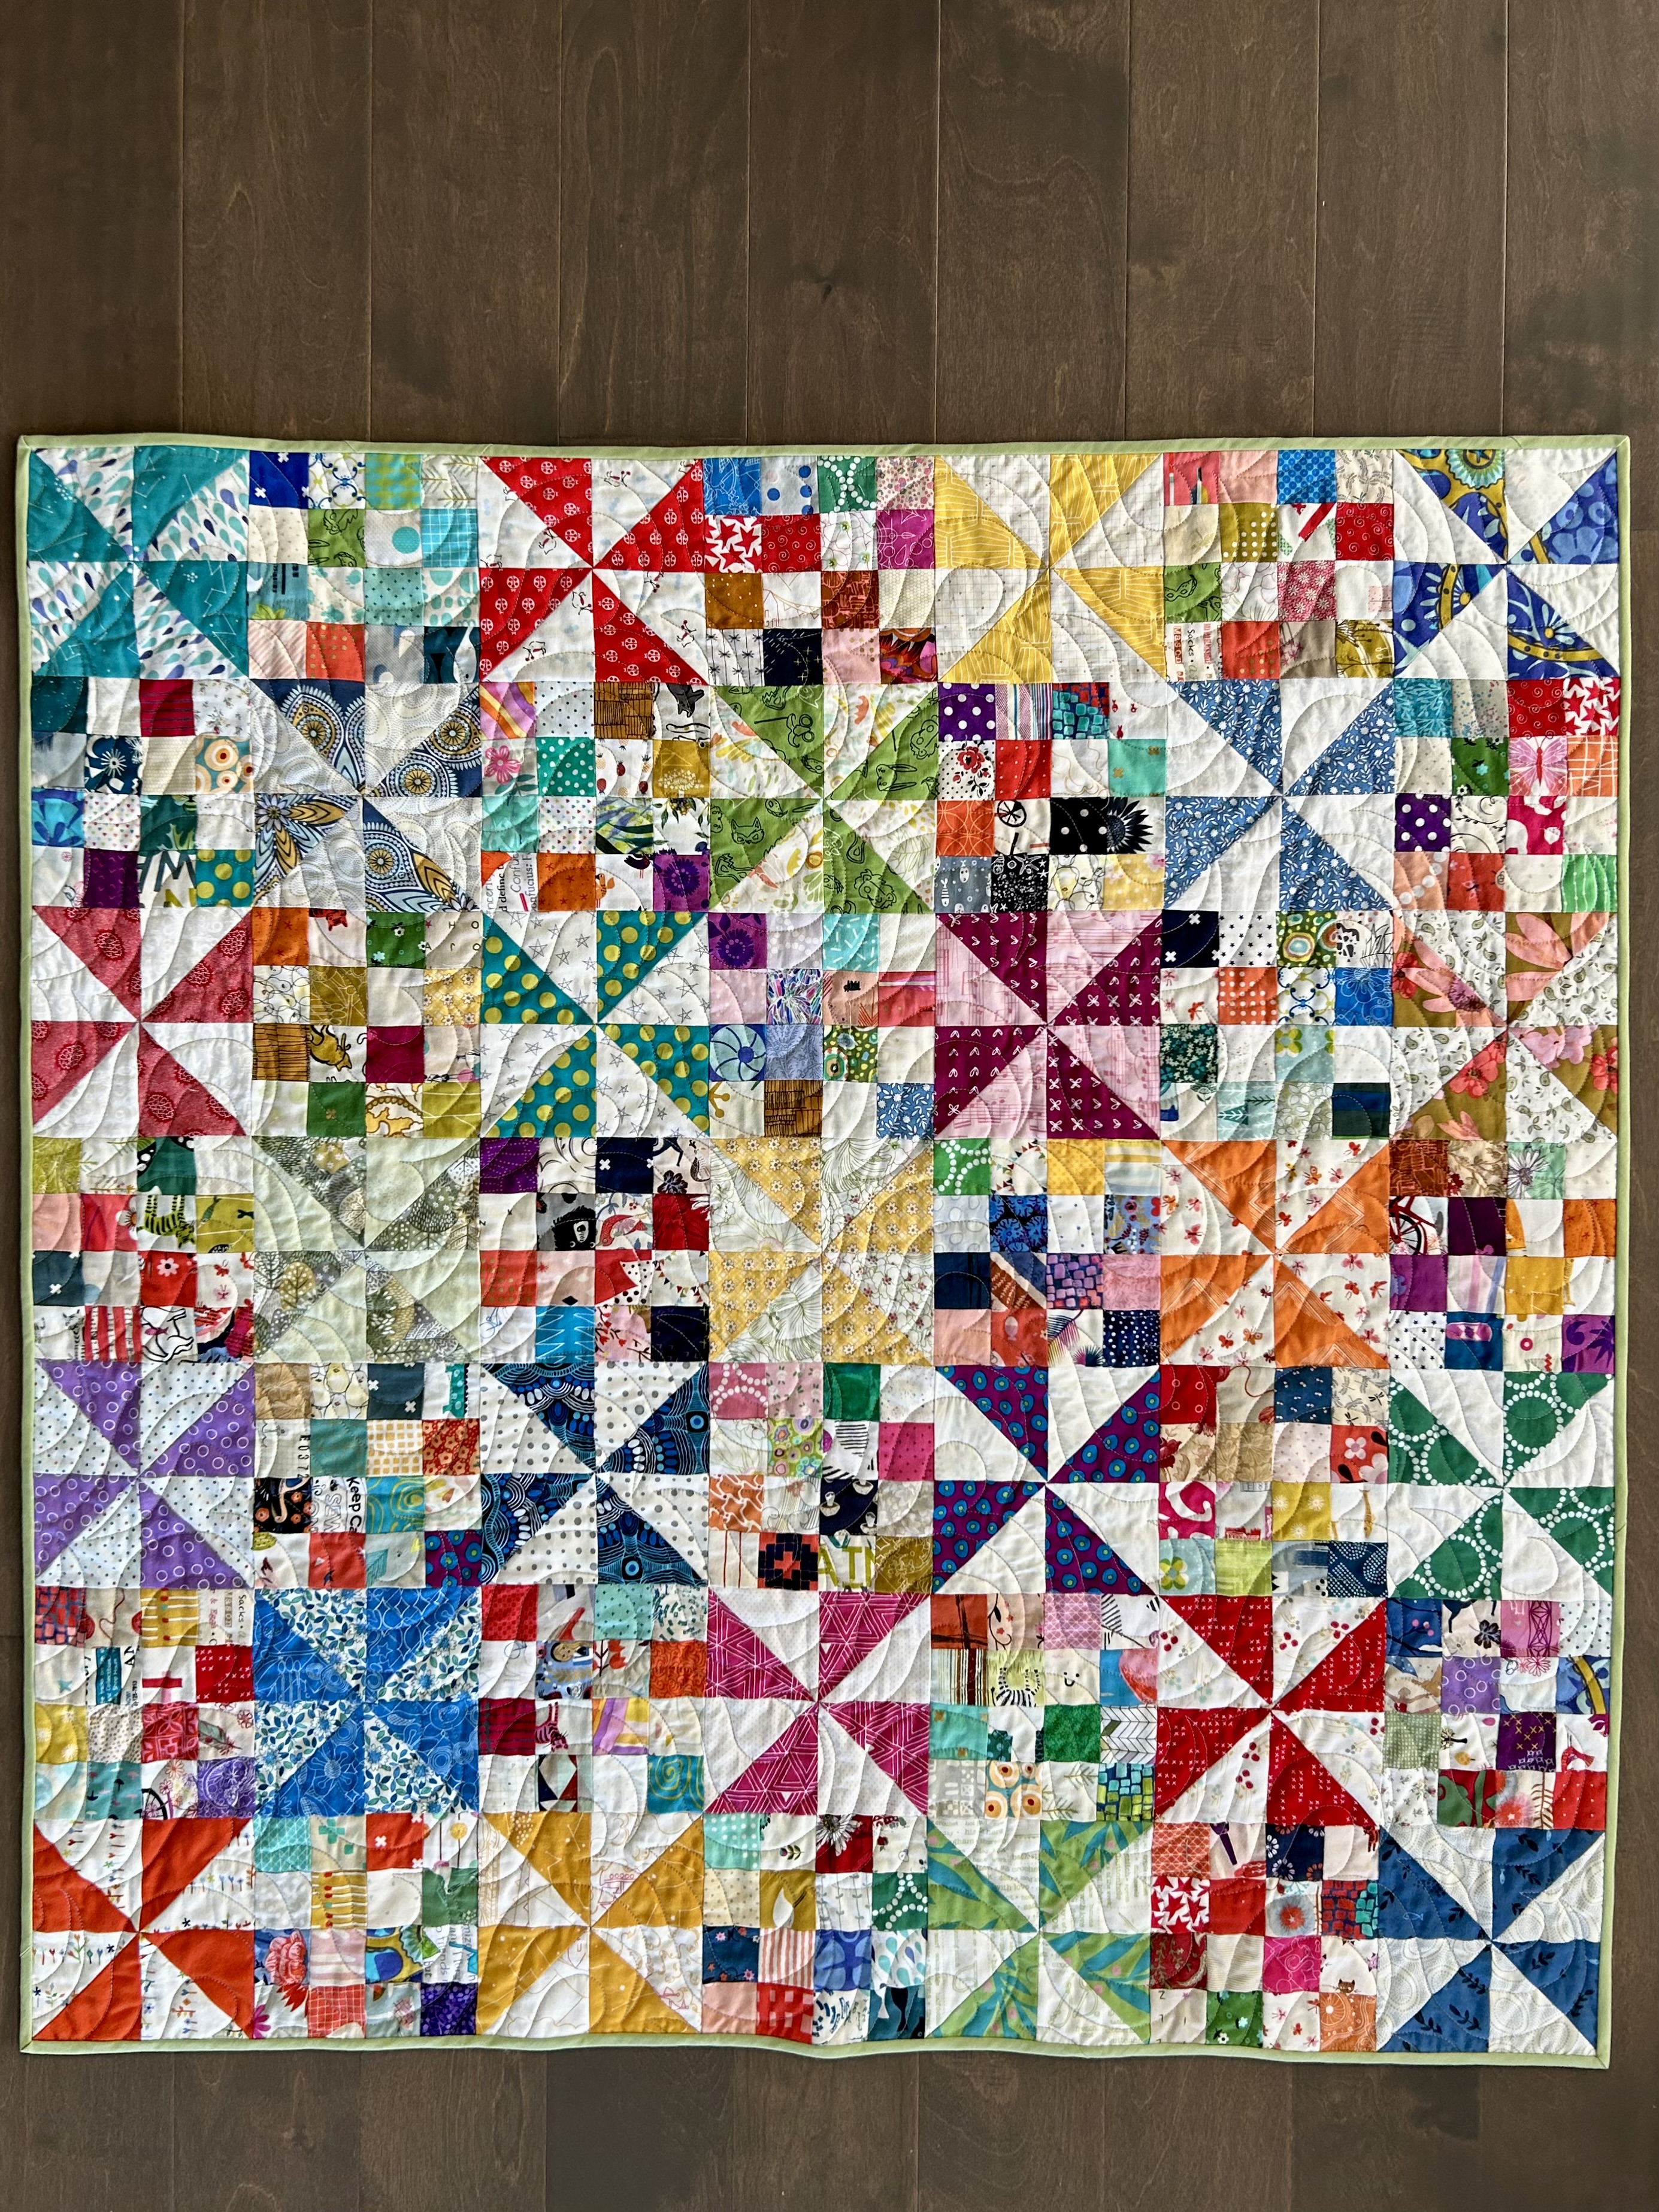
Once I got the pattern I decided to make all cool centers with warm edges done in solids–as I was interested in how the graphic nature of solids all in warm colors would bring out the star at the center of 4 blocks. I love it! And boy does it use up my stash bins of strips–now arranged by color families. And each individual segment sews up pretty fast–I’ve been using those as leader/ender sewing.
I will make 3 other sets of these wheels to make a quilt. I also love the warm center version… And I am already wondering where that idea will go…
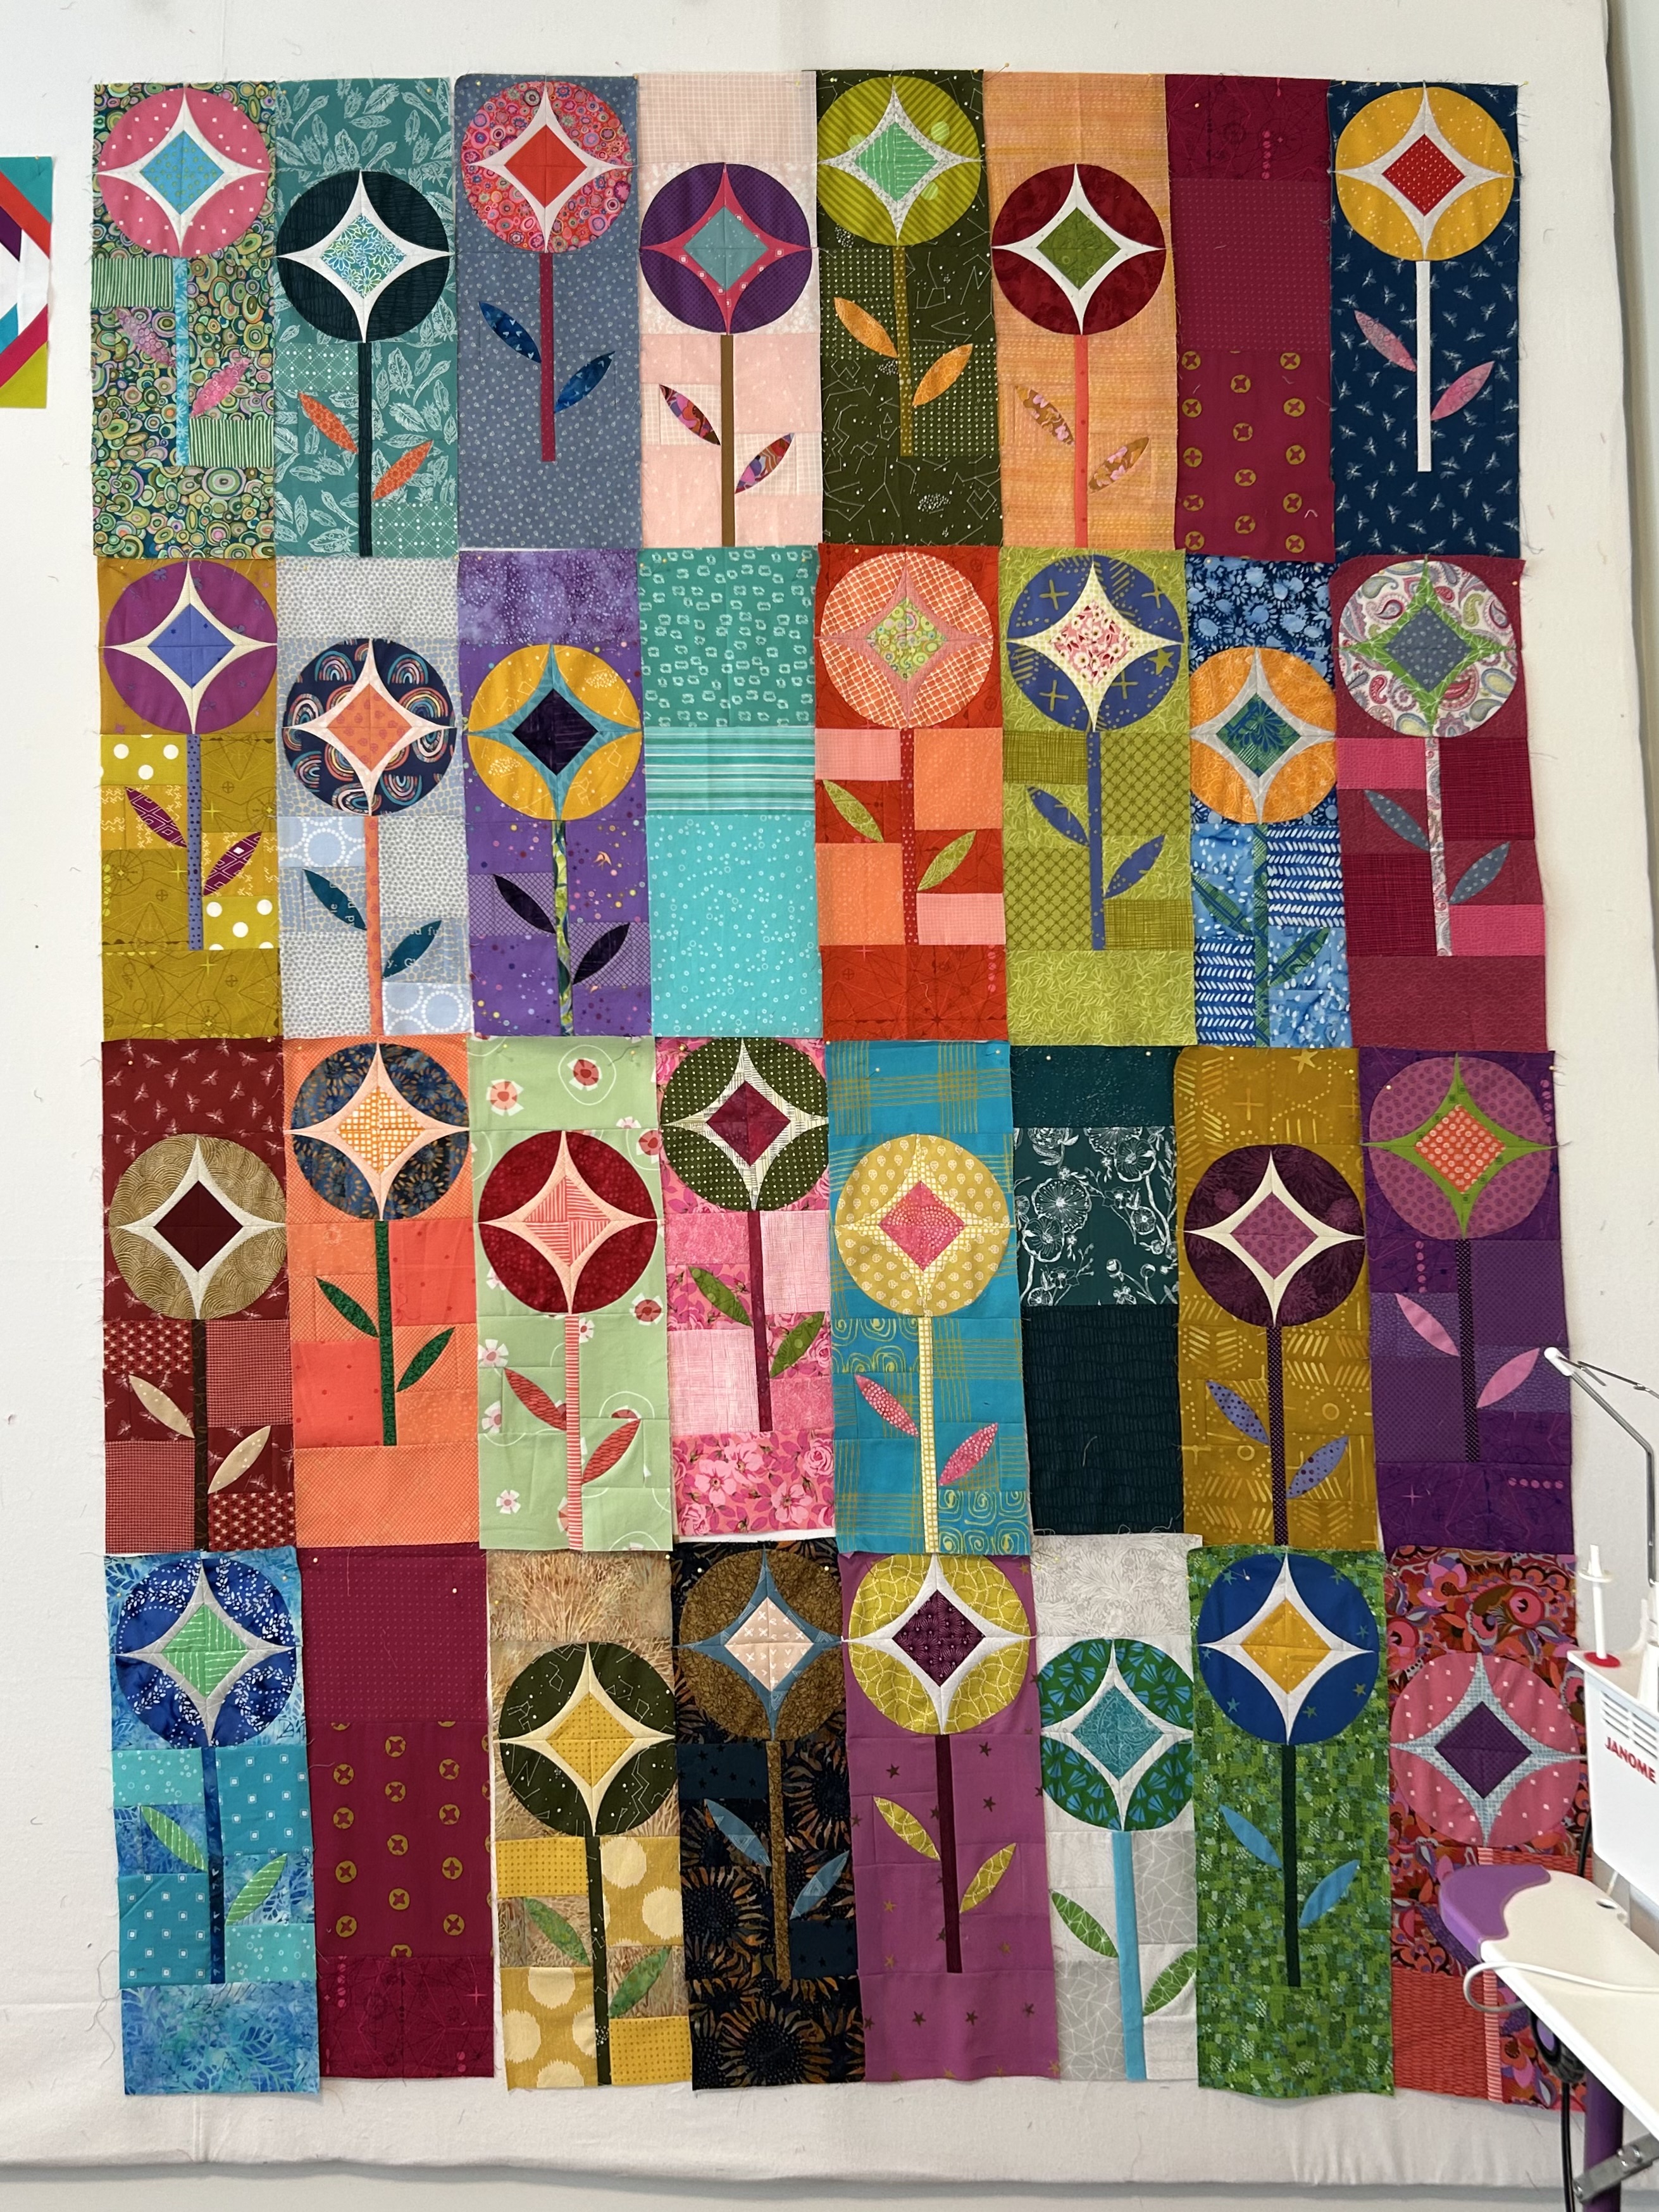
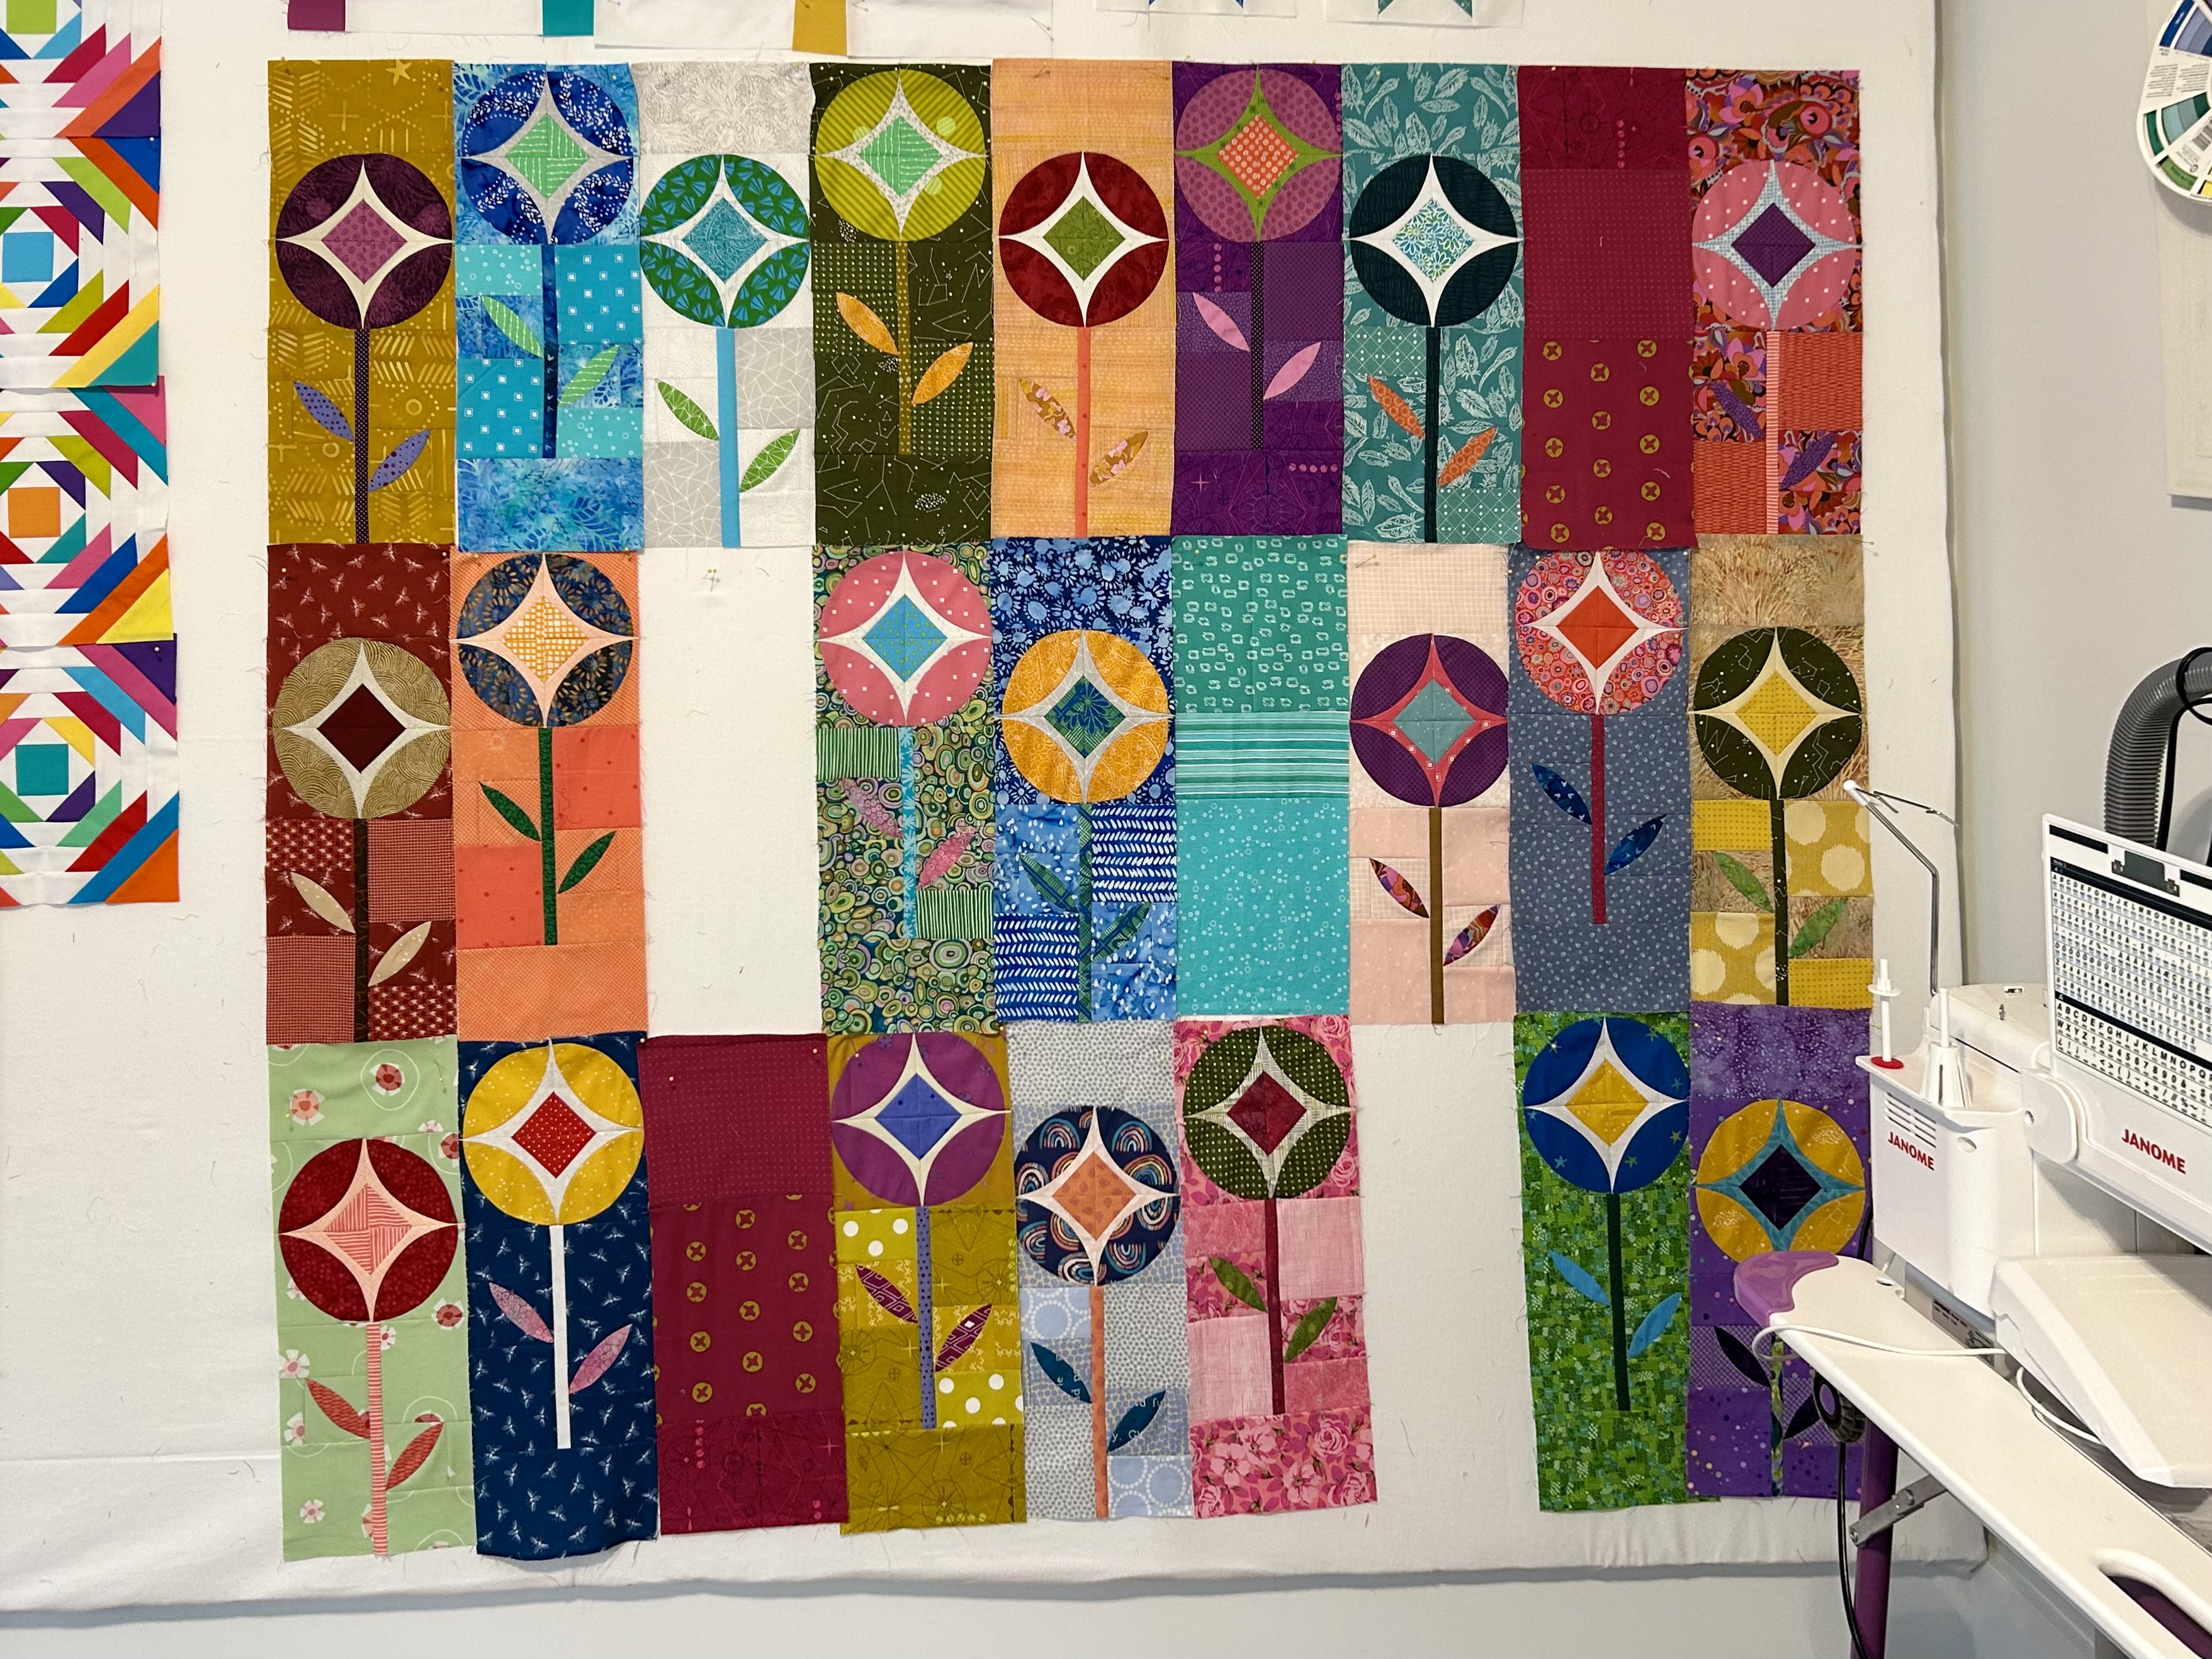
All my blocks for “Flower Pop” from Sew Kind of Wonderful are done. They are resting on the design wall for a few more days as I still seem to be moving blocks. I swapped two more blocks since I took this picture, not 30 minutes ago. The right side was too dark.
The pineapple blocks are almost done–just 9 more to make. It will be 60 by 60 inches. They are the primary quilt right now, with the “Spinny” blocks as leader/enders.
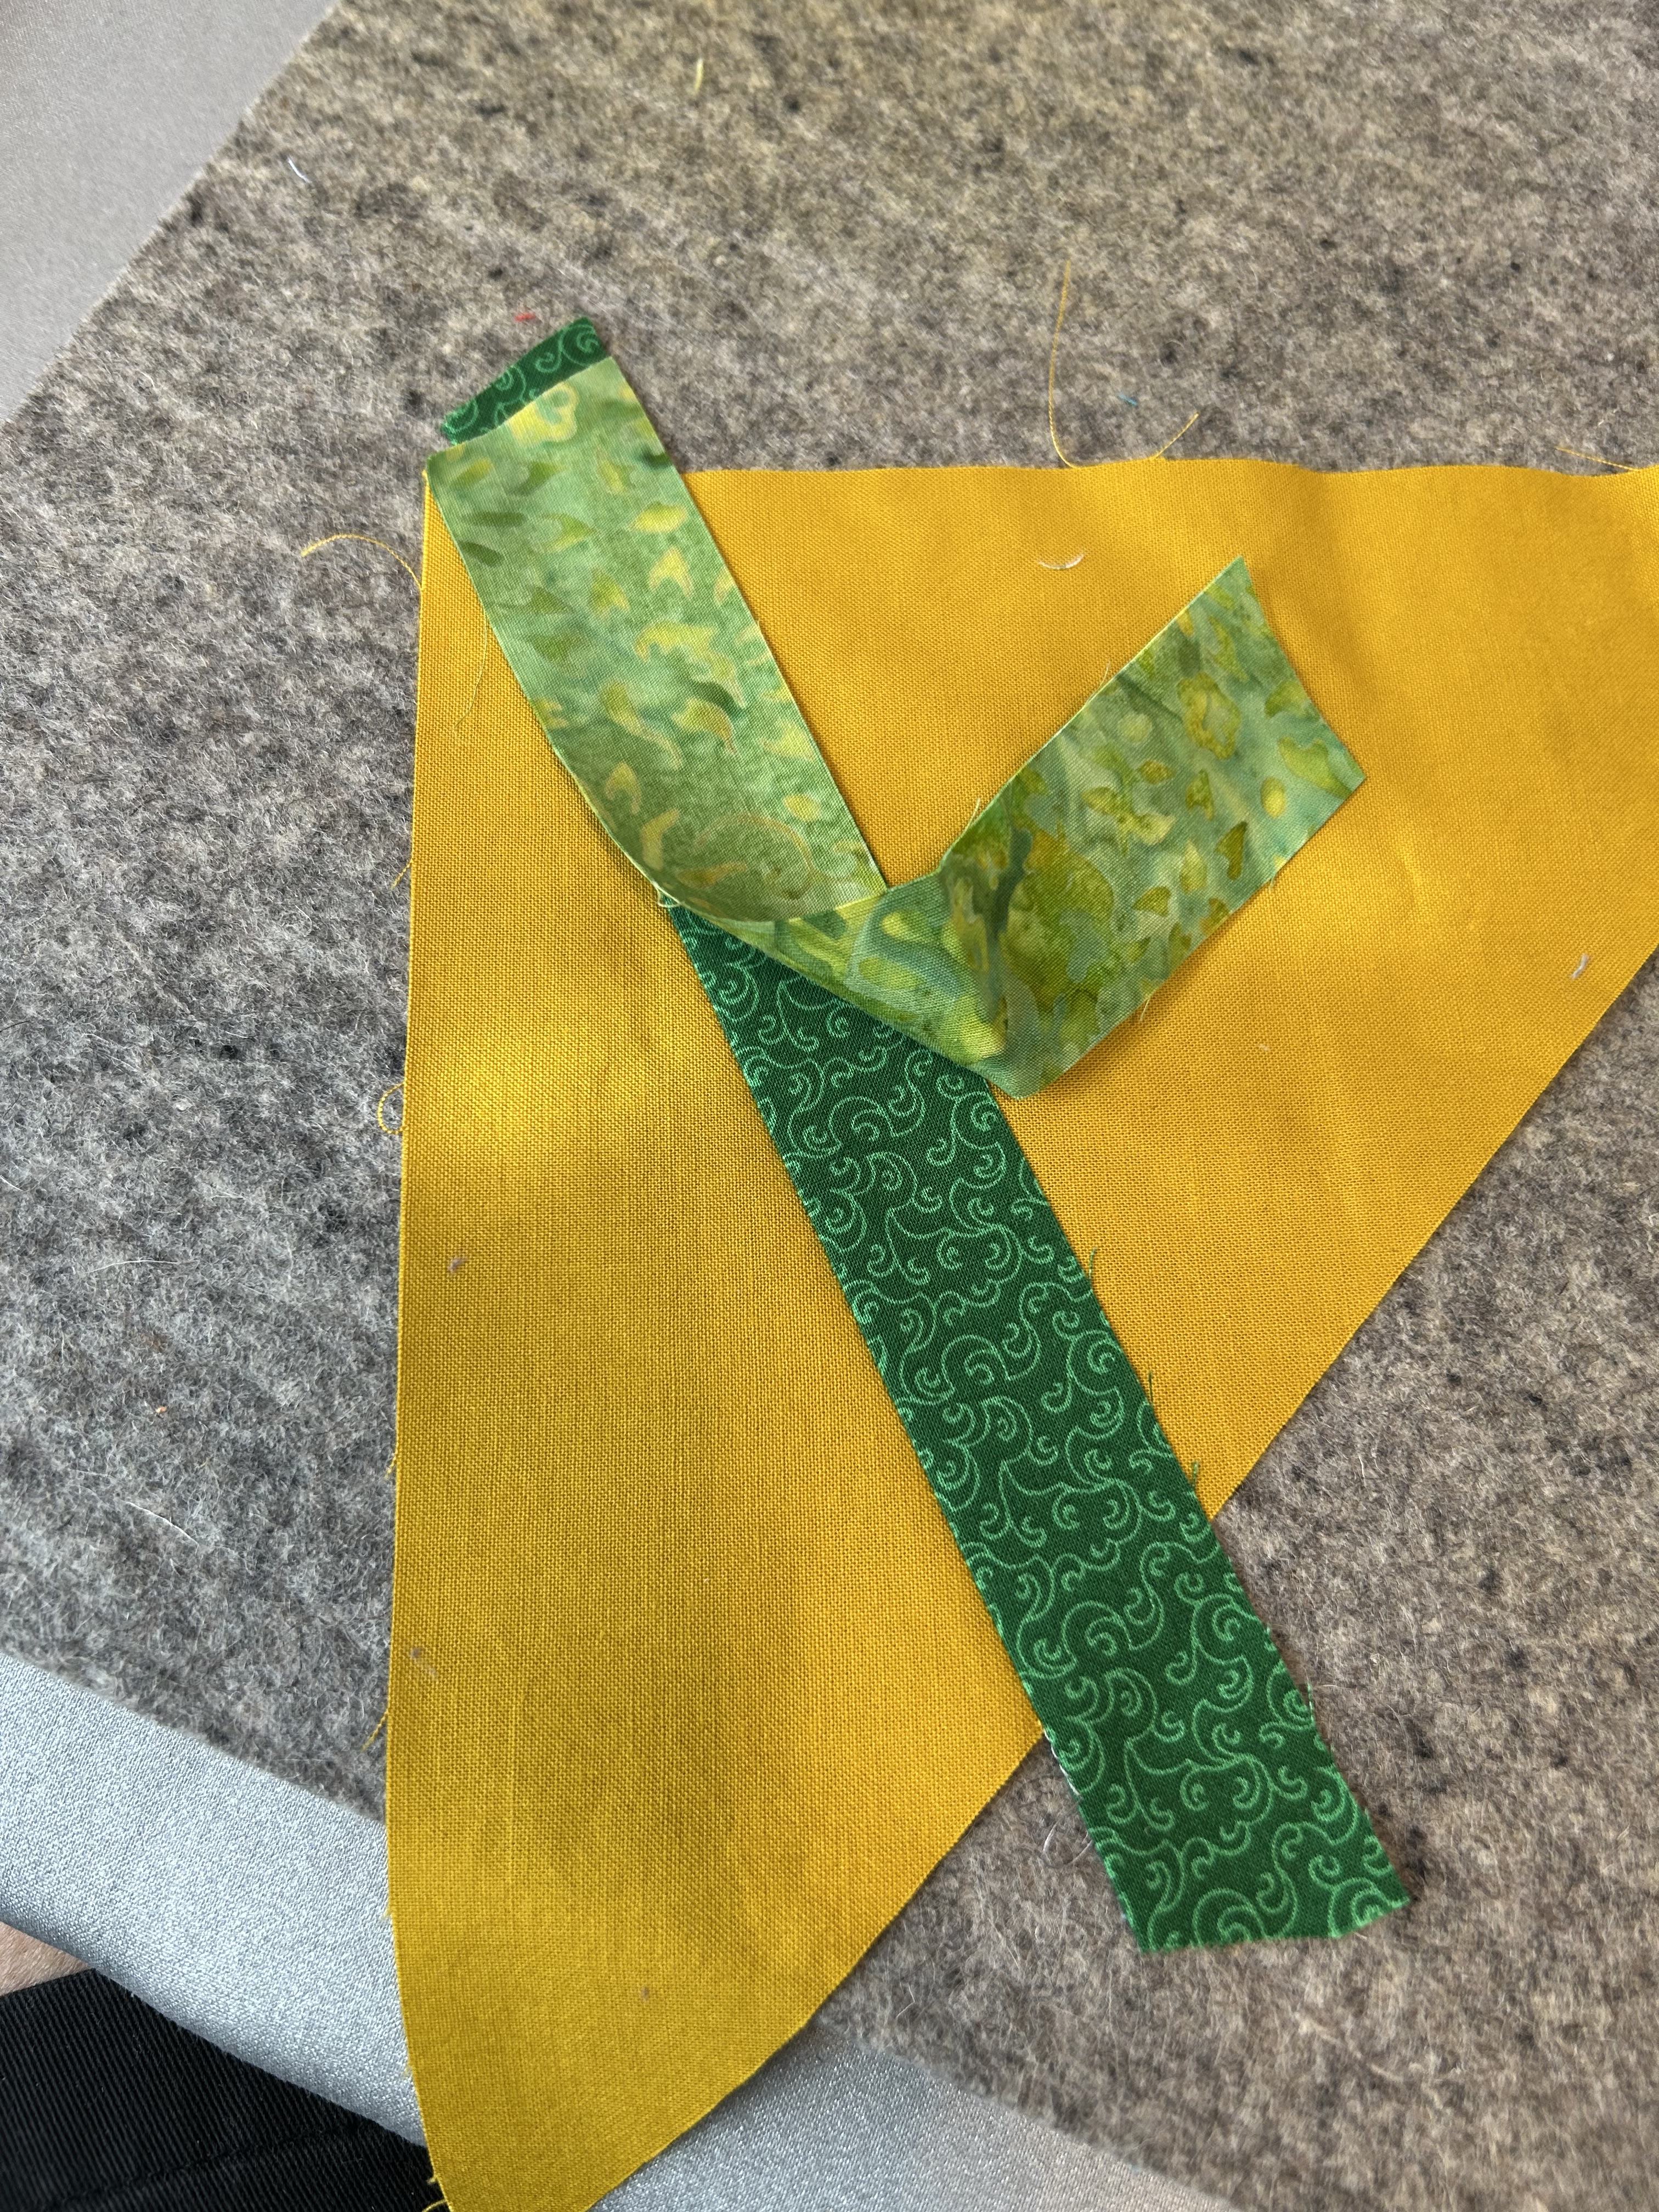
I spent some time yesterday cutting squares for “Spinny,” cutting them on the diagonal, and marking the first sewing line.
Still no rain here. It is, right now, cloudy, so maybe…
Beloved neighbor and I have been good about walking earlier in the morning this week. We were moving along at a good pace when…wow…we both stopped short to gander…
Wow! Beautiful birds, about a dozen, lined up along the pond edge up by the schools. I had to try to take a picture over the top of the fence–and I include it here so you can get an idea of the size of this bird. They are not large.
But what are they??? I’ve never seen this bird. We started reciting what we were seeing: bright orange short bills, pink legs, swimming feet, black underneath and a warm beautiful brown on the upper body and neck.
Beloved neighbor had an ID almost as soon as we got home.
Black-bellied Whistling Ducks. What?? This one was totally new to both of us.
I found this picture of one in flight.
Here’s a link so you can read more–and there is a link to the high-pitched whistling call they make. These ducks can and do sit in trees. Truly they are very different from other ducks.
Ann’s comments really helped me to make decisions about how to manage the Flower Pop quilt so that it has better proportions and doesn’t overwhelm me with needing LOTS more blocks and growing really big. My mind had been turning over mixing up things when Ann commented and made some suggestions about shortening the rows and using those blocks to make the quilt longer.
I’m loving the mix of tall and short flowers, rather than lining them up short and tall. Now I’m working more with color placement than height placement. And I’m reminded that I loved my Maine garden which had all sorts of flowers of varying heights and colors.
Now, five more blocks to make, and they are going much faster now that I’m well over the learning curve. And note that I’m sure I’ll be moving blocks around as I go.
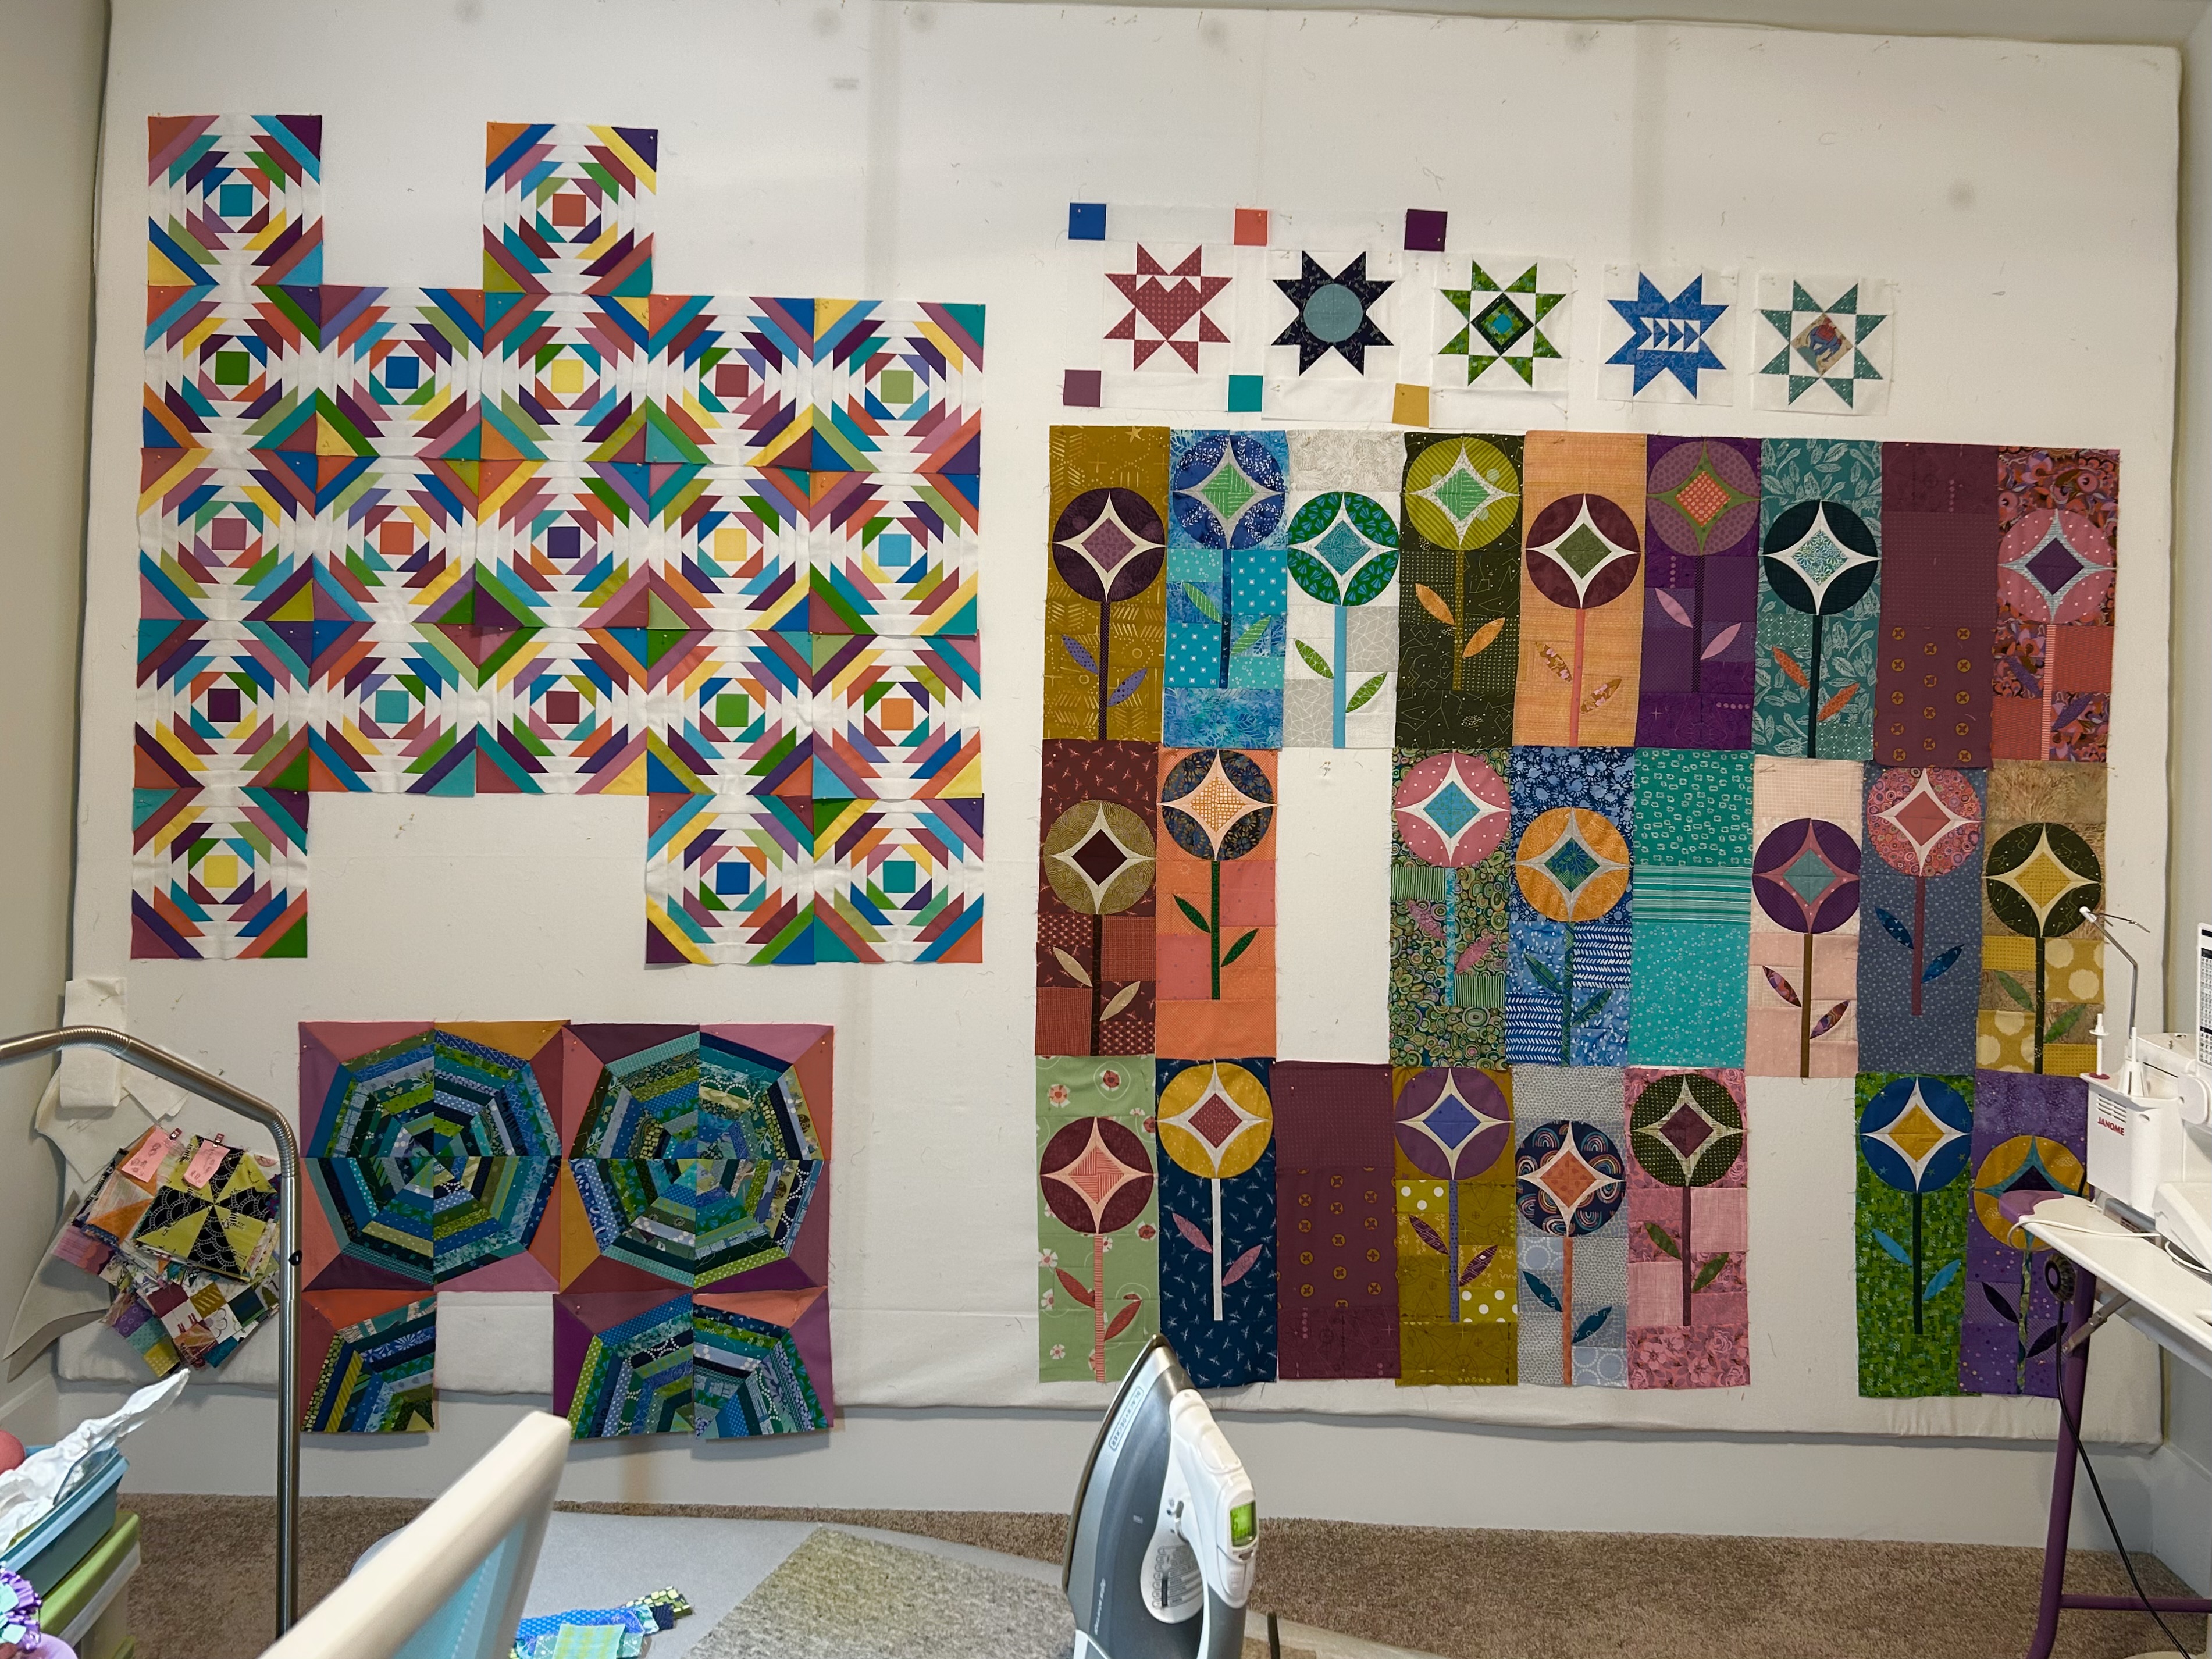
There are FIVE quilts in progress on my design wall.
Why on earth? you might ask…
Because two of them are intense (pineapple and Flower Pop), so I keep engaged by making a few blocks each day rather than just completing a whole quilt first.
Note: the star blocks above Flower Pop are Leila Gardunia’s design, and, LOL, they are intense too! But all three projects are so much fun. I have been using Tara Faughnan’s folded paper method for the foundation pieced centers, and so far, that method has worked just fine on the more intricate centers.
Flower Pop, designed by Sew Kind of Wonderful and which uses their speciality ruler, was a BIG learning curve for me–but I am down to two blocks now and one is already cut. I can make these blocks (7.5 by 19.5) pretty fast now. The slow part is chosing the fabrics and cutting the block parts. I’m not entirely happy with the size: about 63 wide by less than 60. But I will sew these blocks together before I make any other decisions about size and potential borders. As a mostly modern quilter, I don’t usually use borders now.
The pineapple block is 10 inches finished. It’s fun and is using up a ton of solid scraps. It will be 60 by 60 minimum, and maybe more. So a ways to go… Bit by bit, block by block, leader/ender progress.
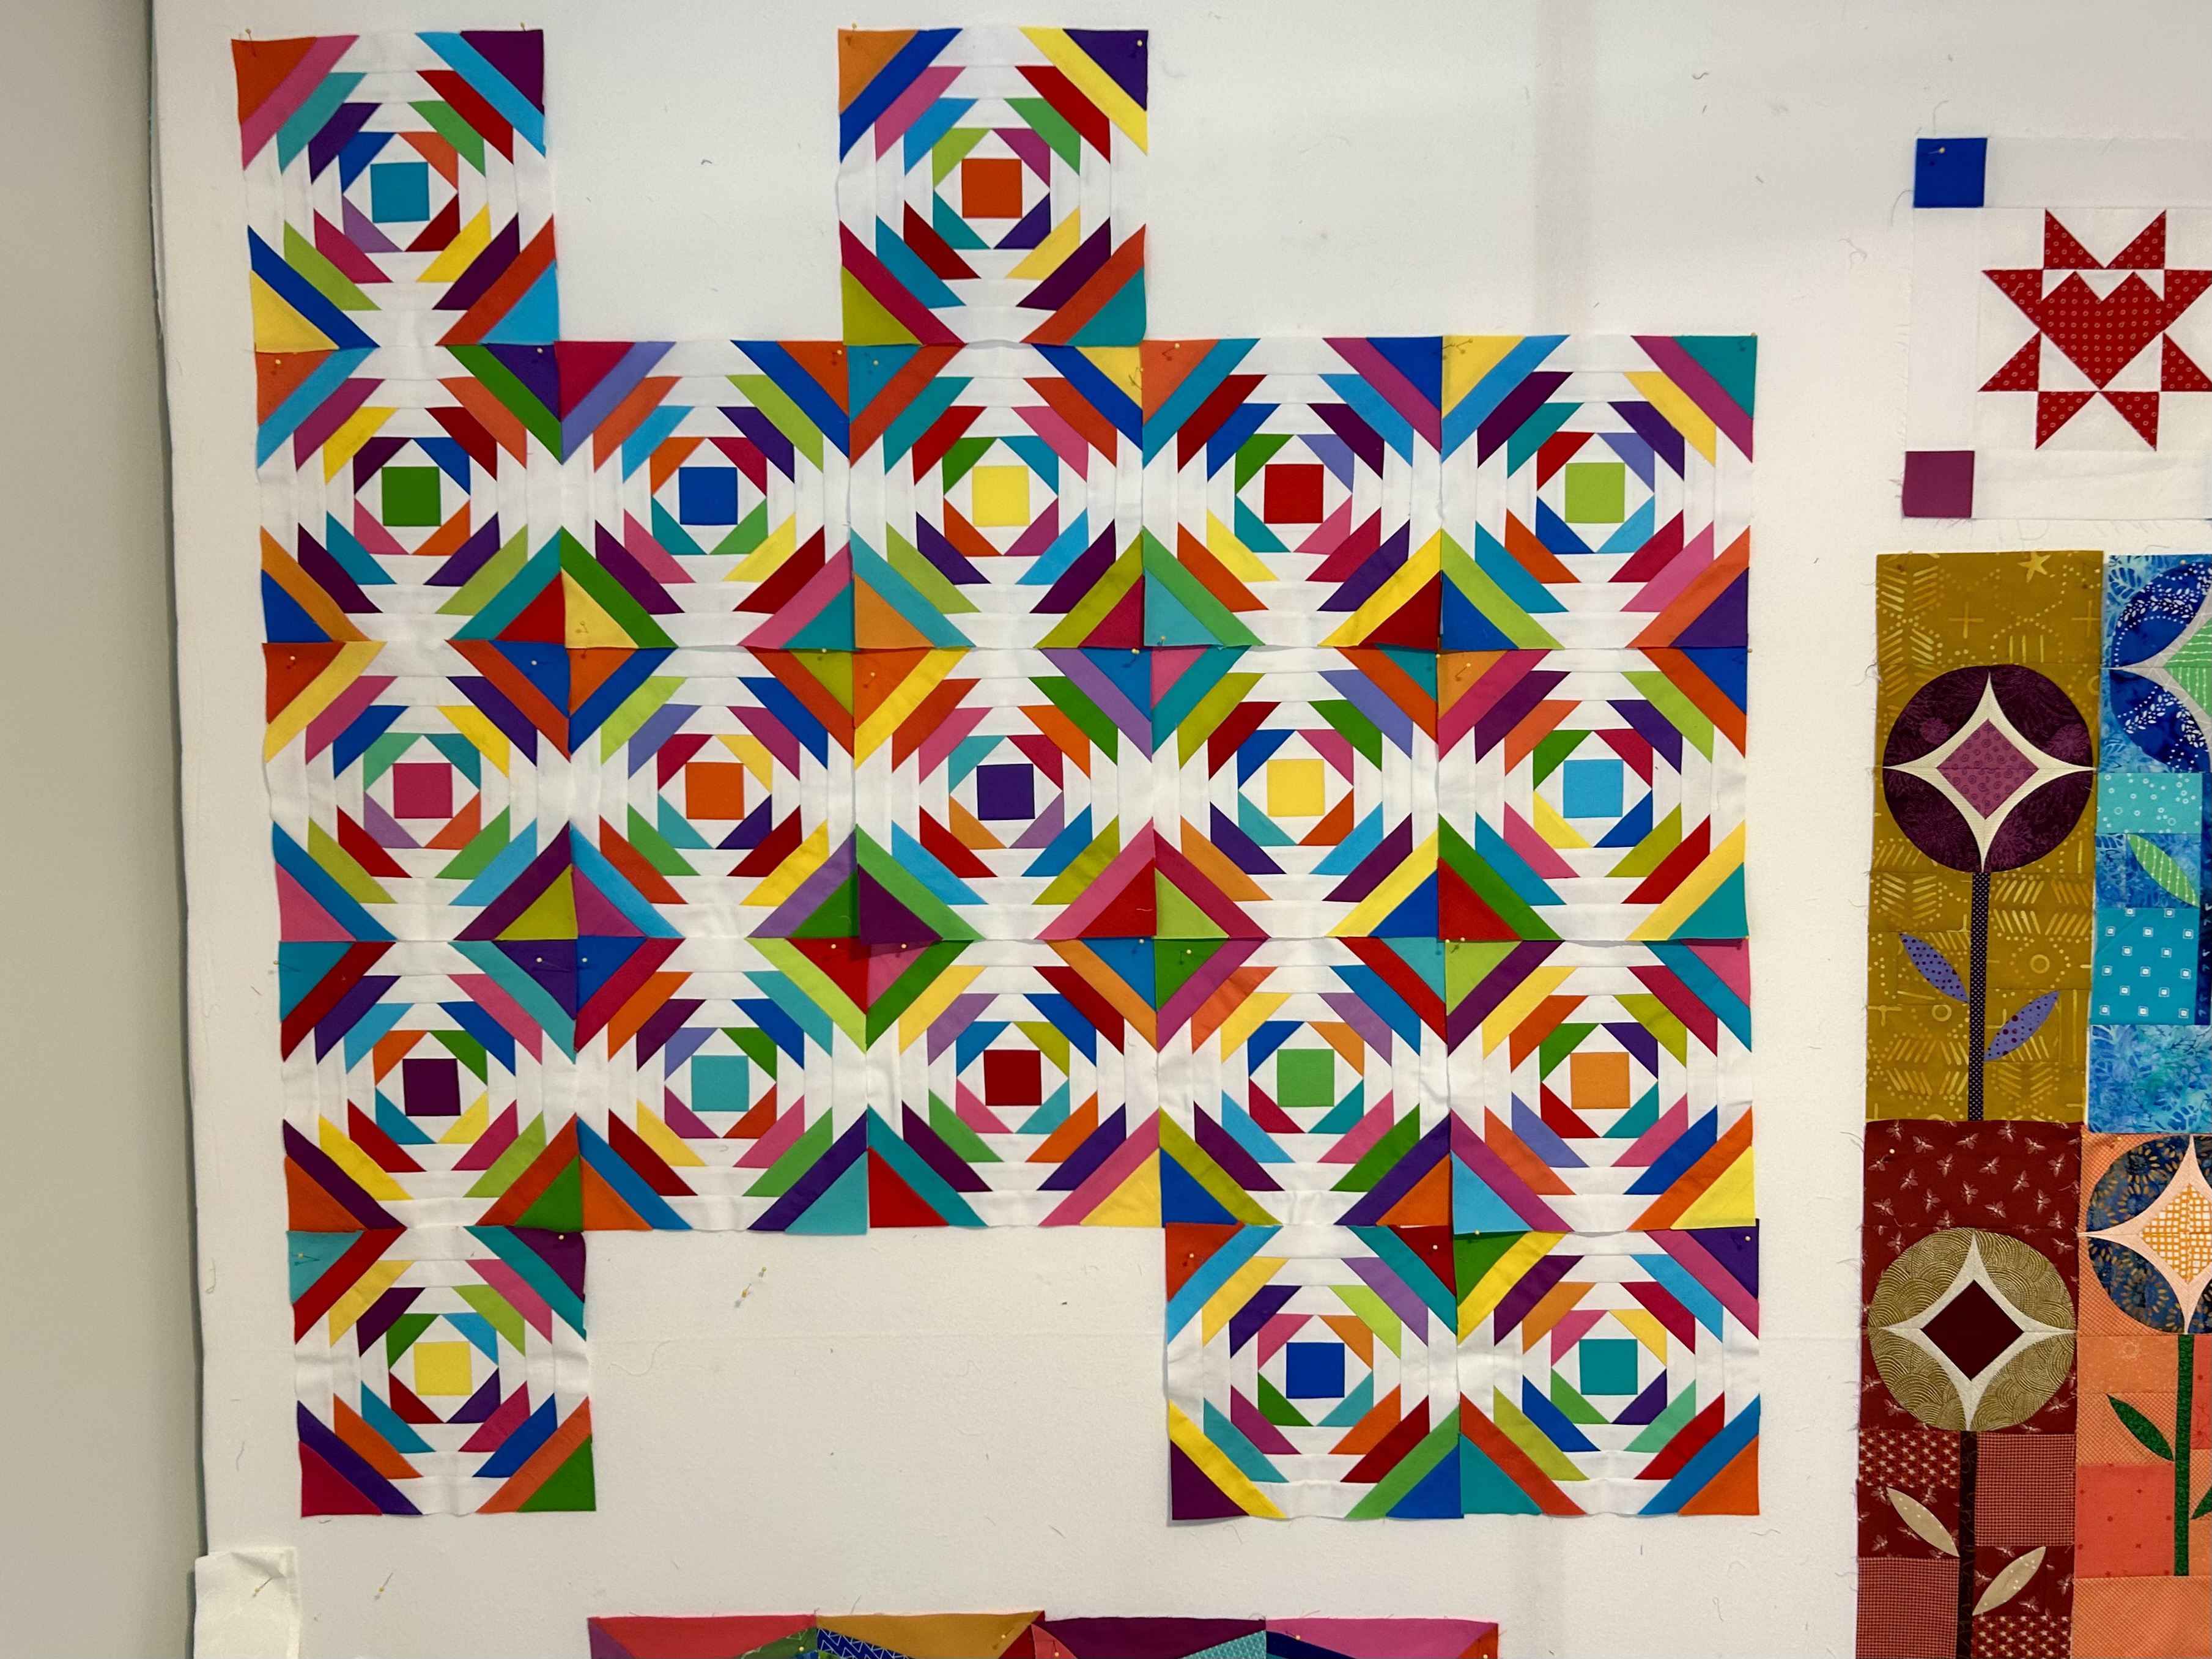
My current obsession is this scrappy block (16 inches finished) designed by Rachel LaBour of Stitched in Color, called “Spinny.” Mine will at least be 4 by 4 blocks, which is a good lap size at 64 by 64 inches.
Here’s what Rachel did–she made some blocks for a donation quilt and combined those with blocks made by others in her quilt group meant for a donation quilt.
Rachel and her sewing mates alternated cool and warm block centers with cool and warm edge pieces–and the fabrics are almost all prints. I was drawn to the star that forms in the center so decided to make all cool centers and warm edges made from solids so the stars would, I hoped, become more dominant.
Before Rachel finished her pattern–on her blog we begged her to make and sell her pattern so we could try it–I tried to guess measurements and made this trial block–which has some errors due to not trimming well and the edges are too narrow and it is VERY big. But I do like it so am hand quilting it and will use it as a table topper or gift it.
Boy! Talk about using up scraps, especially the strips in bins which I now have separated by colors! I don’t know, I might have to make another block with warm centers. Or…mix the warm/cool centers, like Rachel did. I think the stars would stand out as they are solids and would be more graphic than prints. Or, maybe, put 4 warm blocks in the center surrounded by cool blocks. One never knows…
The pile of blocks on the bottom left of the design wall are blocks for another “Patches and Pinwheels” donation quilt. Bonnie Hunter designed this pattern. These blocks are waiting for room on the design wall. Here’s one I made earlier this year.
And I have other projects that I am dying to start, but I am making myself wait until this design wall is wrapped up or, LOL again, mostly wrapped up.
I am having fun, and that’s the whole thing of it for me.
When conceptual genes were passed out, I didn’t get enough of them–which is why I like to work on a design wall.
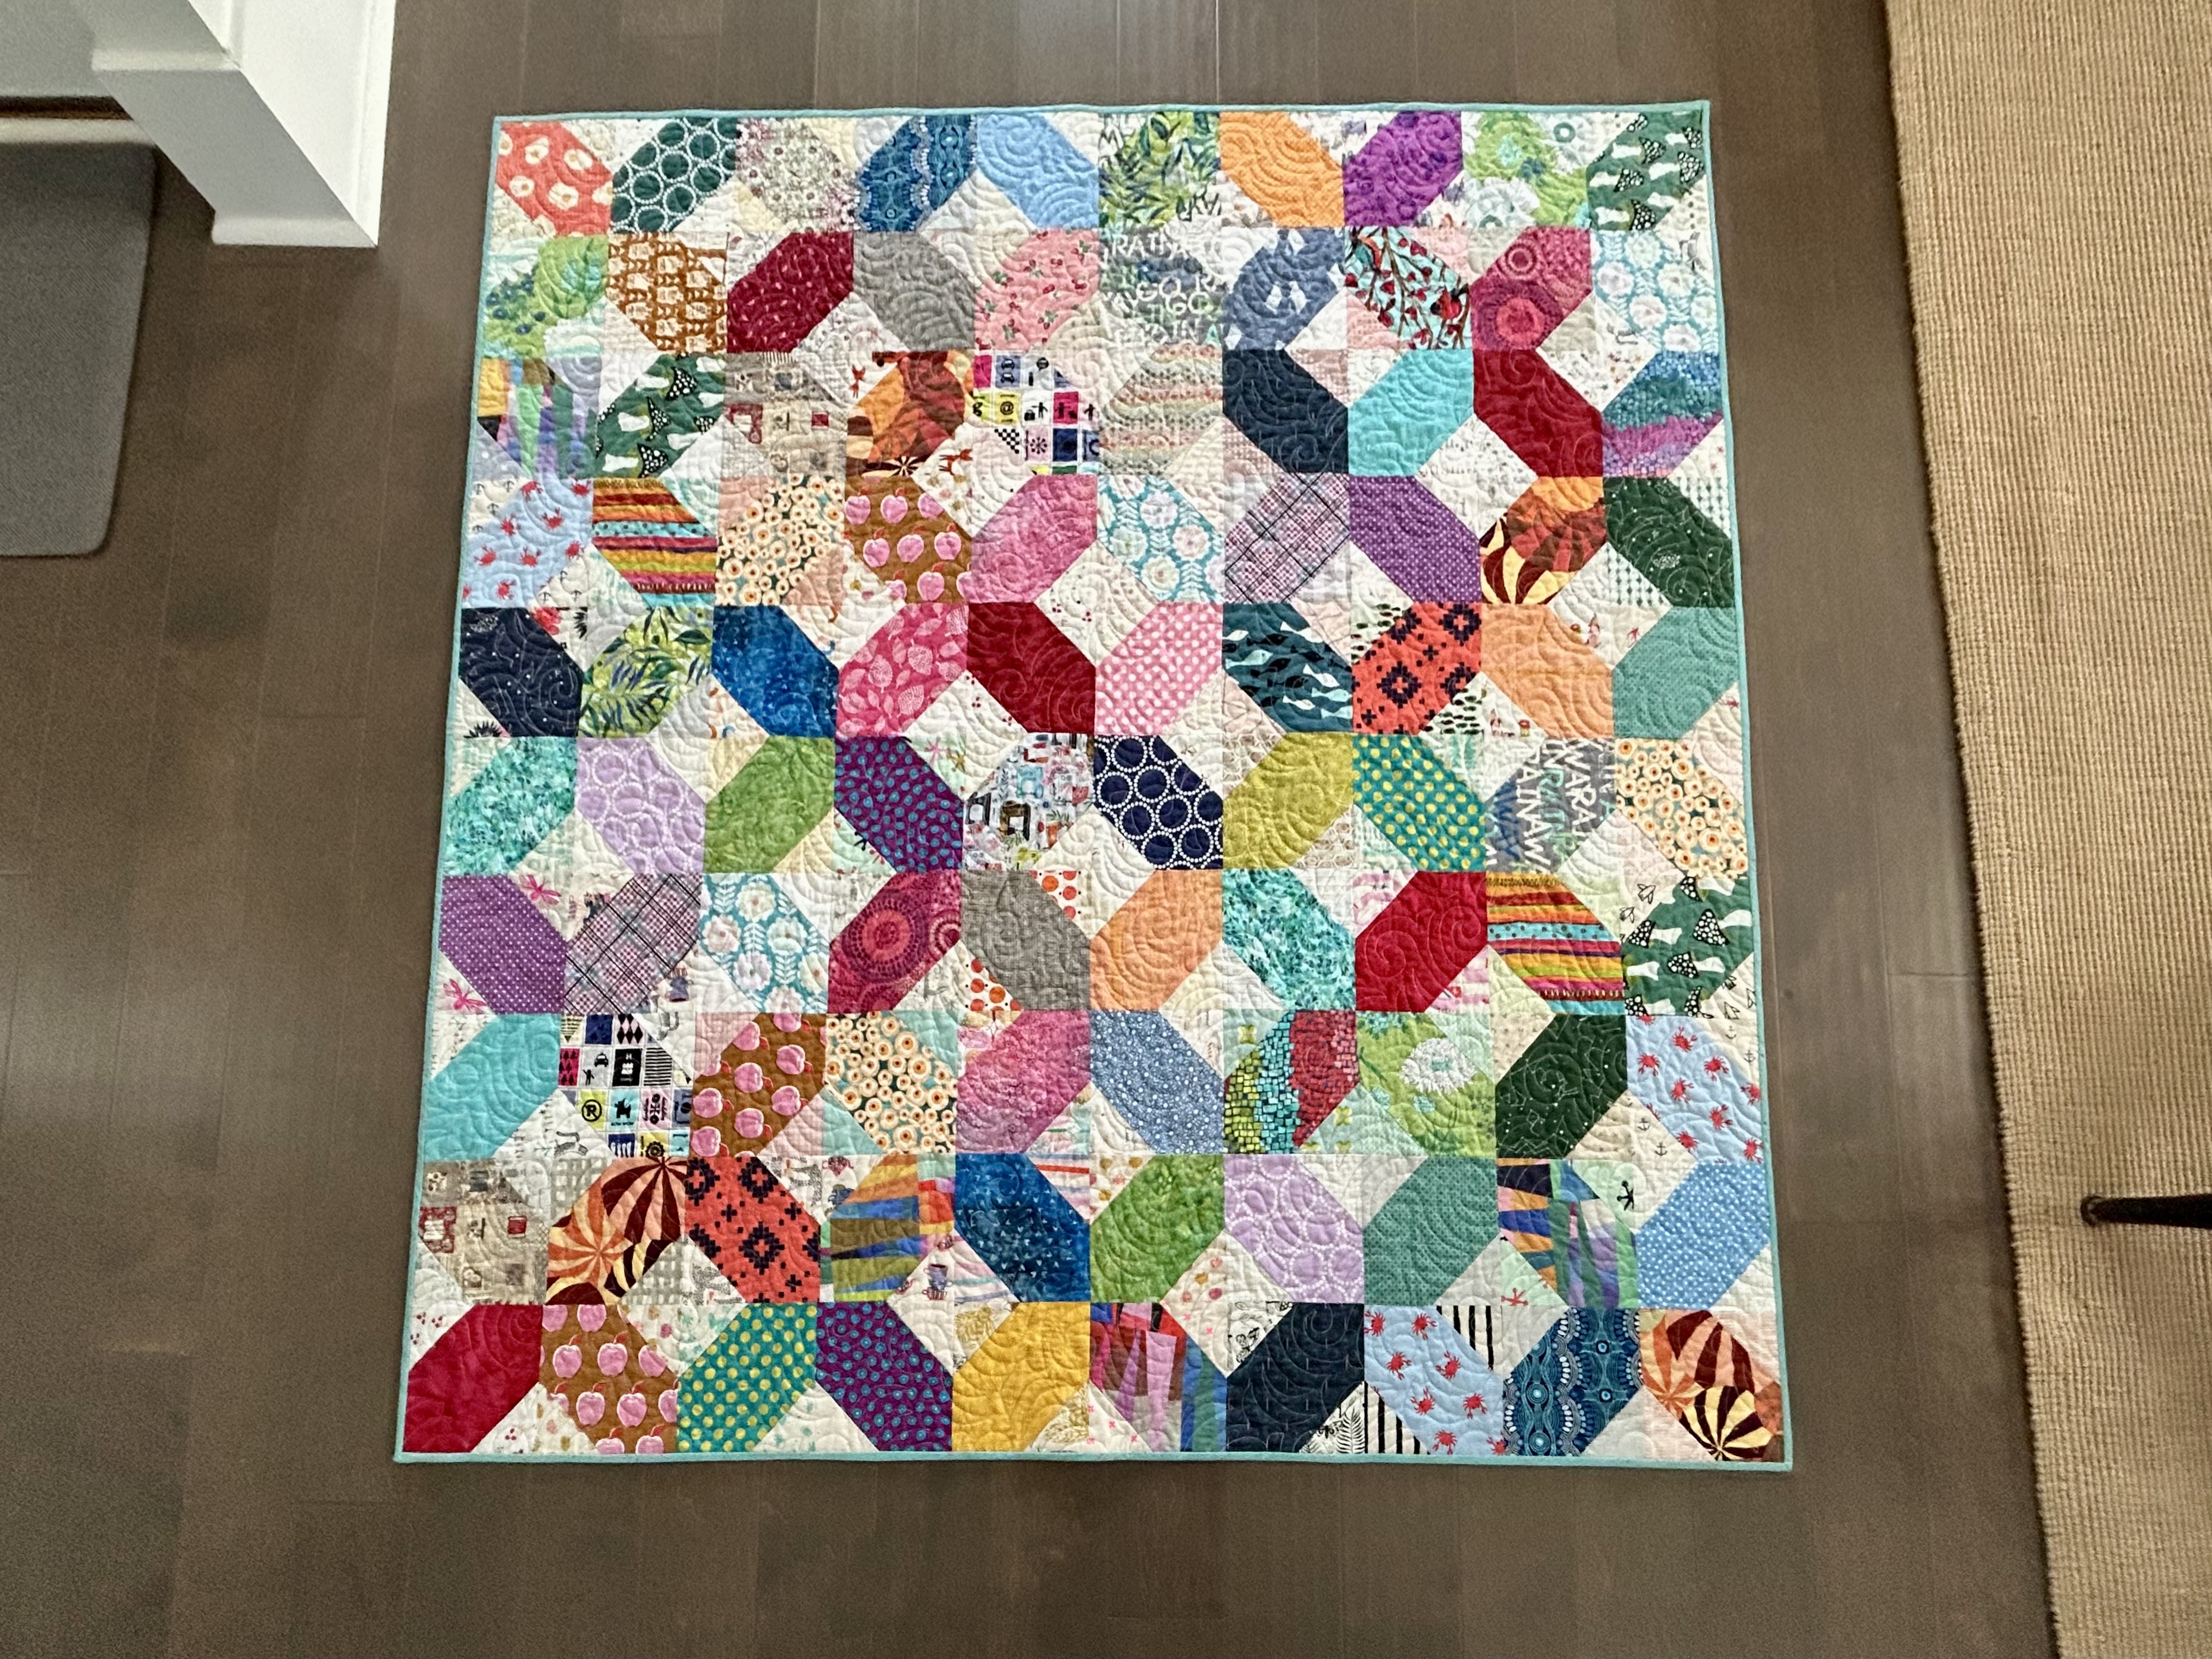
I thought this “XO” block, seen on Rachael LaBour’s blog “Stitched in Color” (one of my very favorite blogs), would be two separate blocks: an X block and an O block. Nope, putting two X blocks side by side makes the O block in between–and once your eye “sees” the O block, it travels down the row of O blocks.
I was happy to see when I showed this quilt at a recent quilt meeting that many people had trouble seeing the O block as well–until I pointed it out.
So, this quilt has a little “magic” involved.
This quilt is 60 3/4 inches square–a nice size for a donation quilt. The block is easy to make: cut a 6.5 square, lay a 3.5 inch square on two diagonal corners (after marking a sewing line from corner to corner), and sew with a scant seam. Trim and press. Sew four of your blocks together to make a 12-inch X block.
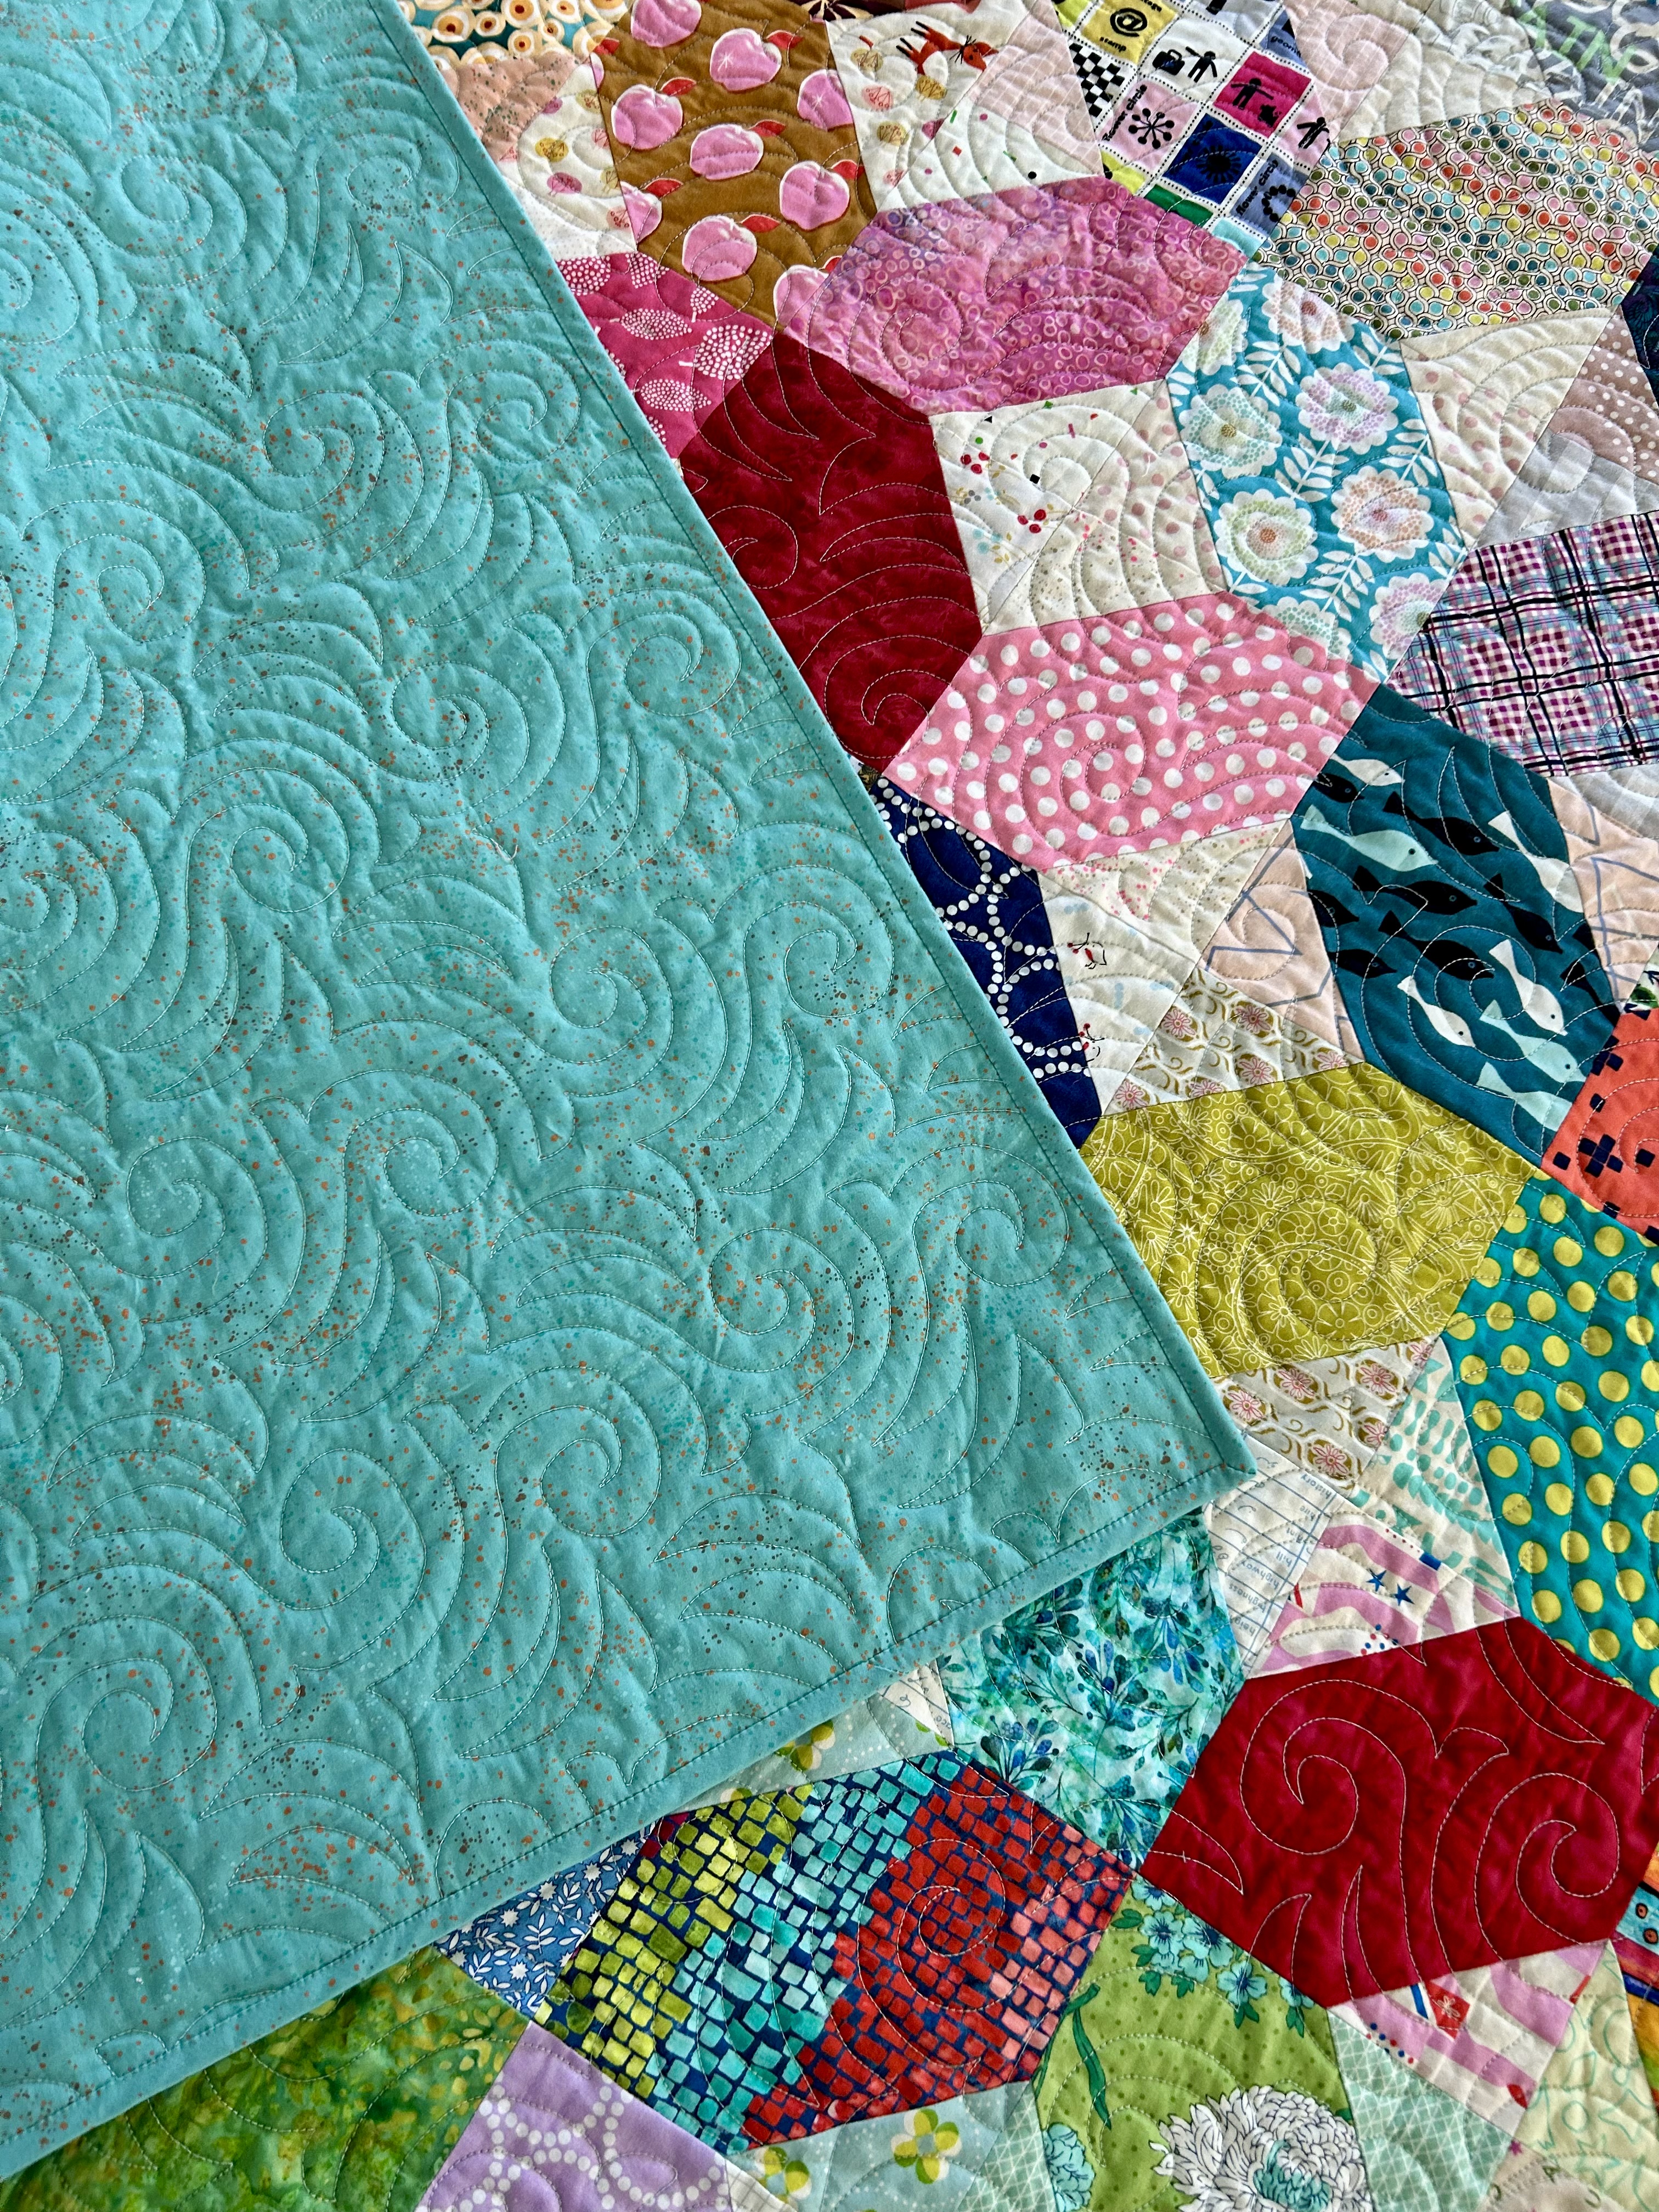
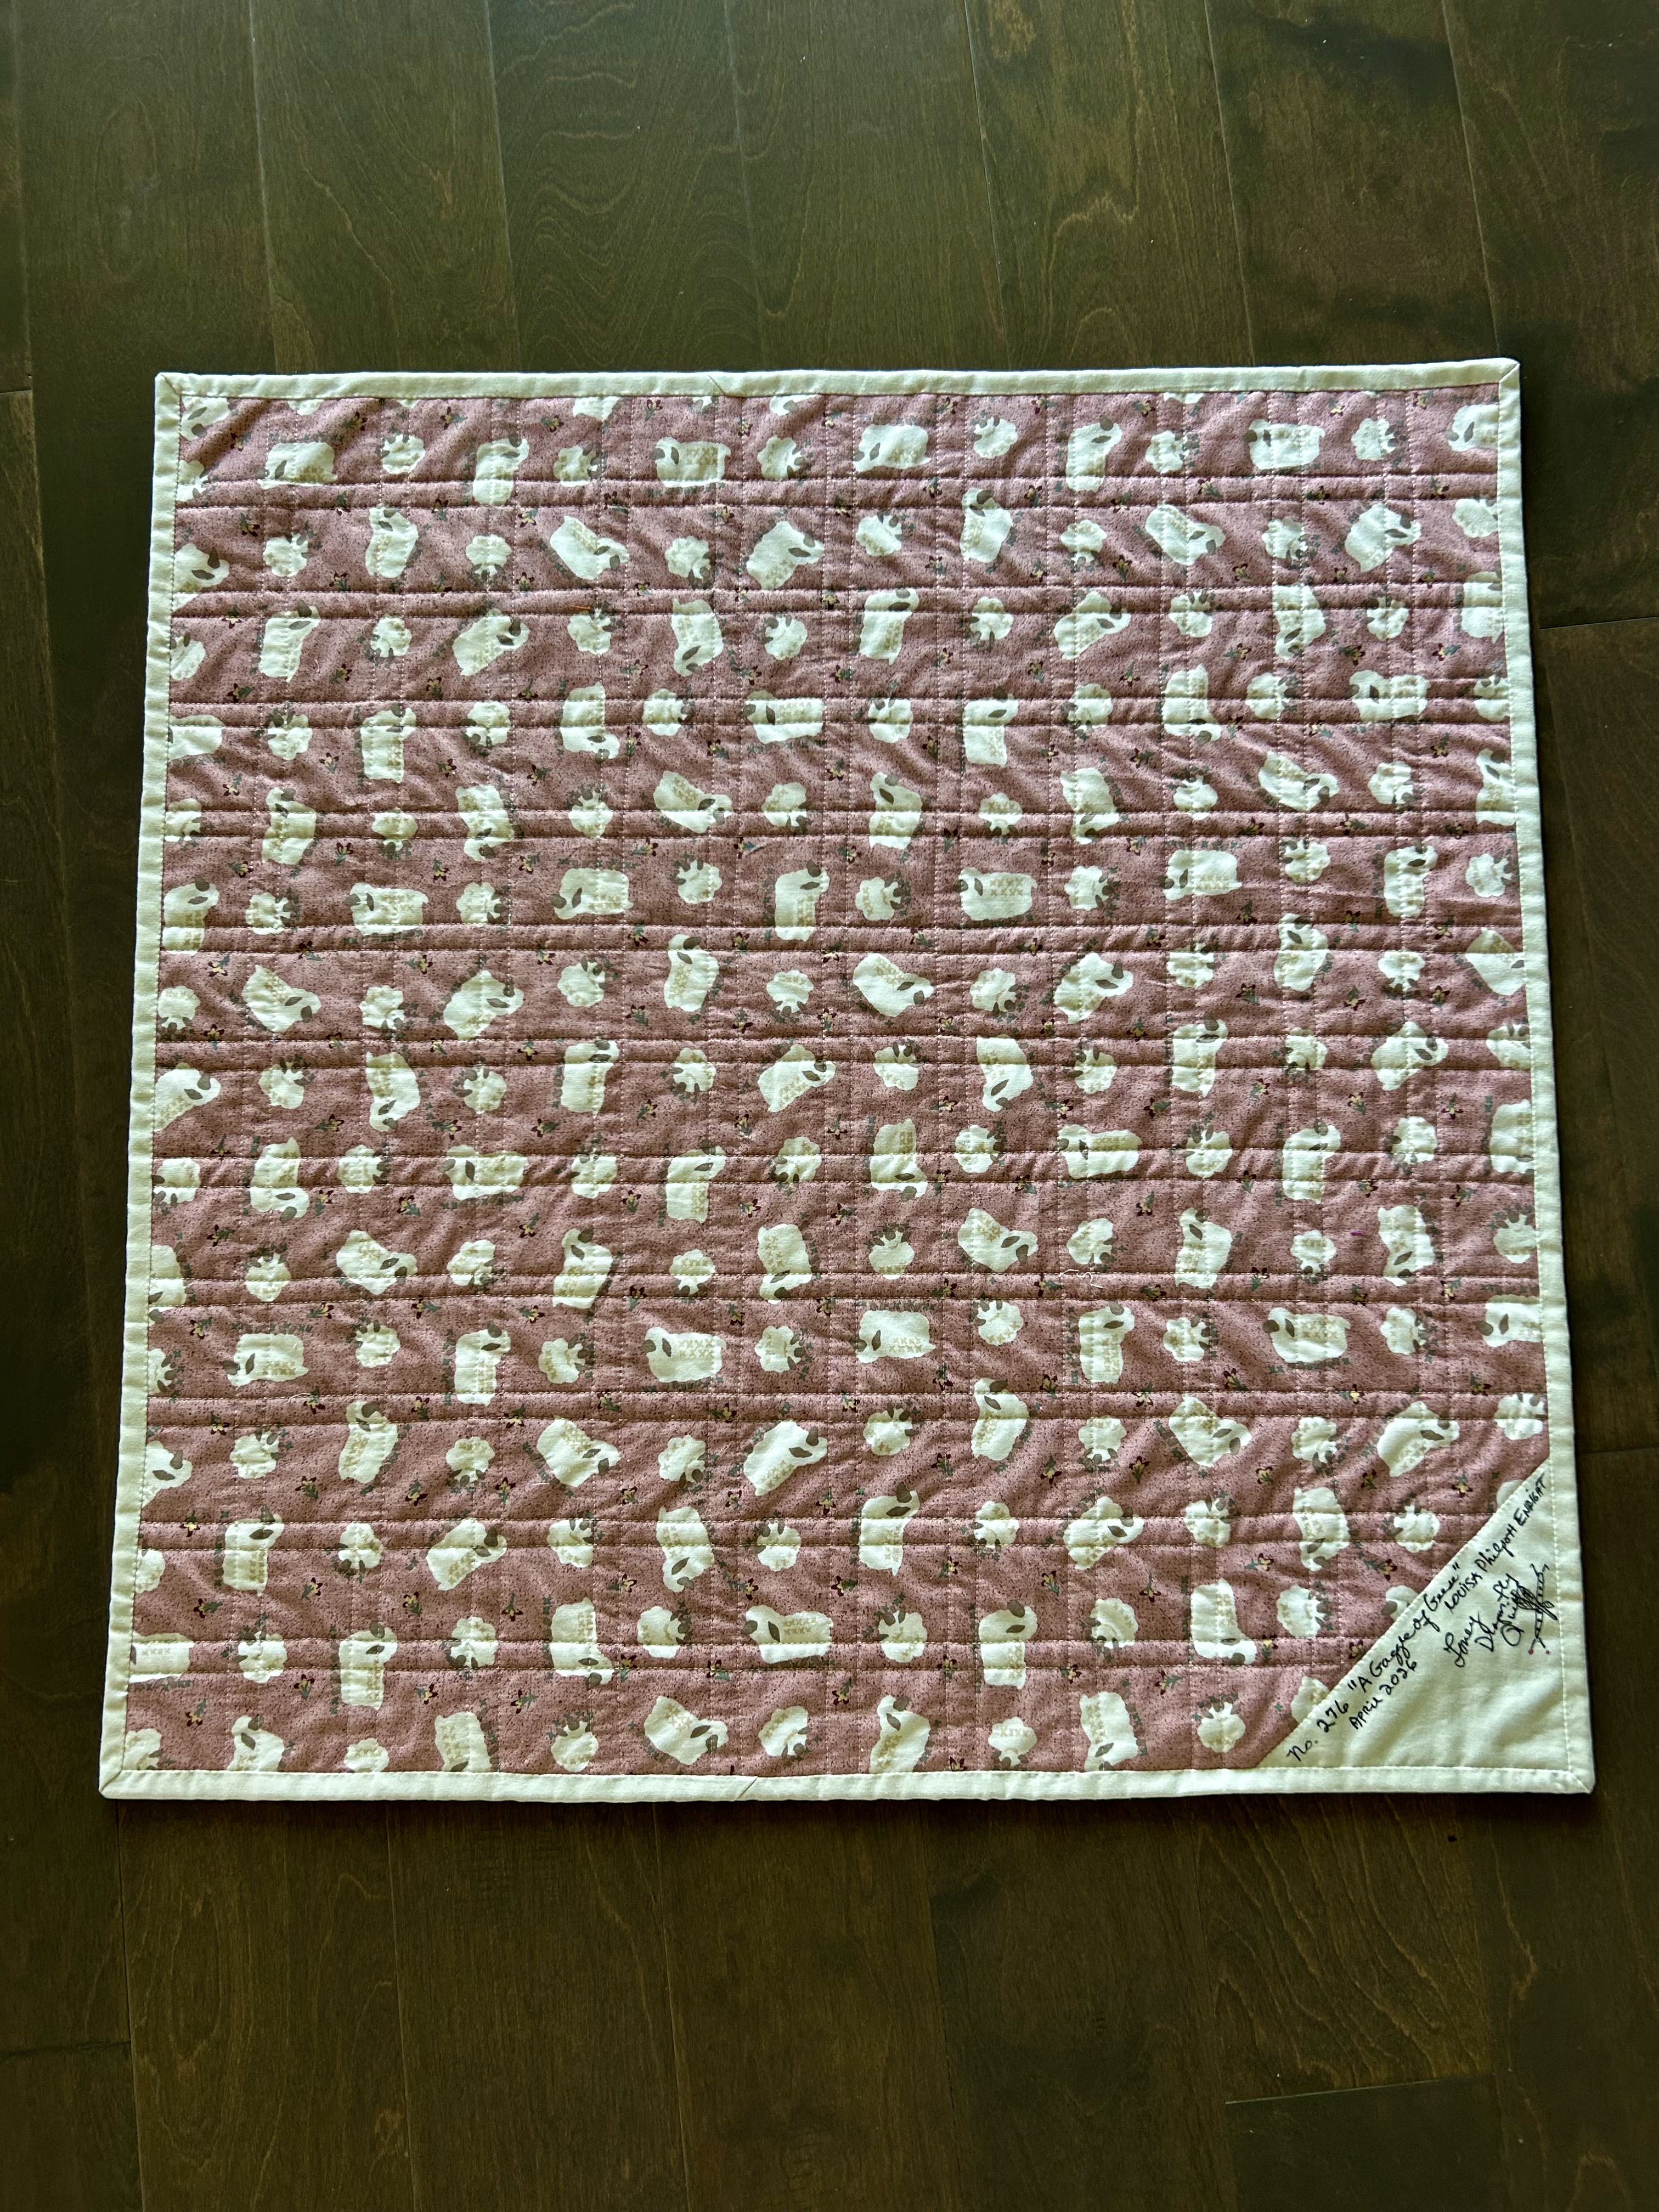
The backing and binding is Rashida Coleman Hale’s “Metallic Turquoise” (Ruby Star) 752106503175. (I guess I do like one fabric for the backing in a scrappy quilt, most of the time.) The thread is Signature 40 wt cotton “Misty Jade.” And the pantograph I is Hermione Agee’s “Check and Chase.”
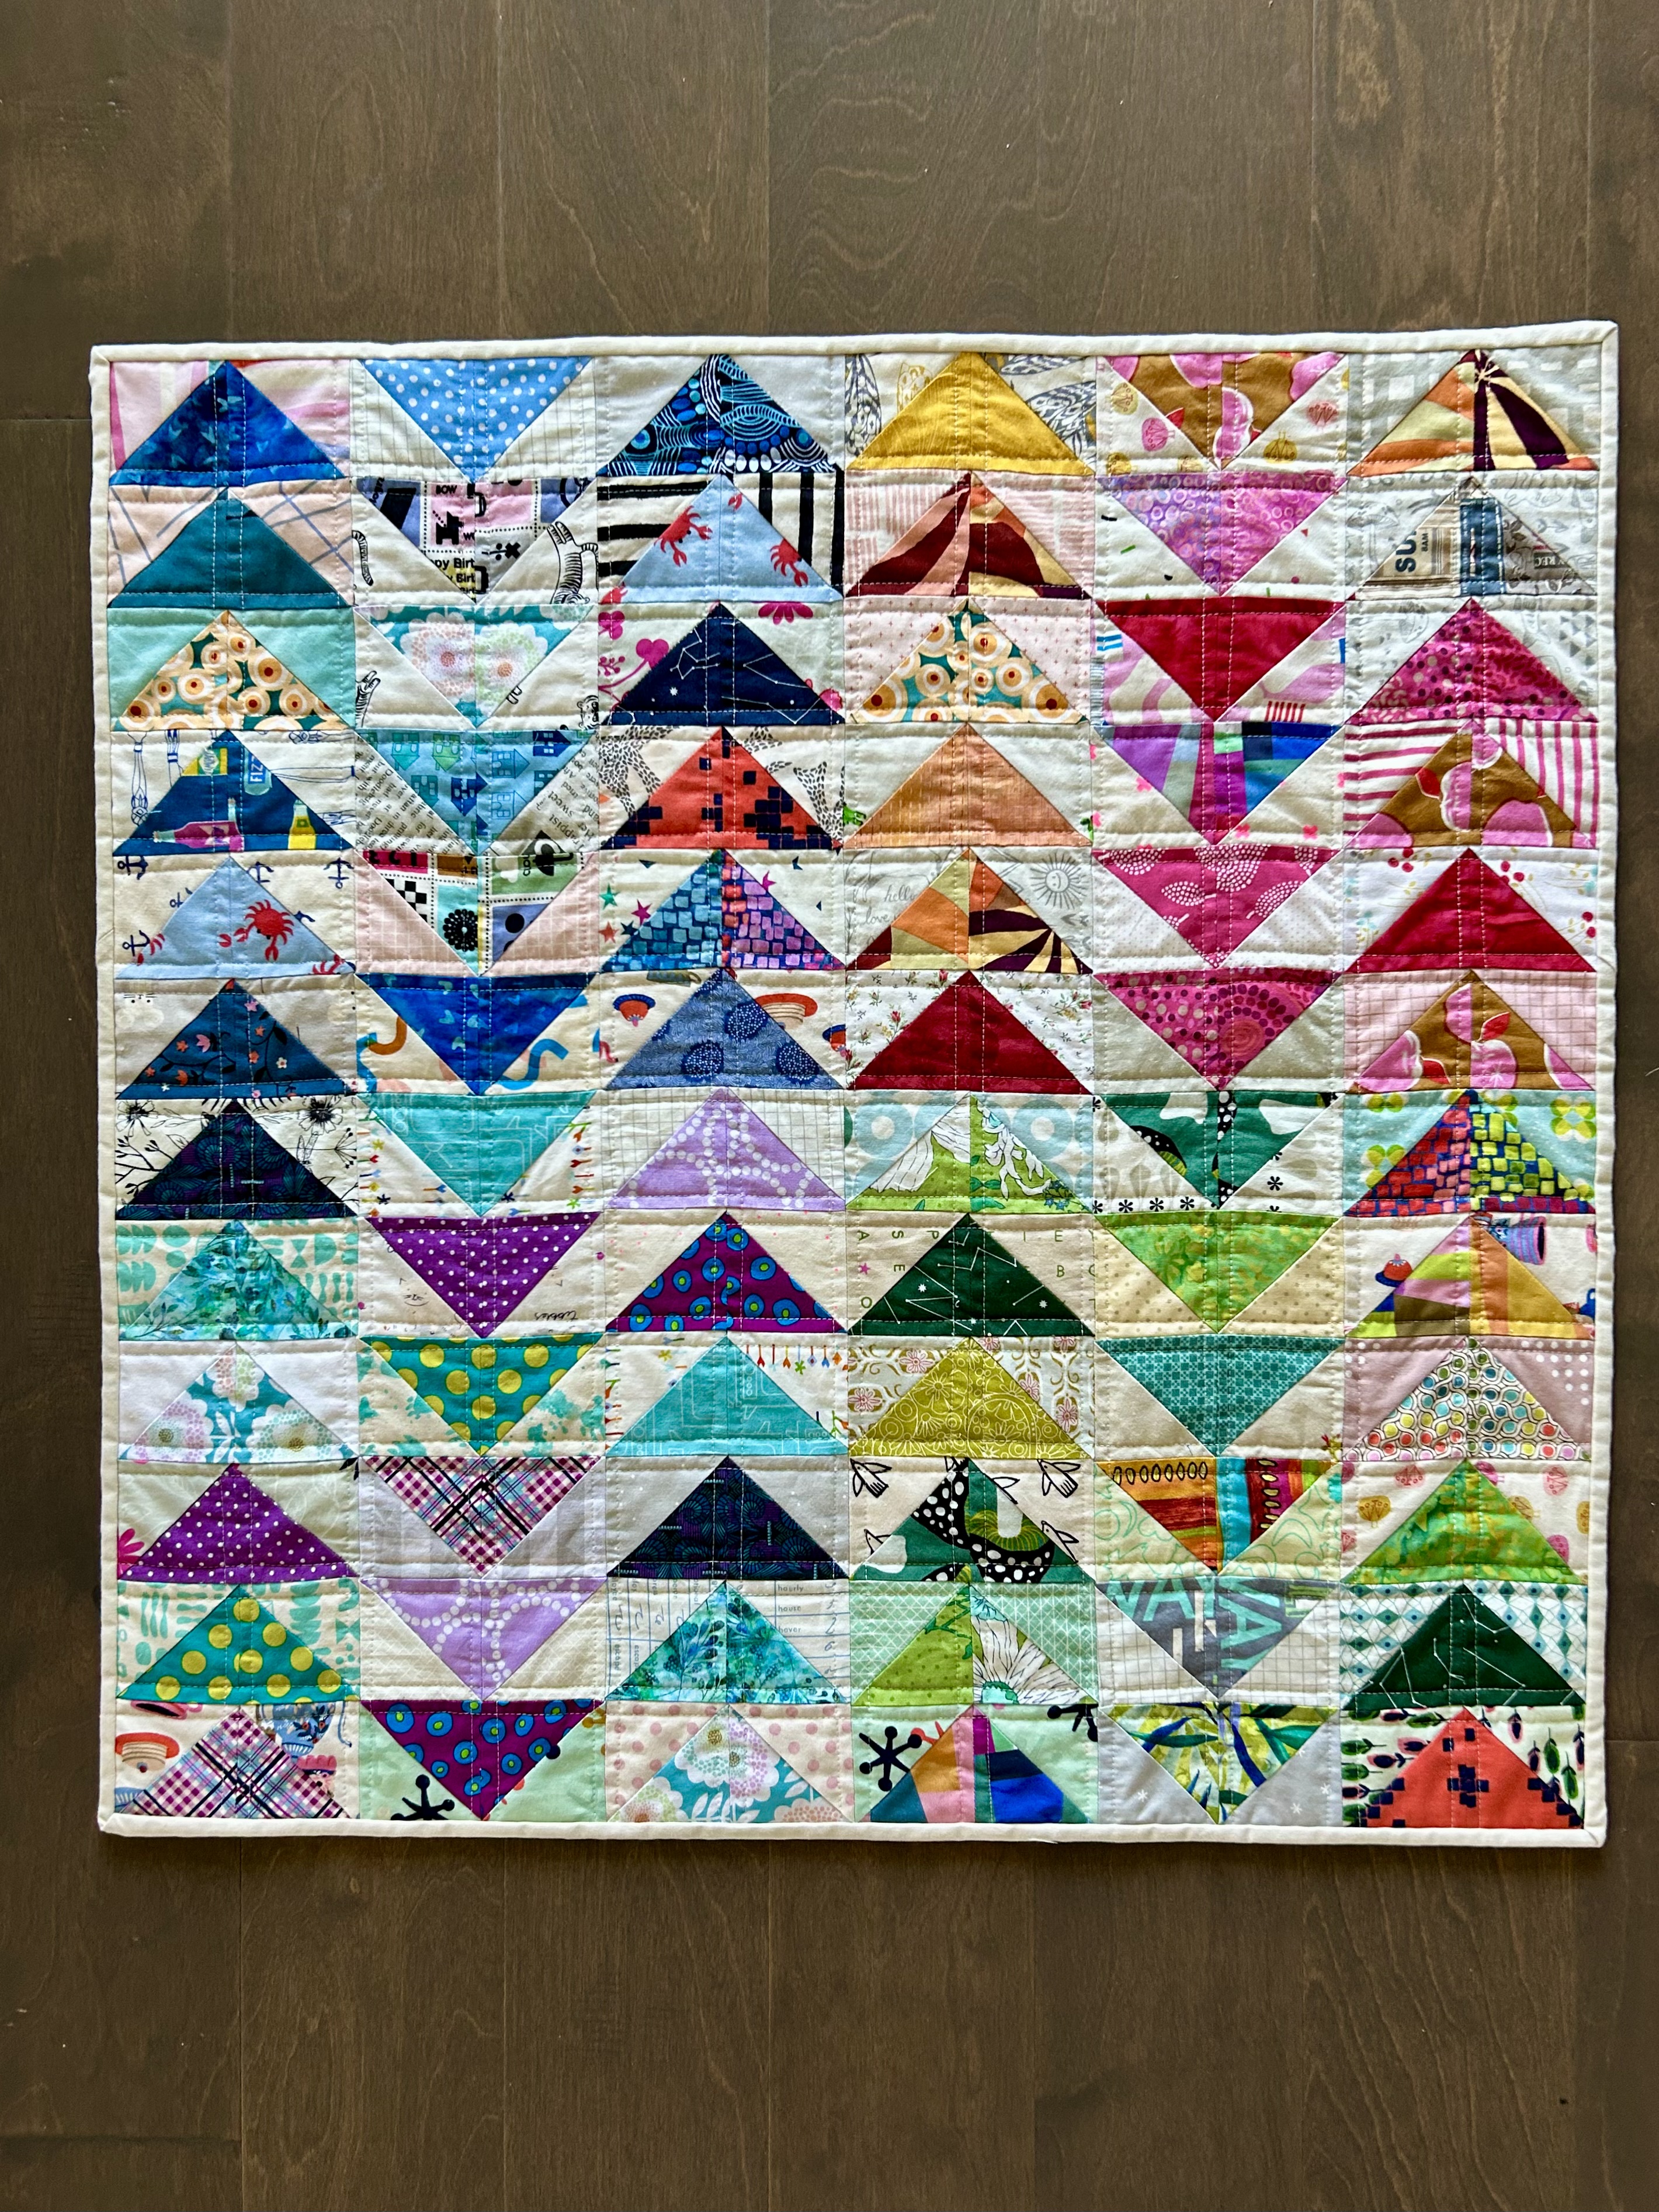
As I posted earlier, I couldn’t throw out the larger half-square triangles that landed when I trimmed the small squares. And as I had TWO of each combination, I sewed them together and made this little table topper–which I think is just so, so cute. I love it! But I’m a sucker for flying geese.
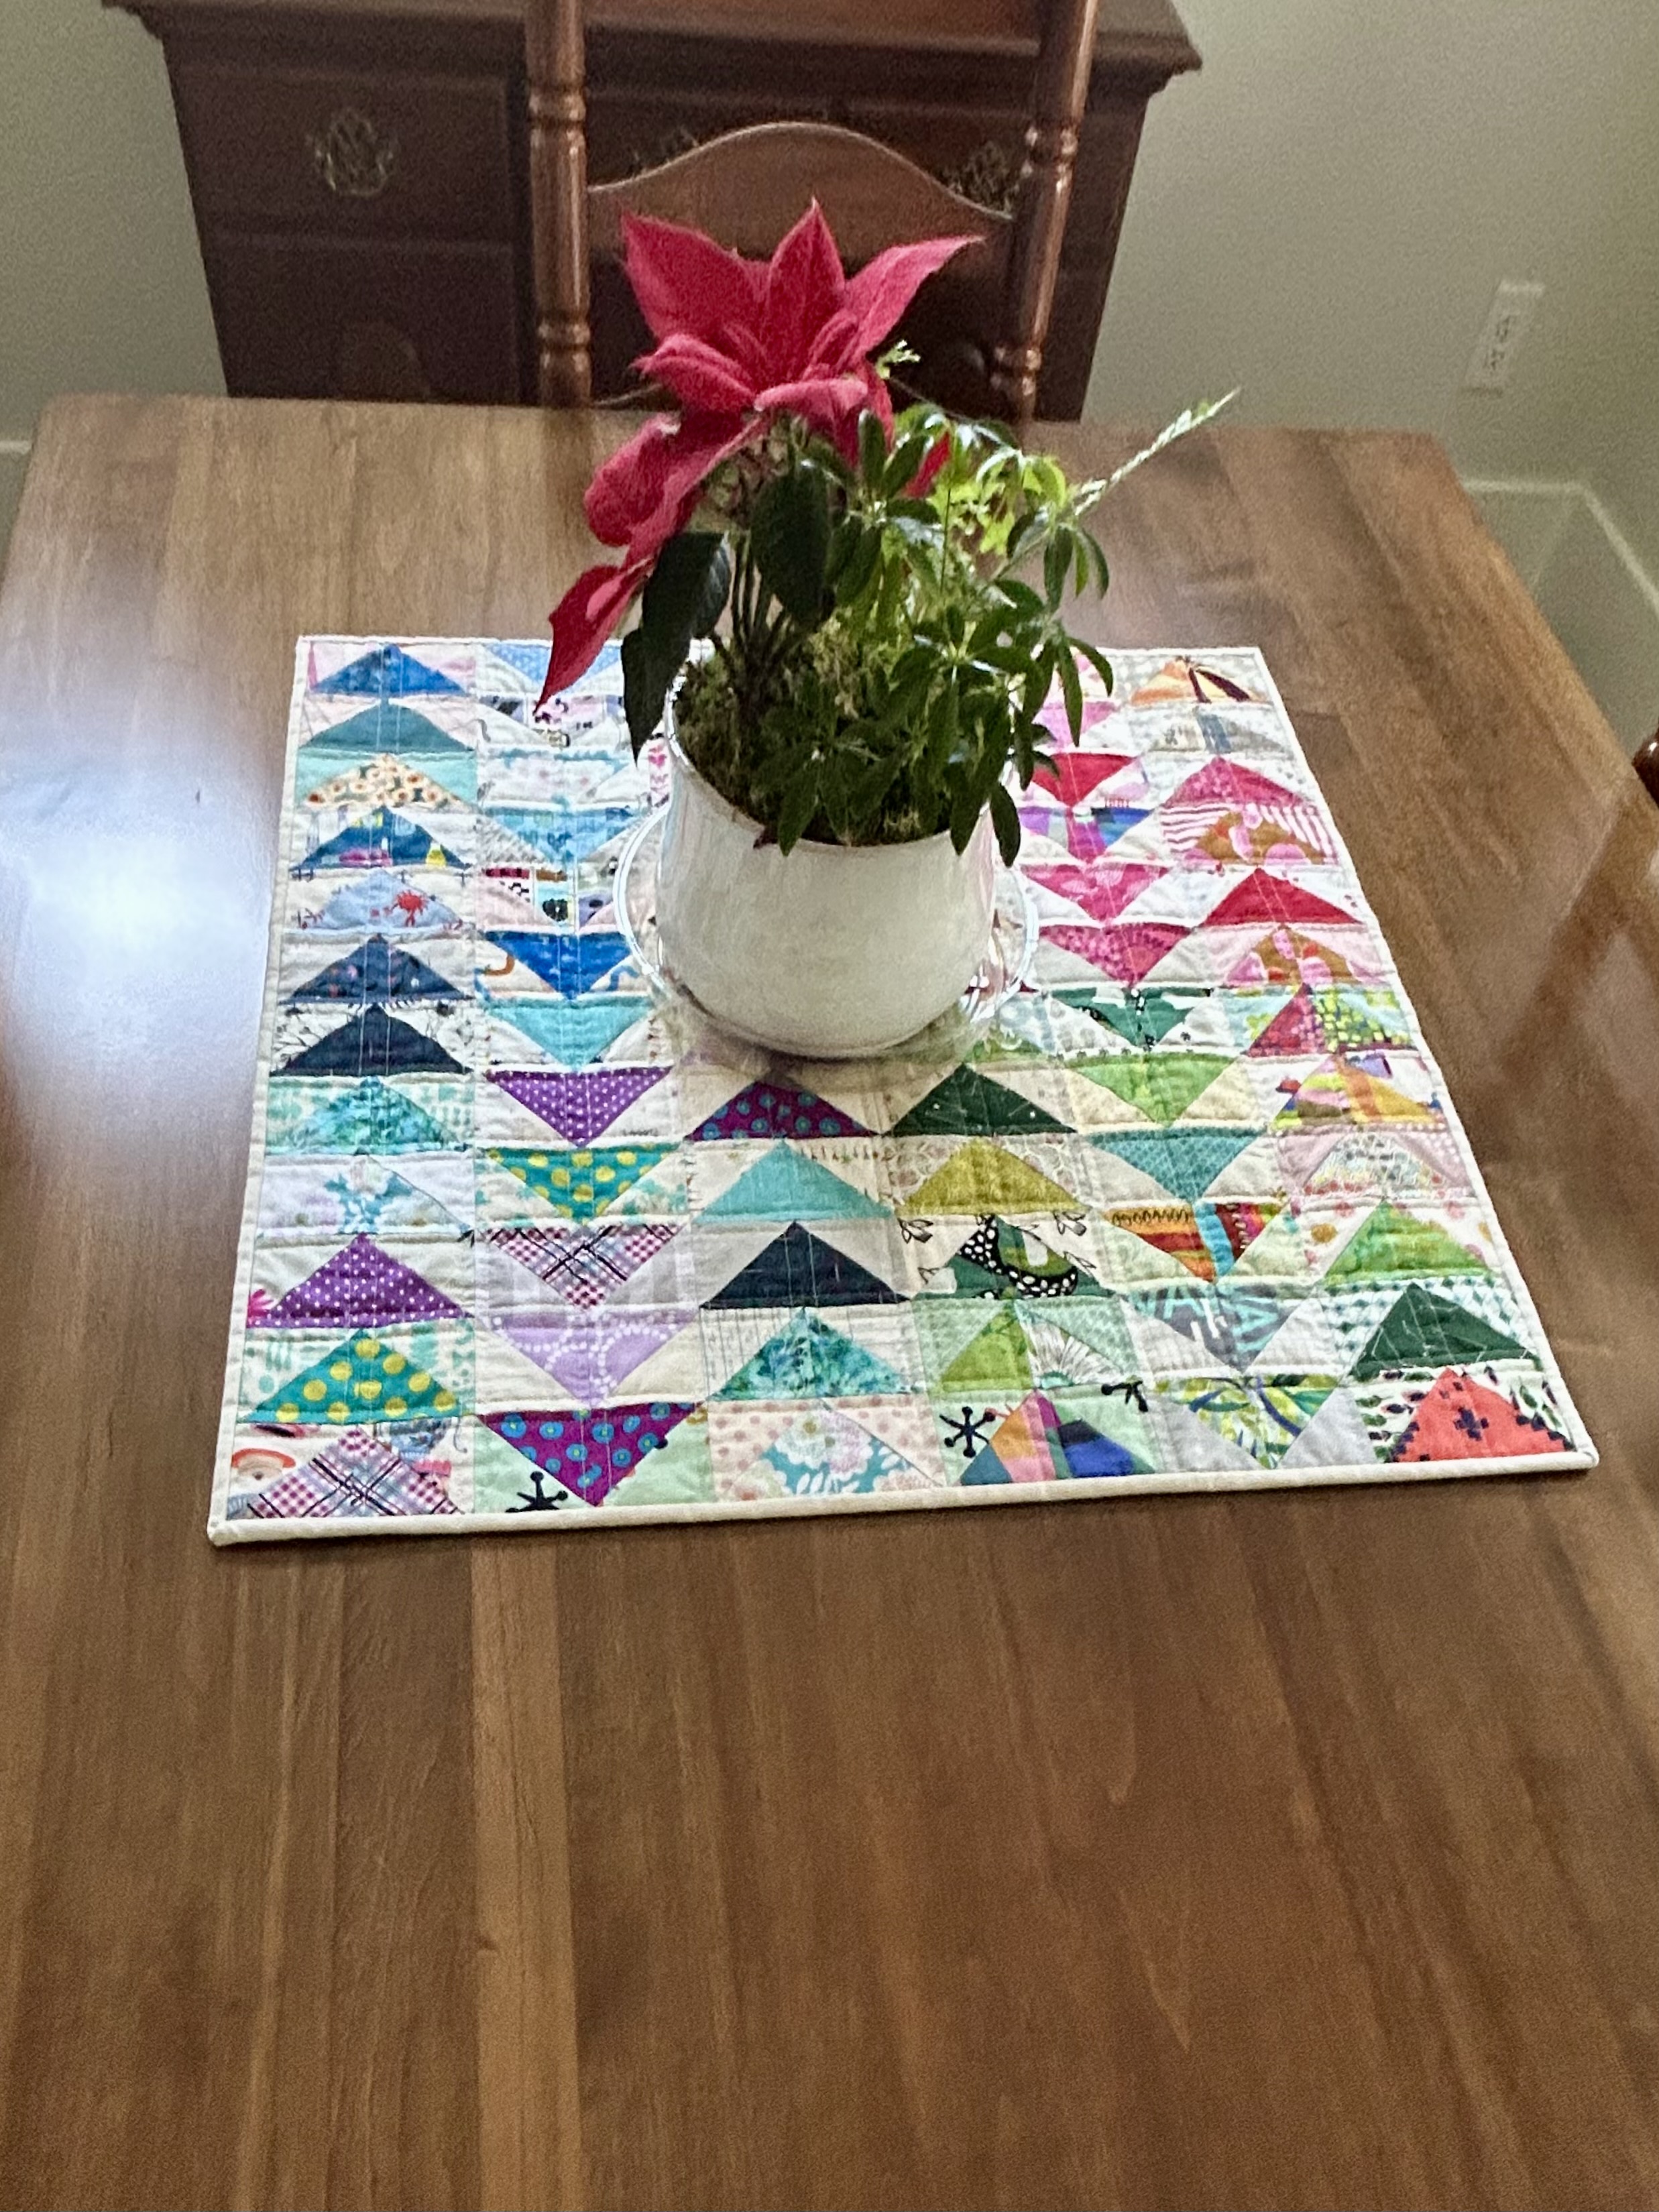
This little piece lives on my dining room table at the moment.
The backing is a VERY very old print from my stash that finally found a home.
I quilted it with straight lines on my domestic machine.