The light these days has changed a lot. There are long shadows everywhere just a little after noon. The winter solstice is coming.
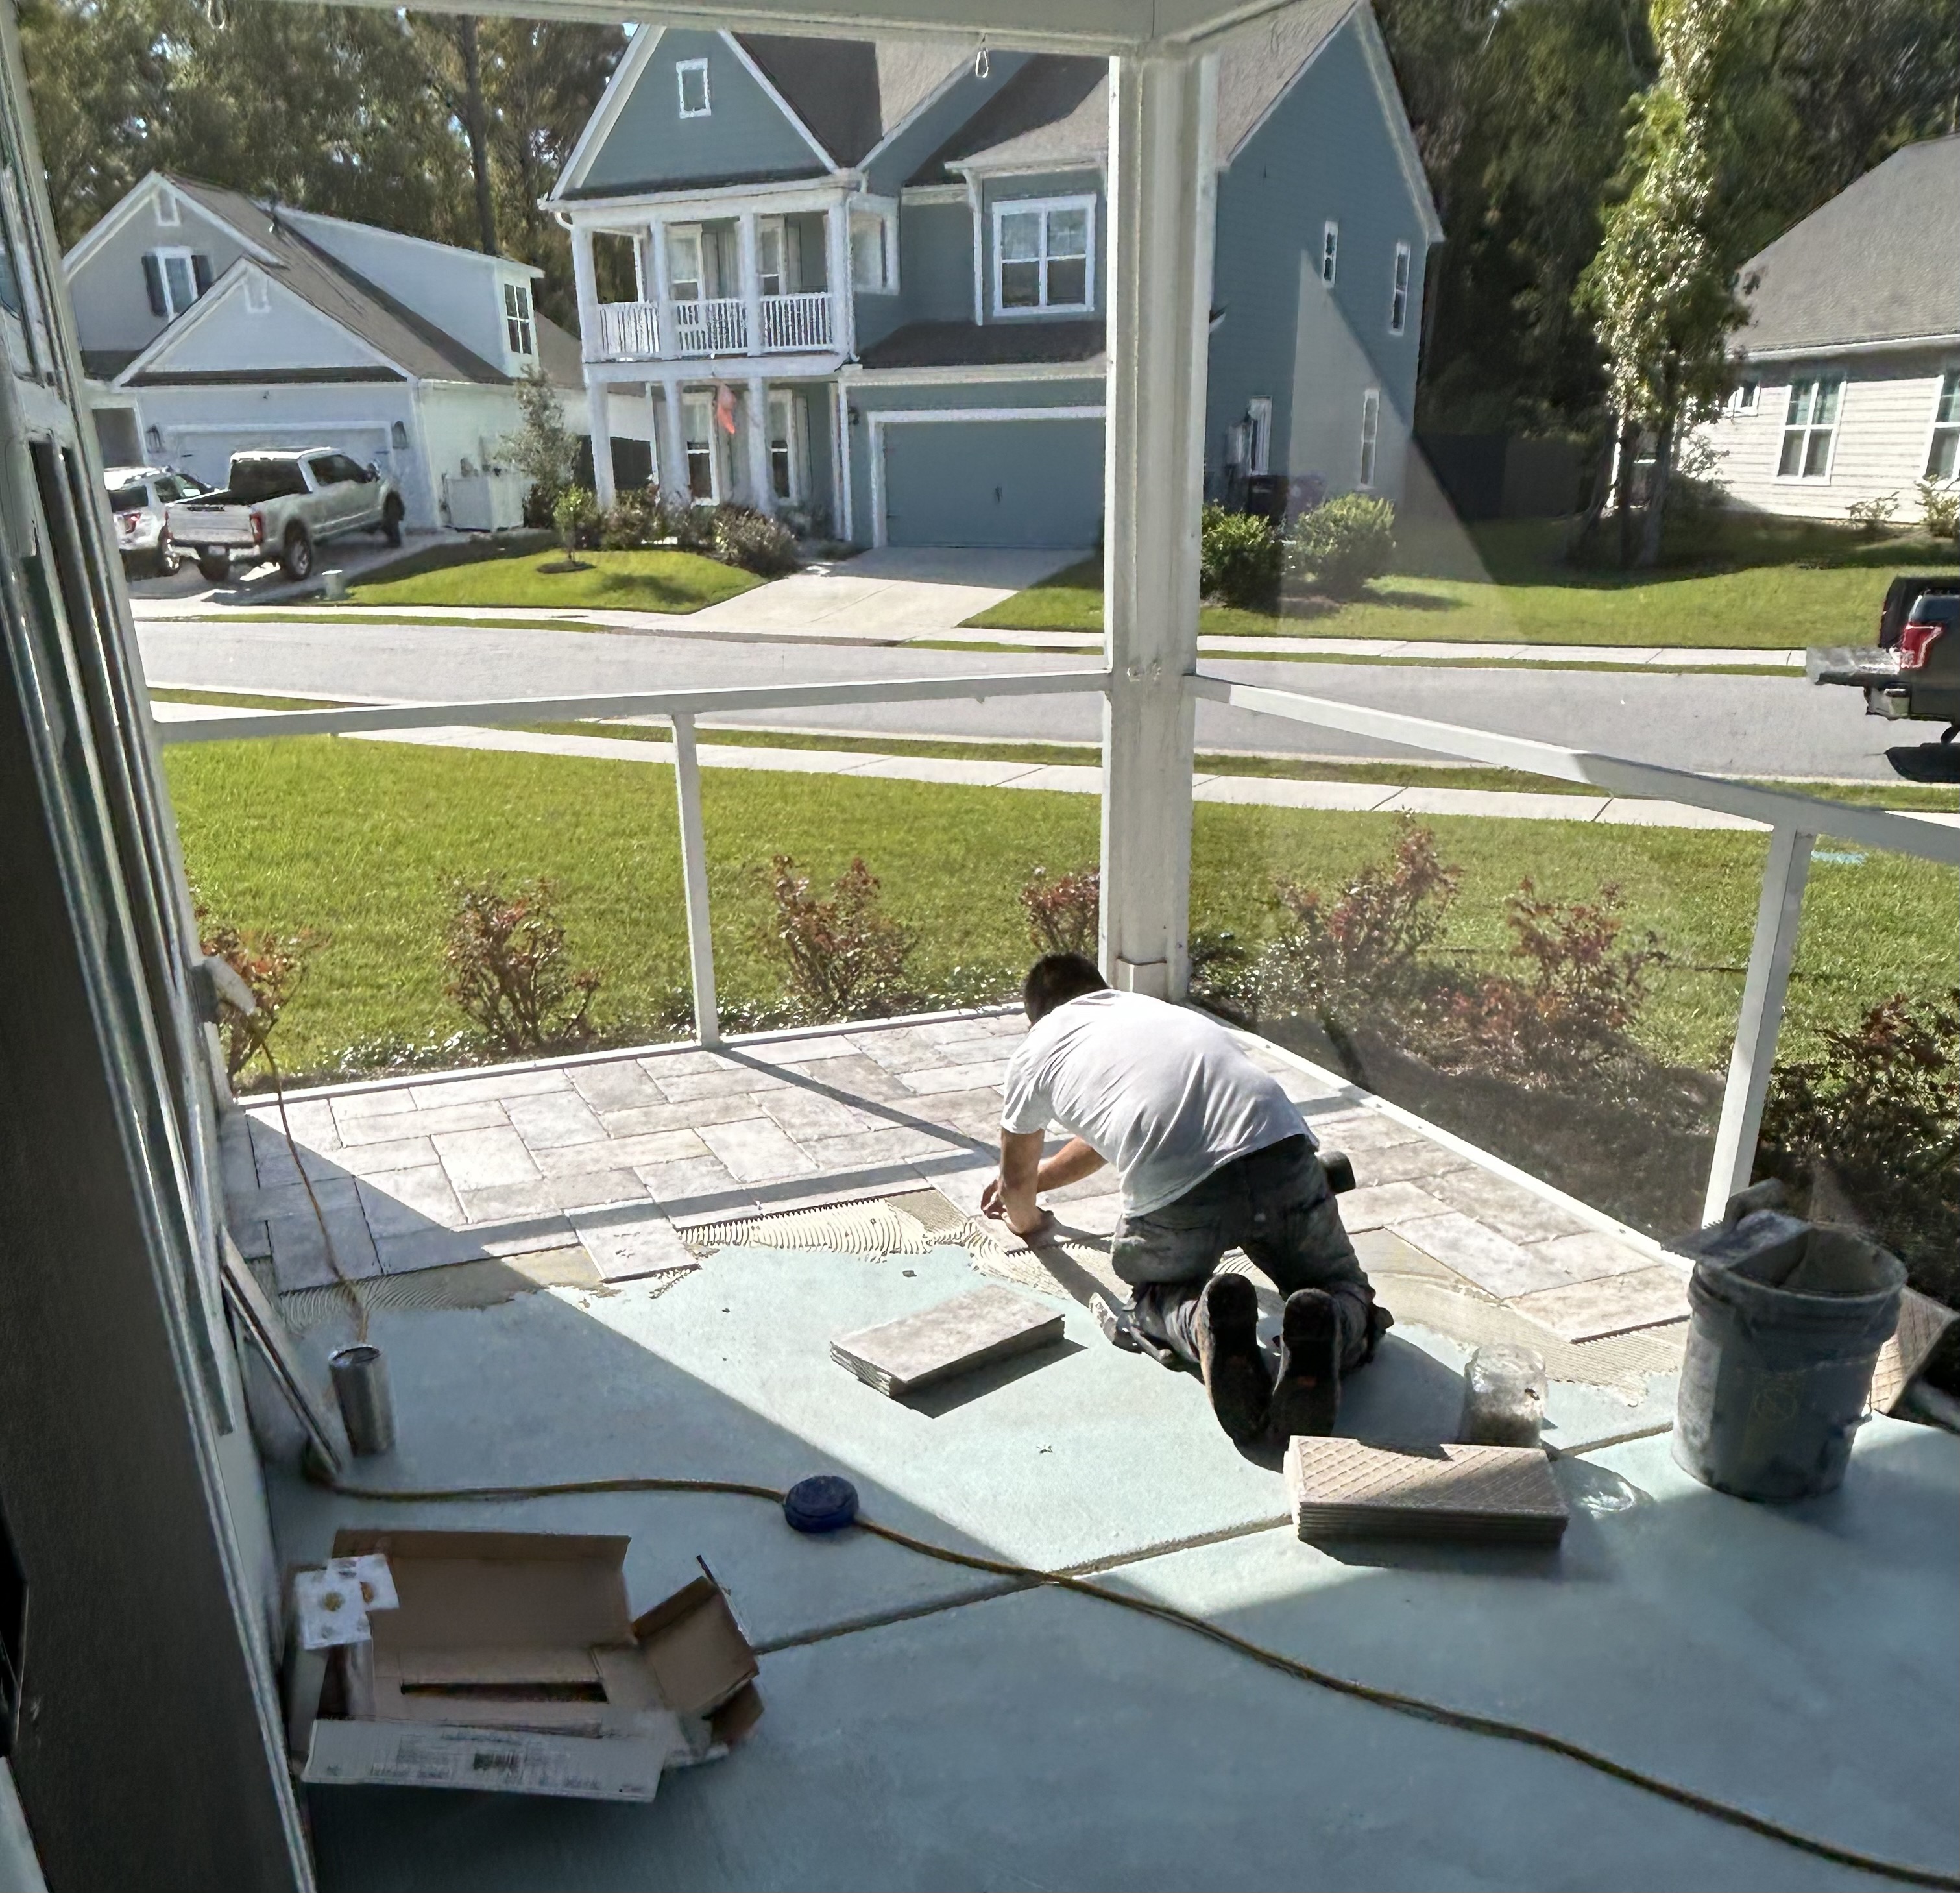
But, here’s Jose starting to tile in the afternoon. The aqua blue (two coats) are waterproofing layers, due to the concrete sitting right on clay–which is like cement when dry, but like soup when wet. Thus, the staining on the concrete.
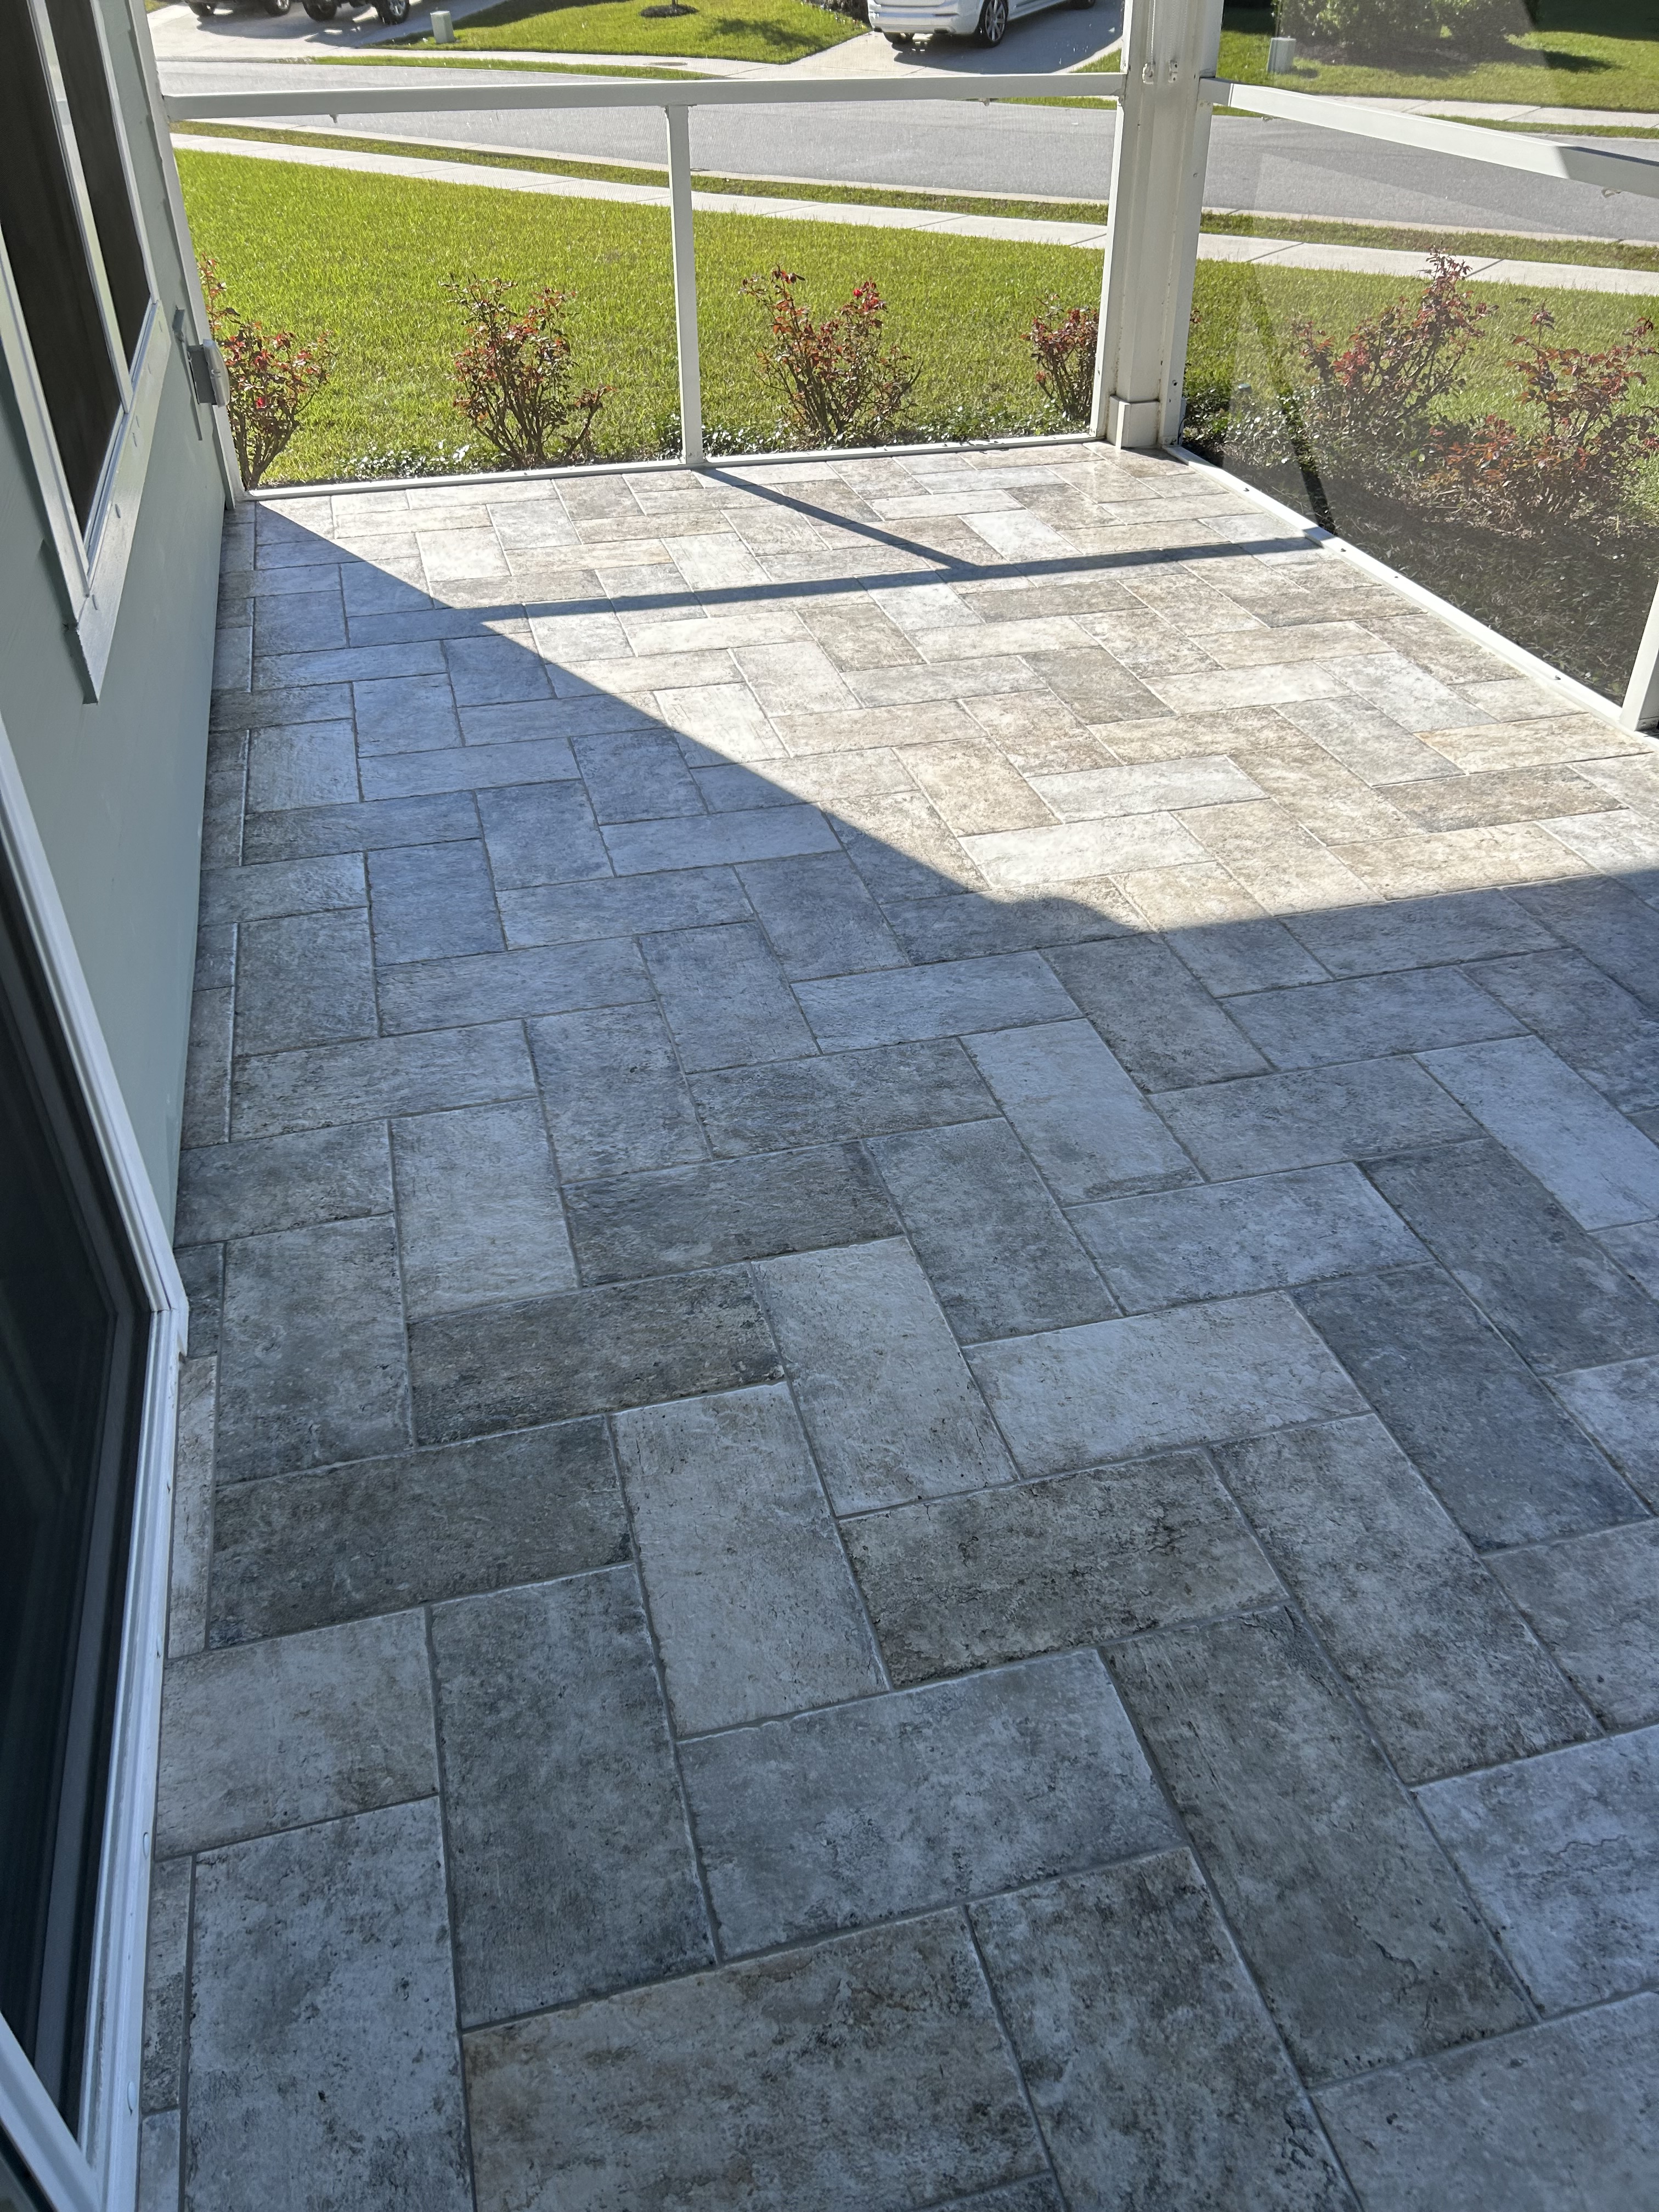
The tile is done, but grouting will come the next day.
Done!
And my “outdoor room” is ready to go again.
I spend a lot of time in this space.
There was enough tile to do the little outside platform.
I am really happy with this decision and this outcome.
My neighbor, who moved here from California, gave me a small pot of Kalanchoe plants on my birthday in March last year. The flower heads were enormous and so colorful–the heads were made up of composite flowers all grouped together. There were three separate plants in the pot.
Kalanchoe are succulents, and they thrive in California. I knew nothing about them, as I had spent almost 20 years in Maine. The flowering heads stayed blooming for weeks and weeks before stopping.
Then, the plants started to…grow. So I repotted them sometime last summer.
Now look!
They are covered with blooms that are about to color up. They are little, not the big heads, but… How exciting!
This plant doesn’t like temps below 45 degrees, so I’m keeping a close eye on how cold it is getting at night. I will bring this big pot inside if temps drop into the high 40s.
When my neighbor comes over–often using the porch entrance–she stops to pet this plant and to exclaim over its size. It reminds her of California, of course.
I’m sorry I’ve been AWOL, sort of, these past days.
But I’ve been…busy.
The screened porch, my “outdoor room,”got tiled. My neighbors tiled theirs, and they held my hand about organizing getting mine done. It’s so pretty, and more on that in a separate post soon. The concrete sits right on the clay here, and it was so ugly, so stained and dirty looking.
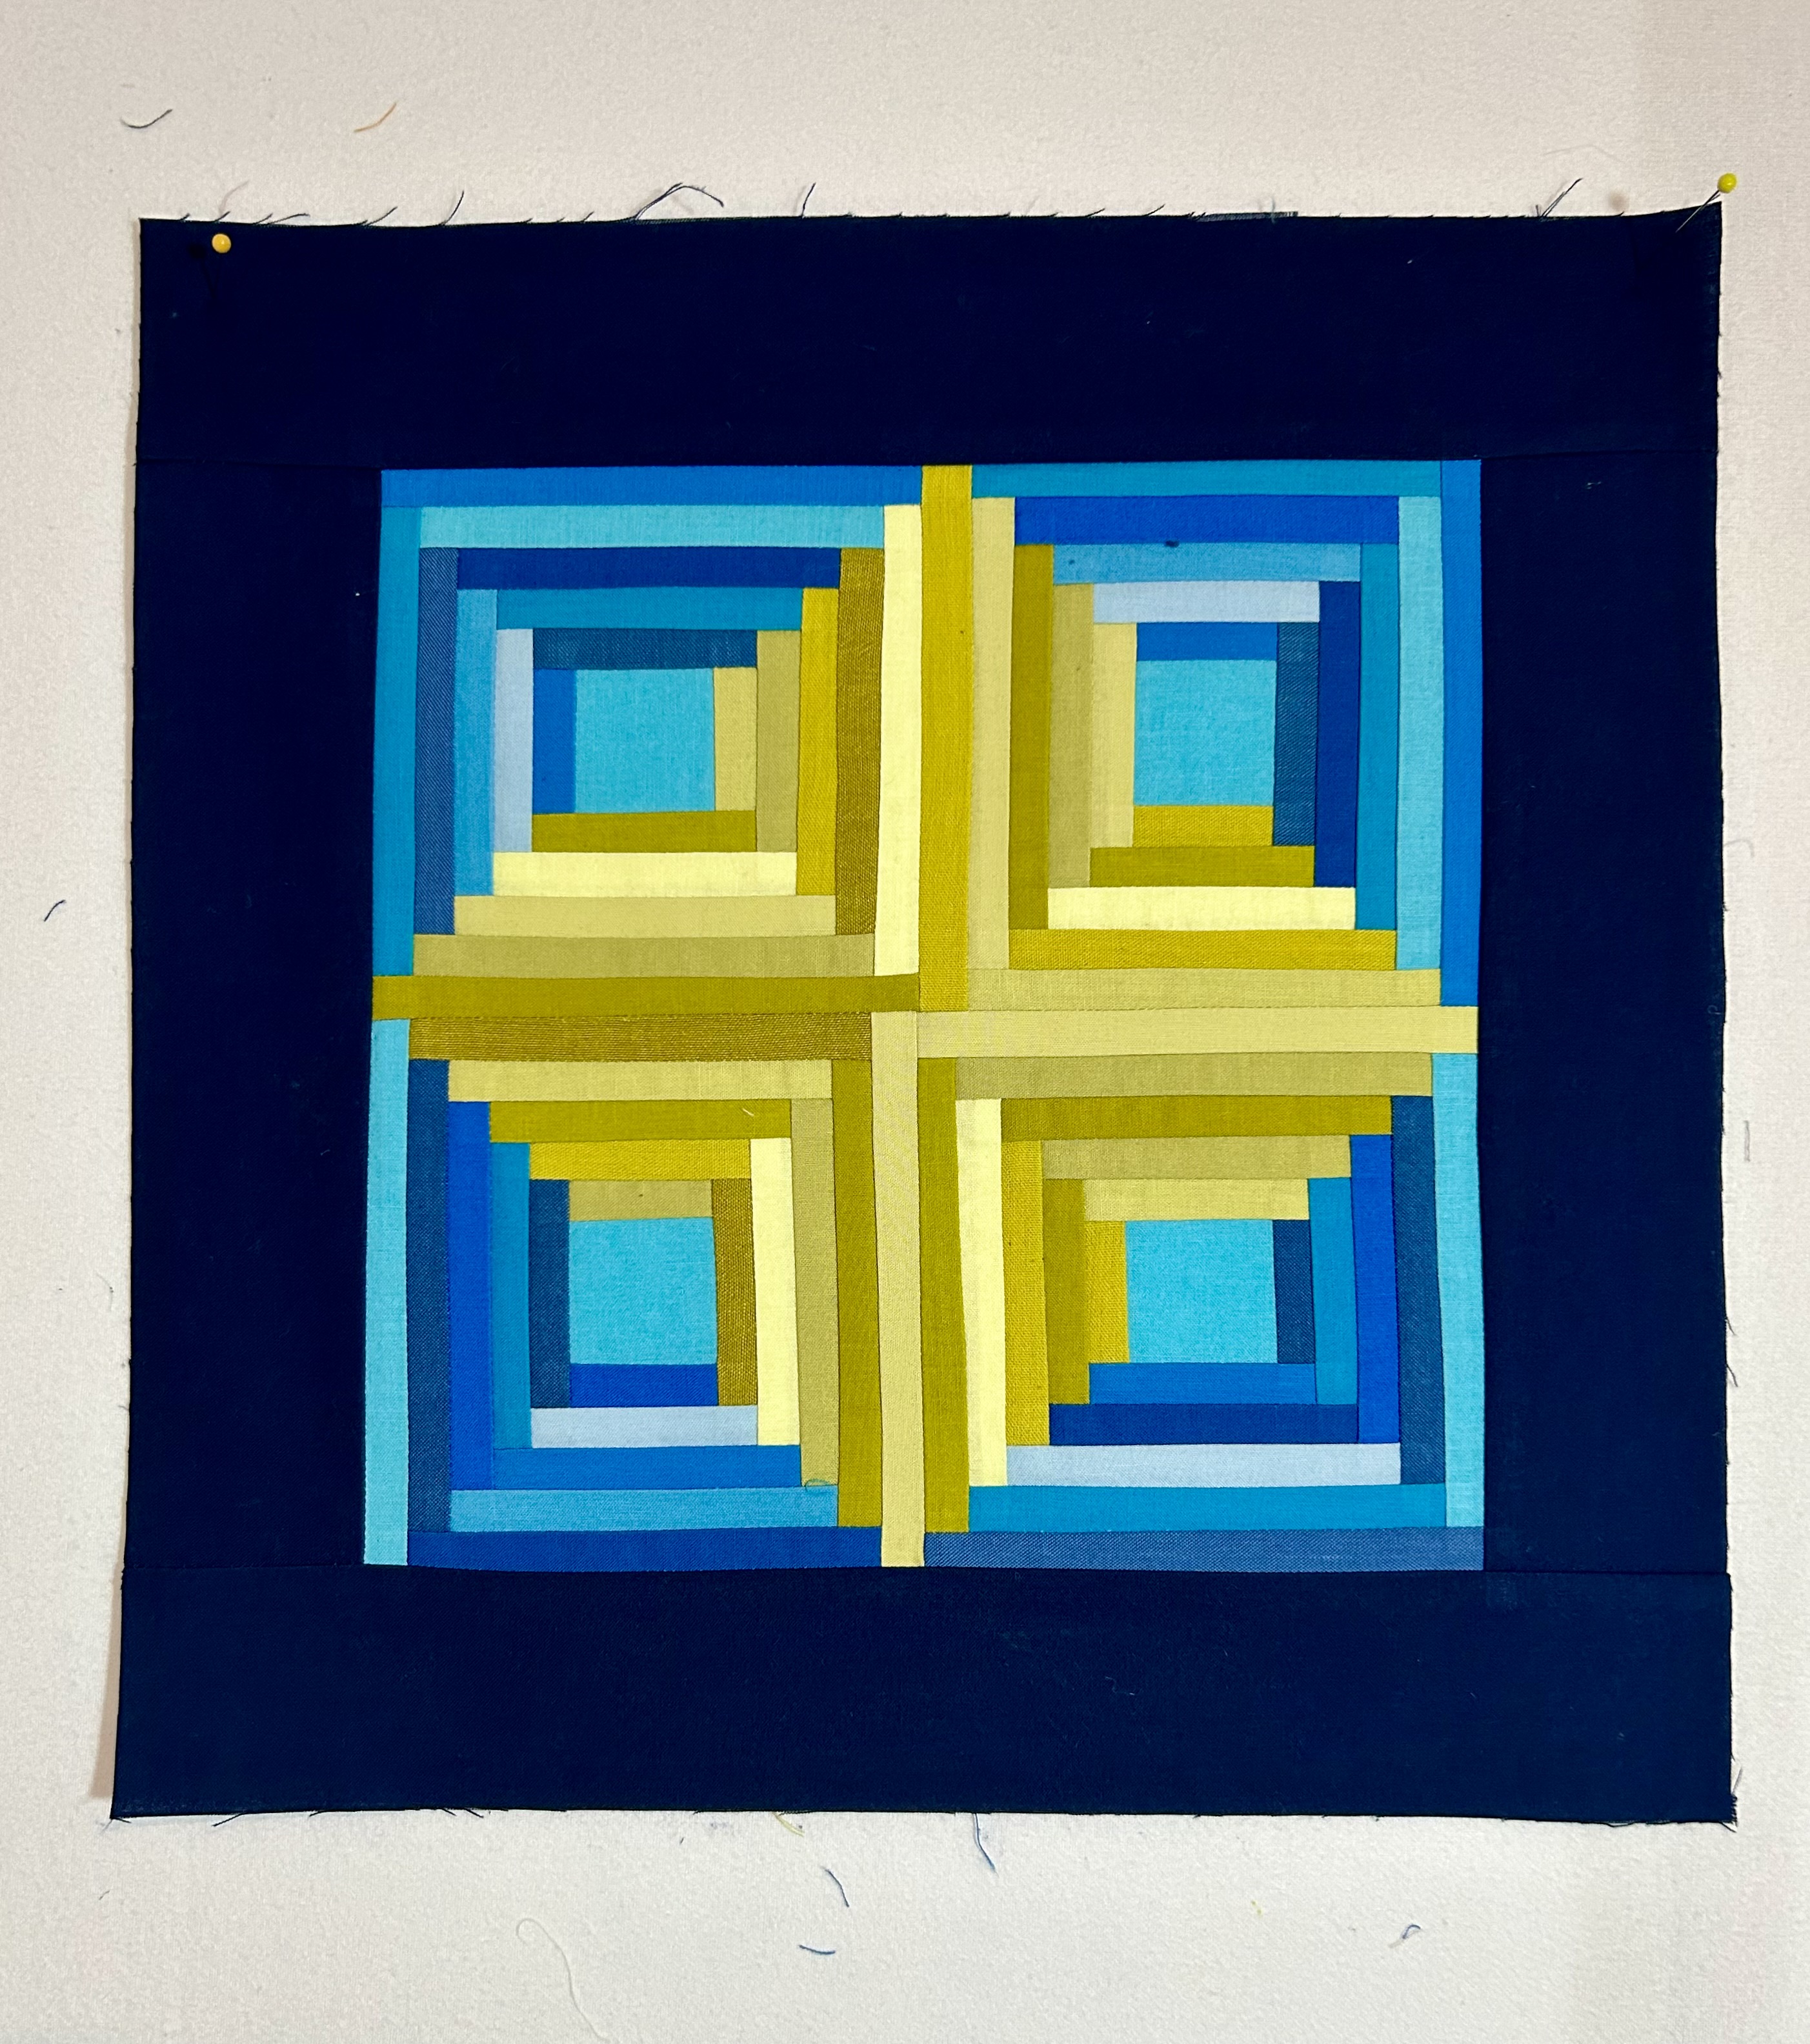
I have been having so much fun with this month’s “Block 2” block in the online class with Tara Faughnan: Log Cabins. And with learning how to install blocks on stretched canvas frames. Here’s the one I mounted yesterday–using the fabric palette I pulled in early November. It’s…so handsome.
With my sweet neighbor in tow, I found Michaels’s yesterday, and they had such a lovely selection of these stretched canvas frames. And the prices were terrific! They even had a “buy one, get two more free” sale, so I came home with 3 of the 12-inch frames as well. The frame above at 18 by 24 was perfect for this piece. Michael’s has 3 levels of quality to choose from, and the cheapest one is perfect for my needs as it is thinner. All of them are coated with acid-free gesso.
I will take a picture of ALL of this month’s completed projects when I finish the last one I’ll make this month. My goal is to finish it today.
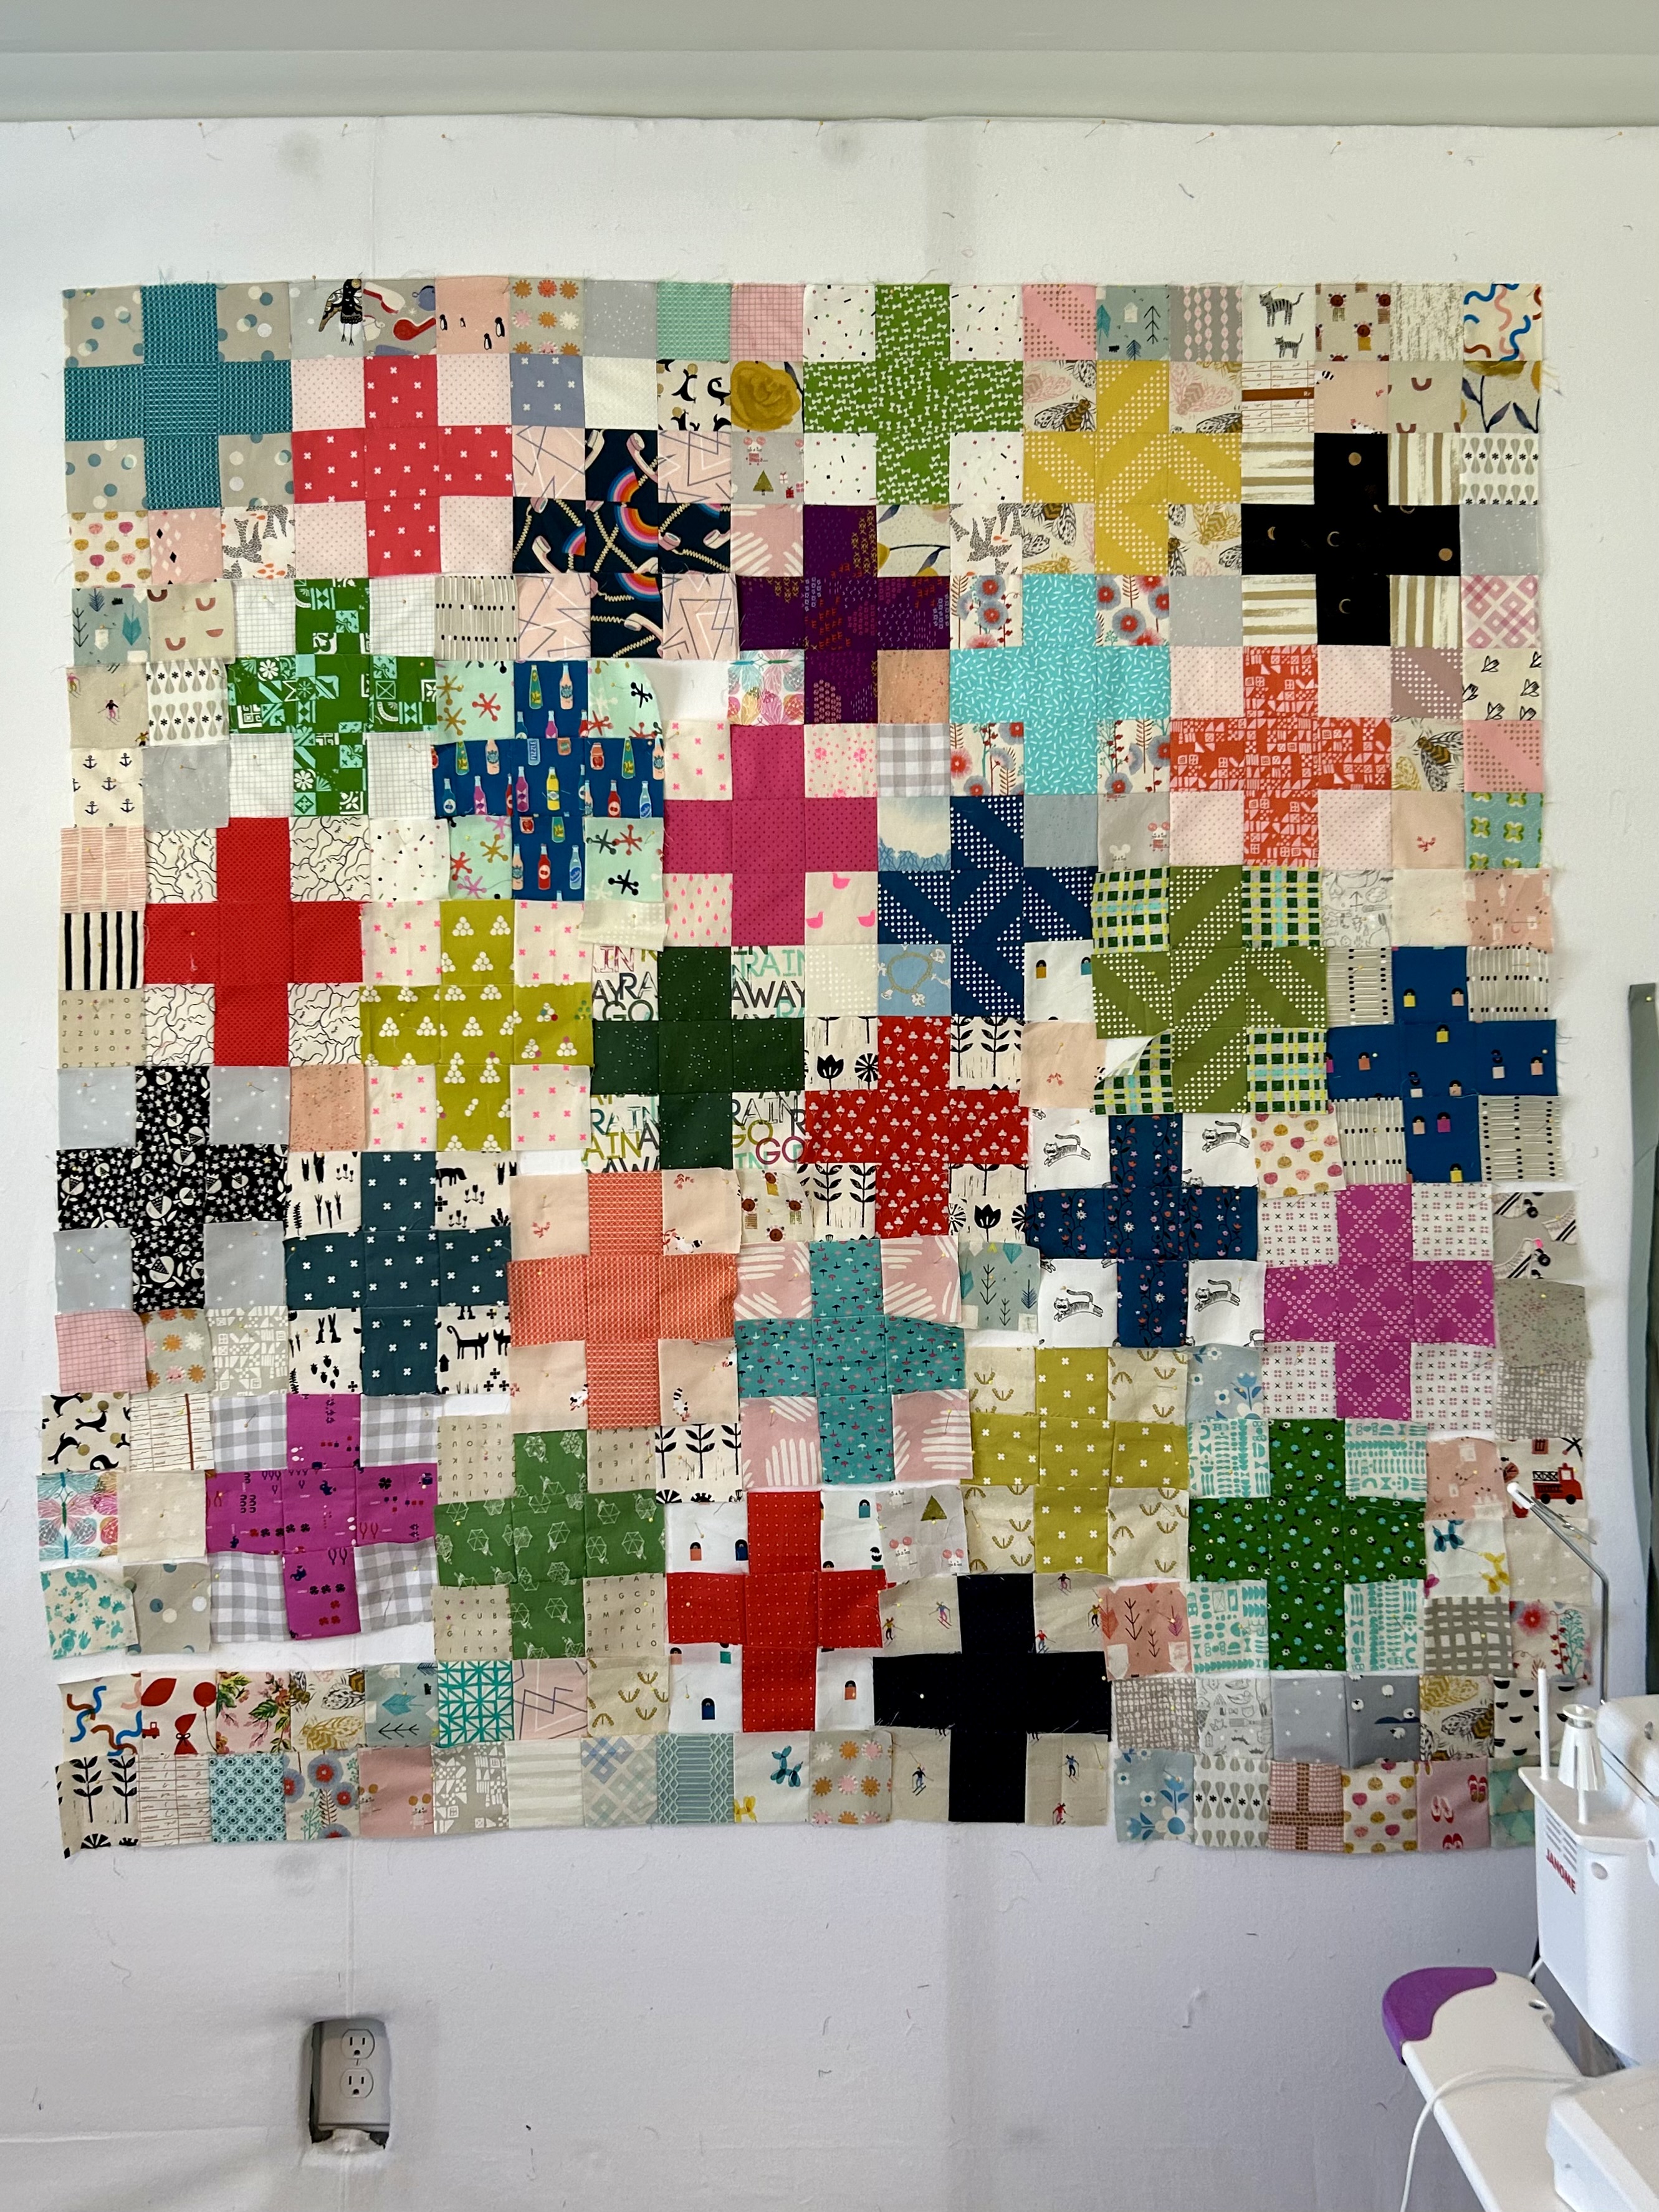
It’s time to return to the design wall projects. And, I do have the third quilt in my half-rectangle series underway. It uses the half-rectangle “hourglass” form I learned in last month’s block class, which featured the hourglass block. And today I’ll try to finish the “Crosses” scrap quilt that is all laid out and about half sewn together. (The adorable backing for it came yesterday and is already washed. I’m nearing the end of sewing down binding on the second quilt in the series so I’ll soon need another hand-sewing project.)
Both of my quilt groups met this week: one at night and one the next morning. In the modern group, our “make the Churn Dash block modern” challenge quilts were due. It was so fun to see the awesome creativity our members produced. I will do a separate post on mine soon.
I was very late to the morning quilt meeting as it was also the day to retrieve the raw milk, which comes every other week and which sells out now in a few hours. The delivery was running late, so we all just…waited. But, success, and I delivered the milk the next day to my two sons’ houses, which sometimes includes short visits at each house or outside in the driveway. I absolutely thrive on raw dairy and have for over 20 years now. (In my book, commercial dairy is a dead food that is almost, now, a fake food. No wonder it disagrees with so many people.) In two weeks I use 3 half-gallons, and I freeze one of those as an emergency back-up and just switch the frozen one out when I get the next three jugs. See the gorgeous cream on the top? Yummy!
And now it’s time to shop for the Thanksgiving dinner. I’ll provide a green salad, roasted Brussel sprouts, and the roasted carrots/sweet pepper/garlic dish I like. I went out to Chucktown Acres farm with DIL Corinne to get our organic, locally raised turkey, and they had raw butter as well, so I came home with three containers. Two went to the freezer and one went with Corinne to be used in the mashed potatoes–a dish the children have requested.
We’ve had a cold spell. Or what gets called “cold” here in coastal South Carolina. I turned on the heat this week and am in warmer clothes. And it’s been too cold to have my noon meal out on the porch, which I miss. But the cool weather is great for walking, and it is sunny and so cheerful outside. I’ll need one more grass mowing I think, but that should do it.
And, now, hurricane season is over for the year! Here, we dodged a few bullets that proved to be terrible for others in the region–and that’s a story that is still ongoing. Western North Carolina is suffering terribly.
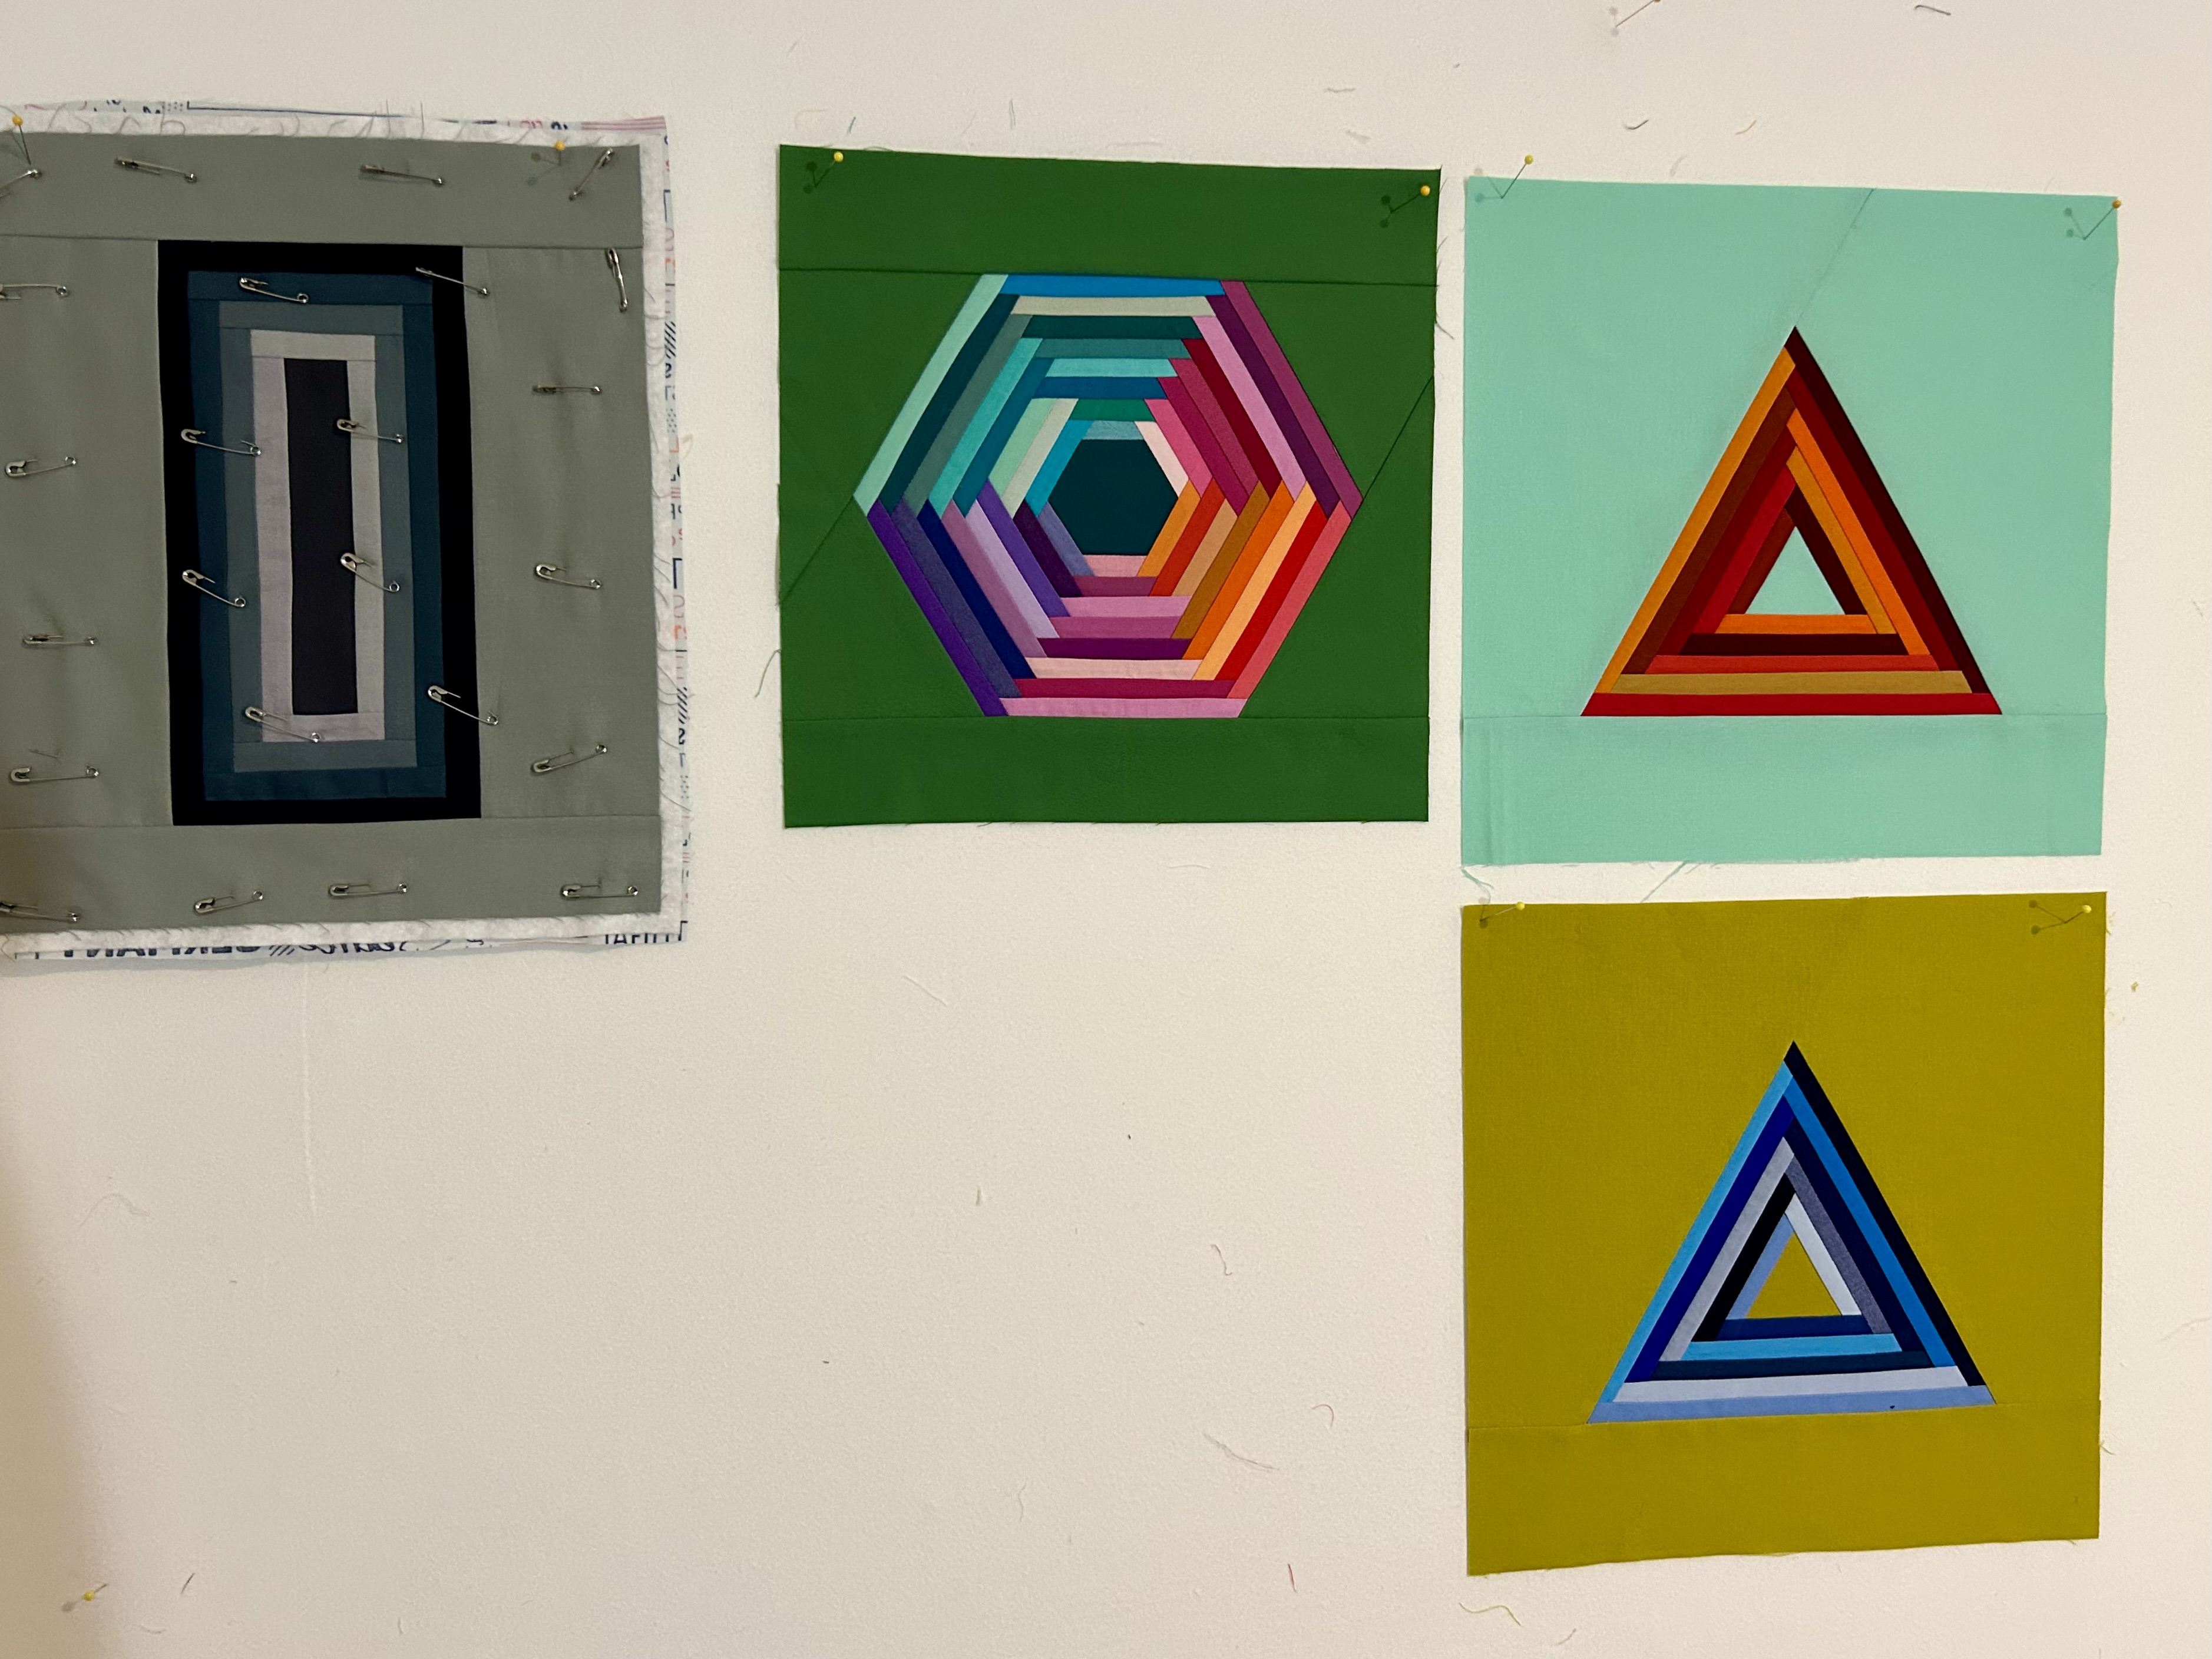
I am having such fun with this month’s block play. Tara Faughnan gave us a whole packet of patterns that included much more than recognized log cabin forms–we also got triangles and a big hexagon. I am still playing with these patterns. (Tara uses a foundation piecing method where the template patterns printed on regular typing paper can be reused over and over.)
I noted some time back that Tara takes her small “play” blocks and mounts them on stretched canvas frames. I was intrigued…
So, what emerged for me was a really fun–and at times frustrating–learning curve. I ordered 10-inch square canvas frames, a hand-held stapler, and, eventually some felt for the back and some little sawtooth hangers.
Here’s what happened:
The hexagon was just totally scrappy, made from my strips to try out this pattern, and I will make another one as it was so fun.
I quickly learned that I needed a bigger size outer block than a 12.5 inch square to make the corners square up nicely. (There are online videos showing how to do the corners–indeed, how to do the whole process.) Something like a 14-inch square is better for me.
And, I discovered that my cheap stapler…had to go. And that maybe the staples I was using were too large, too long. The length of a staple is called its “legs.” I adore tools, as many of you probably recognize, so I purchased an electric (battery driven and rechargeable) stapler, but have not tried it yet. I also got a smaller staple. The stapler is all charged and ready to go.
For this block–which needs its dark blue border–I ordered some 12-inch canvas frames. And I can’t wait for them to come. Maybe today. (This block is made from the palette that I pulled for this month. And, yes, the yellow green fabrics featured uses Kona pickle as its key color.)
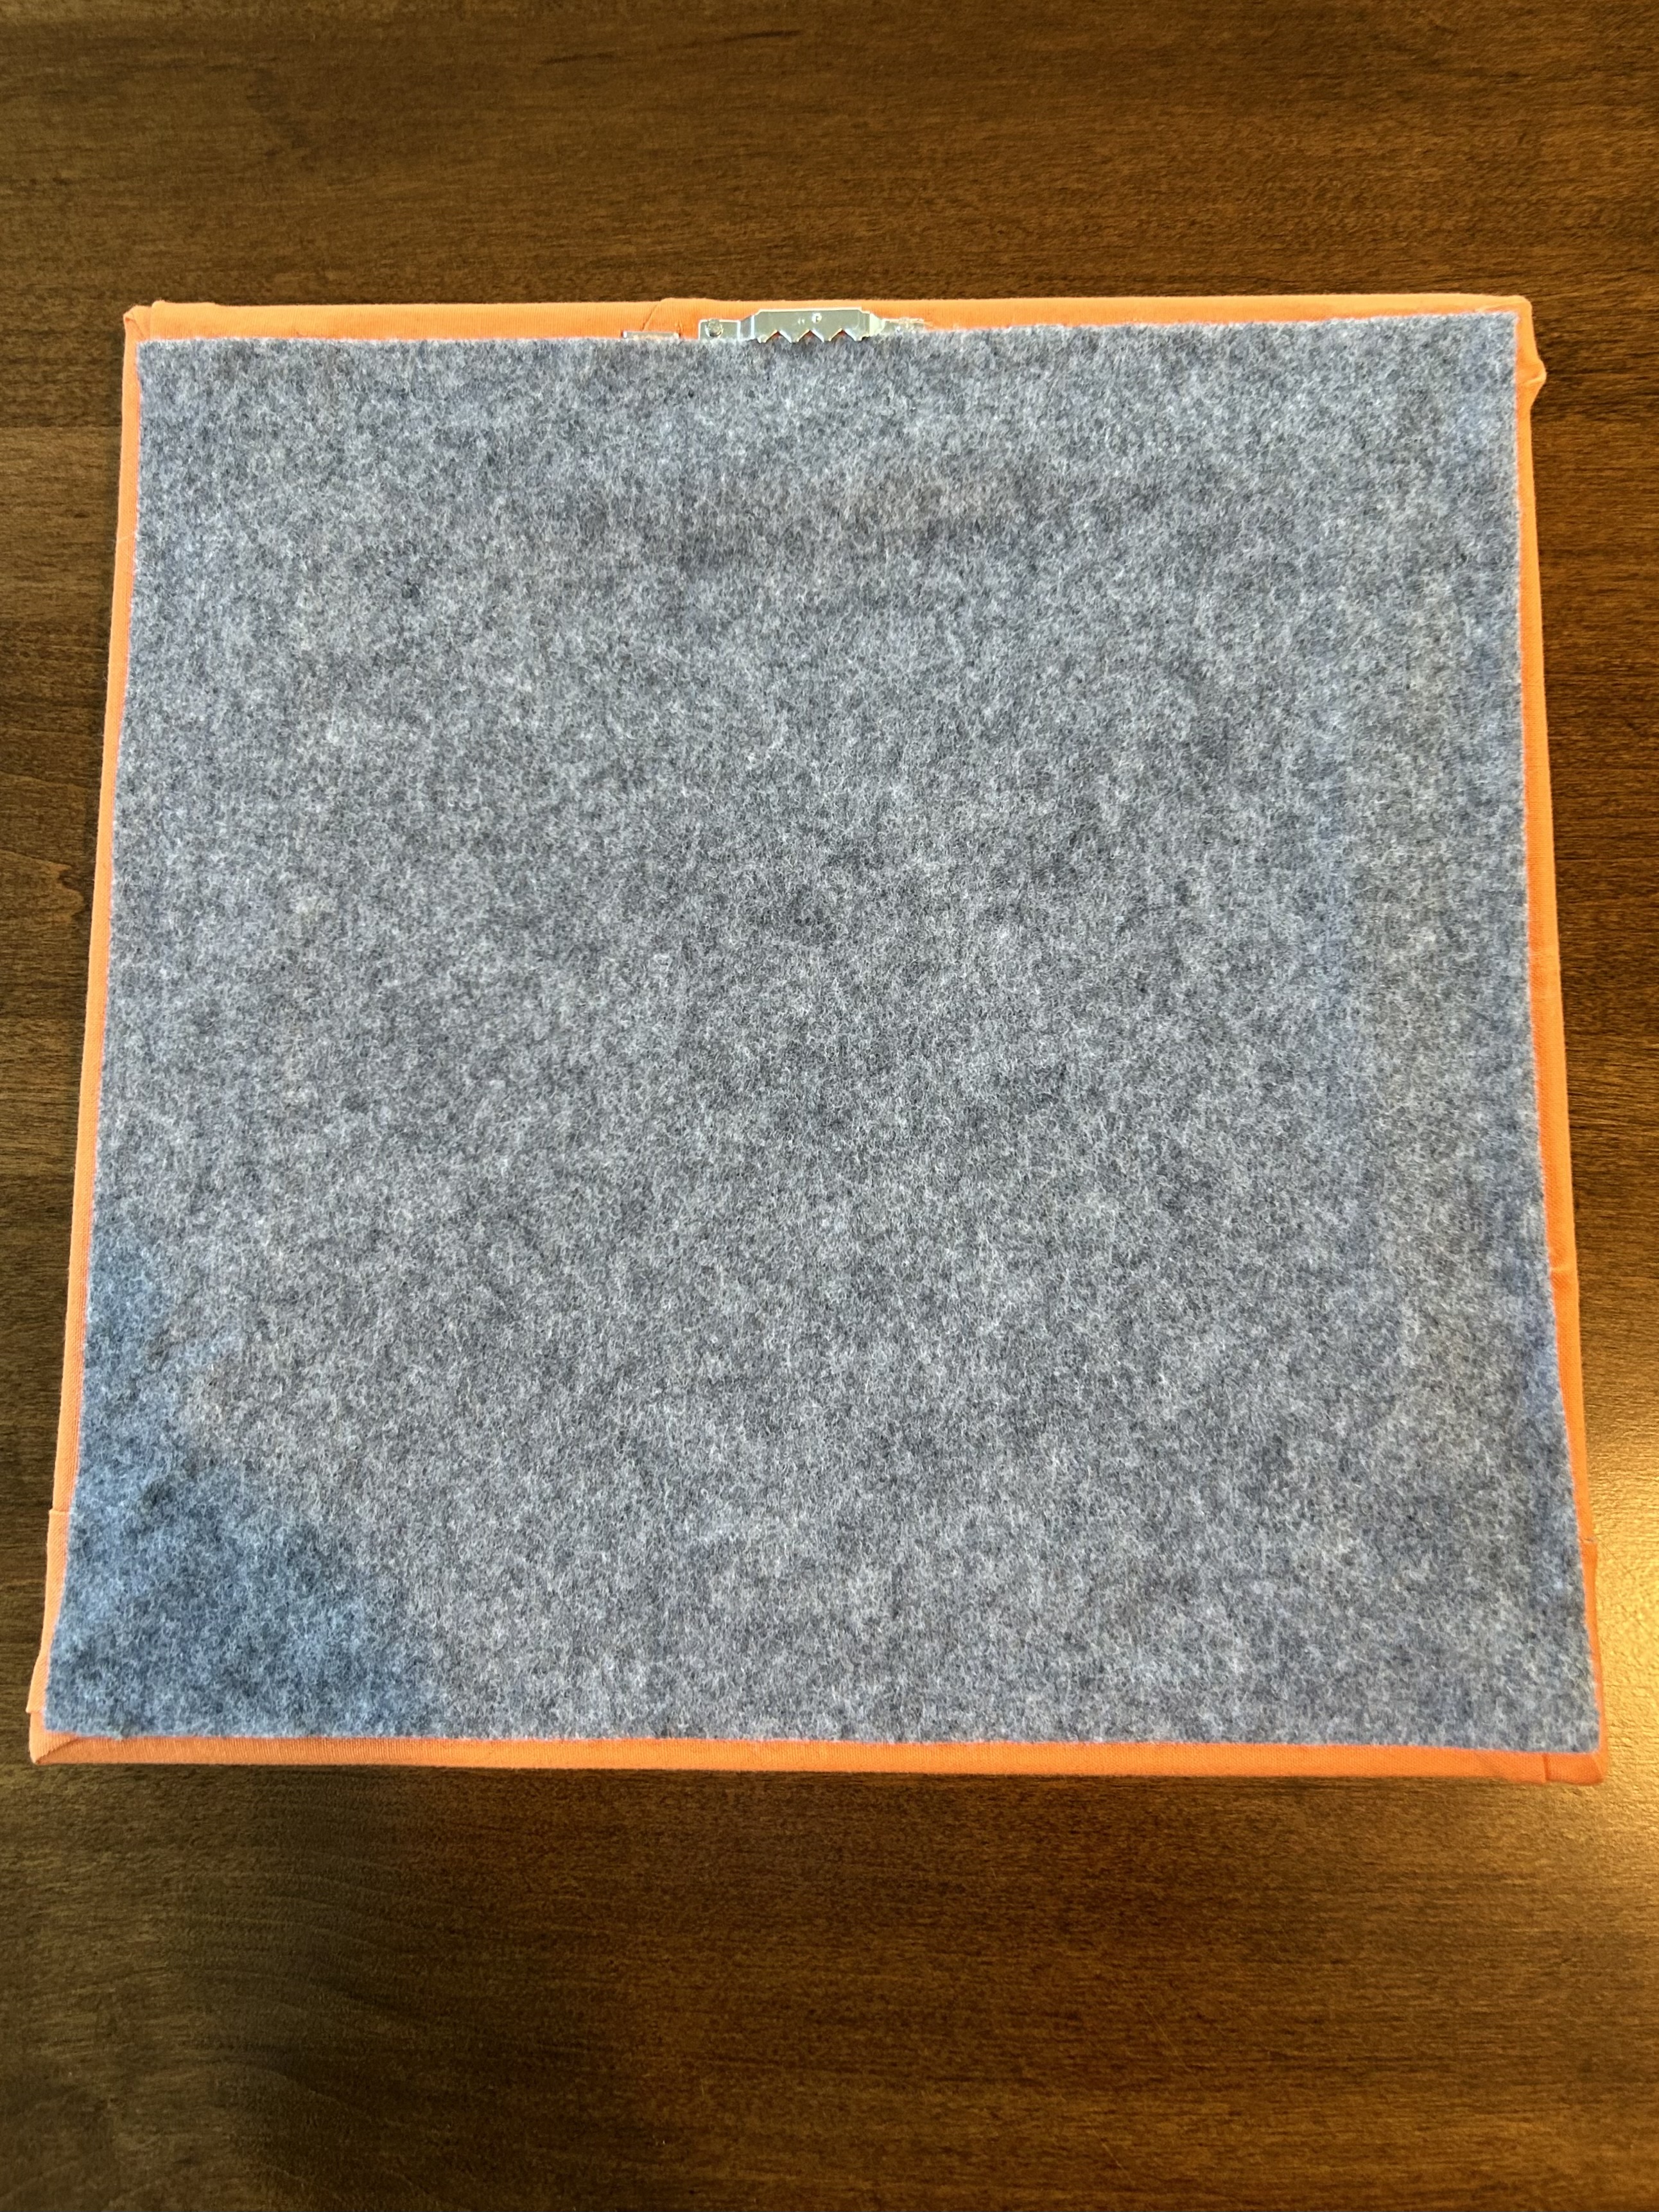
I wanted the backs to look nice, so that was a learning curve too. The trick is to get a wide enough felt backing (glued down) so that the sawtooth hanger still can work and so that the felt covers more of the back.
I redid the borders on the hexagon block so that it had wide enough pieces to go around to the back without struggling and stretching–which can throw off the alignment on the front. But this felt could have been cut wider. It was my first try. I glued it on the edges with a strong “tacky” glue–the same one I use for rope bowls to stabilize cut rope ends. (Note that the fabric on the left bottom corner is closer to being an almost perfect fold–which should run next to the edge of the canvas.)
This one is better:
Nailing the tiny nails into the sawtooth was an issue–until I used a pincher type pliar to hold that tiny nail until I got it started. (That pliar is also good to pull a staple if needed, along with a screwdriver thin enough to pry out the staple.) And I taped the sawtooth center to hold it steady while I nailed.
Now, I am waiting for the 12-inch canvases to arrive (along with more 10-inch ones). And I’m still sewing blocks. More on those later.
For this block, I made a tiny quilt and hung it in the front hall. I just used the leftover grey strips to make it–and try out this pattern. It’s kind of funky–and I like “kind of funky.”
But…hmmm. For these long skinny log cabin types, what about a rectangle frame??? I love the neat look of these blocks on stretched canvas.
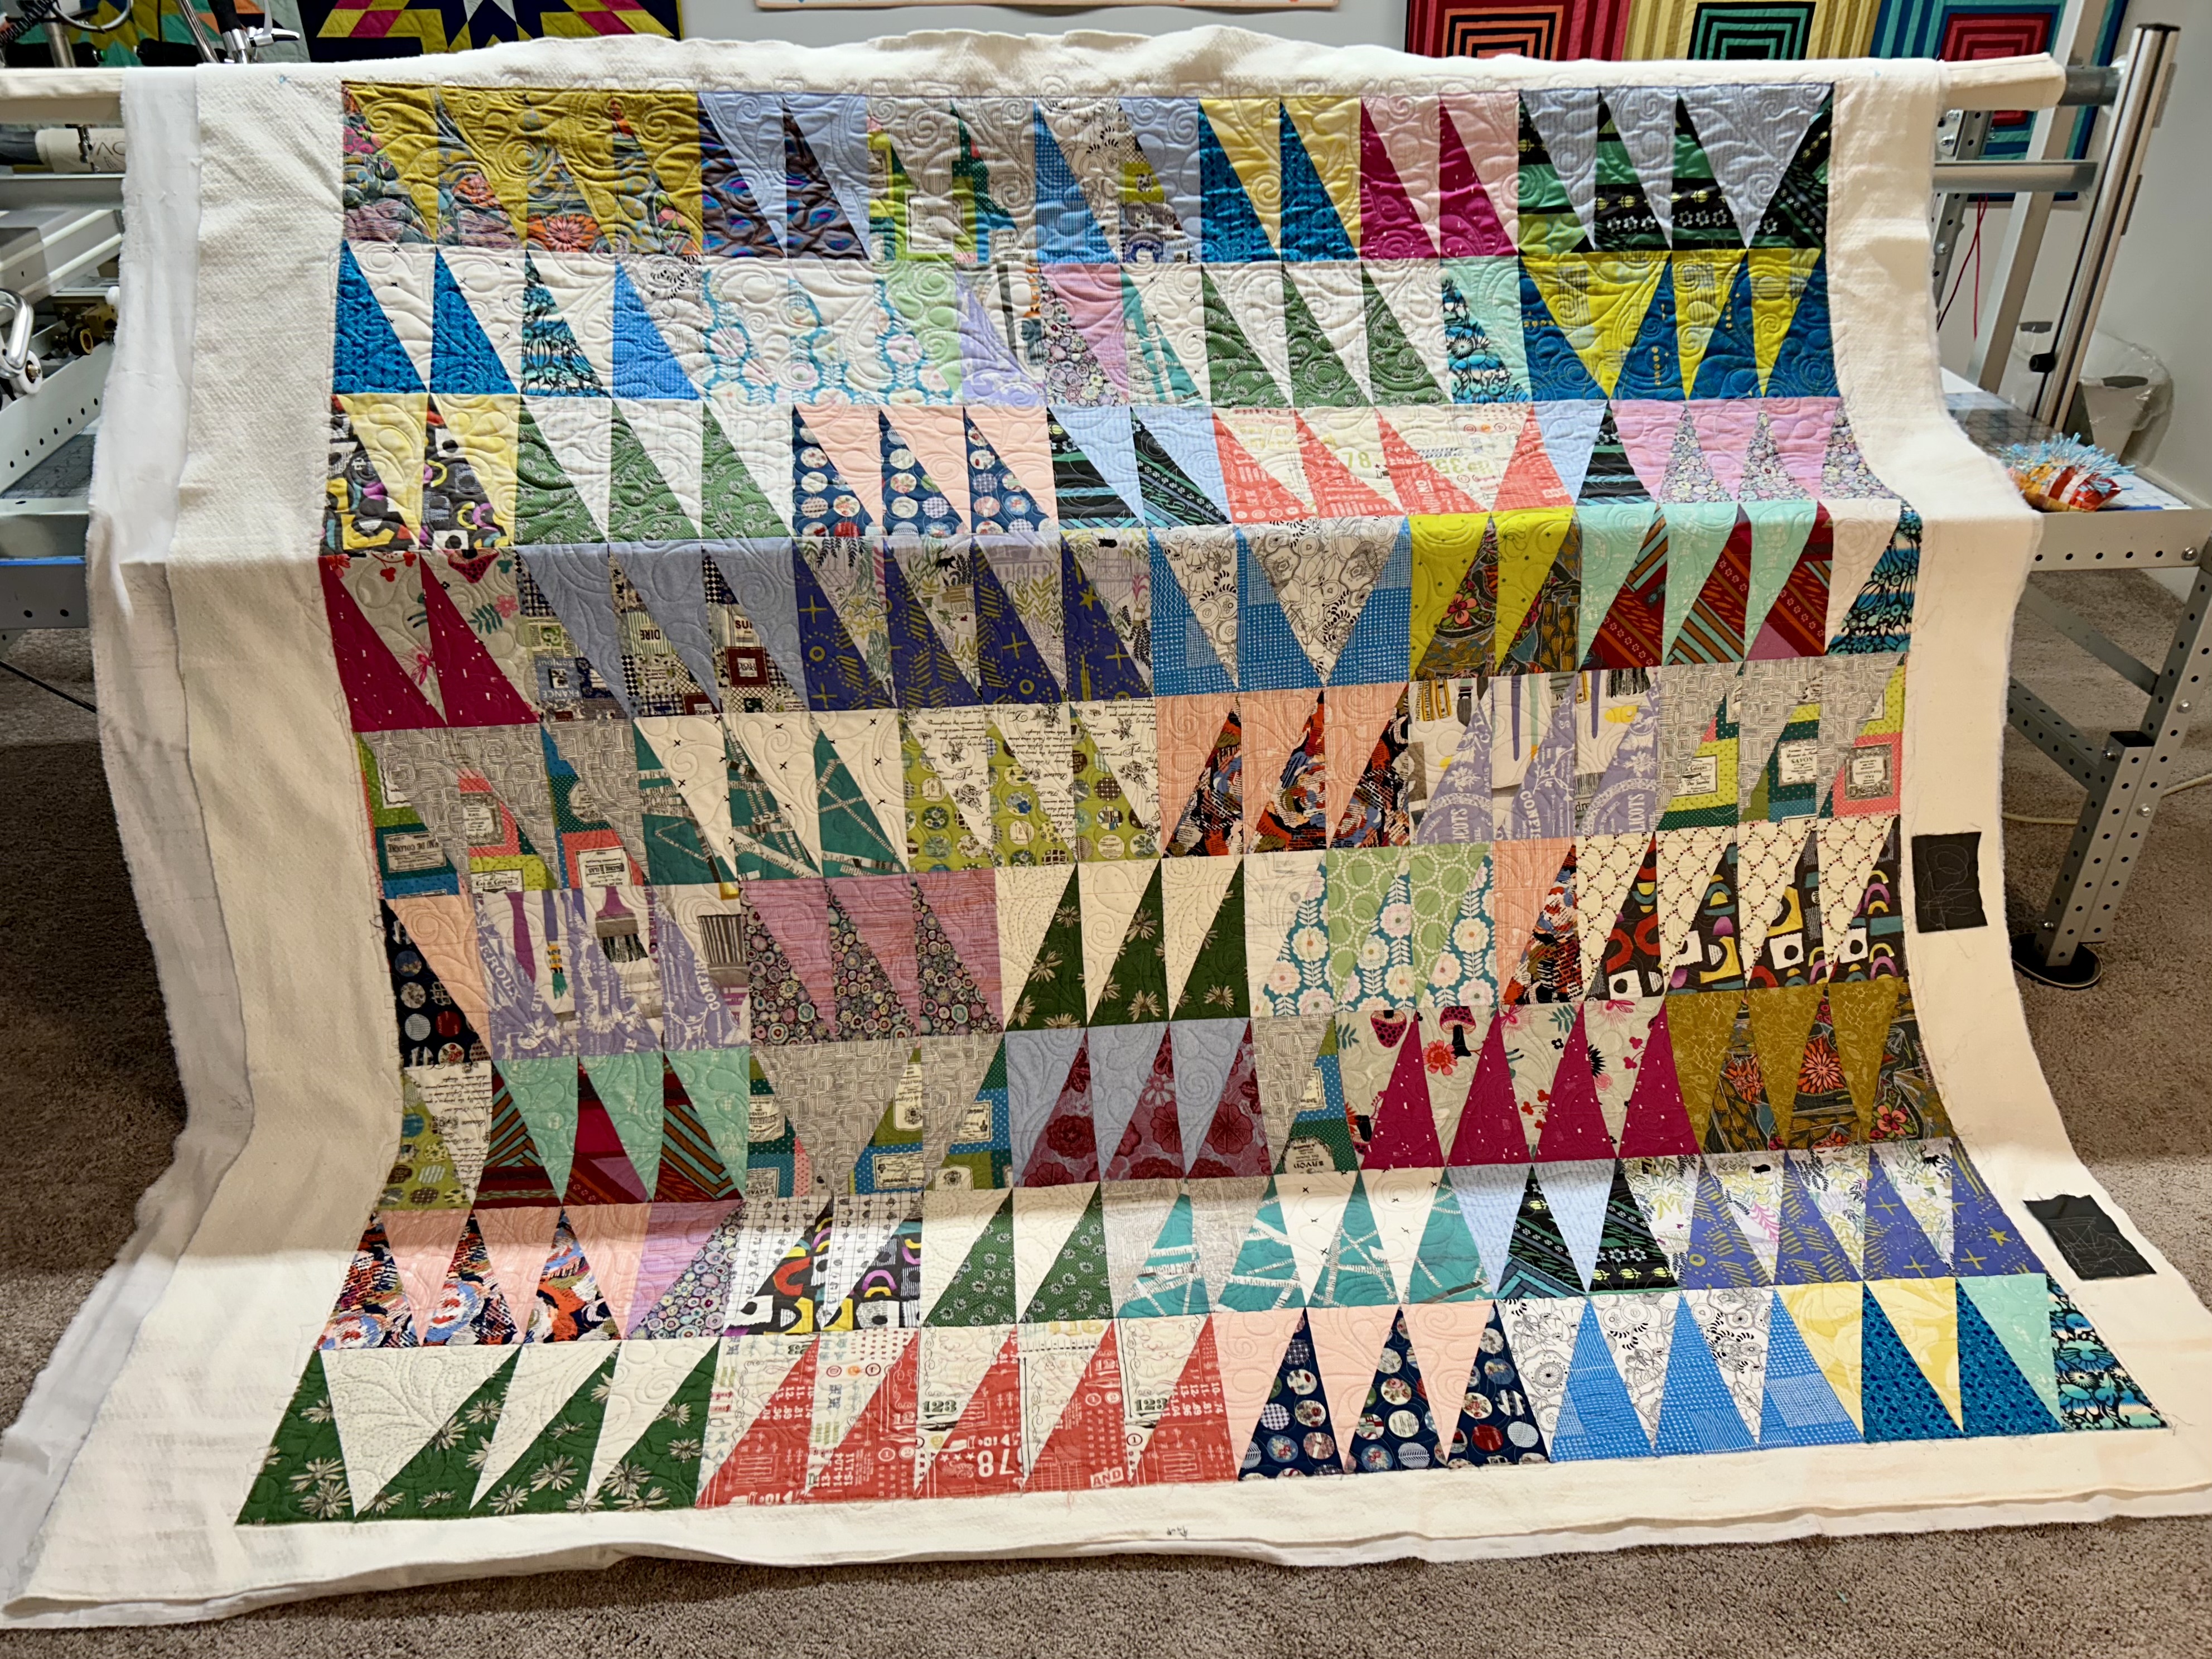
This pic does not do this quilt justice. It is such a fun, fun and handsome quilt. I have loved every minute of making it–using the Hurty ruler by Latifah Saafir.
Part of the creative fun for me was changing directions of the block in an orderly manner. When you put both sides together (left cut and right cut) you get an “arrowhead.” Thus the name. If you look at the upper right block, you can see one. I then had these “arrowheads” travel down the quilt on a diagonal that ends on the loser left. It is subtle–and I love subtle patterns.
This quilt is the FIRST in what will be a series using the half-rectangle triangle.
This pic shows truer colors and better sense of the size of the block:
I quilted with a pale grey and used the same Nemesh’s Feather-Grande panto that I later used in the second quilt in this series, “Diamonds,” which came off the longarm yesterday, was trimmed, and which get its binding installed this morning. (It too is a wonderful quilt.) The backing is a great low-volume wideback from the Hawthorne Supply Company–and due to the “quiet” print, the grey thread works well.
Here’s a close-up of the “Arrowhead.”
Here’s a good look at the texture from the panto–and of my beautiful blocks.
I can’t wait to show you “Diamonds” when the binding is done. I do sew bindings by hand.
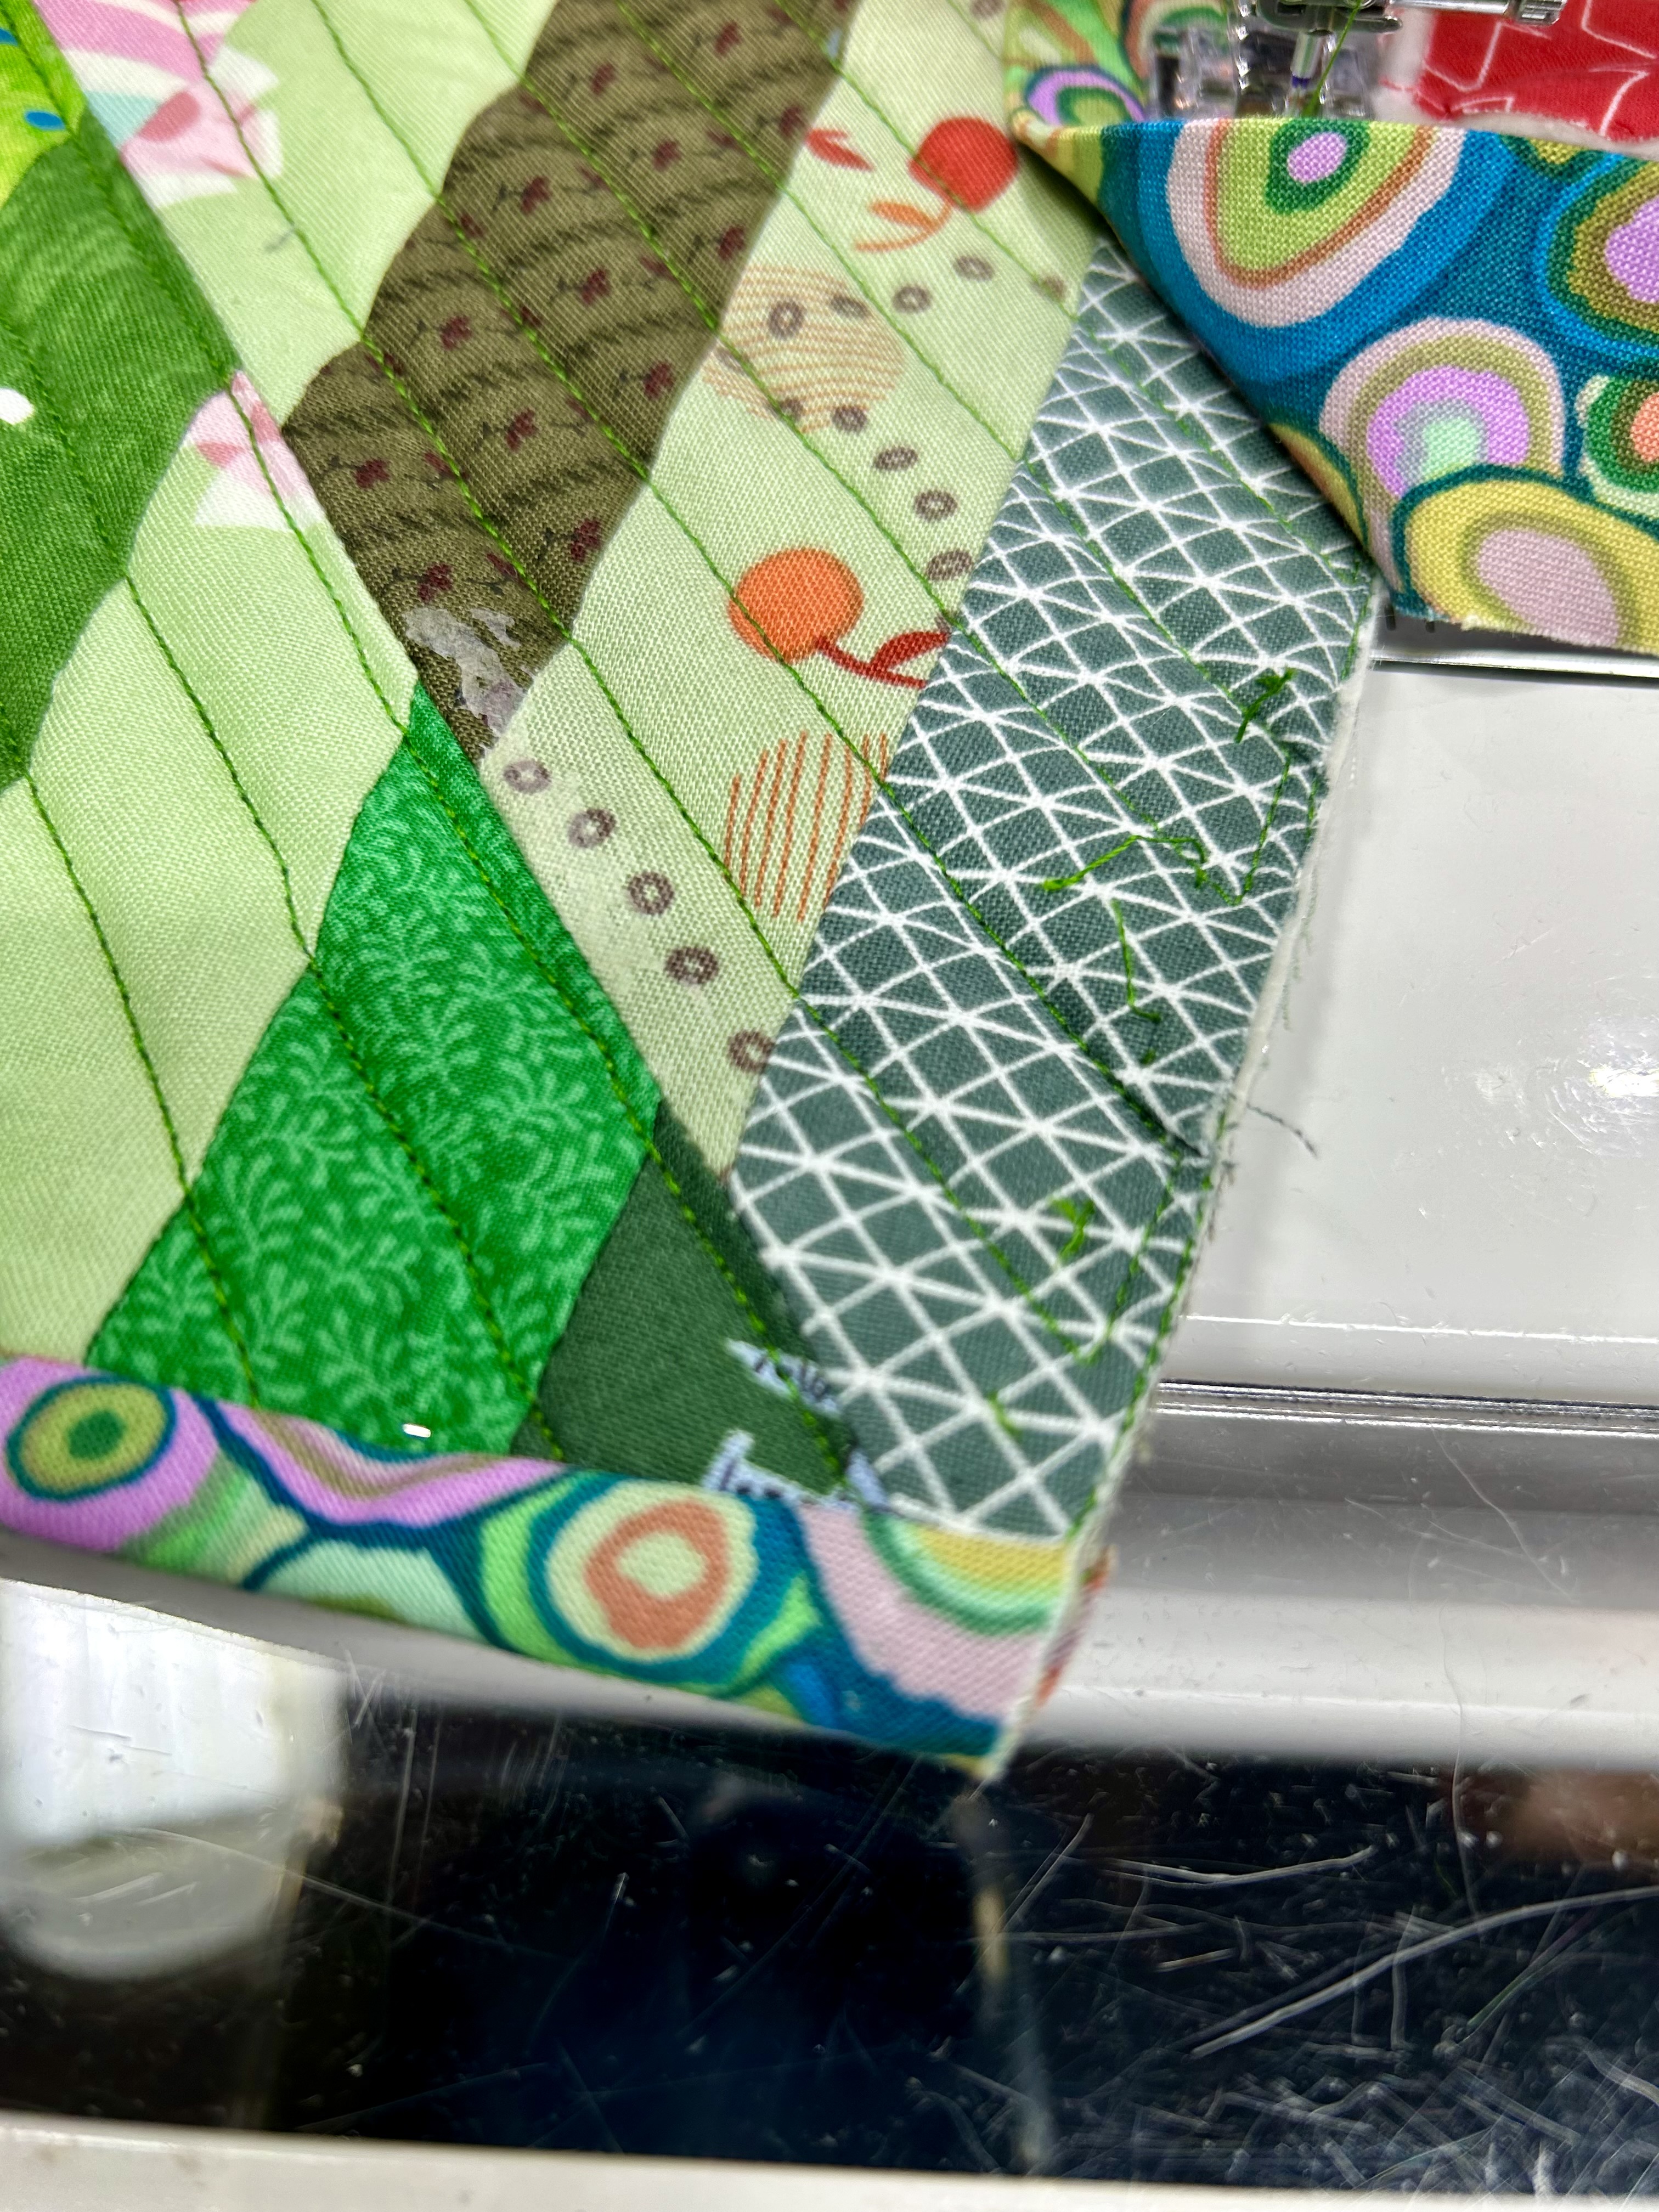
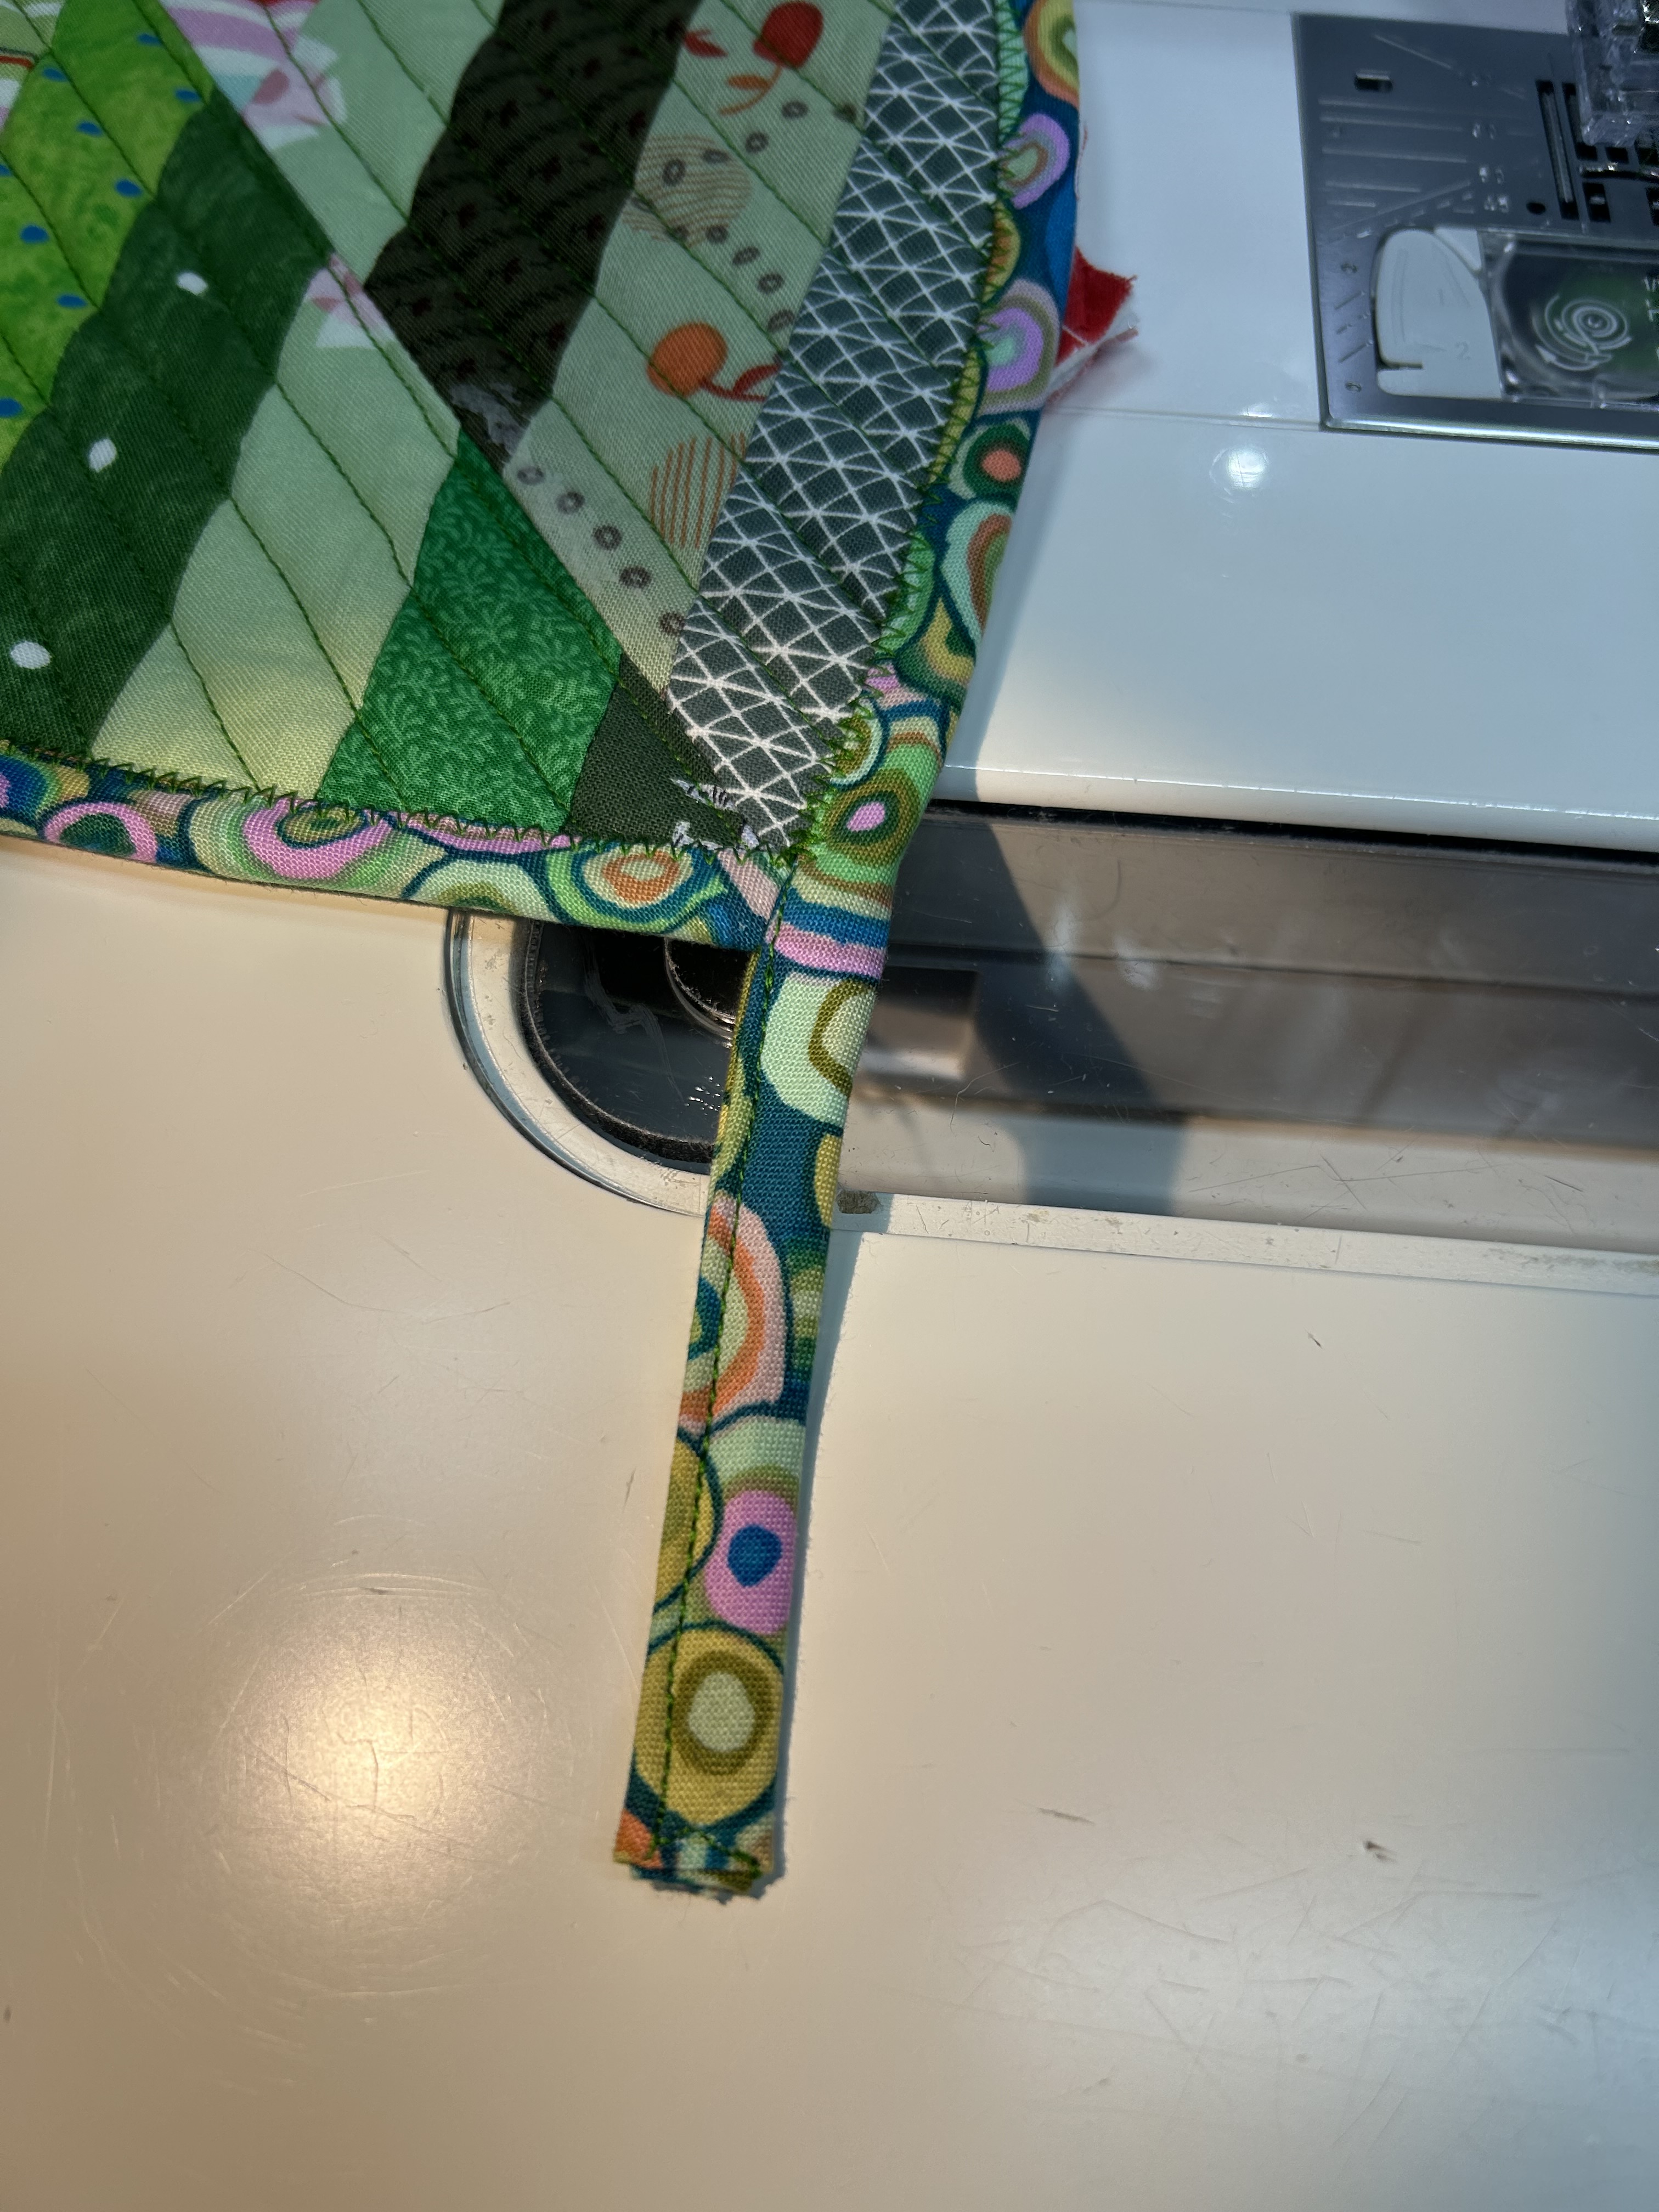
This curved leaf potholder from Amira Ameruddin–found on Instagram (amira__little mushroom cap)–really needs a bias binding. Note that I made my top and bottom as Amira showed, then used a freezer paper template to cut out my leaf as I was hopeless with freehand cutting.
Start binding on the right side of the bottom of your leaf–after choosing which side you want to be the top side of your potholder. At the pointed upper end, treat that like a normal mitered quilt corner. ***Note that when I am almost to the end, I folded the binding at the start over.
Overlap the binding and sew to the end of the potholder edge.
Back up to reinforce.
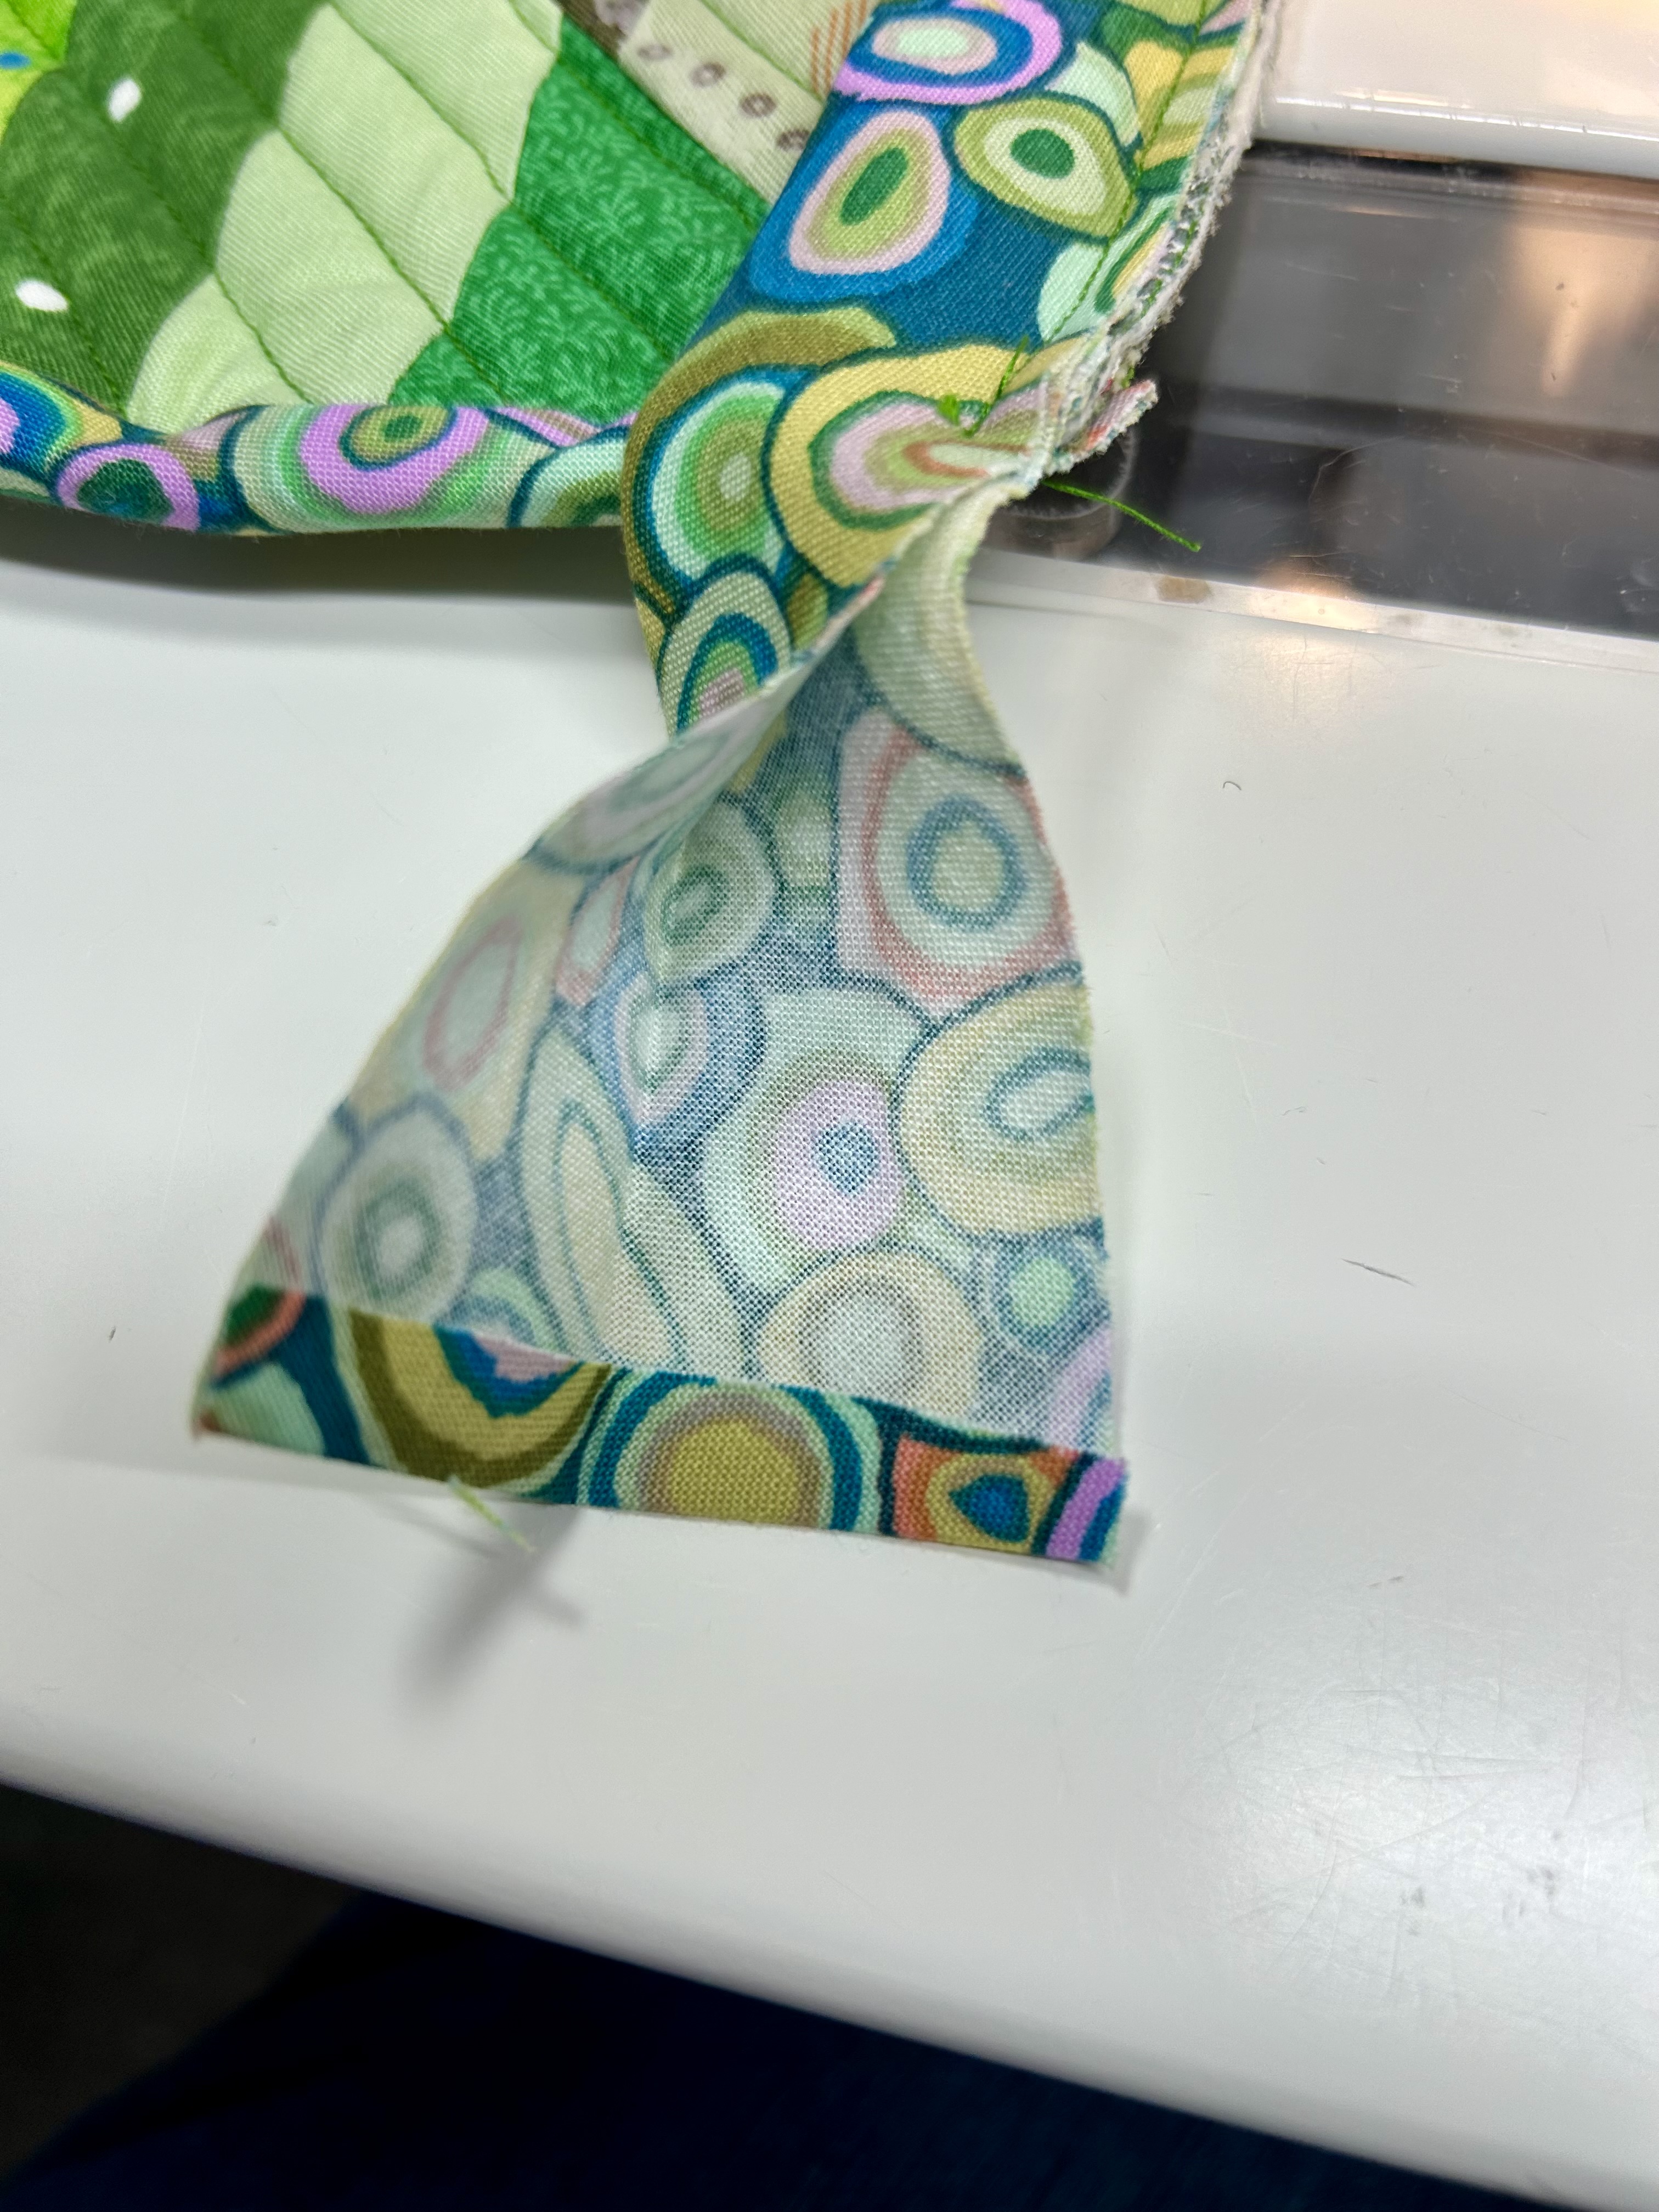
Trim the hanging strip–and turn under and press the end you just trimmed. **Note that I trimmed this one a bit shorter than I should have.
Fold the strip in half and press it so you get a center line.
Line up the cut edge with your pressed fold center line.
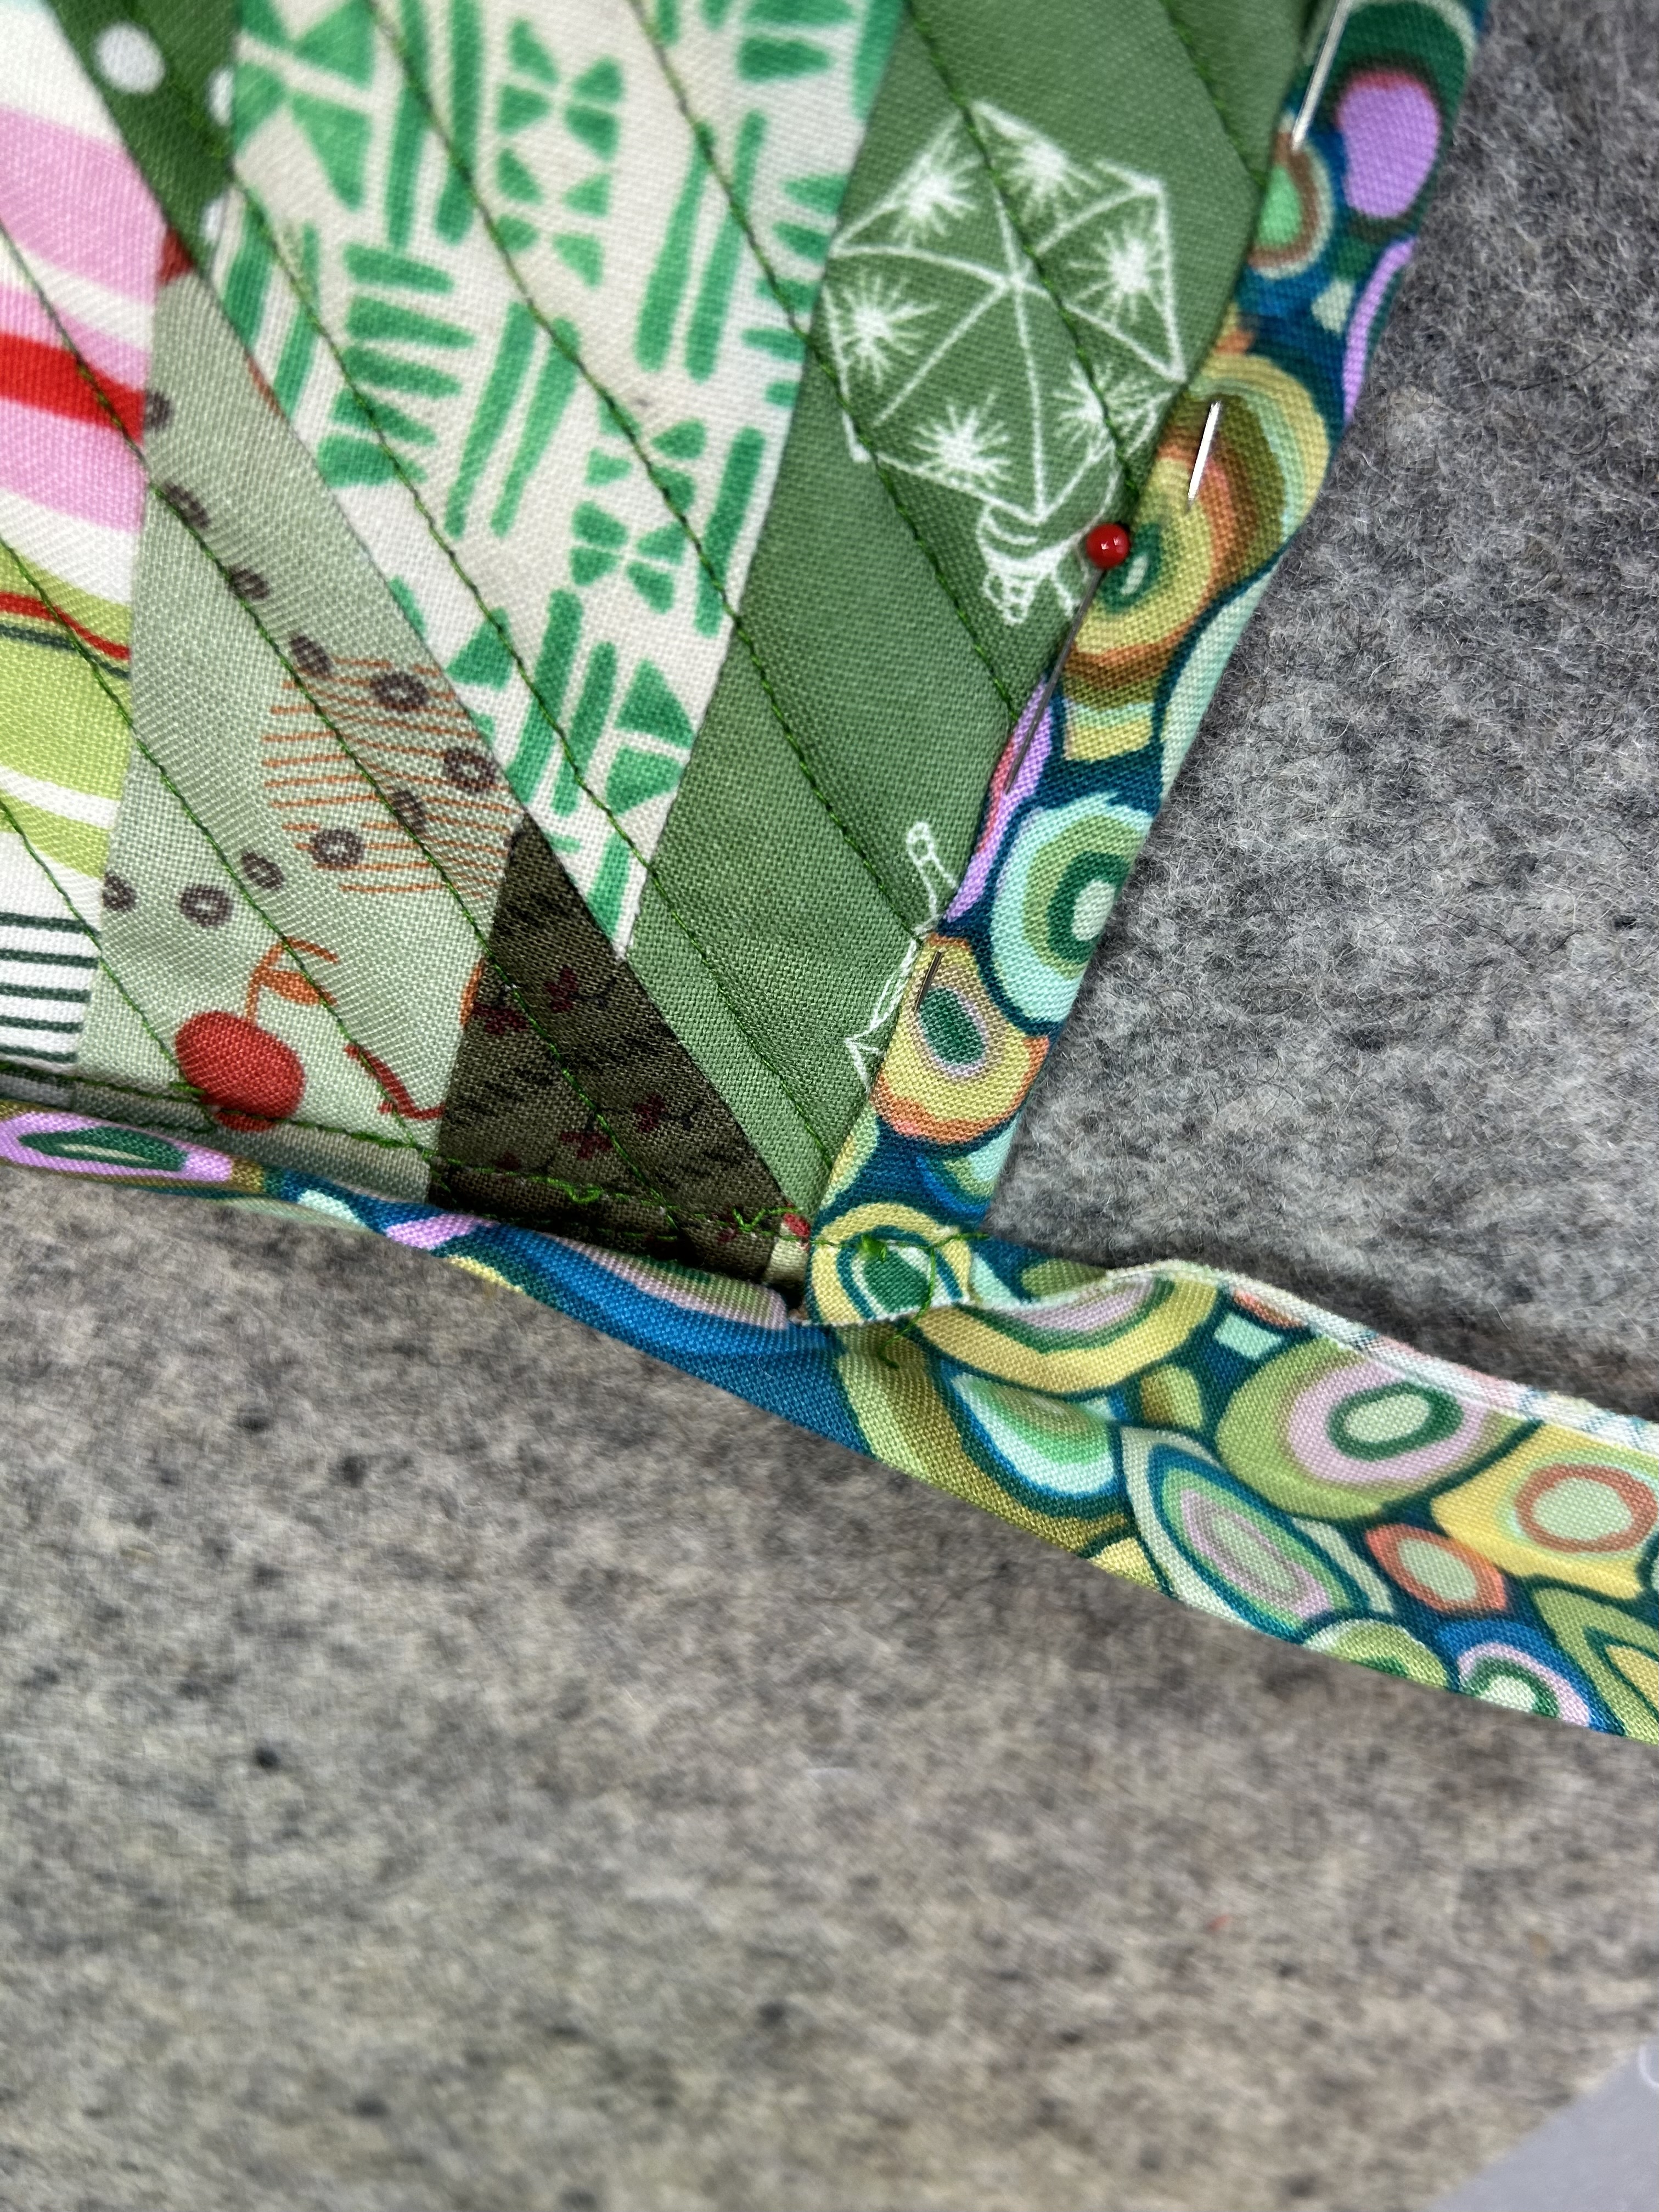
Press and pin the hanging strip together.
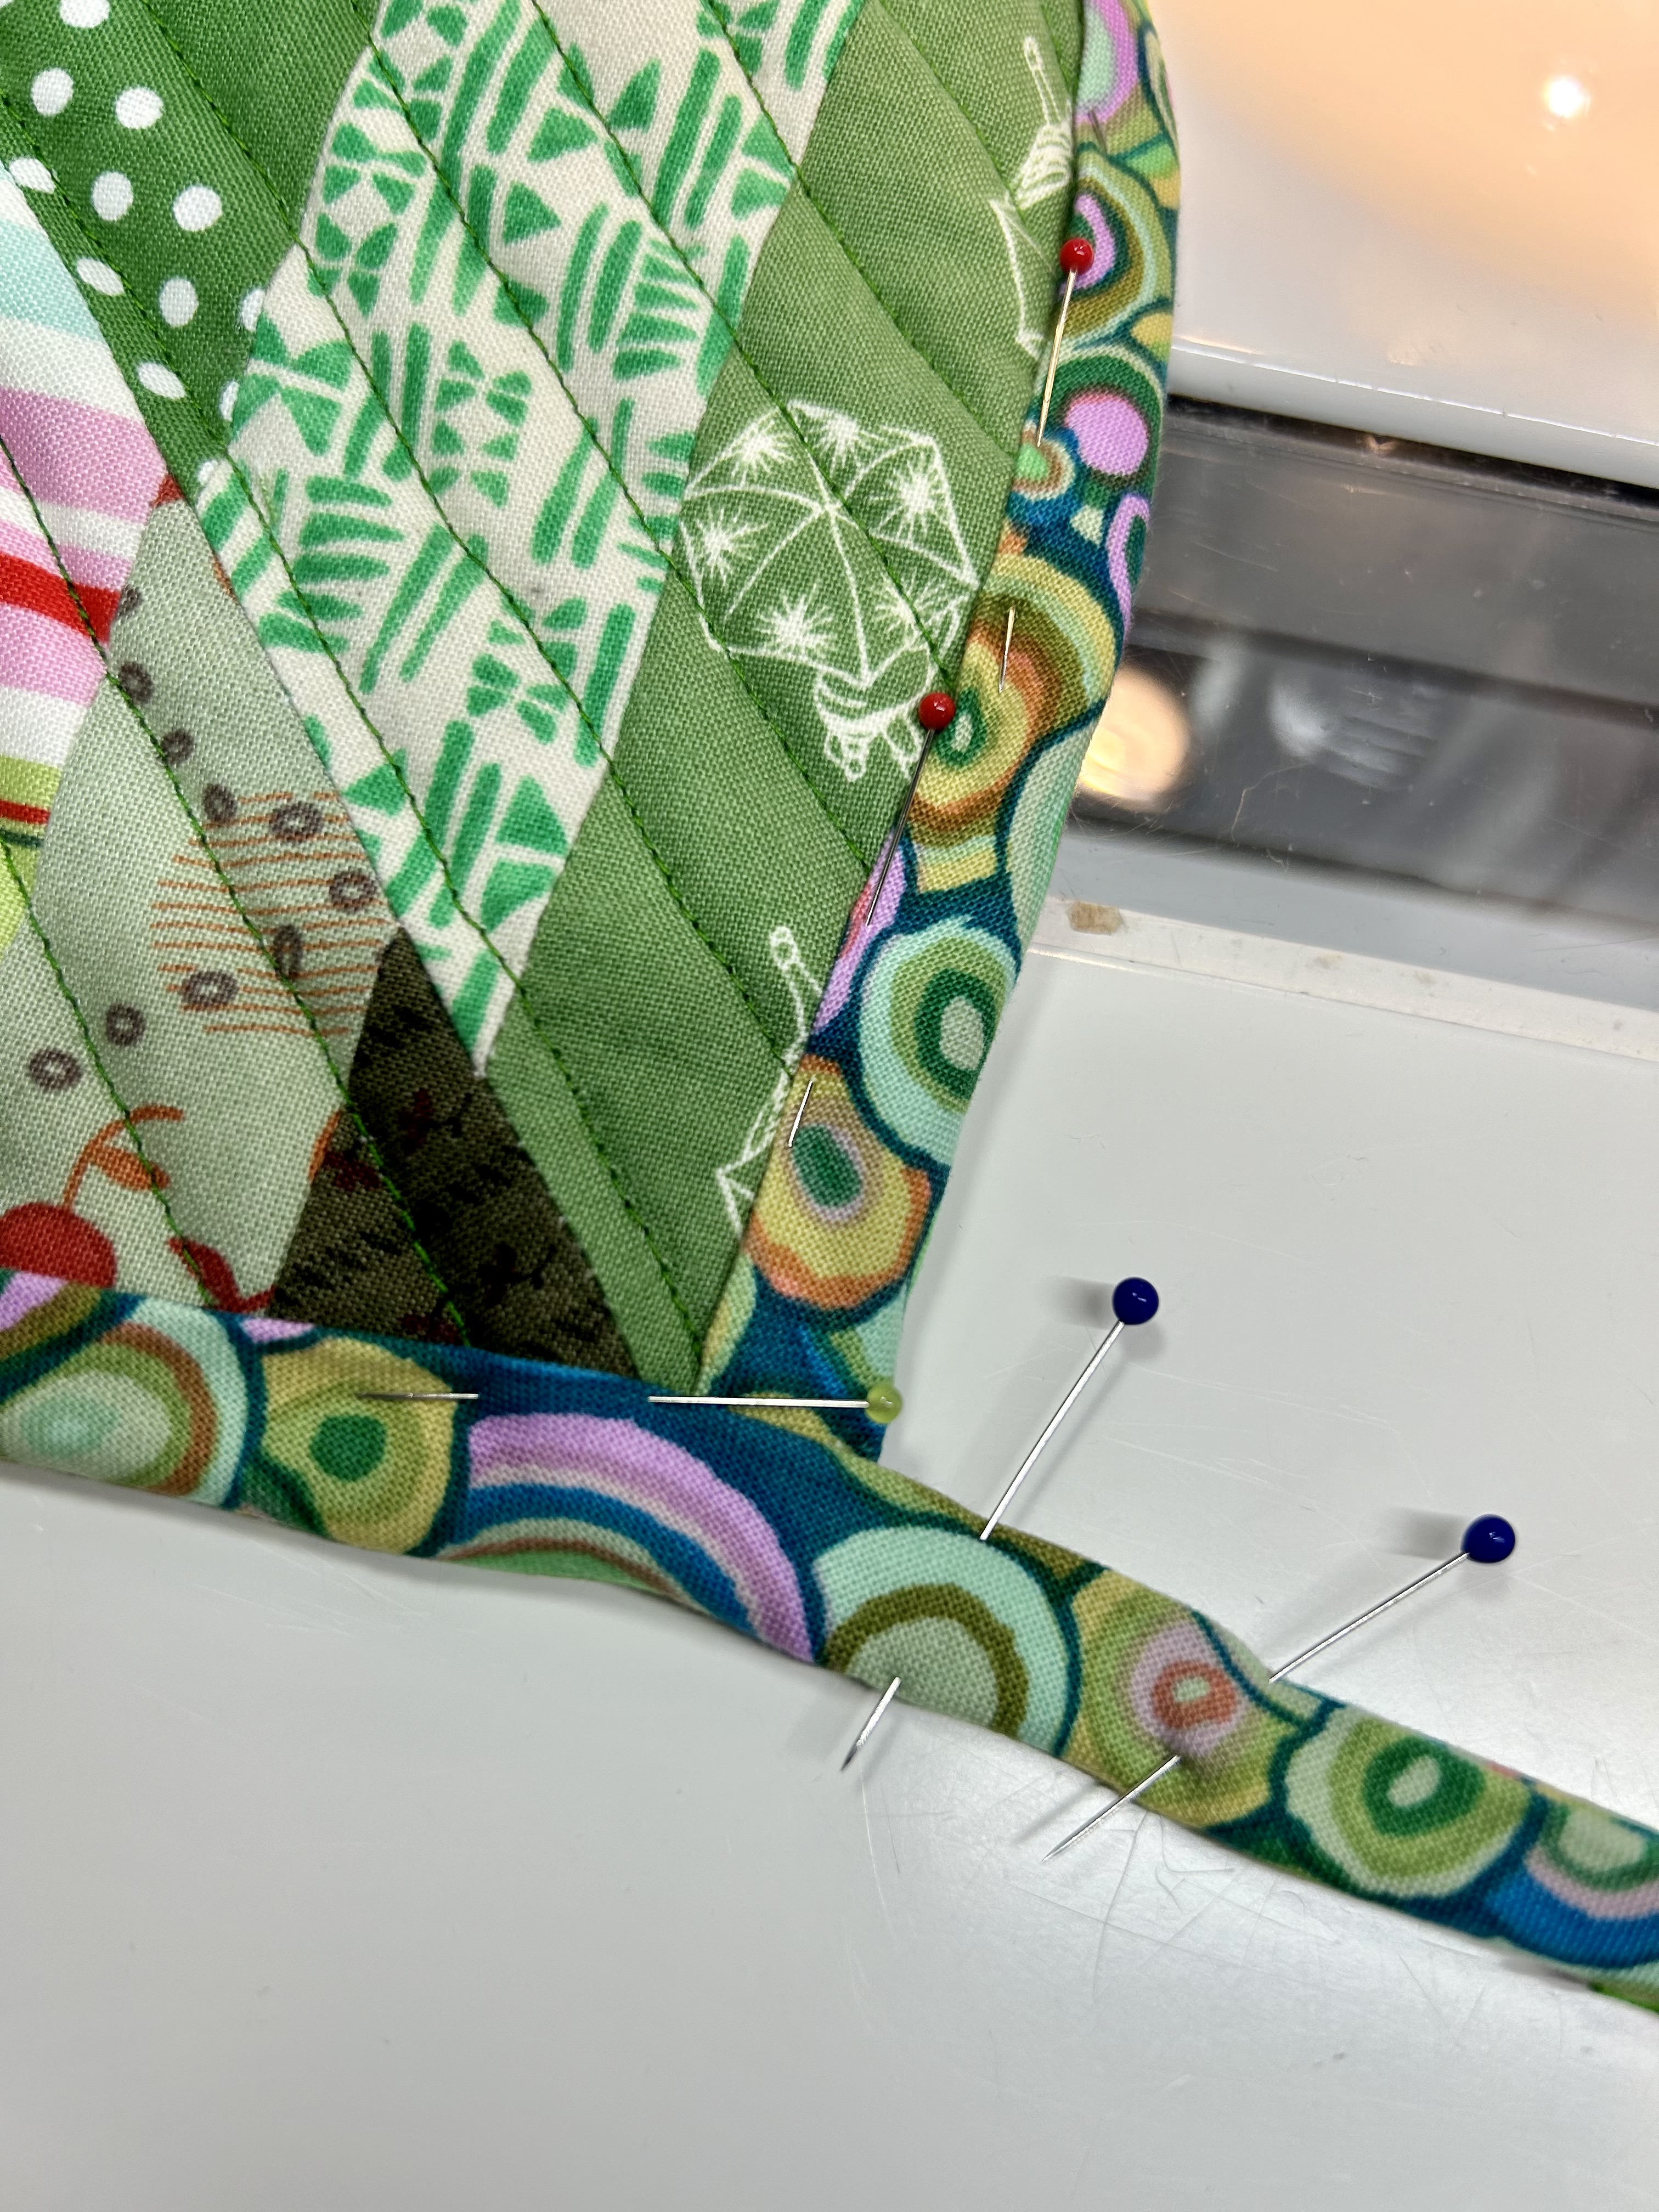
Close up the bottom side and pin. ***Note that to zig-zag (or however you want to sew down your binding) you will be doing that from the top side AND ***you will want your pins to be pinned with the heads on the bottom as you sew, so you can easily pull them out as you proceed. So, my pin below will need to be reversed when I pin the binding down.
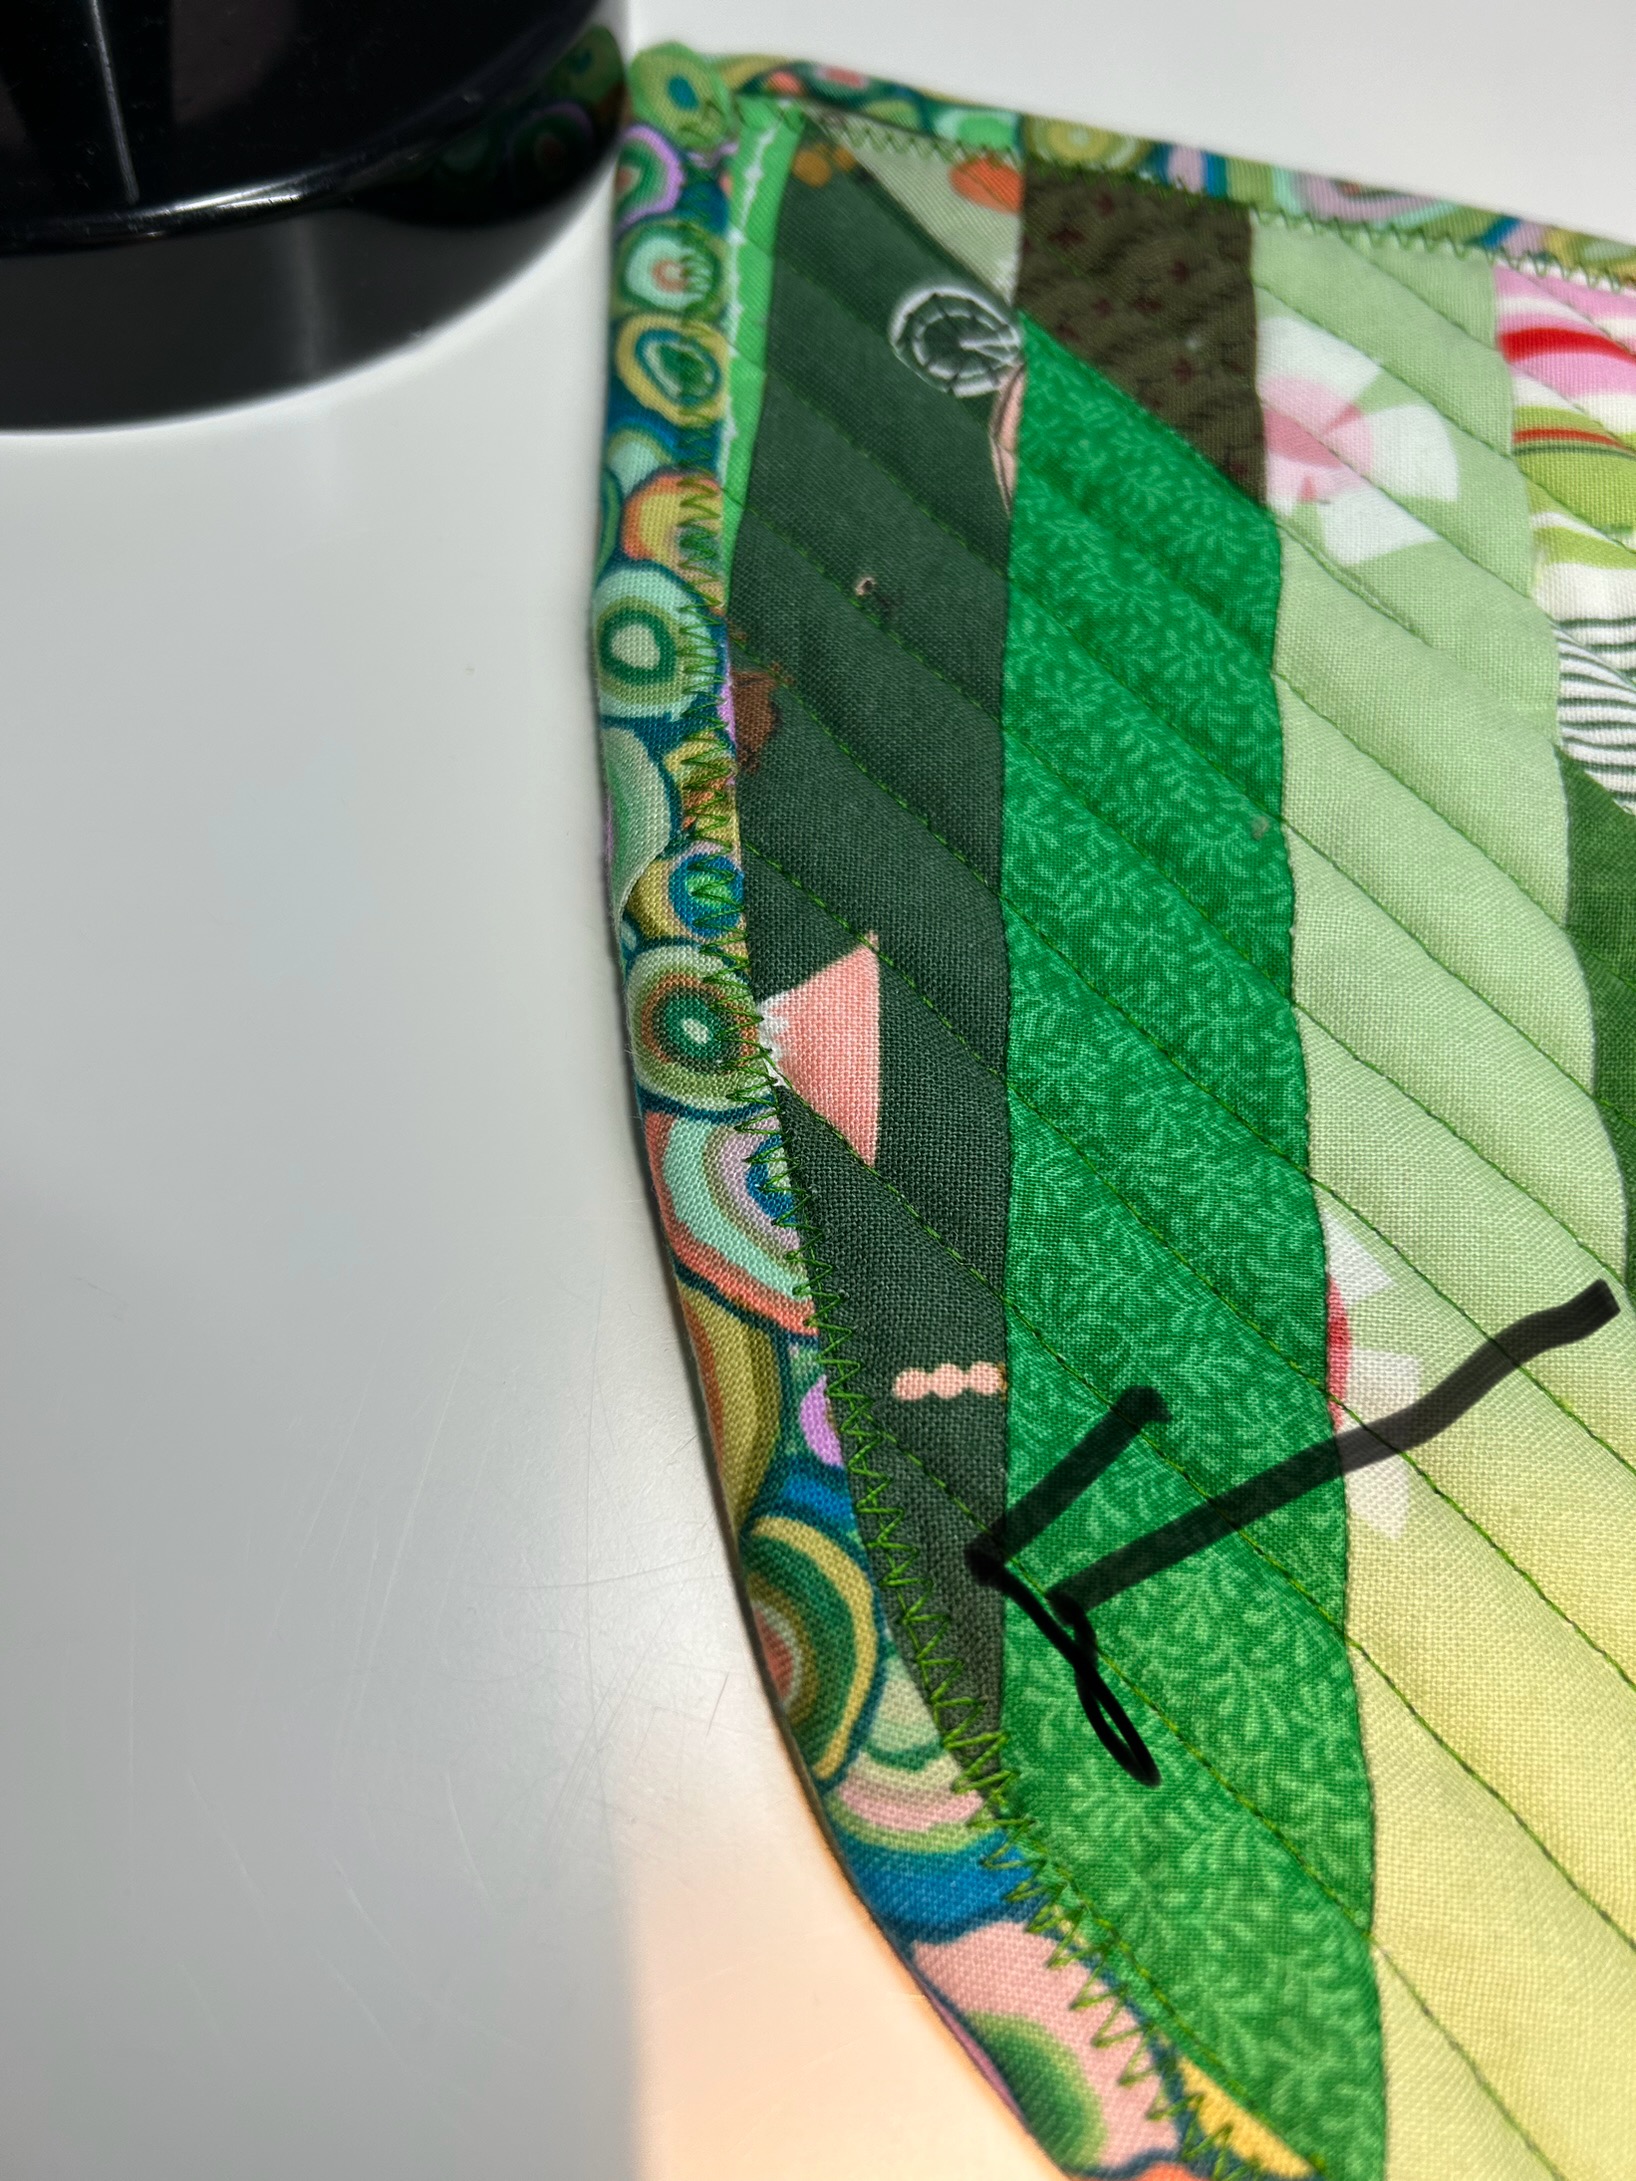
On the top side, sew down the binding. I use a zig-zag stitch–and I remove the pins as I go around. ***Start at the side that is underneath where the binding ends–not the strip side. And just start at the edge of where the top binding lies–not on that upper binding.
When you get back to that starting point, change to a straight stitch and go down the length of your hanging strip. Sew down the folded end as best you can. It can be tricky to handle the thickness, but if you turn the potholder and use something to help the feed dogs grab the bulk, you’ll be ok. I suppose whip stitching that end closed is not a bad idea either.
Turn the loop and sew it down. ***Turn to whichever side you think would be the best back side. I found that sewing it down outside the bulk of the binding was easier.
If you missed grabbing some part of the binding, just catch it with a hidden whip stitch done by hand. I am terrible at this machine sewing down of binding–and on this curved leaf potholder with the added layer of the Insul-Brite, I think maybe is also a factor of making the binding thicker and trimming well before turning the binding and sewing it down.
This machine sewing of a binding has been a learning curve for me.
I’m getting there with each try. And these potholders are visually forgiving and will be used and washed, so there’s no need to be crazy about perfection.
It has been a busy week for me. But we did get a good rain. I’ve had a sore knee, but am now walking again. I have no idea what I did to it. And I’m so happy with my quilting work. I mailed “Pot Pourri 4” to a niece with a new baby. And I’ve been contemplating tiling my outdoor screen porch. Neighbors just tiled theirs, and it is so lovely. They are encouraging me…
“Arrowheads” is almost bound. Yeah! It’s gorgeous! Pics to follow soon now.
“Diamonds” is on the longarm. This pic does not do it justice I don’t think. I really like this quilt. And I’m enjoying making this series using the half-rectangle triangle block made with the Hurty ruler (Latifah Saafir). On to the next… I have TWO ideas to trial.
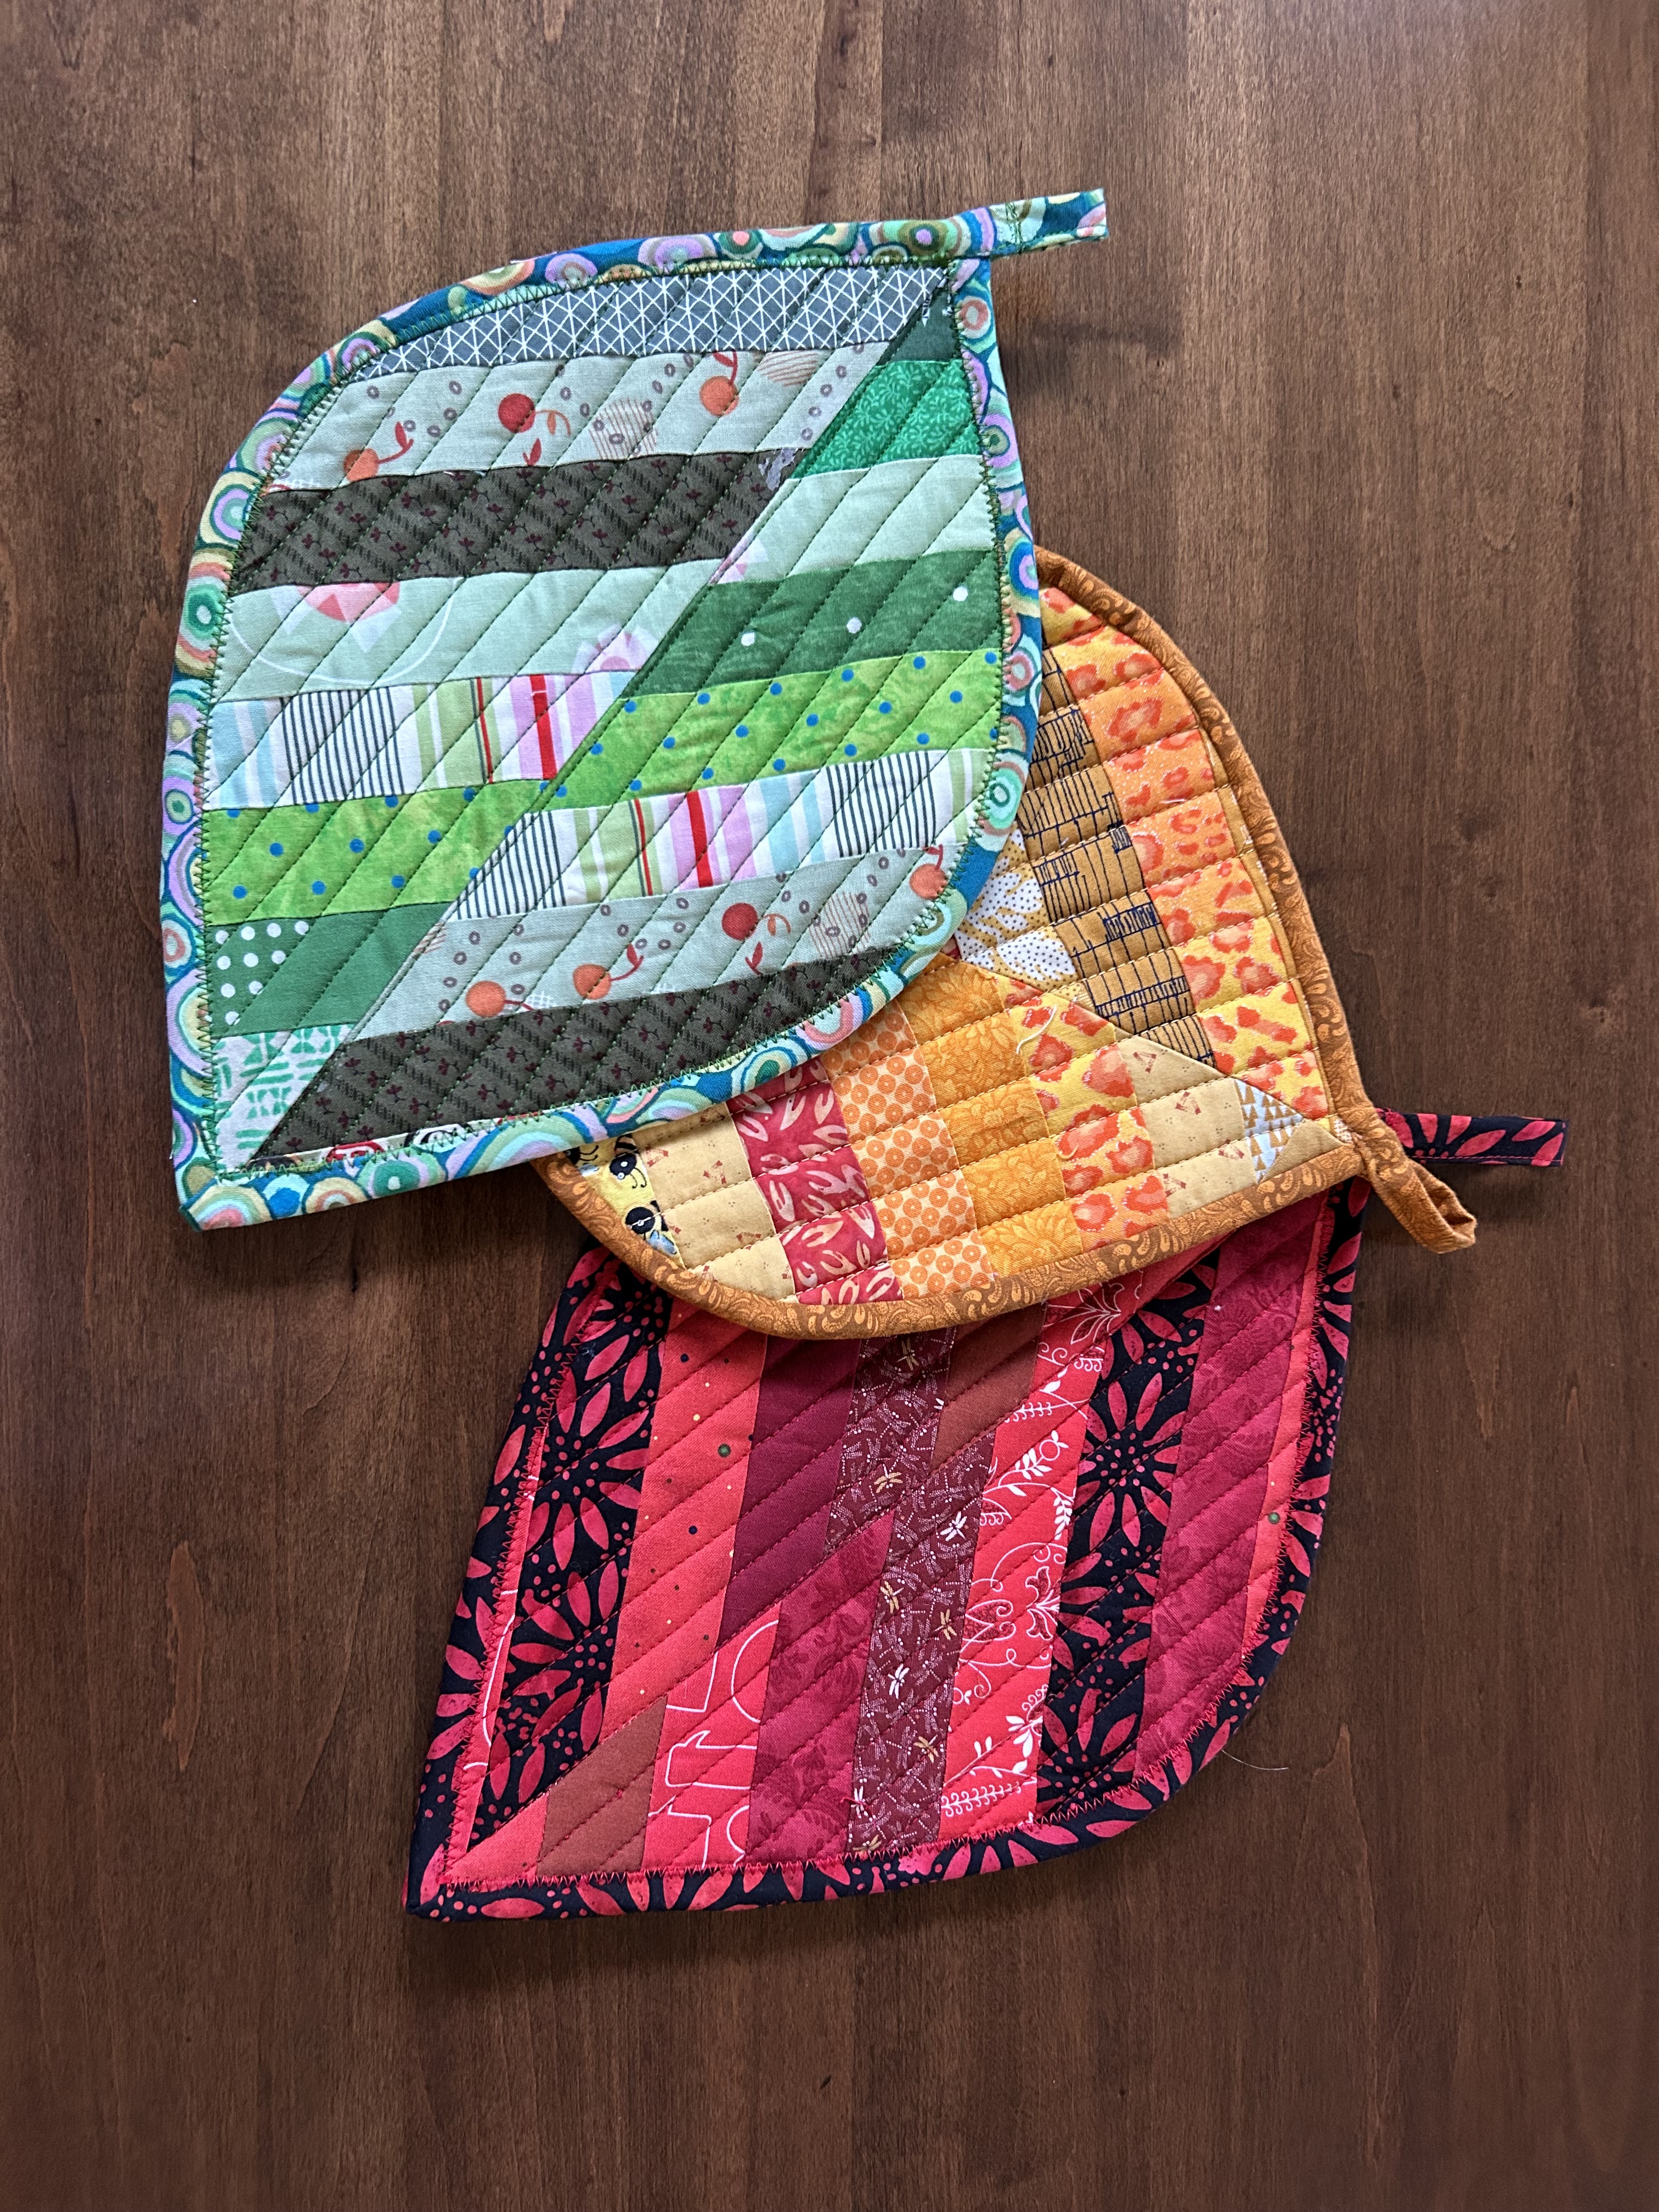
And then there are three leaf potholders–but yesterday the orange one went to a neighbor who had a birthday, along with a rope bowl. As requested by a reader I did take pics of how to do this binding and will post them soon.
Tara Faughnan, in our online “Blocks 2” class showed us her method for corralling solid scraps so they are easy to see and use. She clips color groups together and then links groups together with big rings. I had some small clips on hand, but ordered 2-inch ones and the rings. Wow! No more pawing through strips. I can just reach for the ring that holds the colors I want.
And now I can’t stop playing with these scraps rather than using the very pretty palette I pulled for this month’s block play. The pic on the left is from the grey strips–and you can see how very varied they can be and how their colors change according to what other color next to them. I’m going to hand quilt it and bind it. I have sorted all my strips but the greys–which will be a task for today.
What I want to do with the hexagon and the triangles (there will be a green triangle next–with an orange center and background) is to stretch them over 10-inch canvases to be used as little gifts. I am so excited about trying out this idea.
“Pot Pourri 5: Crosses” is all laid out. Now if I can make myself stop playing with this month’s block project, I’ll get it sewed together. (Remember this one is part of the 5+ years of using up Cotton+Steel/Ruby Star Society 3 1/2-inch squares. The bins are about half gone now, and the colors are starting to run out.)
The scrappy “Glitter” blocks are growing, but I’m not really engaged with this project. The block is intriguing, but so fiddly, even with the templates I broke down and ordered. I have two more cut out. So one more row, than…a decision.
It is another beautiful day here today! I’ll be getting out into it shortly.
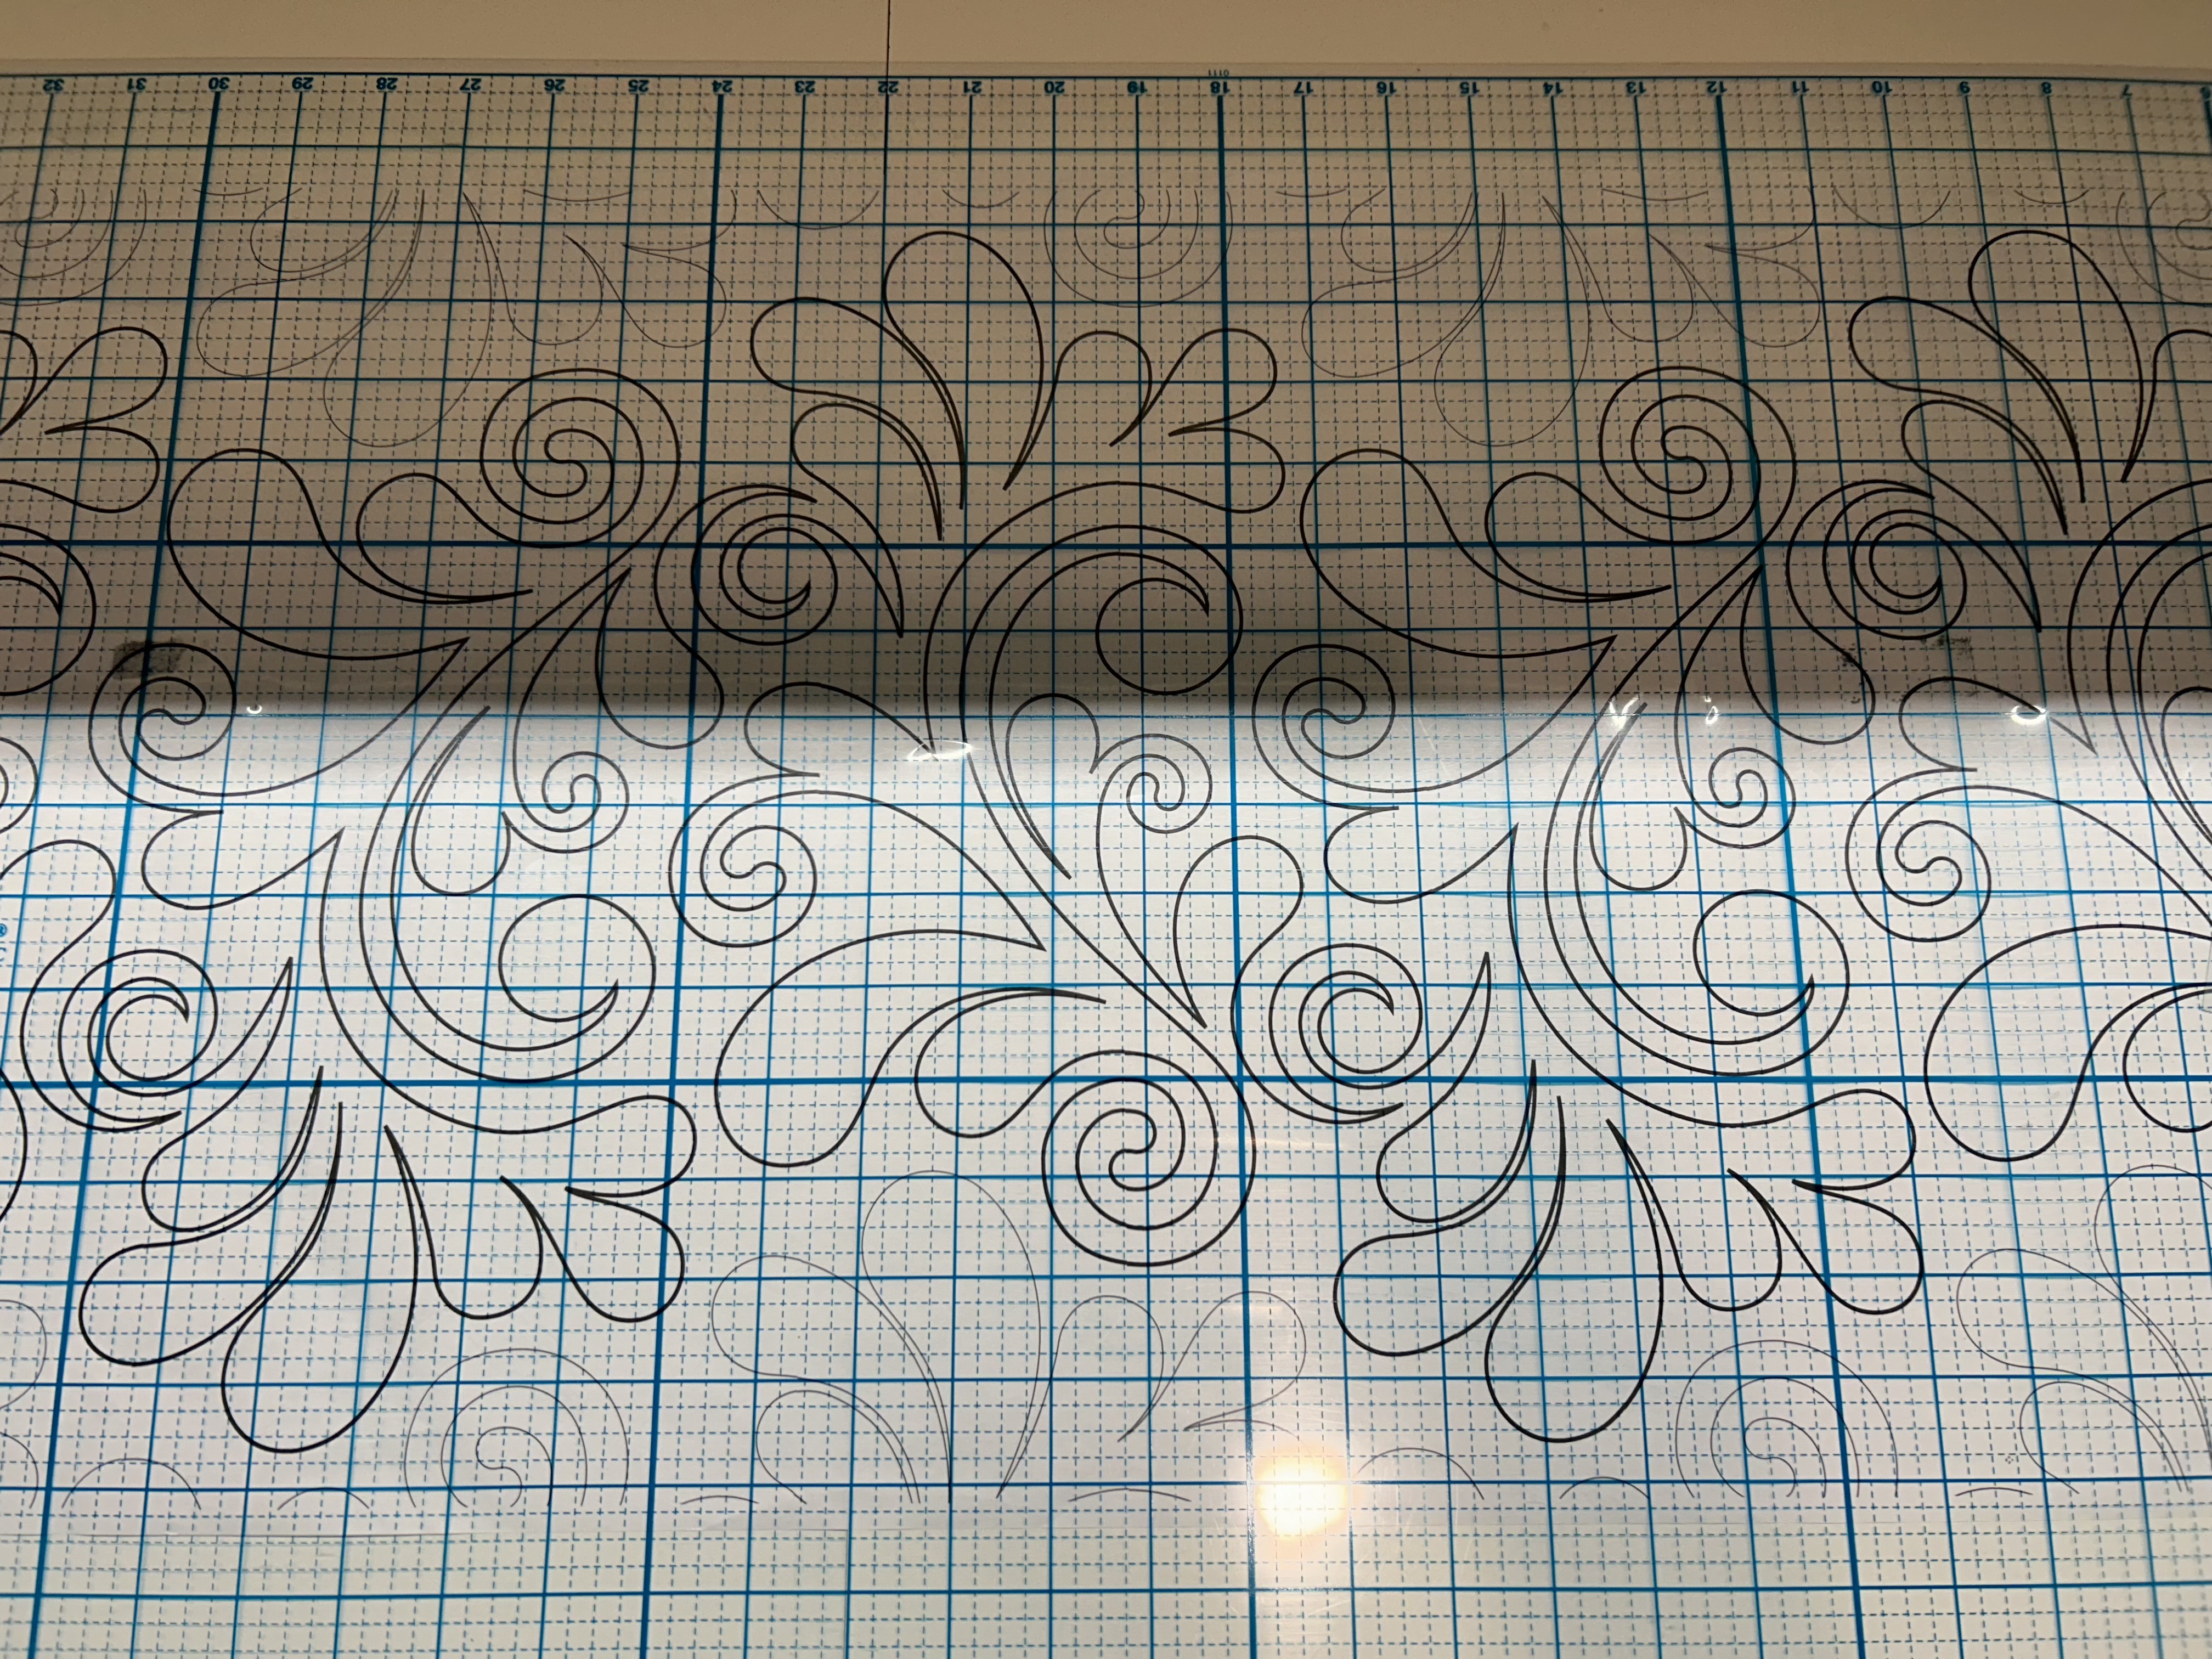
It took me a while to quilt it as I had planned to use a daunting pantograph for the first time: “Nemesh’s Feather Grande” by Bethanne Nemesh.
I was intimidated. For sure.
But once I got organized with this panto, I found it was fun to use–all those cute swirls. And it lays down what would be a double/wider run, which means a more intense run, but double the amount it does on the quilt–so less runs to do.
It proved to be PERFECT. The texture is just awesome. Here is “Arrowheads” just finished.
Here’s a close-up of the texture:
And here is “Arrowheads” all trimmed and bound and ready for me to sew down the binding. I lay out a quilt on the floor to lay out the binding so I don’t play “binding roulette” with where a seam falls near a corner.
I’m liking this striped binding a lot:
“Arrowheads” is the first quilt in a series–using Latifah Saafir’s Hurty ruler–with which I am currently obsessed.
The second quilt, “Diamonds,” will come off the design wall later today–and I’ll likely use this same pantograph to quilt it. And I have enough of this striped binding to use it again. And I have a backing.
I have two more ideas to play with regarding at least a third quilt.
Meanwhile, I’m loving pulling so many cool fabrics out of my stash to make these blocks. This project is allowing me to play to my heart’s content.
With the last of my units made for my online monthly class with Tara Faughnan, I made these adorable POTHOLDERS. (And the rope trivet for a neighbor, who also collected two of these potholders yesterday.)
I wanted to just play with the leftover “hourglass” units I’d made to see what kind of patterns would emerge. Two of these (hourglass squares in the middle) are just the straight hourglass units–and they make the intriguing square–which would make a nice quilt block if set off with sashing. Hmmmm. Two use trimmed hourglass units combined with the half-rectangle triangle units and trimmed in an improv way. And one just uses up the remaining scraps from this month’s “play” block.
What was really fun was to figure out this new way to bind a potholder so that one leaves a tail that can be made into a loop. This way means NO need to join the two binding ends somewhere in the middle of the little potholder (about 6 inches finished). The end tail just folds over–turn in the raw ends–and sew it down. Then make the loop and sew it to the potholder. I sewed just outside the actual potholder as that was easier.
I’m sewing down binding on the last two projects from this month’s class, and it’s a good thing as the next project comes November 1st. It’s all good, and I certainly enjoyed this October project.
It’s cooler now, so it’s time for warmer dishes. I made a lamb stew the other day, and it has been rich and delicious. I bought a rolled leg of lamb some time back and unrolled it. I cut the thicker piece into a roast and cut the thinner piece into chunks for k-bobs or a stew–and froze the two packages. The roast was cooked some time back, and now, this stew.
I wanted some turnips, but couldn’t find any organic ones. They were a fall staple in Maine. But, I did find parsnips, so included those. The green is collards. The rest is chopped onions browned with lots of garlic–then carrots, potatoes, the parsnips, red peppers that needed using, some onion chunks, and herbs–all thrown into the pot after I browned the onions and garlic–then when the mixture started caramelizing, I threw in the meat and cooked for a bit, the added water.