The Design Wall

…is filling up again!

On the left is a very old Kaffe Fasset print I bought many years ago at a sale in Maine where a fabric store was closing as the owner was retiring. And because it is an old KF print, it has sturdy fabric, not the sheer fabrics the market gives us today, fabrics that require starching to even cut them properly. LOL, no more on that rant this morning.

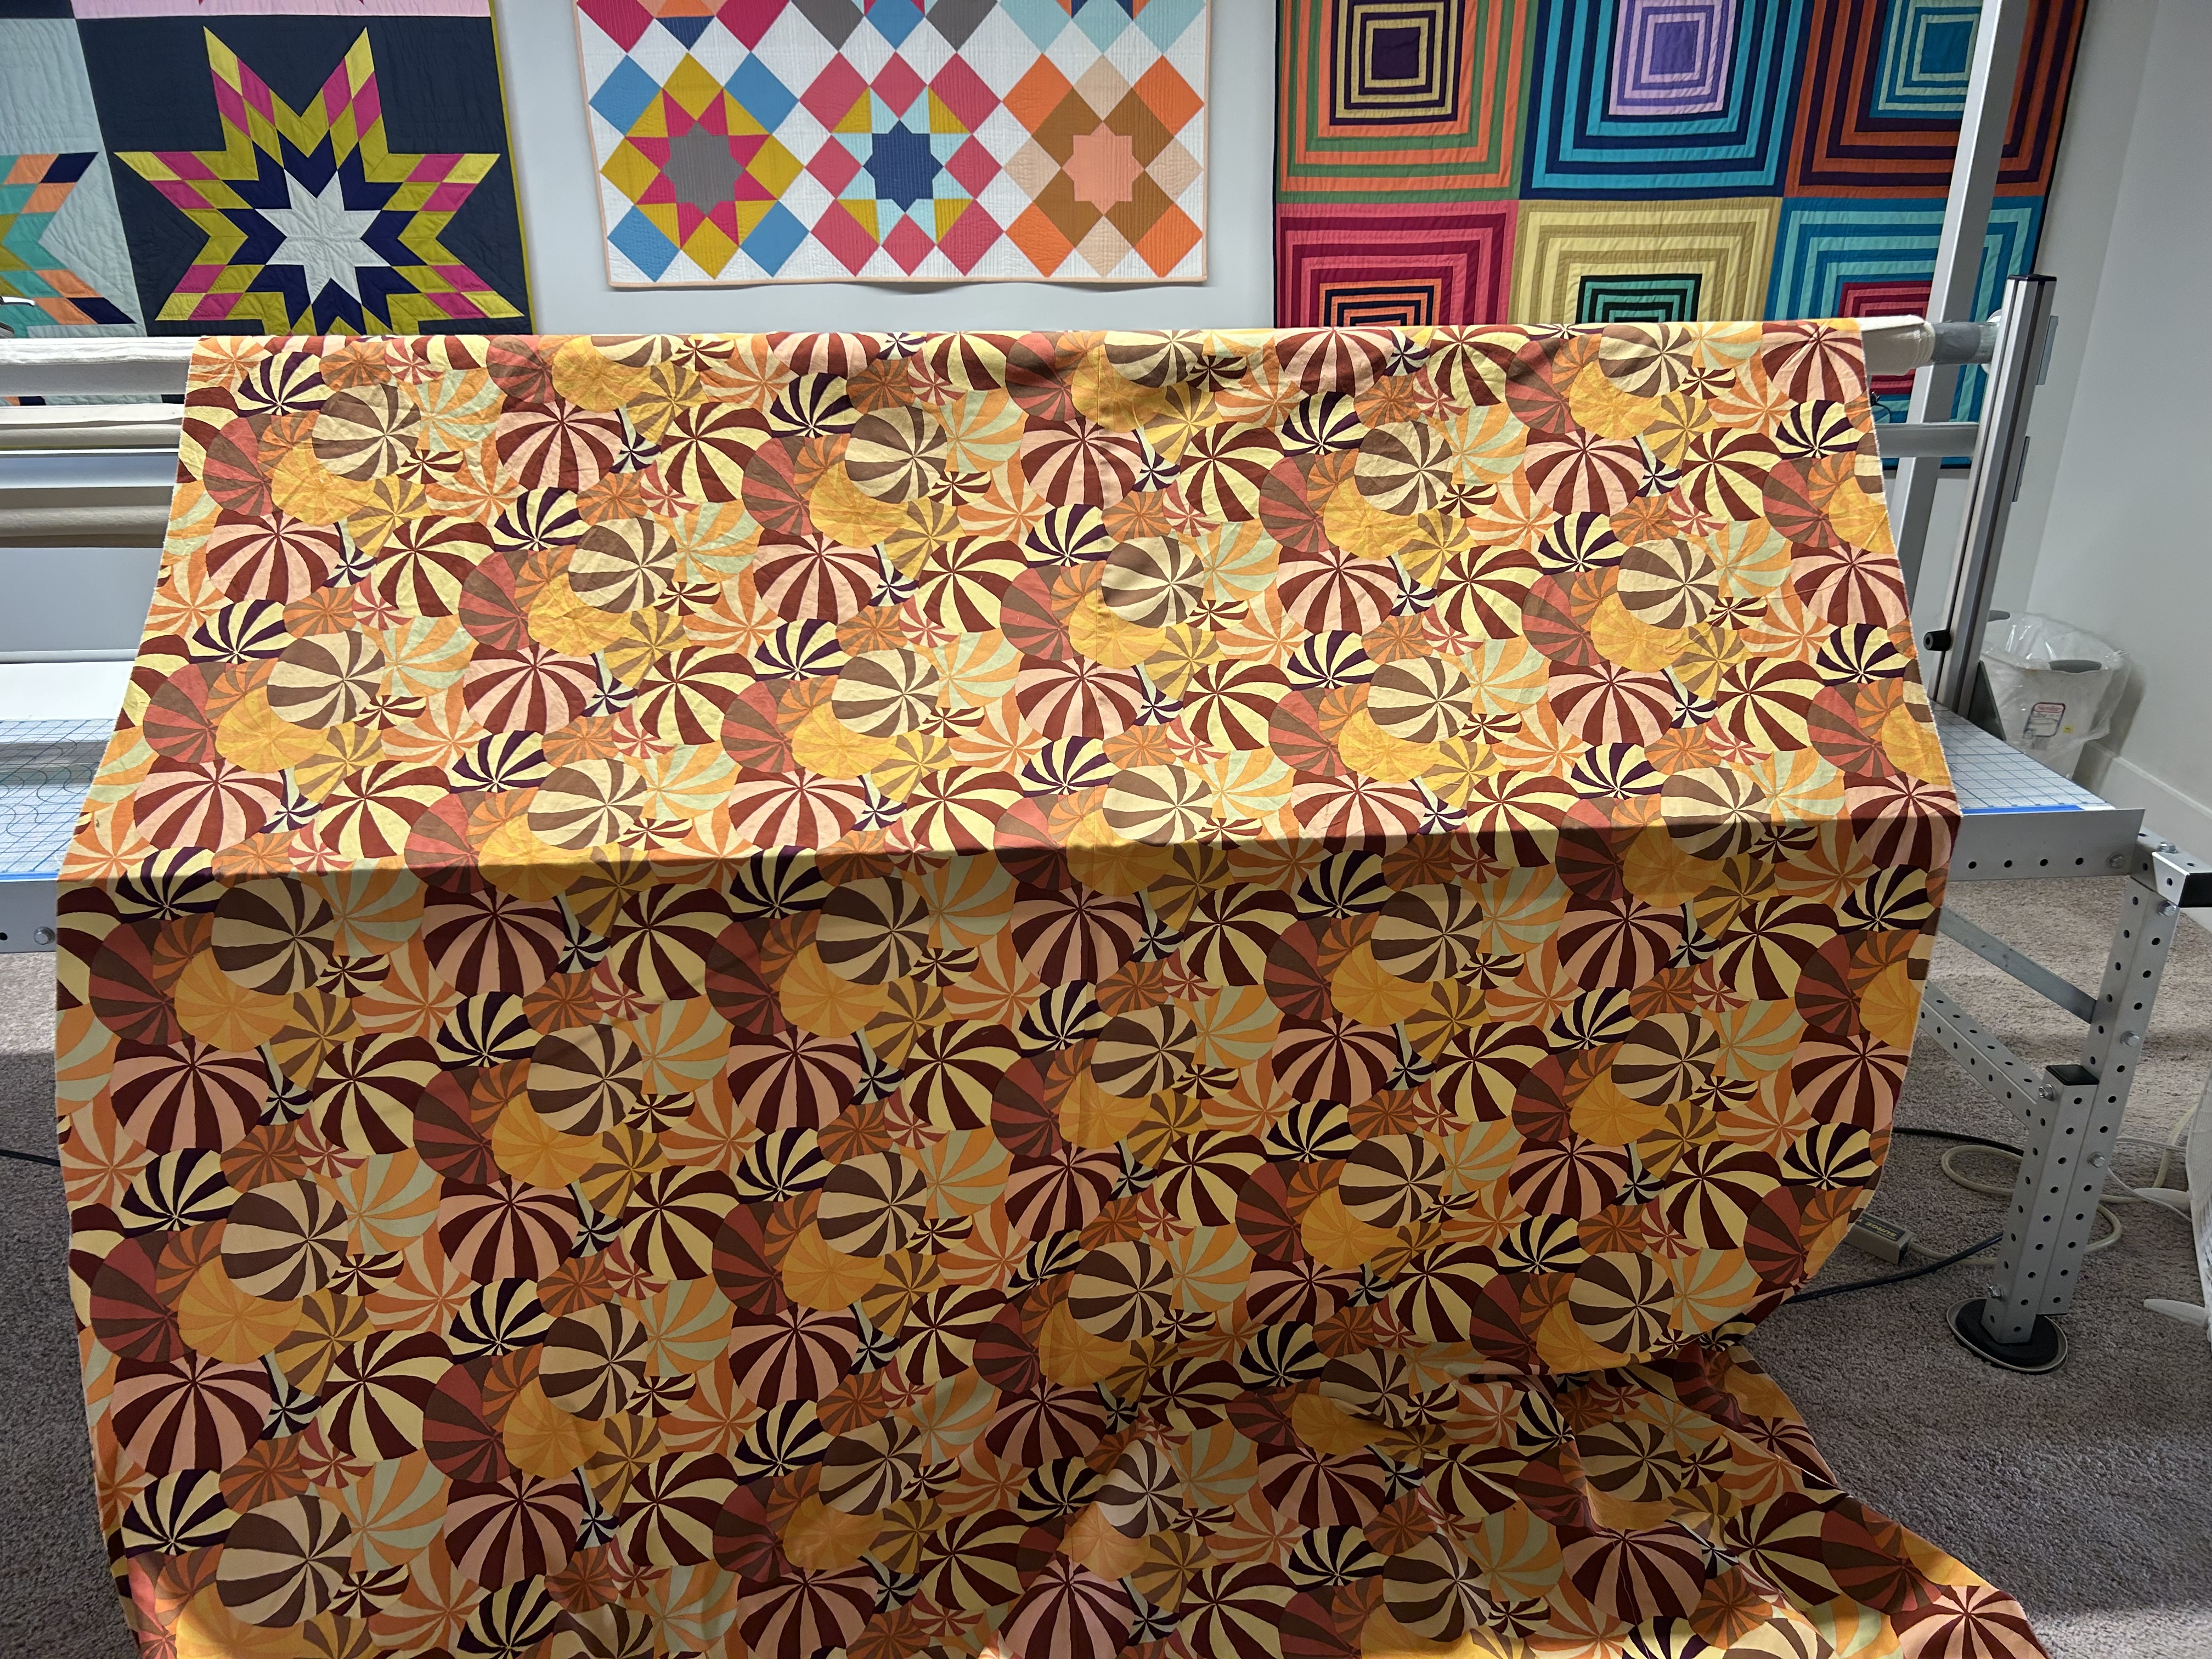
I was thinking of using this fabric for the Cat’s Cradle quilt top next to it as I’m trying to use up stash fabrics, but these two critters are fighting. I’m going to use this old KF print for a backing for another 8-inch Cat’s Cradle quilt top that uses solid fabrics in the colors in this print. I’m VERY happy with how the match of my two cut pieces matched up with the method I use. See the seam on the left? (I blogged about matching prints some time back.)

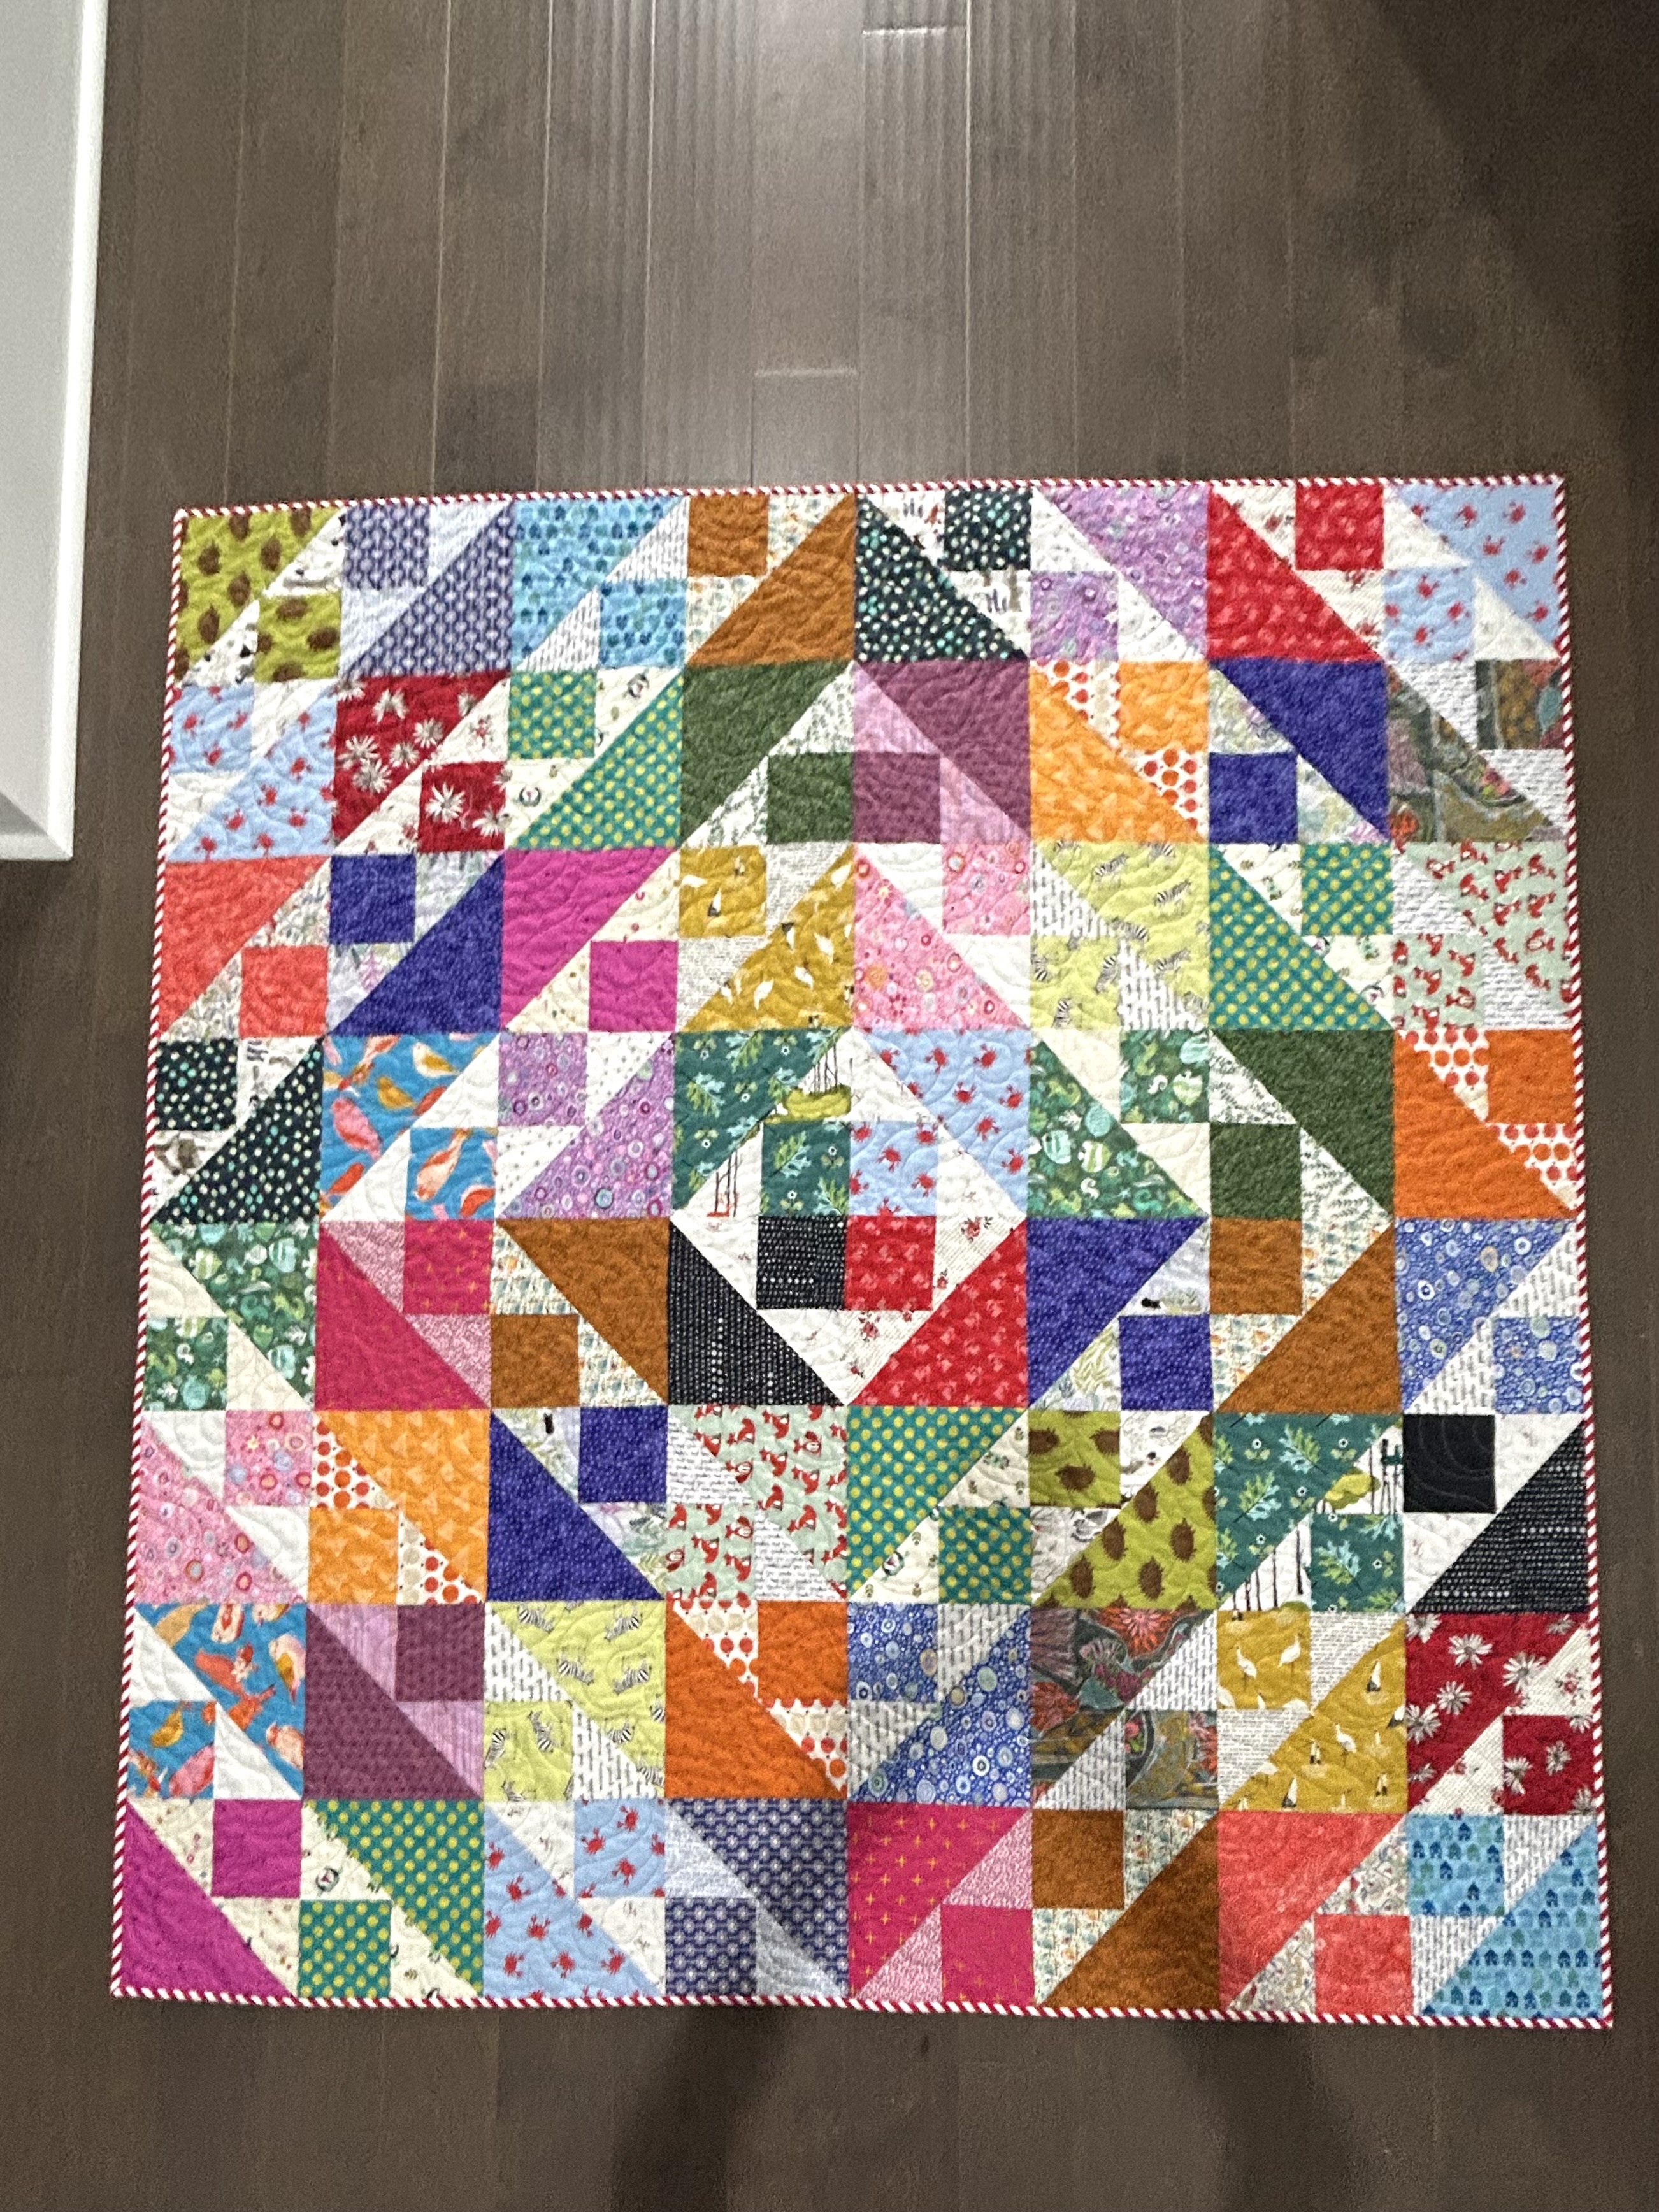
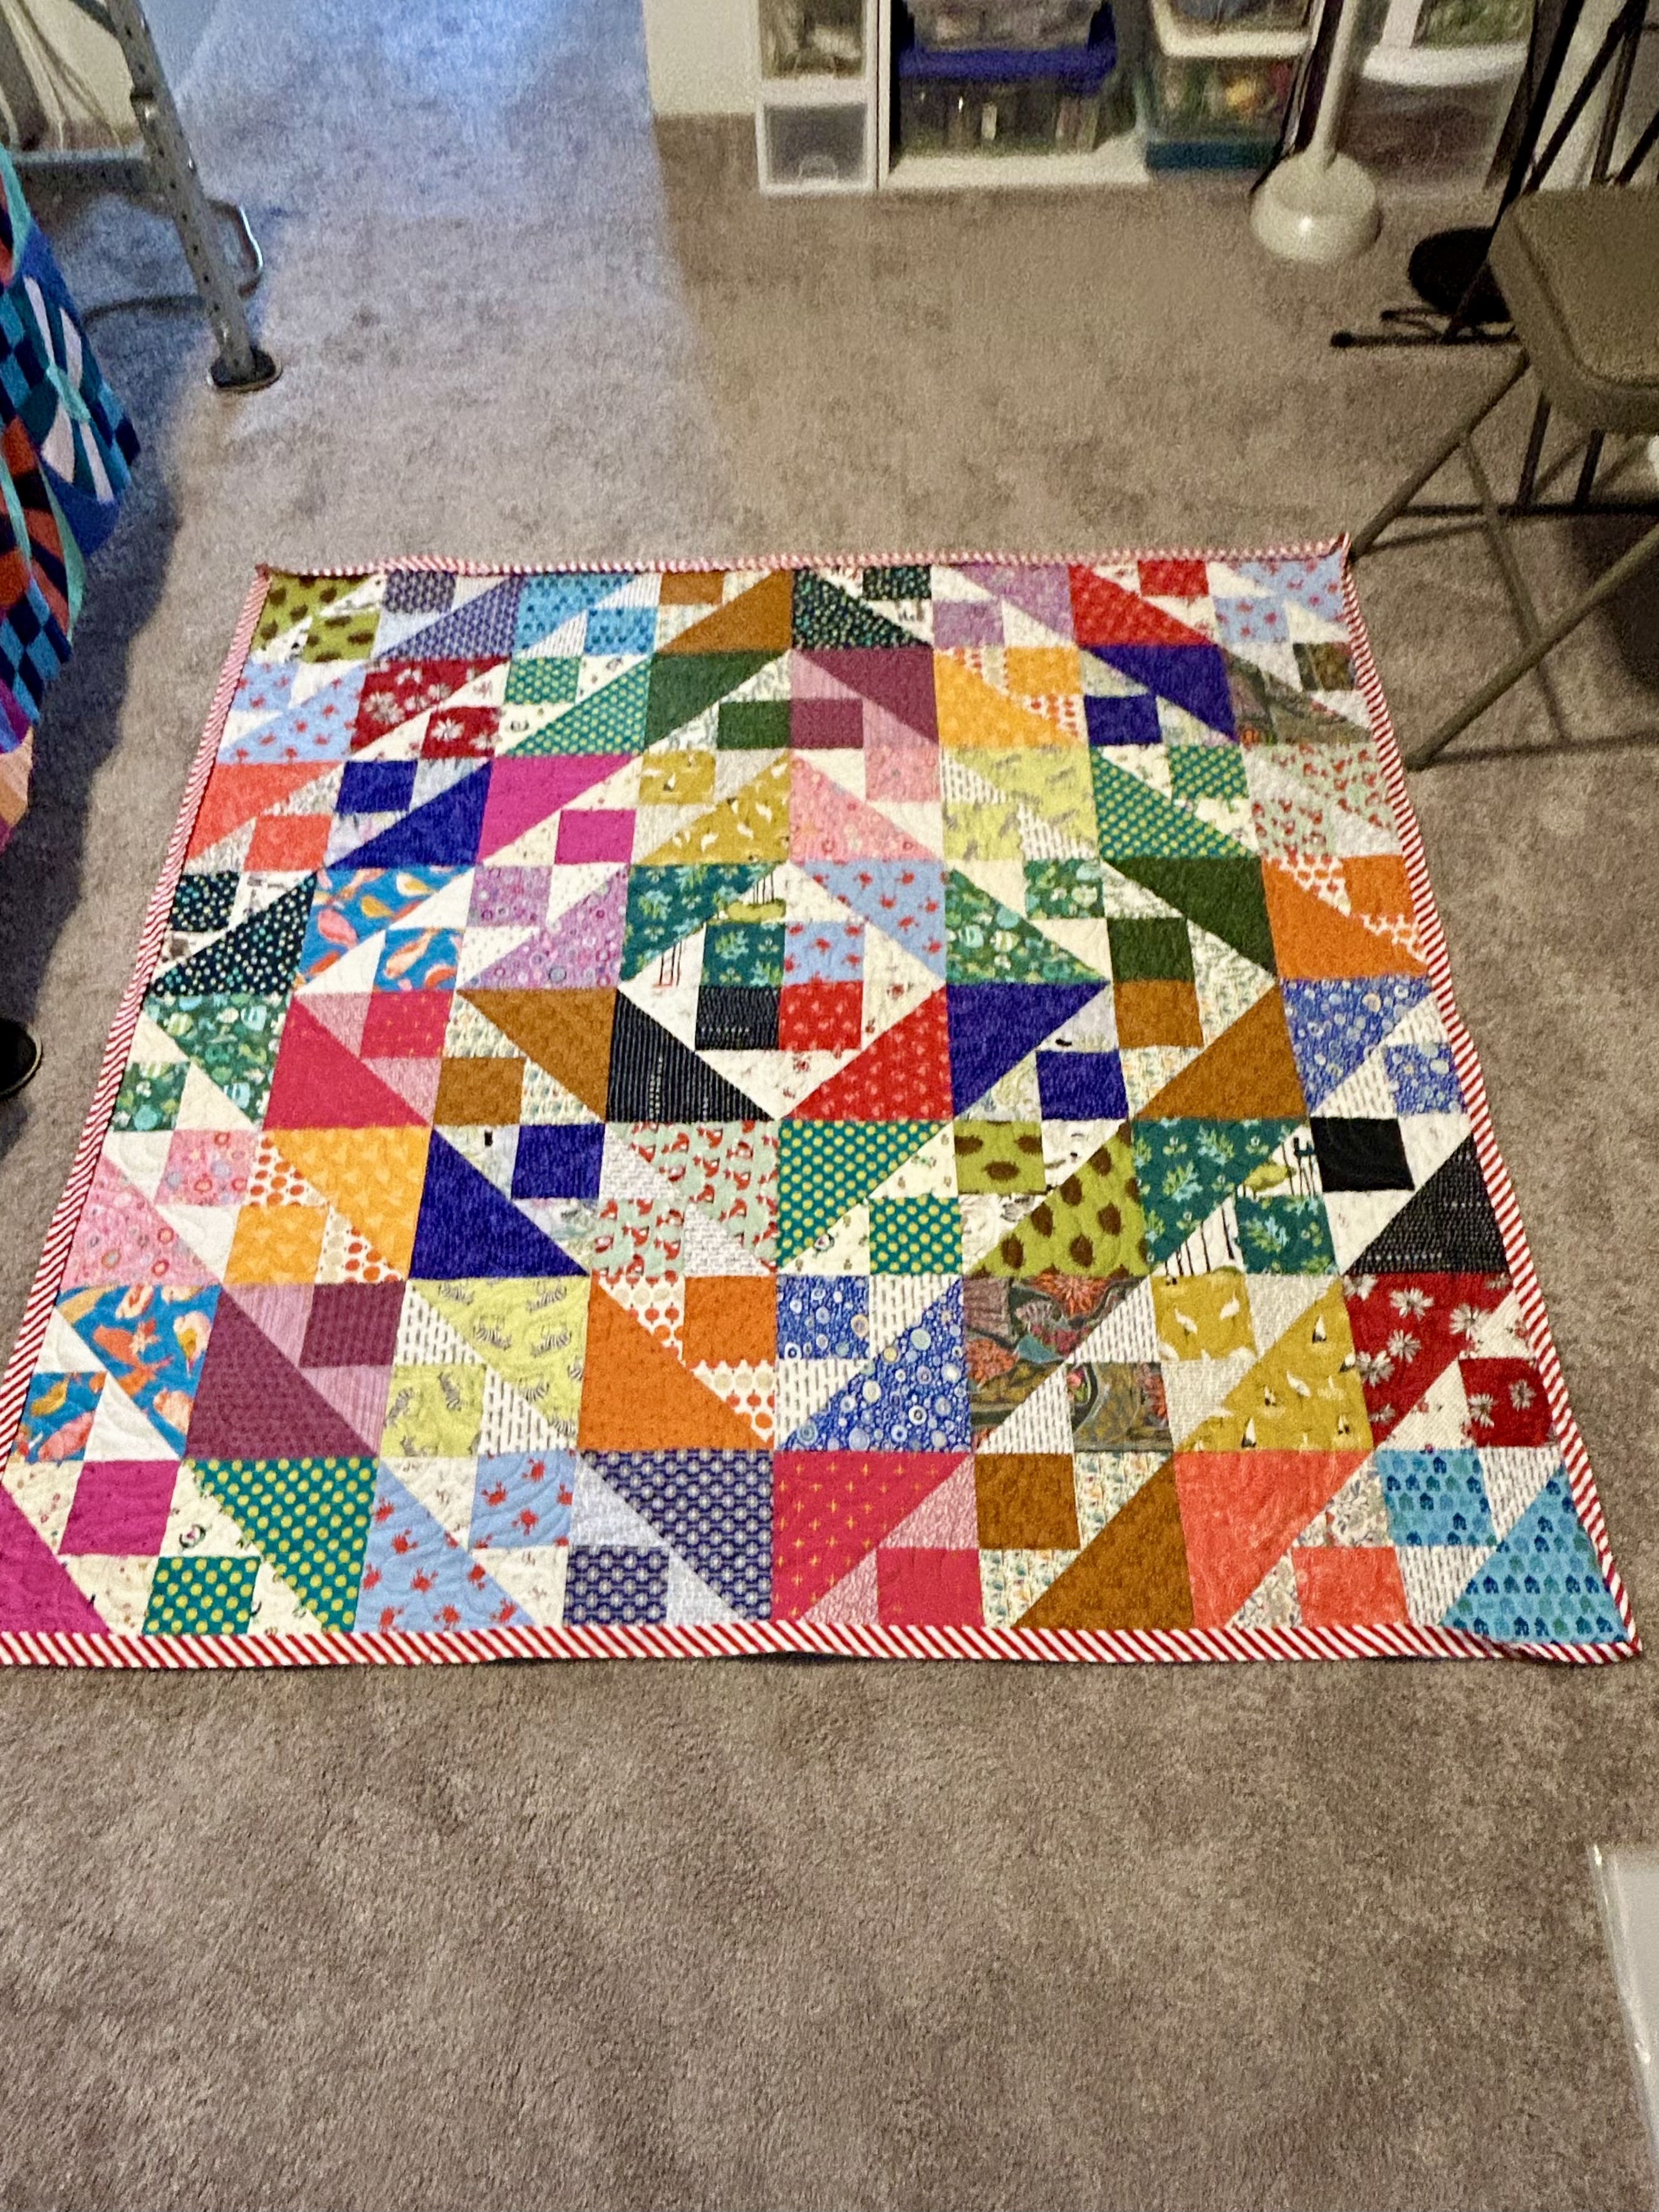
And now, the 4-inch Cat’s Cradle top is on the longarm.

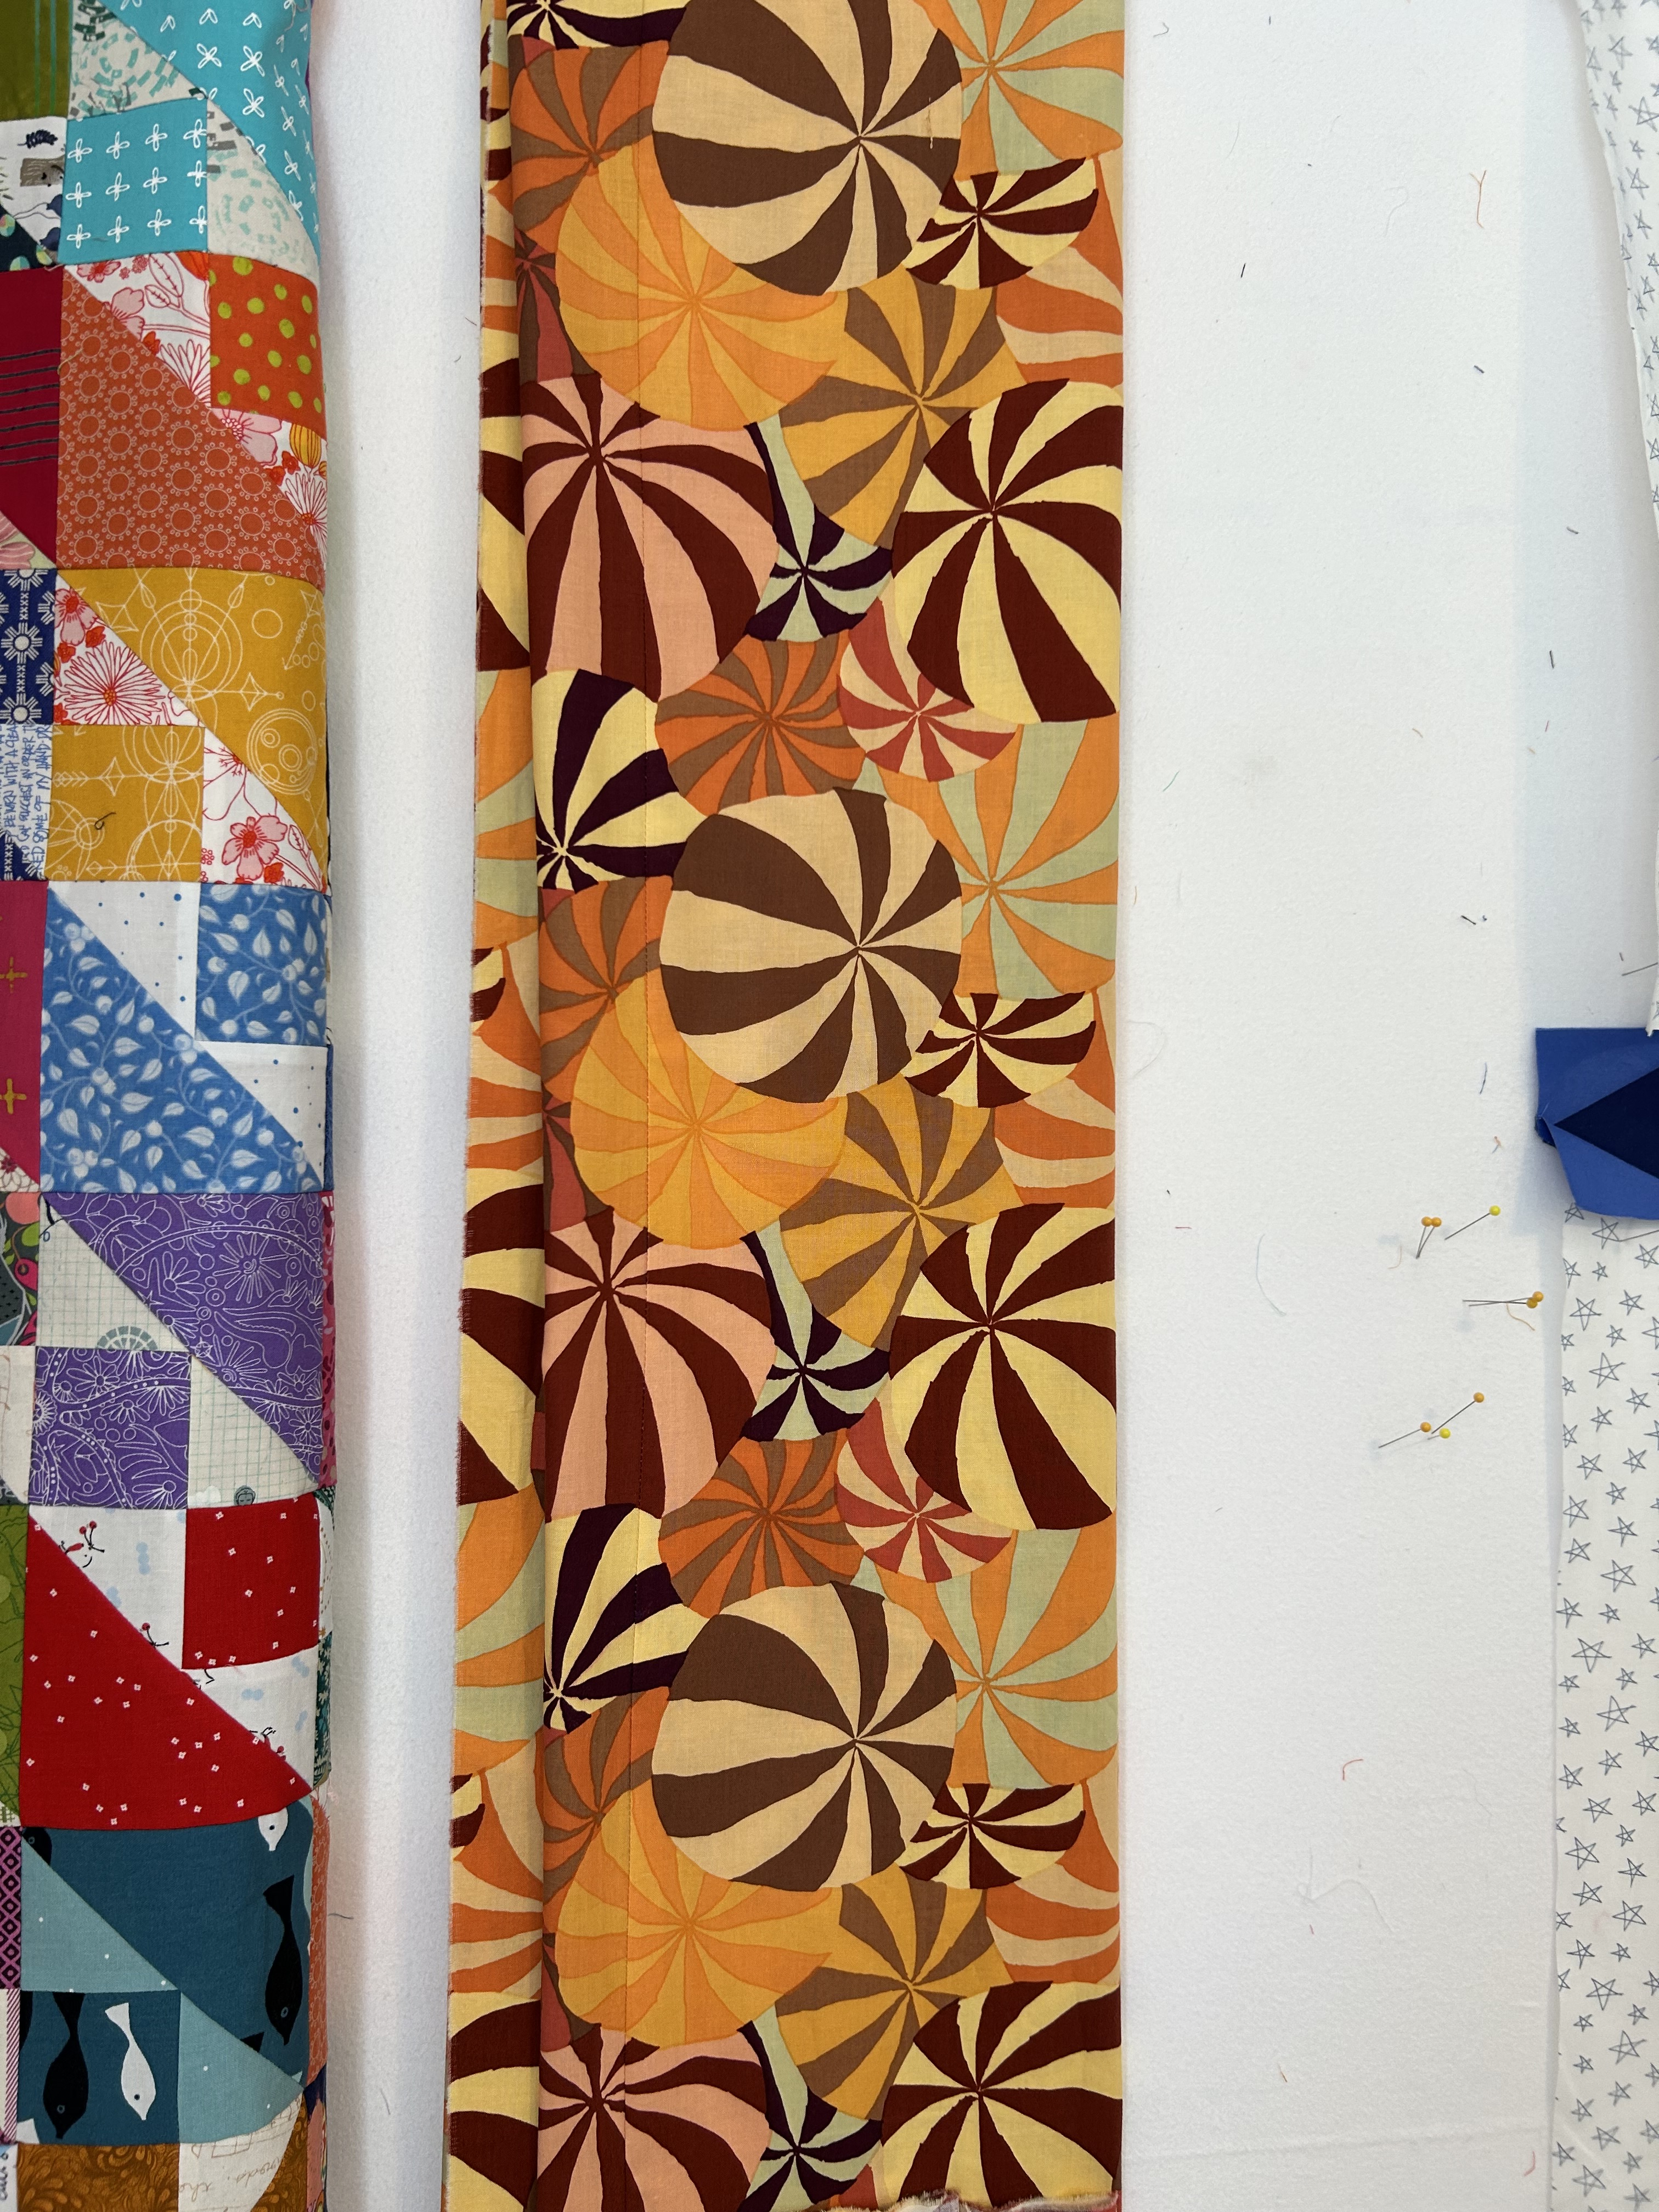
And you can see this fabric actually has lines of pattern running lengthwise. I didn’t really notice that at first.

I’m excited about this new 8-inch Cat’s Cradle project with these unusual colors (for me). And I think I have collected enough of these colors for this new quilt now.

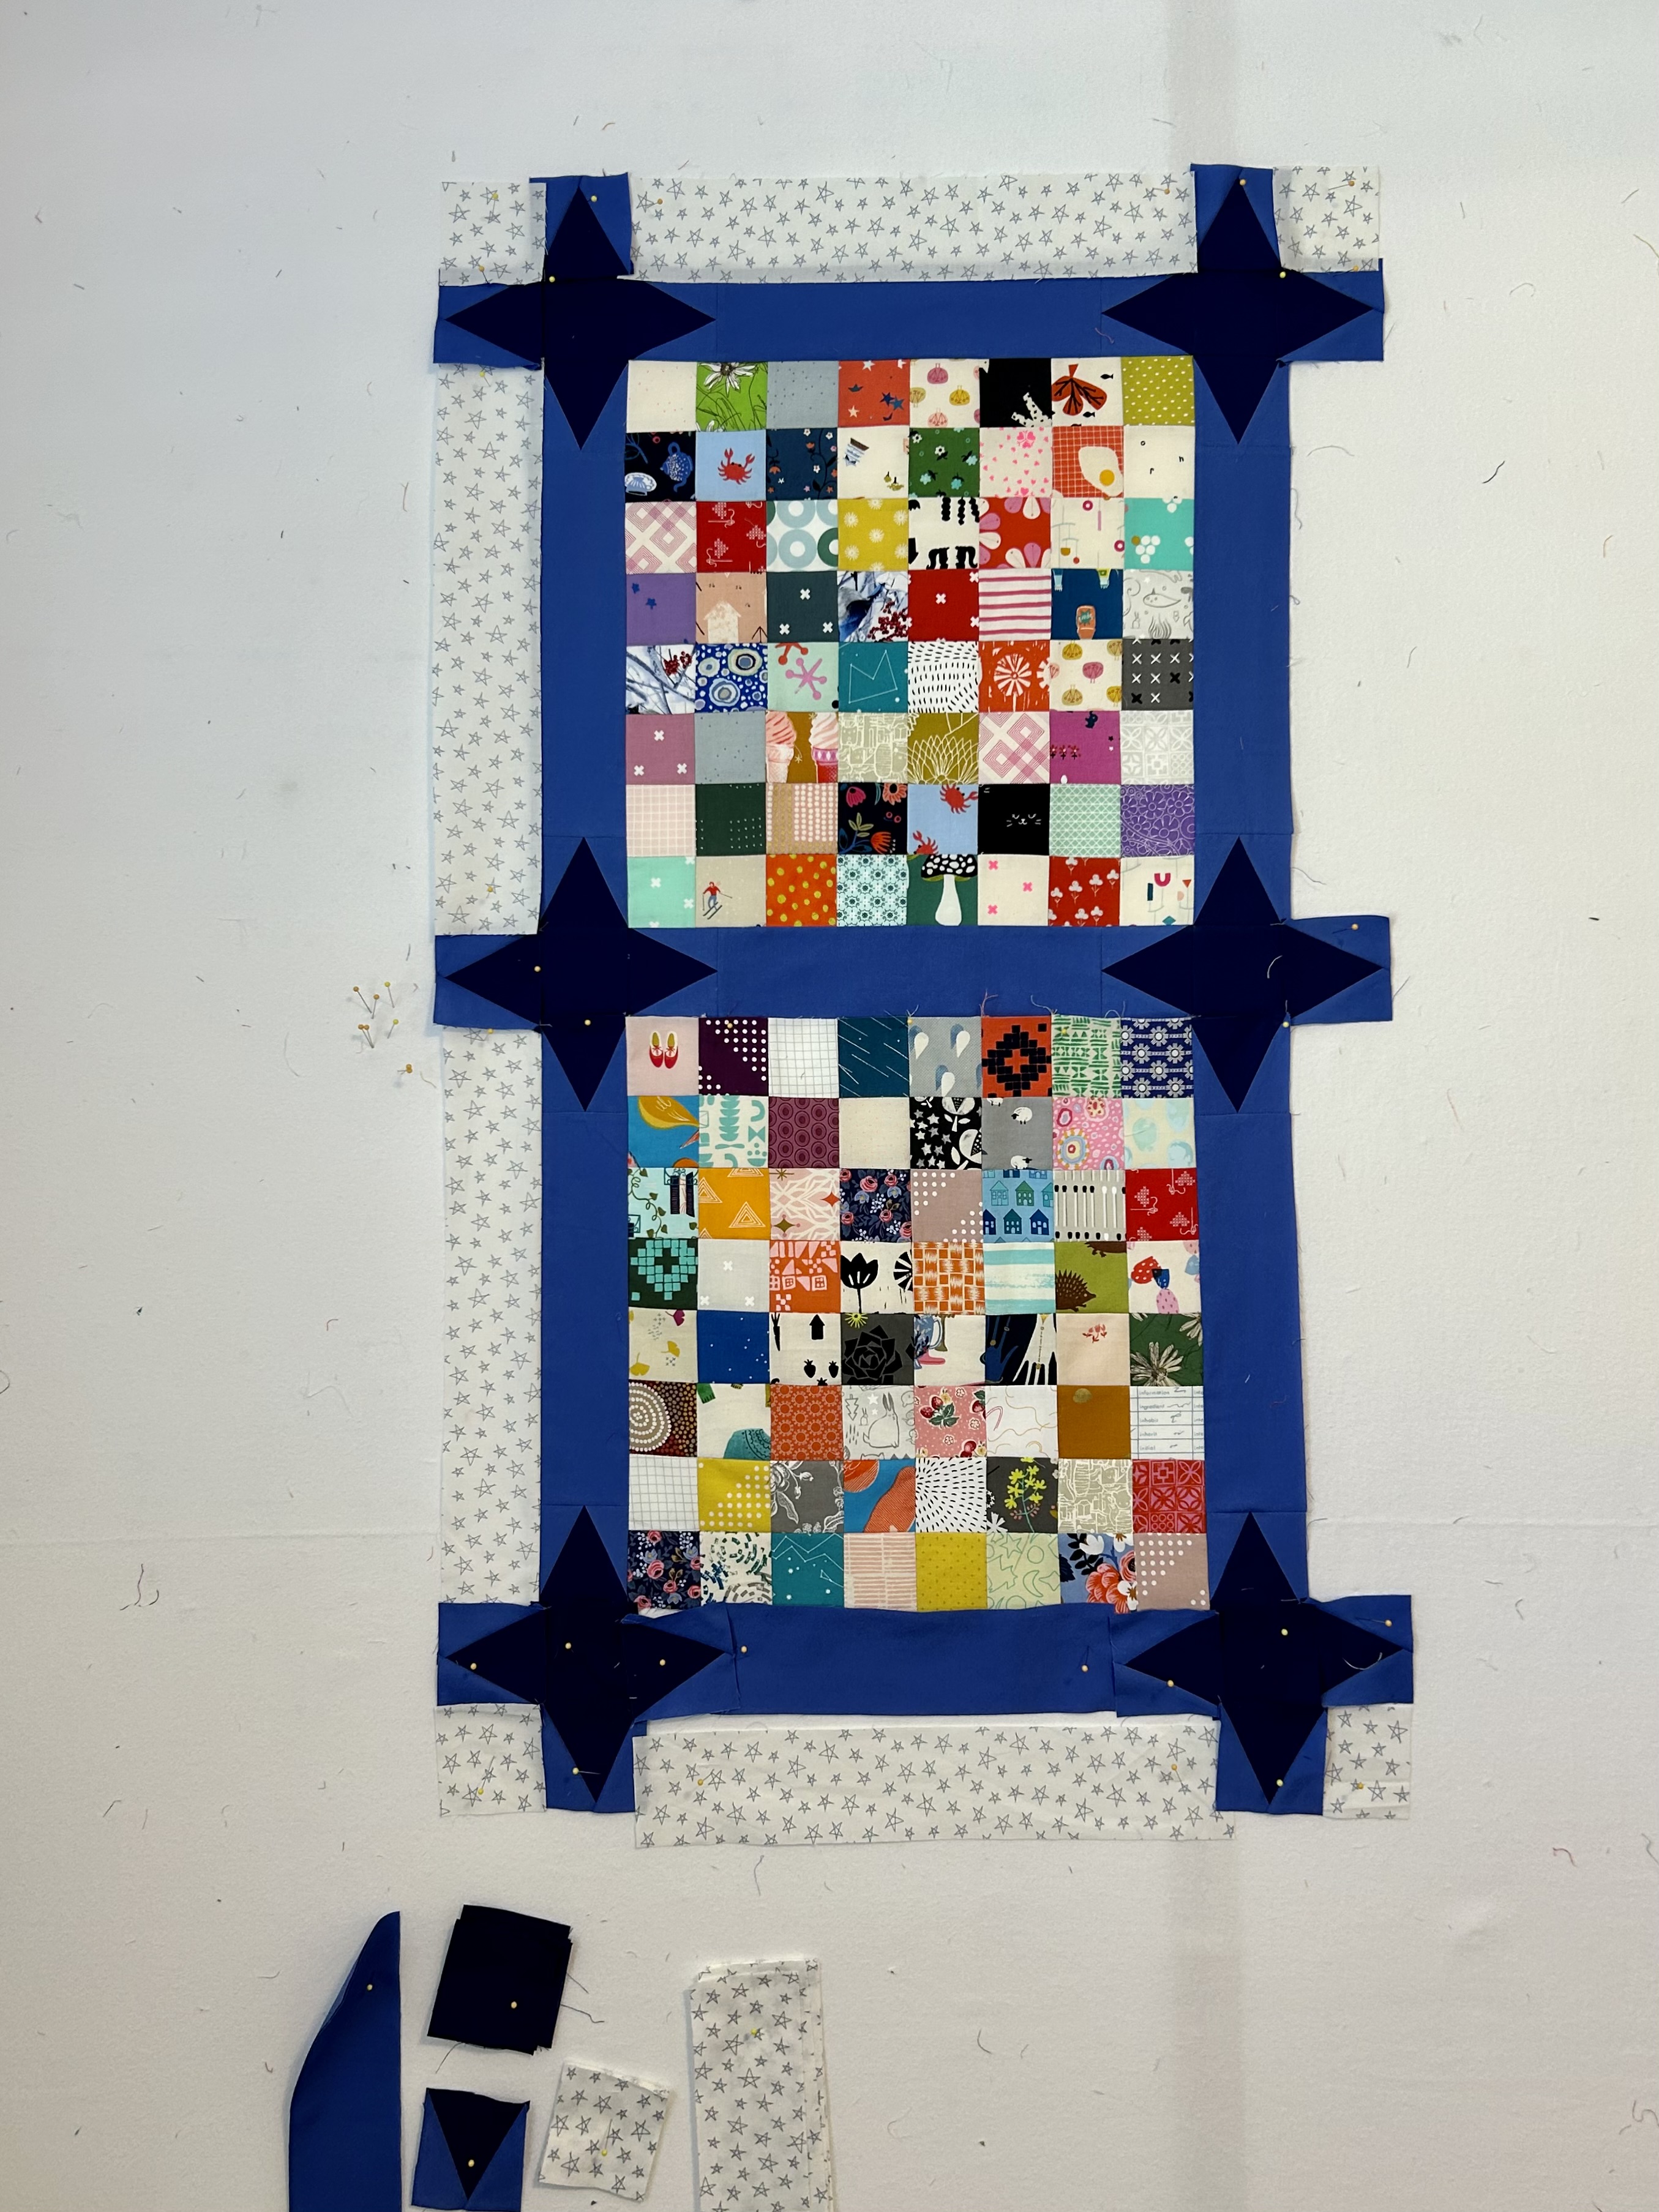
My online quilt project from Rachel Hauser of Stitched in Color is coming right along. I am using 2 1/2 squares from those stored in my 2 1/2-inch square bin, and I’m loving the blue sashing and the darker purple/blue (Kona “Nightfall”) for the triangle star block. I added a neutral outside border so I will have full stars on the border. Right now these squares are in the leader/ender category.

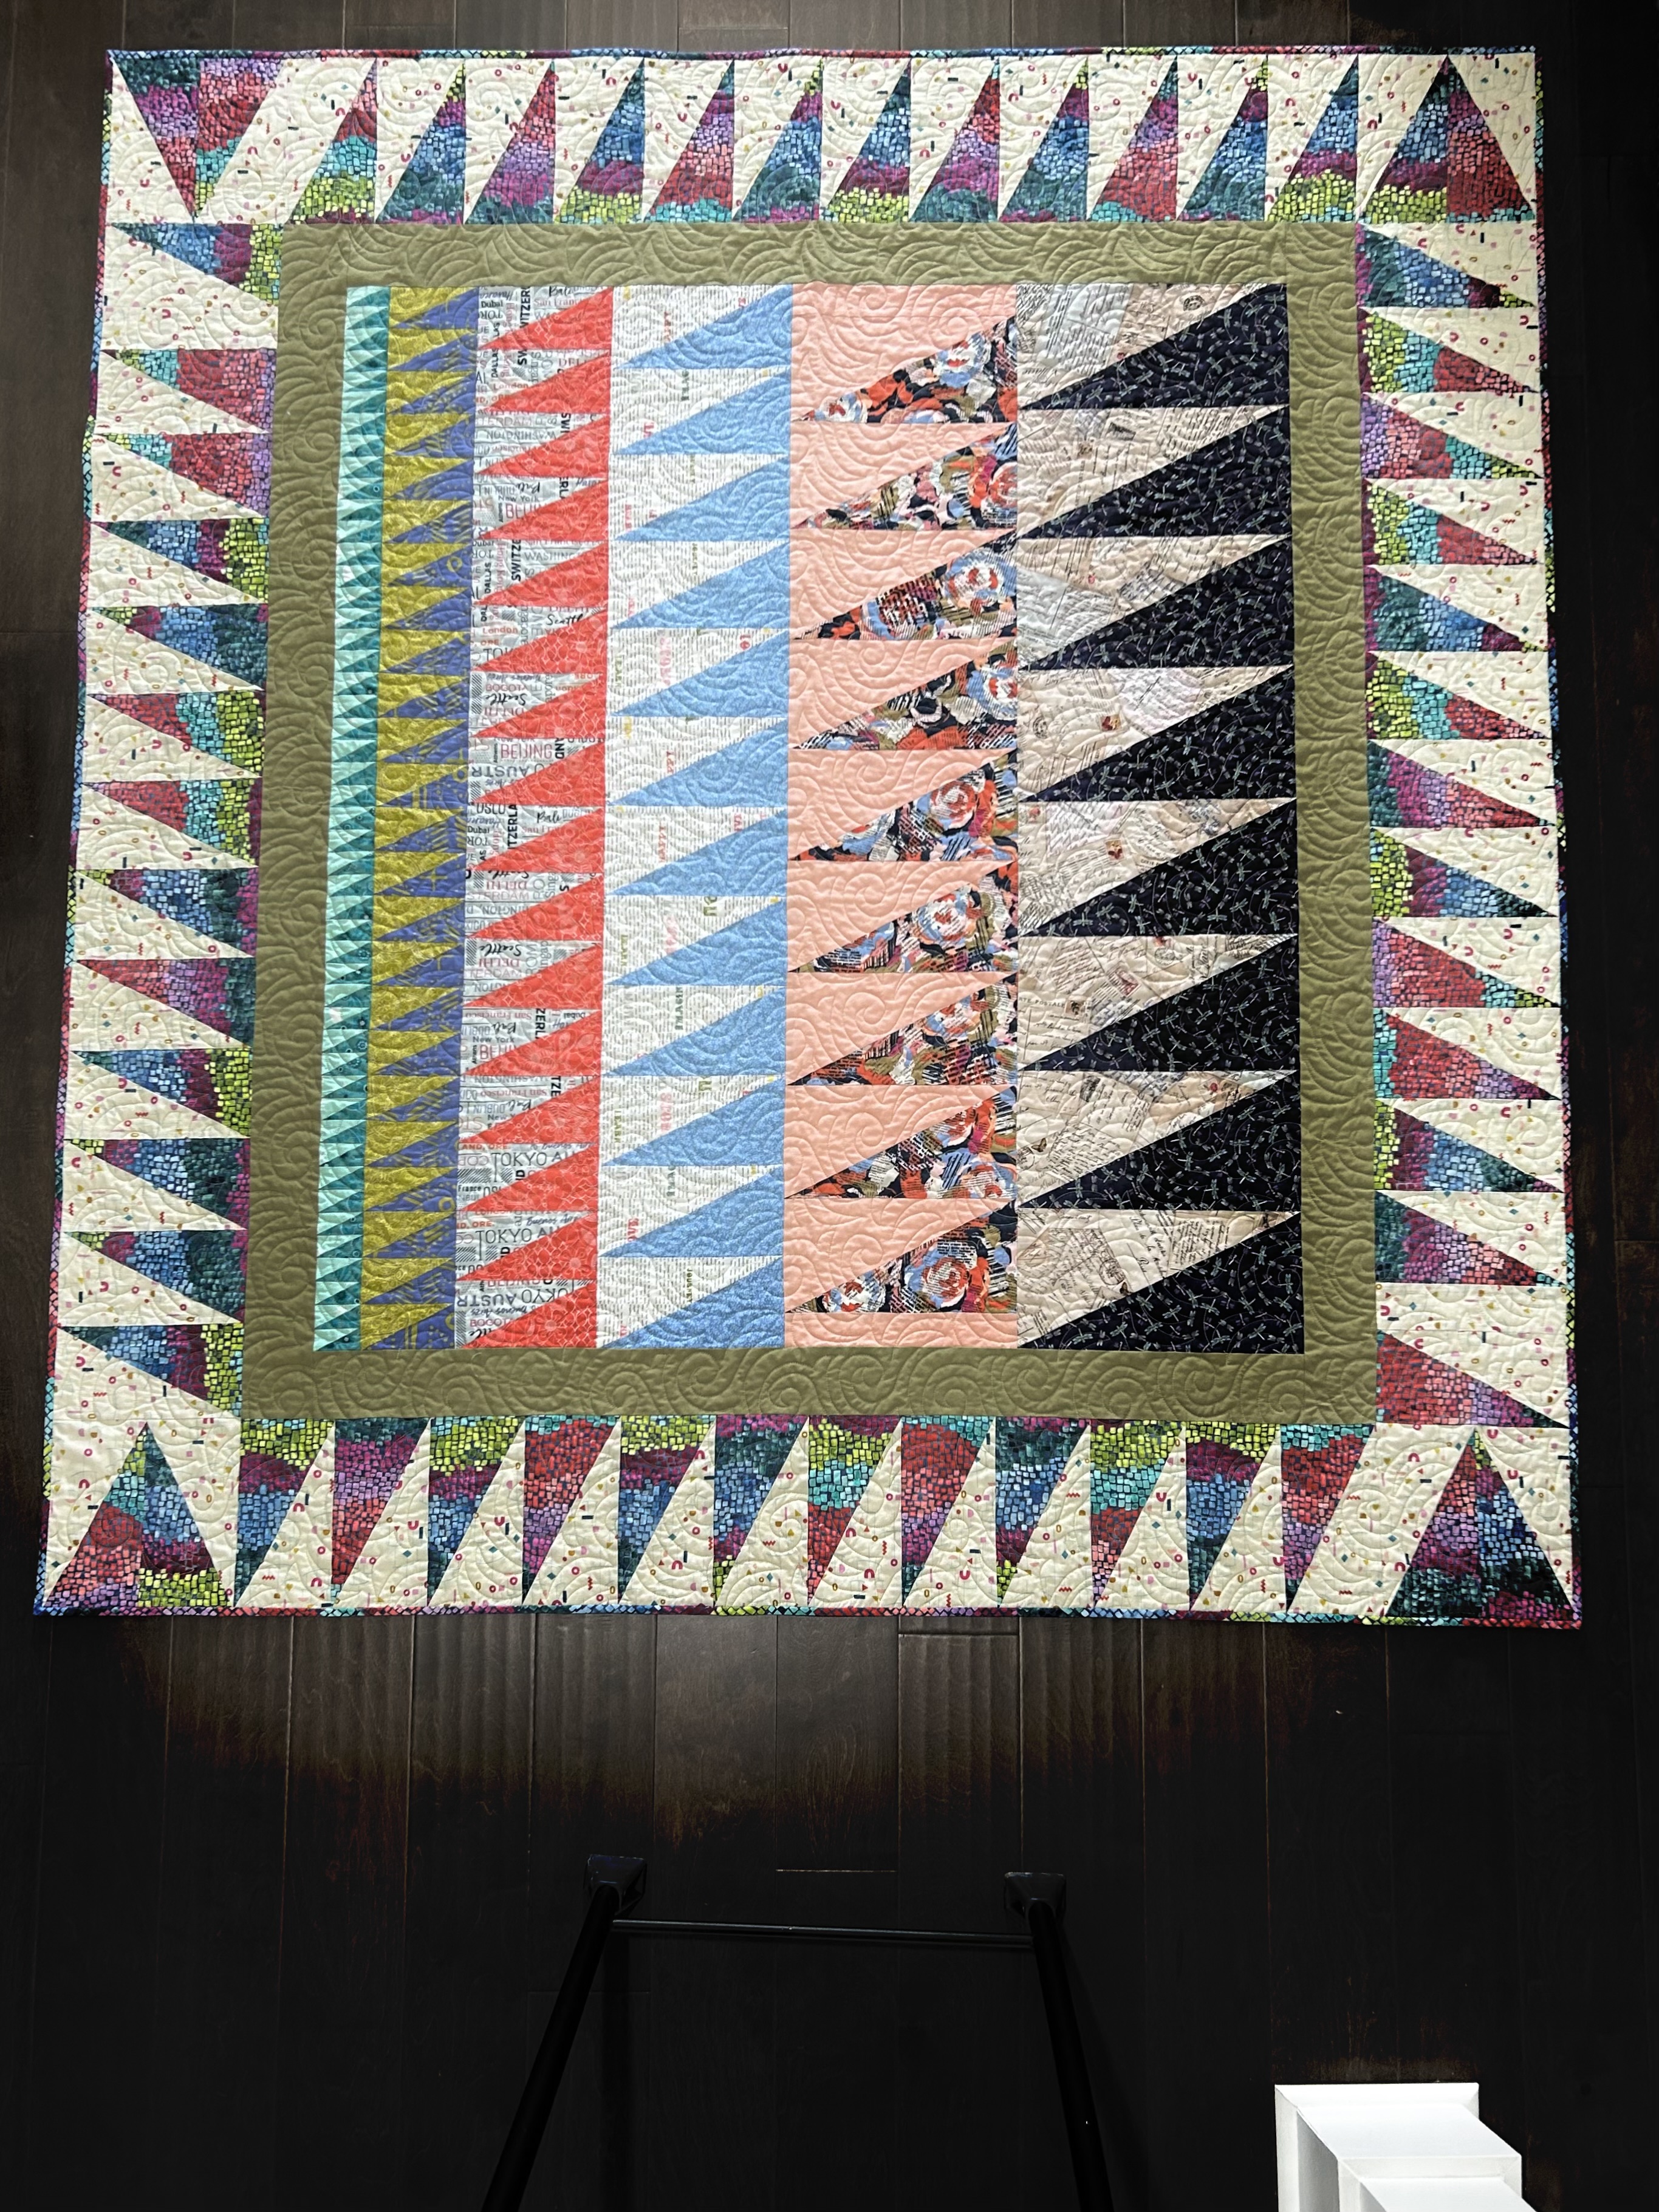
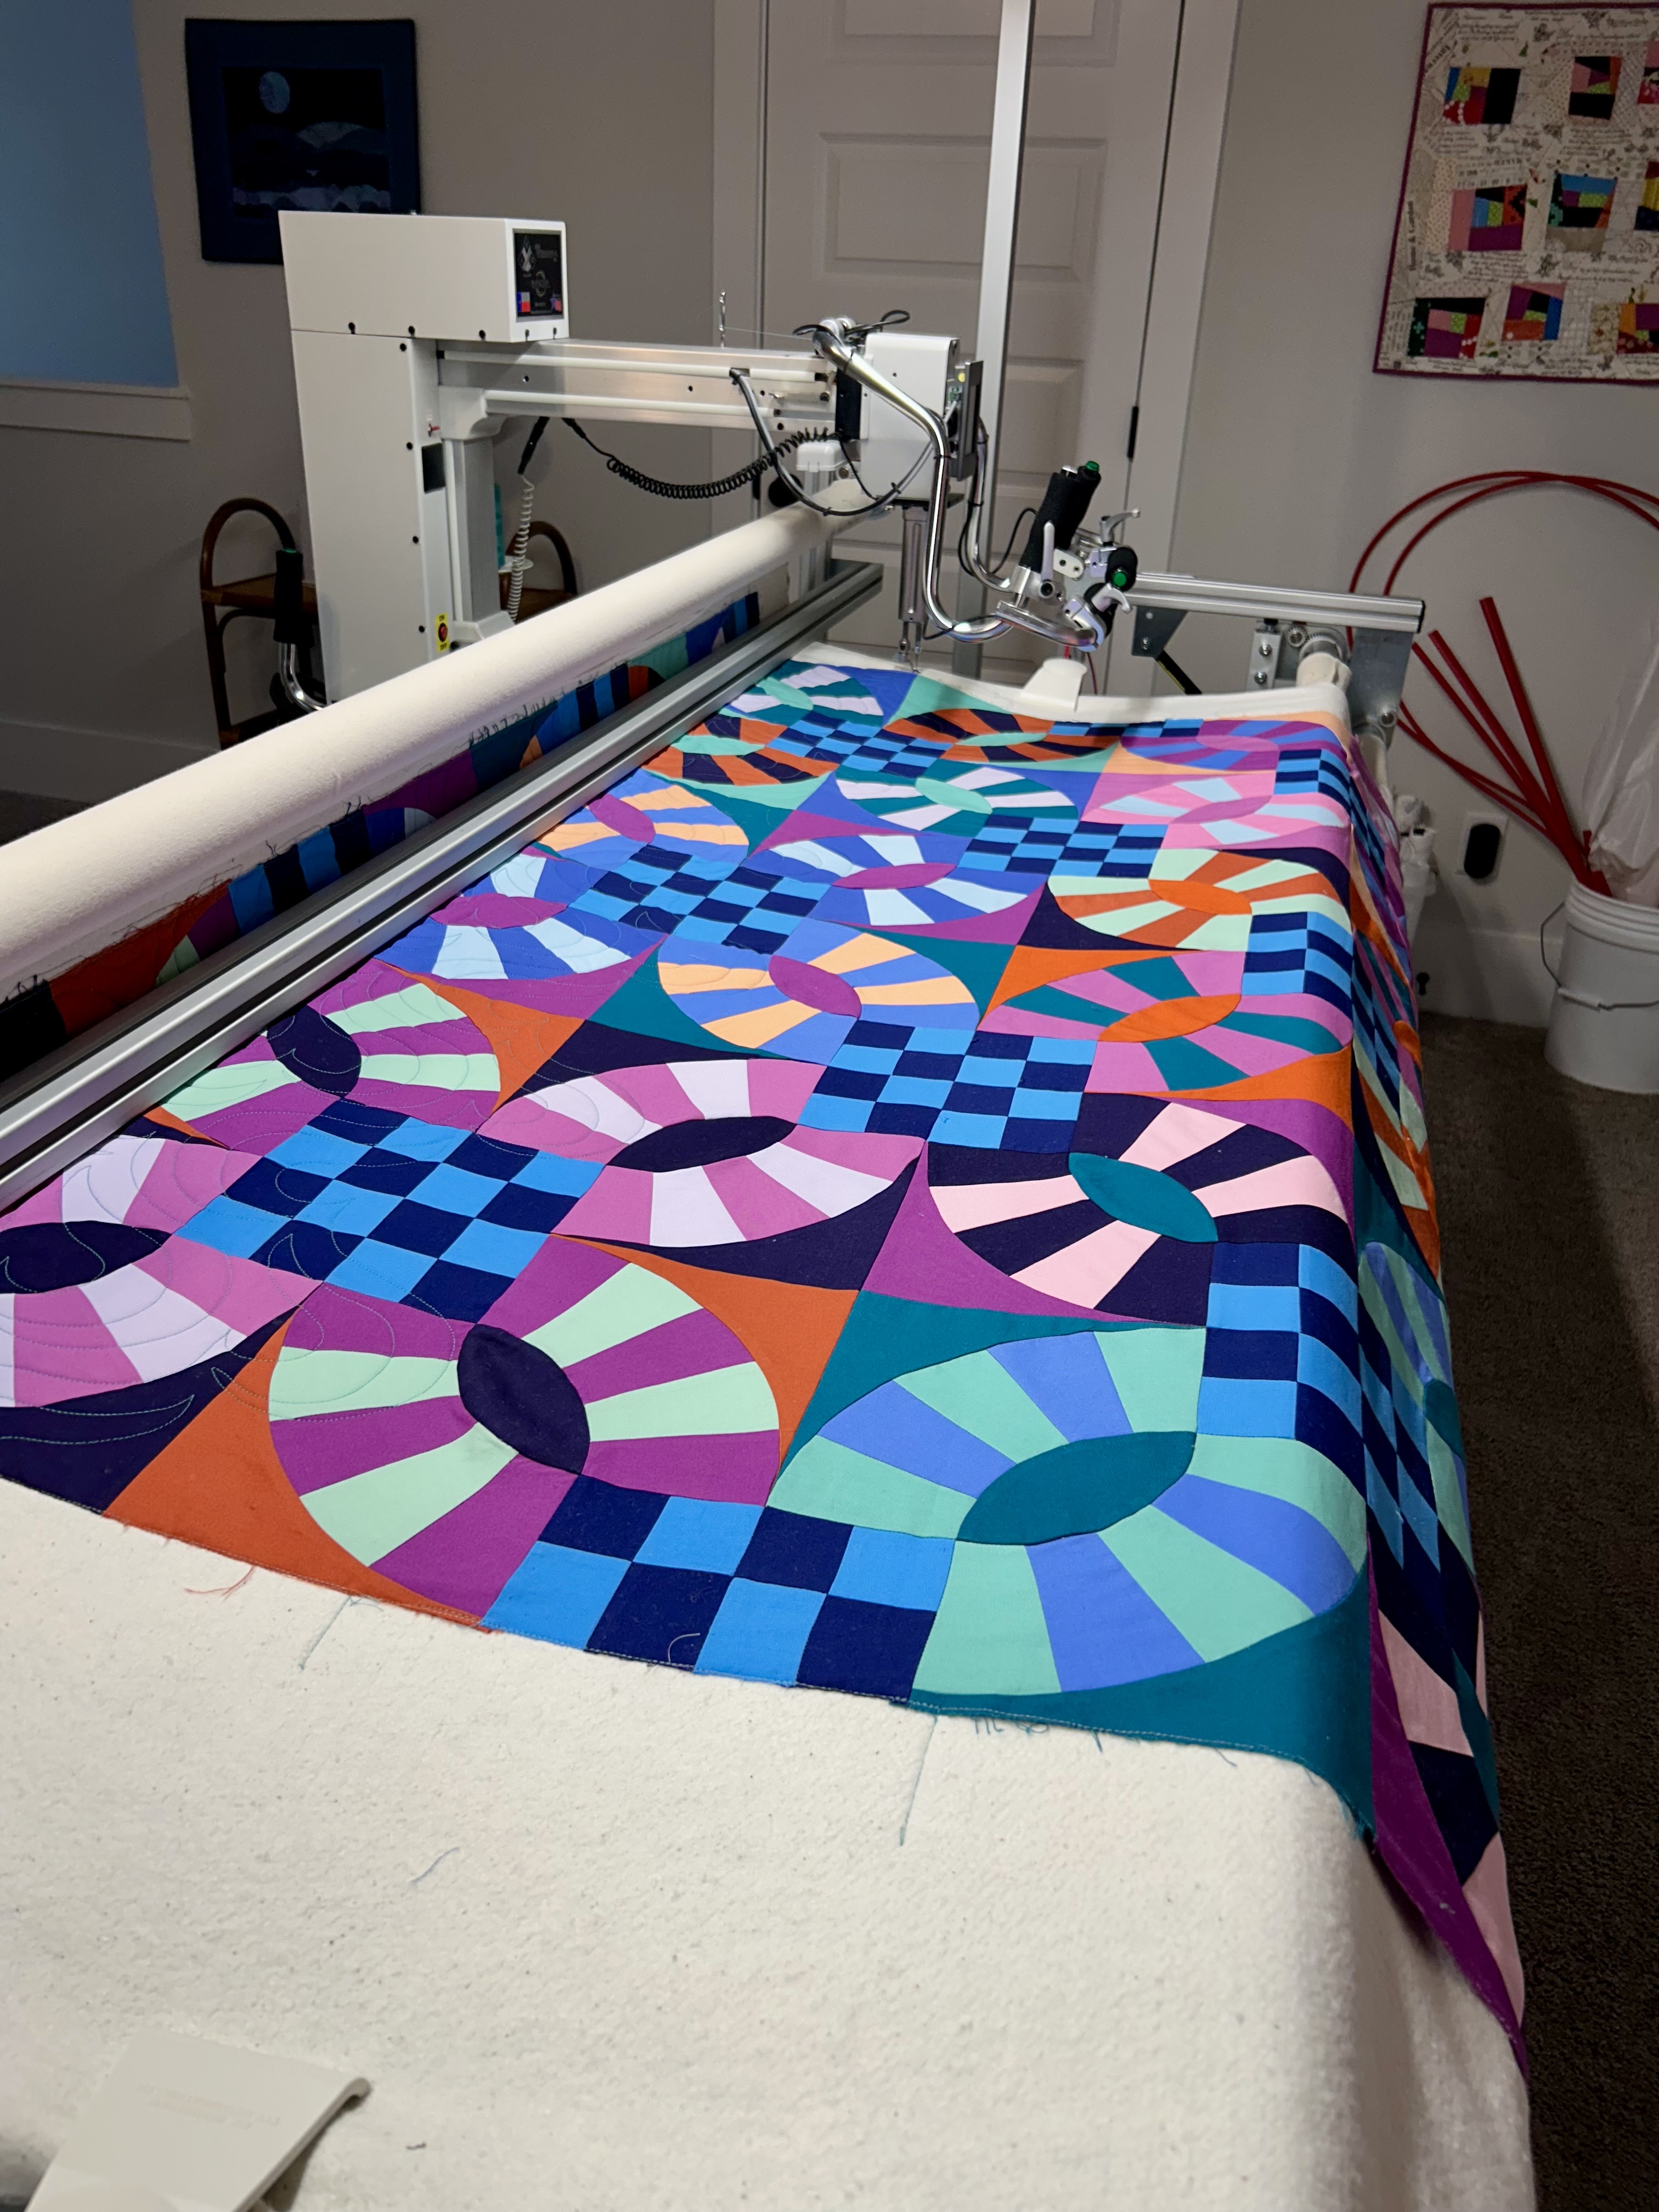
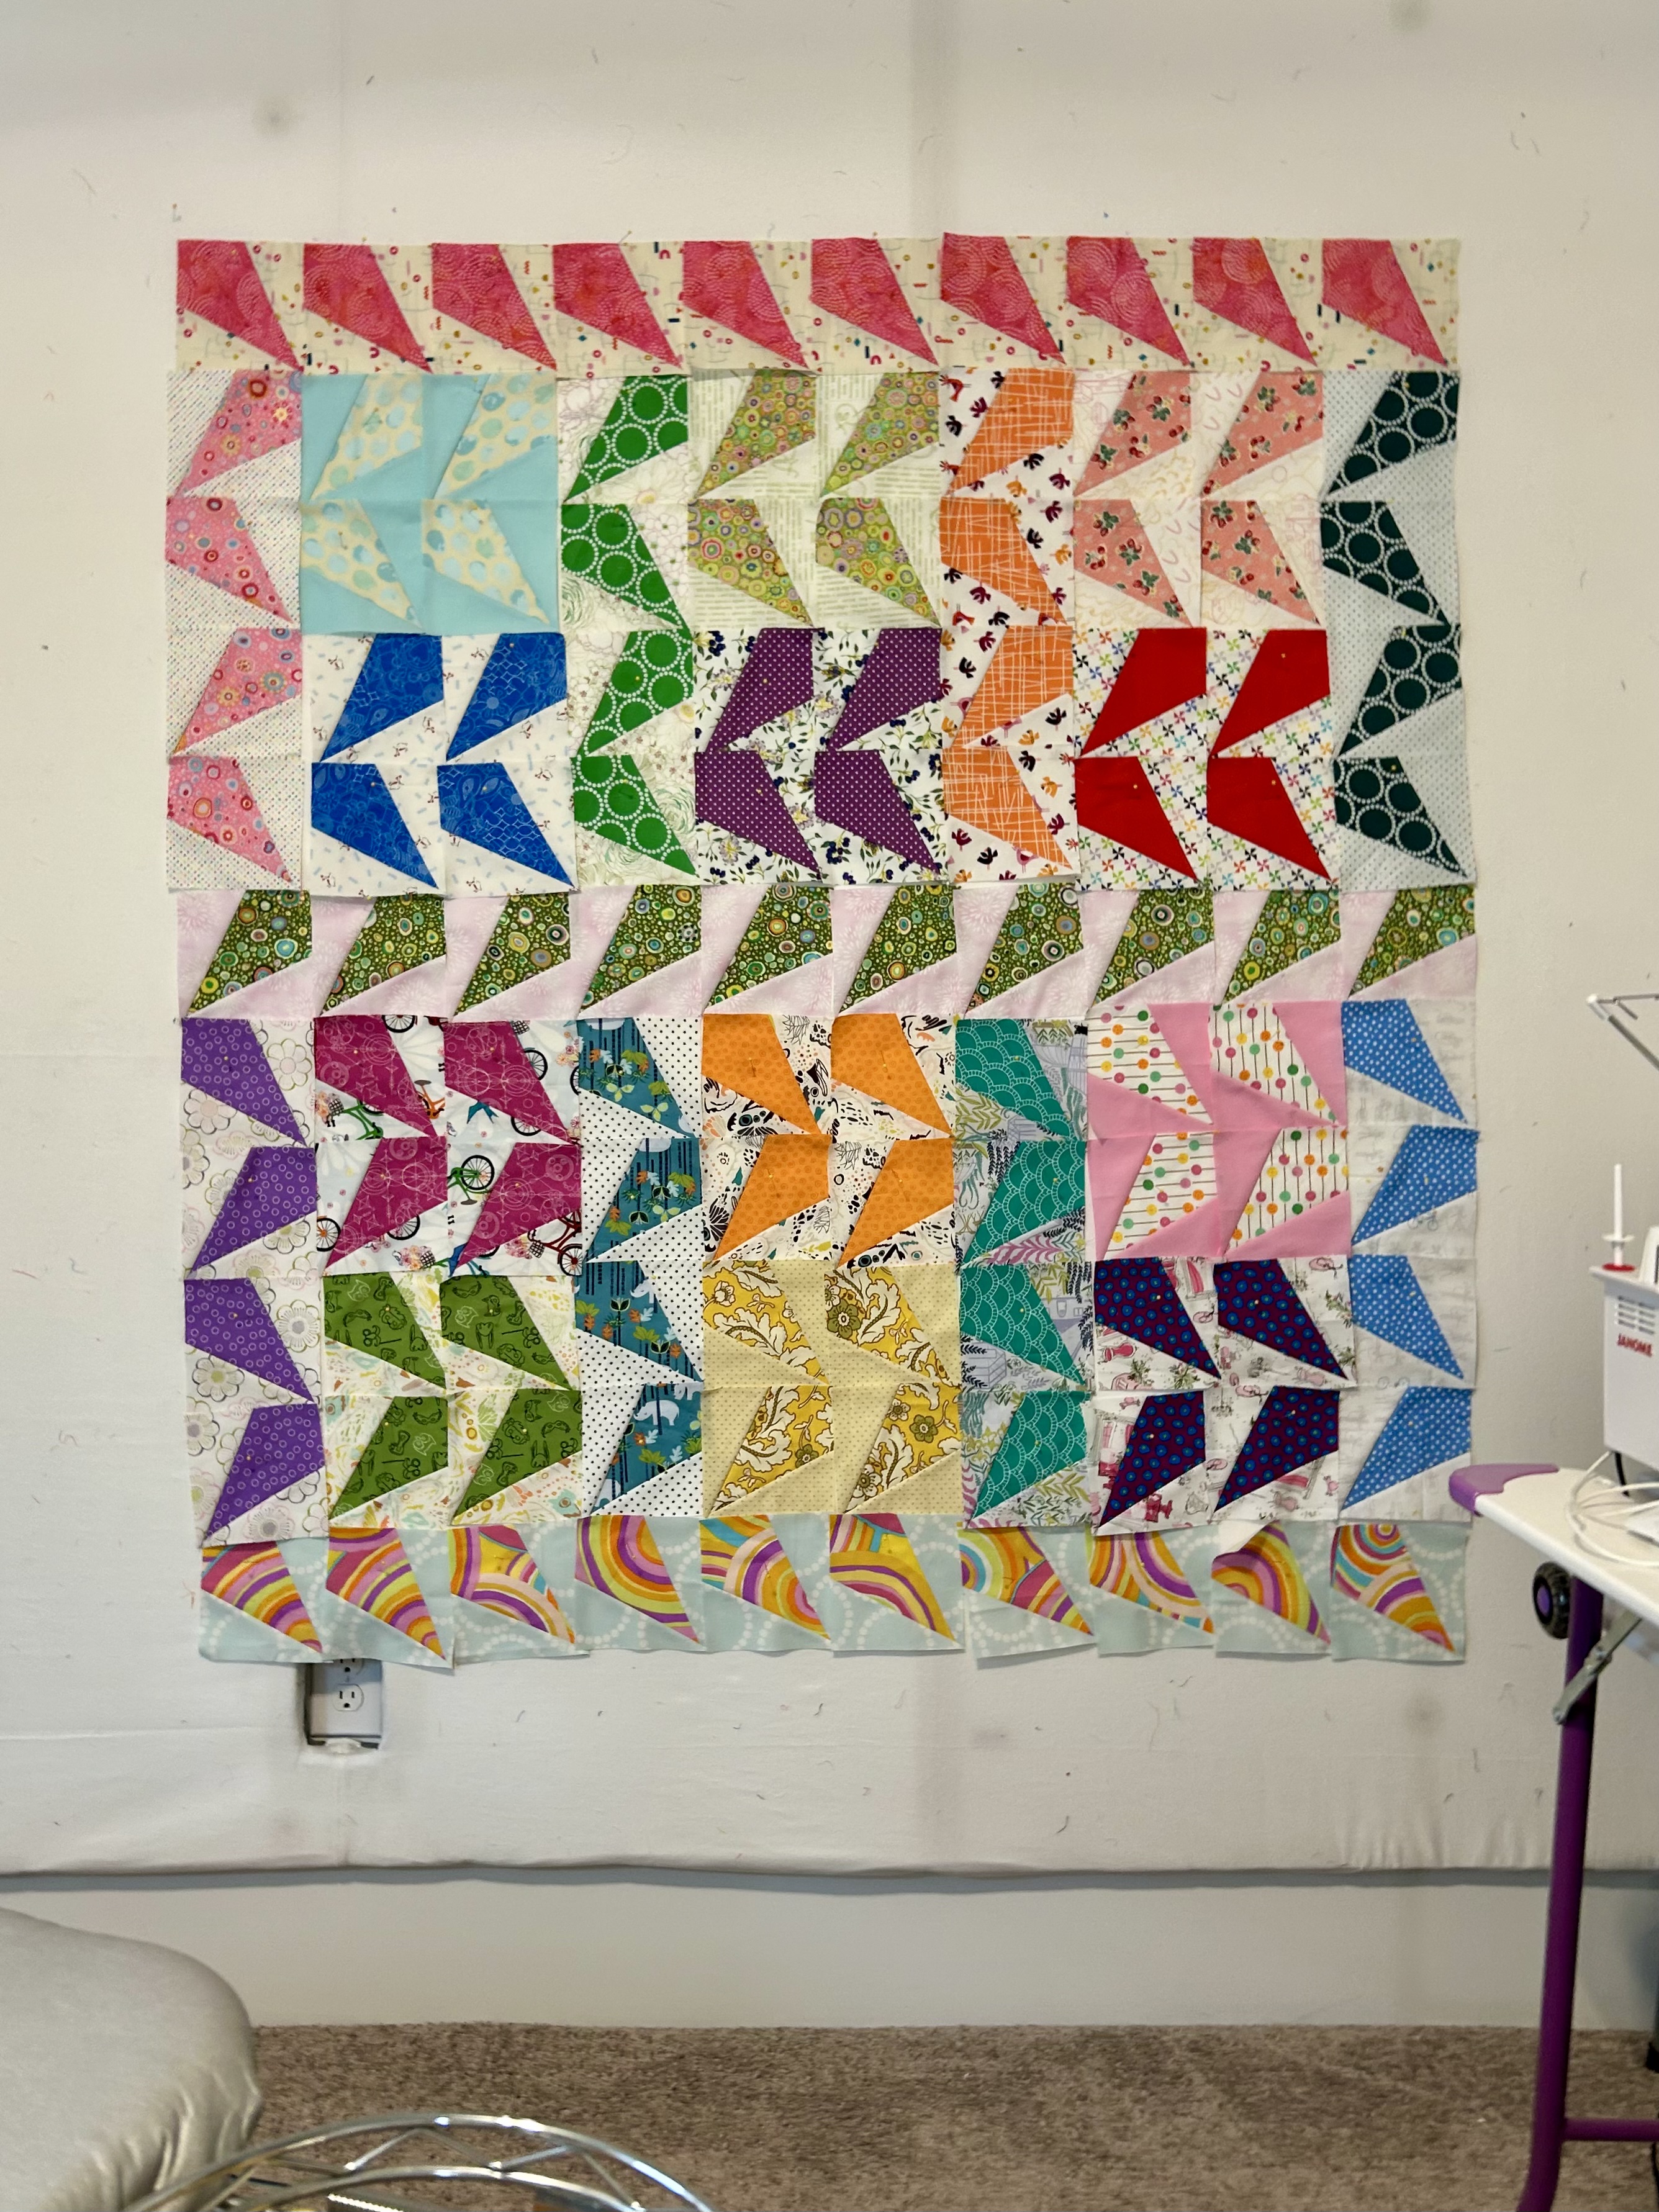
And I’m sewing together the Kites in this top. I like the movement with this arrangement. The long lines of one color are functioning as sashings–as are the single blocks that separate the double blocks. I found an adorable backing (a Tilda print) for the backing. This quilt will be for a girl, thus all the pink.

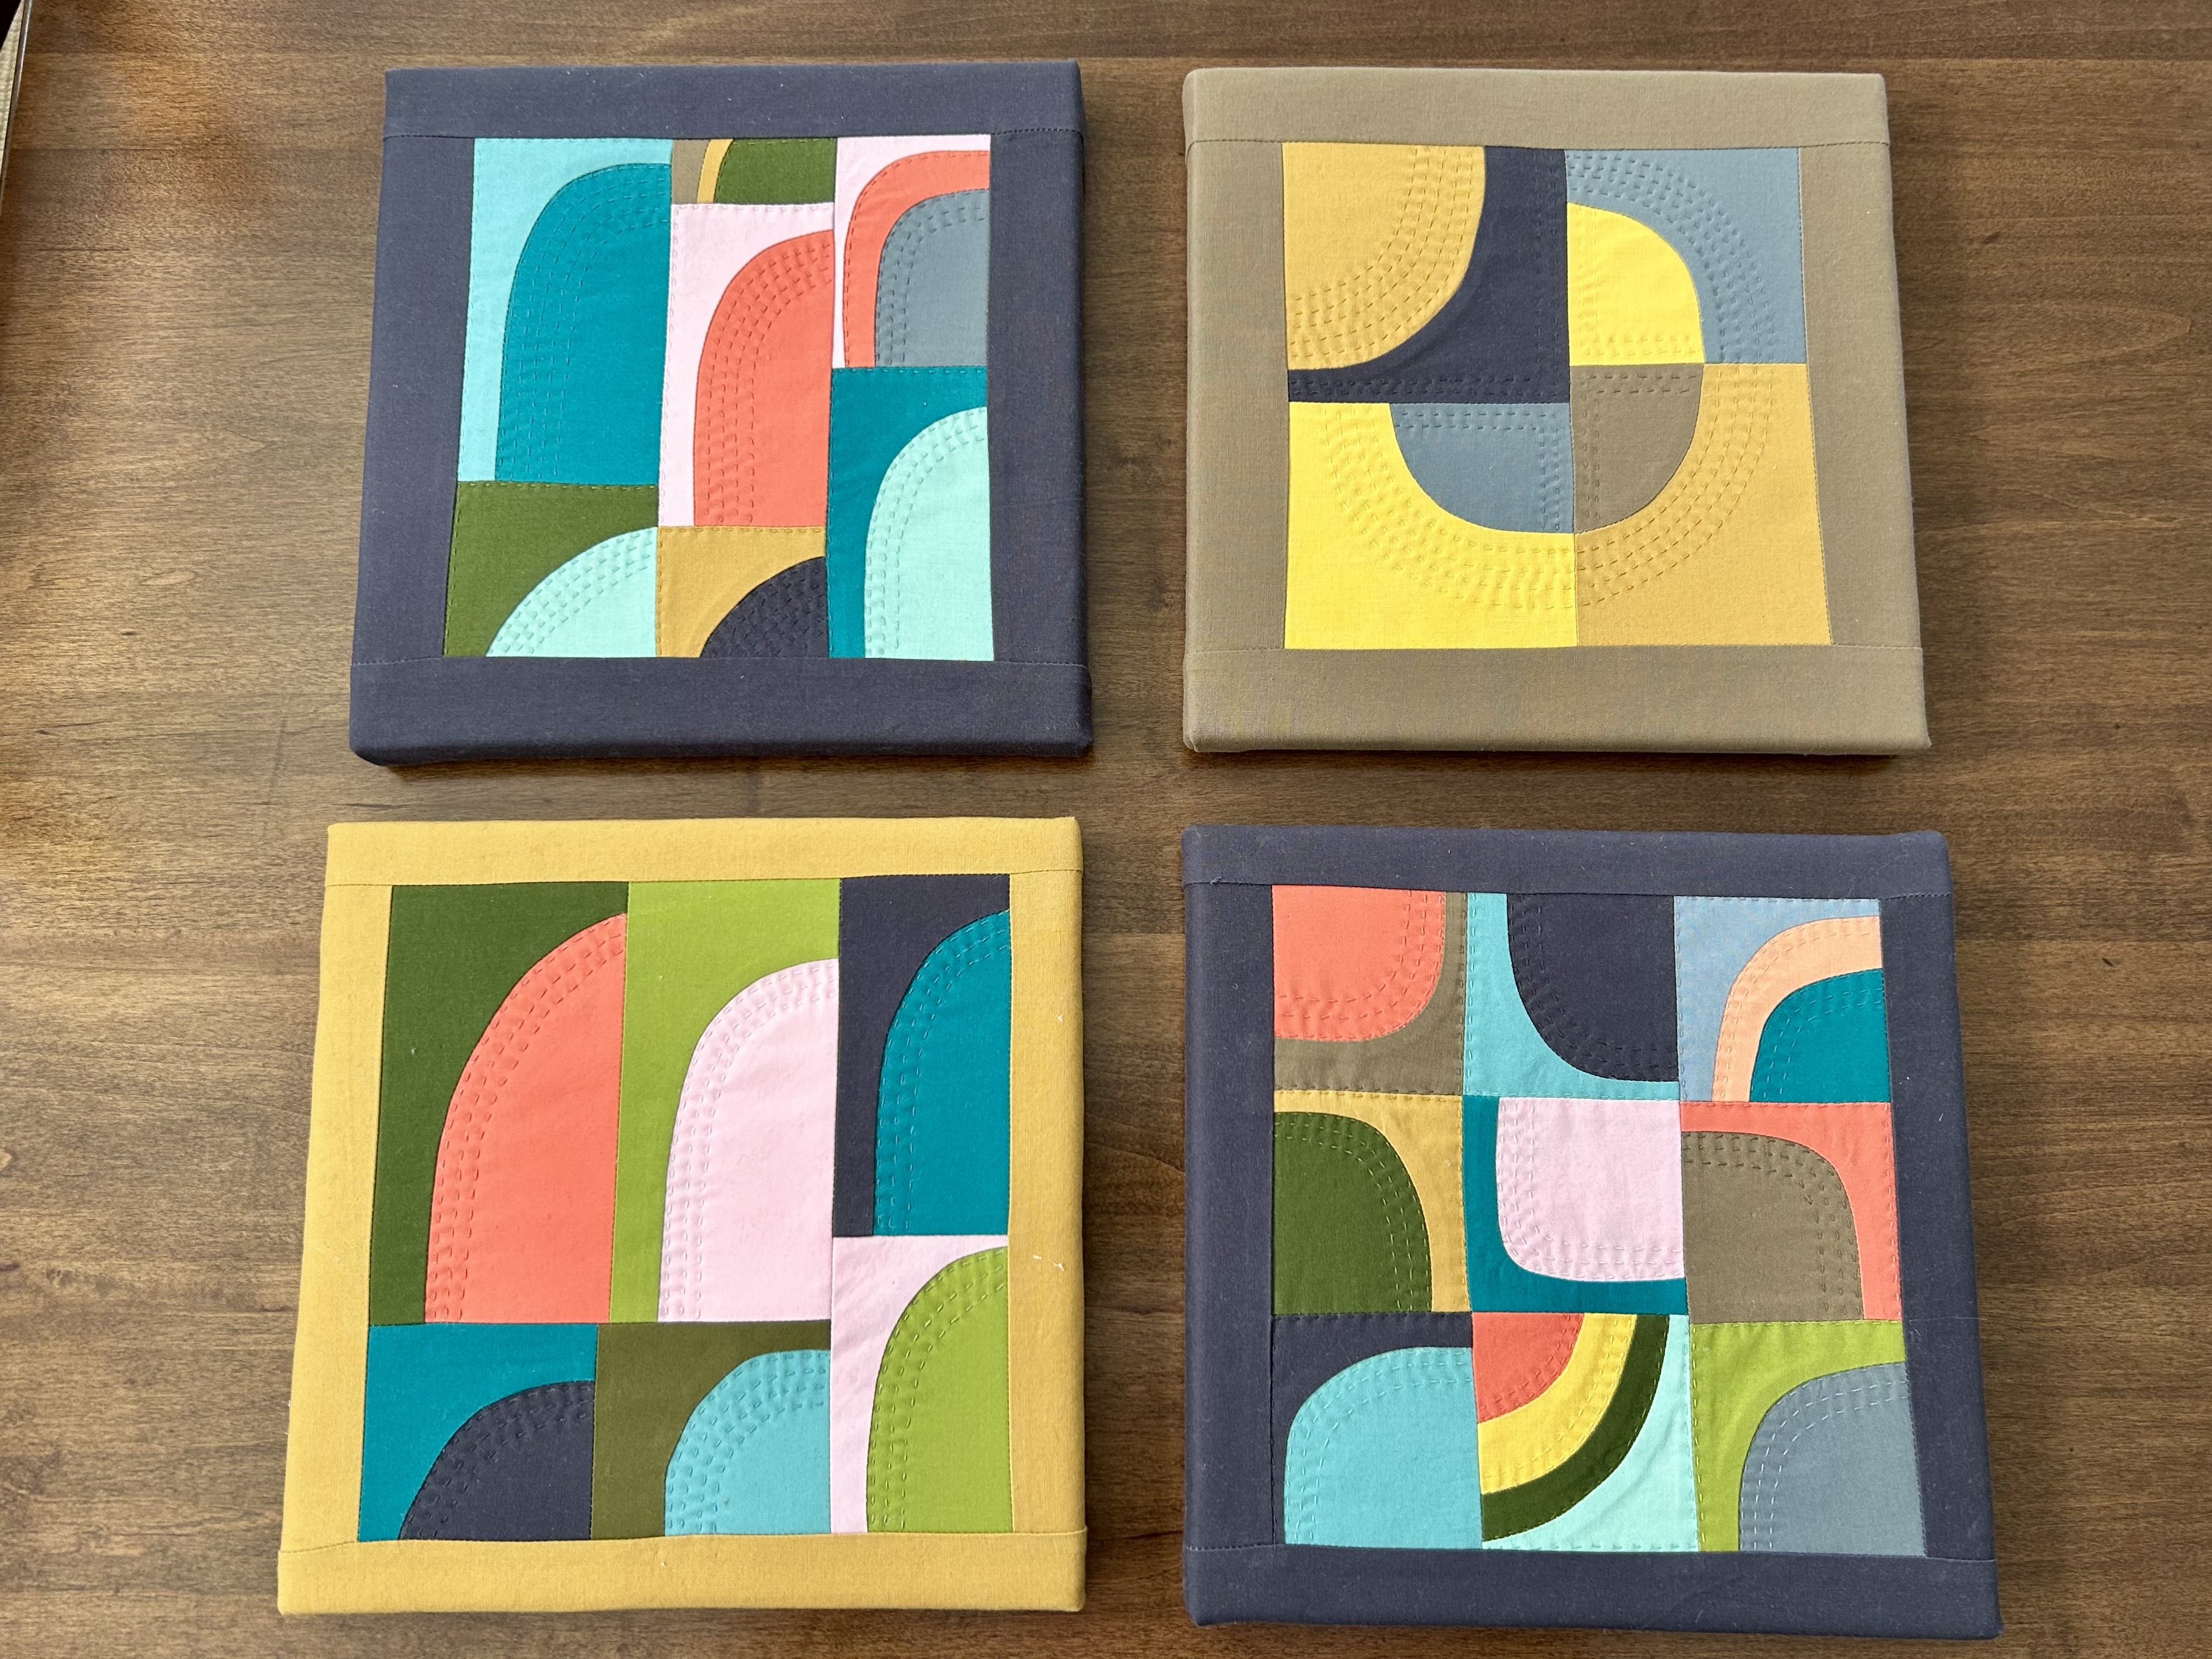
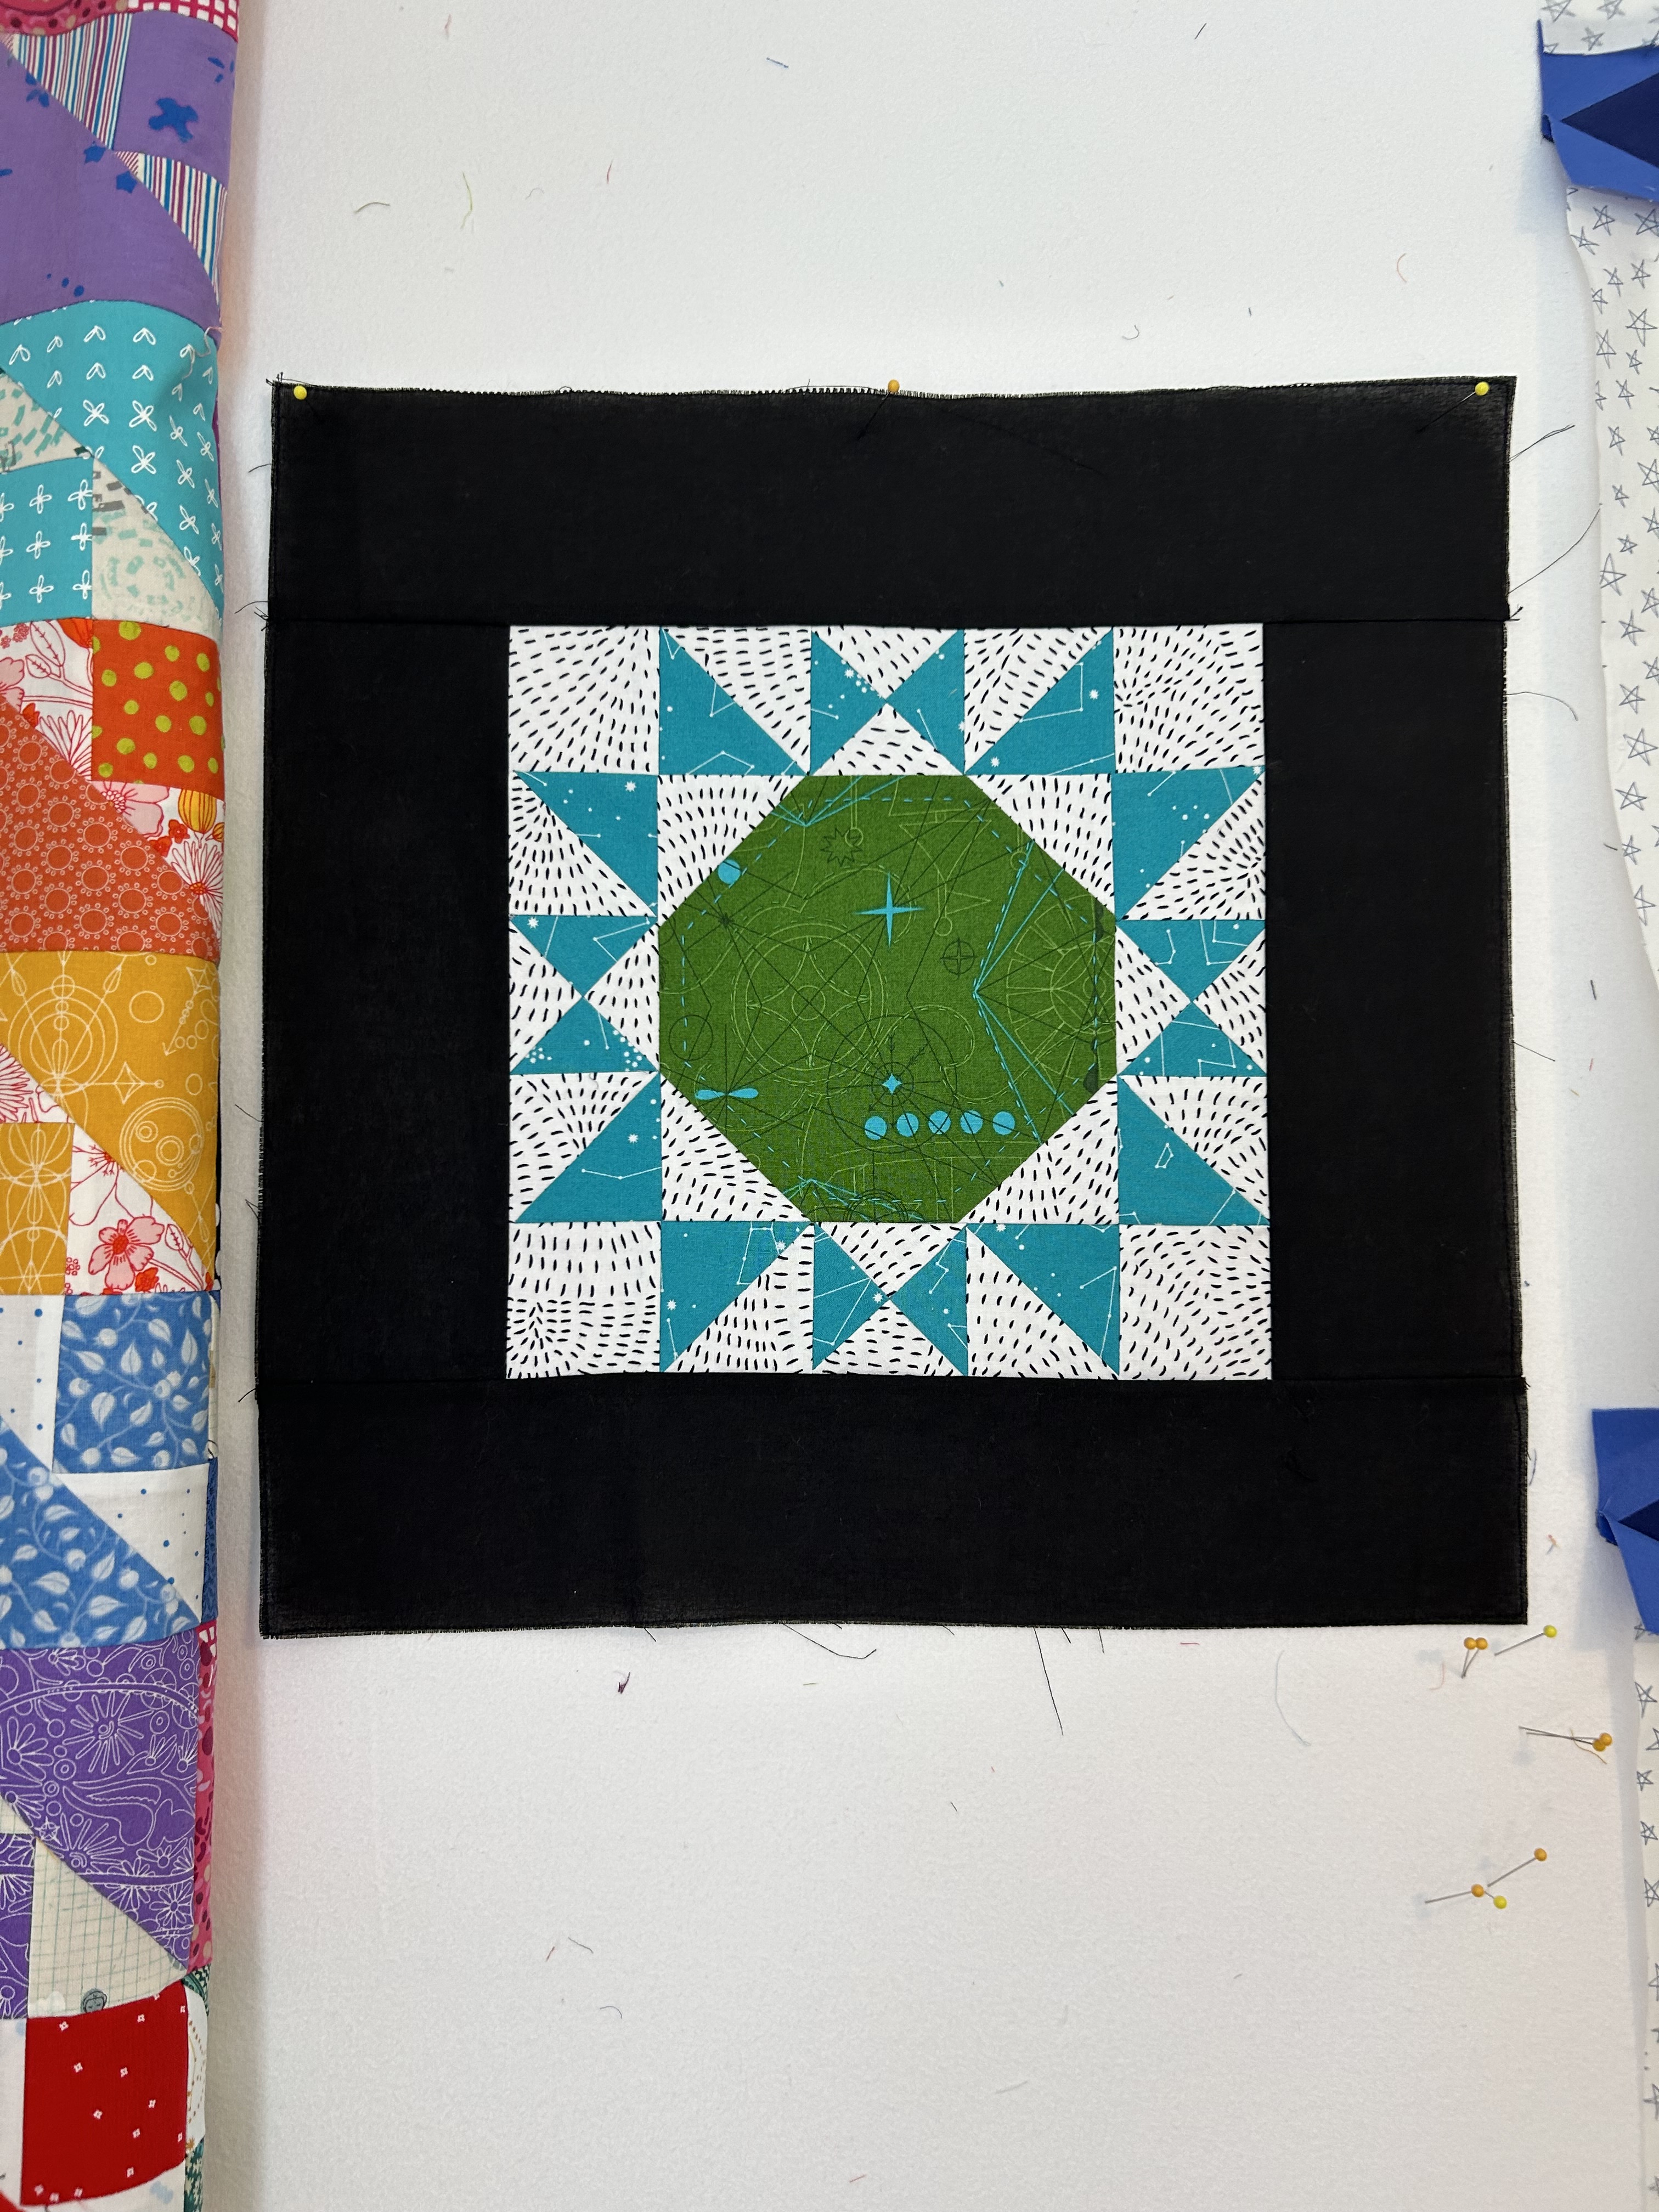
Below is the block I’ll use to show my Charleston Modern members who come to tomorrow’s Sit and Sew how to mount a quilt on stretched canvas. I did some very subtle hand-sewing on the green center, which added just a little texture.

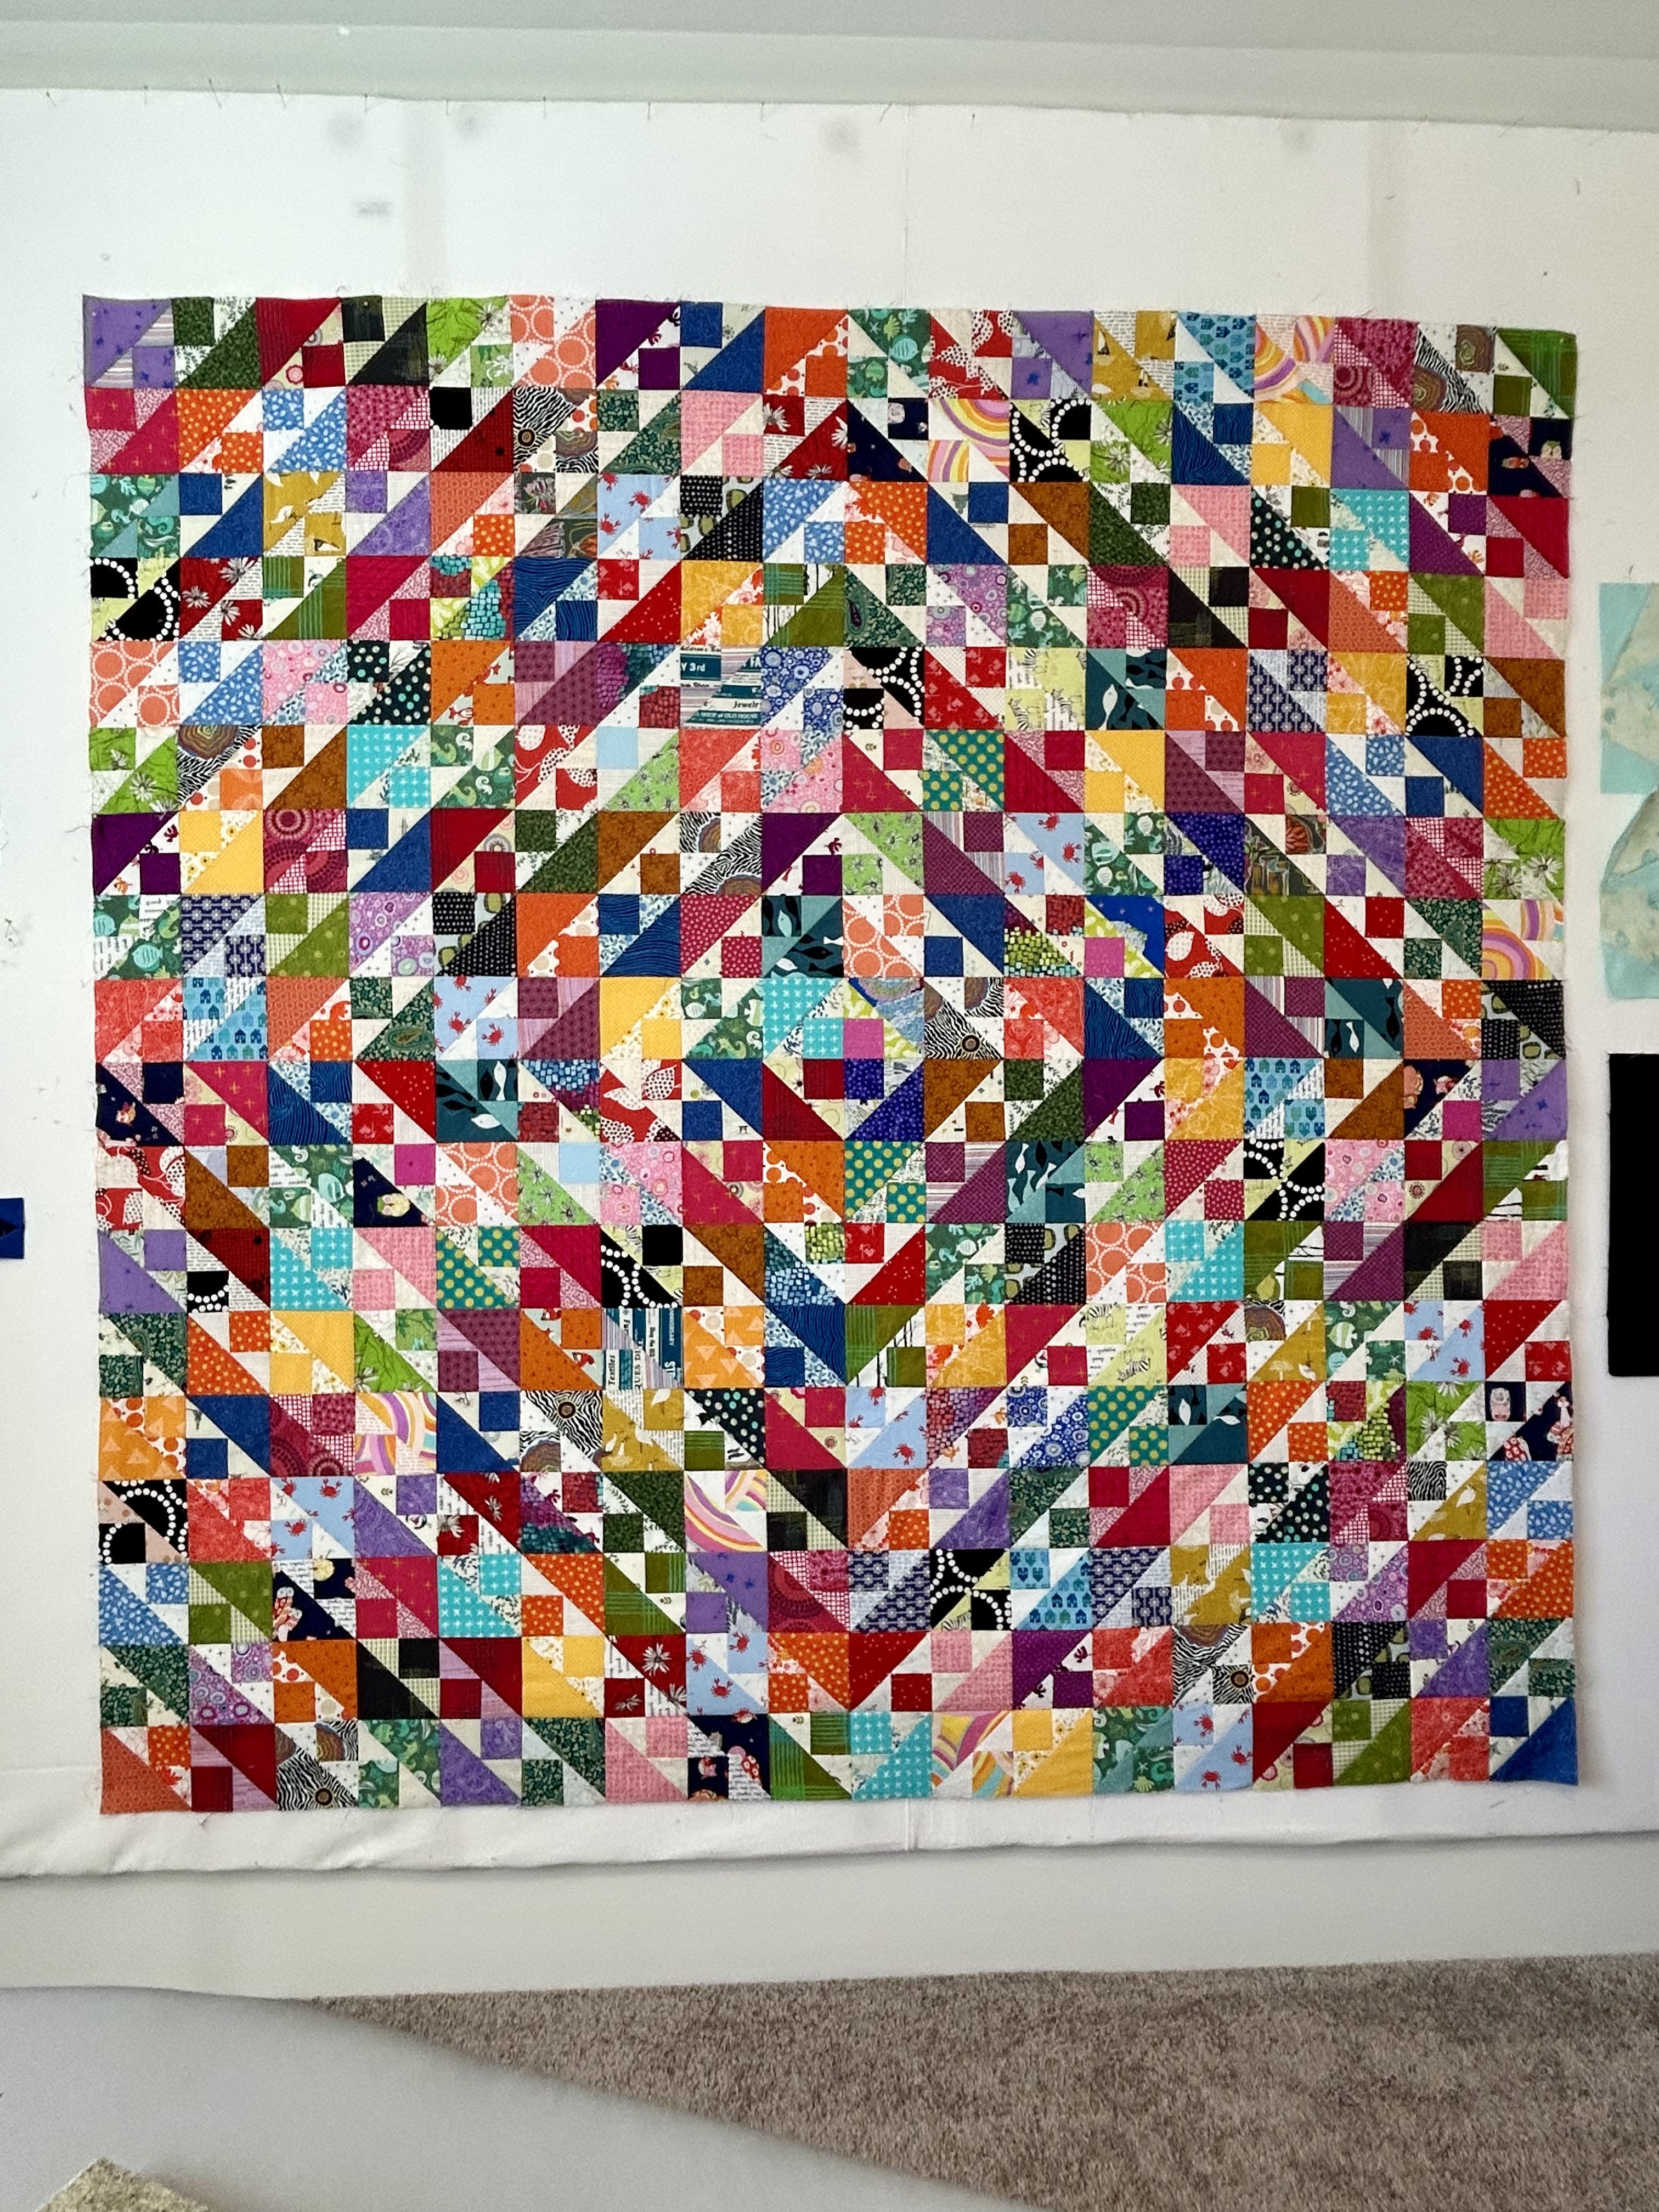
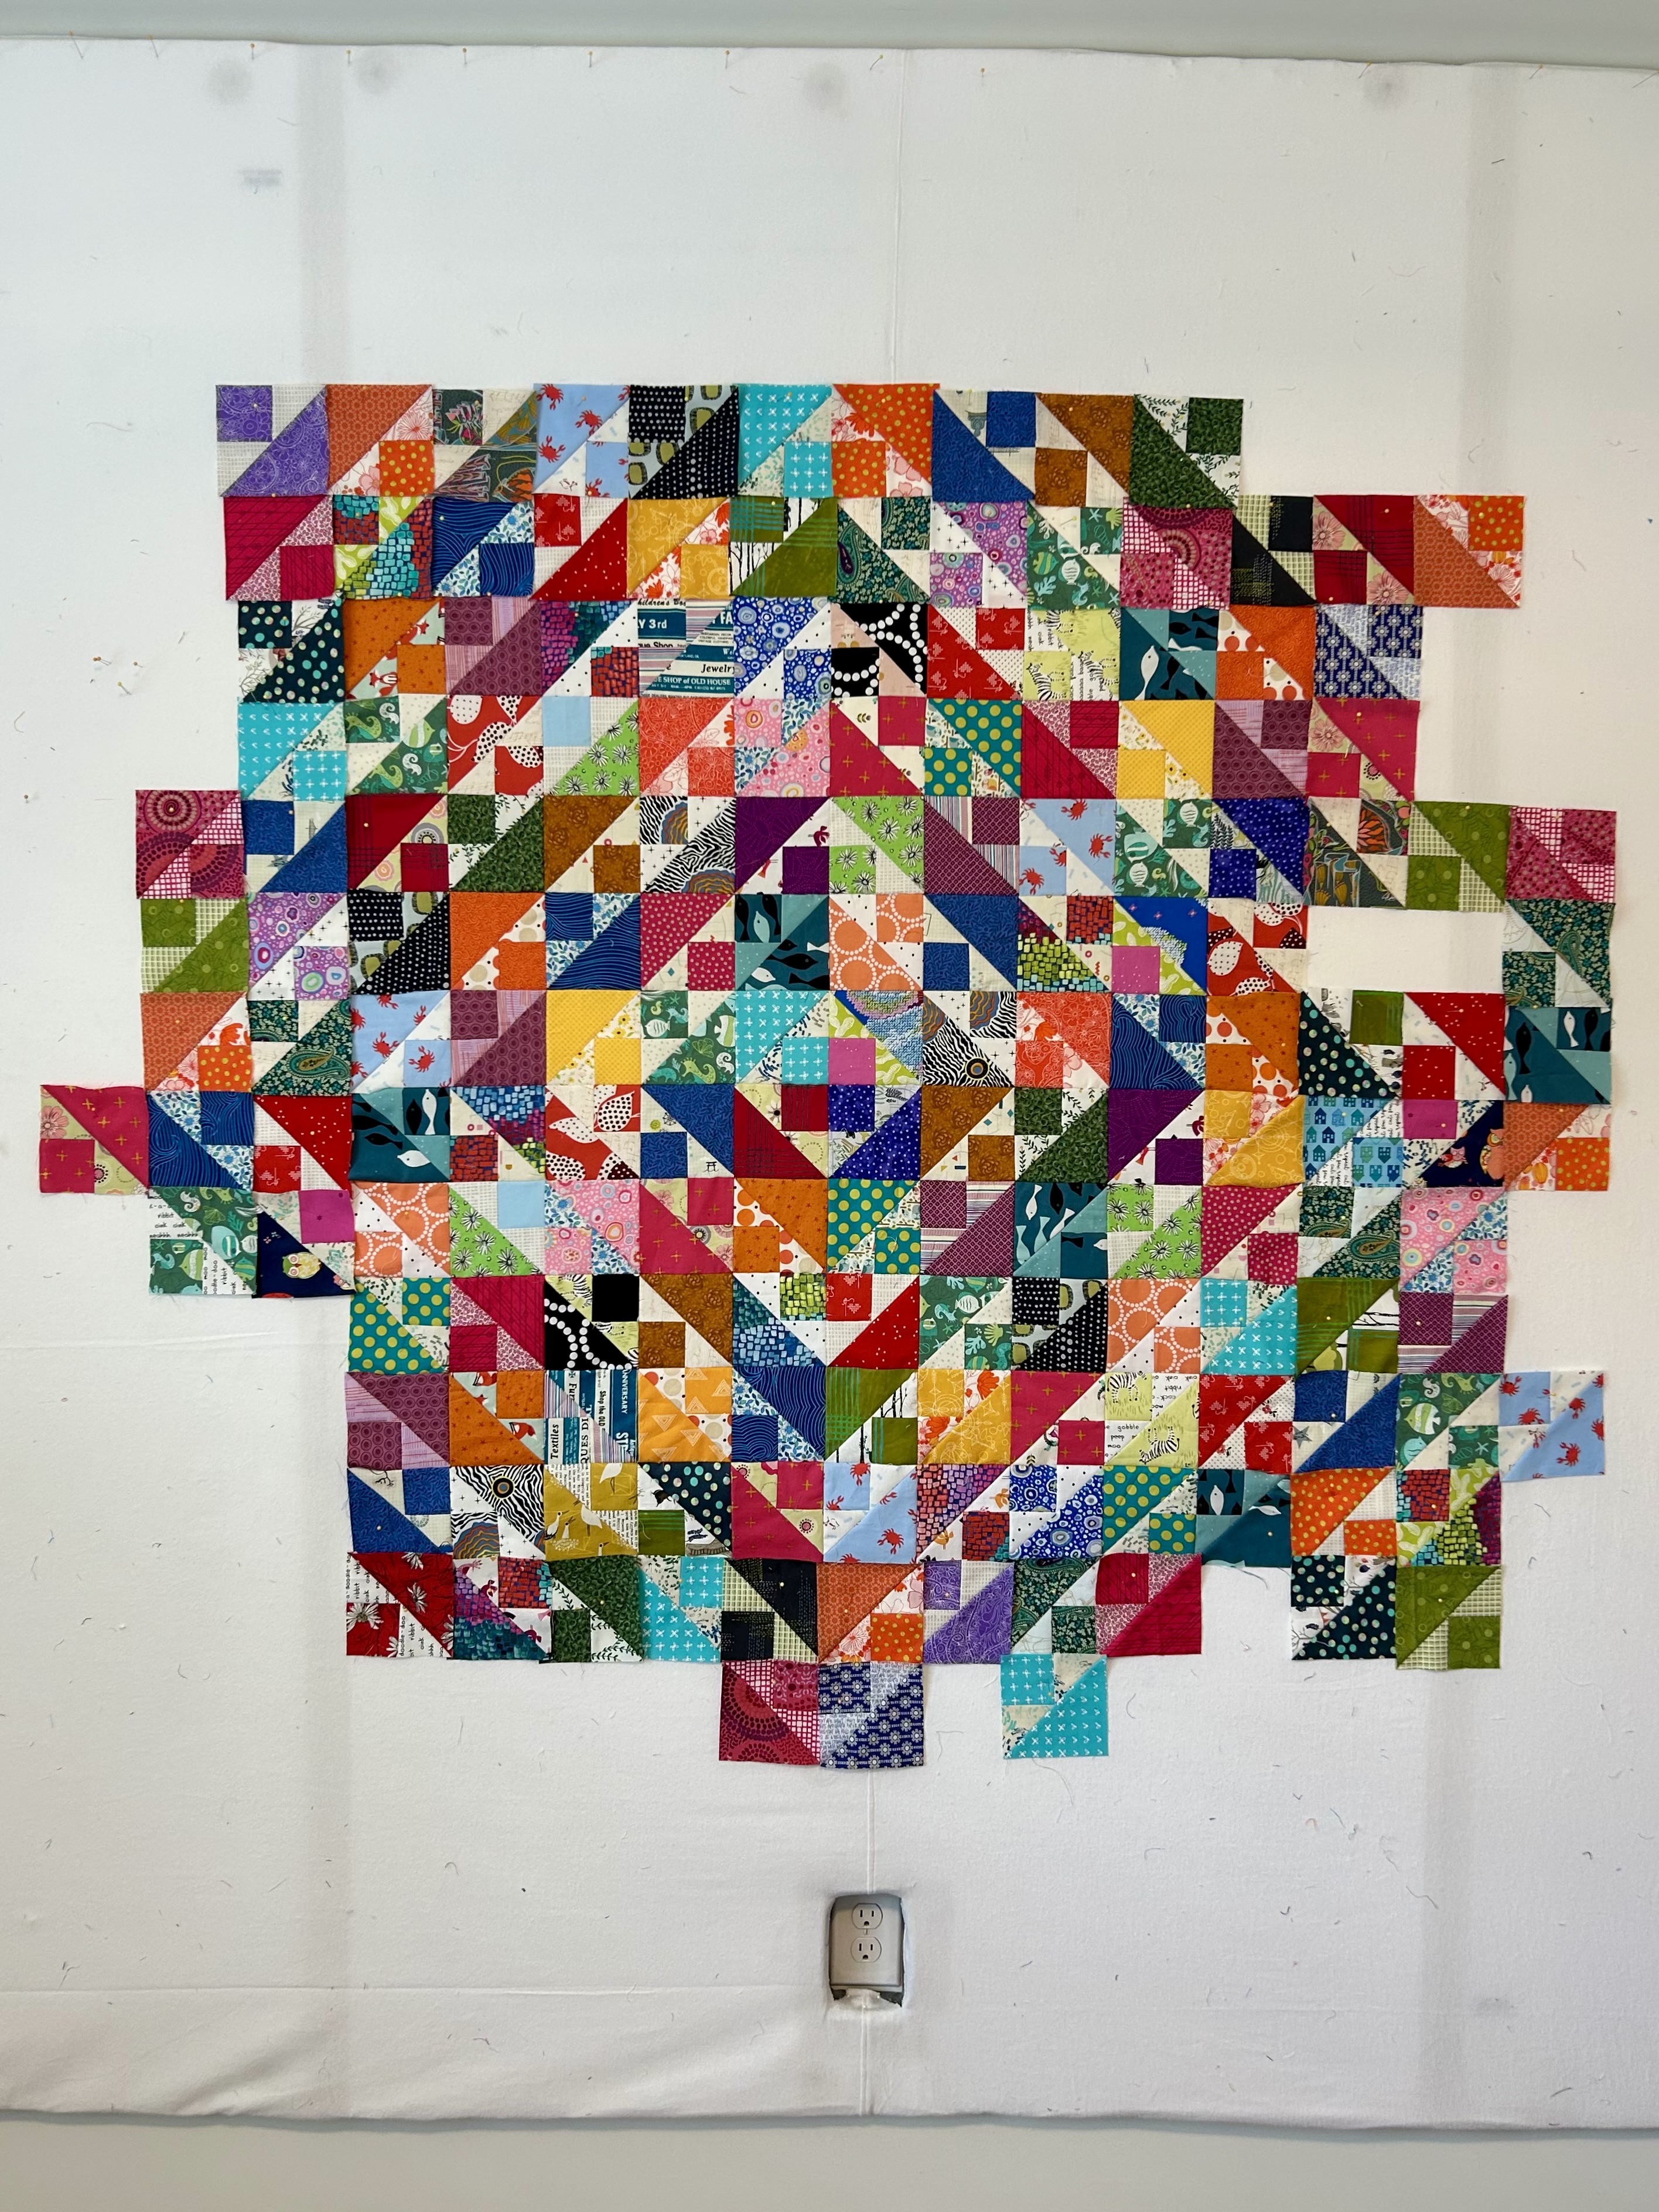
My changing design wall shows how my quilting rolls along. And it is so much fun.

My 4-Quilt Series is Done

This past winter I worked on making a series of quilts using Latifah Saafir’s Hurty ruler (which makes half-rectangle triangle blocks sized 12 inches down to 1 inch). My goal was to use materials from my stash, with the exception perhaps of some backings if warranted. I do like plain backings for busy quilts.

Each of these quilts has its own blog post entry. But I thought it might be nice to see them in one place–to see the design progression I made–in the order of making.

In “Arrowheads” I wanted to play with the design that gets created when the left or right angle cuts in the half-triangle meet and form an “arrowhead” triangle shape. See the upper right corner for an “arrowhead” triangle. I organized the blocks to make that fat triangle on a diagonal line from top right to bottom left. In places, these “arrowhead” triangle are more subtle than others.

In “Diamonds” I wanted to play with the long triangle that forms when you combine 4 of these half-rectangle blocks. In places I made diamonds, yes, but I didn’t want a quilt of all diamonds. So away from the center of the quilt, I often just used the half of a full diamond block. I also made some diamonds and long triangles in much lighter fabrics, to vary the rhythm.

In “Dancing Hourglass Diamonds” I used the “hourglass” rectangle triangle block I discovered in this year’s Tara Faughnan’s online Blocks 2 class. Once the rectangle triangle block is made, one cuts block on the diagonal and combines the parts with OTHER cuts. Note that you have to have all left or all right cuts on the Hurty ruler for these diagonal cut pieces to line up.

I made some solid little diamonds to pull the eye around the quilt, but take a moment to gaze at the quilt to see what happens–magical bigger diamonds form to join the dance around this quilt.

I was thinking of a red or green border and found this blue leftover in my stash–from a wideback used in another quilt. The minute I laid it next to the quilt top, the quilt started singing. Out loud. Insistent. Who knew?

In “Gradations” I played with the range of sizes available in the Hurty Ruler. I chose sizes that would add up to creating a downward row of 48 inches–in order to make a center with the darker color in this block oriented to the bottom on its side. This center sat on the design wall for several months until I ordered the fabric used in the border triangles and on the back.

A nunber of people have asked me for the name of this fabric: It’s “Pixie Petals in Sapphire,” made by Coming up Roses for Moda (fabric 39788/13).

There may be one more in this series one of these days as I just realized that by mainpulating color, you can make a straight line with this block.

Hmmm…

New Sewalong From Rachel Hauser And A Kite Block

Rachel Hauser of the Stitched in Color blog is starting a new online sewalong, starting May 11th. Rachel is predominately a scrappy quilter, and I love her work. You may recall I did her “Scrap Cabin” quiltalong some months back–as I fell in love with her border for that quilt.

Well…

Her new sewalong features her quilt “Parsnips”–which has a sashing treatment with which I also fell in love. Her green sashing color is much more intense than I could get my camera to capture from the front of her downloaded pattern.

Here’s a better picture of how she used colors:

Rachel used rectangles, but I have a bin that has a ton of 2.5-inch squares, so I’m going to use squares.

And I was guessing the size of her sashings before she released her pattern, so mine are just a bit bigger. I’m using my “Tri Rec” rulers to make my triangle sashing blocks, but Rachel has included templates in her pattern.

I’m sewing together my squares as a leader/ender project for right now. And I’m adding an outer neutral border so I can have the whole of these cute stars along the edges. My block of squares measures 16 inches and I’m sewing it in 4 pieces. I don’t know yet how big I’ll make this quilt.

Clearly I’ve never met a ruler I didn’t like. I recently saw an involved quilt that used the kite block, and I was so intrigued that I ordered the recommended 5-inch version.

In the process of trying out the ruler–it’s awesome–I seem to have started a quilt using a kite block. I’ve drawn a plan now and am cutting out more sets of 4 blocks.

I really like the movement in this arrangement and will use the single rows as if they are sashings. I already see where I want to move that light blue single row–I think it needs to be a block on its own and there need to be more blocks with light kites and stronger outside pieces. And that’s how my quilting goes…

The 4-inch Cat’s Cradle quilt top is done, ironed, and pinned to the design wall while it waits for its backing and for its turn on the longarm–which gave me the design wall room to play with Parsnip and the kites.

This quilt needs a name. Right now, I have no idea…

And I will say I’m not done at all with playing with these Cat’s Cradle rulers. There are so many different settings in the “Cat’itude” little book by Deb Heatherly.

This week is flying by so fast…

Now I need to stop and get “Big Slice” done and off the longarm. But that means I need to stop playing, which is always so hard for me to do.

“Tunnels to Towers” Quilt is Done

This quilt is made with the 8-inch Cat’s Cradle ruler–the bigger ruler than the first original one, which stops at 4-inch blocks. Each use of either ruler produces TWO blocks, so you can vary the square color if you like. Or, if you are reversing light and dark, you could also vary what are the light triangles here. This quilt measures 64 inches square. And, of course it used a lot of my scrap stash.

Isn’t the red striped border perfect? I think so. The whole project is just so…cheerful. I’ve had this Blue Jay fabric for some time in my stash. I used it on the back of another quilt years ago. And I had enough left to use it on this quilt.

This quilt is a donation to our Charleston, SC, Tunnels to Towers project that will house 90 homeless vets. I so hope that the person who chooses this quilt (they will be able to choose) does so because it will brighten his/her day just by looking at it.

I will make another version of this quilt again–meant to be a donation quilt likely and to have a nice leader/ender project in the making. It’s easy, fun to make, is scrappy, and uses a lot of stash fabric.

PS: the 4-inch Cat’s Cradle top needs only its bottom 4 rows sewn now. YEAH!

Here it is with the blocks unsewn, except for some of the center blocks.

The 4-inch Cat’s Cradle Quilt

I’m sewing these blocks into rows and sewing rows together.

This quilt feels like a monster project right now, LOL. But, slowly and surely. And I do love it! It is so colorful and interesting. Boy has it eaten up stash fabric.

“Big Slice” is on the longarm with one pass done–and is waiting for me to finish her and put on her binding (which is cut).

I’m still drawn to the “prickly” version of this block–I made one and posted about it when I turned it into a stretched canvas piece.

Tara Faughnan made a quilt with the “Big Slice” block that is very engaging and interesting. You can see that on her Instagram or on her newsletter page. I hesitate to reproduce it here as that probably isn’t legal.

Meanwhile, I’ve been distracting myself by playing with two other projects as kind of “leader/ender” projects.

But…

More on that later!

Quilty Update: “Gradations” Is Finished and More

“Gradations” is the 4th and final quilt in my half-rectangle triangle series, using Latifah Saafir’s Hurty Ruler. I am so happy with this quilt. It was so fun to make. The center sat on the design wall for some time until I saw the fabric I used in the outer border. Then, poof, I was off and running.

I used that fabric for the backing and binding–and cut it so that the strips ran sideways rather than up and down.

I made another block to go on stretched canvas. This block is from Tara Faughnan’s Blocks 2 class and was one of the choices for her Big Slice wedding ring block–which you can see further down in the quilt top I made.

These blocks are kind of hung “willy nilly” but they also work just fine in my sewing quilt room. They all make me smile. The middle piece is a quilt and is not on stretched canvas.

My 4-inch Cat’s Cradle ruler quilt top is coming along. I can see the end. I like making this block a lot, so there’s no pain involved here. Each block makes TWO blocks.

“Tunnels to Towers,” my donation quilt is off the longarm and has had its binding installed. This is the 8-inch version of the Cat’s Cradle block. It’s now downstairs getting its binding sewn down at night.

Next up on the longarm is “Big Slice.”

It’s kind of funny how lots of projects come together all at once. Funny and Fun.

Have a great week everyone!!!

My “Scrap Cabin” Quilt is Done

You’ve seen pics of this quilt off and on, I know, but I do like to do a final photo when a quilt is all completed. “Scrap Cabin” is a Rachel Hauser (Stitched in Color) design, and she held an online sewalong in January to make her second “Scrap Cabin”–this new one, meant to have more color combinations than just two. I also chose to use two color families in each of the nine blocks. I fell in love with the border she designed.

And I’m still in love with that border. I especially love how she designed the border’s corner blocks. So clever…

This quilt used up A TON of my stash strips. I even had to cut some strips out of bigger pieces of fabric in my stash to get the colors I wanted. ***If I make this quilt again, I will keep the neutral pieces very light and not use the lighter greys in my stash as the lighter neutrals look a lot more lacy. I did figure that out by the border as I had not seen the full impact of the lacy border effect until I started making it.

I kept the backing plain–and did buy that fabric. The panto is “Check and Chase” by Hermione Agee. I love the texture and the curves this panto added to this quilt. I used a parchment colored 40 weight Cotton thread (Signature).

This quilt is my 239th quilt made.

My Blocks2 Class

This six-month online class taught by Tara Faughnan started in October and ended in March. Each month Tara encouraged us to take time to “play” with that month’s block idea.

I thought it might be fun to review my own “play” time and to show you one of my favorite pieces from each month.

“Hourglass” was the first month’s project. I was drawn to the half-rectangle triangle version–and here’s where I learned to diagonally cut a half-rectangle triangle block and recombine it to make a whole new block–which eventually wound up in my half-rectangle triangle series made with Latifah Saafir’s Hurty ruler. But more on that series later as the final and 4th quilt is now getting its binding sewn down.

Here are some small pieces I made with that half-rectangle “hourglass” block. I had fun with playing with hand-stitching and with trying a facing on one.

“Log Cabin” was the second month’s project, and here’s where I started learning how to put a project on stretched canvas. Tara gave us MANY variations of this narrow log cabin form, including triangles and hexagons in all sorts of sizes. I had to make myself STOP.

I hung this one in my quilt room, but all the rest of this month’s work have been gifted.

“Abstractions” was the third month’s project, and again, I made many different blocks with this method, plaing with density and color combinations.

I hung this one downstairs, and I smile whenever I see it.

“Wayward Arcs” was the fourth month project. And predictably, I had a lot of fun with this improv curve method and hand stitching.

“Big Slice” was the fifth month project–a new Tara Faughnan “wedding ring” block. I had made her older version years ago. I loved her fabric palette for this project, so ordered those fabrics and added a few more colors from my stash. This one is waiting in line for the longarm. It is 60 by 60 inches.

“Grid Work” was the sixth and final block idea.

I had made a type of grid work project last year in our Charleston Modern Quilt Group’s Sit and Sew, taught by Cathy Beemer, so after viewing projects shared on our online Community page, I moved to this idea of a city scape installed on stretched canvas. It wound up being 24 by 30.

Here’s the gridwork type of work I did last year and a picture of my recent treasures on stretched canvas hanging alongside.

After a lot of thought, I hung my Grid Work project, now called “City Scape” in my tv sitting room. It really makes the space next to my tv come alive. Here’s the view from my seat. The improv quilt on the chair is made from all the blocks I did in Blocks1.

Blocks3 will sign up in September. I’m thinking of doing it again. These past two years have been rich in experiences and new methods learned or old lessons expanded. Go to Tara’s web page to get her newsletters.

Grid Work Project

It’s April, and Tara Faughnan’s online class Blocks2 is finished for this year.

The 6th month March project block was “Grid Work.” I was late in the month starting to play with it, but while being late I checked into our Community page several times and got inspired by the kind of city scapes people were making. Some made whole small quilts of this kind of “grid” block–some even tried the funky blocks and made whole small quilts by joining their many blocks.

My project took me about a week to make and wound up being stretched on canvas that was 24 by 30 inches as I needed more room at the top for a big, orange moon.

I did not try to add in hand stitching as I just wanted this piece to be really graphic.

I am very pleased with this project and now am not sure where I want to hang it. It will probably wind up in the upstairs quilt studio.

What a fun class this year’s Block2 class has been!

Thank you Tara Faughnan!

Sunday Quilty Update, March 23, 2024

“Gradations,” the 4th and final quilt in my half-rectangle triangle series, using Latifah Saafir’s Hurty ruler, is on the longarm.

I am sewing the colorful polka-dot binding on “Scrap Cabin” at night and have almost finished the 3rd side. (Rachel Hauser’s online sewalong in January, Stitched in Color blog.) Sewing binding is soothing, but for me, slow. I must sew tinier stitches than other people do??? I shared this quilt with Patchwork Gals this past week. Boy did it eat up stash fabric in my strip bins.

Here’s my design wall yesterday. “Big Slice” is folded on the left as it is all ironed and is waiting for its turn on the longarm. These two in-process quilts are being made with the Cat’s Cradle ruler. The left-side one is a 4-inch block made with the smaller ruler. The right-side is made with the larger ruler and is an 8-inch block, so will finish at 64 by 64. All the large blocks are done, but I’ll let this big-block quilt simmer for a few days before sewing the blocks together–in case I see something I want to switch.

There are many ways to set this Cat’s Cradle block, including one that makes a star. But I fell in love with the diagonal rows of little blocks and the rows that form with this setting and with this color placement in the block.

This big-block quilt is going to be a donation to the new Tunnel To Towers project here in Charleston, SC, that will house 98 local homeless veterans. (Tunnel to Towers started after 9-11 in New York city for those first responders who were injured. Now it is a national project for mostly homeless vets. (https://t2t.org/homeless-veteran-program/). They have asked the local quilt community for quilts for each bed, and we will do that work with pleasure.

Here is the smaller 4-inch block quilt. The 40-inch center has been webbed, leaving the horizontal rows unconnected, but so that the blocks stay in proper order. Now I’m adding blocks to the top and sides. I will need 16 by 18 rows in total to make this quilt a rectangle at 64 by 72.

When I pulled fabric pieces from my stash, I cut blocks from each piece of fabric for both quilts. The big blocks are done, but I now have to sew the 4-inch block parts I cut. And I will need to cut more along the way. It is a fun block to cut and sew though, so I don’t mind. And, again, ALL of these winter projects have been made from my stash fabrics–exept for some backings.

I am feeling really good about using up so much stash fabric this winter. It feels like making the fabric load much lighter. There is a balance for a scrappy quilter between keeping a stash of many colors and prints/solids and having an overload of fabric.