I’ve been actively sewing quilts since about 1996. From the beginning I’ve archived information on every quilt I’ve made. And I can’t believe how many times I’ve gone back to check on some detail about a finished quilt.
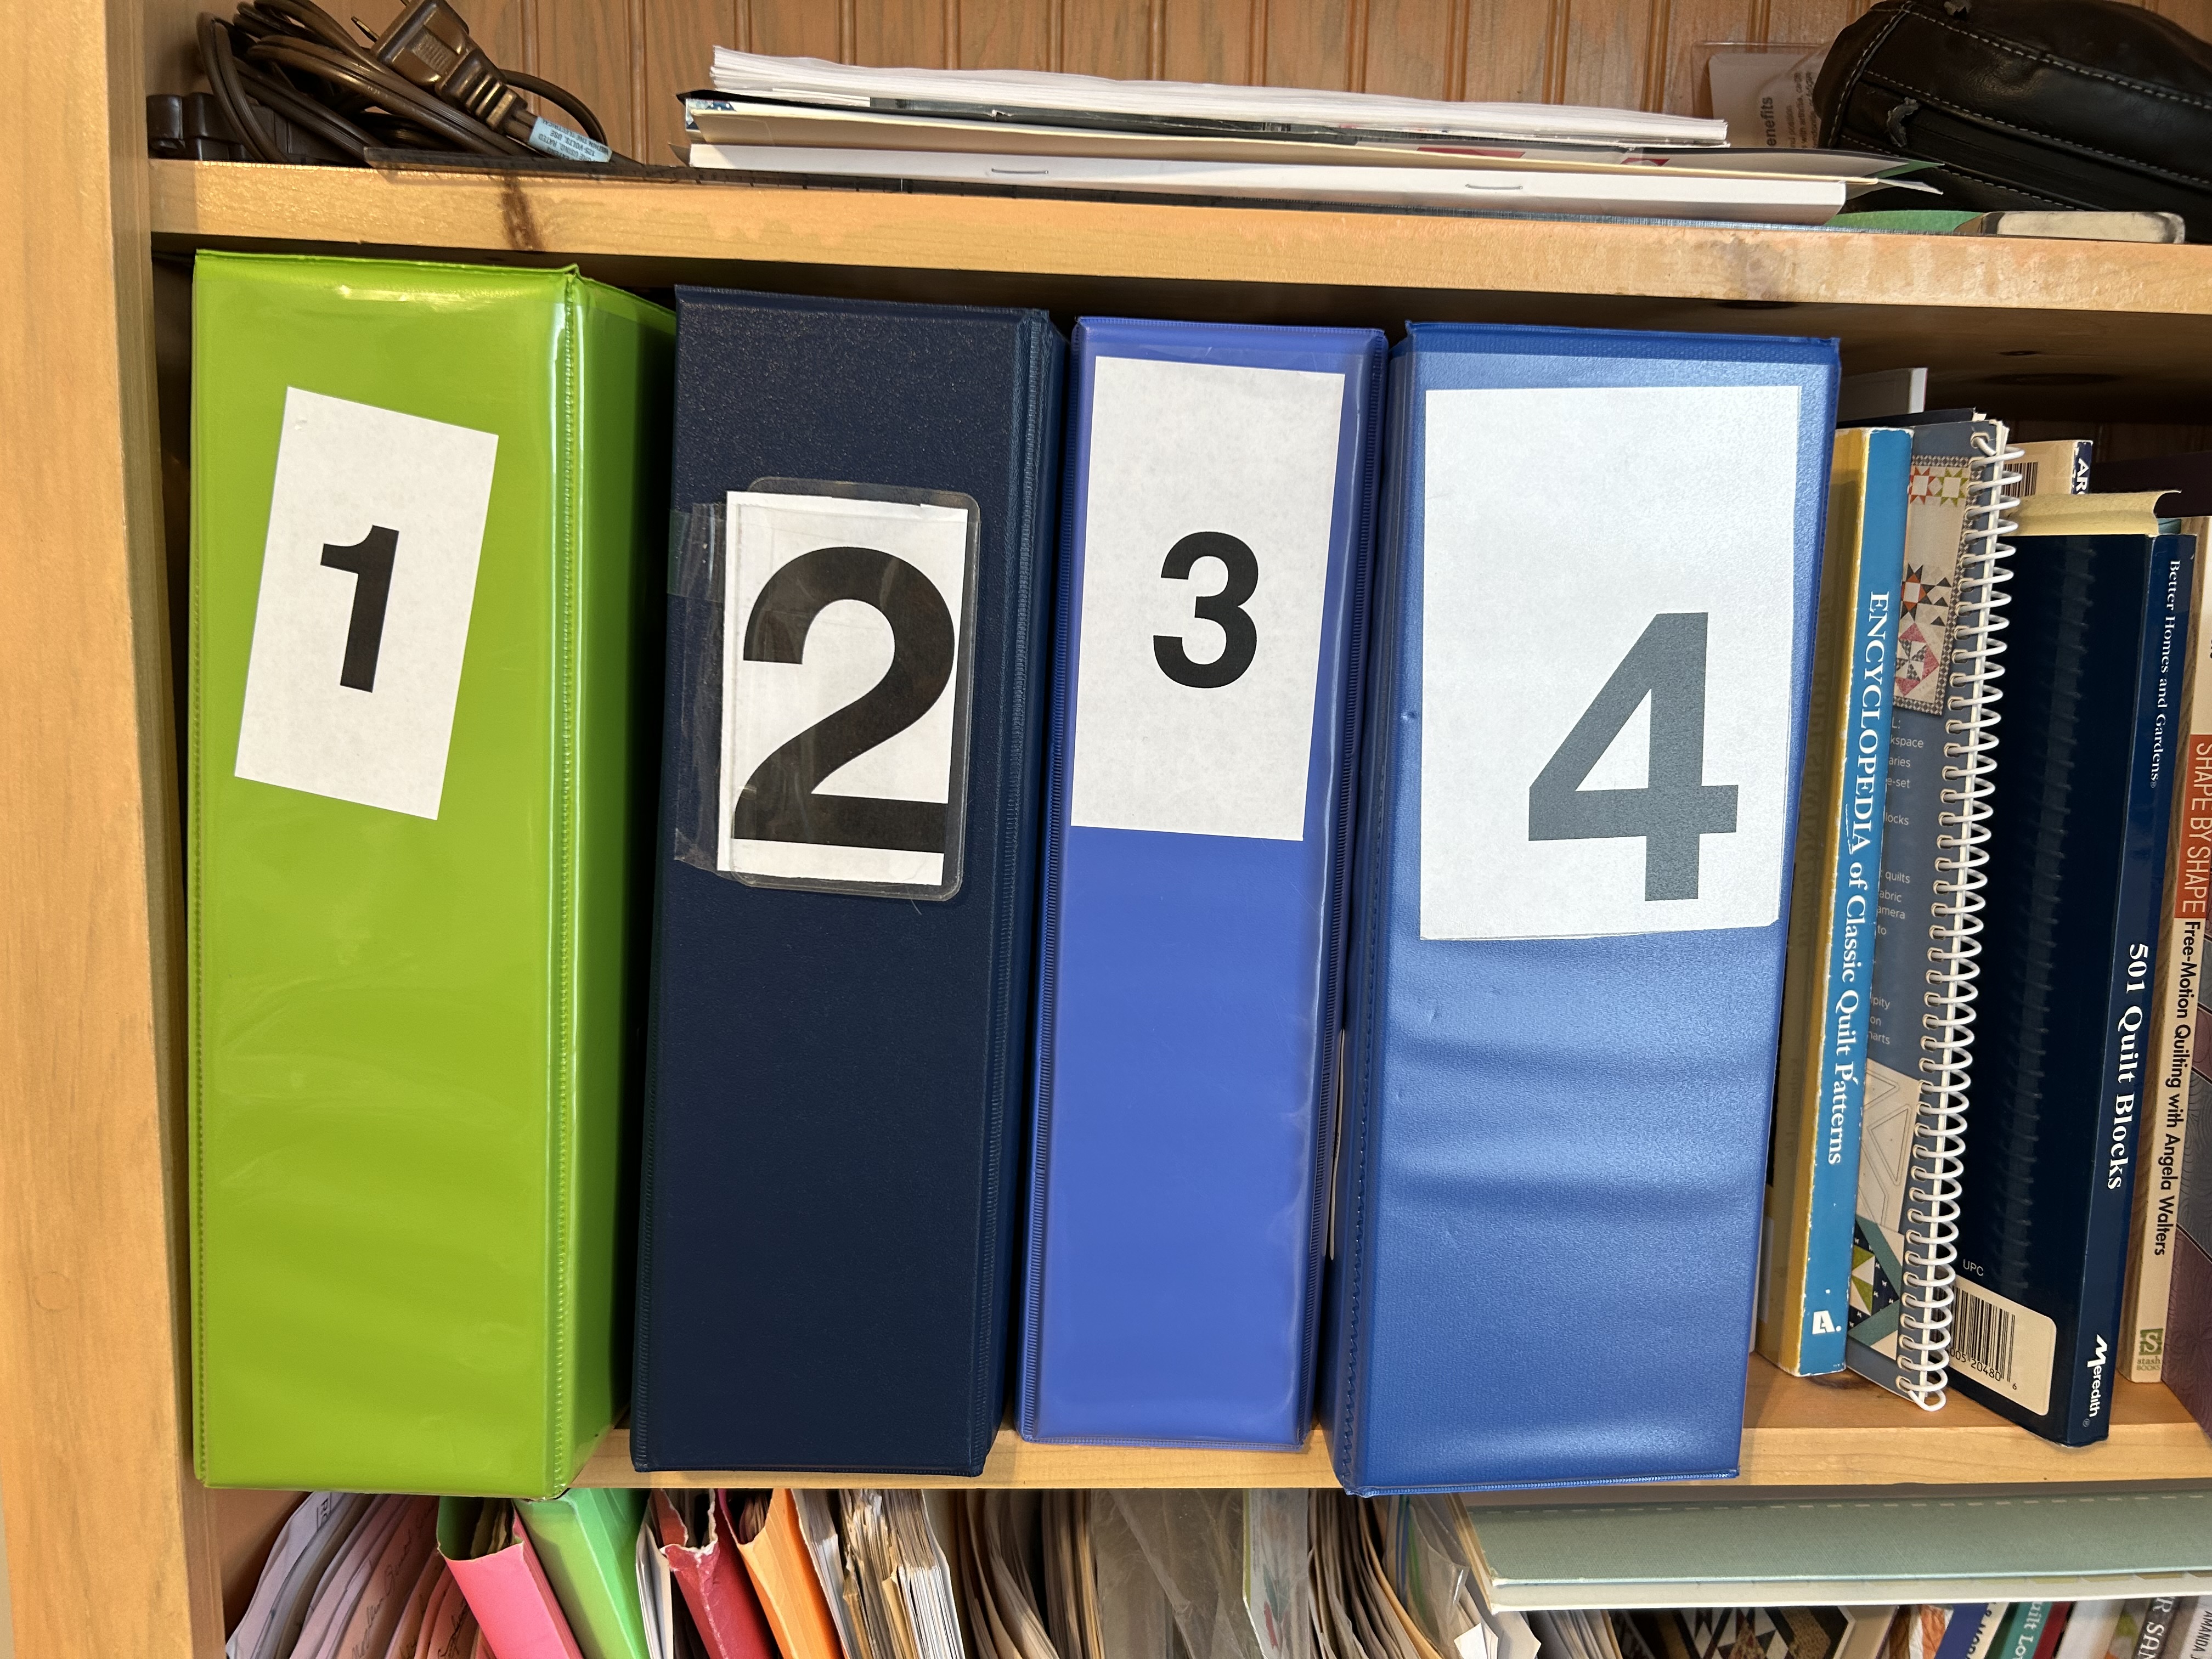
I use big notebook binders, and inside the binders I use plastic sleeves that will hold my quilt information and that open on the top only. The pictures below are from volume 4.
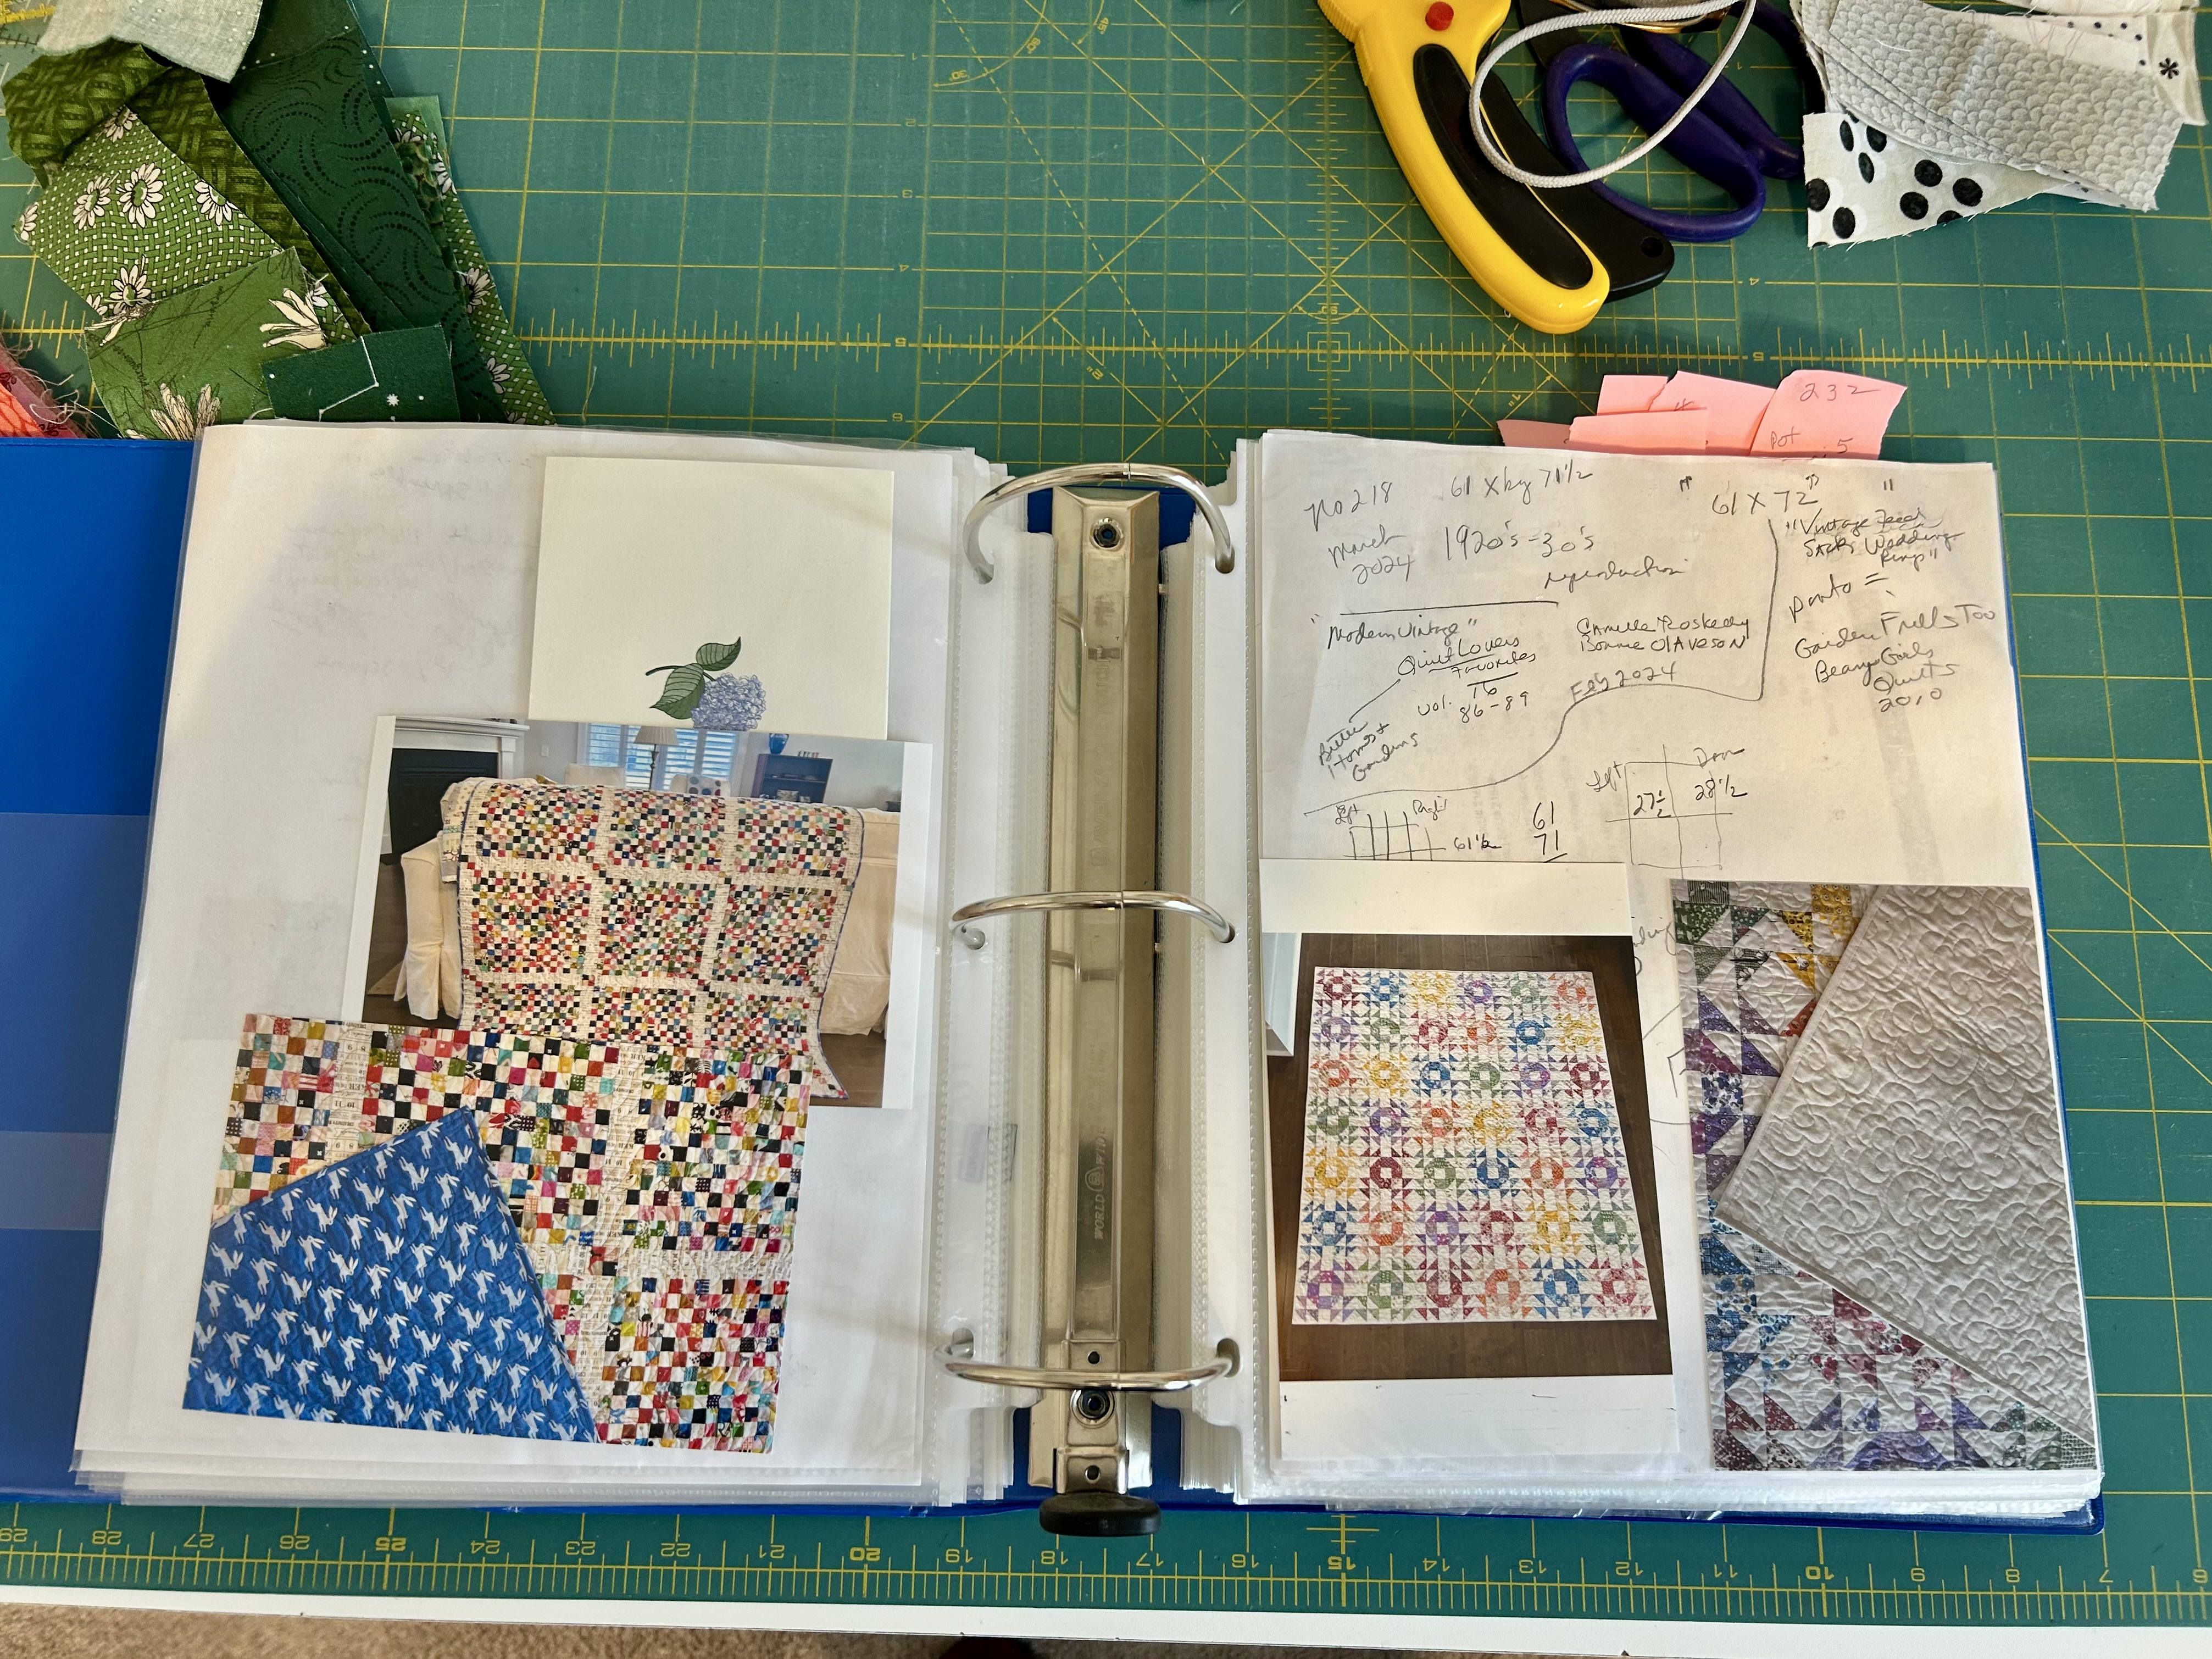
What do I record? EVERYTHING about a quilt I might need to know down the road. Always, I include pictures, the number of the quilt in the completion lineup, the completion date, the patterns involved (sewing, quilting), the size, the backing fabric, information on the front fabrics if needed, to whom I gave the quilt or why I’ve kept it (quilts saved for grandchildren), thank you cards or pics sent to me by recipients, and so on.
Below, the left page is more information about the quilt on the front side of that sleeve, and the right side is the first info for that particular quilt. On the left you can see there is a thank you note included. You can see each quilt has a page where I take notes as I work on the quilt.
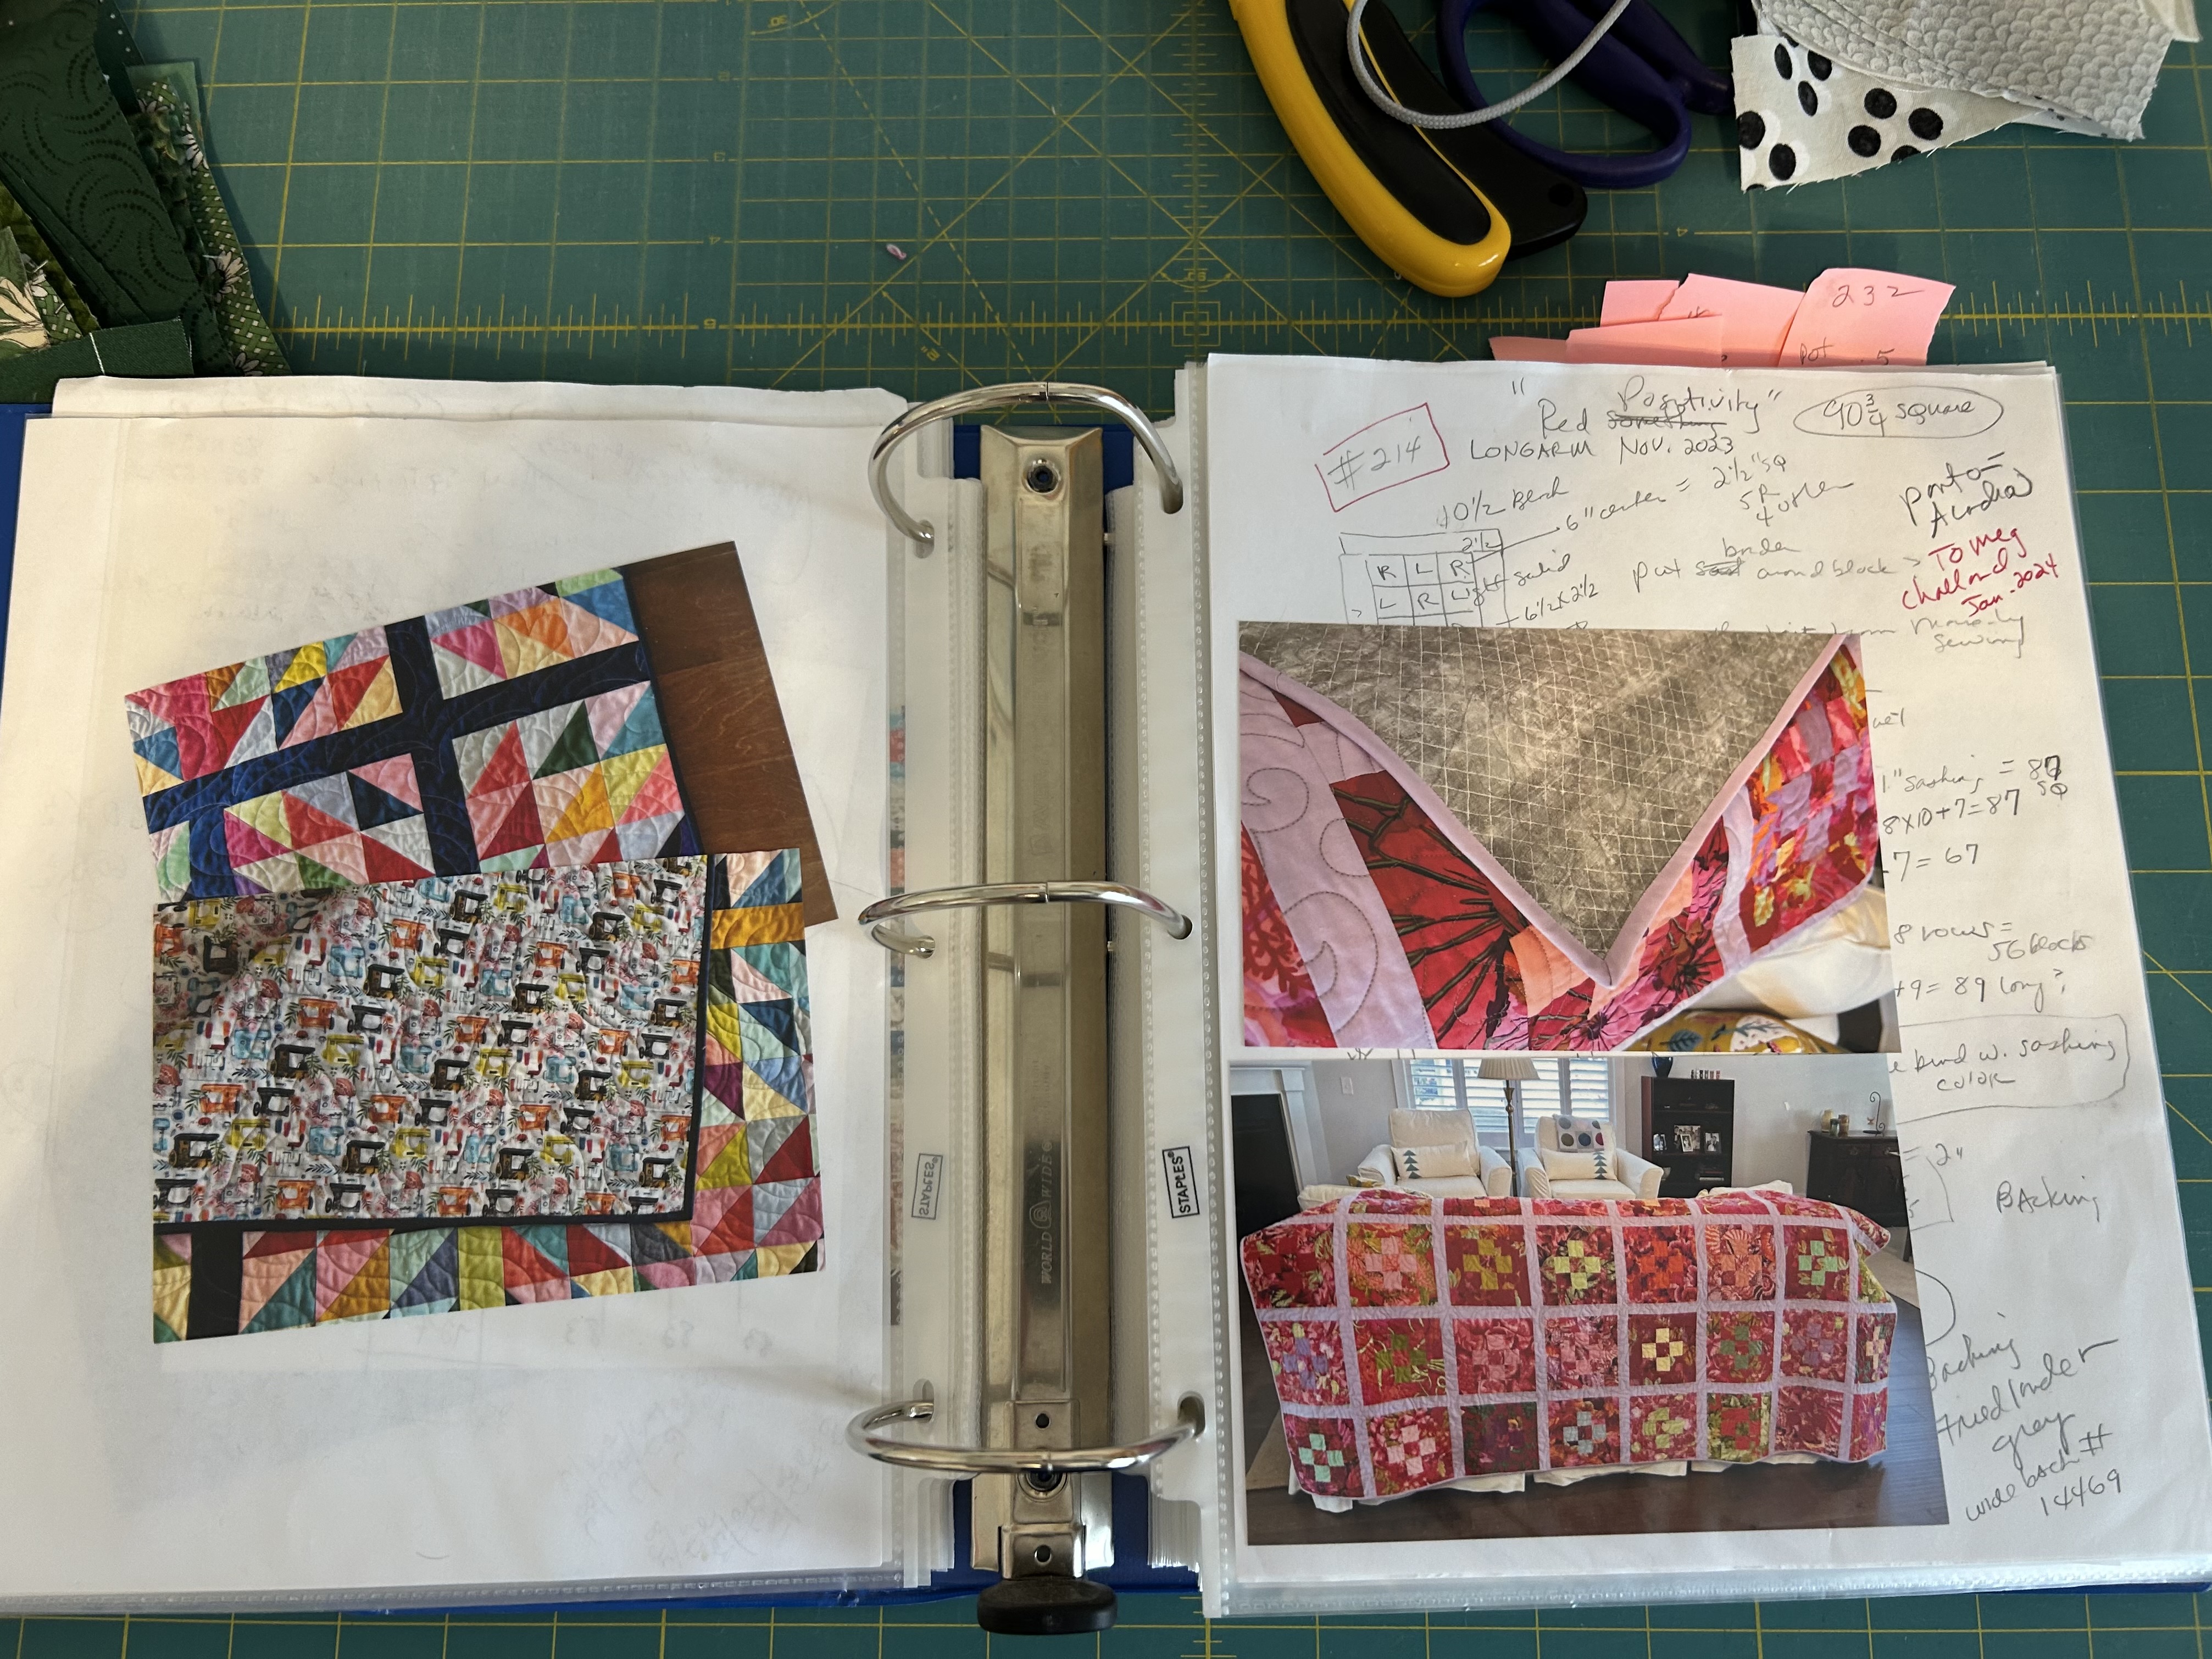
On the left below you can see I included the pattern for the quilt on the front side. On the right side you can see the backing of that particular quilt.
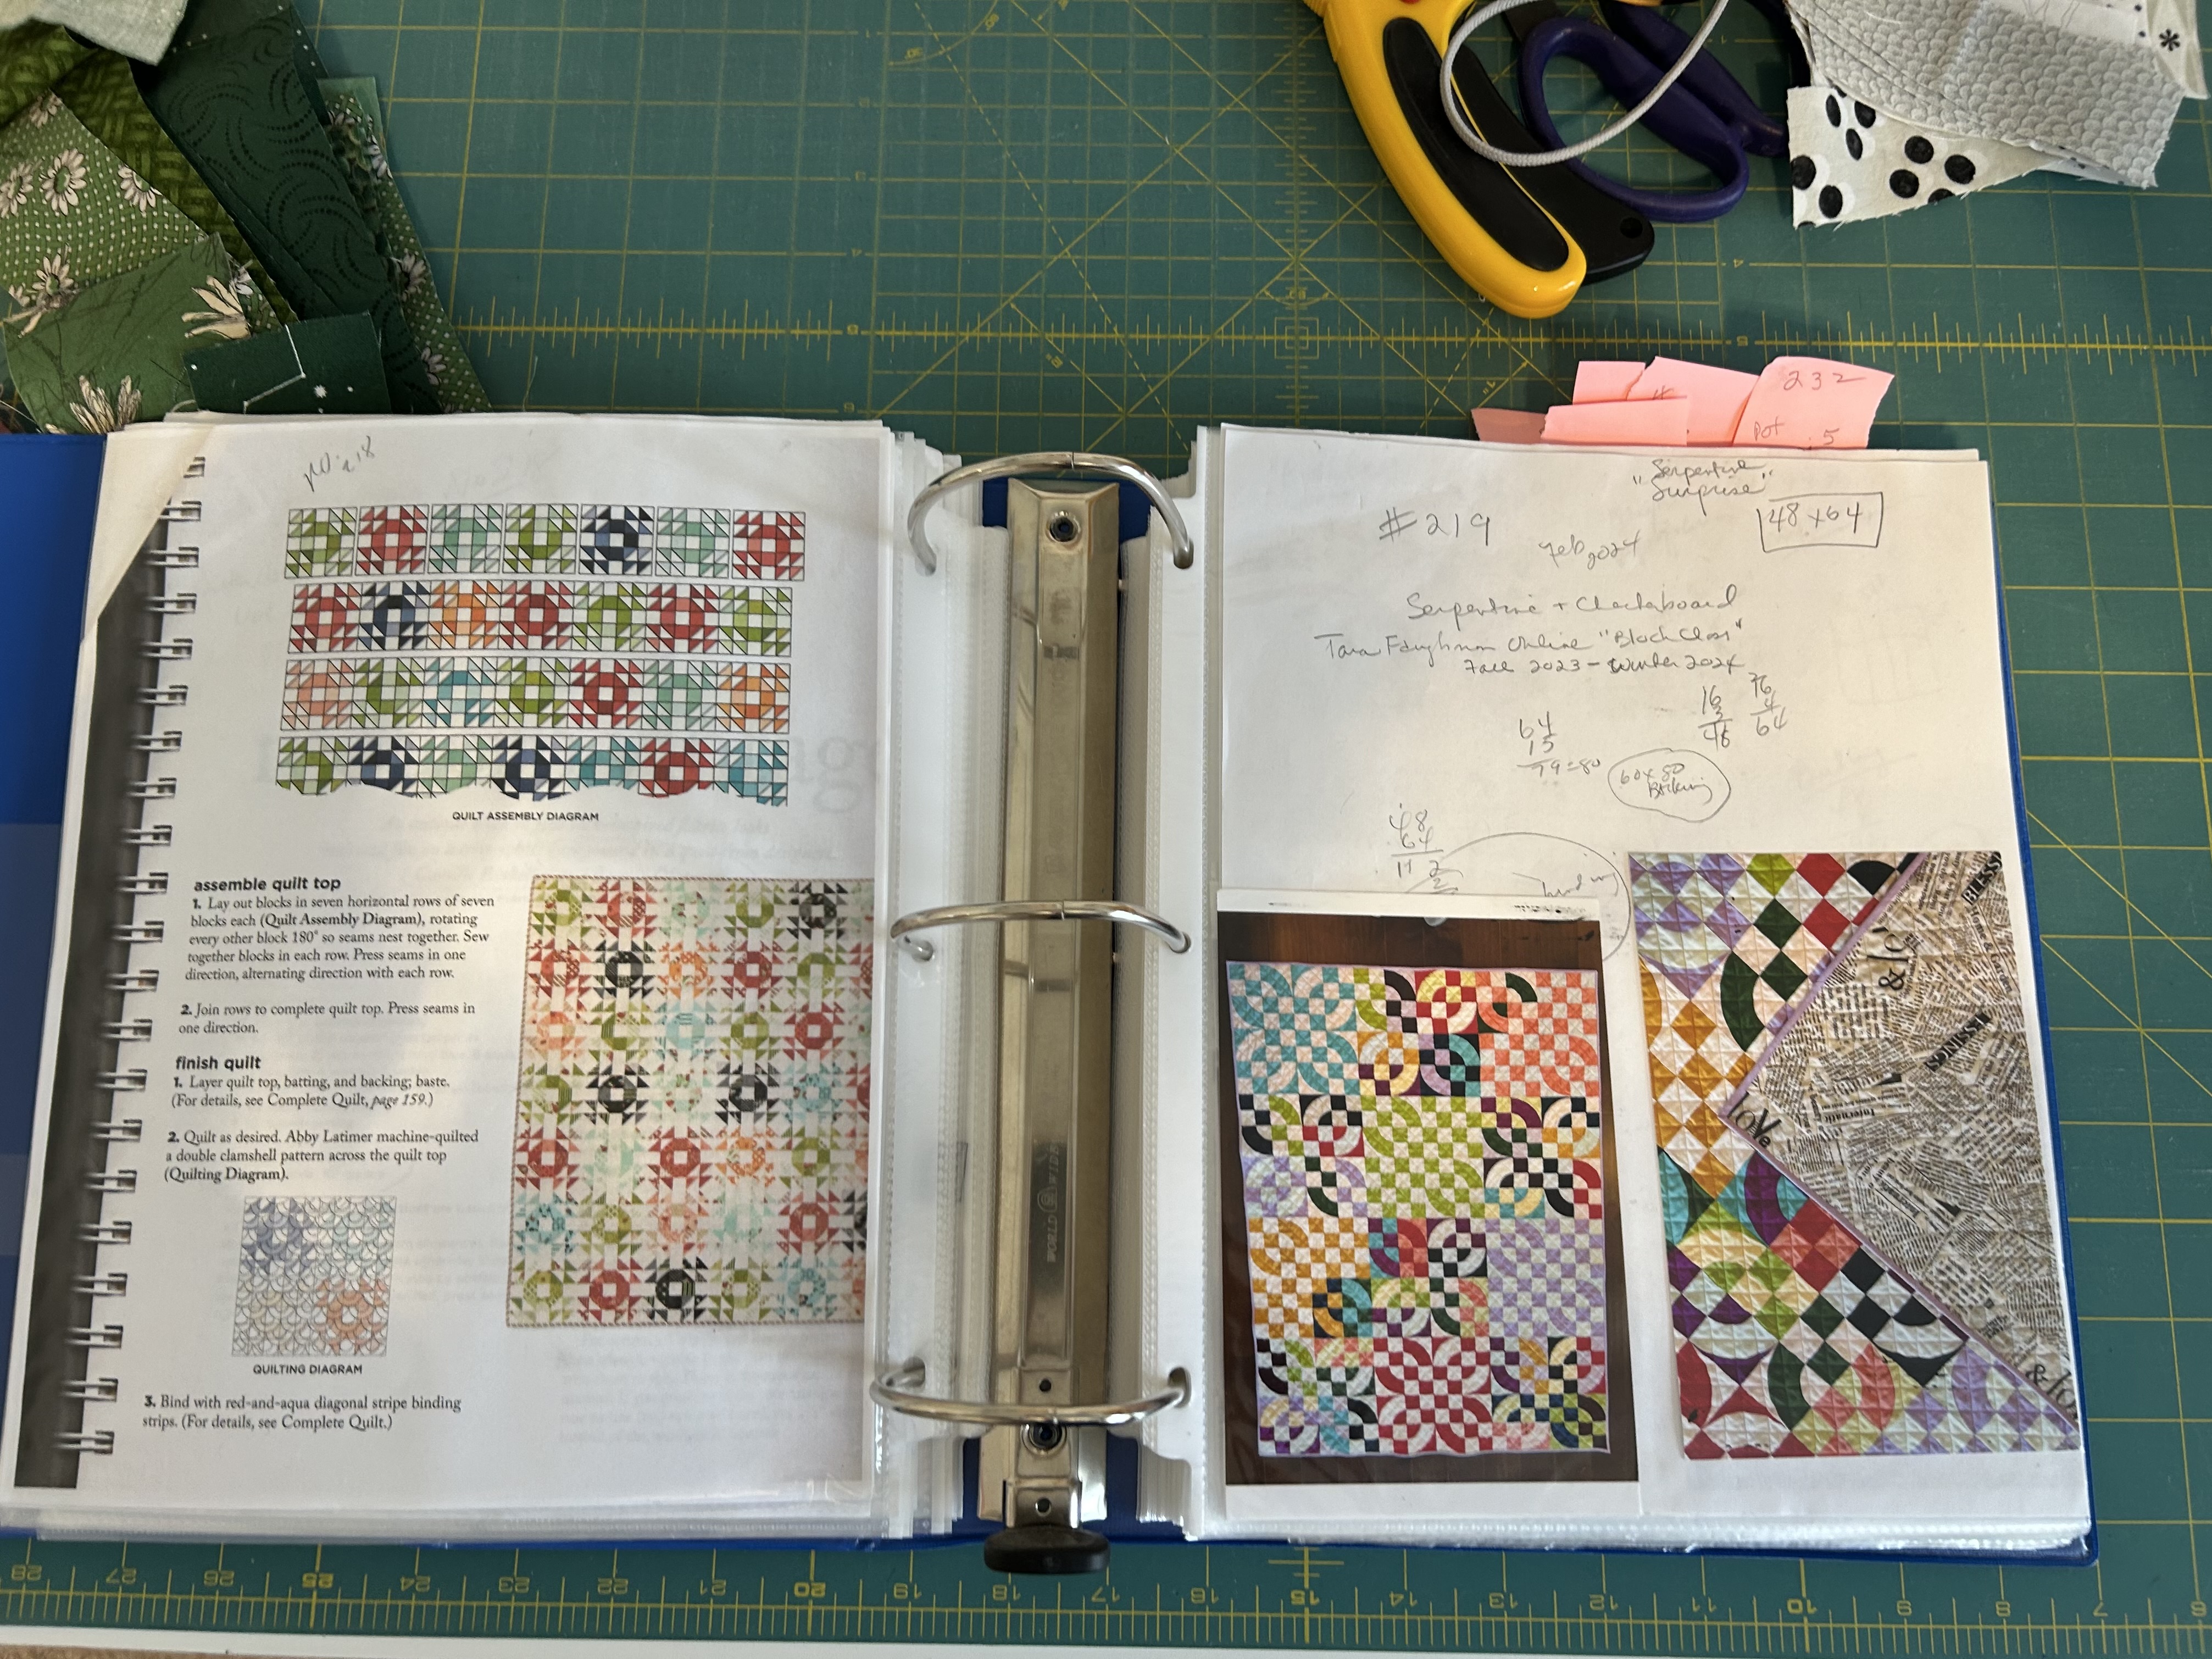
Another set of pages:
The back side of the right page above:
In the book I reserve pages for quilts under construction–so I keep all the numbers in correct order for when I create a quilt’s label.
I hope this post encourages the quilters who read this blog to start archiving your own quilt work and/or other sewing projects. YOUR work is important.
The water pipes are fine today, but we will have two more really cold nights, so I will drip water again tonight.
One of the “joys” yesterday was seeing the children in the snow, yes, but also the parents.
Out came golf carts to pull children on whatever worked–like the very thin boards that can skim retreating shallow waves at the beach. But there was a wide array of finding “whatever works.” And neighborhood dads participated in making sure lots of children had a try.
The local streets are still rutted with frozen ice where there was some melting and than refreezing. I wouldn’t take my car out on a bet, given that most folks here have no experience driving on ice.
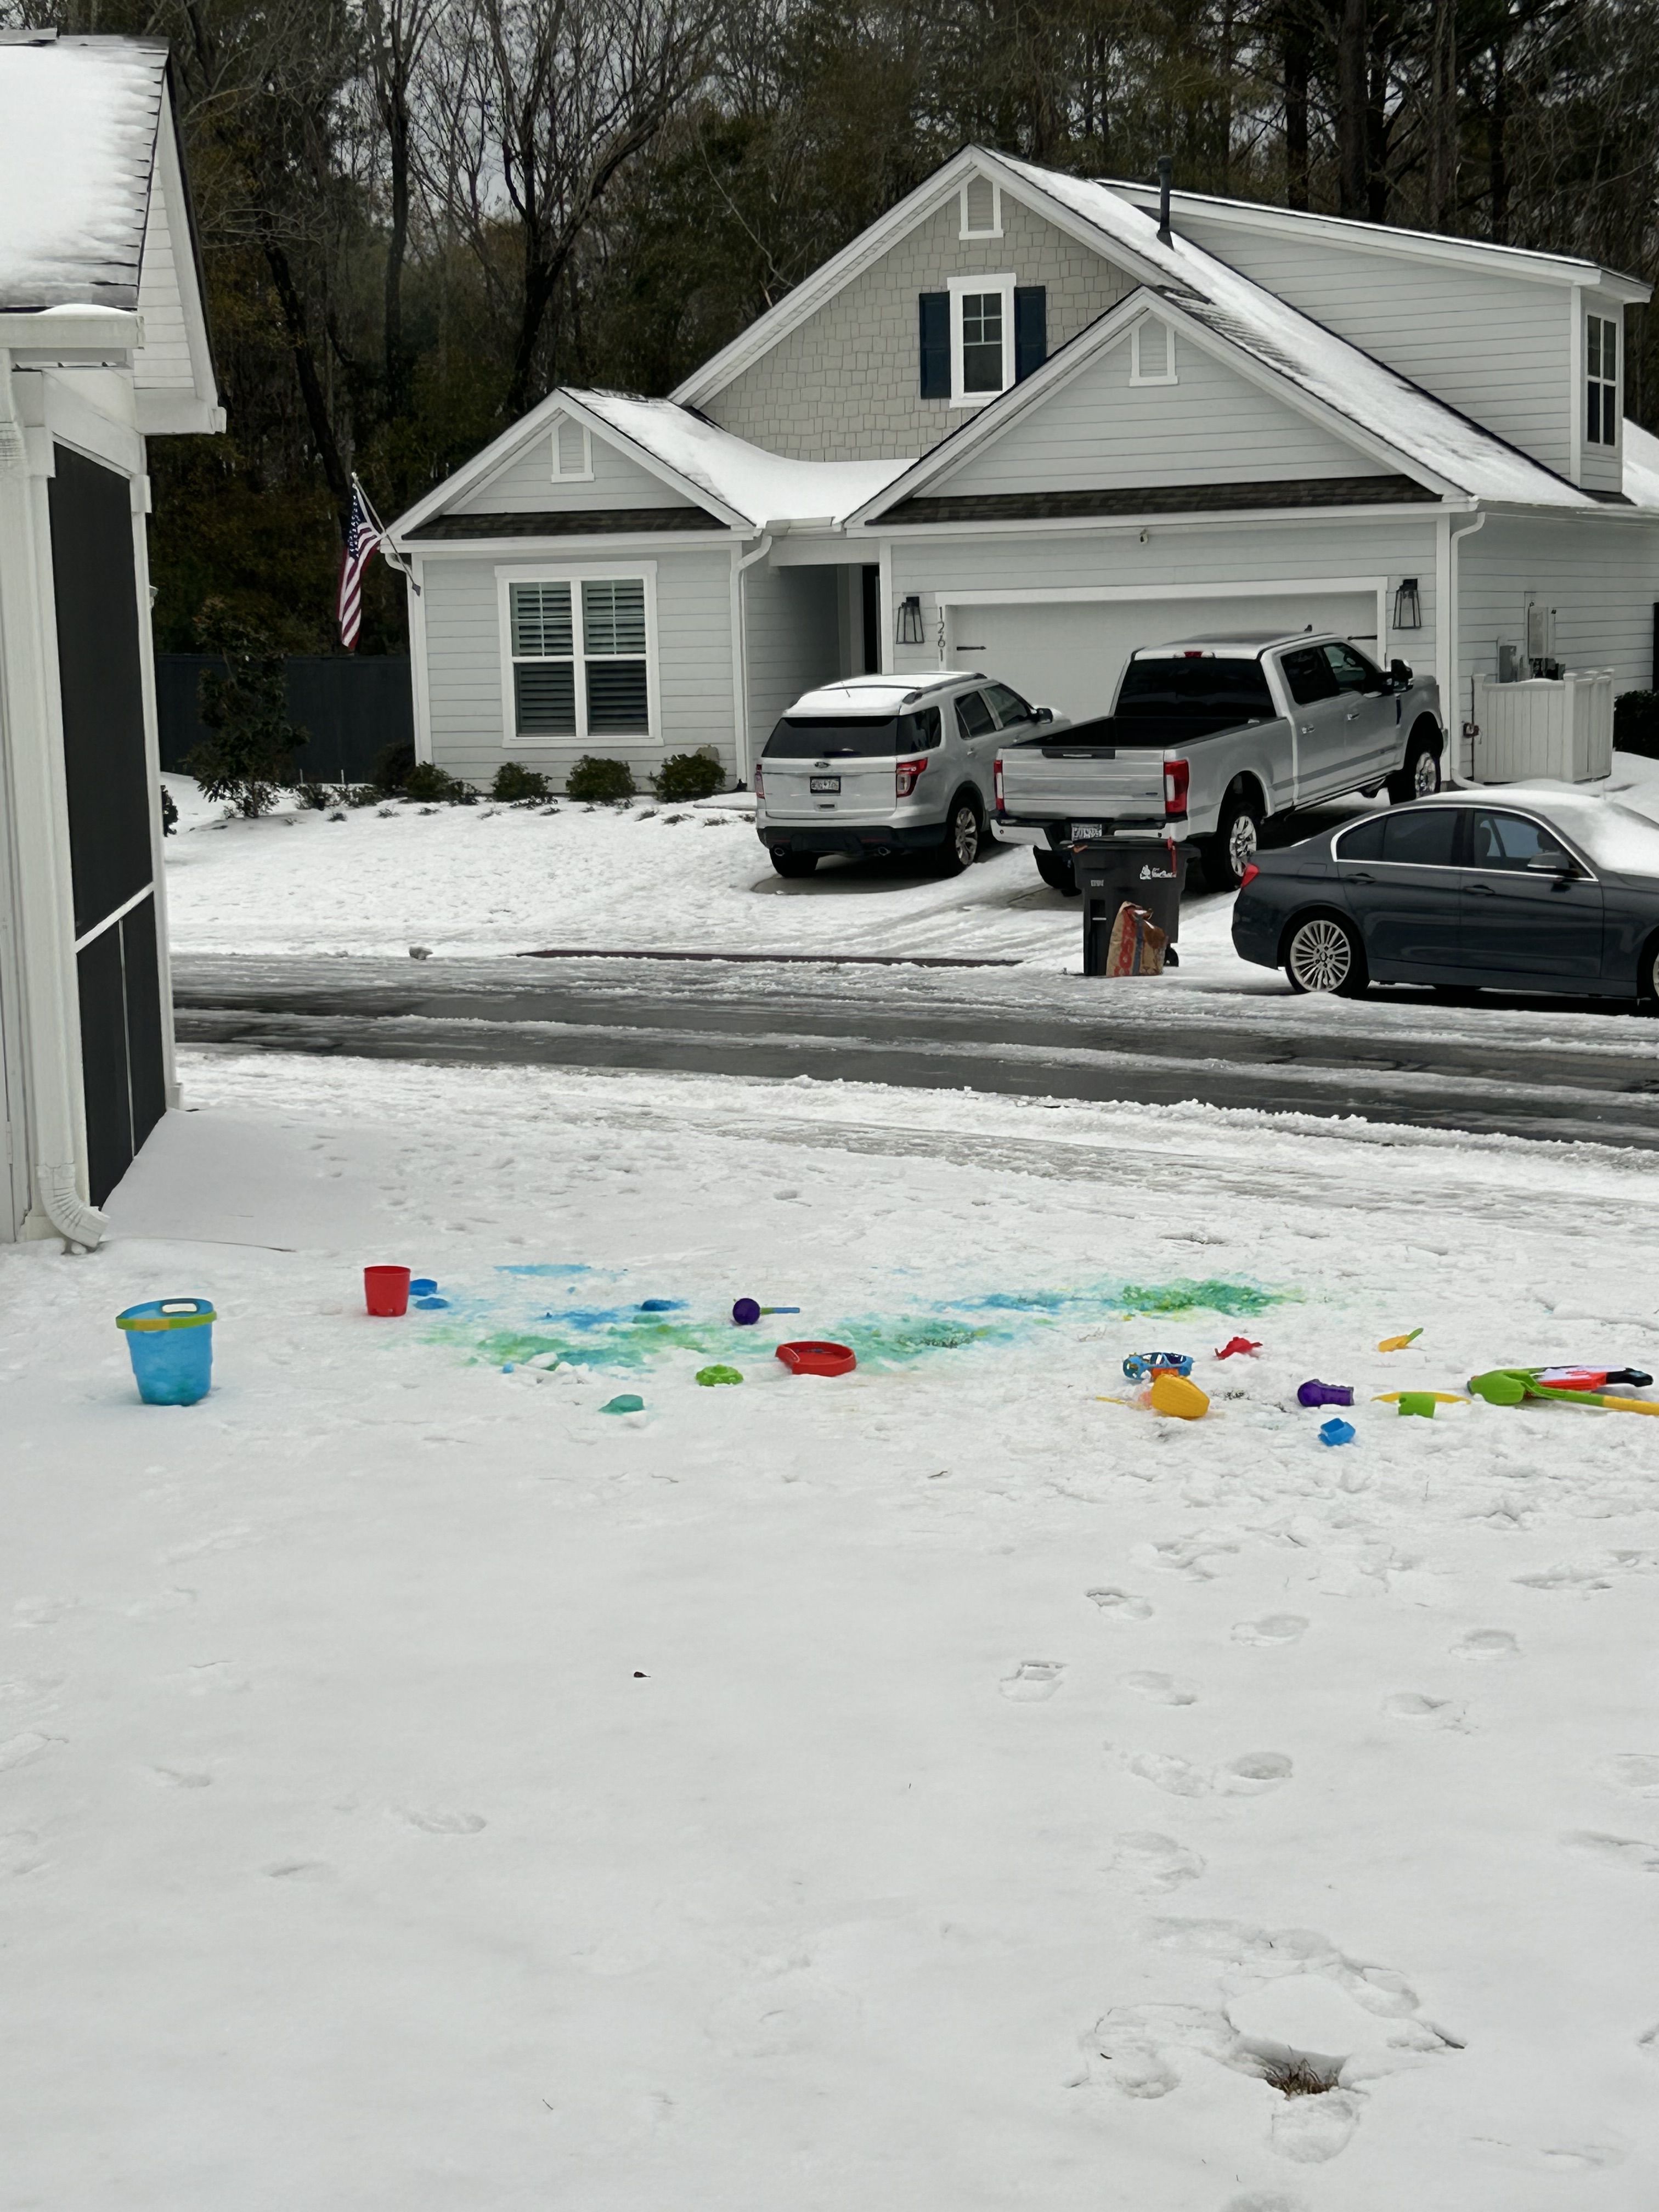
This morning the detritus from all of yesterday’s play reminds us of all the fun in the snow. Most of our children were out all day, despite the cold. Whatever cold be used for snow play…was. Like these beach or tub toys.
My three youngest grands are still hard at it. The last video was them coming down a hill (hills are rare in this coastal plain) on single skis. It’s time for them to go to a ski resort I think.
And meanwhile, here’s another bit of joy from me:
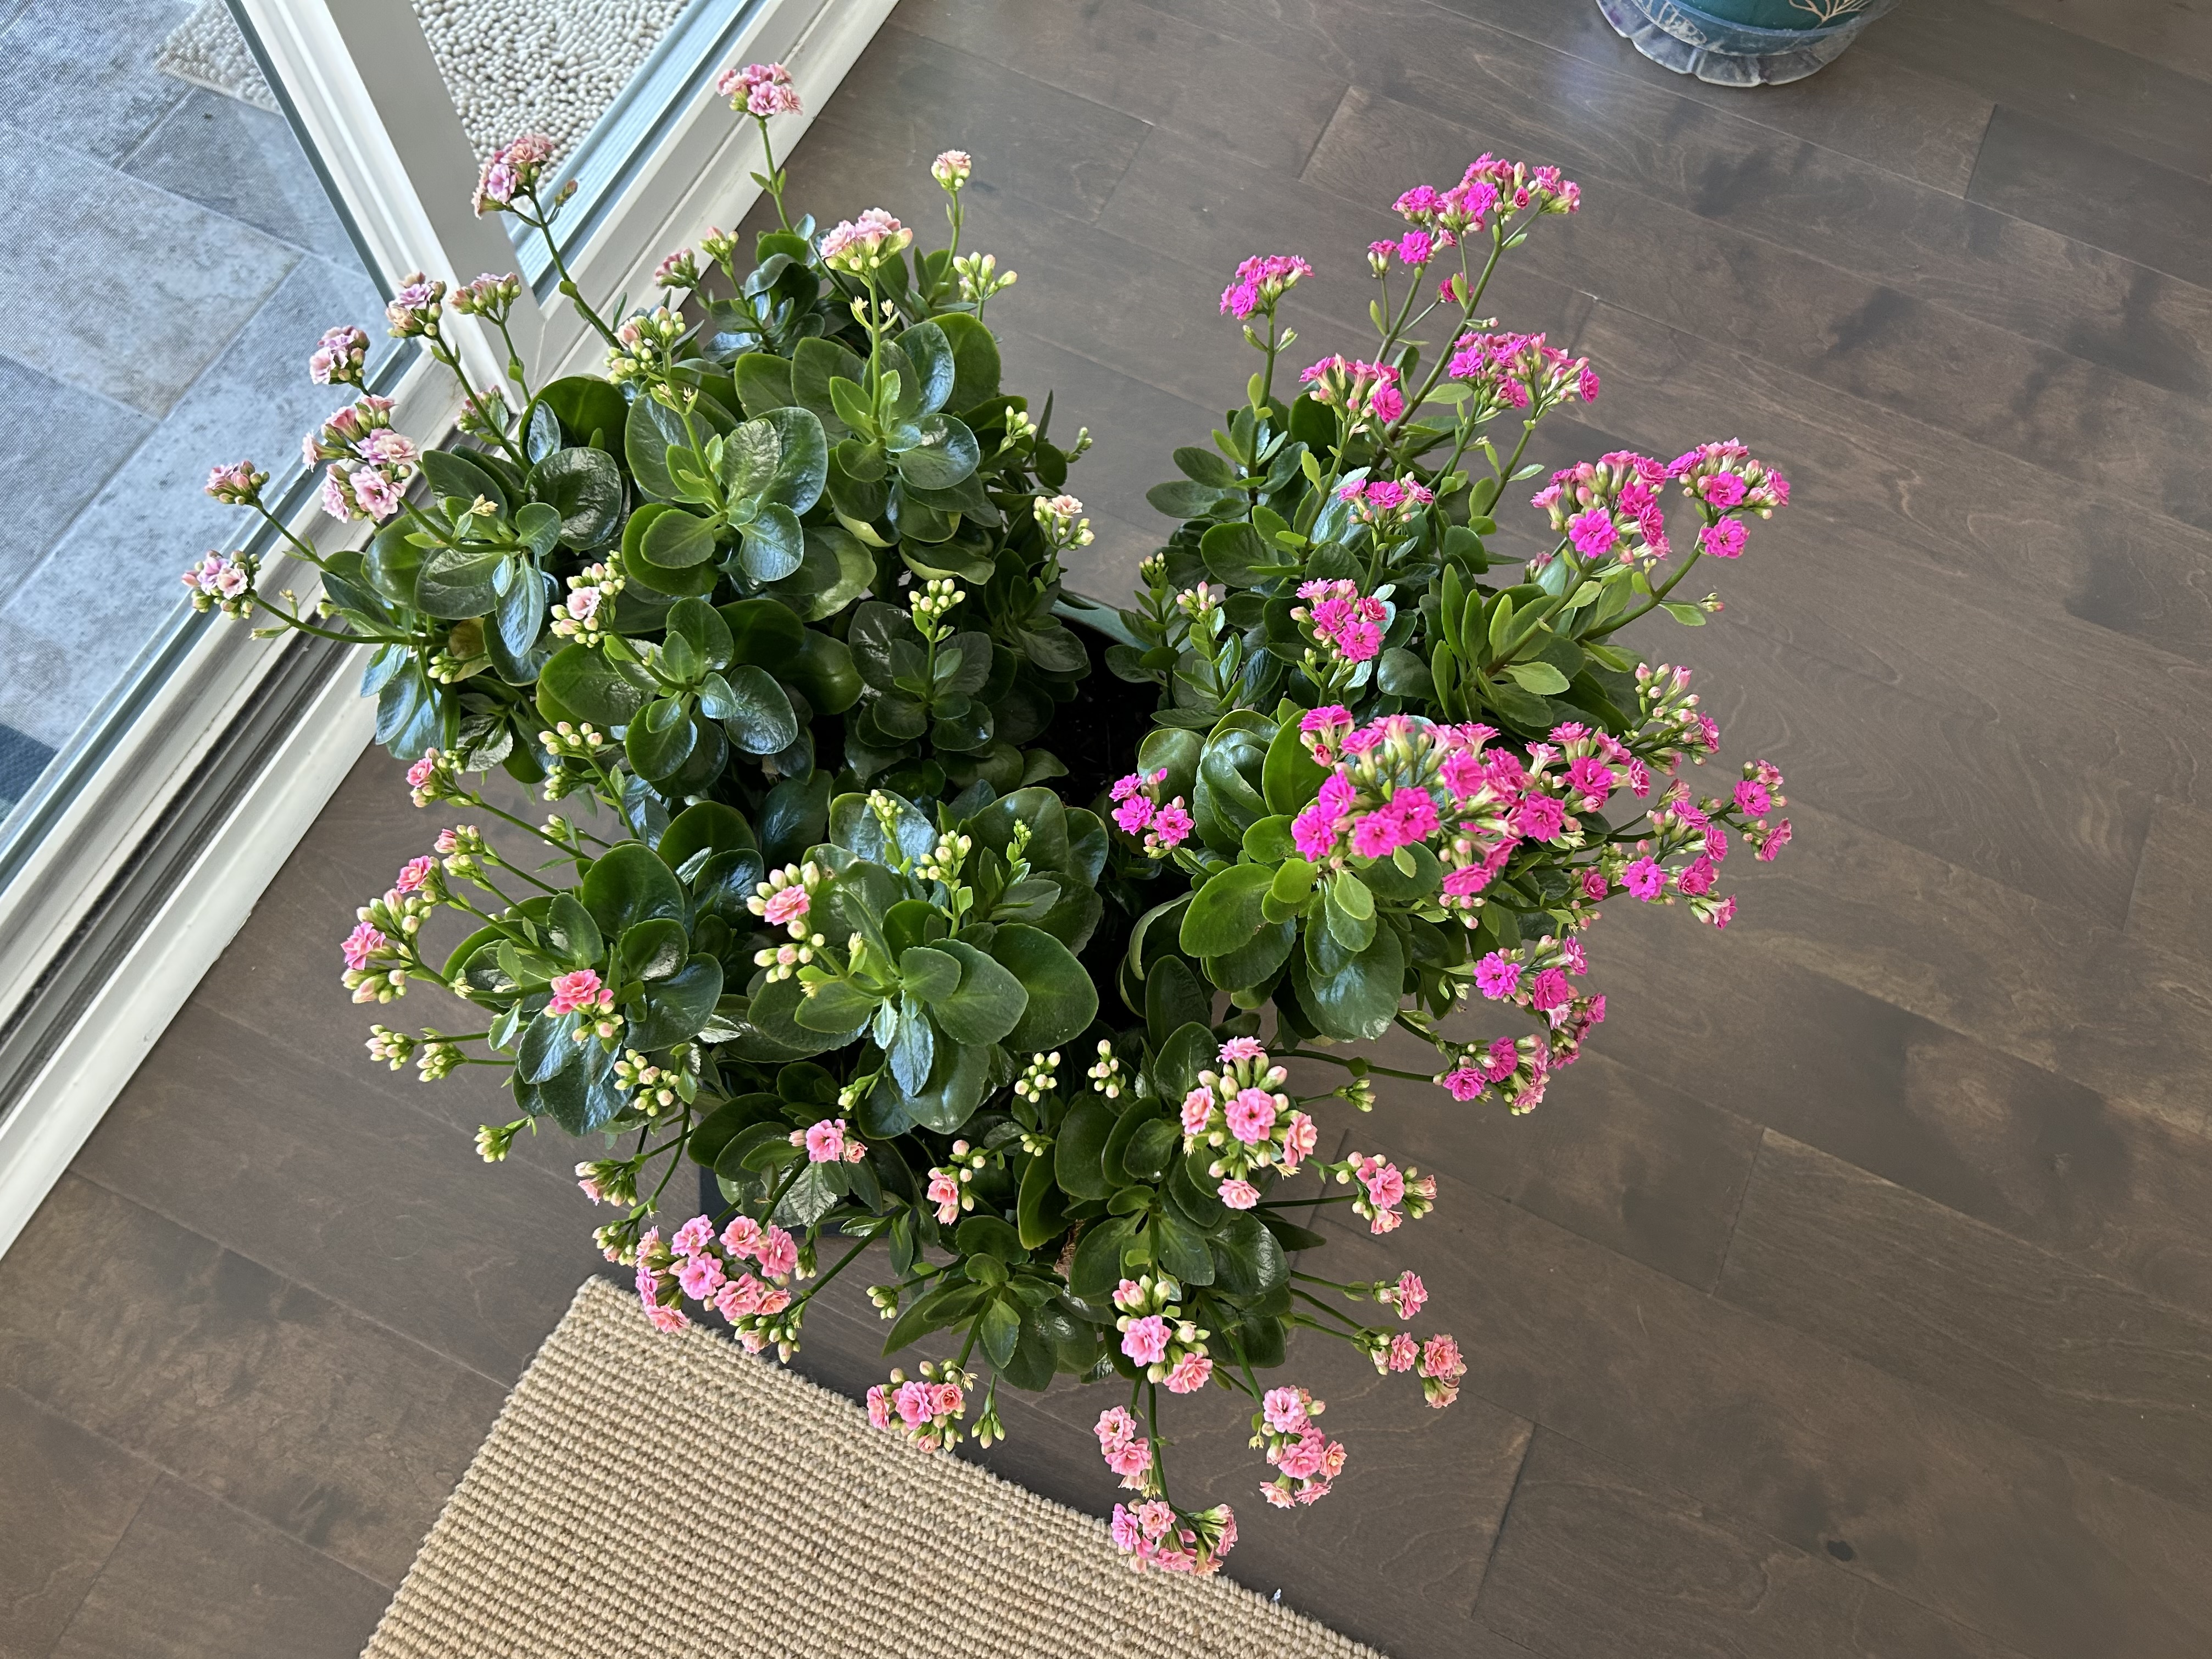
Kalanchoe is now in full bloom!
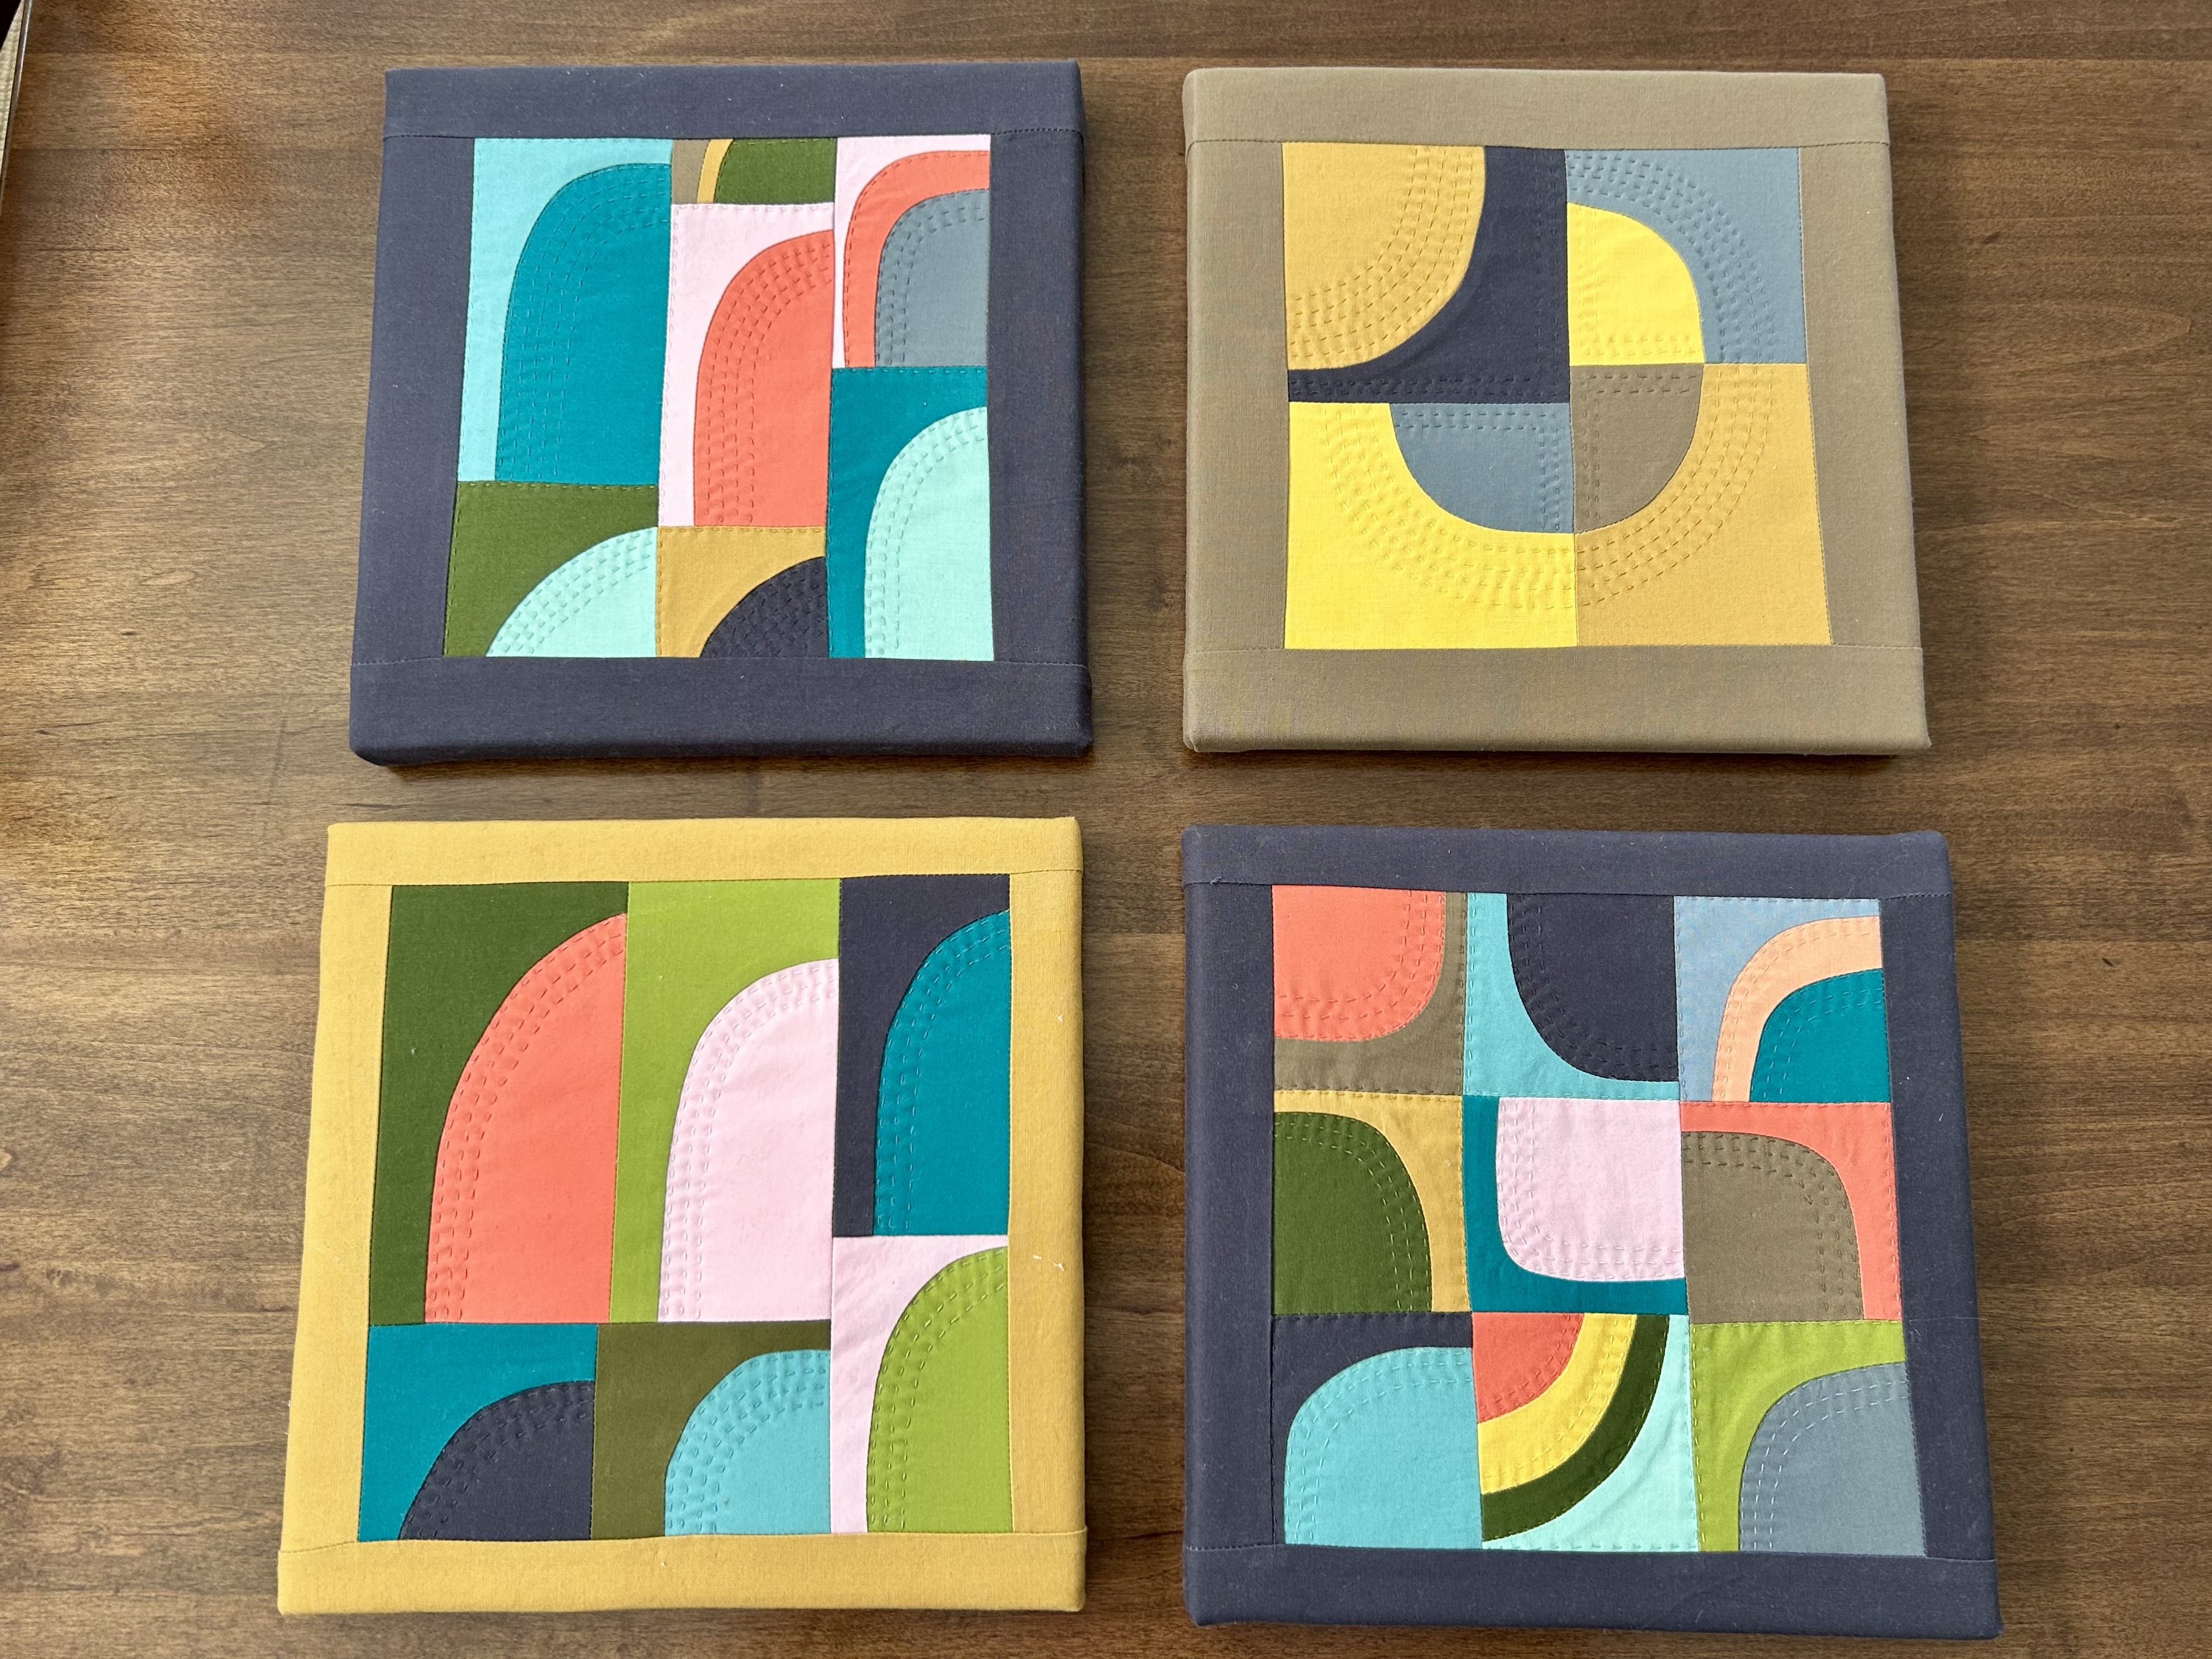
And I have all four of my Wayward Arc projects finished. I so enjoyed hand stitching them.
I’m keeping the one on the upper left–it will go in my quilt room.
My back screen door is frozen in a mostly closed position, but the sun is coming out later. That might melt away the ice that is glueing it to the little porch step. If not, I know what to do.
There might be enough snow for industrious and determined children to make a small snow man. I suspect they will try.
It remains to be seen if the trash and recycle trucks will come today.
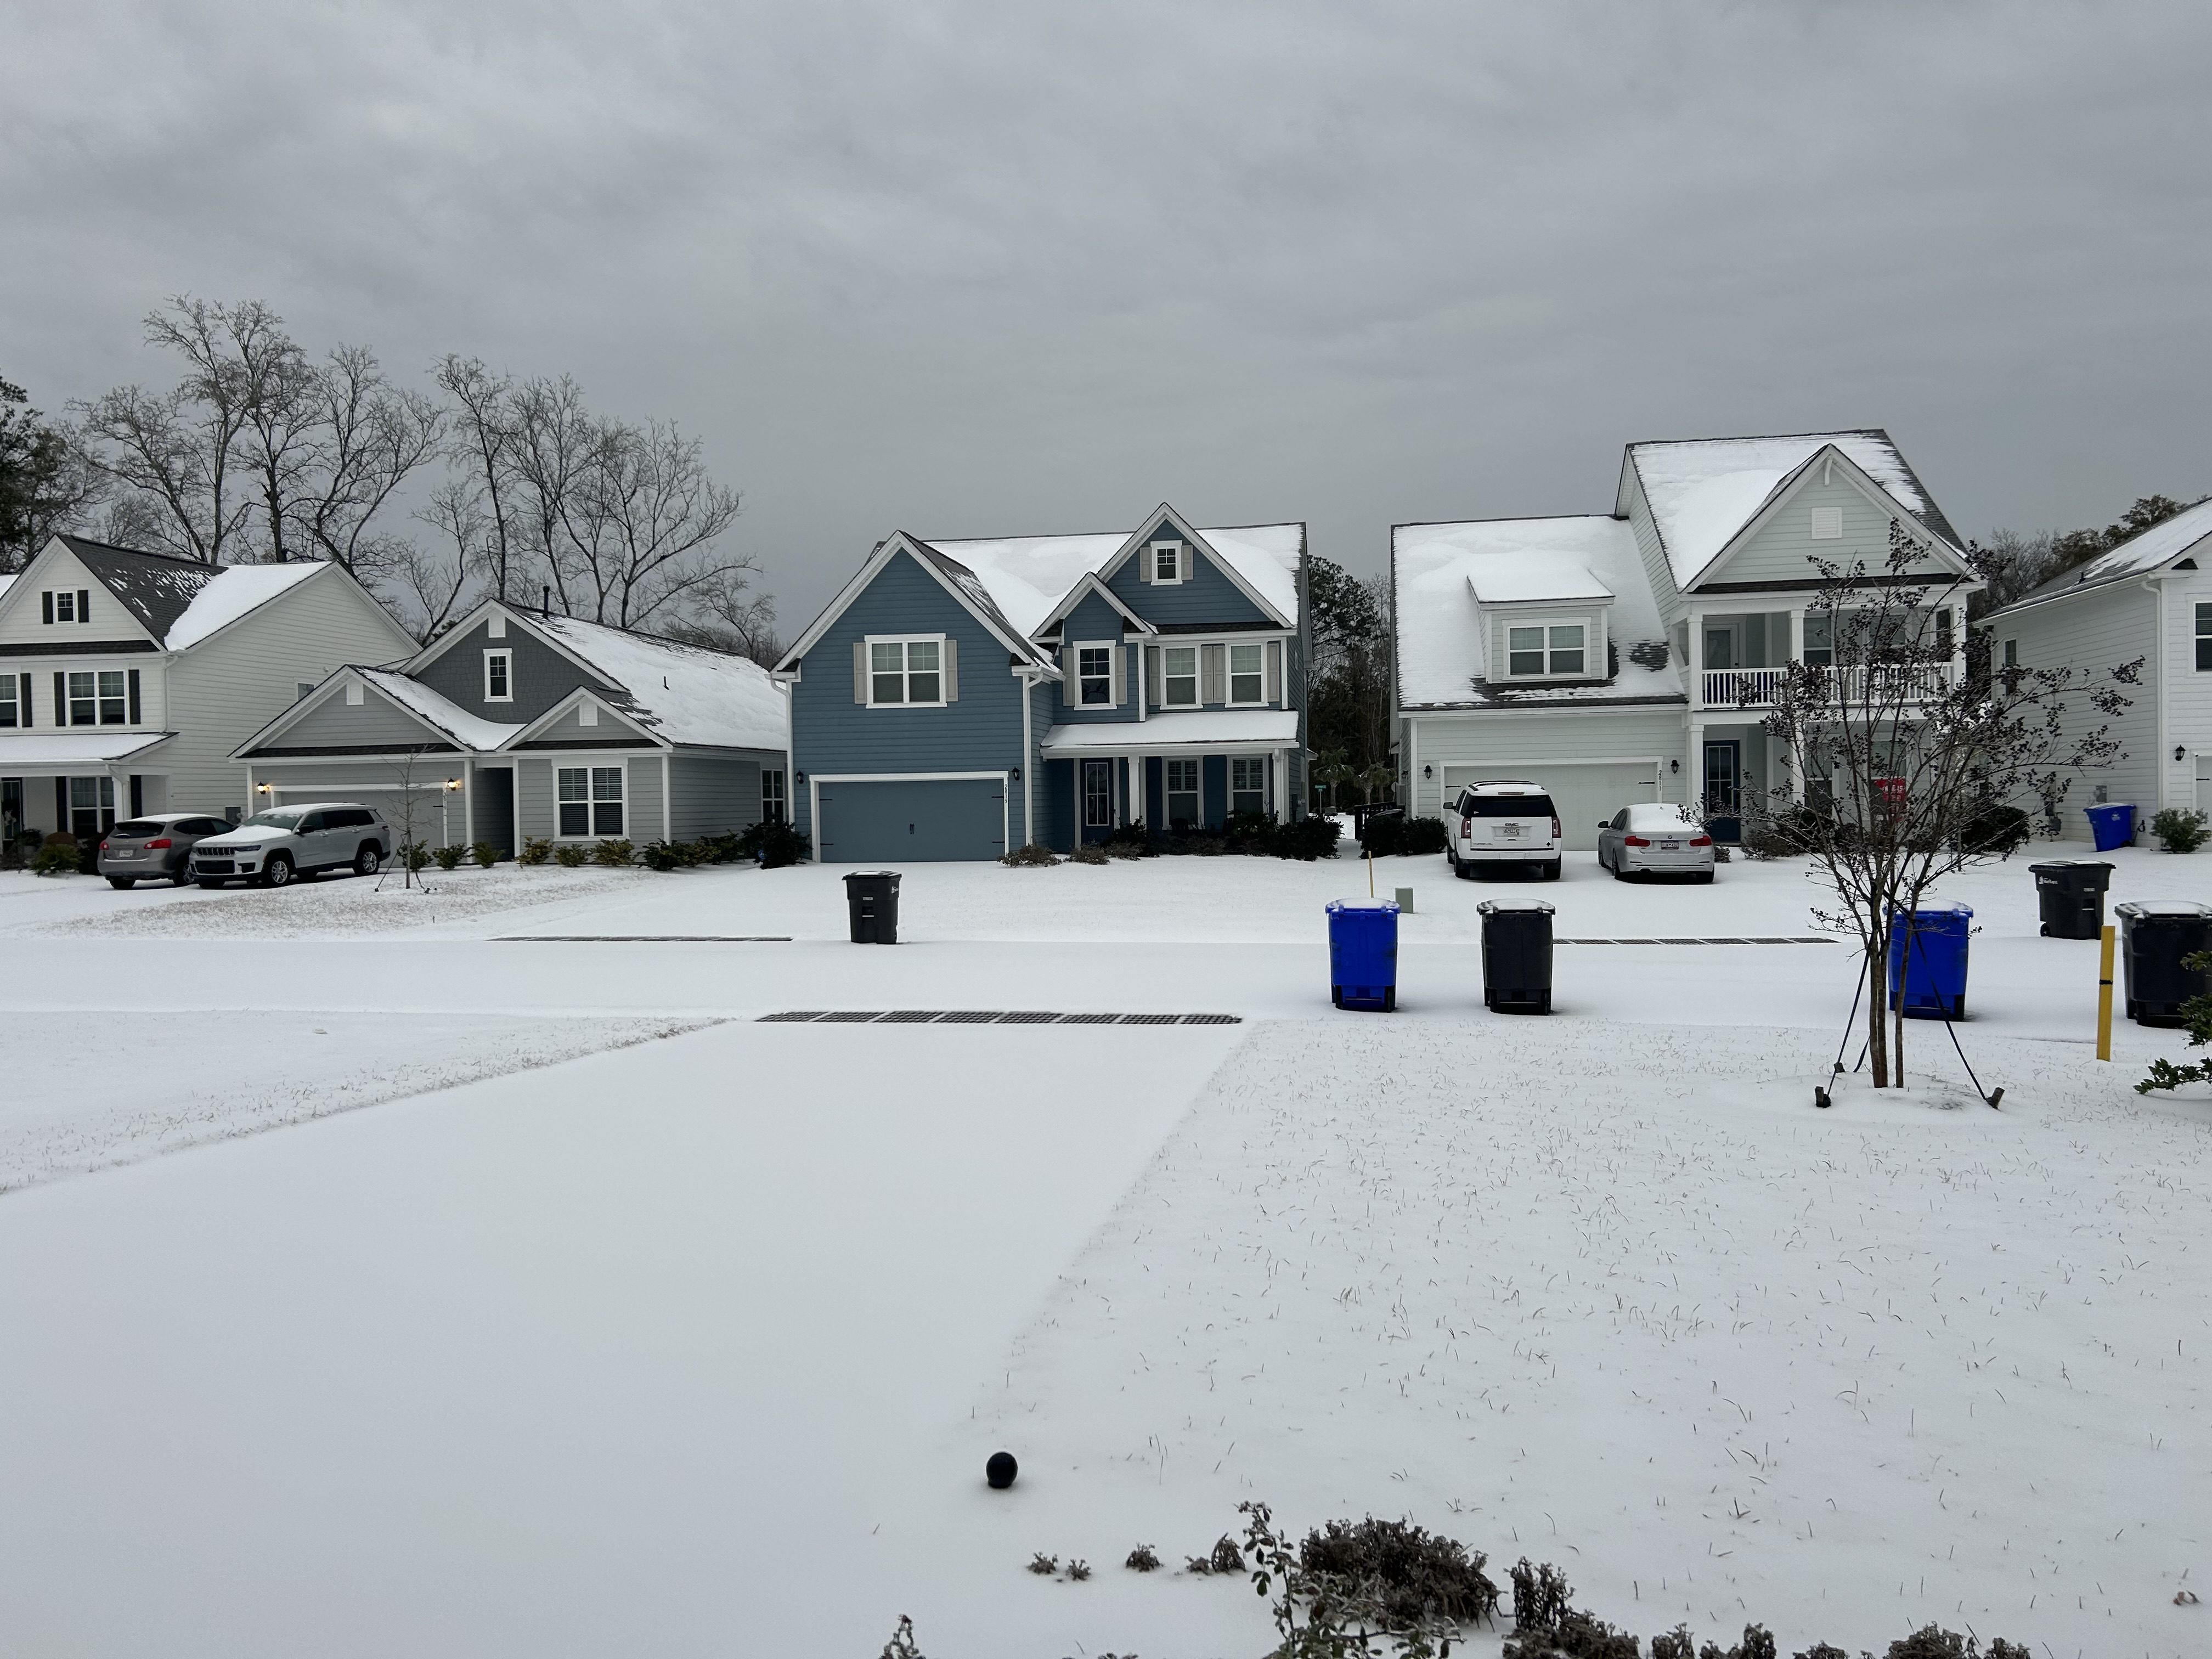
Snow in Charleston, SC, is very rare, of course.
It is very cold for here, and will drop to low 20s tonight. I’ve been dripping water in a bathroom faucet as the Rinnai heaters are OUTSIDE on the side of our houses. Pipes freezing is always what we dread.
We are bracing for what gets called “really cold” here in SC. And we have gotten some much-needed rain. When it dries up a little today, I’m going to cover the camellias with tarps–which will stay on for the next three nights/days.
I’ve been enjoying quiet weeks and lots of sewing time. Here are my four blocks for this month’s online “Blocks2” class with Tara Faughnan–called this month “Wayward Arcs.” Tara always has a “curves” block project for one of our 6 monthly blocks with which to play. These are all improv and freehand cut–except to square them off.
I’m hand-quilting these four to add more texture and two are done and ready to be put on my 10-inch stretched canvases.
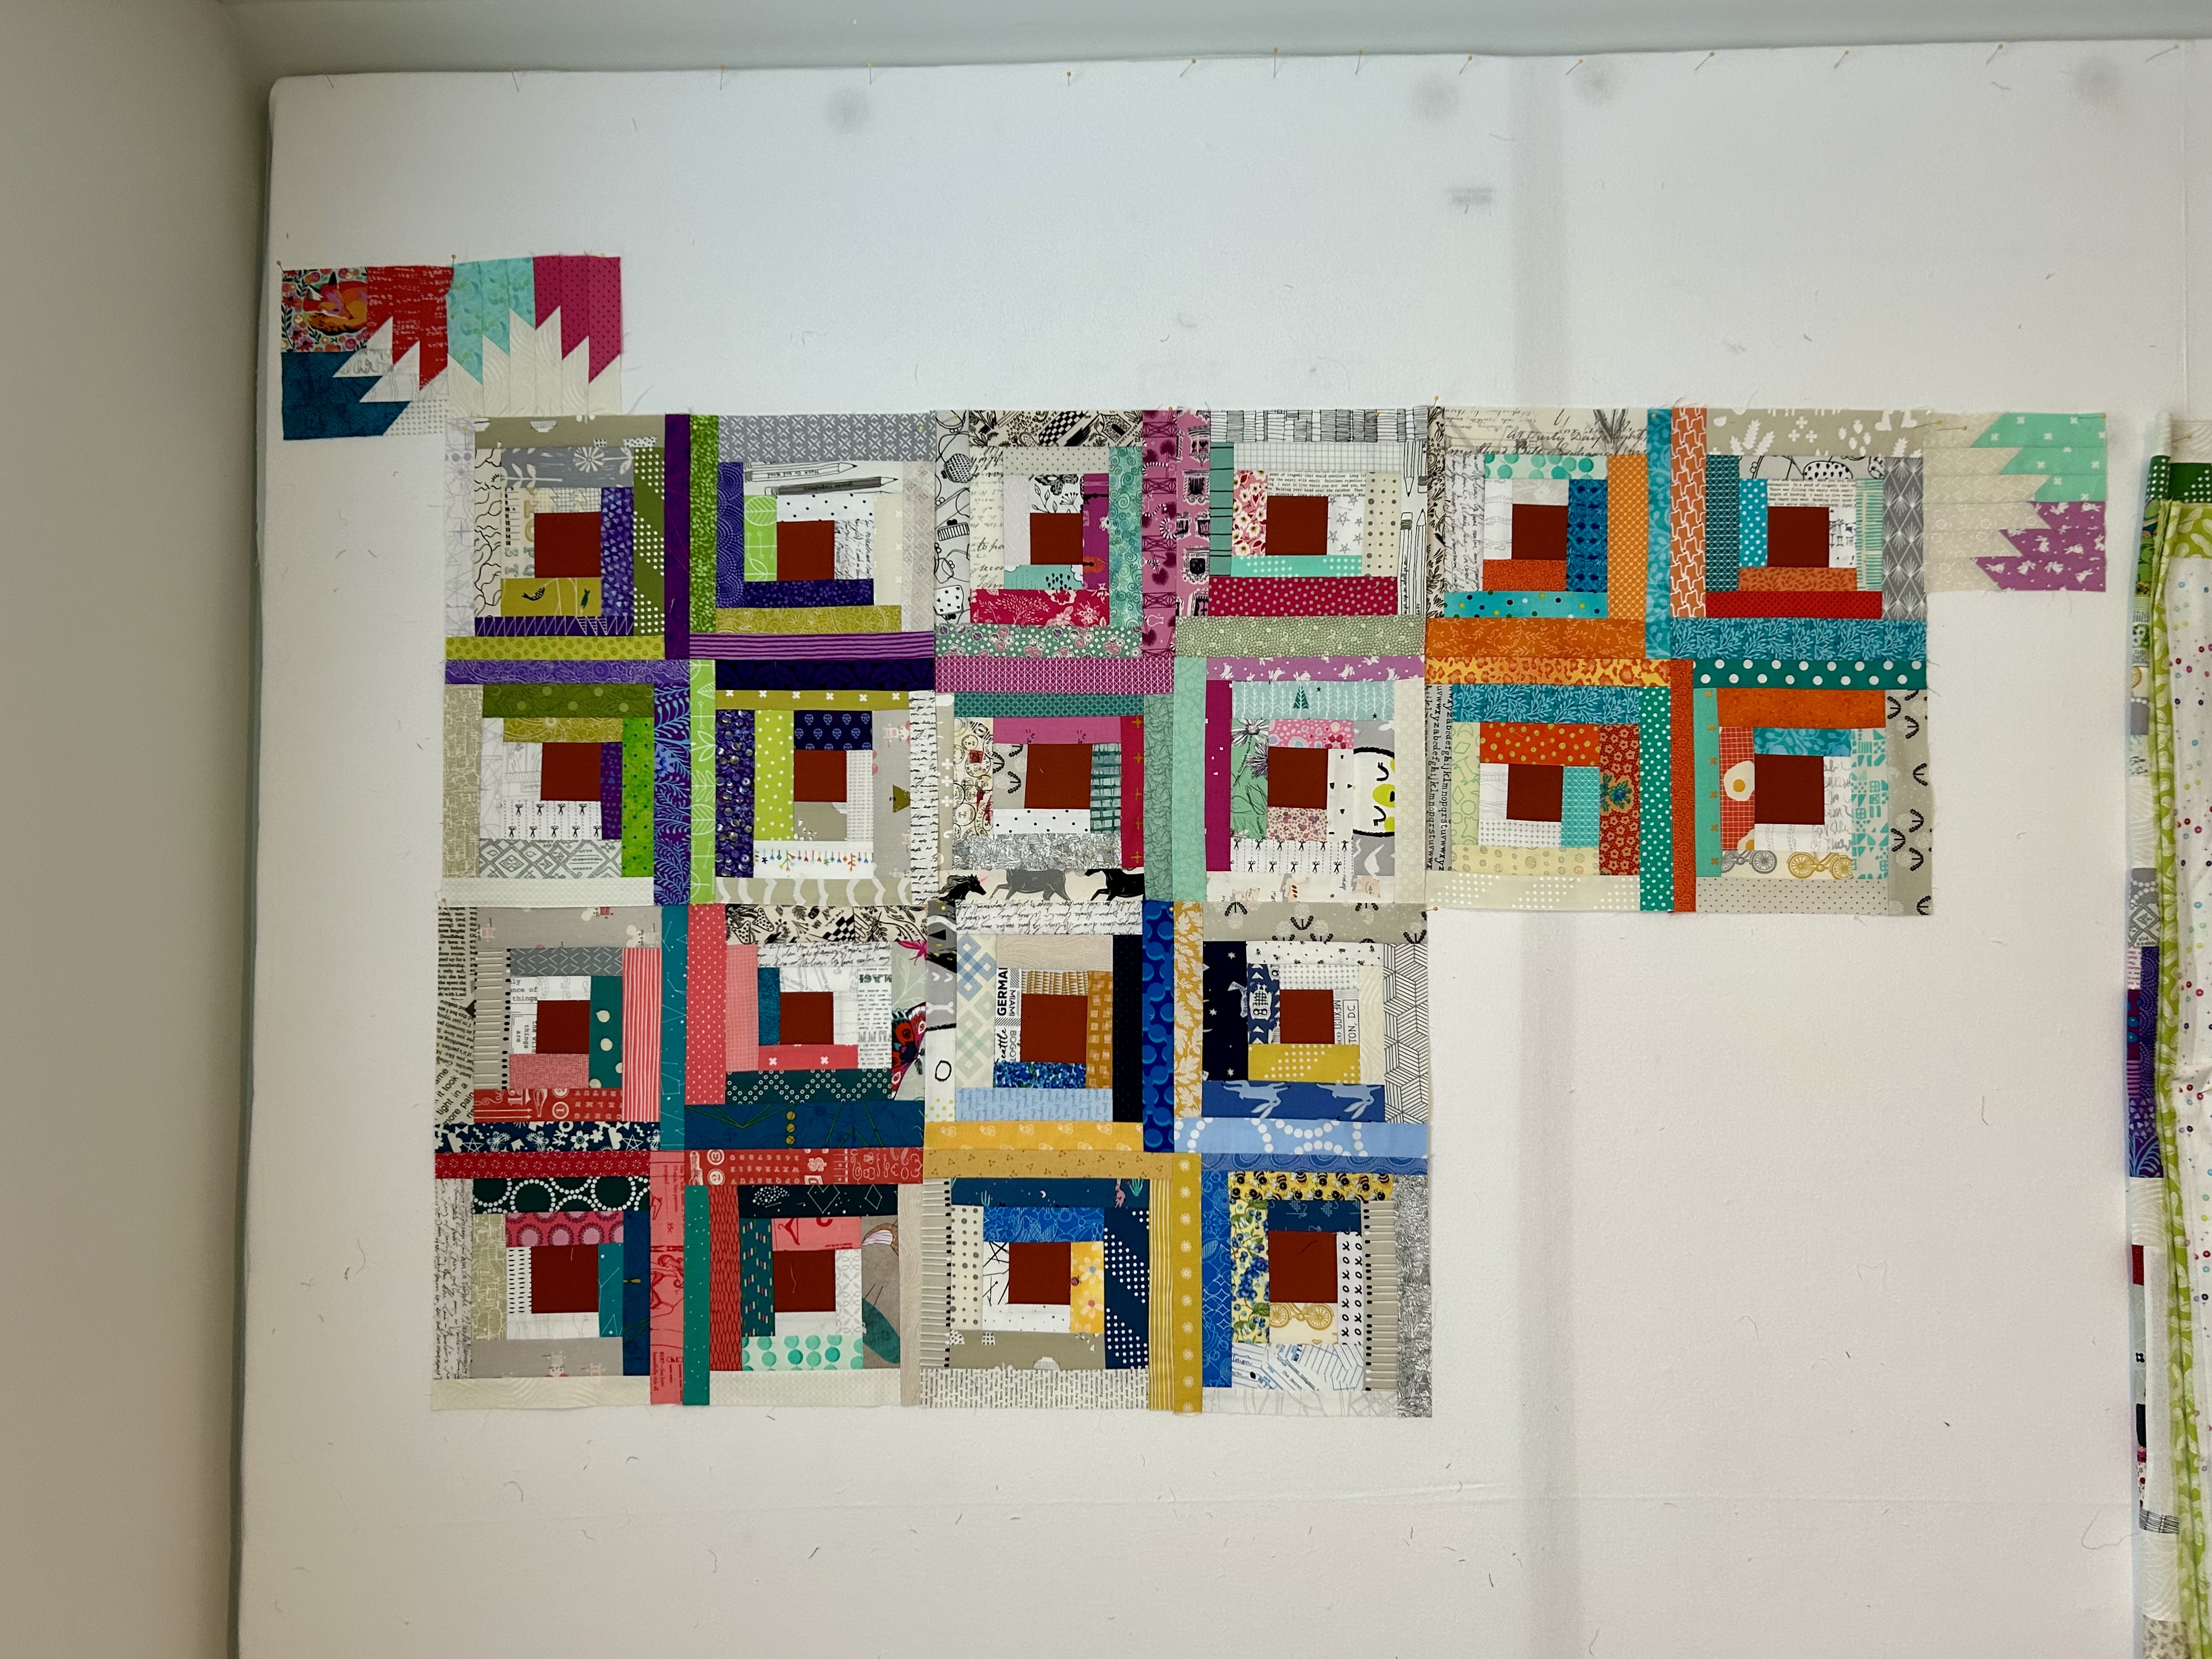
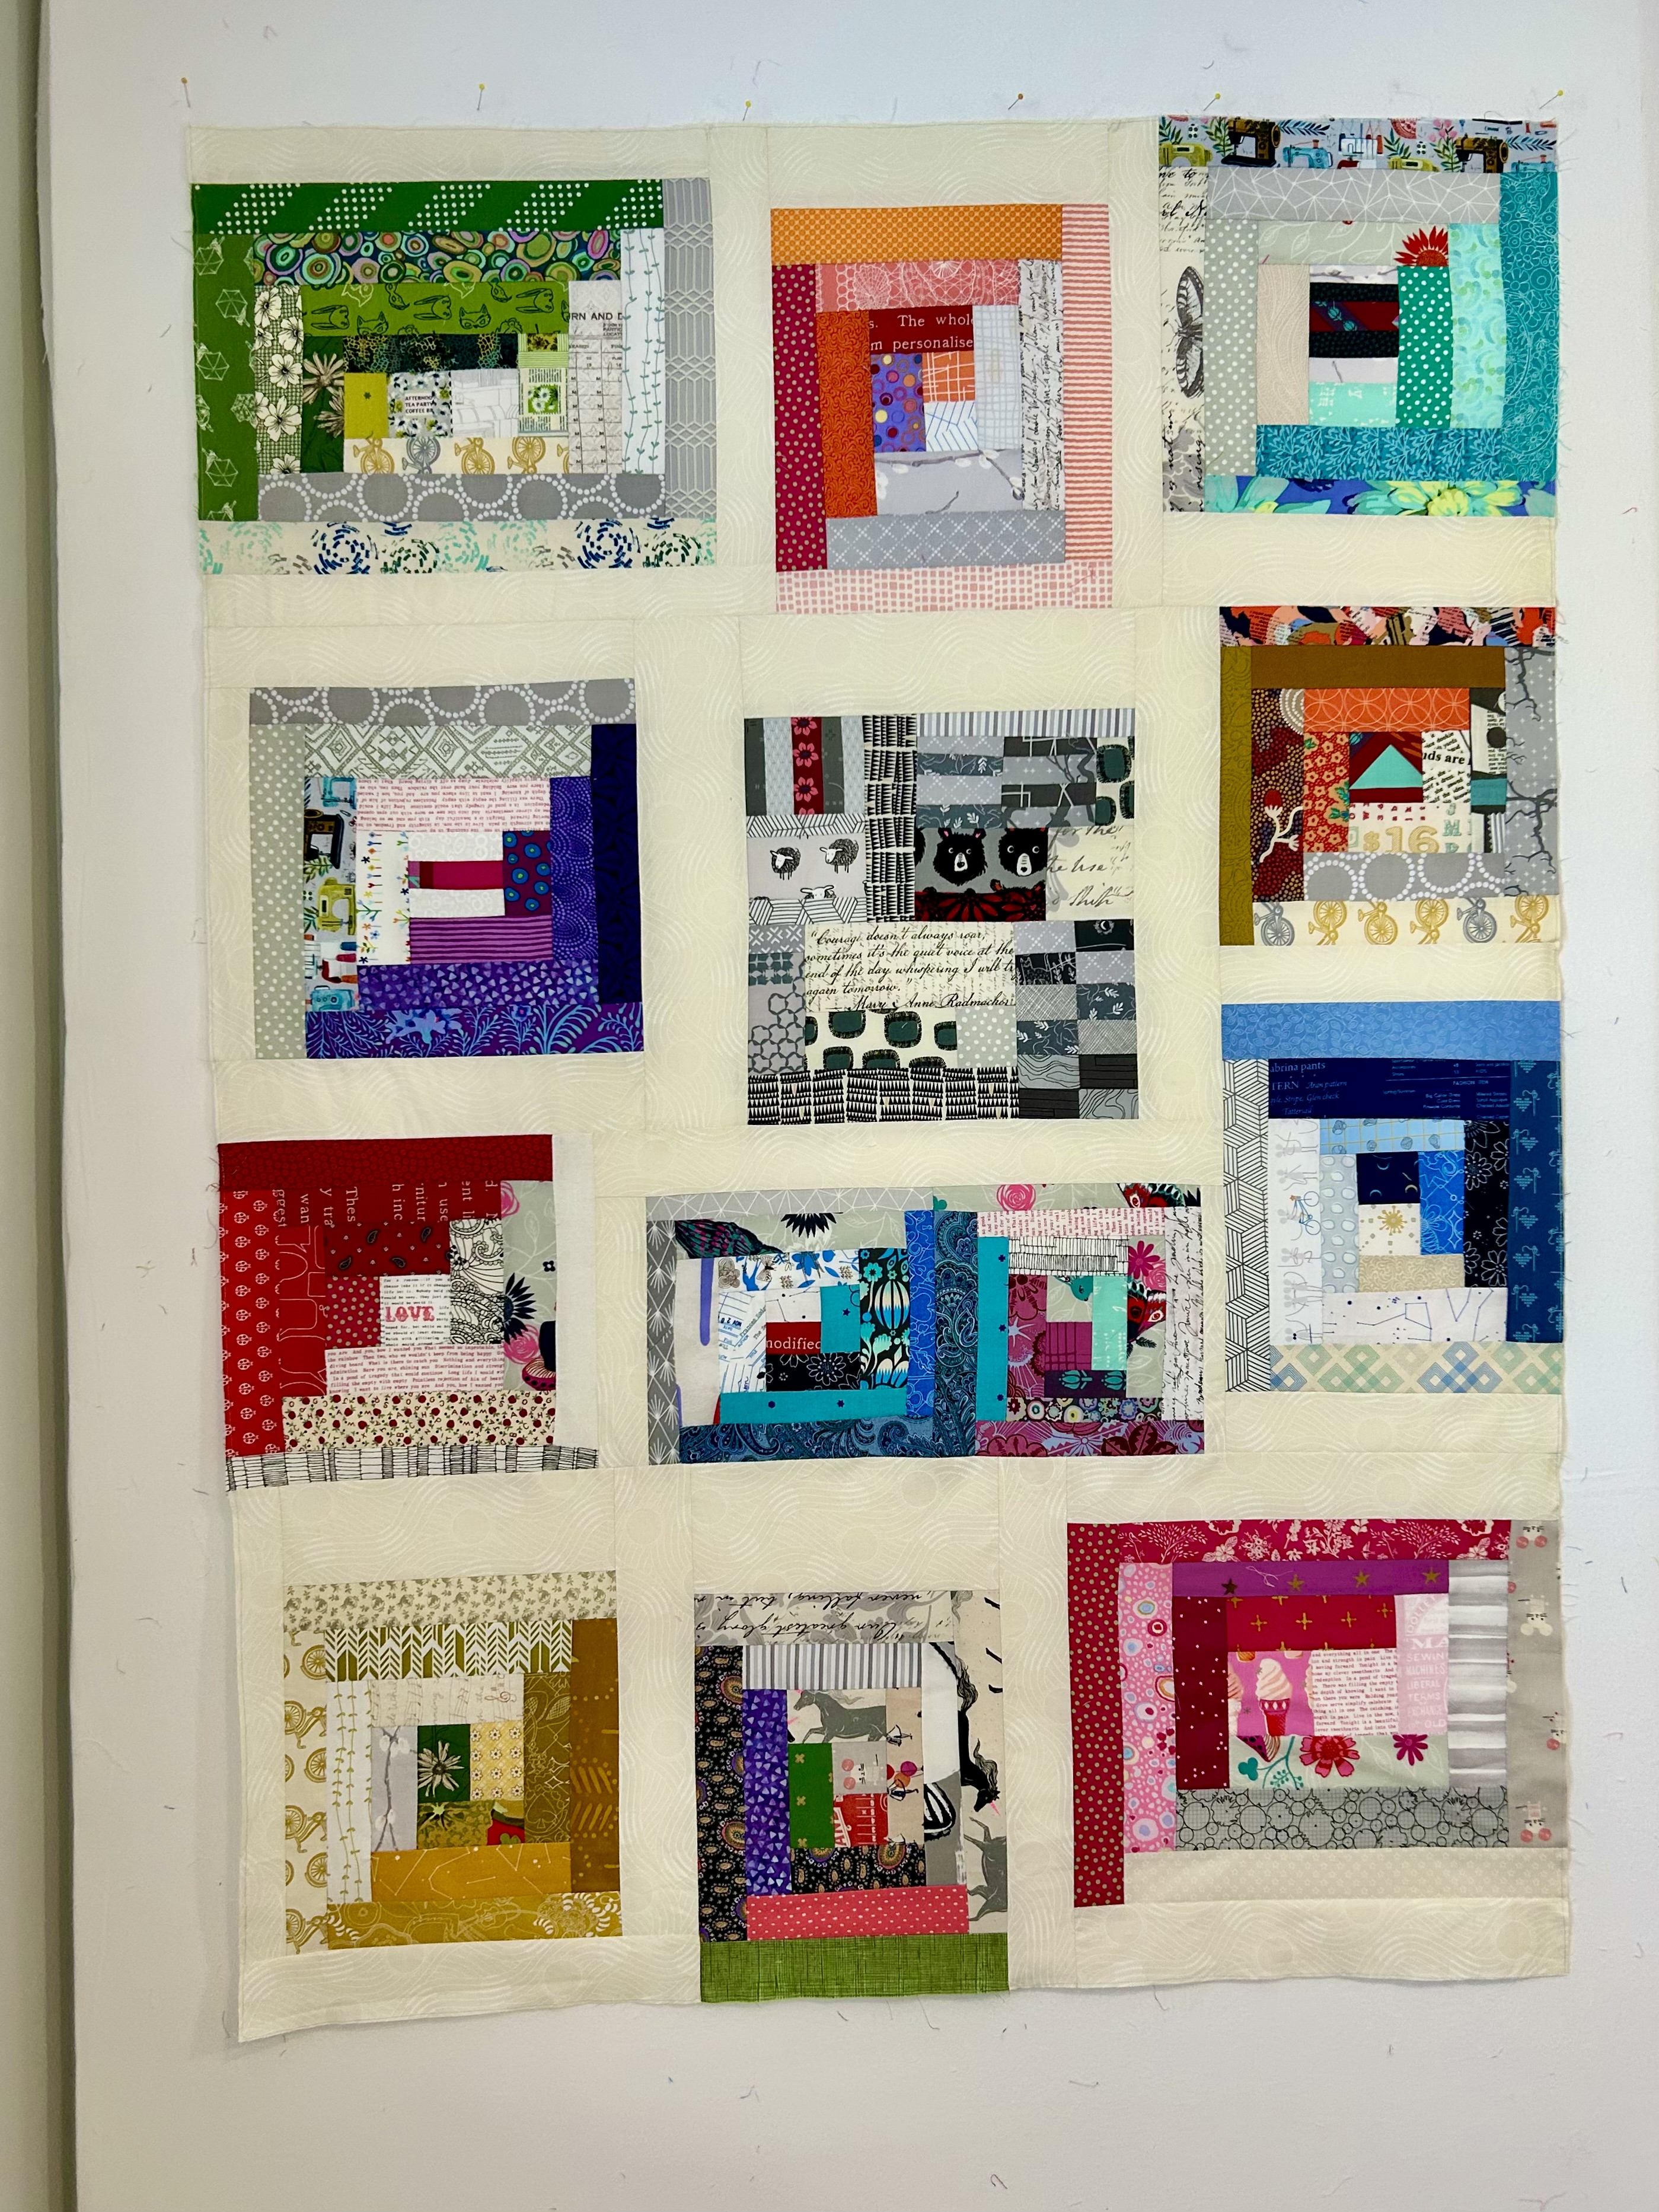
Here is where I am with Rachel Hauser’s sew-along scrappy log cabin.
Yes, this project is chewing up my stored cut strips. Yeah!!! Of course I’m still moving around blocks as I complete one. These blocks finish at 18 inches.
I’ve never seen anything as brilliant and special as the corner block arrangement Rachel Hauser gave us–to finish off the very lacey border she designed. Of course I had to make one.
And here’s how it will work with the rest of her border units. These are “tricky” to make–as they are cut and sewn on a 45 degree diagonal line. But they are WORTH the trouble.
Here are the colors up next:
And!! Oh my goodness! Look at the Kalanchoe plant! I brought her inside–actually there are 3 plants here–a gift from my neighbor on my birthday last year. I repotted them at some point, and in the fall tiny buds started appearing. It’s the gift that keeps on giving.
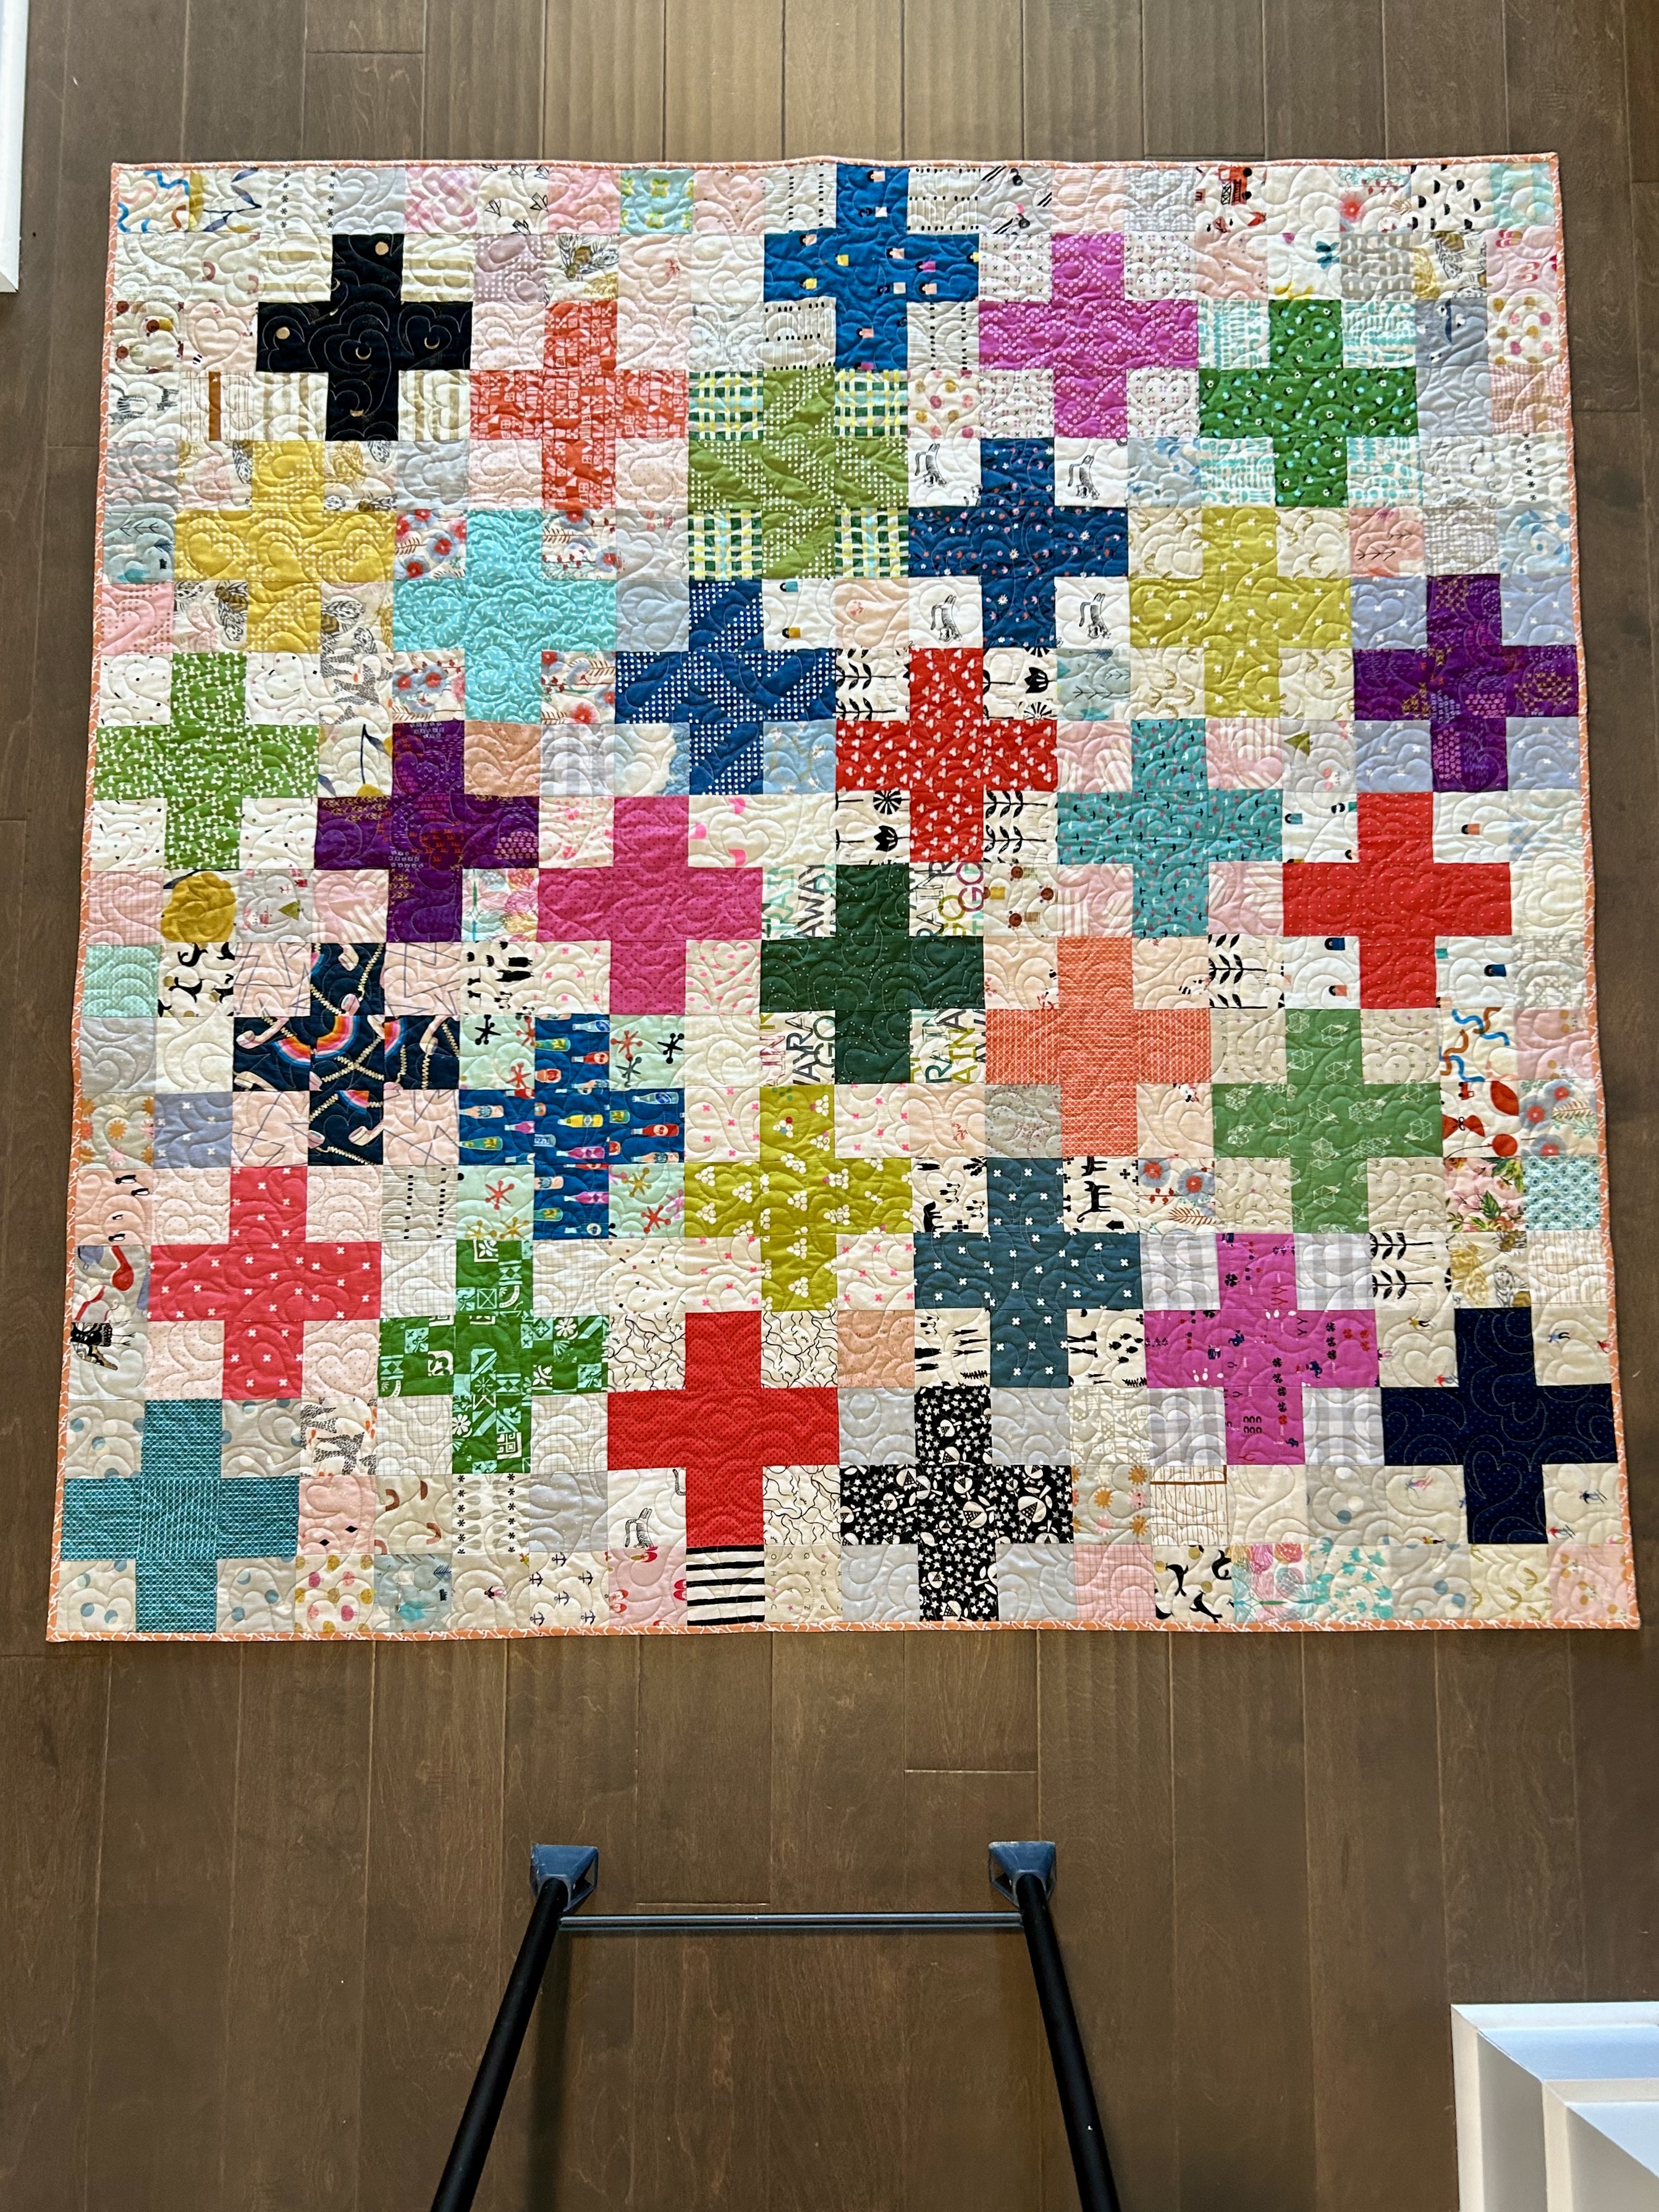
“Pot-Pourri 5: Crosses” is finished. This is the TWENTIETH quilt made from the cut up Cotton+Steel/Ruby Star Society fabrics in my stash–cut about 5 years ago now. I went back this morning and added then all up. They are all out of my house, with a one exception–the EPP quilt I made by hand. I gave these quilts to various members of my very big family and friends network.
Sorry about the ladder legs in this photo but I can’t get them out and don’t want to drag out the ladder again this morning. LOL, there’s always…something. Anyway, this quilt has a home. It’s going to a baby boy.
I used a fun pantograph called “Folk Heart,” which laid down a really nice texture. I quilted with a pale grey thread, which disappeared up front, but shows on the this adorable backing from Ruby Star Society. Their bears are back… And the bears have always been some of my favorites. A light orange binding–not C+S or Ruby Star–does not distract but picks up the orange spots in the bears’ ears.
Here’s where I am on this month’s block from Tara Faughnan’s online class Blocks 2. This month is “Wayward Arcs.”
I am going to hand quilt some of these–and then put them on stretched canvas. And I’ll make a few more as well as I’m not tired of this fun yet.
I have three 18-inch blocks of Rachel Hauser’s log cabin sew-along made. Nine are needed. These blocks are strong colors–opposites on the color wheel which gives a lot of punch. They won’t stay together. Indeed, I’ll make some softer versions now.
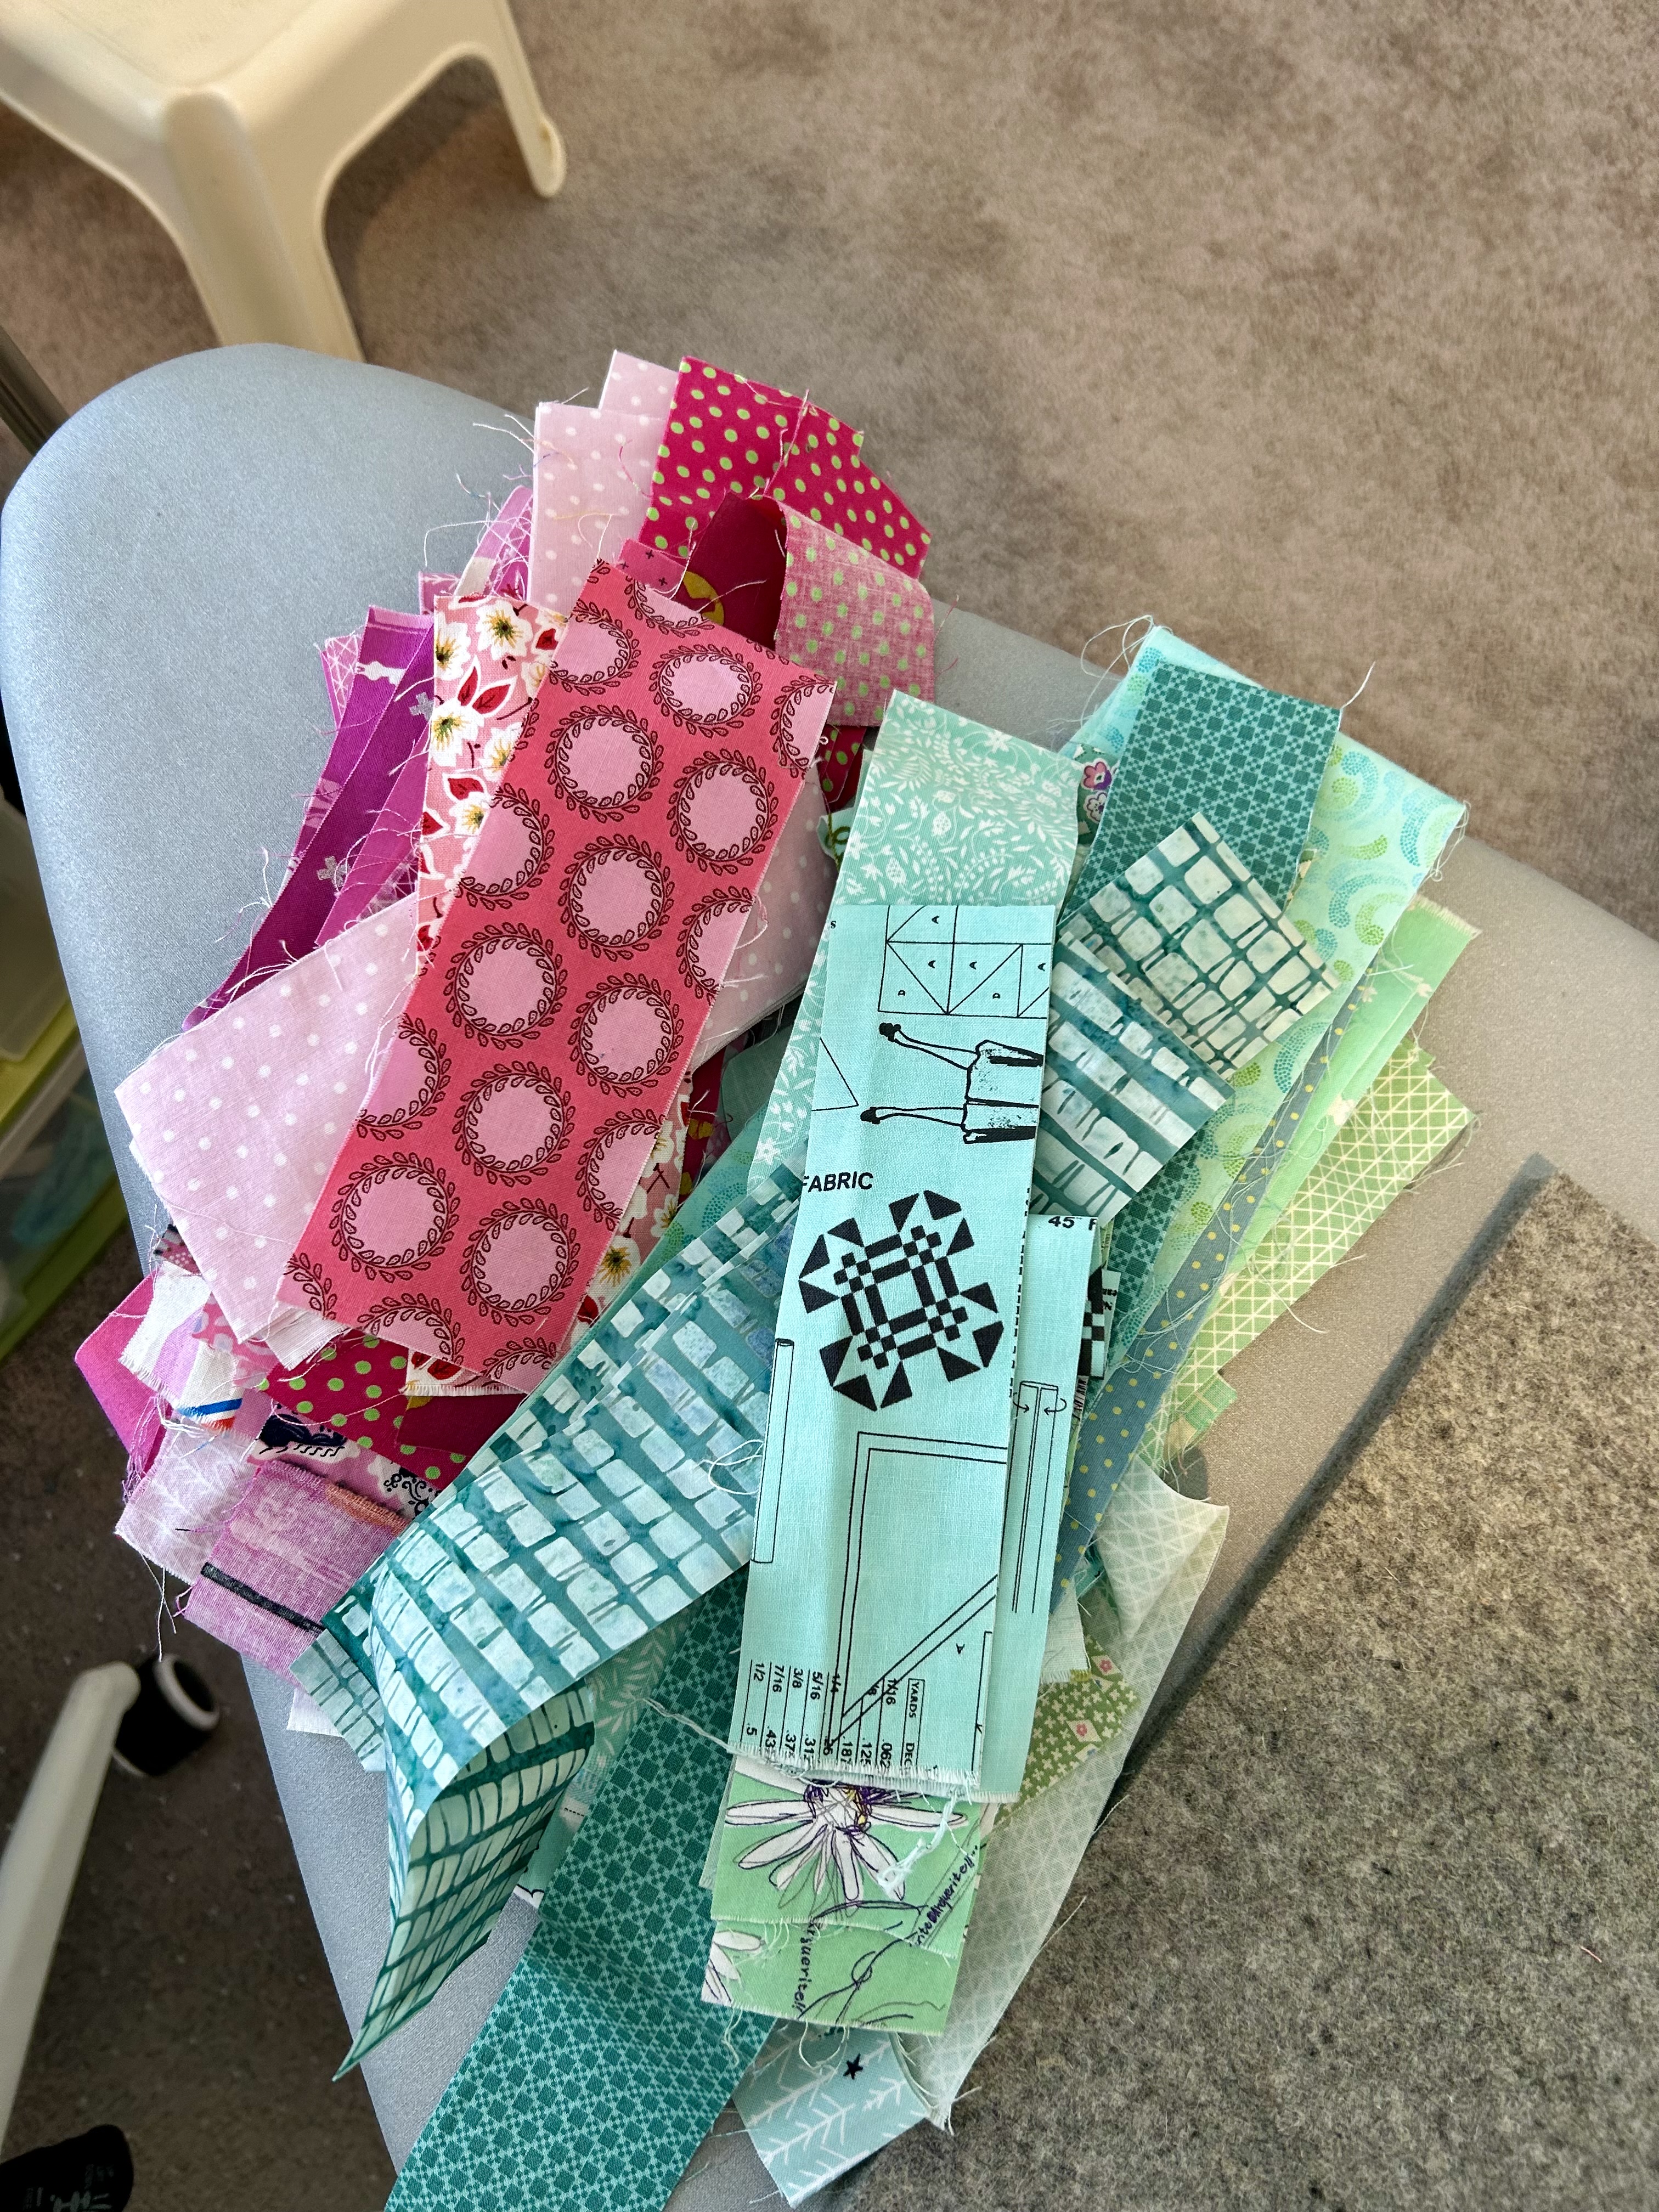
Here are the softer colors for the next block: pink and a mint green. And low contrast which just relies on color.
This project DOES chew up a ton of fabric strips–my bins of cut strips are…going down.
It is cold today, but sunny. I have avoided checking on my covered camellias. But… I need to, of course.
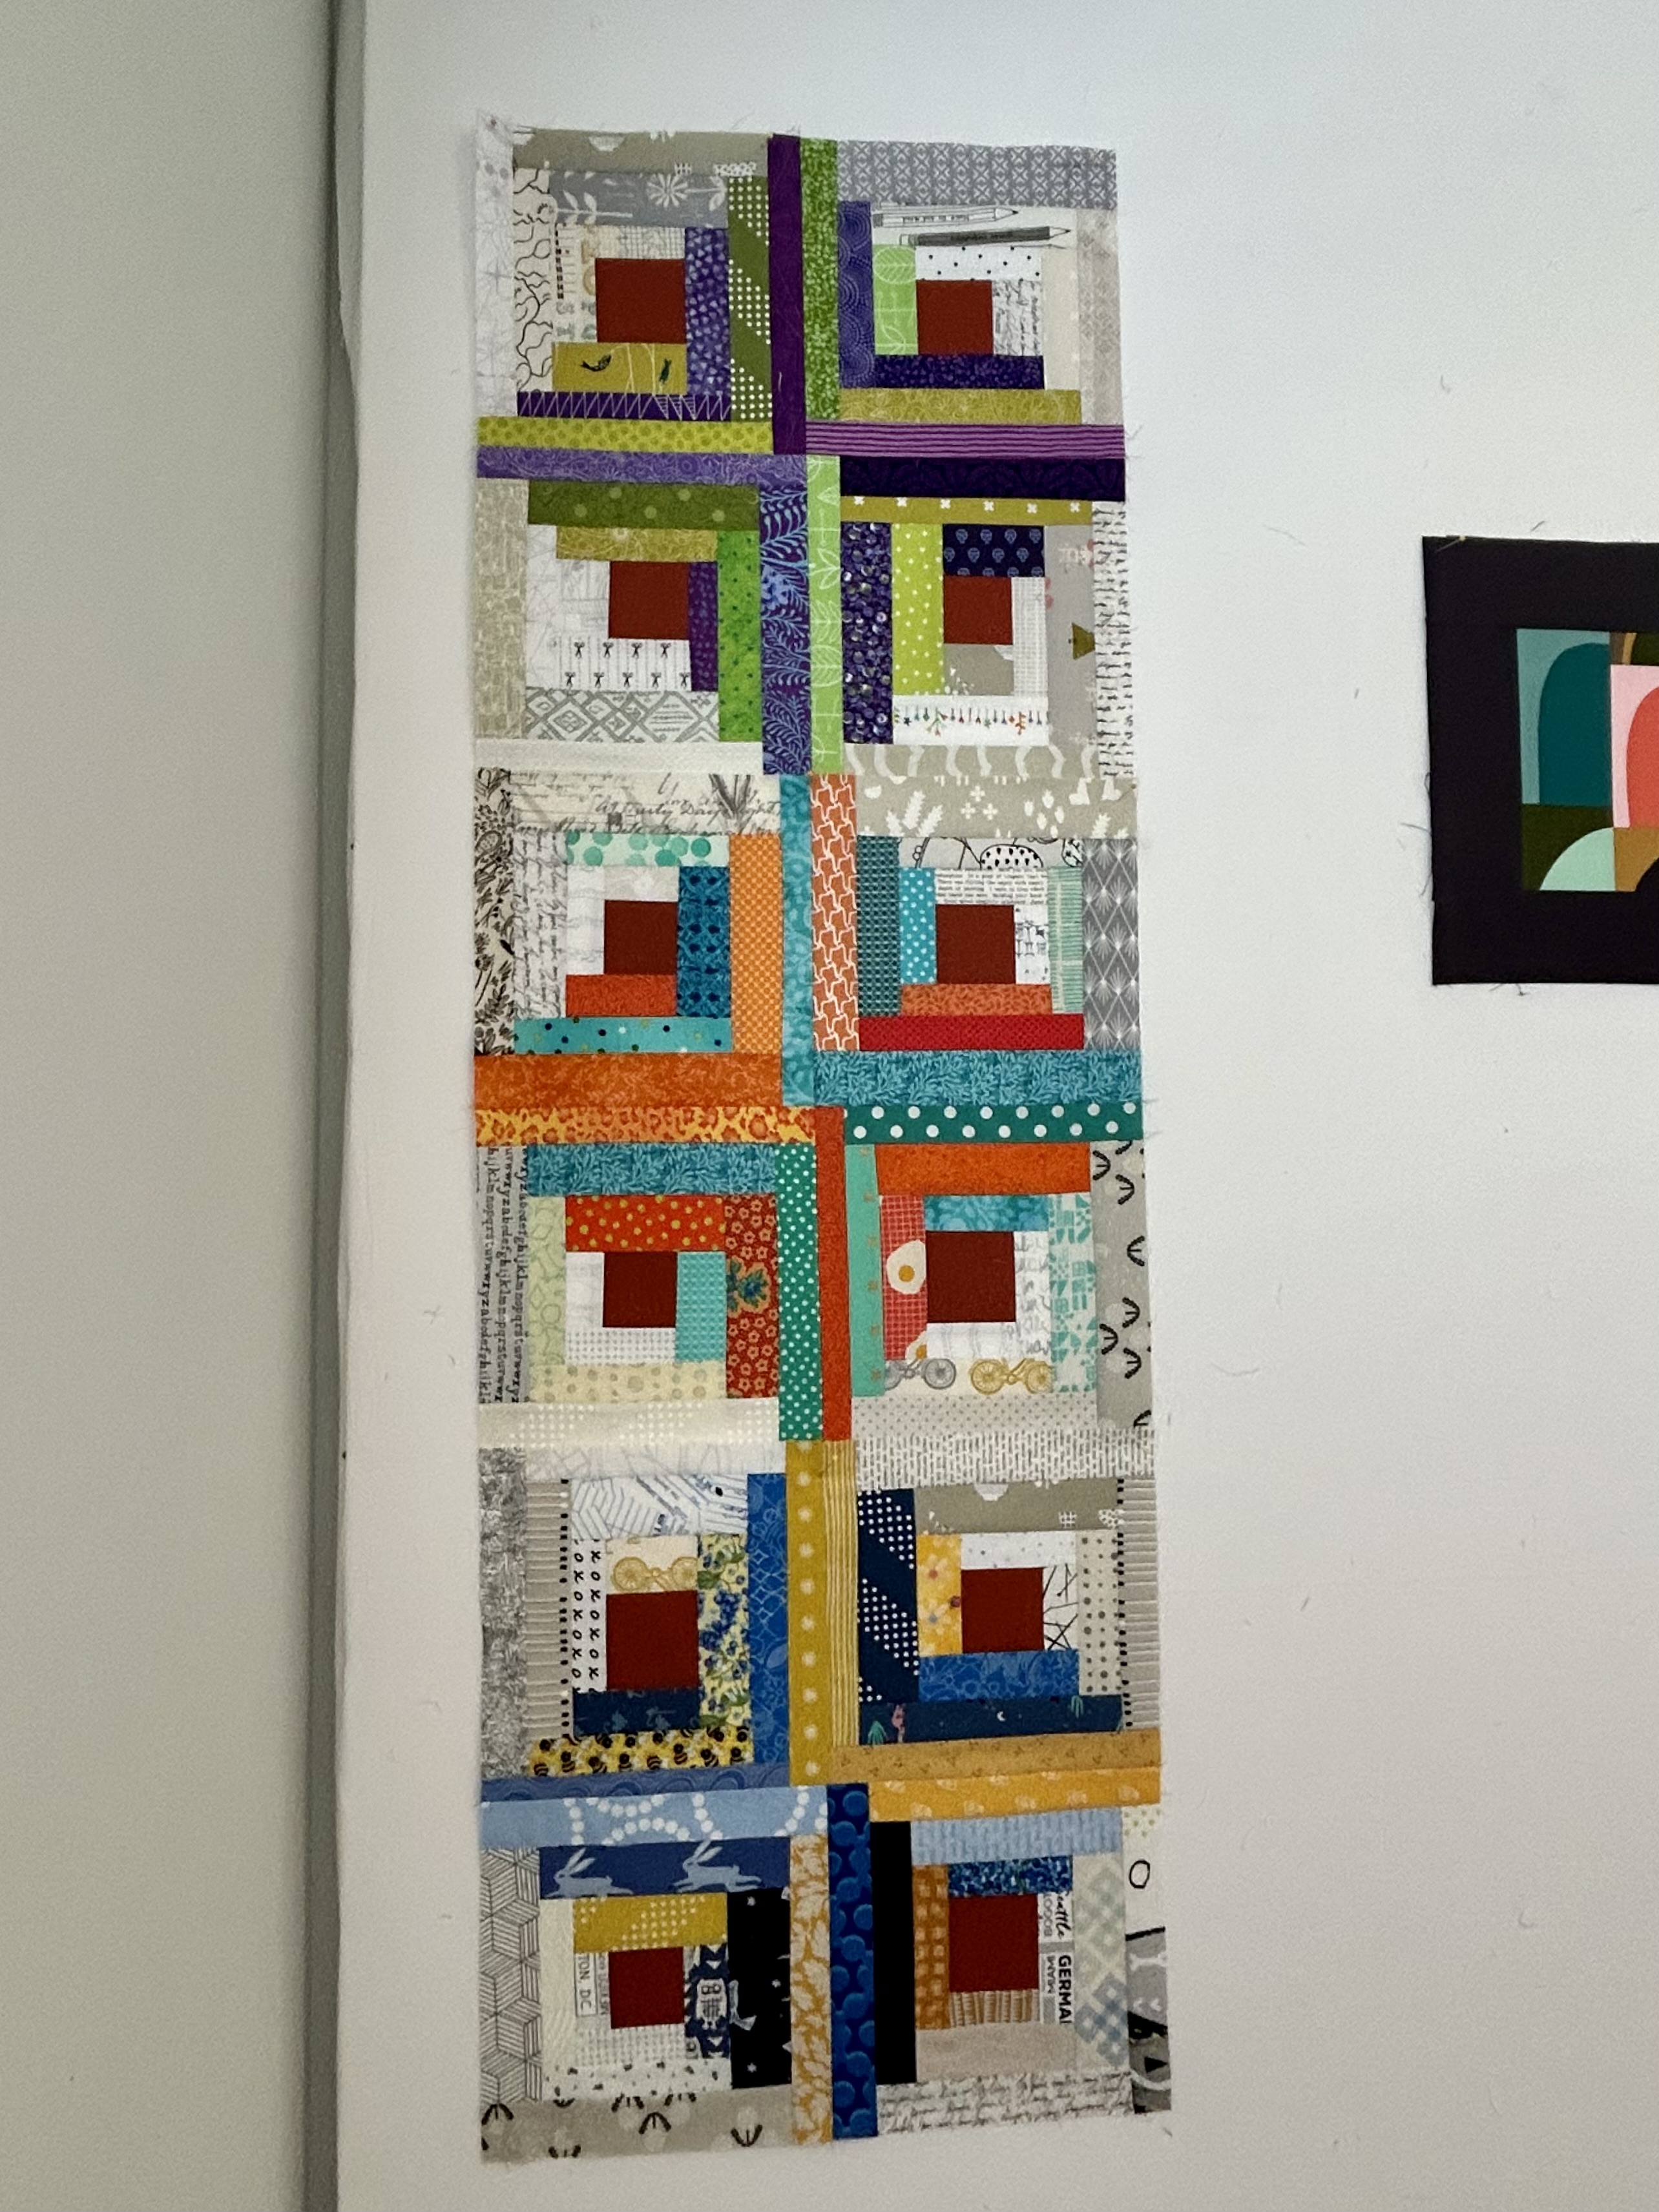
Weeks ago I ran out of handwork for night sewing and started to make funky log cabin blocks from scraps at night–free form and hand trimmed with scissors as I went. And this happened:
I did square off each block–and of course the grey/dark block in the middle is VERY improv for a log cabin–but I had fun making it. That block was actually the first one. These blocks are NOT meant to be about perfection or to line up perfectly, etc. They are meant to be funky.
Sewing them together into a quilt top was a bit of a challenge, but I do like that kind of creative work. It measures 40 wide and about 55 long–so a baby quilt I think. It doesn’t need a border.
I have organized a backing and the batting, but the third quilt in my Hurty ruler half-rectangle triangle series is ready to be quilted–and I have a backing and binding chosen, but not sewn together yet. Nor have I double-checked the top’s measurements. BECAUSE, I’ve been playing with month four of Tara Faughnan’s online Blocks 2 block AND using Rachel Hauser’s long cabin sew-along project as my leader ender project. I have 2 and 1/2 blocks done out of 9 needed for that project. Pics to follow on these two projects soon. Meanwhile a reminder of the third in my quilt series–the hourglass block form which gets cut from the half-rectangle triangle. The border–found in my stash–has changed how the colors are working in this quilt–in a very interesting way.
Meanwhile, we were on the rain edge of the VERY BIG snow storm that moved through here yesterday and last night, so I had a nice snow day of sewing yesterday.
As I noted in an earlier post, I signed up for Rachel Hauser’s “Scrap Cabin” quilt-along starting in January. (Her blog is Stitched in Color, and she is a really creative scrappy quilter.) I am in total love with Rachel’s border for this project and would probably make it based on that fact alone. BUT, this project will also chew up leftover cut fabric strips BIG TIME. I’ve been reorganizing my strips and am looking forward to using many of them up.
Some of you have also signed up for this project. Rachel’s first quilt was made from two analogous colors, blue and a pink/magenta.
For this sew-along, she is making blocks with complimentary colors–and here’s an example she gave.
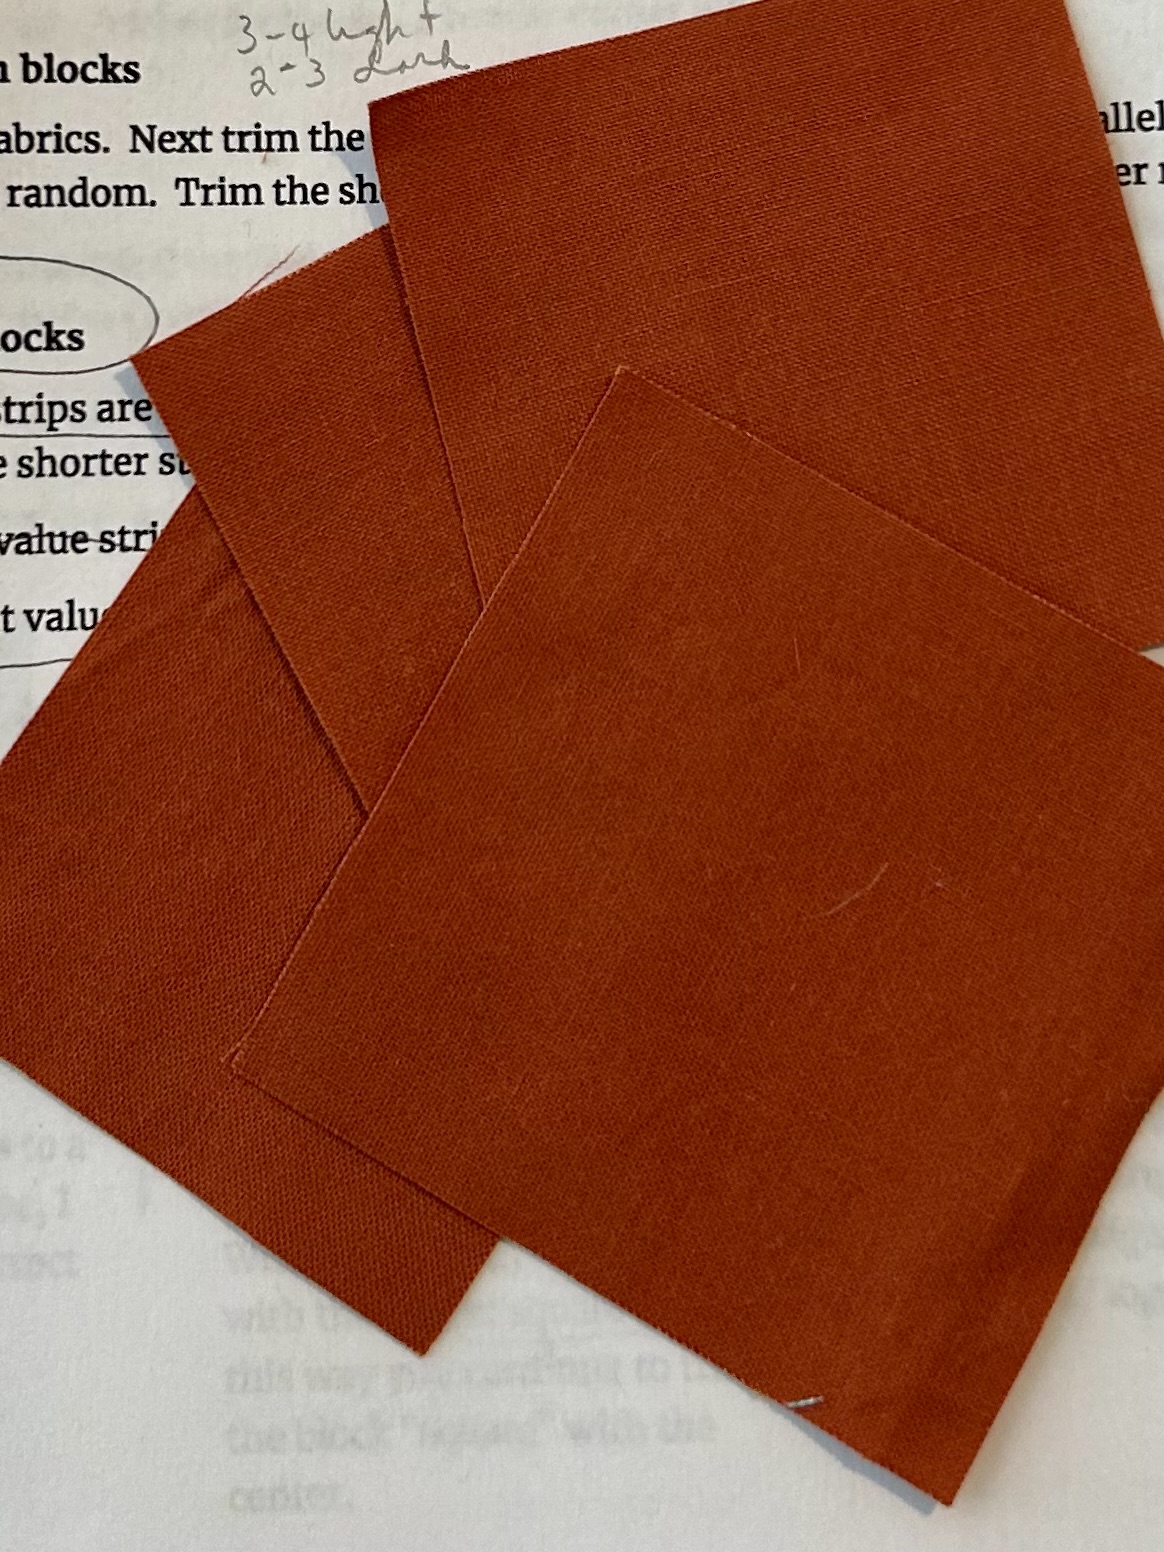
I’ve been pondering what color to use for the “chimney” block at the center of these log cabin blocks, and I settled on this brick red. I like it, and I have enough of it in my stash. Rachel used a mustardy gold solid, which works well, but if I wanted to make a set of blocks using gold/yellow, Rachel’s color wouldn’t work well. This brick red might not work with clear red strips, but I will have to see what those colors do with each other–adding in the idea that alongside a red would be some other color as well–which could “buffer” the brick red. I call that…creative play.
Here are the first colors I’m going to use: blueberry and lime green/pickle. And I’m testing out the block right now to see how that goes. Of course I am! I mean, the design wall isn’t nearly full enough, LOL.
Tara Faughnan’s Block Studies 2 online class will release a new project January 1st. Meanwhile, I hung one of the “Abstractions” pieces I installed over stretched canvas on the wall in my quilt room–next to the Maria Shell inspired project that a local quilter here taught us (Cathy Beemer) in our Charleston Modern Group’s monthly Sit and Sew. “Abstractions” is a bit like this Maria Shell style. I suspect I will hang more pieces made in upcoming months on this wall. I couldn’t part with this “Abstraction” piece.
Then there are those potholders… They are now calling my name, LOL.
I had a quiet Christmas as both my families traveled away, one at a time so they overlapped with being here. But both families had also flu running through them, and so I stayed away, discretion being the better part of valor I think. Besides, I don’t like the commercialism of Christmas, though I love this dark season that is filled with light, hope, rest, and realized joy for all that we do have.
Add in that the painful knee strain reappeared, and was worse this time. I decided to get a good brace, spend time with a heating pad, and to really let it mend this time. I do so miss my walking though. It is much better now, but not totally healed.
I have SO MANY wonderful sewing projects happening, and I just delved into those–alongside spending more time reading (I’m halfway through the Mitford series now (Jan Karon) which is peopled by people I like and with whom I want to spend time–unlike much of what is on tv or described in current books these days. I also have listened to 25 of the 28 Tony and Anne Hillerman books–two of the early books aren’t on Audible or Libby, and Anne H’s most recent comes out this year. I love the quiet and peaceful spiritual way of the Navajo people described in these detective mystery books. (Some have been recently made into a tv series (Dark Winds), which led me down this path.
Here’s what the design wall looks like right now:
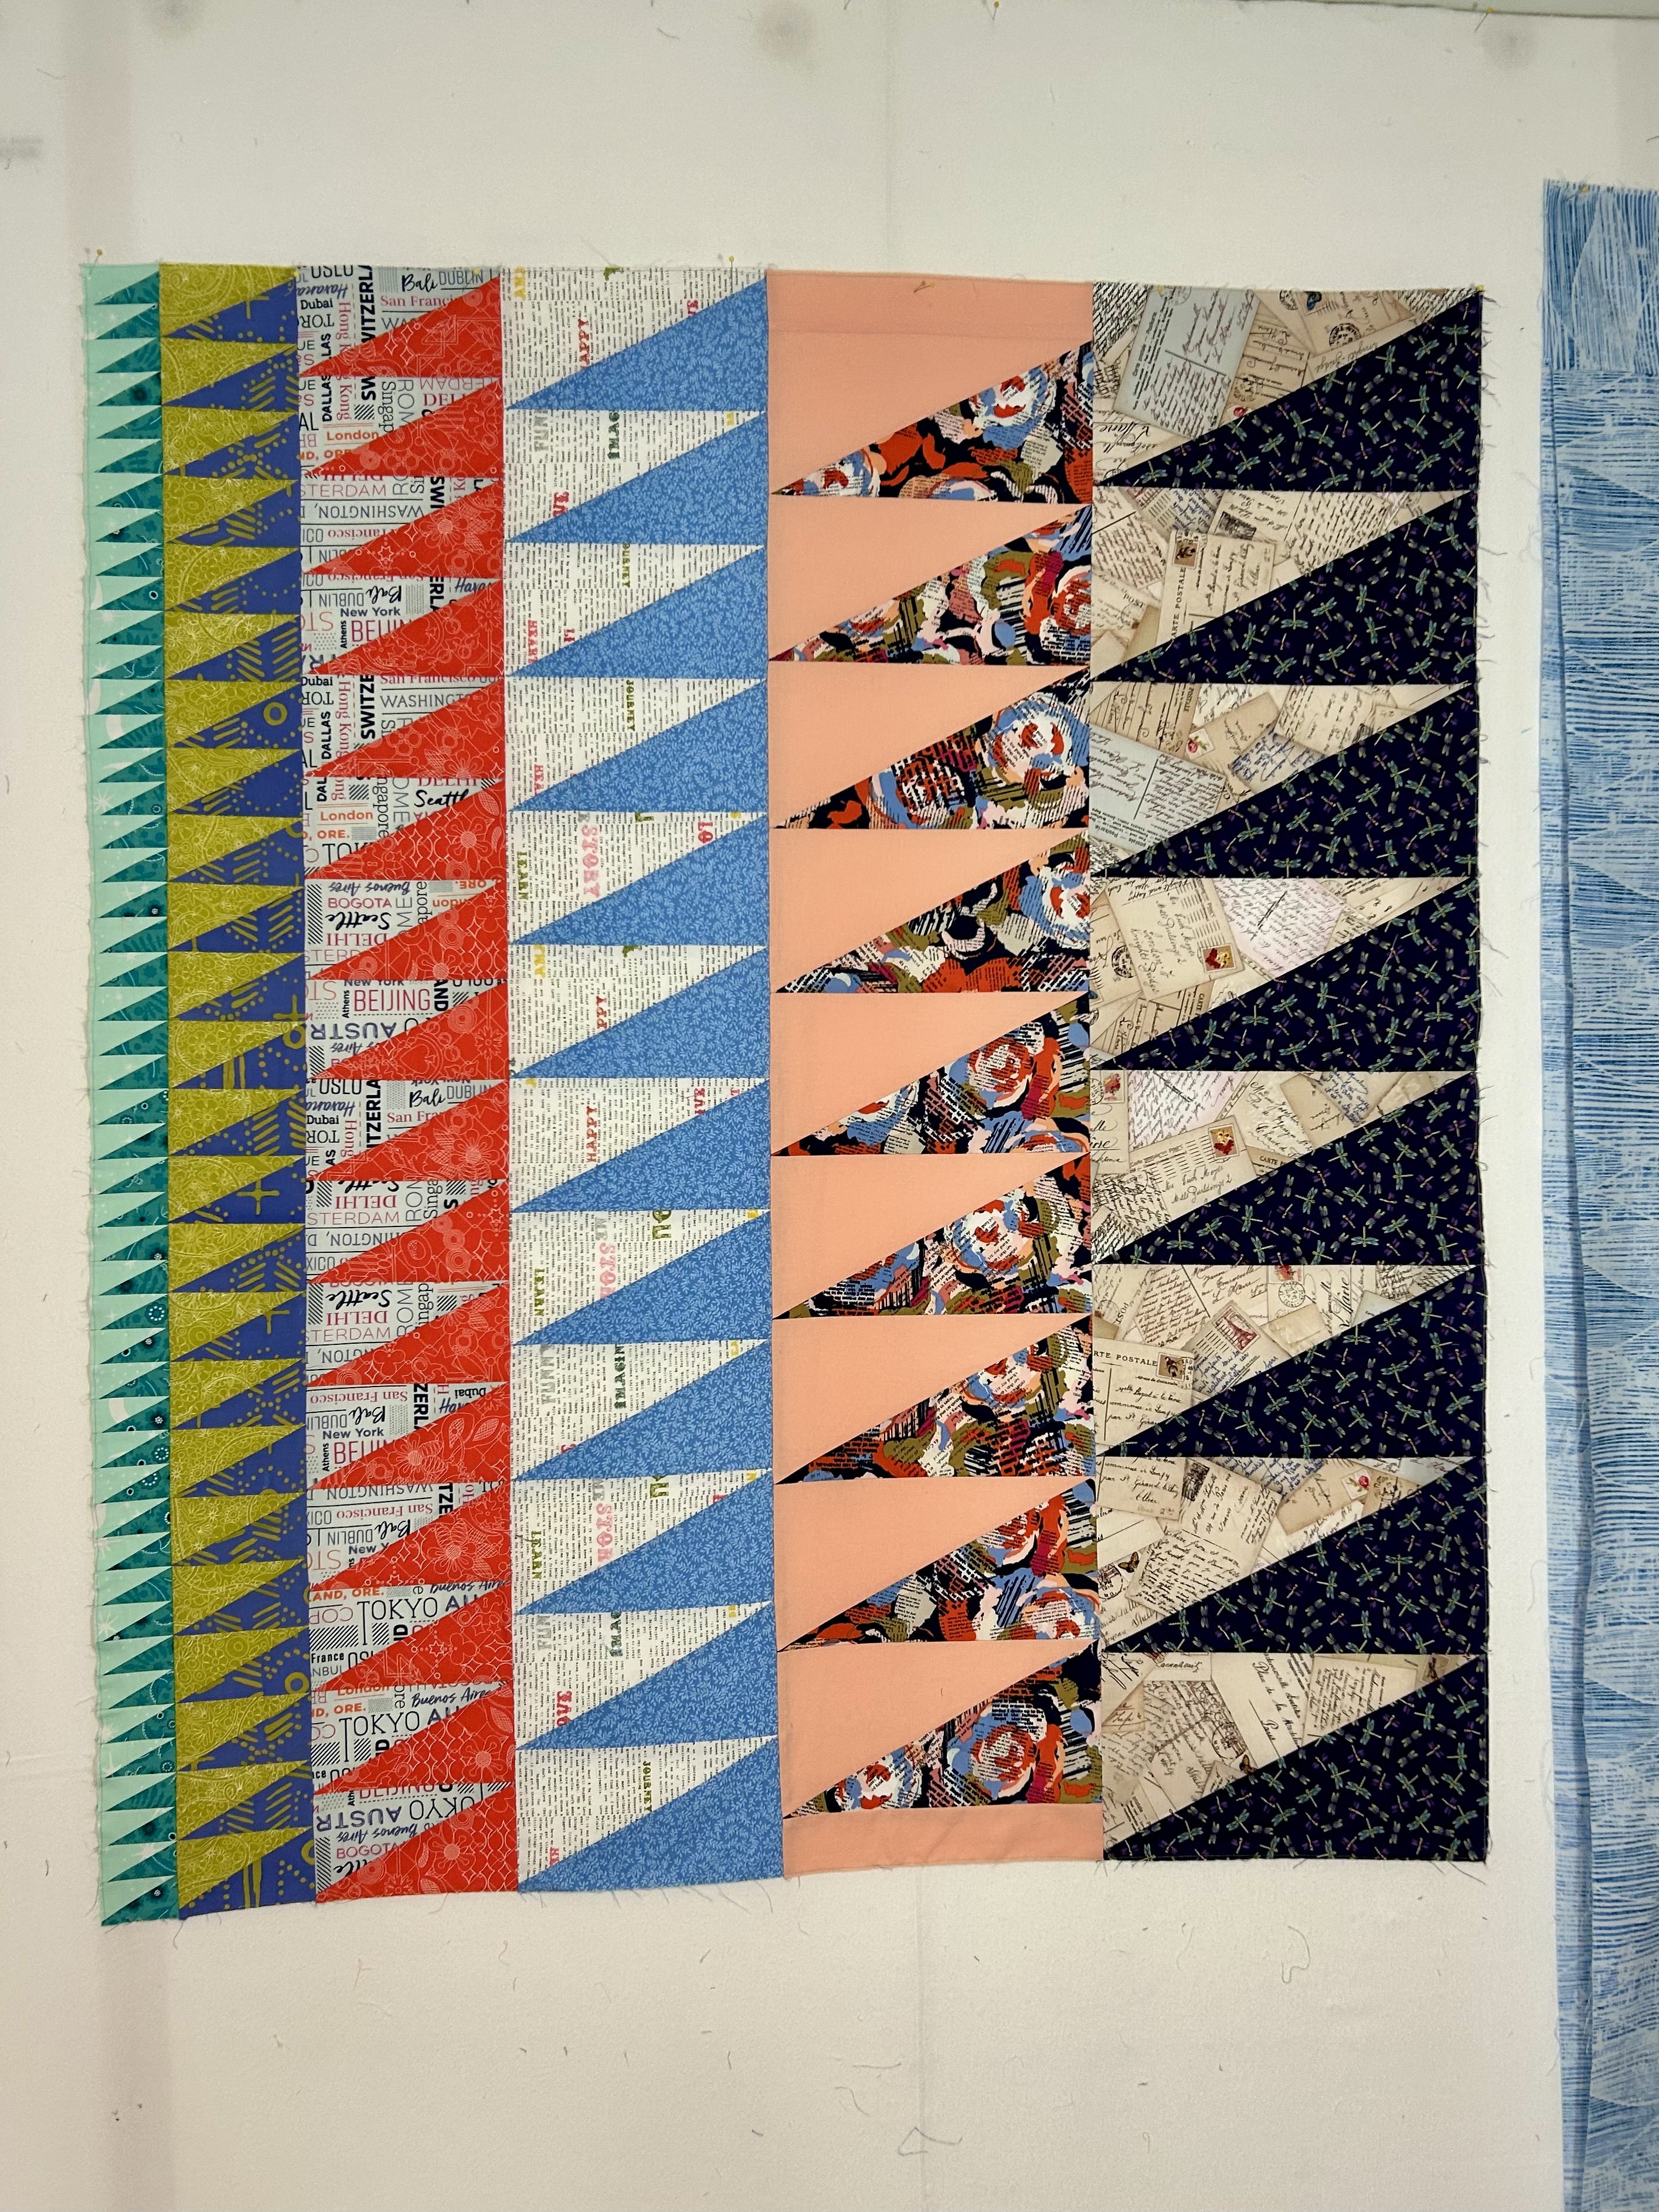
Here’s the third quilt in my half-rectangle triangle series, made with the Hurty ruler (Latifah Saafir). “Dancing Hourglass Diamonds” has been so fun to make–one’s eyes go all over the place to see the diamonds that form with this block learned in Tara Faughnan’s Block 2 online class–the diamonds along the diagonal and straight lines, yes, but also medium size and large diamonds that form and shimmer before your eyes let them go again.
I thought this quilt needed a border to control the chaos, and this fabric was in my stash, and it brings out the blues in the quilt. I’m going to back with a wild but gorgeous print bought on sale from Hawthorne Supply Company’s Black Friday sale. I don’t know yet about the binding.
Here is the fourth quilt in this series, “Gradations.” The strips are a mathematical gradation–and all but one measure 48 inches. The wild print set in light orange just got strips to even out that row. These blocks are 12, 10, 8, 6, 4, and 2 wide. At 43 or so wide and 48 long, it is either finished or needs something. I’ll just look at it for a while and think on it. I don’t really see it as a wall hanging. And it doesn’t feel like a baby quilt. Maybe this part needs to be the center of something???
“Crosses” is loaded on the longarm, and I did one pass days ago. But until this quilt is done, I didn’t have any binding handwork for tv at night. I find hand sewing so soothing. “Crosses” isn’t a large quilt, and I should make myself do one pass a day until it is finished. (“Crosses” is made from the 3 1/2 inch squares of Cotton+Steel/Ruby Star Society fabrics I cut up years ago in Maine.)
With no handwork to do, I started making funky log cabin blocks by hand–and one just funky block in the center. I was inspired by Tara Faughnan’s video and discussion of how she hand stitches blocks at night in our online Blocks 2 class. I learned several new methods I did not know. I think I’ll finish this project up with 12 blocks.
Here’s the 11th block all ready to sew. Maybe the 12th will be a dark green? I don’t know yet how I’ll sew these blocks together, but it will be an improv quilt. Probably it will need a solid field fabric to join everything together.
There are, also, other projects happening in the quilt room. I broke down the last of the separated Cotton+Steel/Ruby Star Society strips and put them into the regular bins–1 1/2, 2, 2 1/2, and 3 1/2 strips–separated by neutrals and colors. And as I pawed through these boxes for the funky log cabins, I isolated some shorter strips, starting with these greys, and sewed them together and cut them into 2 or 2 1/2 blocks, in strips. ( I have smaller bins of cut 2 and 2 1/2 blocks and one of just small scraps–and ***note to self, I should/could be sewing together 4 or 9-patch blocks as leader/ender projects from these cut blocks.)
There are 4 or 5 potholders ready to be made–layered with Insul-Brite and batting. I’m going to try to use leftover binding strips cut on the bias to bind them. I have a pile of those.
AND, upcoming projects are looming on the January horizon, along with New Year’s, but this post is long enough for today.
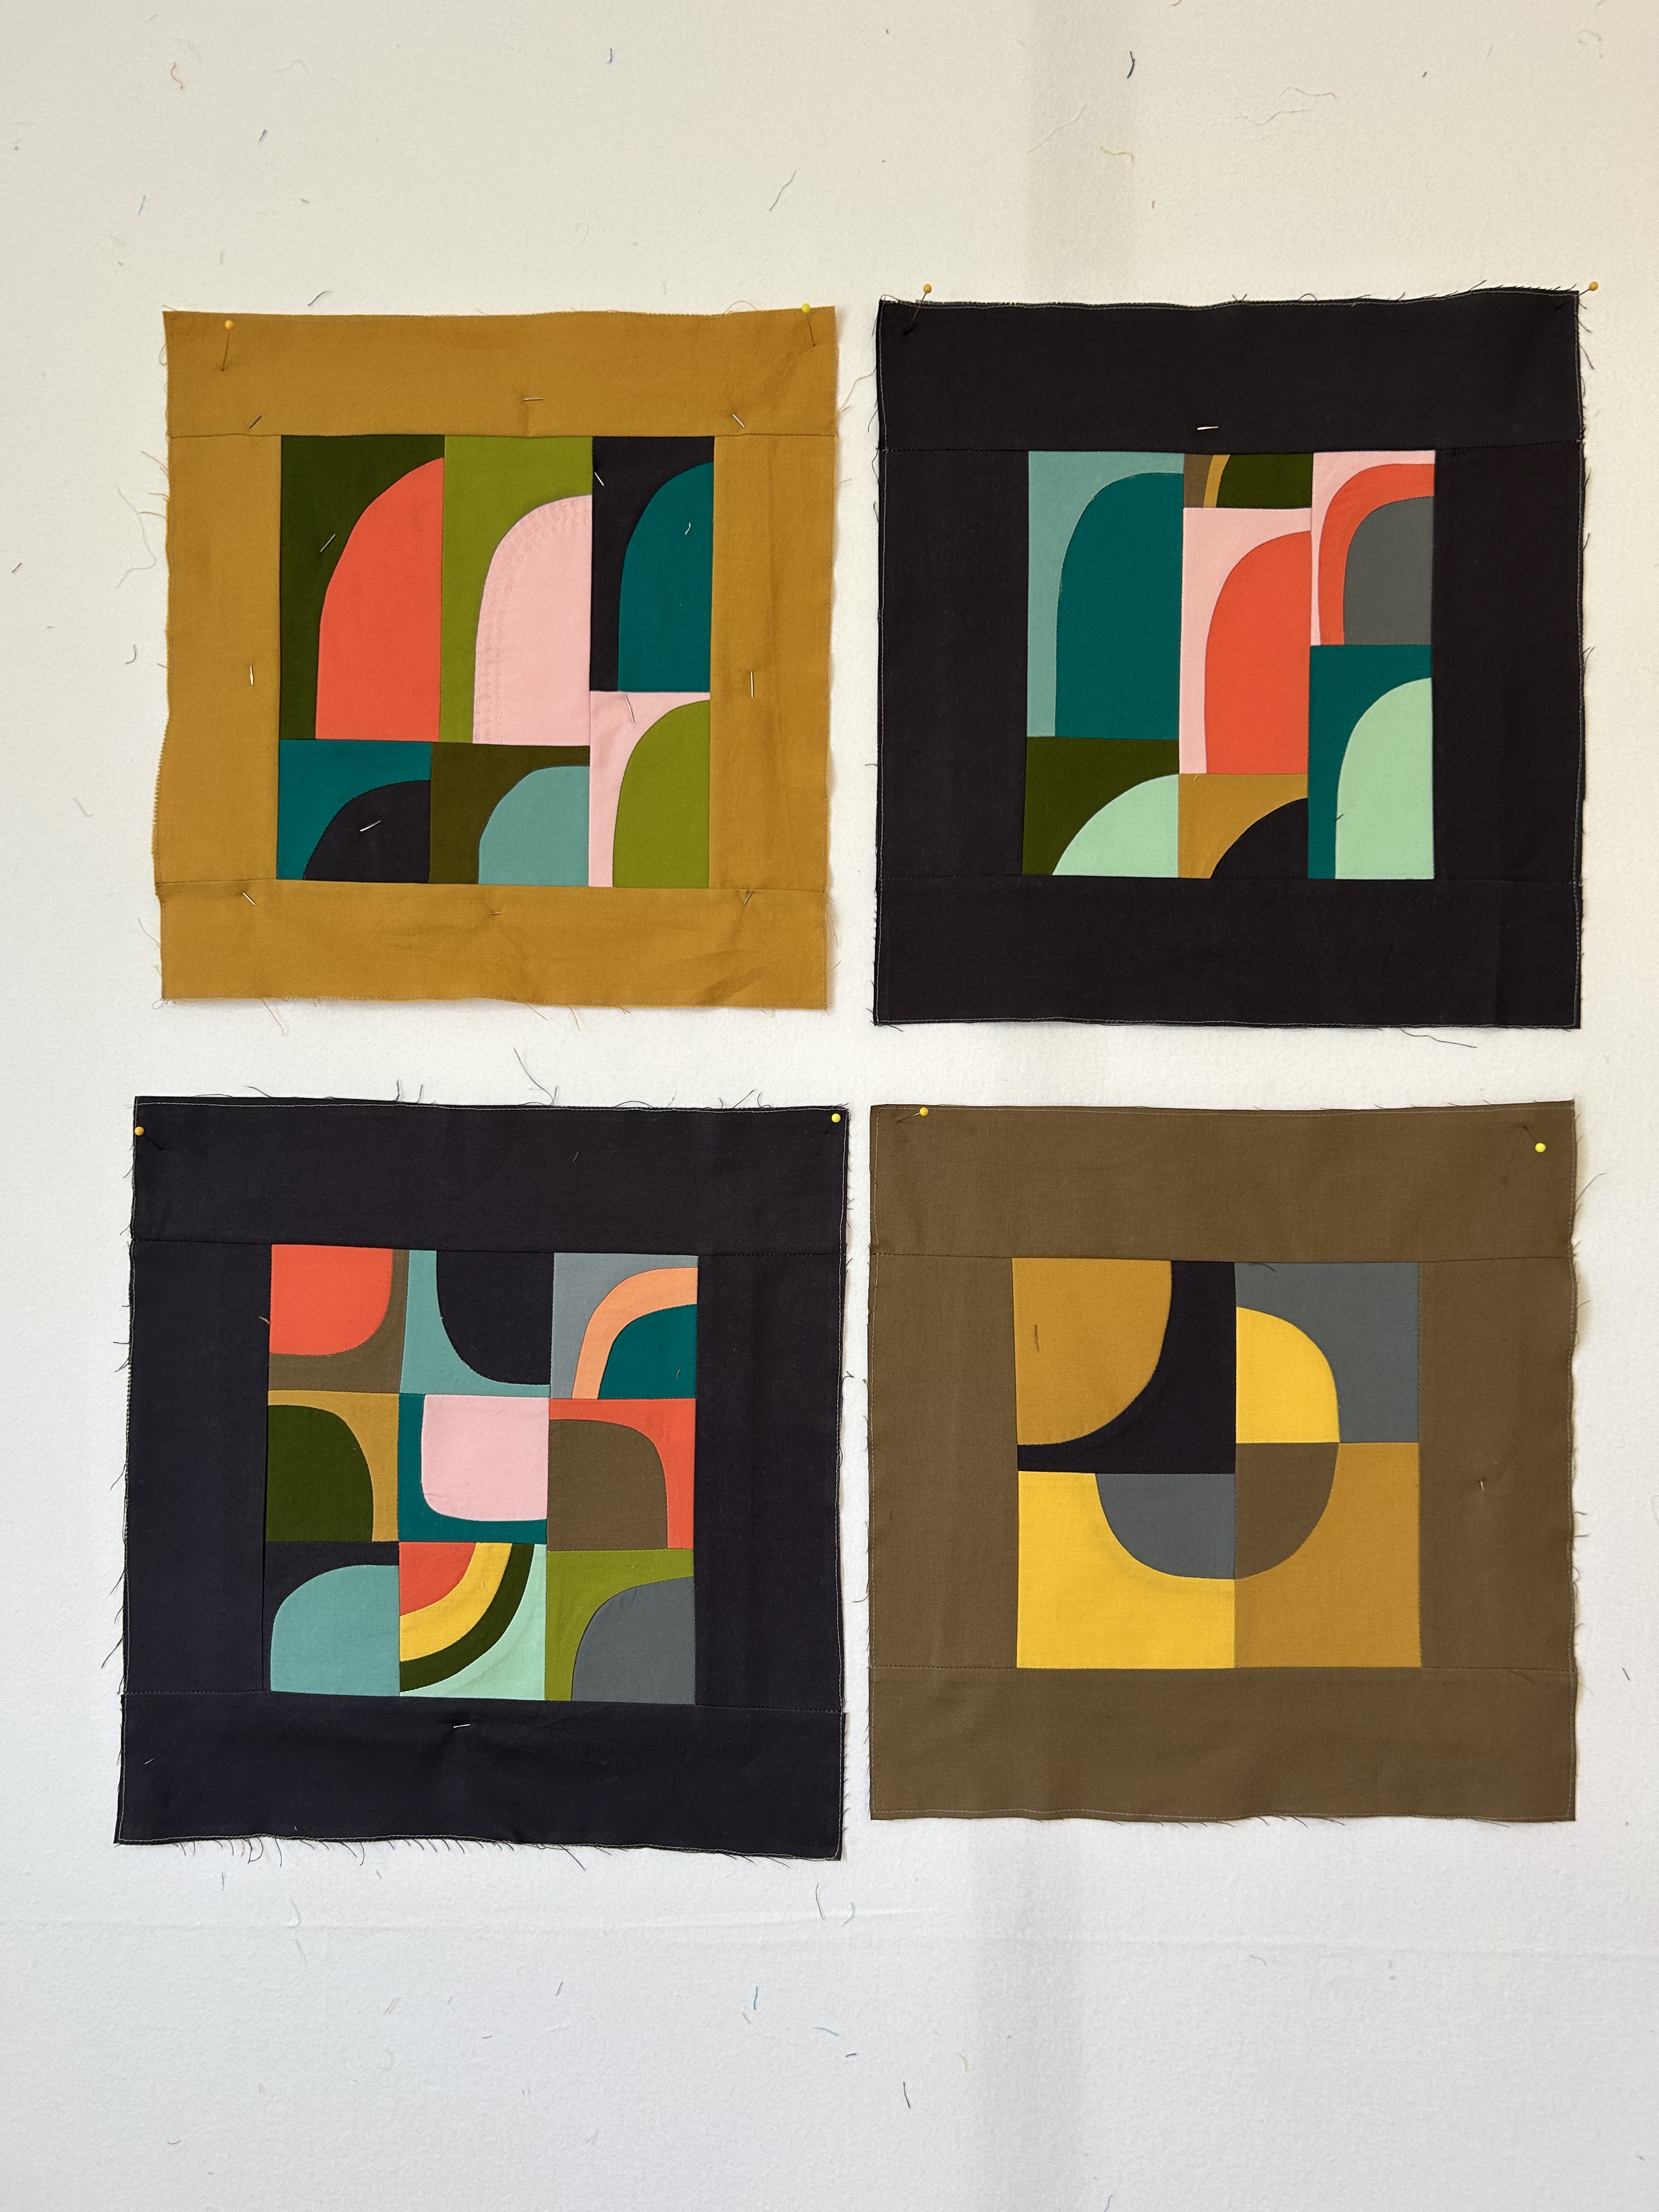
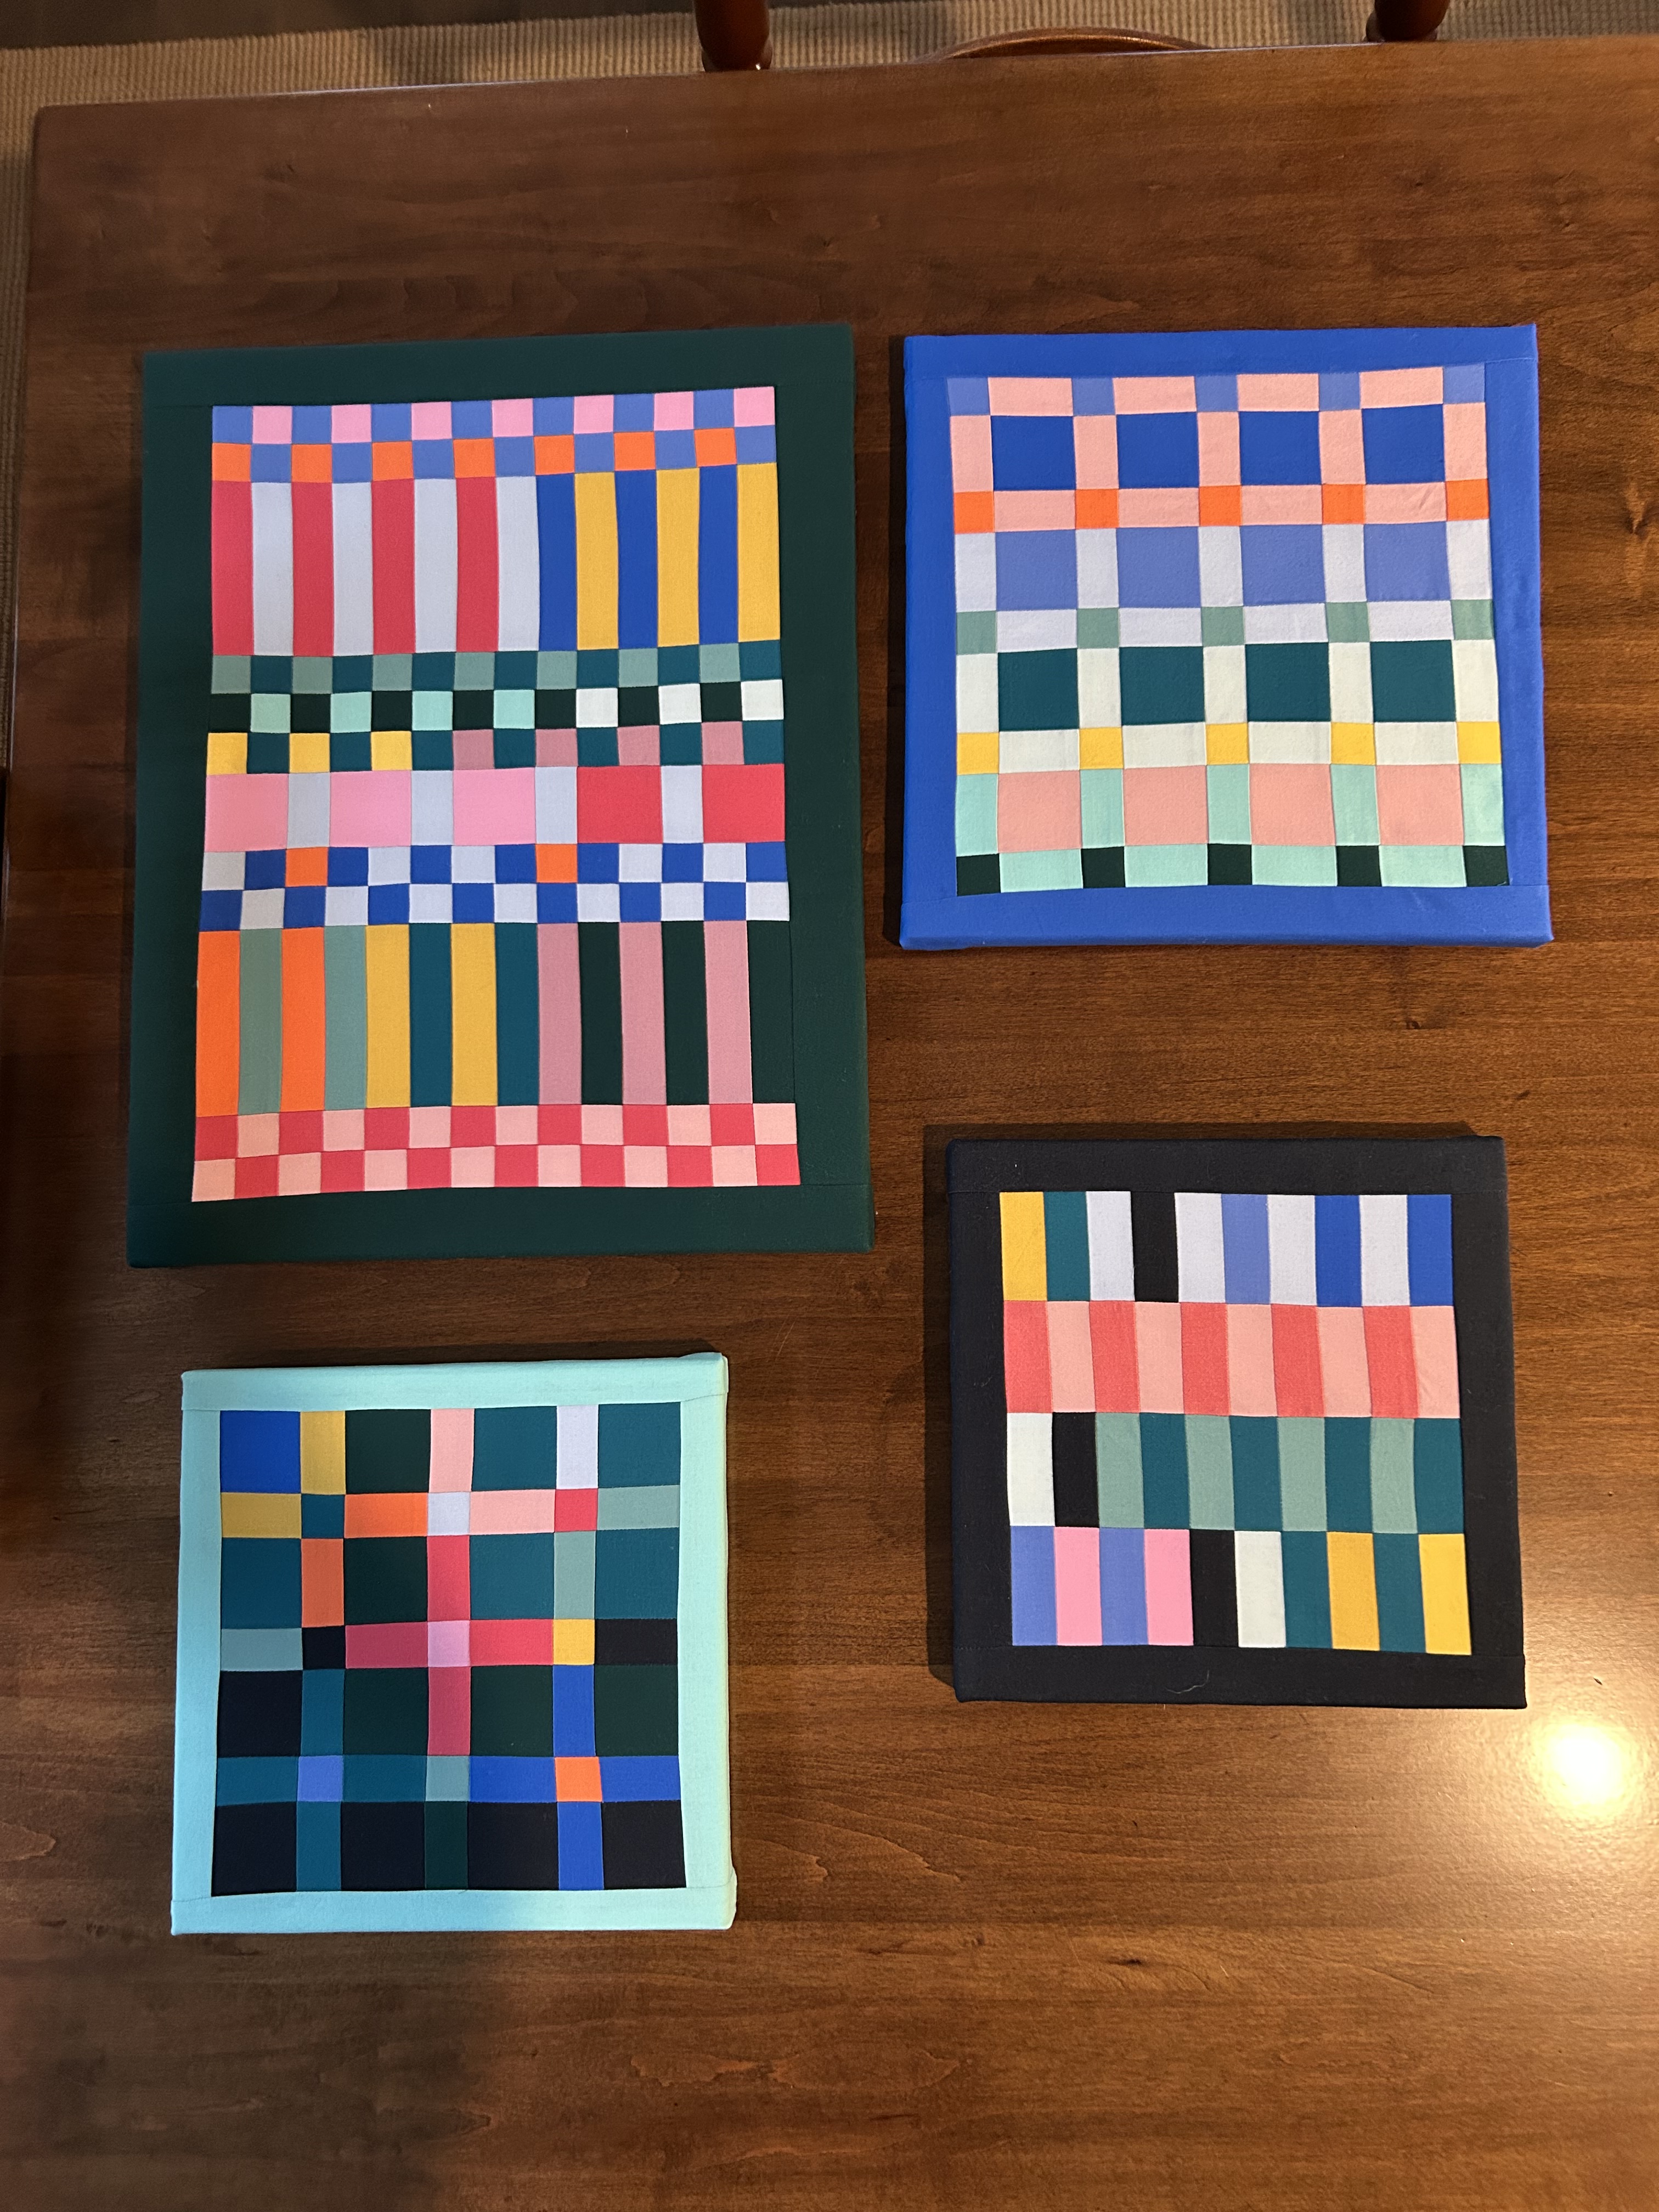
And I have certainly been distracted with this month’s block from Tara Faughnan’s Block 2 online class. Squares and rectangles combined with how colors work together combined to create some really fun play. And I’m getting quite good at covering the stretched canvas with blocks. I now have a collection of sizes–10, 12, 14, and some 14×18 rectangles. Michaels has awesome prices and good quality. I will hang the big one on the left, but the rest will be gifts.
Here’s my “haul” for this month–which has, again, been so fun.
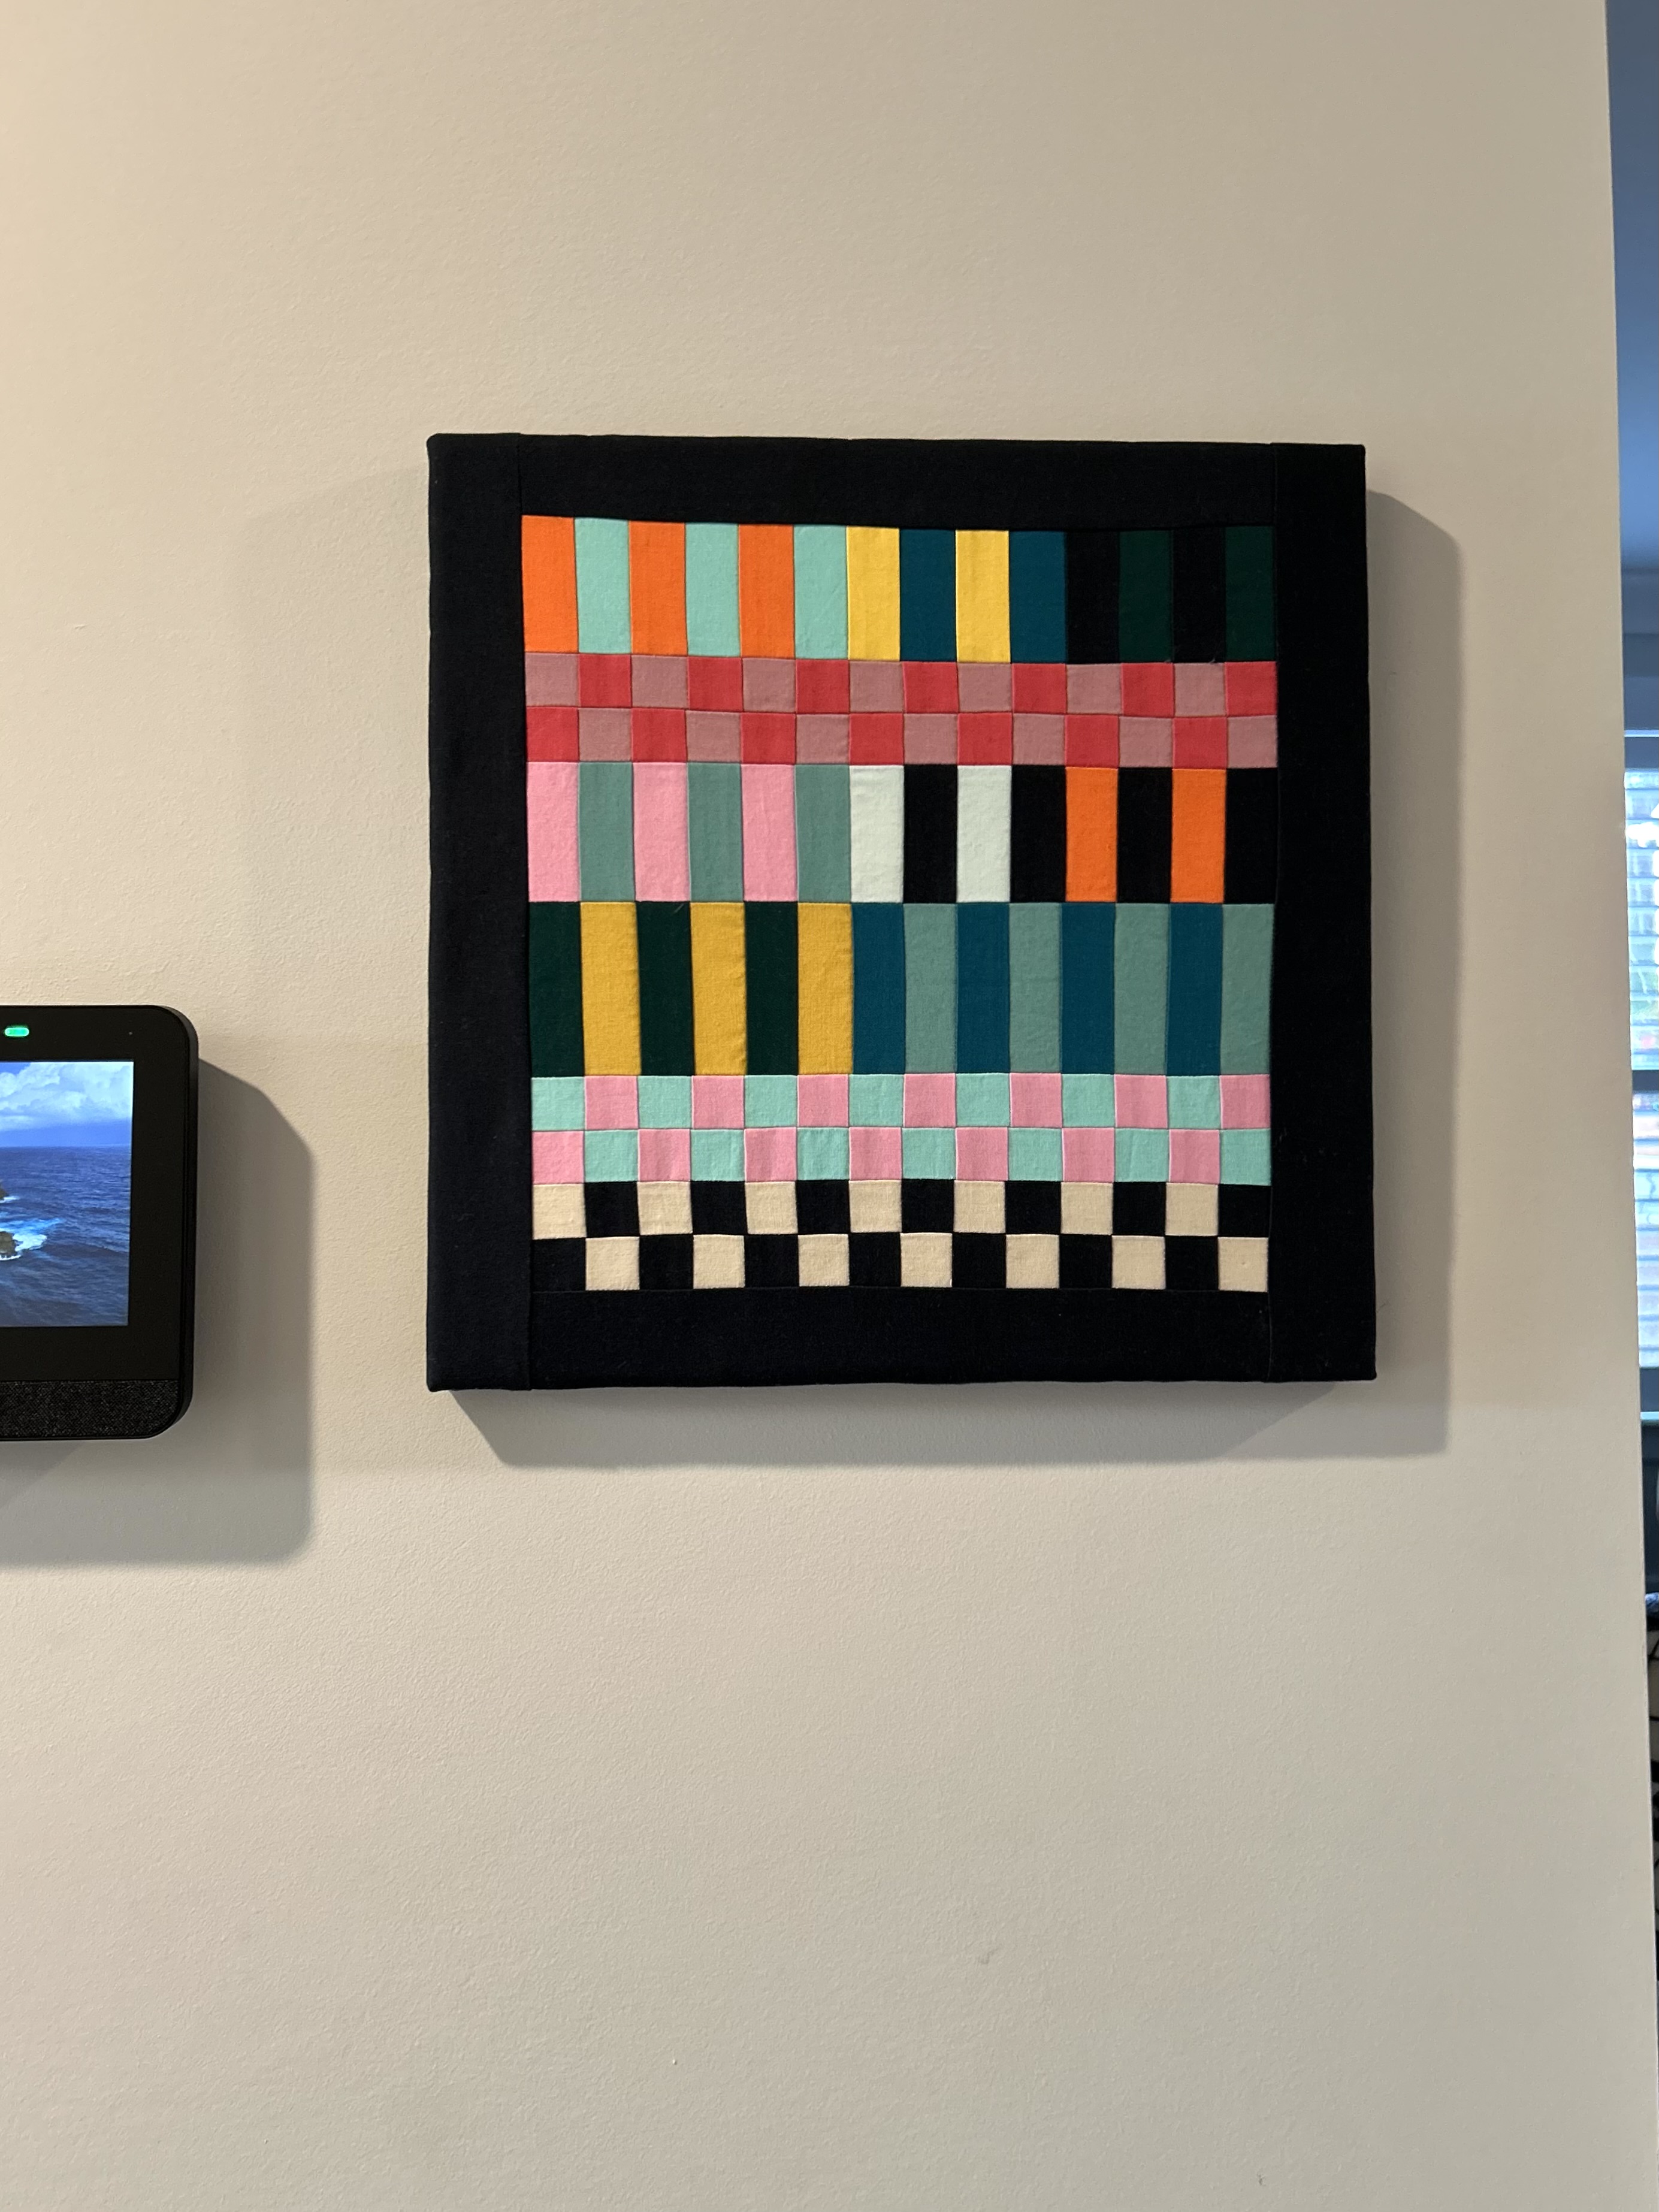
And there’s this one which I hung in the foyer:
And one more picture of the four from another angle. The lower one on the right was made from just sewing together leftover cut fabric pieces, but… I couldn’t resist putting it on canvas as it kept catching my eye on the design wall. Simplicity is so appealing to me.
I’ve almost got the third quilt in my half-rectangle triangle blocks made with the Hurty ruler. This one involves an “hourglass” block version that can be made. I think I’ll call it “Dancing Hourglass Diamonds” as yours eyes make diamonds of several sizes form and dance across this quilt.
Anyway, I’m trying to clean off the design wall to get ready to make Rachel Hauser’s scrappy log cabin quilt in January–and I’m happy some of you are also going along for that ride. That’s the Stitched in Color blog. Rachel is already making blocks for her new version of this quilt she designed. The border on that quilt is just awesome, in my opinion.
And on we go into the New Year and into our quilting passions.
Merry Christmas, Happy Holidays, and the Happiest New Year to all of you!
“Abstractions” is the title of the THIRD month of Tara Faughnan’s Blocks 2 online course. It involves squares and rectangles.
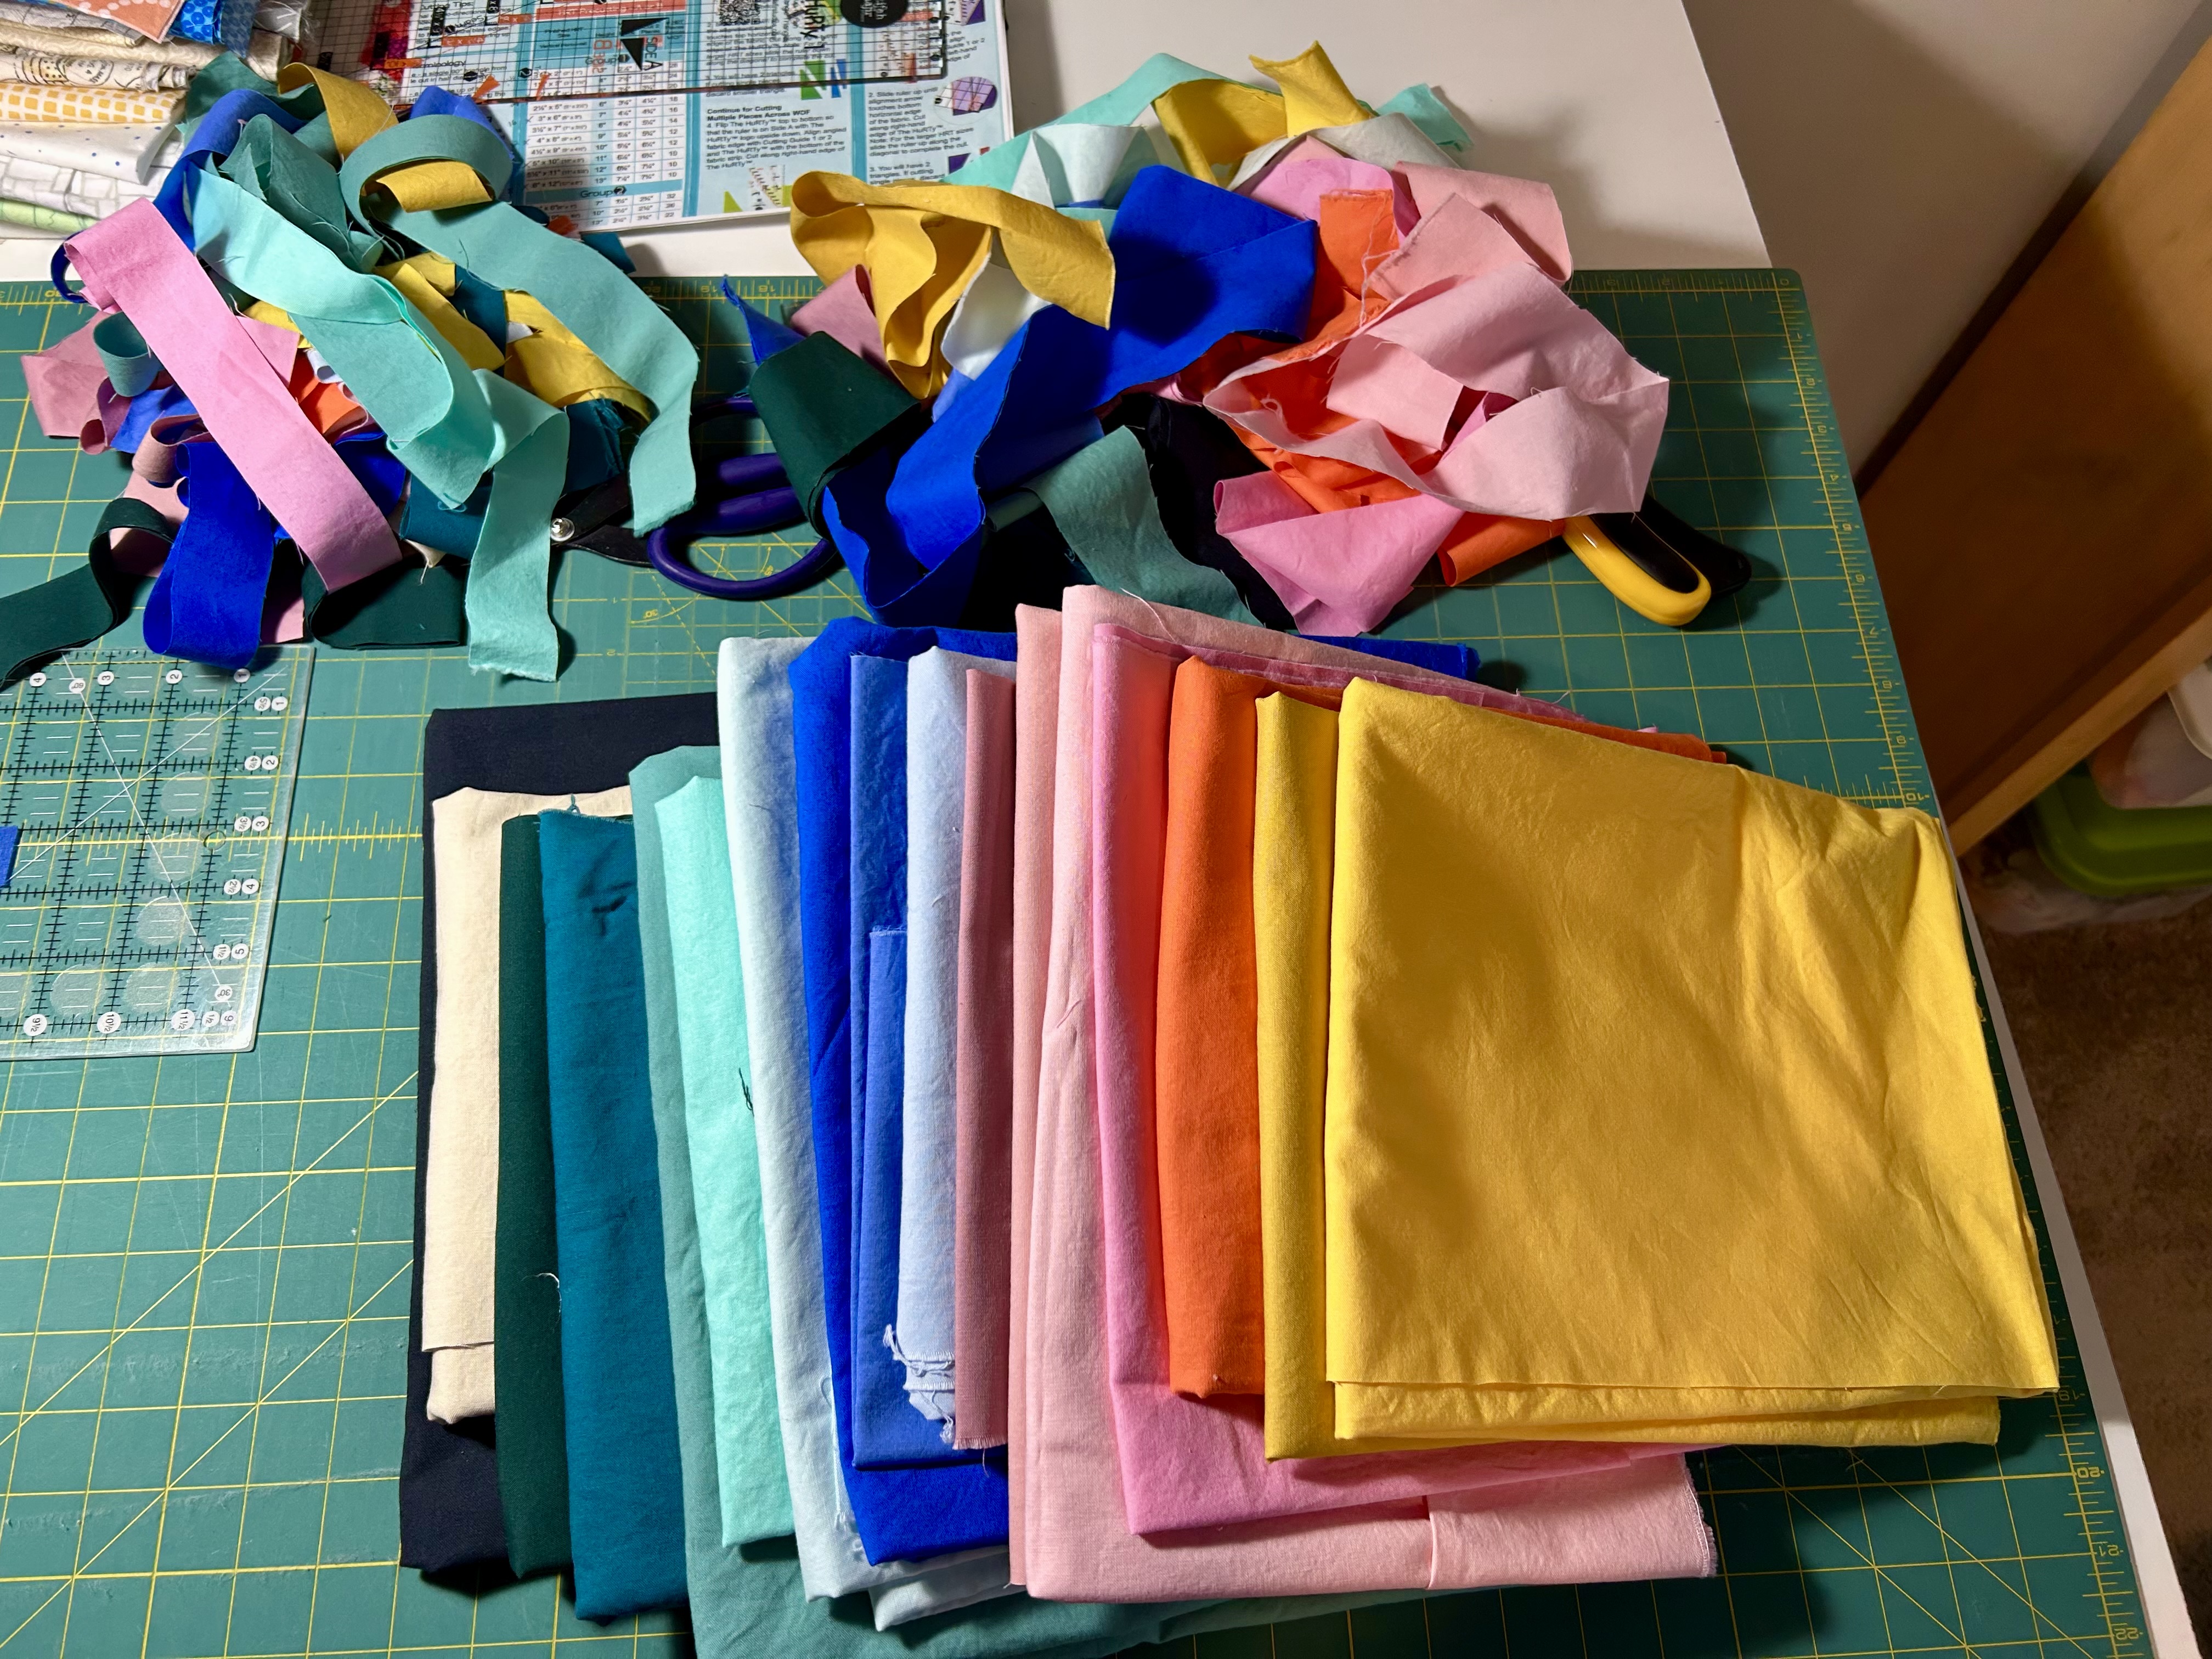
Here’s the palette I pulled–and I did order a few of Tara’s colors to fill in what I was missing in my stash. I added–as suggested–the warmer/softer black Kona “Pepper” and the neutral Kona “Putty” as suggested by Tara. I’ve long been a fan of “Pepper” and had some here, but “Putty” was new to me, and I wouldn’t have chosen it on my own I don’t think. But it is PERFECT, lurking there among the neutrals one could choose.
The dark green, the teals, the aqua pop, combined with the strong blues, the oranges and golds, and the pinks/corals are just singing together. The golds are Kona “Curry” and “Canary.”
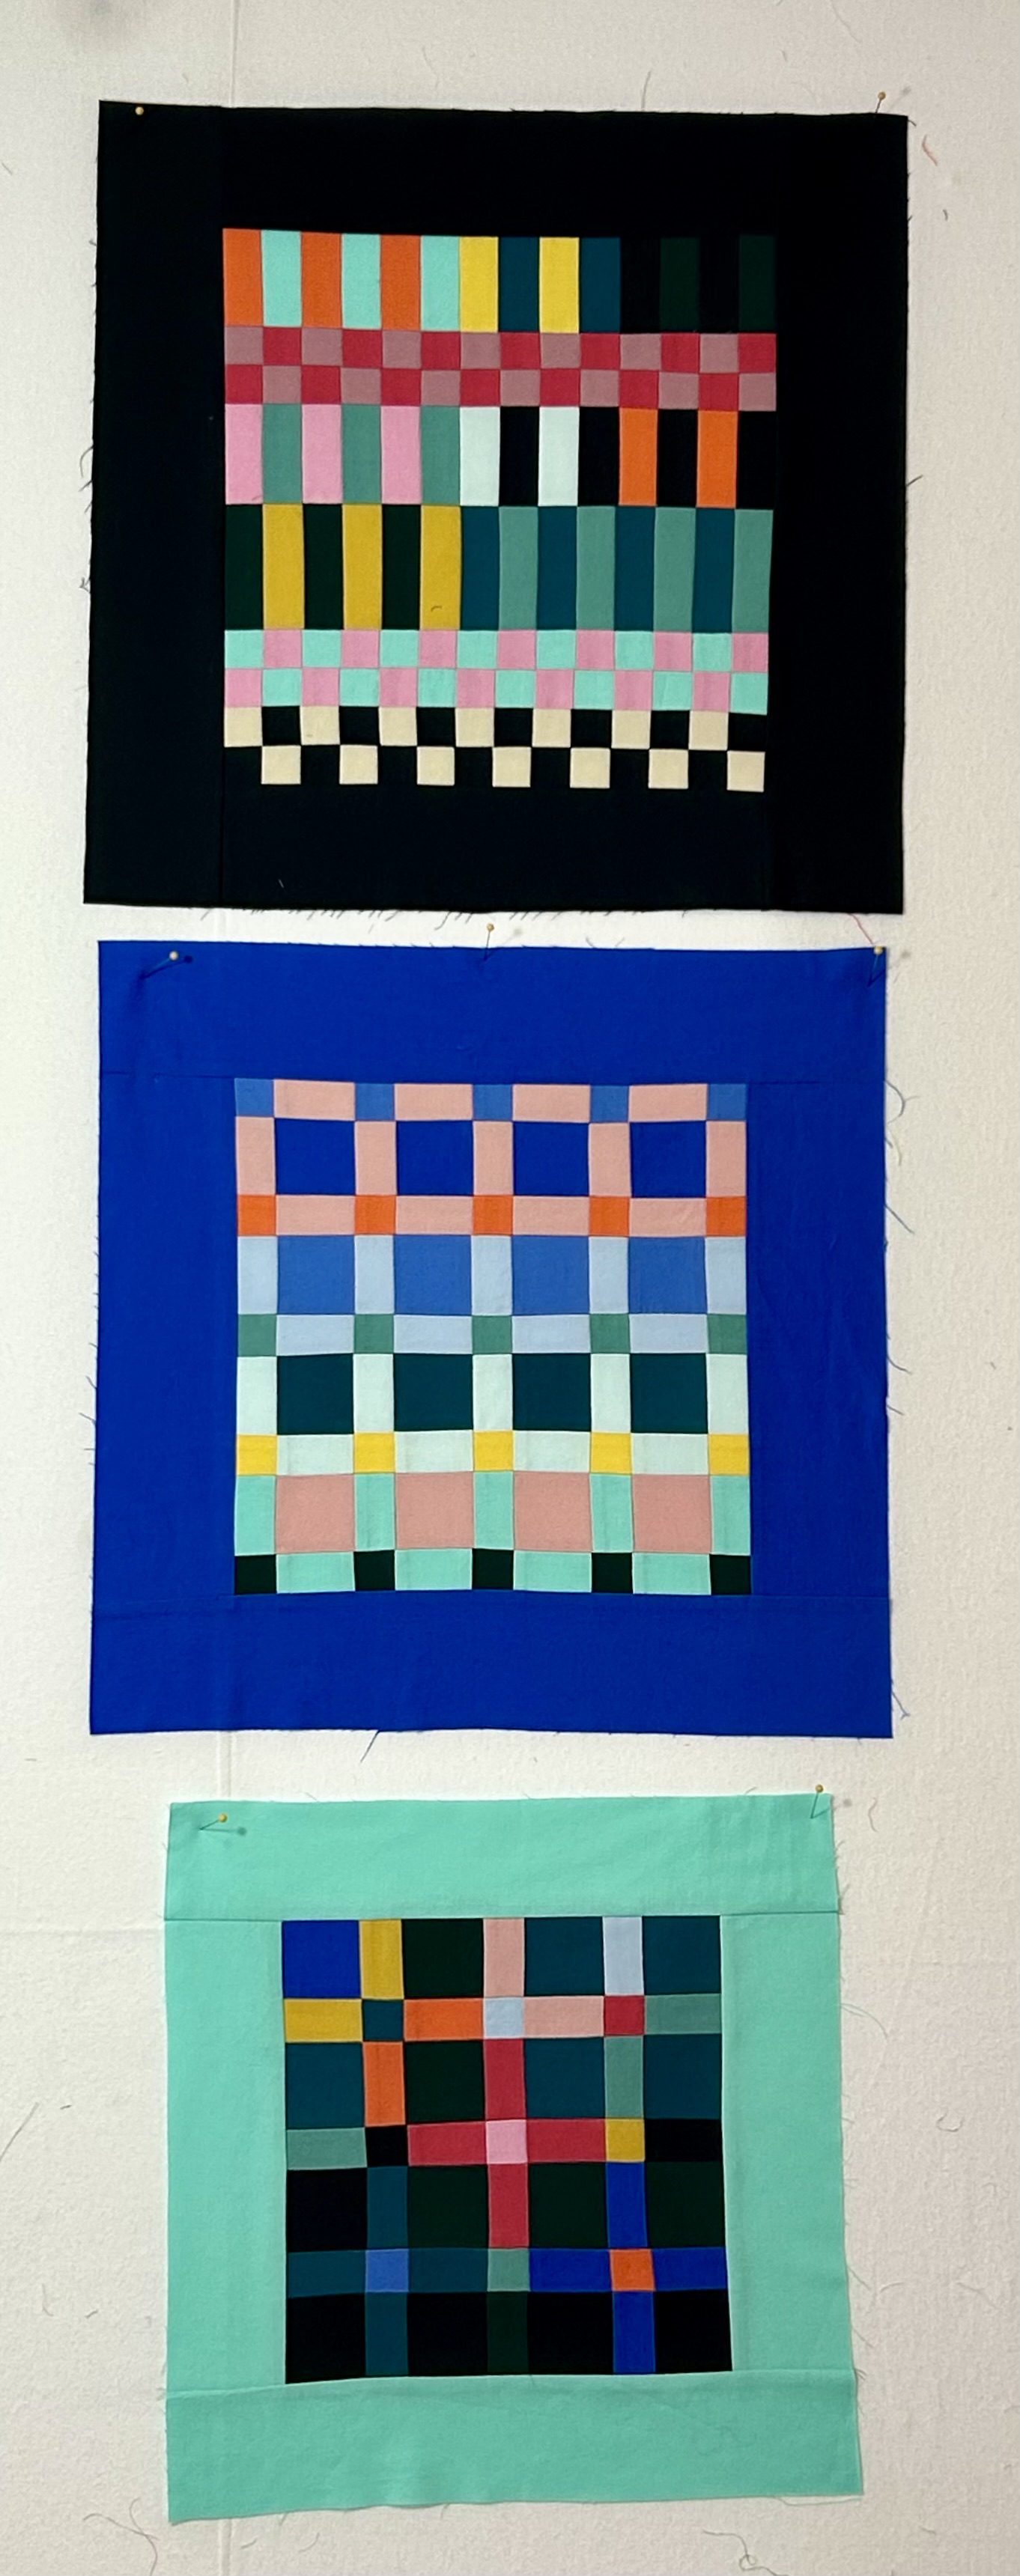
Here are my first three blocks:
I’ll put these blocks on stretched canvas and am waiting on the 14-inch square ones to come in the mail for the top two blocks. I couldn’t find this size locally–due to Christmas shopping I think.
I have another block in process–and will likely make a few more before stopping. I’ve sewed the first row of the THIRD quilt in my half-rectangle triangle quilt series, and it came out really well. So, more work there. Meanwhile, “Crosses” is just sitting on the longarm, ready to go. But right now I’m obsessed with “Abstractions” and with the third quilt in my series.
Everything I start gets done eventually, LOL. Except, I will confess, the “Glitter” blocks I tried to do–and for which I even got the templates–but could not, for the life of me, get to behave. I rarely give up on something quilty, but I put the glitter blocks in a plastic bag–with the templates–and put them on the give-away table. Hopefully someone will find them less fiddly and time consuming than I did.
Joy comes in all sorts of ways, doesn’t it? And it can include letting go of something that isn’t working for you.