I mailed these 2 quilts mid-week. They will arrive today if all goes as promised.
“Sprinkles” is the perfect quilt for baby Jack.
Remember the cute backing? The gender of this baby was a closely held secret, but I thought while making it that “Sprinkles” would be great for a girl or a boy baby. It is all Cotton+Steel/Ruby Star Society fabrics–except for the sashing pieces. And it dates back to the ongoing project of 5 or so years that started when I cut up all this hoarded fabrics and started making quilts–which went out in droves to family members over the years. “Sprinkles” is the last one.
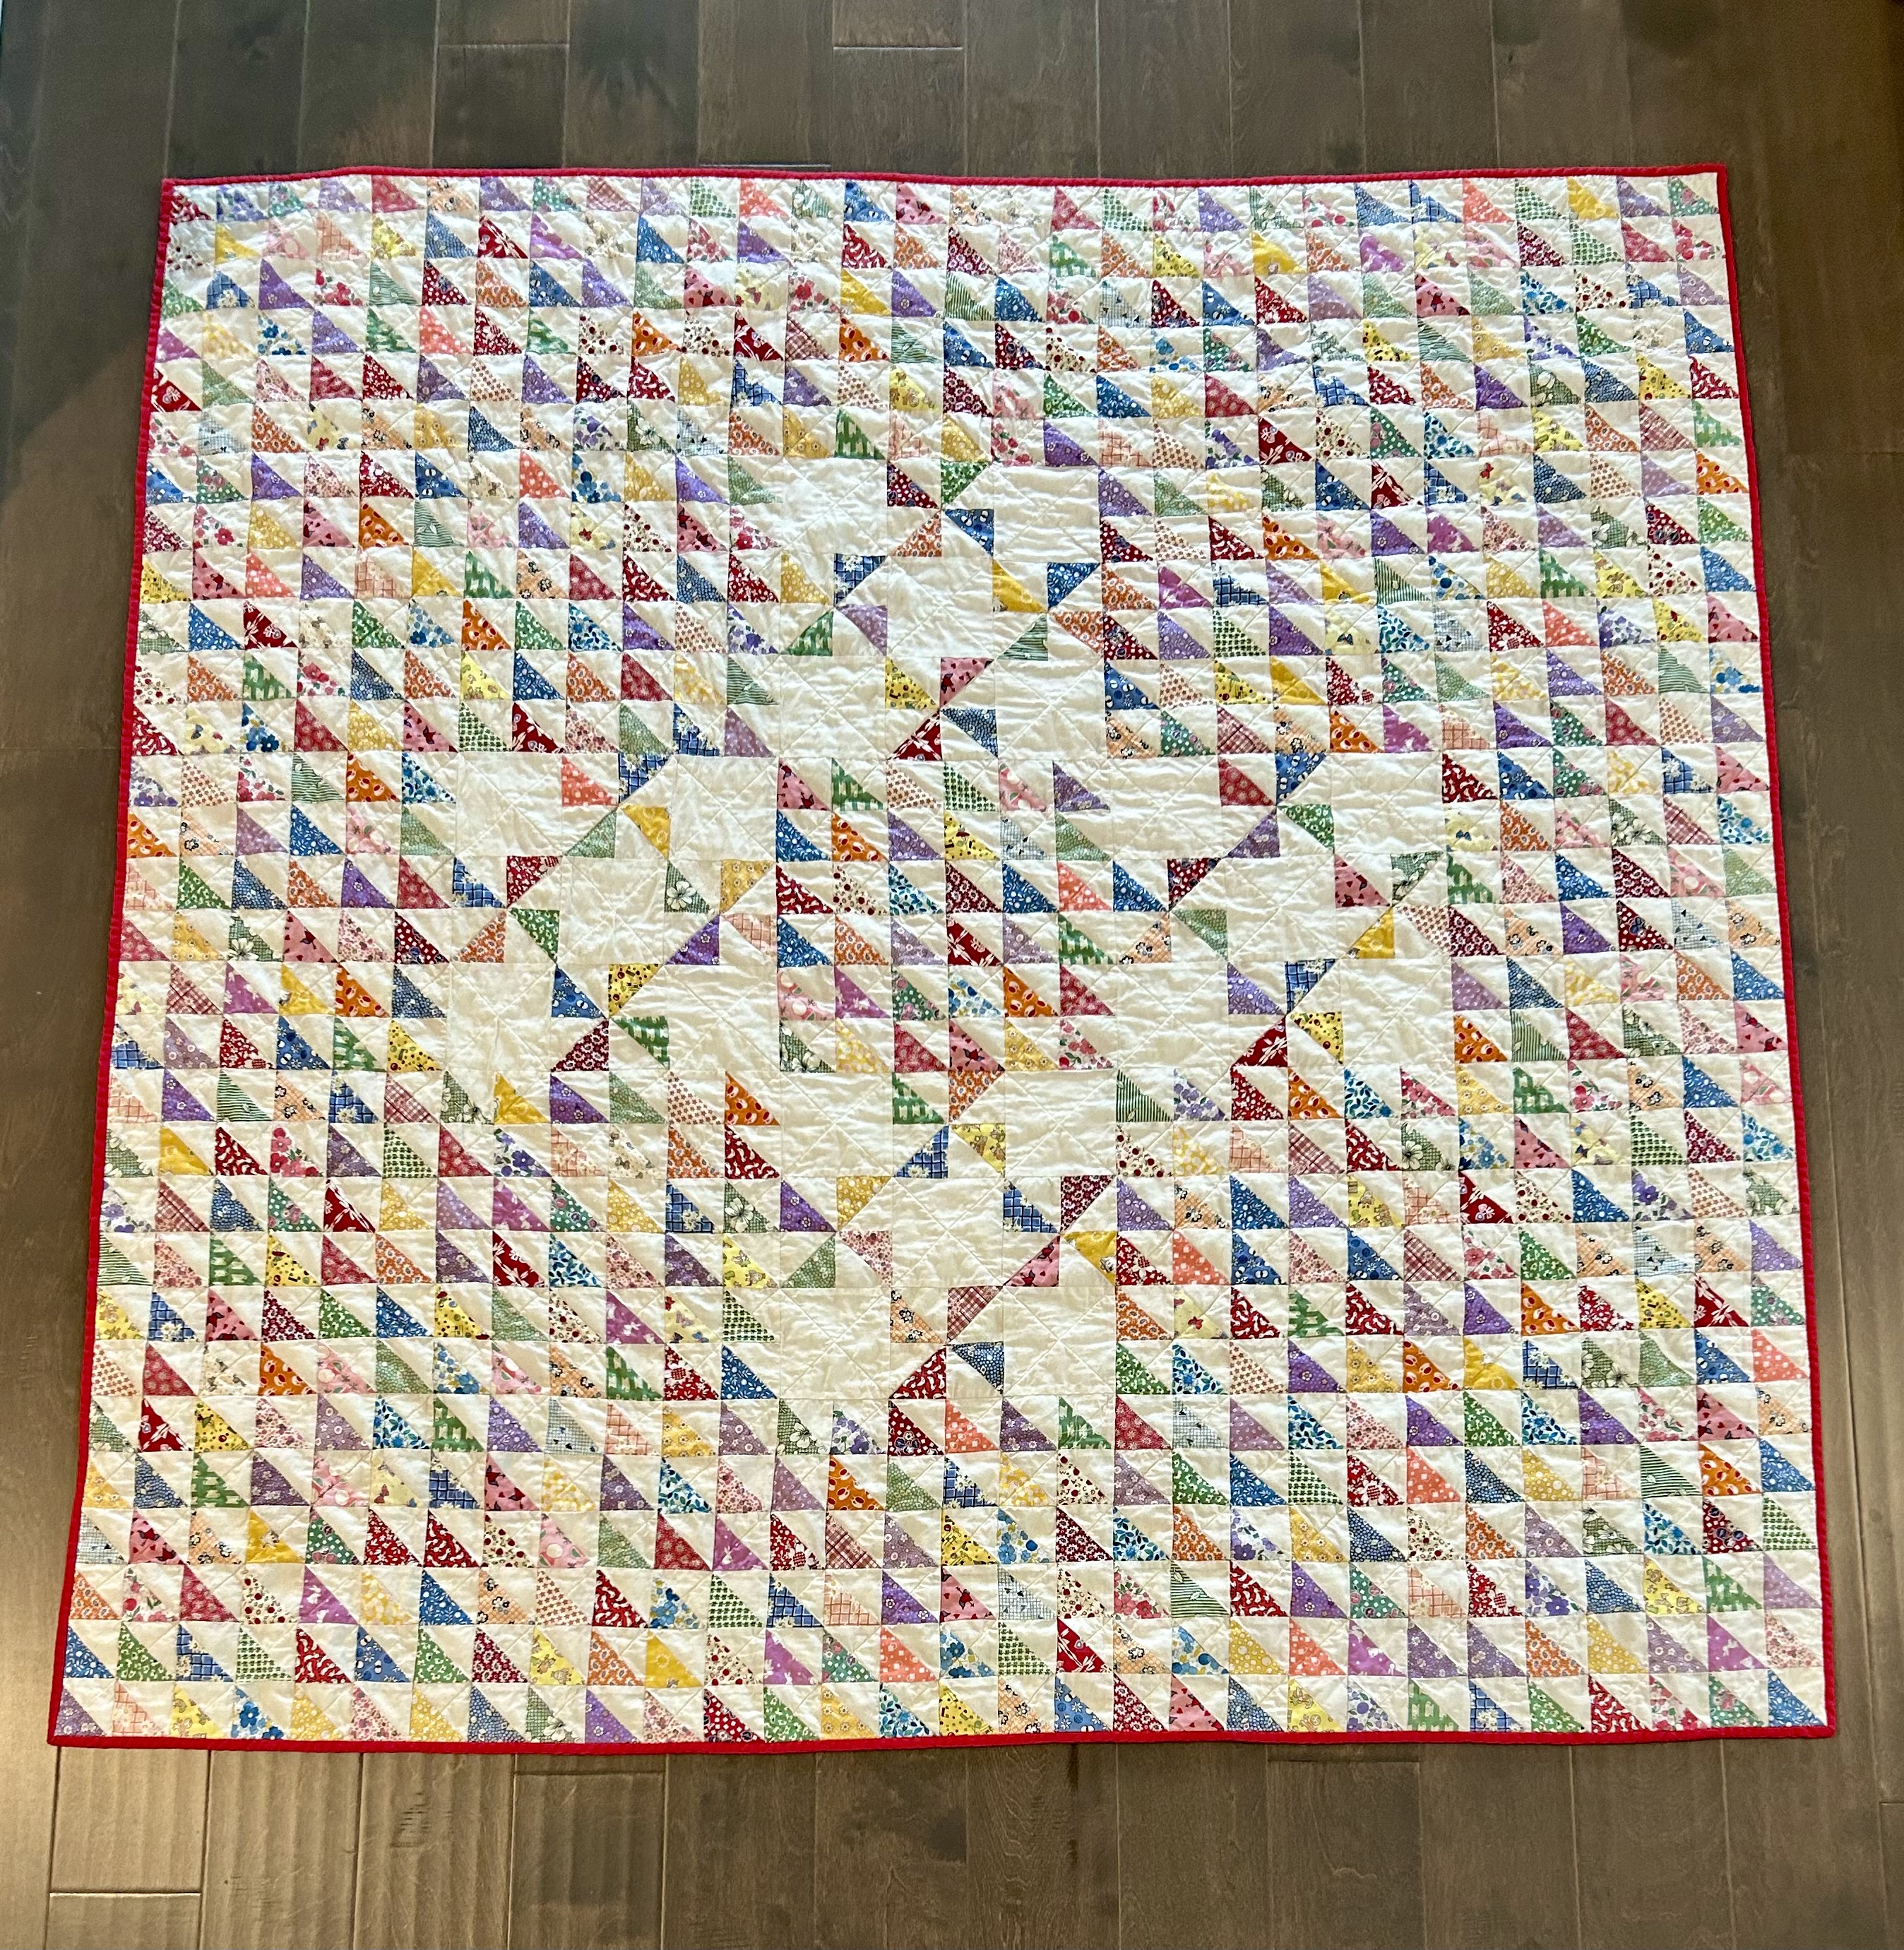
“16 Pinwheels” also went along for the ride as I thought the parents would like something sturdy to warm their laps when holding baby Jack. Or, just in general. They live in a cool climate with long winters.
These fabrics are from the 1920-1930 feed sack reproduction fabrics I had on hand for about 20 years and started using last winter. This quilt is the 3rd in this series. The 4th and last of the series is almost done and is on the design wall. I finished the last block yesterday and put leftover fabrics into the stash according to their colors.
Both of these scrappy quilts are meant to be used and loved and washed as they will provide lots and lots of quilty hugs for this family.
DIL Tami highly recommended the movie “The Taste of Things.”
I watched it that same night.
And, loved it.
It’s about cooking in France around the turn of the century, and it was so fun to watch two chefs, with beautiful ingredients and the help of one other person, produce the most gorgeous dishes. In what we could say was a primitive kitchen today.
The movie is beautifully filmed, and the love story so sweet.
Here’s a review by Roger Ebert. There were others praising the film as well, and you can google those if you like.
Former Virginia neighbor Gina sent me an interesting opinion article “defending” daytime reading–as it is apparently often seen today as being lazy or unproductive since it distracts from “more important” activities. Thus, daytime reading is seen to be a forbidden treat. Or, I suppose, an act of rebellion.
Turns out there are now “silent reading” parties where one can go to read while listening to especially chosen music. And there are Zoom reading parties online. There are small charges for these events of course. And…many of these seem, LOL, to be at night.
I read. Every day. In the daylight. My mother used to say that I would read the back of the cereal boxes at breakfast if I didn’t have anything else to read at hand. Not that she would have allowed me to read at the breakfast table –or any other meal table–anyway.
In the mornings now I read online those whom I follow to keep abreast of what’s going on in the culture. So, that may seem more like work–but it is also a deep passion for me as my background is Cultural Studies.
At my noon “dinner,” and after I’ve done whatever chores or errands I need to do, I read from whatever book of fiction I have on hand. My nearby library has a kiosk that is always filled with books one can buy for $1–books chosen around changing and timely themes. I like to get a few of those at a time–ones that look interesting for one reason or another–as then I don’t have to worry about returning them by a “times up” deadline. I usually “play them forward” or return them to the library, and I’ve found some authors I like this way and often go on to read or listen to (audio books) other books by those authors. I especially like to read a bit longer while I enjoy my dessert fruit and espresso. Having my dinner on the porch just combines all of these pleasures.
When I get well into a book, I will often take time on the couch later in the day to read further or finish a book. That is a joy. I don’t feel guilty. But I am retired–I do realize that fact. Nevertheless, I have aways read a lot–every day.
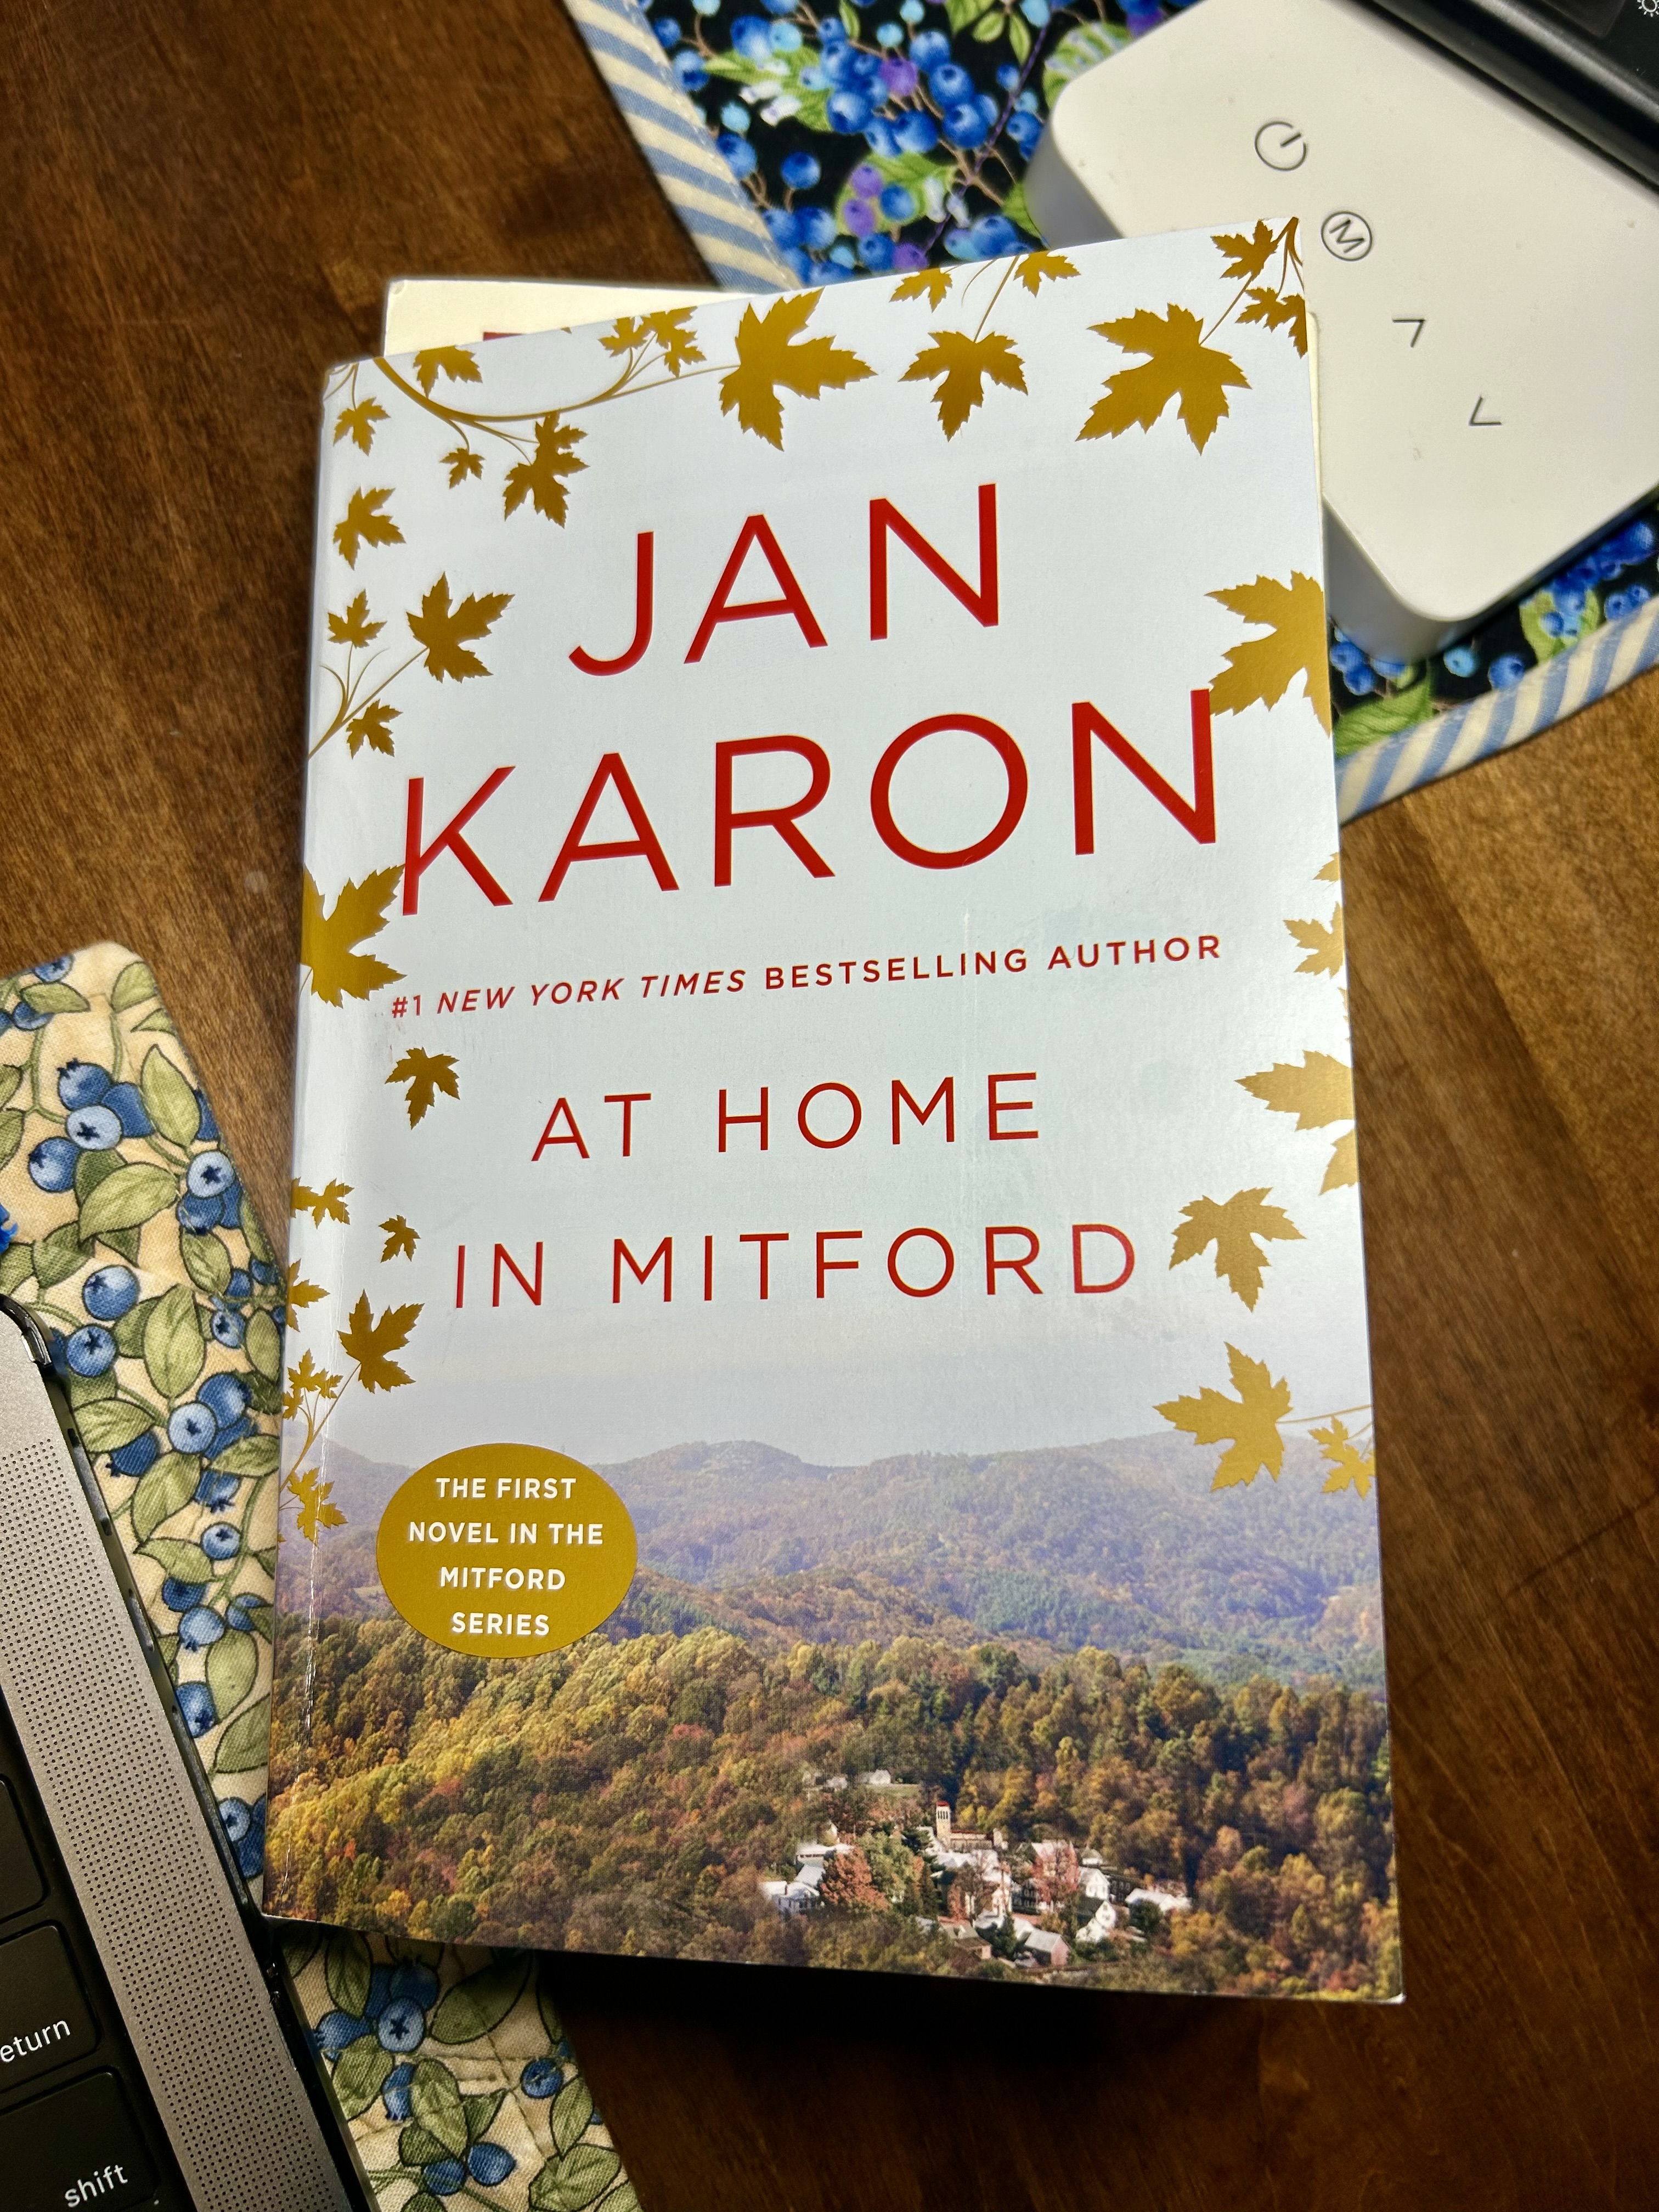
I picked up a book by Jan Karon from the library kiosk a bit ago and very much enjoyed it–an Episcopalian minister’s life in a small East Coast mountain town who goes to a coastal parish for a 6-month interim appointment before retirement (with wife and pets). This book, A New Song, turned out to be a kind of “quiet” book and is midway in a series of about 14 books. I enjoyed the humor, the values on display, and the plot. So I got hold of the first book in the series, which I have just started. I’ll see…what develops.
Gina wrote in her note that her book club is now reading The Last Castle (Denise Kieran) which is a history of the Biltmore estate in Asheville, NC. Next up in this book club is The Women (Kristin Hannah). Book clubs are great for reading good books–for the most part.
Today is VERY stormy with gale winds off and on and flash flood warnings from the national weather system. So, I will stay put, and I’m sure there will be fiction reading. And, sewing later in the day.
Members of the Charleston Modern Quilt Guild had a “red and white” challenge. And many of their quilts were shown at the last meeting (March).
Oh my! The quilts are varied and every one is stunning! Here’s a little panoramic video I took on the fly. There is a blog, however, and if you want better pictures you could go there. The link is below.
First of all, yesterday I cooked the Anson Mills organic heritage grains low-country grits I ordered. Oh my!
I had ordered the coarser version–not realizing there was a finer version–but it wouldn’t have really made much difference in cooking time I don’t think. I soaked a cup of the grits in raw whole milk overnight first.
The cooking, using the Anson Mills recipes, is long and slow and “fiddly,” with needed extra water added from time to time. There was nothing difficult at all–it just required time and patience.
But OH MY HEAVENS!! I have never tasted anything so good. I could have eaten the whole pot. I stored the leftovers in the refrigerator and took some out, heated them in the microwave that I use but don’t like, and paired the grits with some scrambled egg for my supper. (I remember both my mother and her sister making grits for breakfast as a treat. And grits would also get paired with fried ham for a supper meal.)
I can’t wait for my noon dinner today: a roasted spatchcocked whole chicken, fresh green beans roasted with other veggies, and MORE GRITS, with some fresh fruit and my espresso for dessert.
The Anson Mills web site has lots of heritage recipes for these special grains: https://www.ansonmills.com. Next up for me, cooking some of the heritage rice I also ordered.
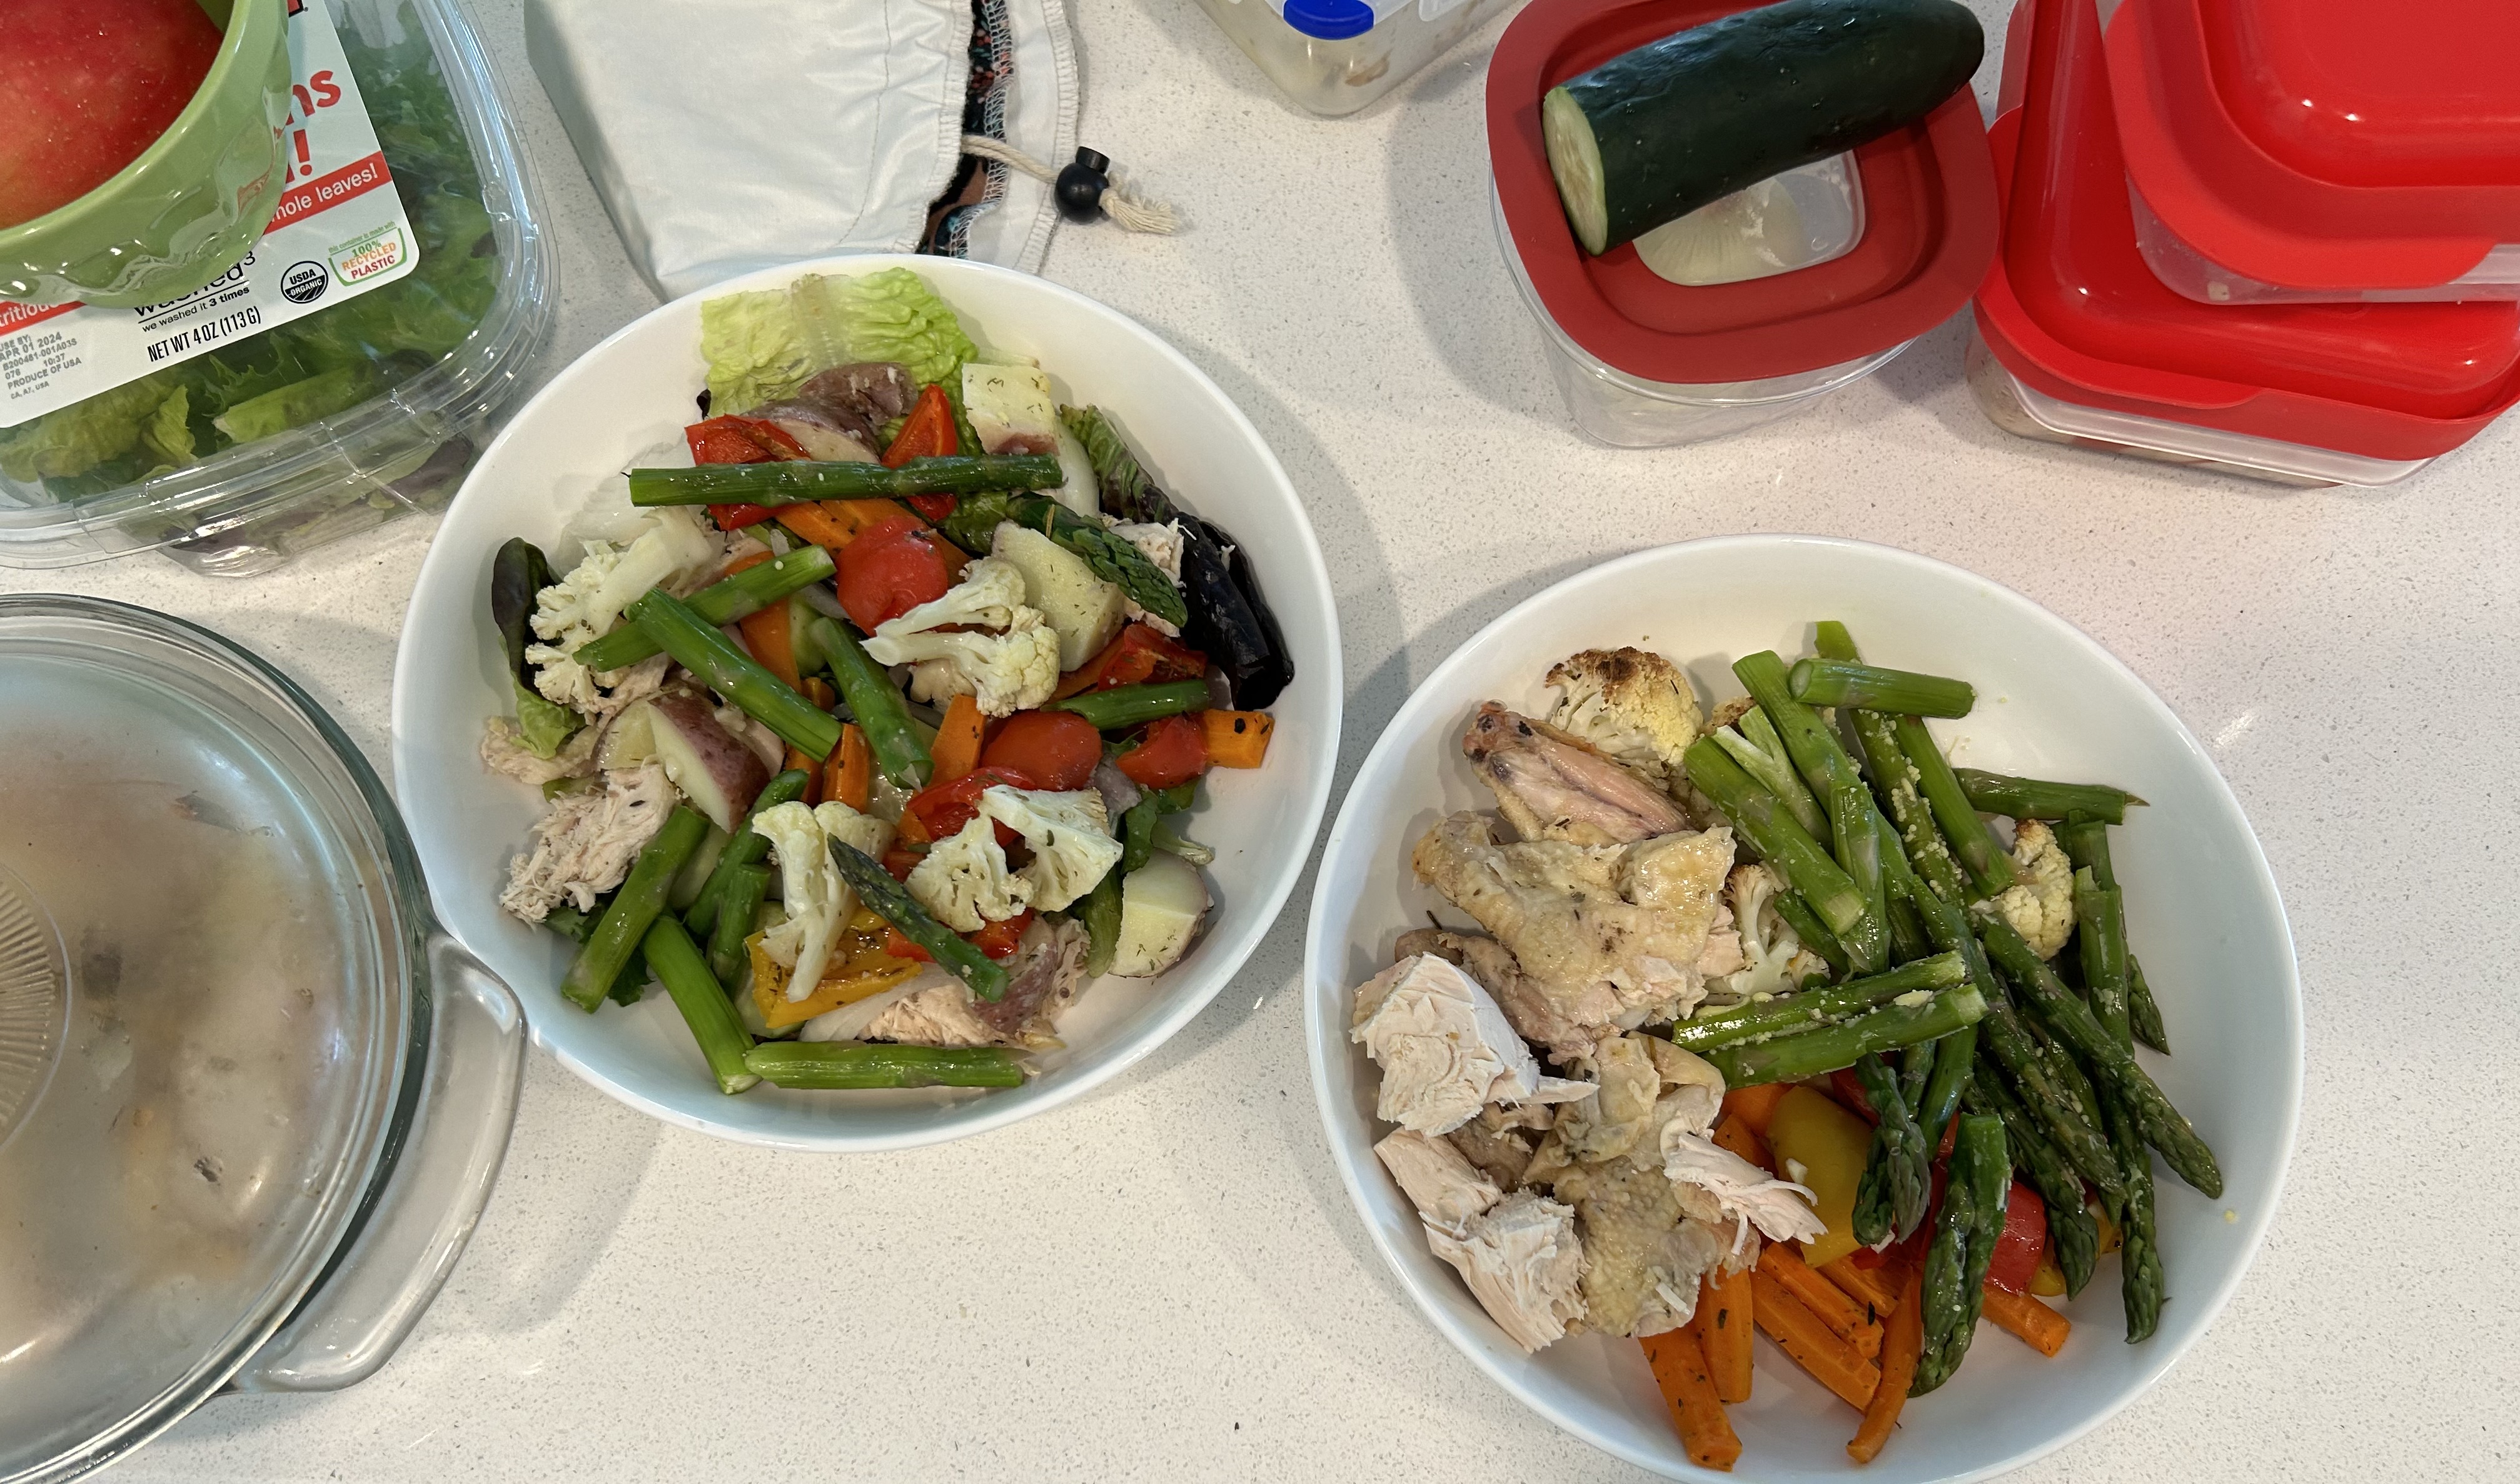
But back to the original topic at hand. I LOVE having refrigerator assets in place, and I use them to create meals each day. Or, I cook up more assets. I usually assemble both dinner and supper at the same time as I like to come down from sewing to a meal all ready to eat. On this day, there was a roasted chicken and many veggies. I made a bowl of food to be warmed for dinner, and a salad for supper.
Here’s a close-up.
I love to drizzle a bit of maple syrup over raspberries mixed with blackberries and blueberries for a special dessert. But organic raspberries are in short supply right now in my area. So I bought some of these big and very sour strawberries. I got so spoiled in Maine with my own strawberries, picked when ripe, or bought locally when ripe. These big and highly colored commercial strawberries arrive green, really. I spread them out and put them in some diffused sun and then left them on the counter overnight. They were better, but tend to mold if not refrigerated and never really ripen well.
It makes me so sad to know that most people have no idea what a ripe strawberry tastes and smells like. Their perfume alone can make one’s kitchen sing, never mind one’s mouth. The sweetness is almost overwhelming.
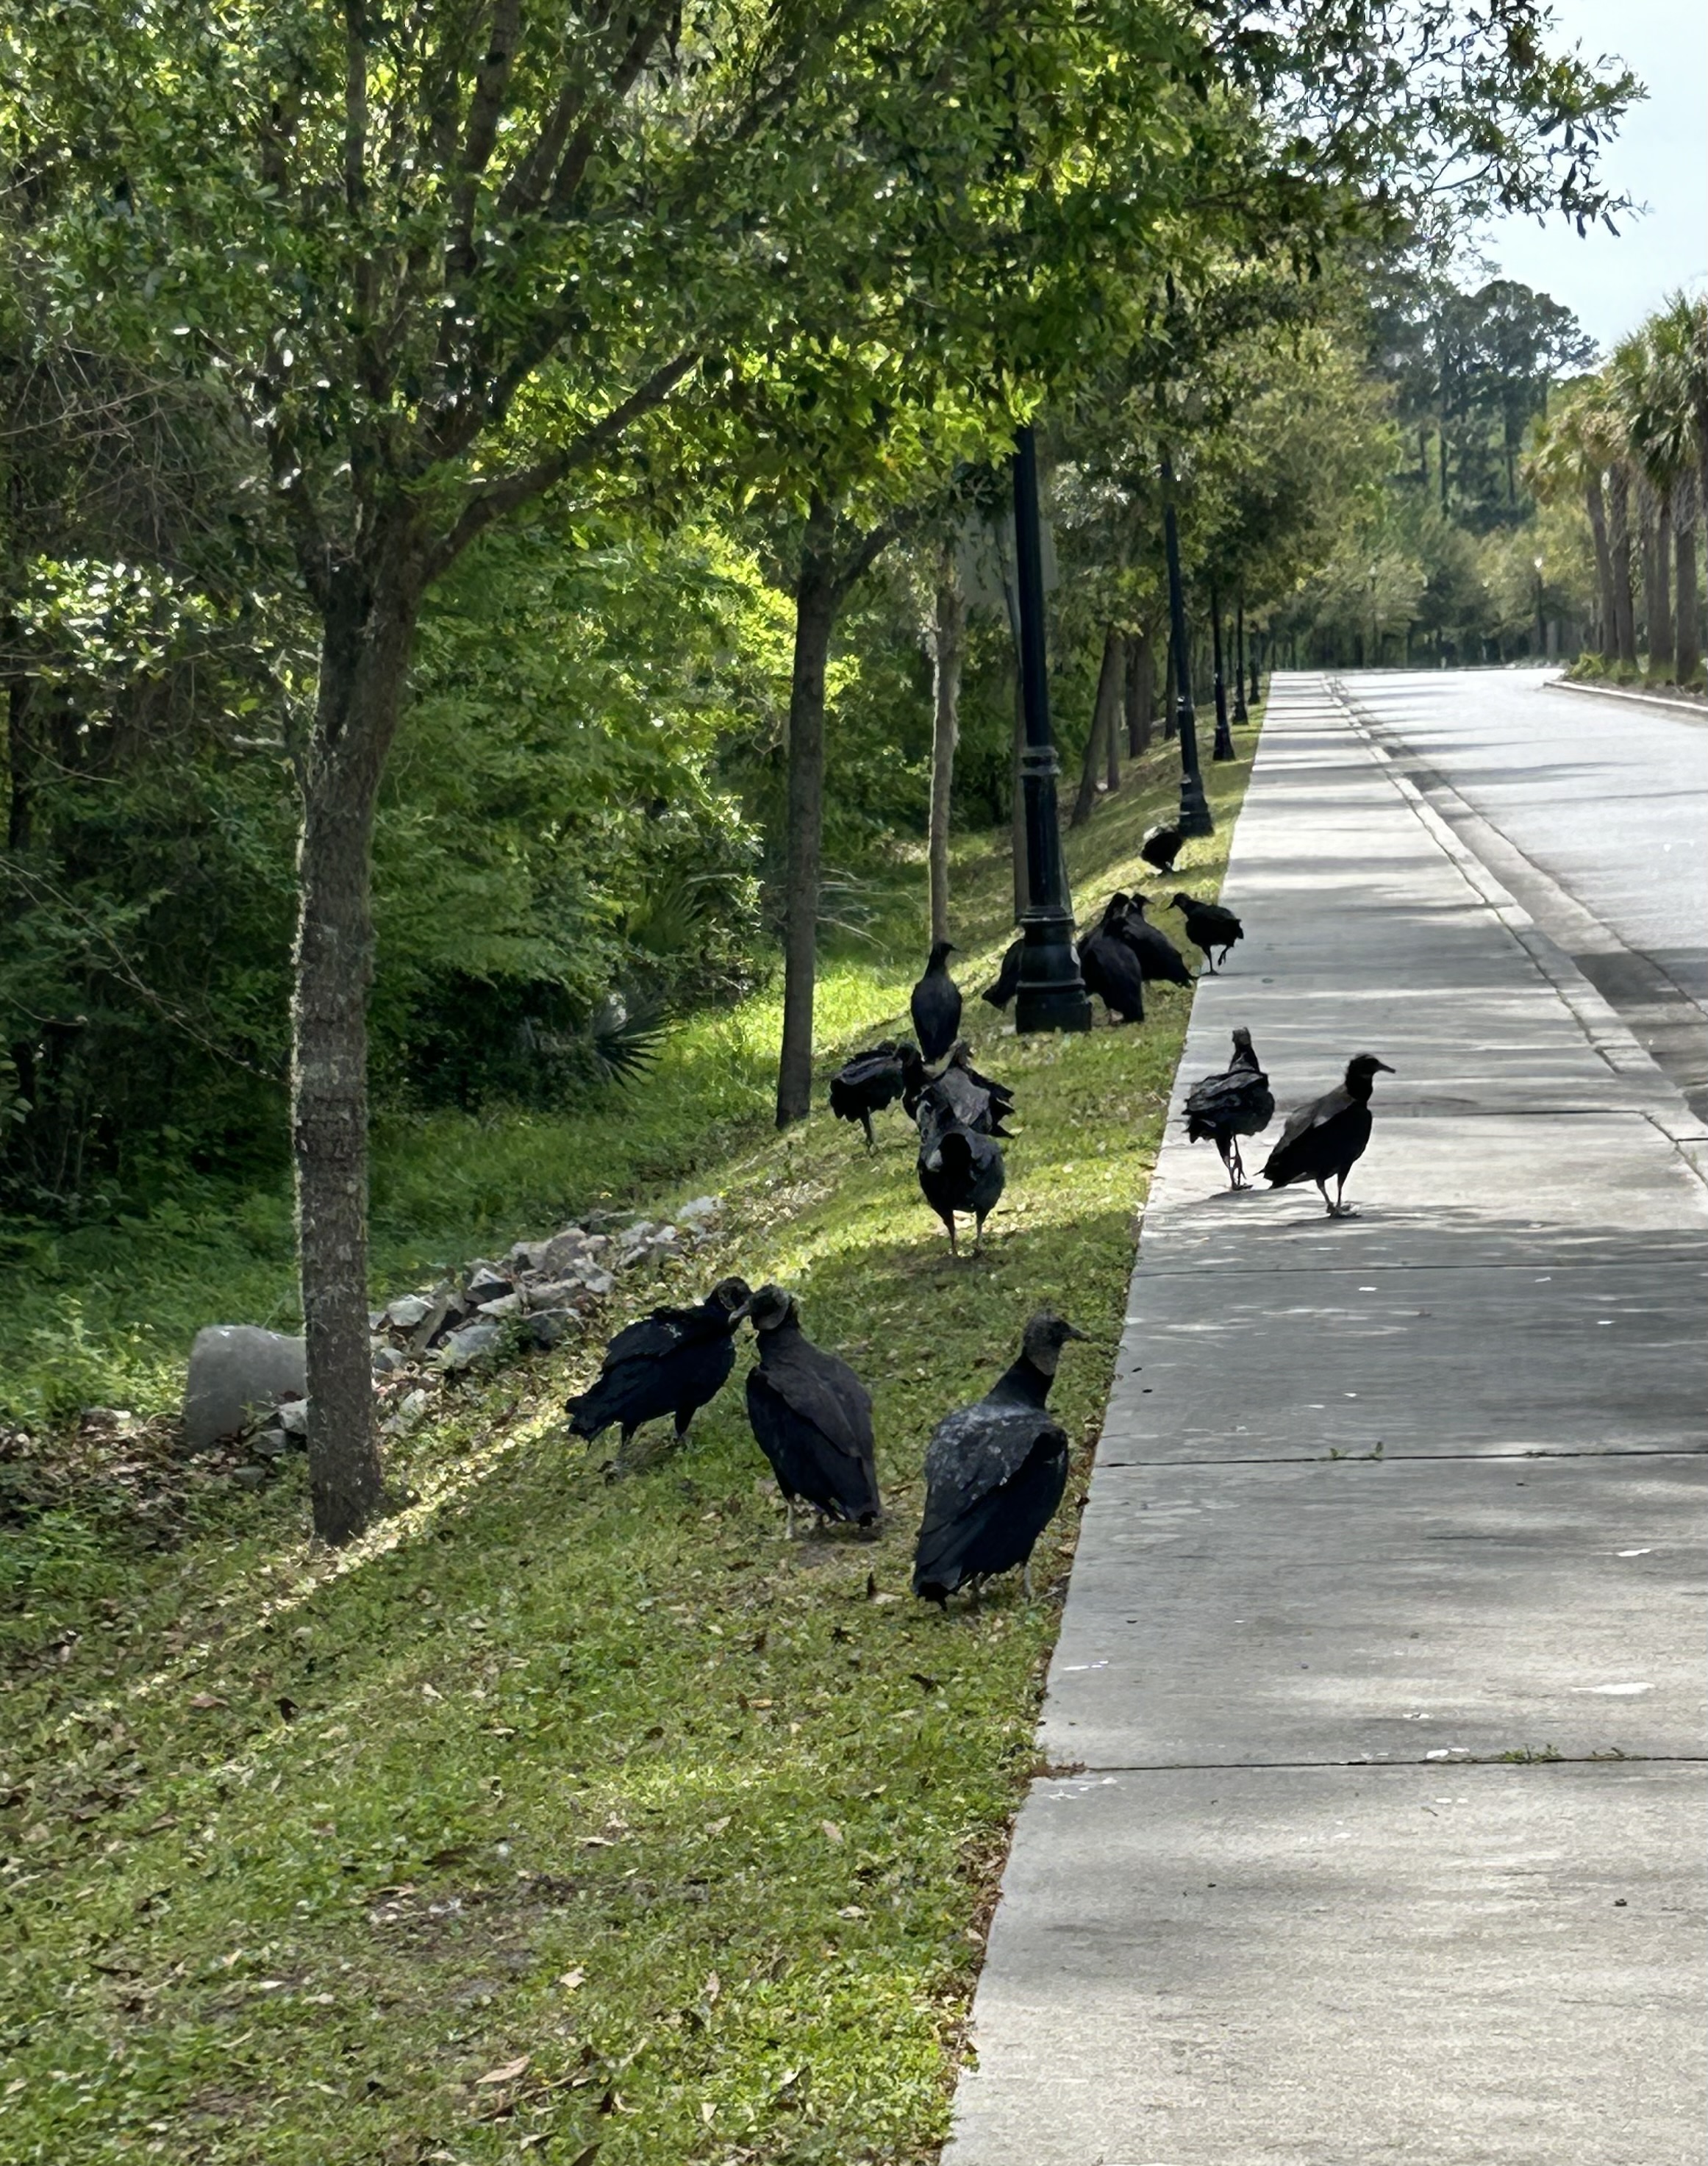
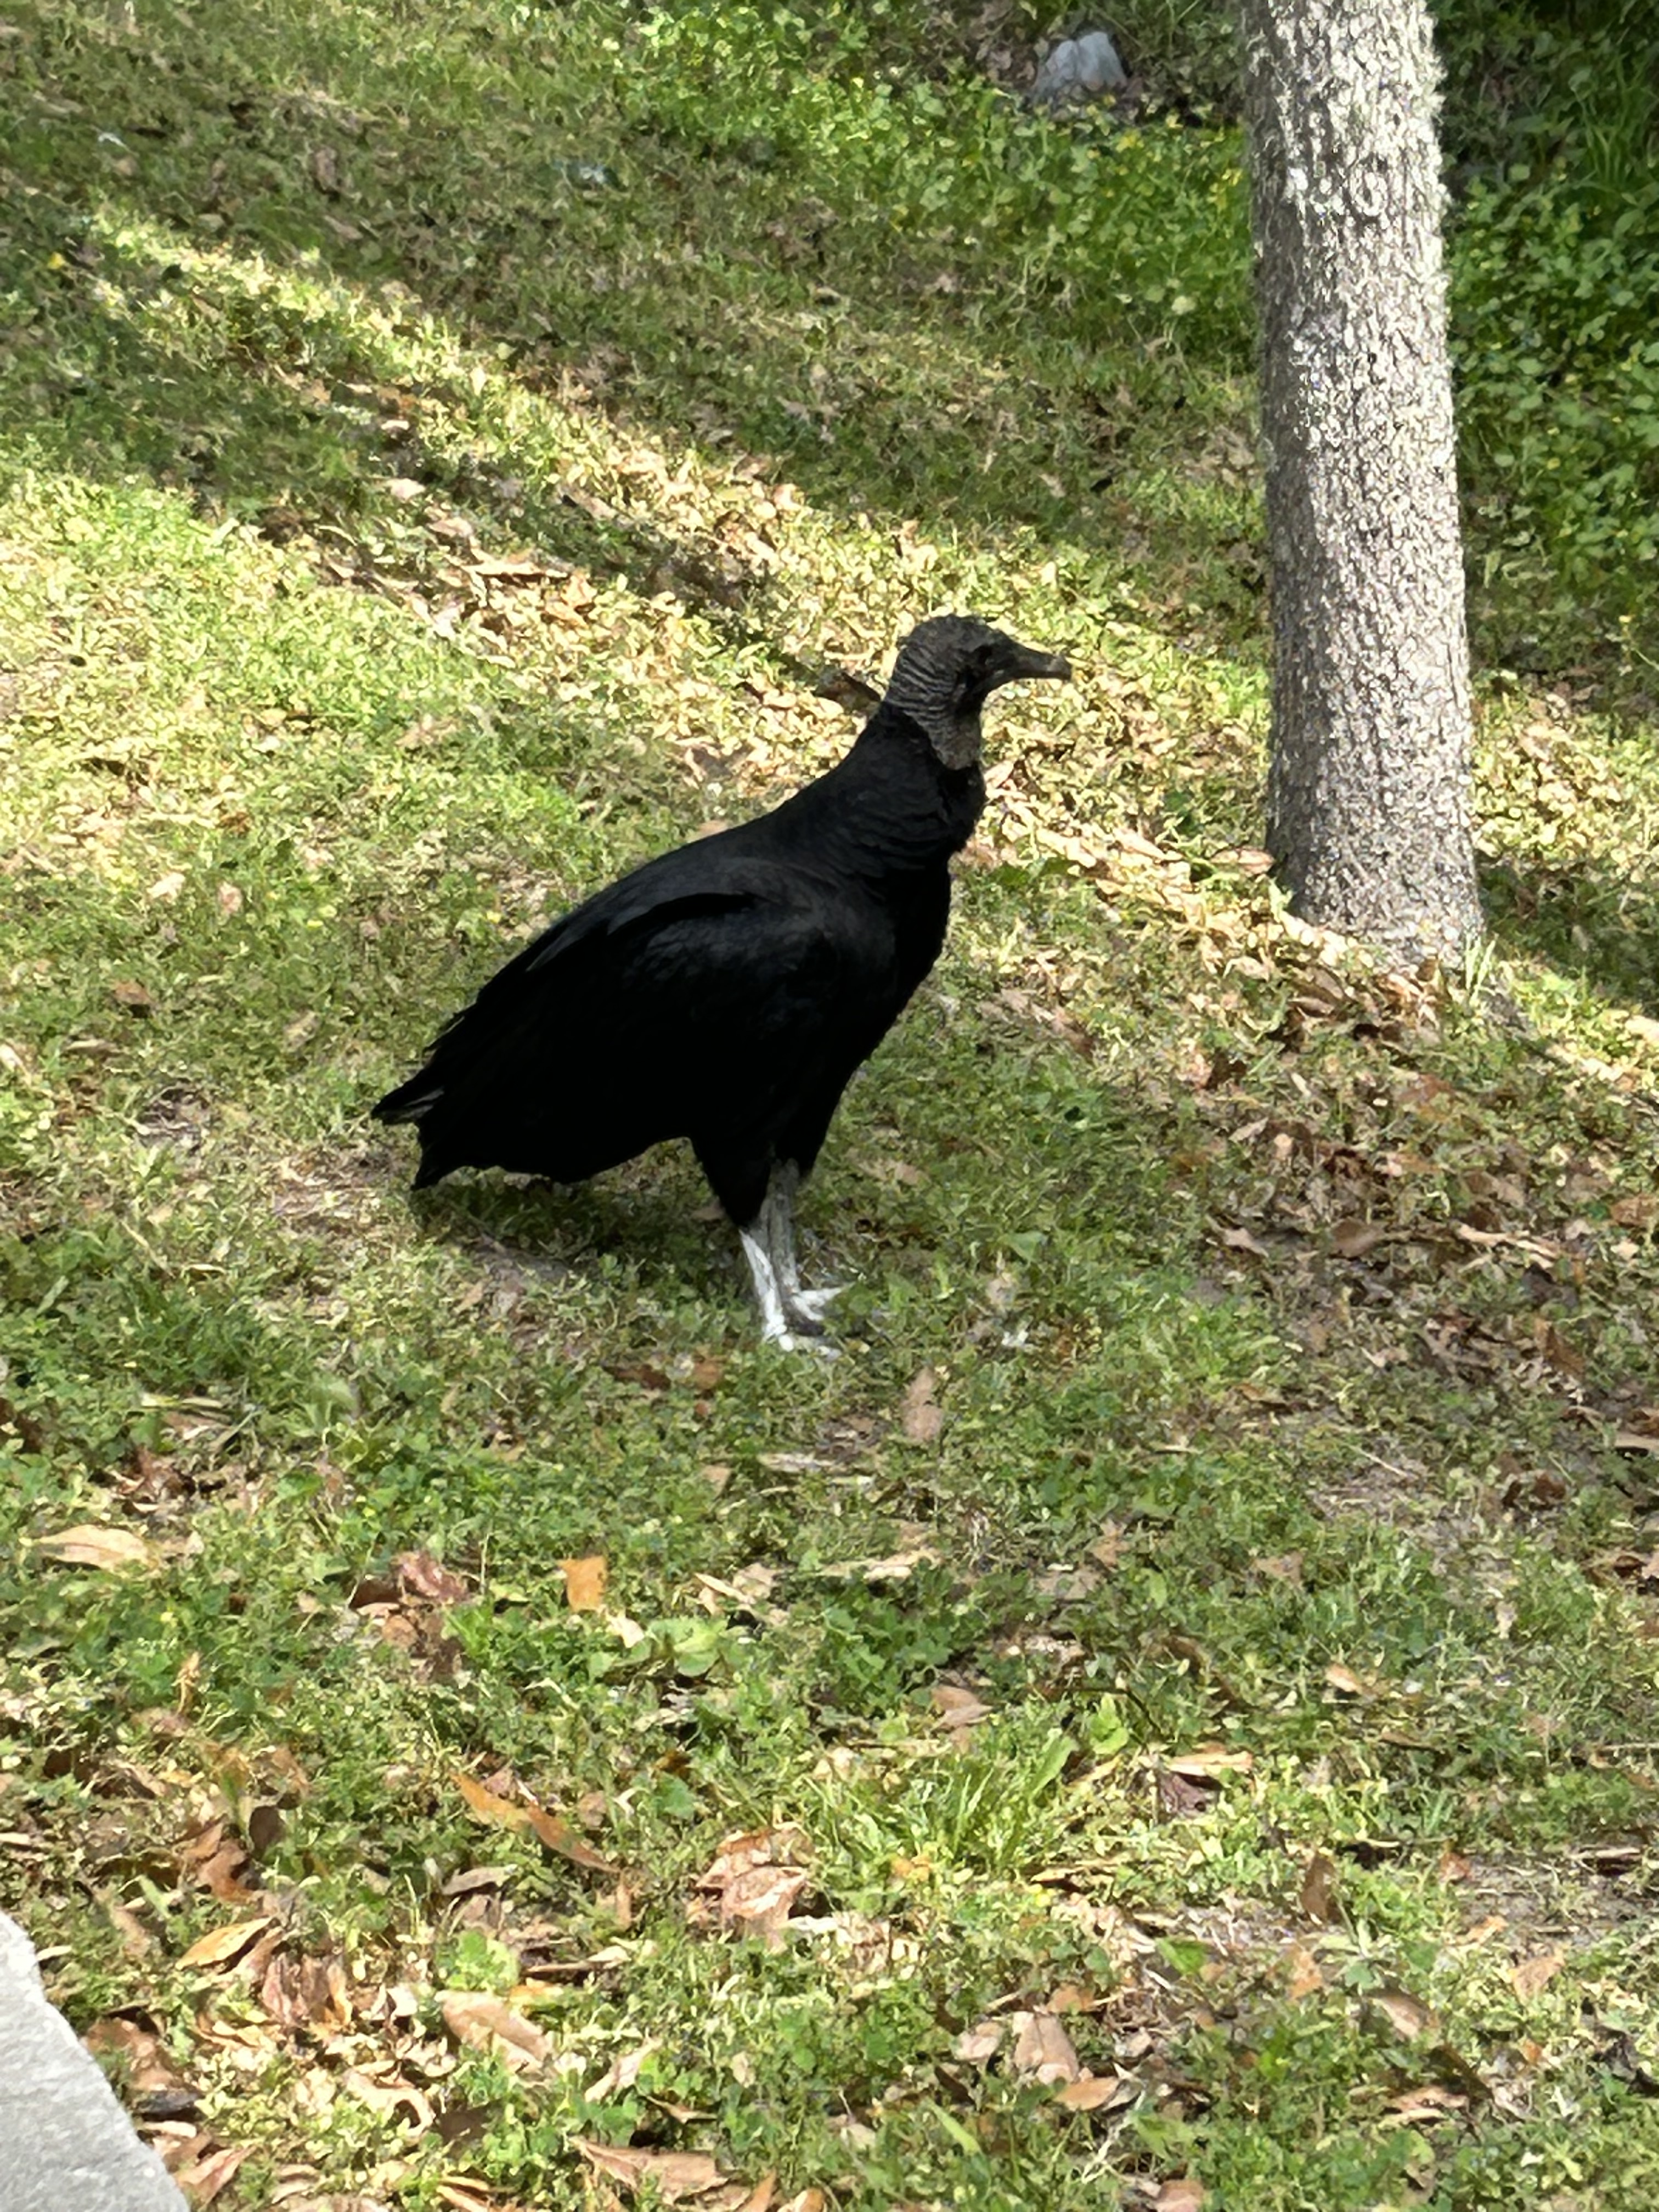
A few days back when walking with a neighbor, we saw that there was a large gathering of black birds along the sidewalk–about 20-25 I’d say. At first I thought the birds were cormorants as some were holding out their wings like cormorants do to dry their wings. But as we got closer, we could see that they were black buzzards, which are very, very common here, and I knew there must be a carcass down the side of the hill.
Yes, there was a dead deer–a young male with its horns trying to emerge. It was probably hit by a car and got as far as the edge of the woods below the road.
But why were some of the birds spreading their wings? Turns out it is a strategy to regulate their body heat–though sometimes it can also be to dry wet wings.
Some of the birds flew as we got closer. I blew up this pic so you could see better.
The birds were still there the next day when I walked–and were much less nervous about people walking by them.
Most, but not all, of them did fly as I got closer.
On the way back, the birds didn’t really retreat from me very much. This one let me get quite close. These are big birds with a big wing span. Underneath the wings the feathers are ash grey or white. And note the white feet.
These birds were actually doing a good job of cleaning up this poor dead animal. In another day or two, there will be nothing but bones.
And that is how nature works.
But it was interesting to think about the deer and the buzzards a bit on Easter weekend, if you know what I mean. The dead deer was providing life for a LOT of buzzards (25 or so). The deer was, in essence, a bonanza for the buzzards.
Now some days later, someone from the town or county pulled the carcass into the woods, and there is nothing left to see but bones.
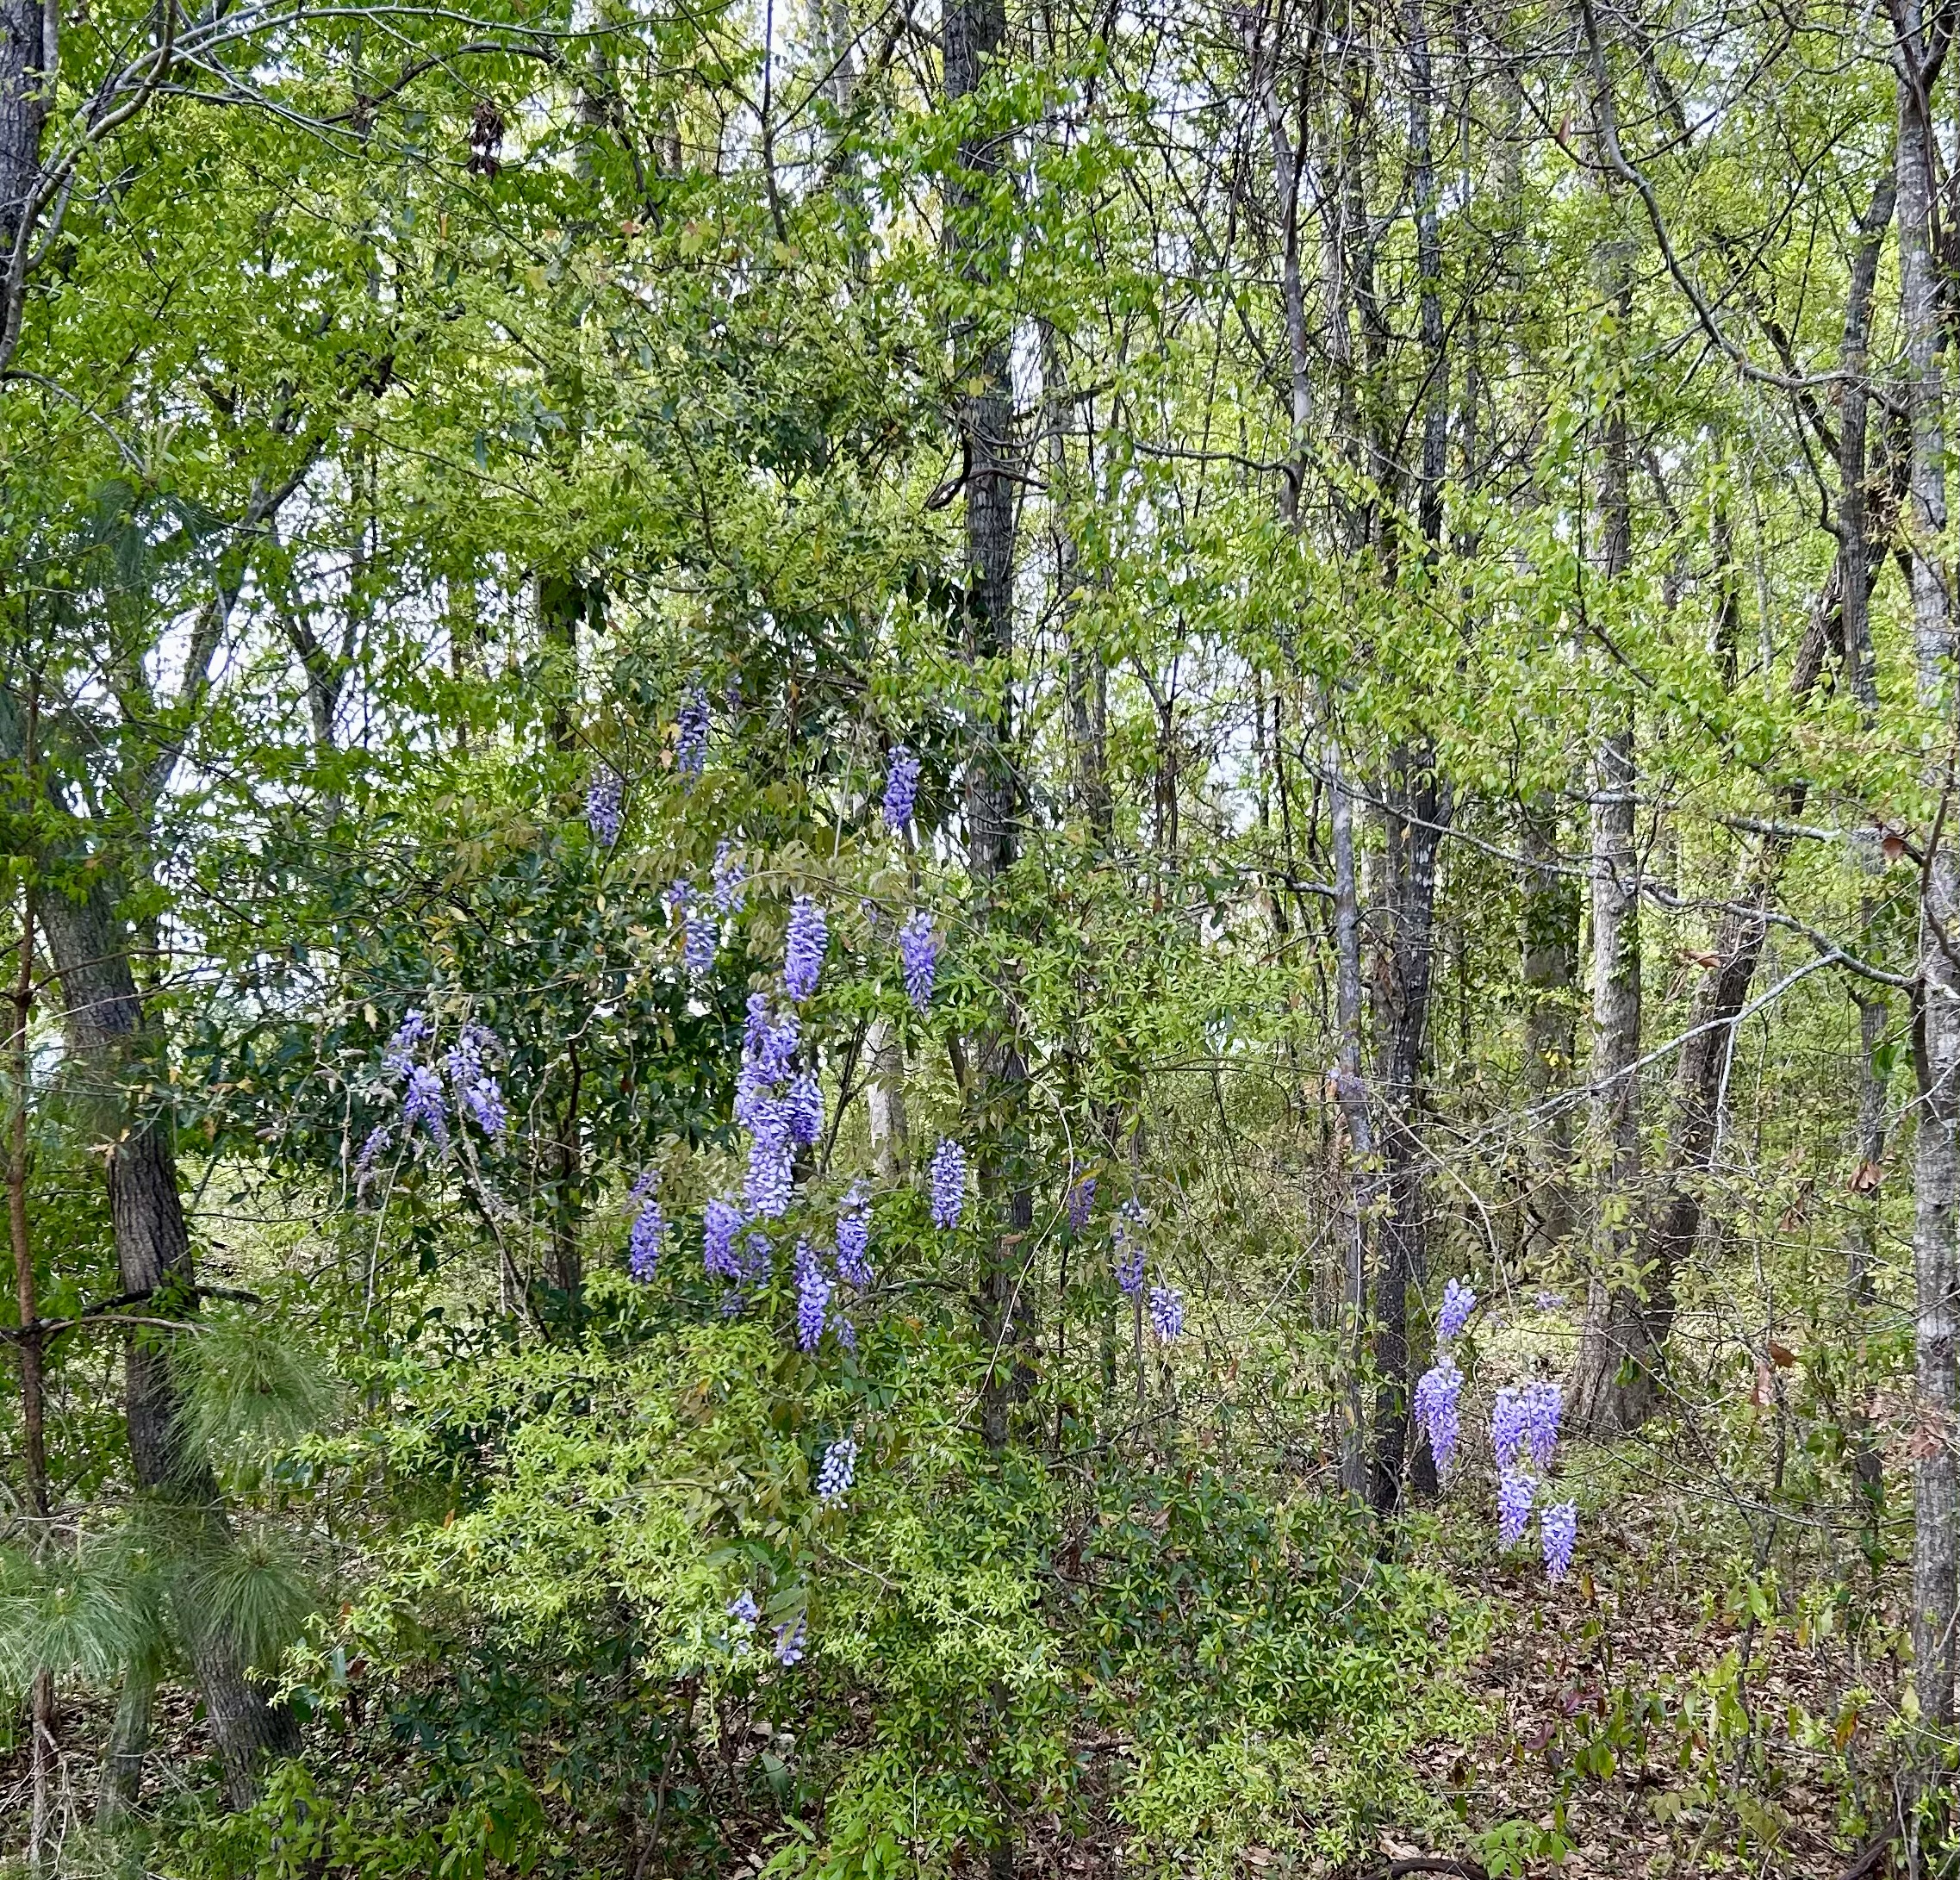
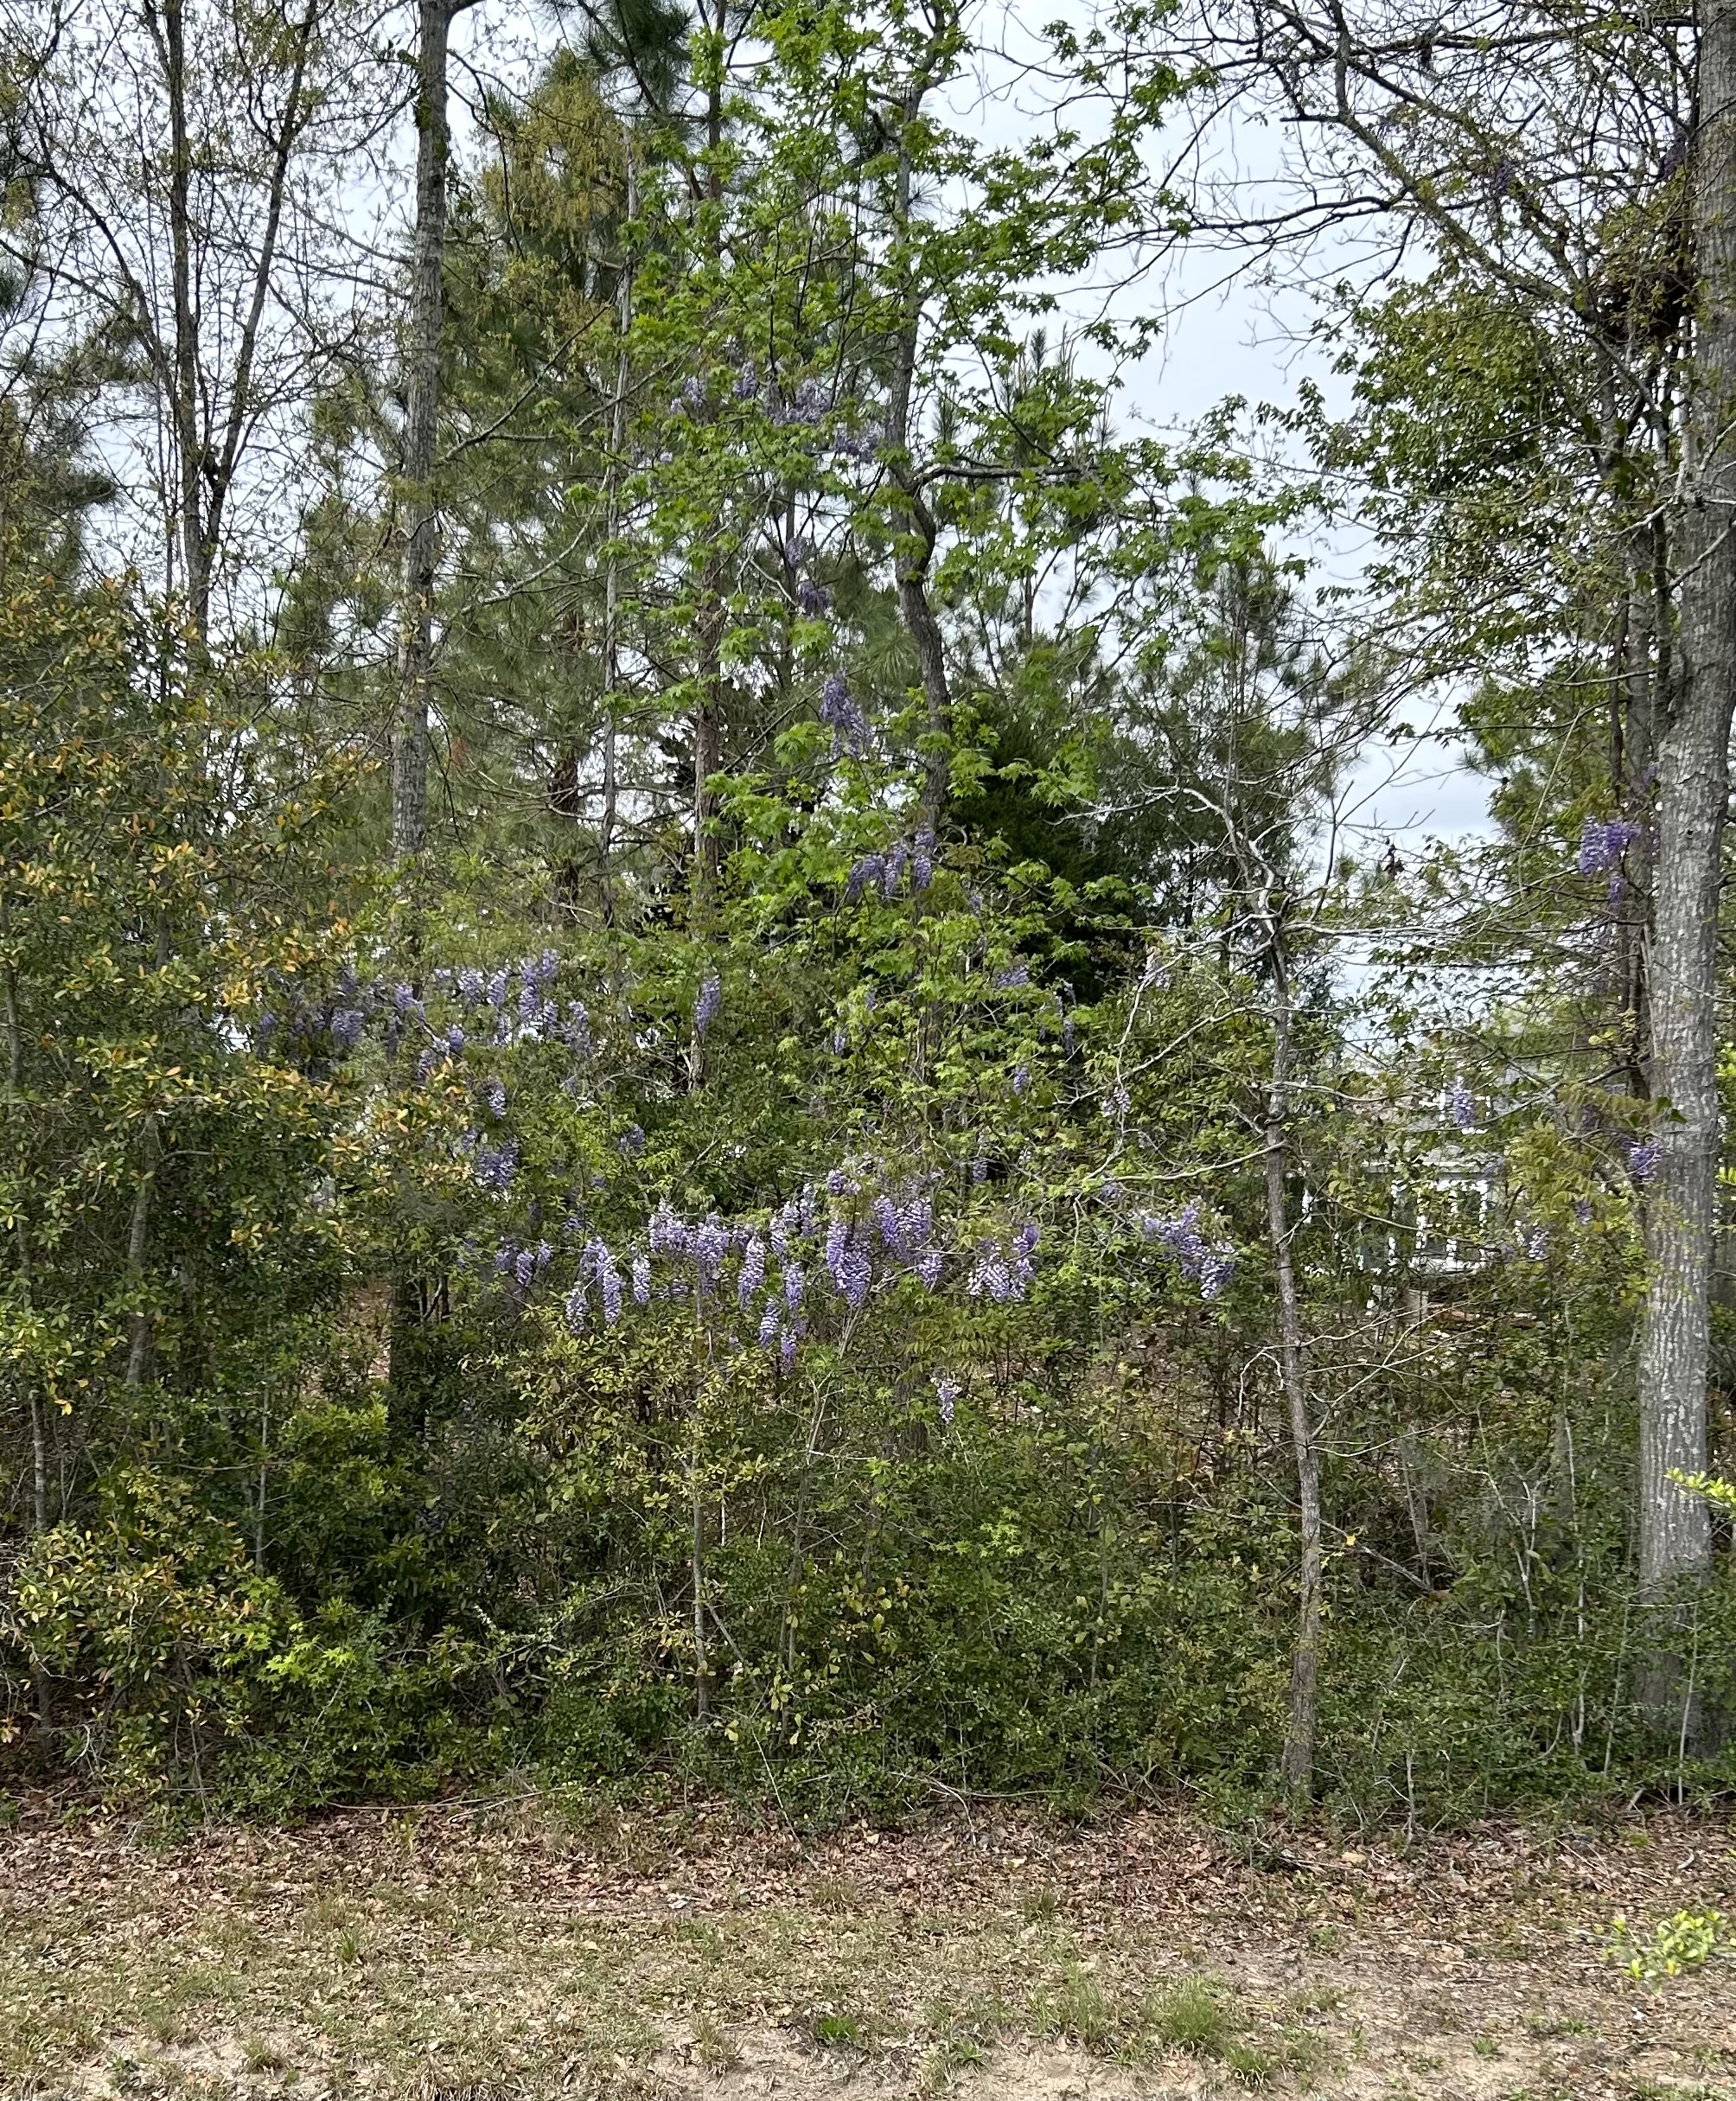
Wisteria is so beautiful in the spring. It can and does escape confinement in formal plantings (where it makes a nice shrub or vine on some part of a house or trellis)–and when it does escape, it decorates the woods in the spring.
Here it is along the walk I take every day. This particular vine is just one among three or four that are running through the woods and are blooming now.
Here’s more of the wisteria in the woods.
There are at least three types of vines here that can get loose in the woods that I know about. One is the Yellow Jasmine, which is the South Carolina state flower. While beautiful and so cheerful in the spring, every part of this vine is poisonous and can cause skin irritation if touched.
Here’s some information on Carolina Jasmine from Clemson University.
The other vine is Kudzu, which in my mind is like “the little shop of horrors” plants. It can take over whole woods and totally cover whole swaths of trees.
Here’s some information and pictures on Kudzu–from an article entitled “Kudzu: The Invasive Vine that Ate the South.”
Cobblestone Quilters Guild is the regional in my area here in South Carolina–I live within the greater Charleston County. Right now I belong to Cobblestone, to one of its “splinter” groups named Patchwork Gals, and the Charleston Modern Quilt Guild (which is separate from Cobblestone and is tied to the Modern Quilt Guild).
Cobblestone has a quilt show every two years, and this was the year. About 200 quilts were displayed, and the show was very sweet. I so enjoyed it. Some of the quilts shown were made by members of the Charleston Modern Quilt Guild.
I took some pictures–but only those that particularly called to me. There is no rhyme or reason really to these pictures I took–it really was just whatever moved me at the moment.
Here is “Fractured Color Wheel” by Cathy Beemer, who is a member of the modern quilt group and whose two quilts I have shown you recently. One hung at Houston recently (2023?), and the other hung at QuiltCon 2024 in Raleigh, NC, in February.
I took this picture for my Maine friend Lynn V, who has made several animal quilts for her grandchildren. This one is “Zoo Family Portrait” by Jennifer McFadden.
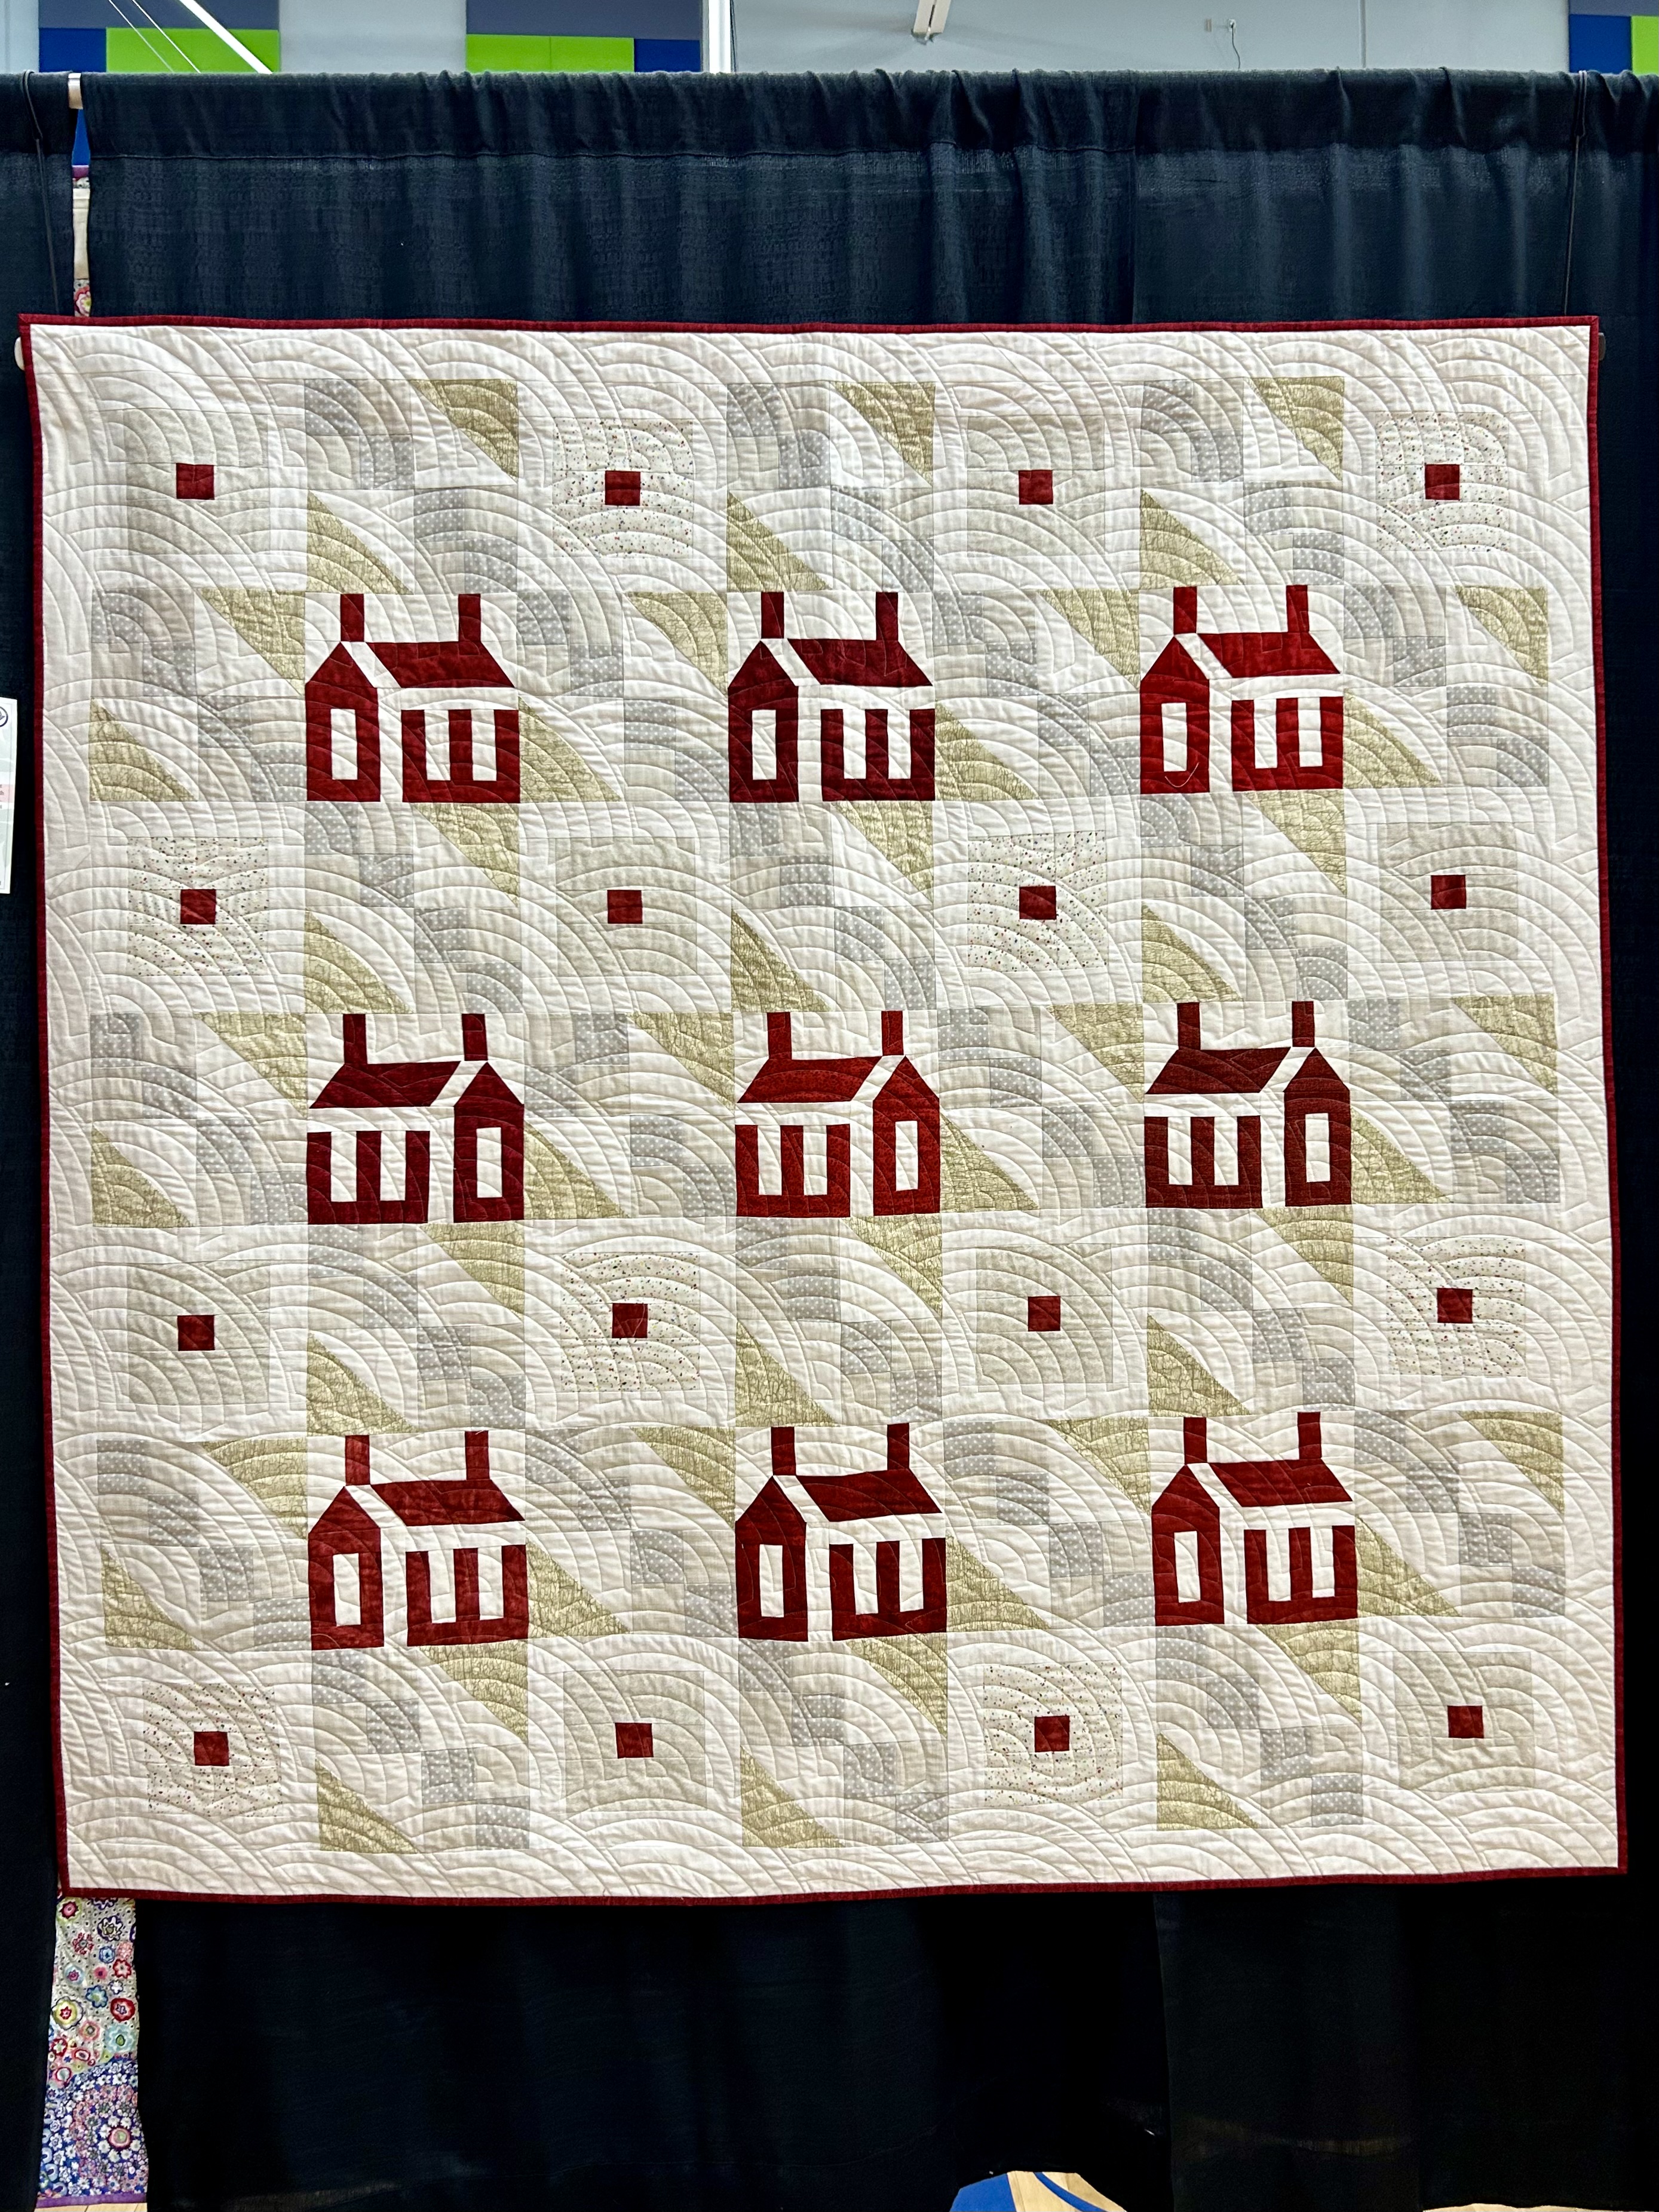
I’ve never met a house quilt I didn’t like. And I really, really loved this one, with its neutral background and quiet strips of diagonal grey blocks (look closely) and it’s Bishop Fan quilting and its red binding. It’s “I Live in a Red House” by Katy Sheehy.
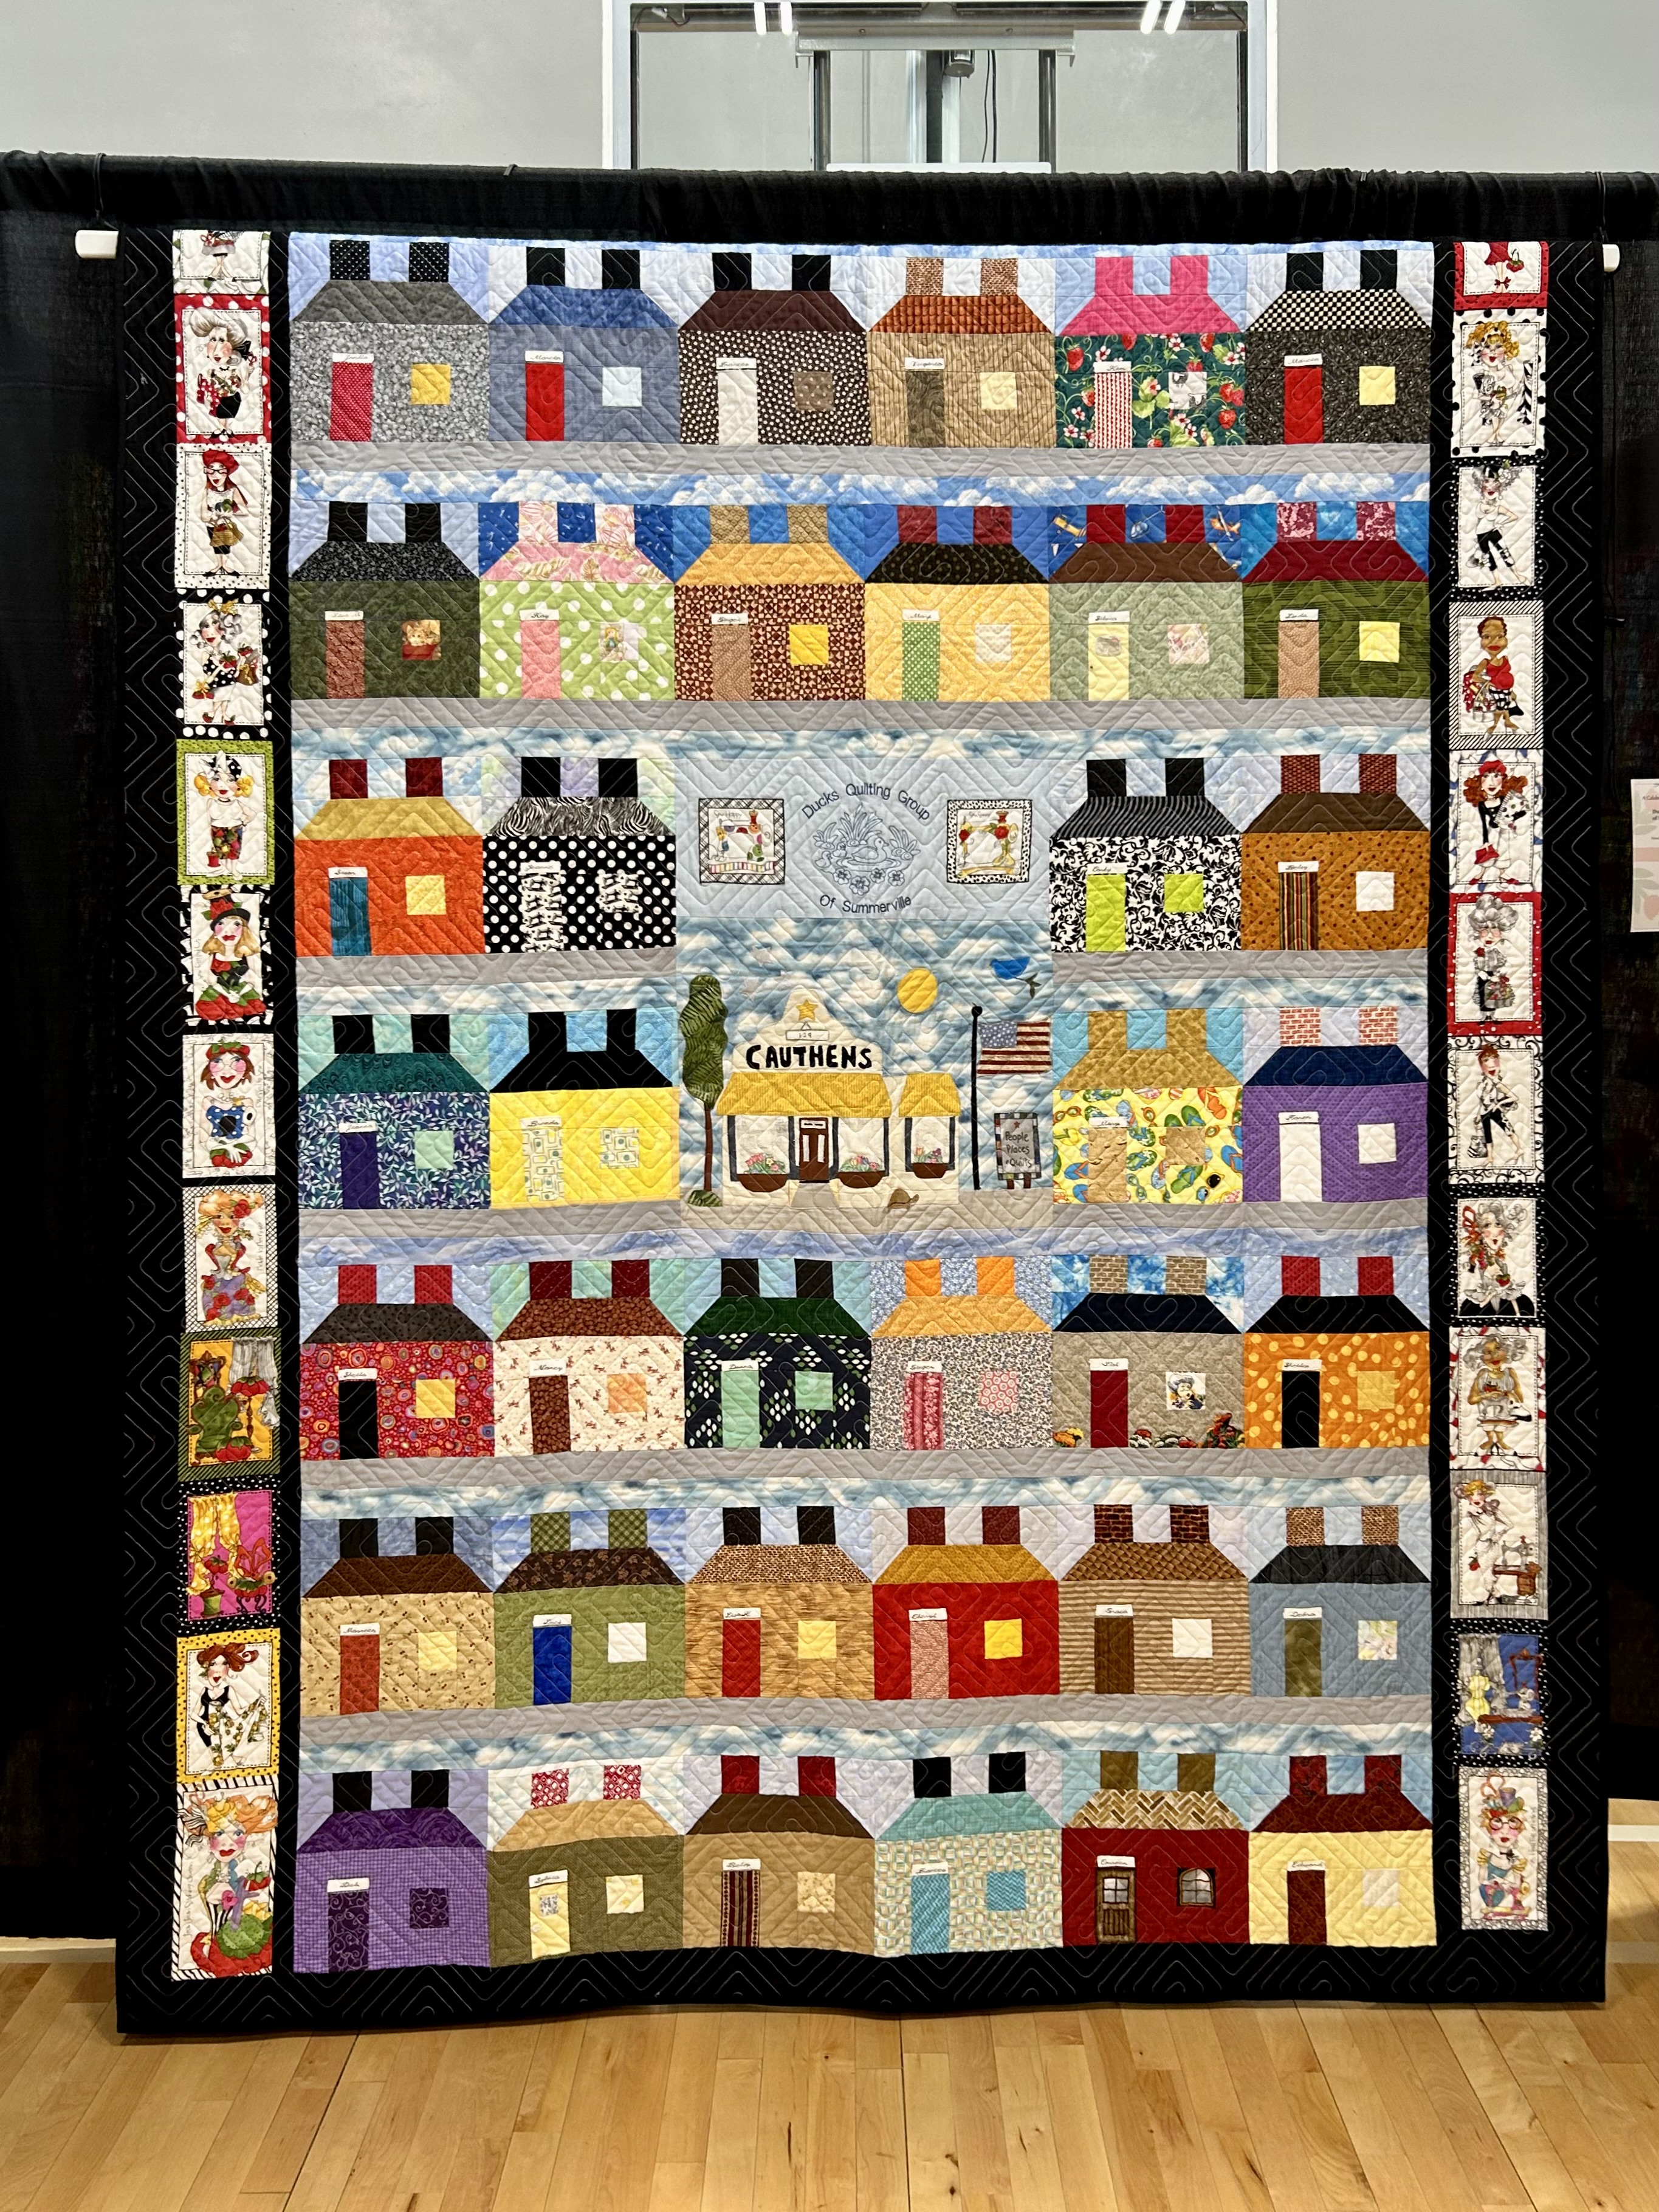
ANOTHER house quilt that I liked. It’s “Duck’s Quilting Group of Summerville at PPQ” (which is the People, Places, and Quilts quilt store in Summerville, SC).
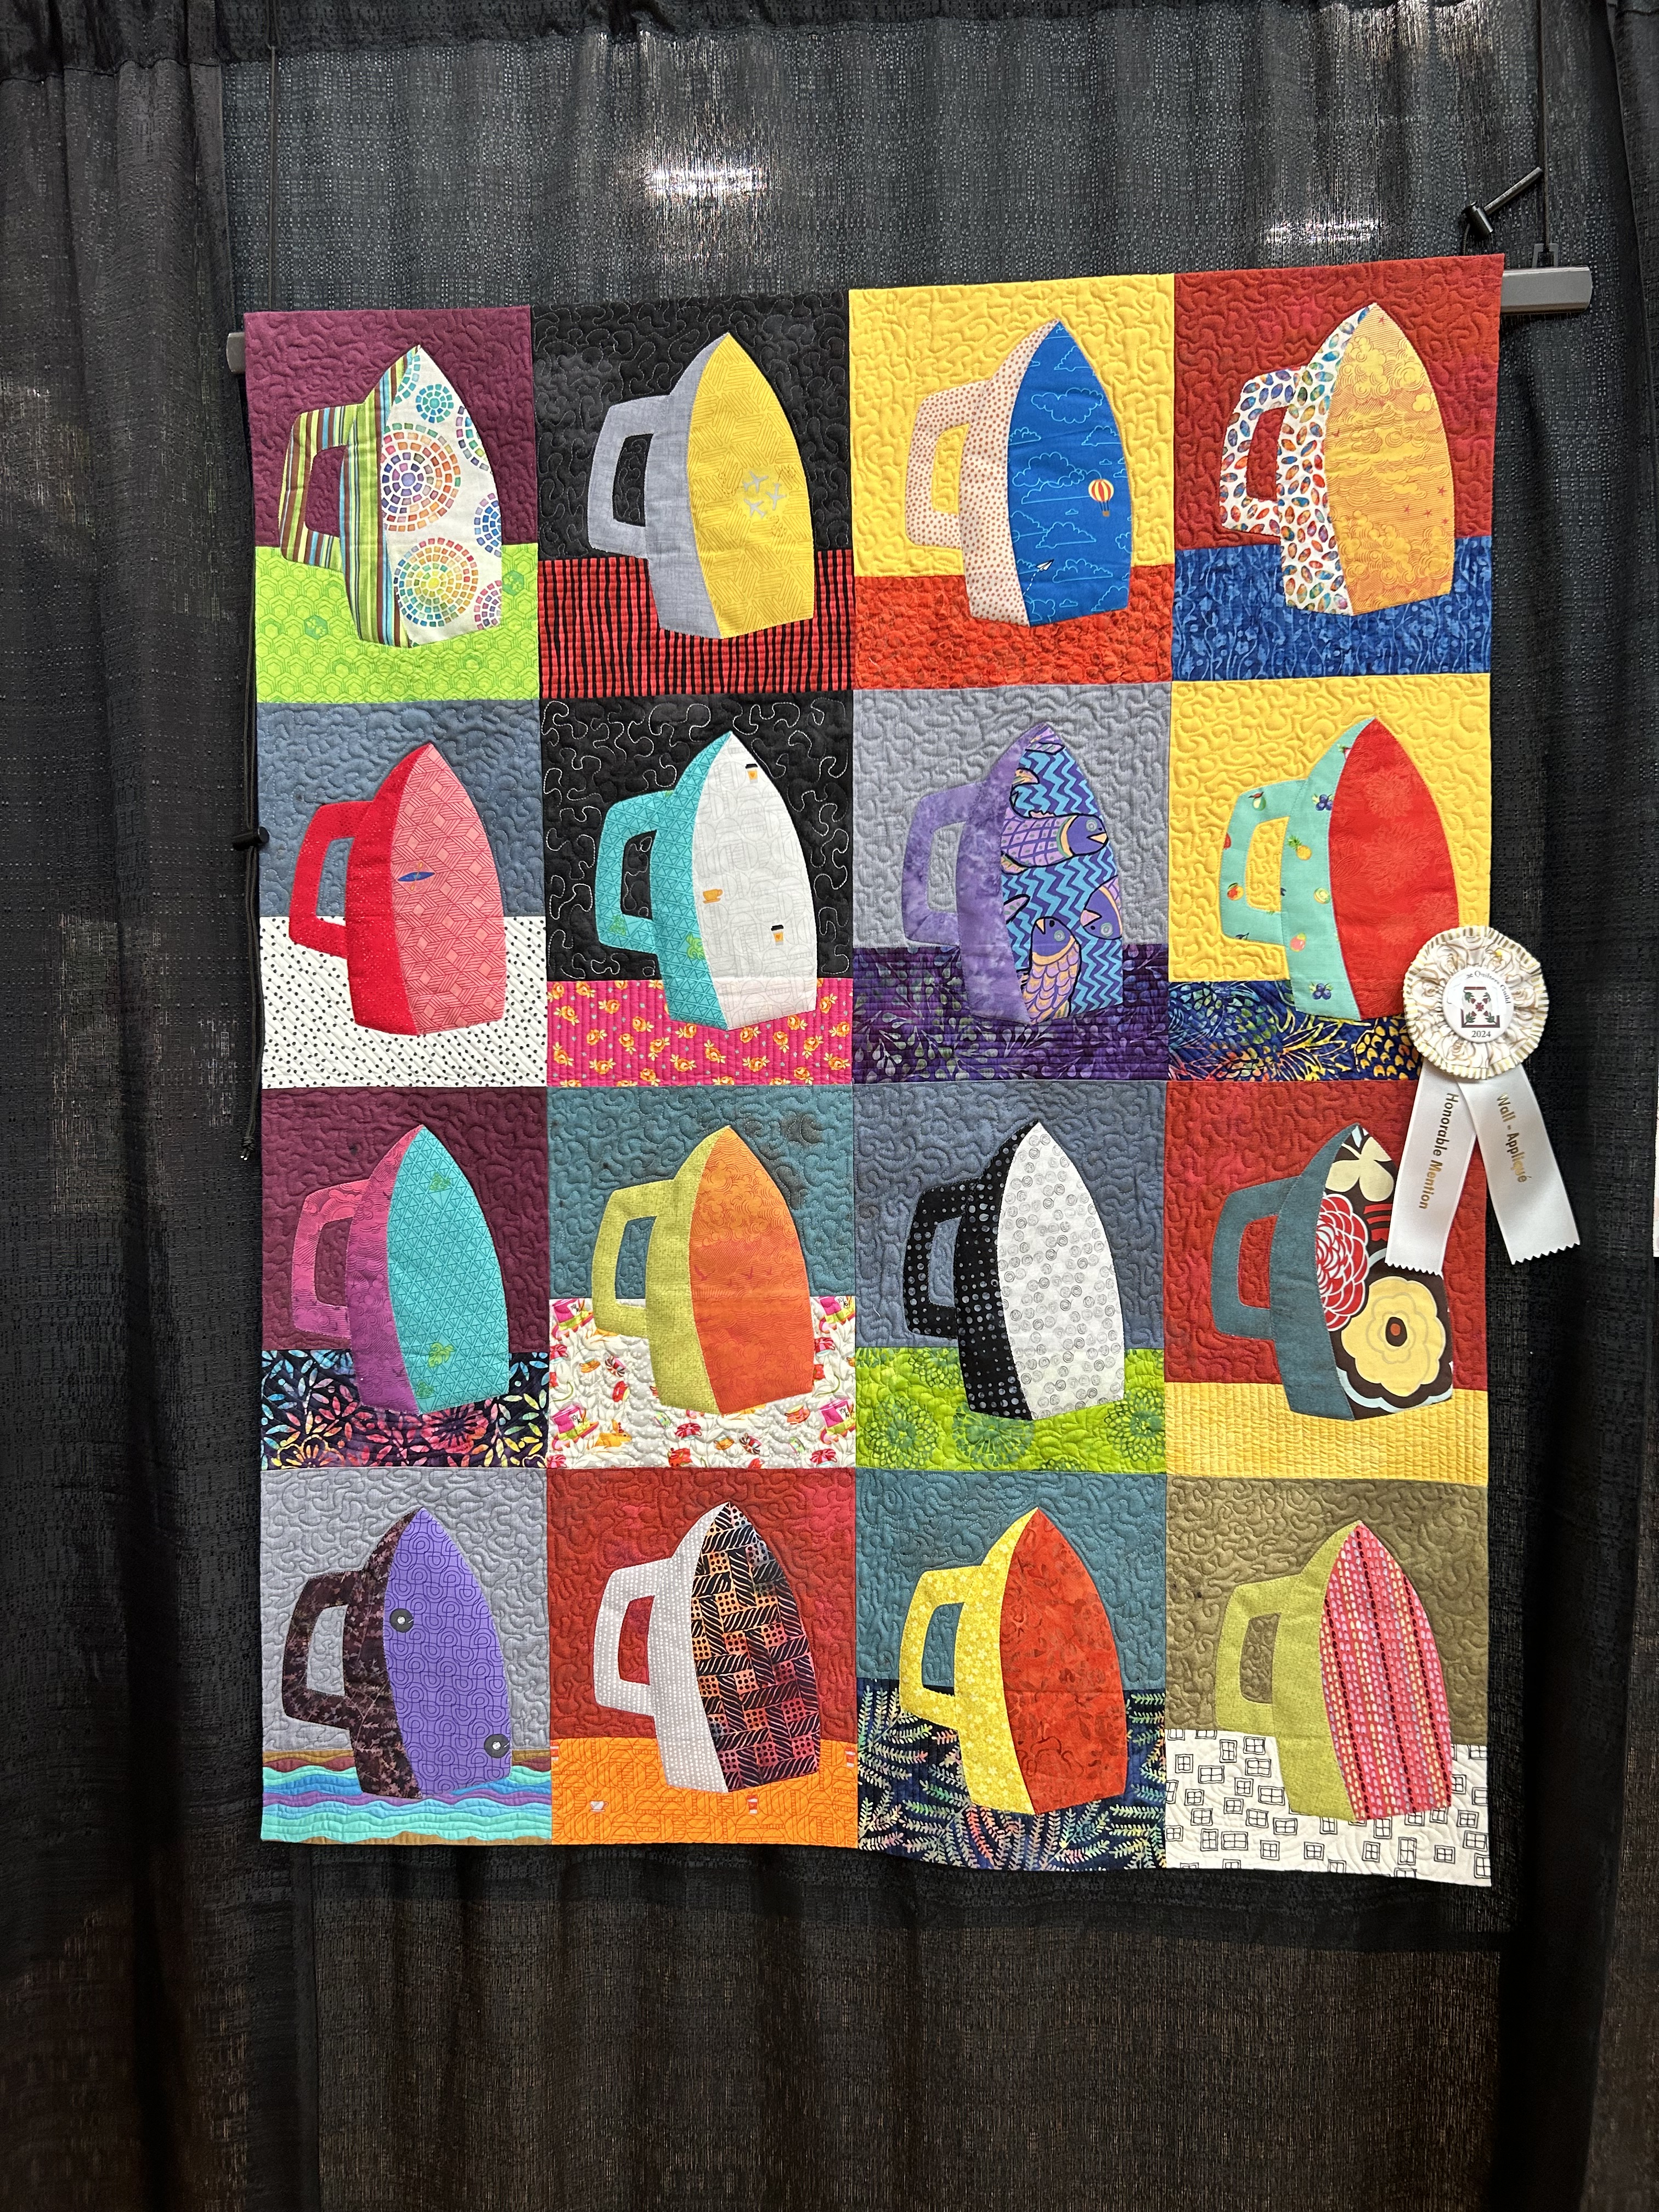
How colorful and fun is this quilt? How could we NOT use irons in quilting. This quilt is “Irony,” by the modern group member Susan Brandt. I love the name too.
This “eyes” are the result of a challenge. And how fun is that? I love this idea.
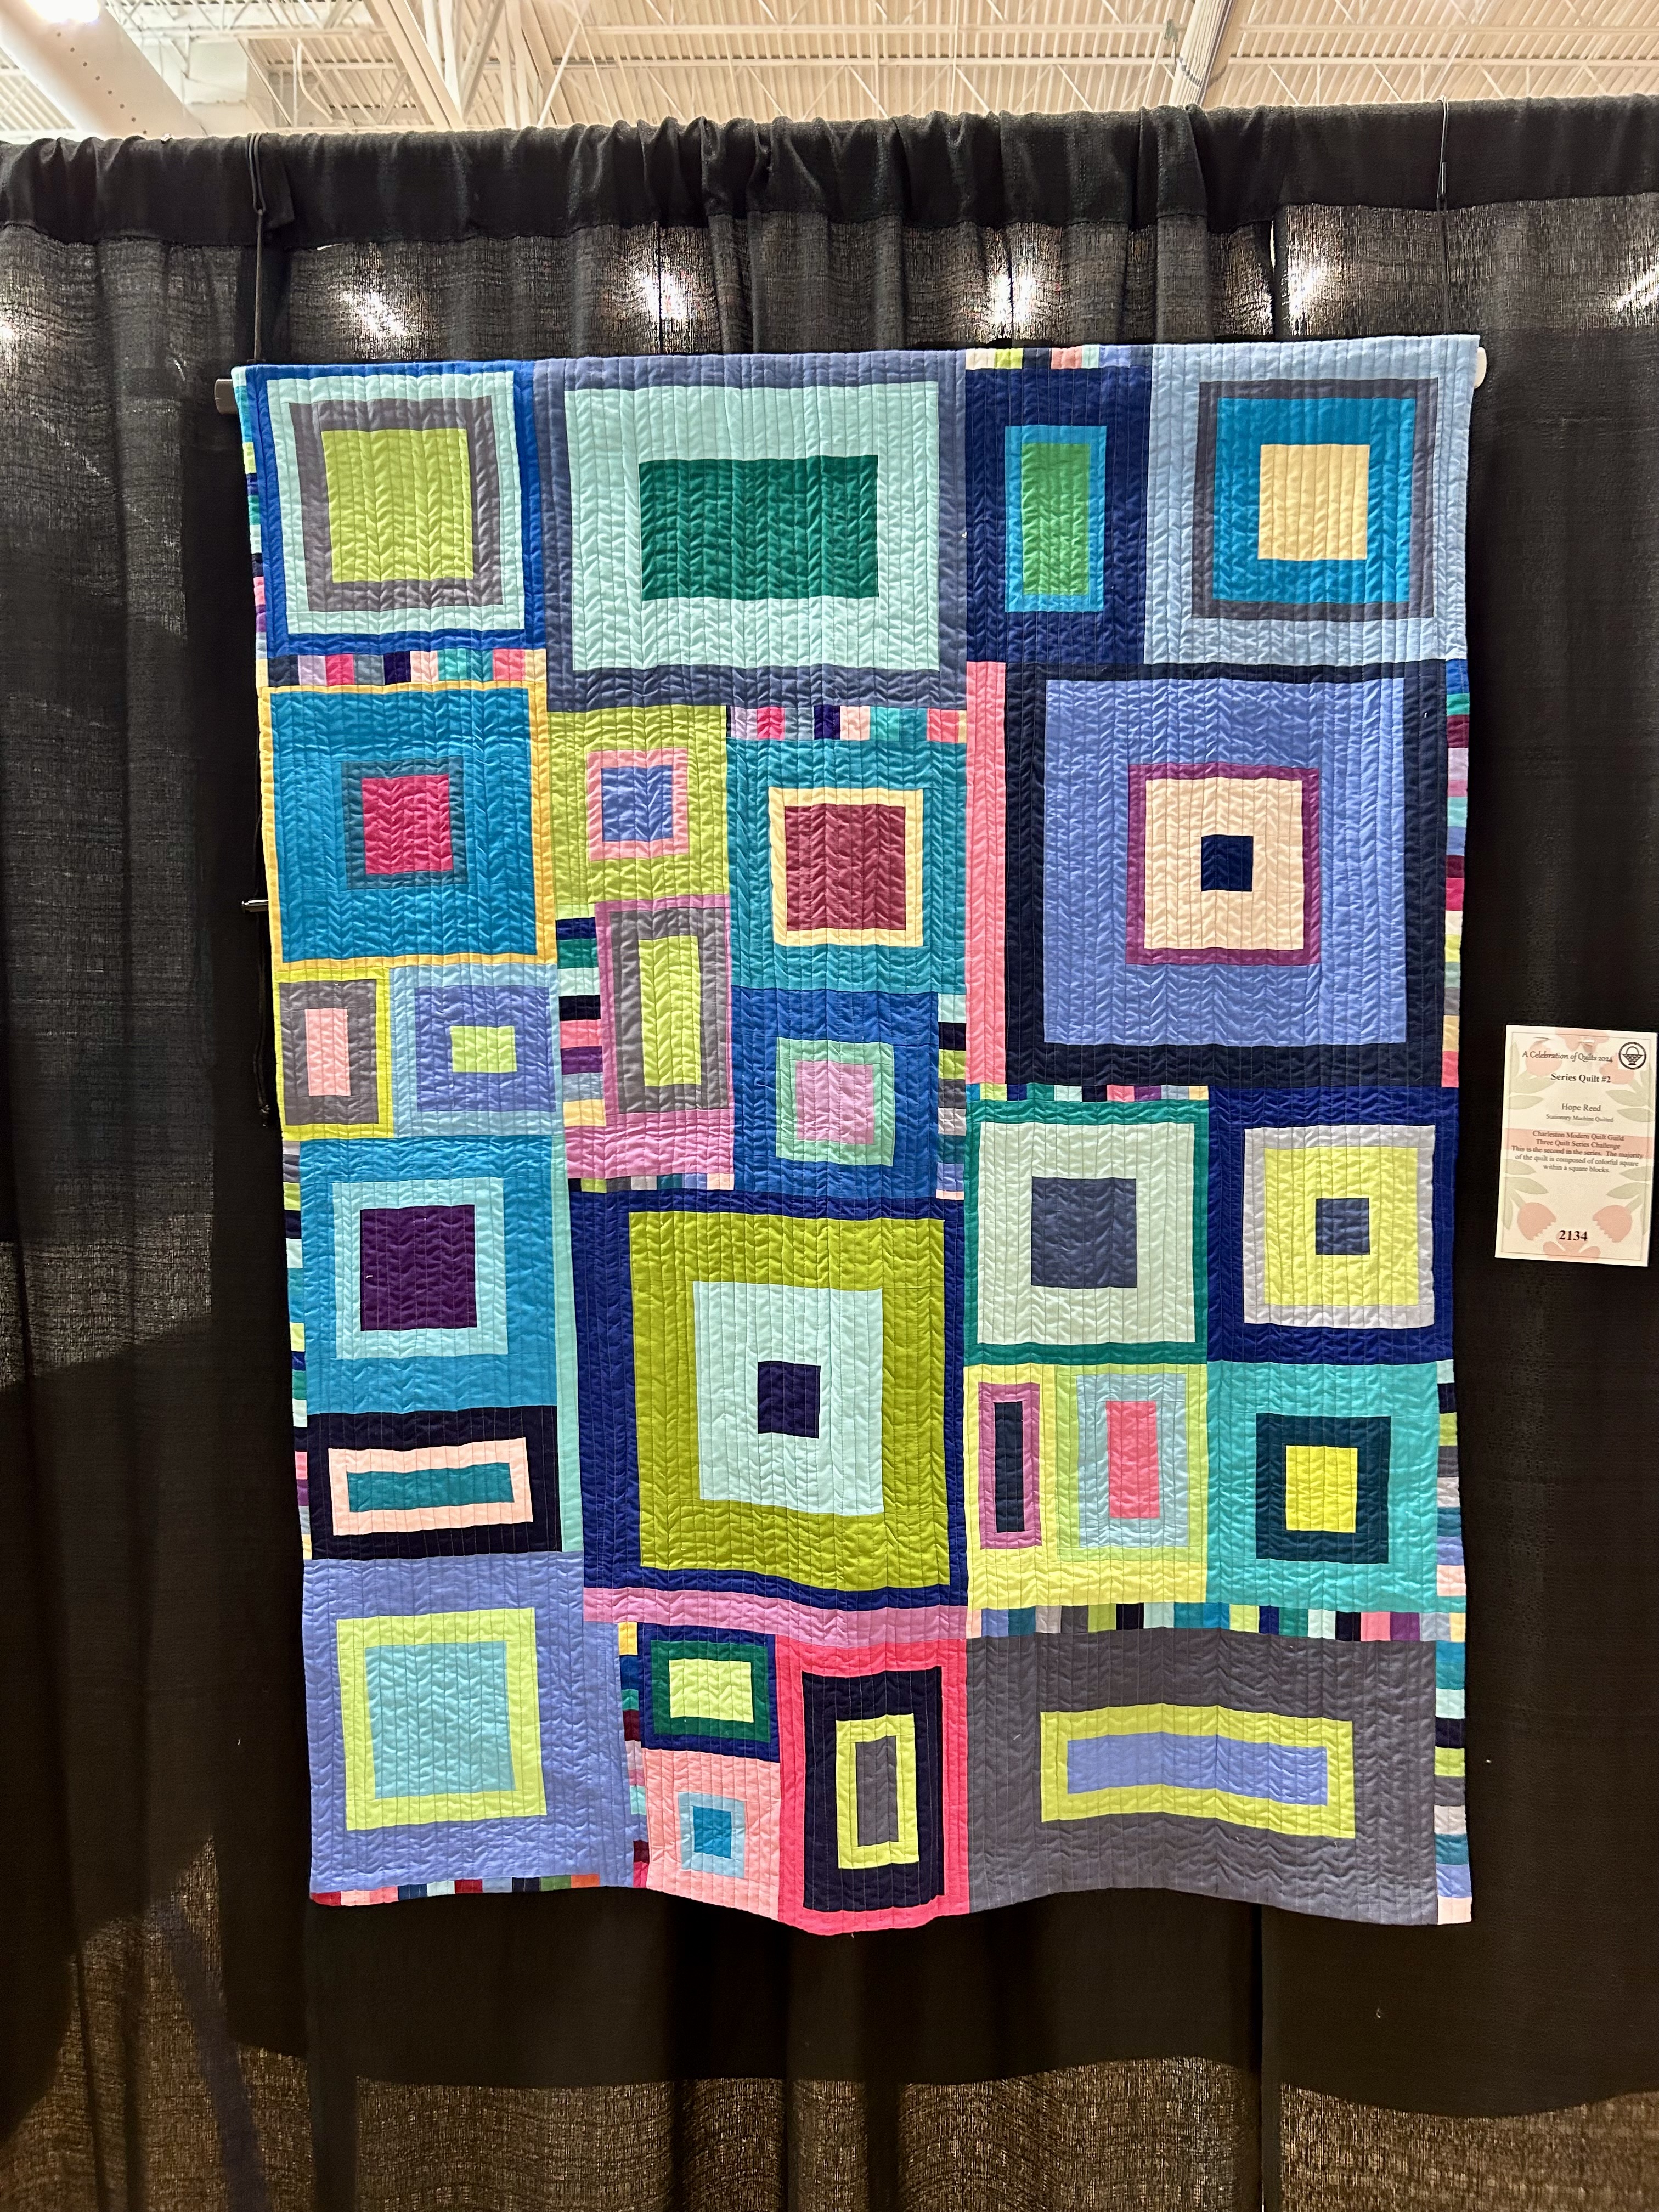
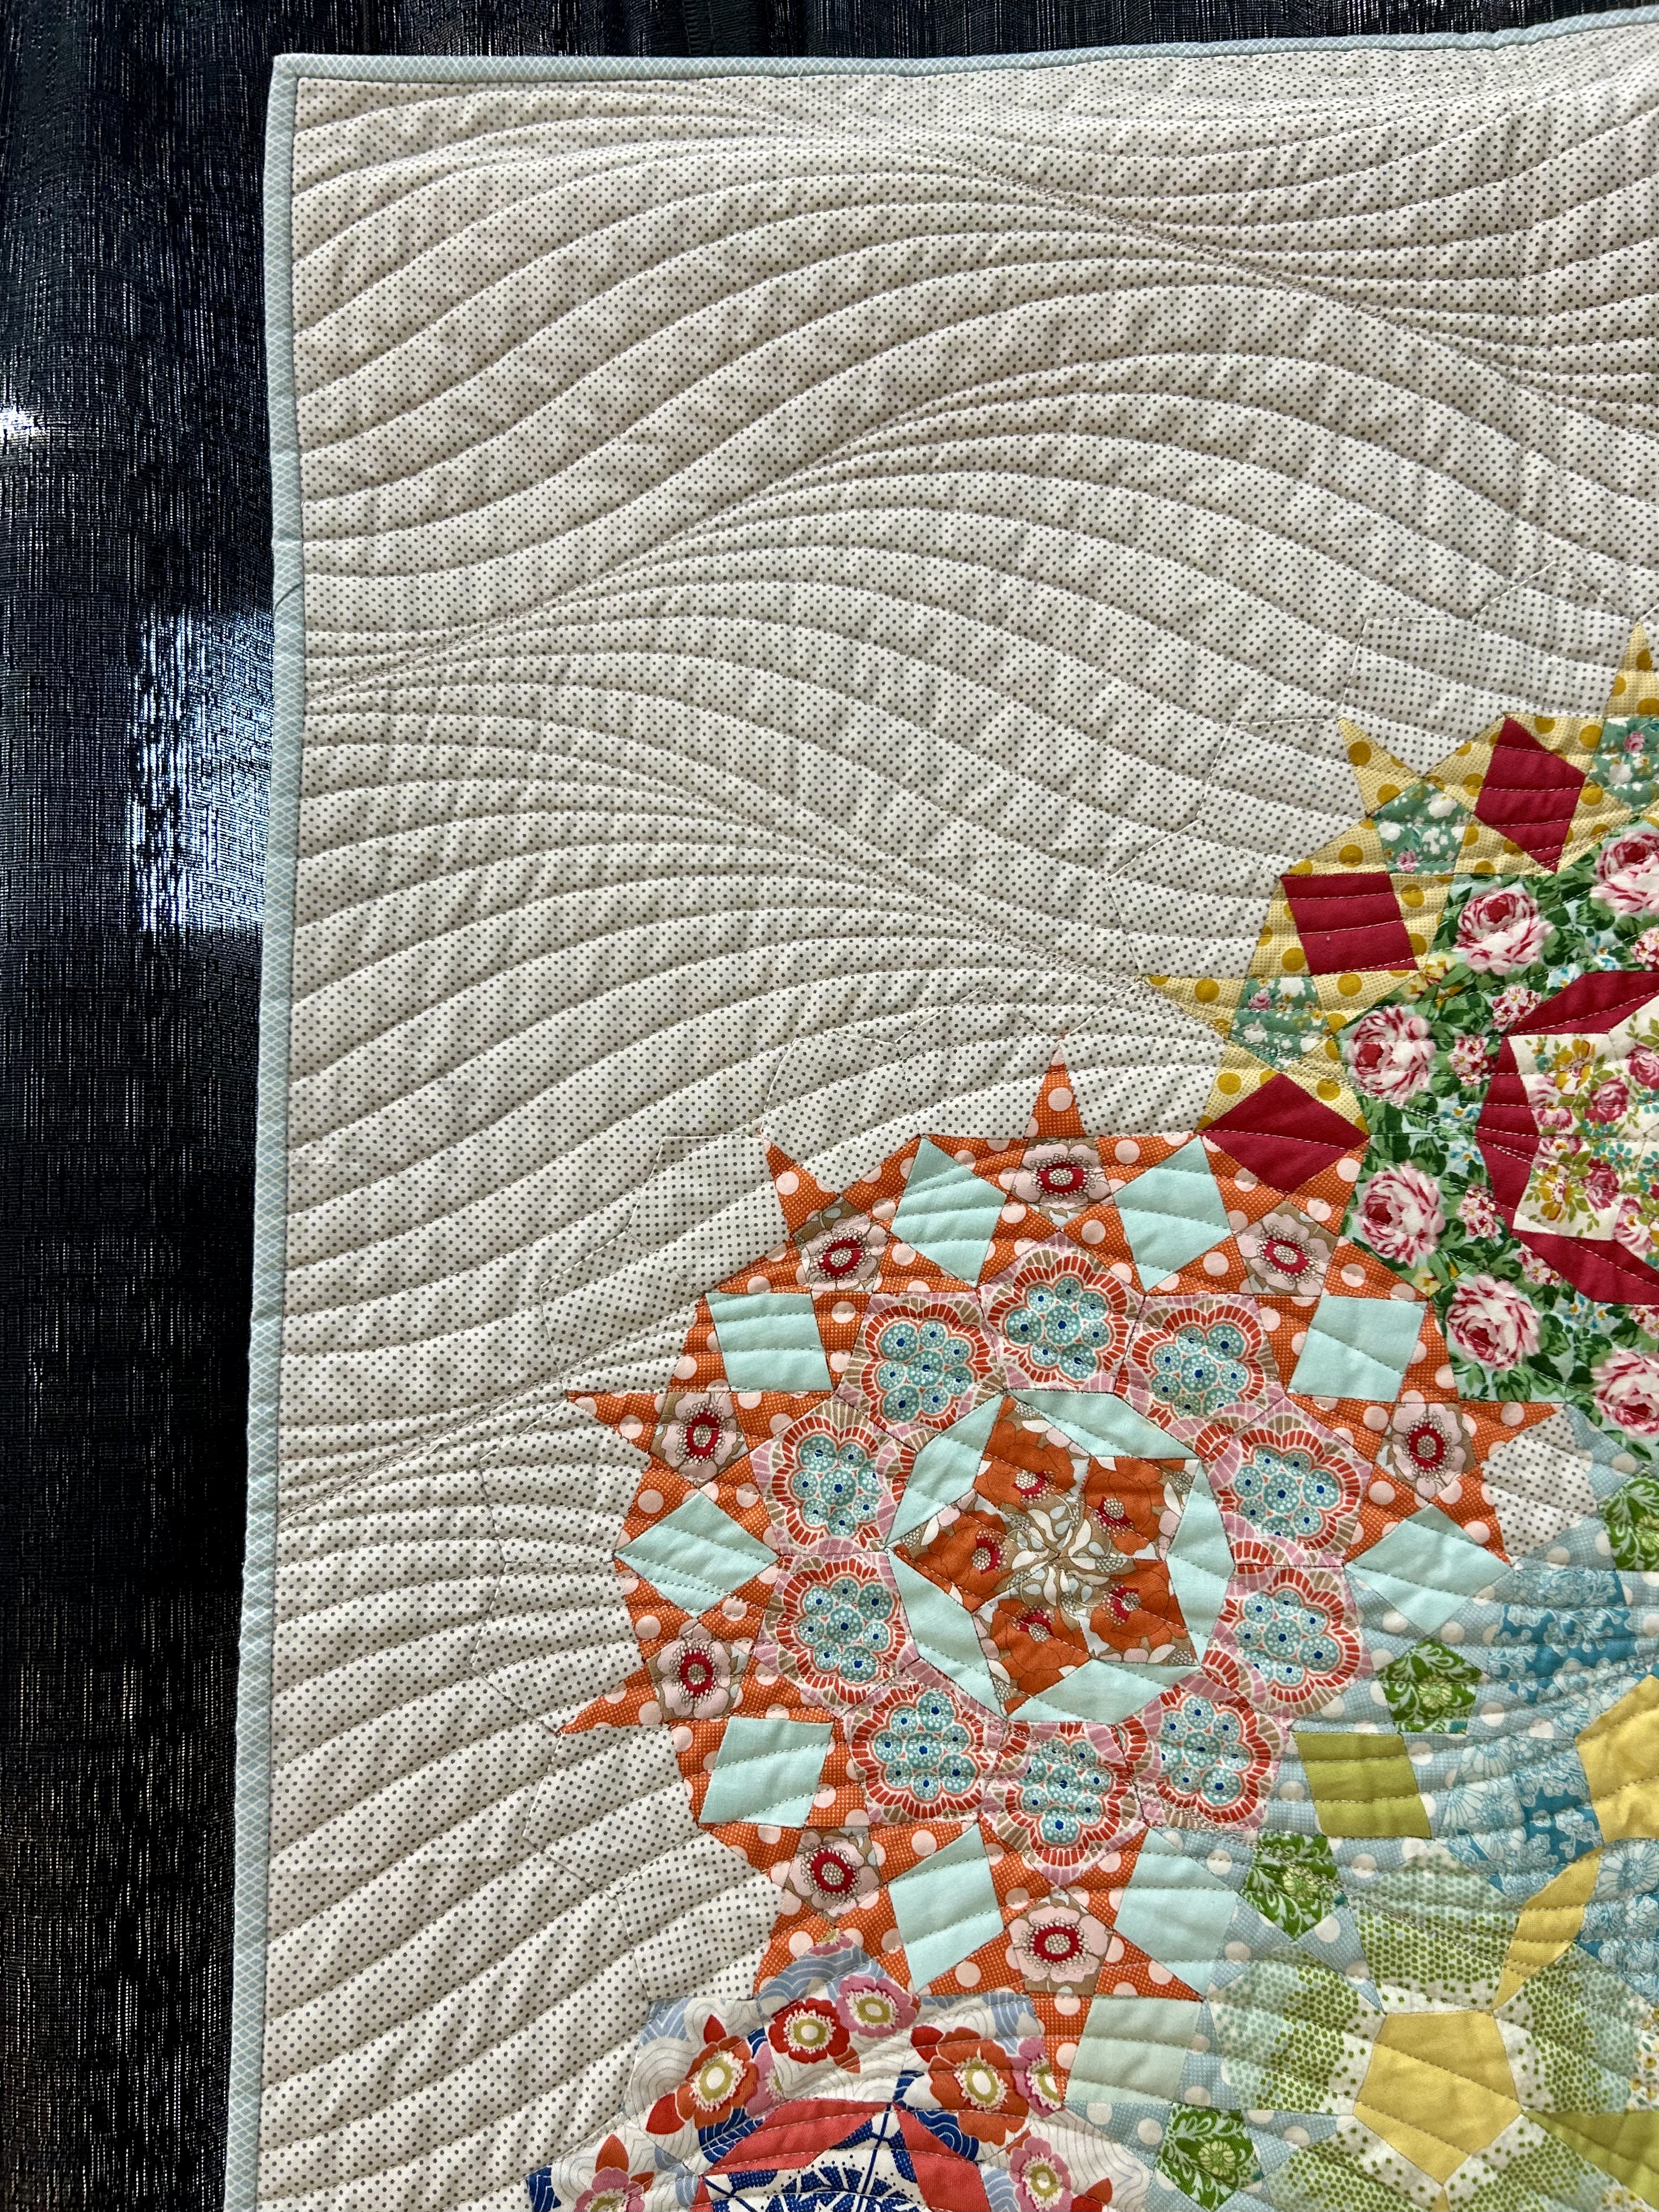
I’ve been intrigued by “house top” backs for a while now. And look at the use of lines of small scraps in the quilt and in the binding. This quilt is part of the series challenge some in the modern group did. This one is by Hope Reed and is the number 2 quilt in her series of three.
I loved this quilting–there is so much energy and movement. I didn’t take a picture of this quilt’s name, who made it, or who quilted it. Bad!!
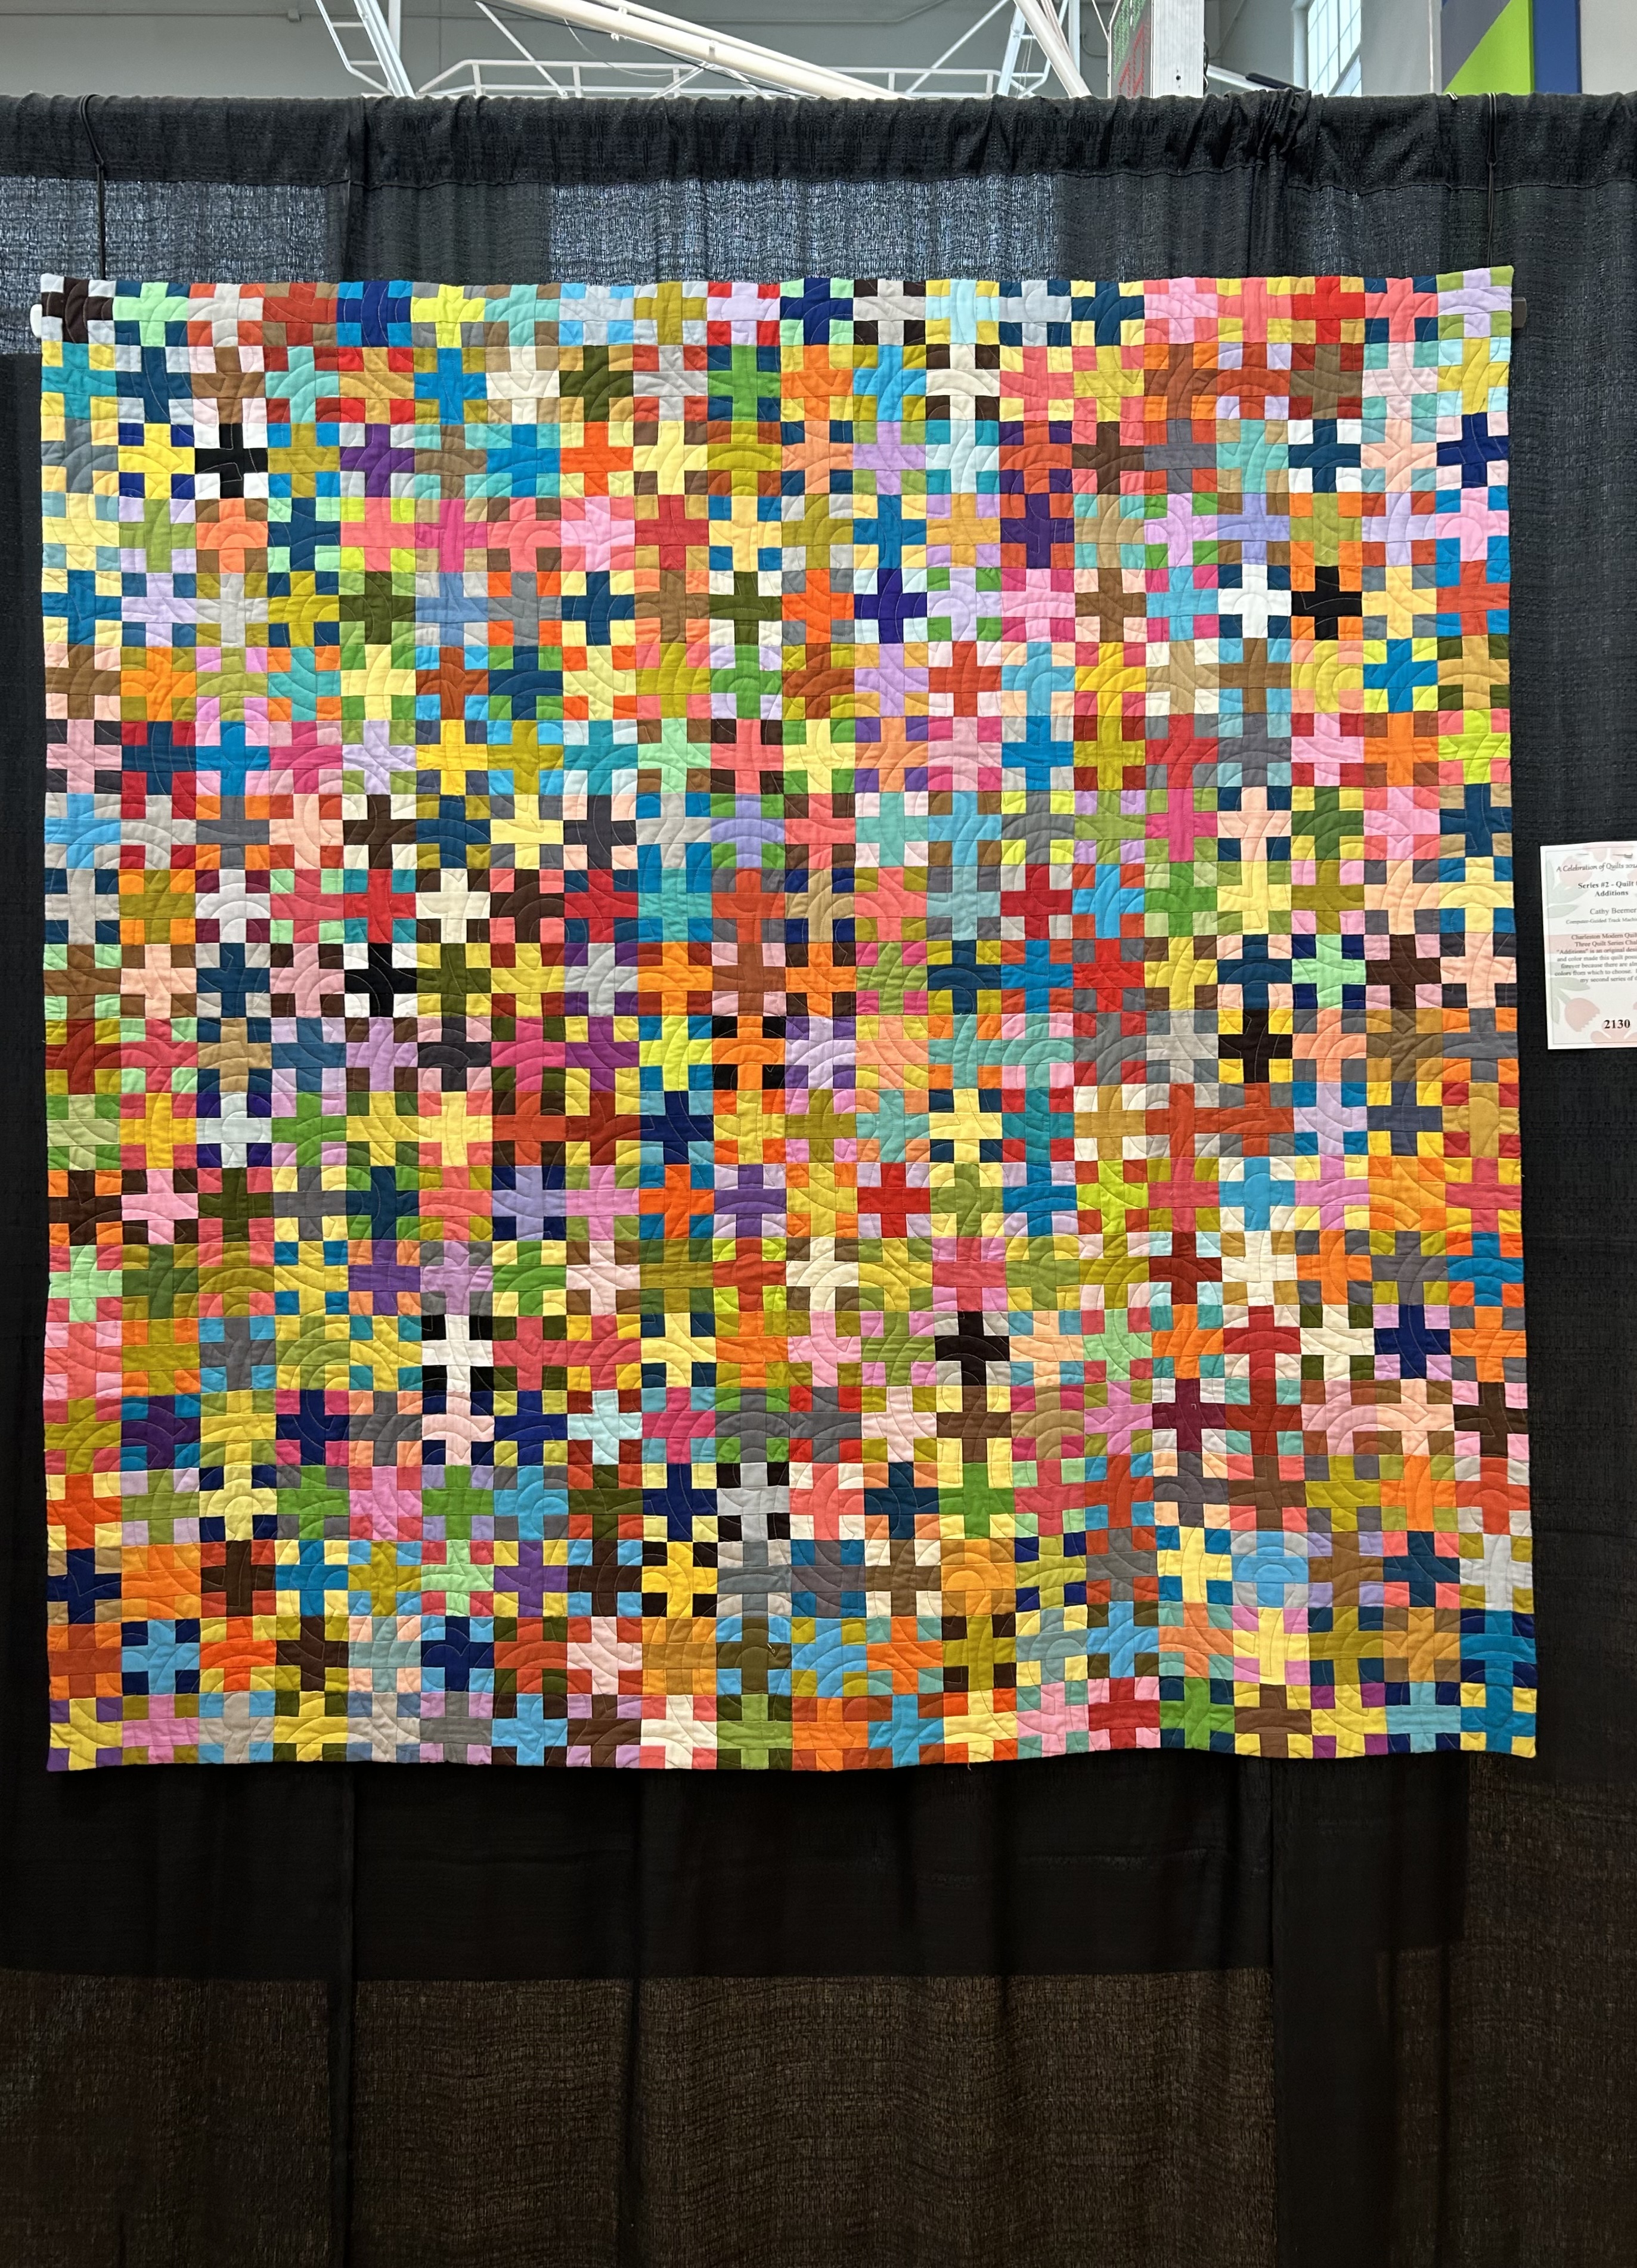
Here is another quilt by Cathy Beemer. Cathy writes that this quilt is the first in her SECOND series of three quilts. This one, for me, is a real inspiration as I’ve been drawn to these small crosses for some time. A leader ender project with solid strips? Probably that will happen.
And that’s it, folks.
I can’t wait for the next show, and I’ll do more to help next time, now that I have a better “lay of the quilty land” in my new adventure.
I’ve finished two of the quilts in the 1920-1930 reproduction series–two of four in the series.
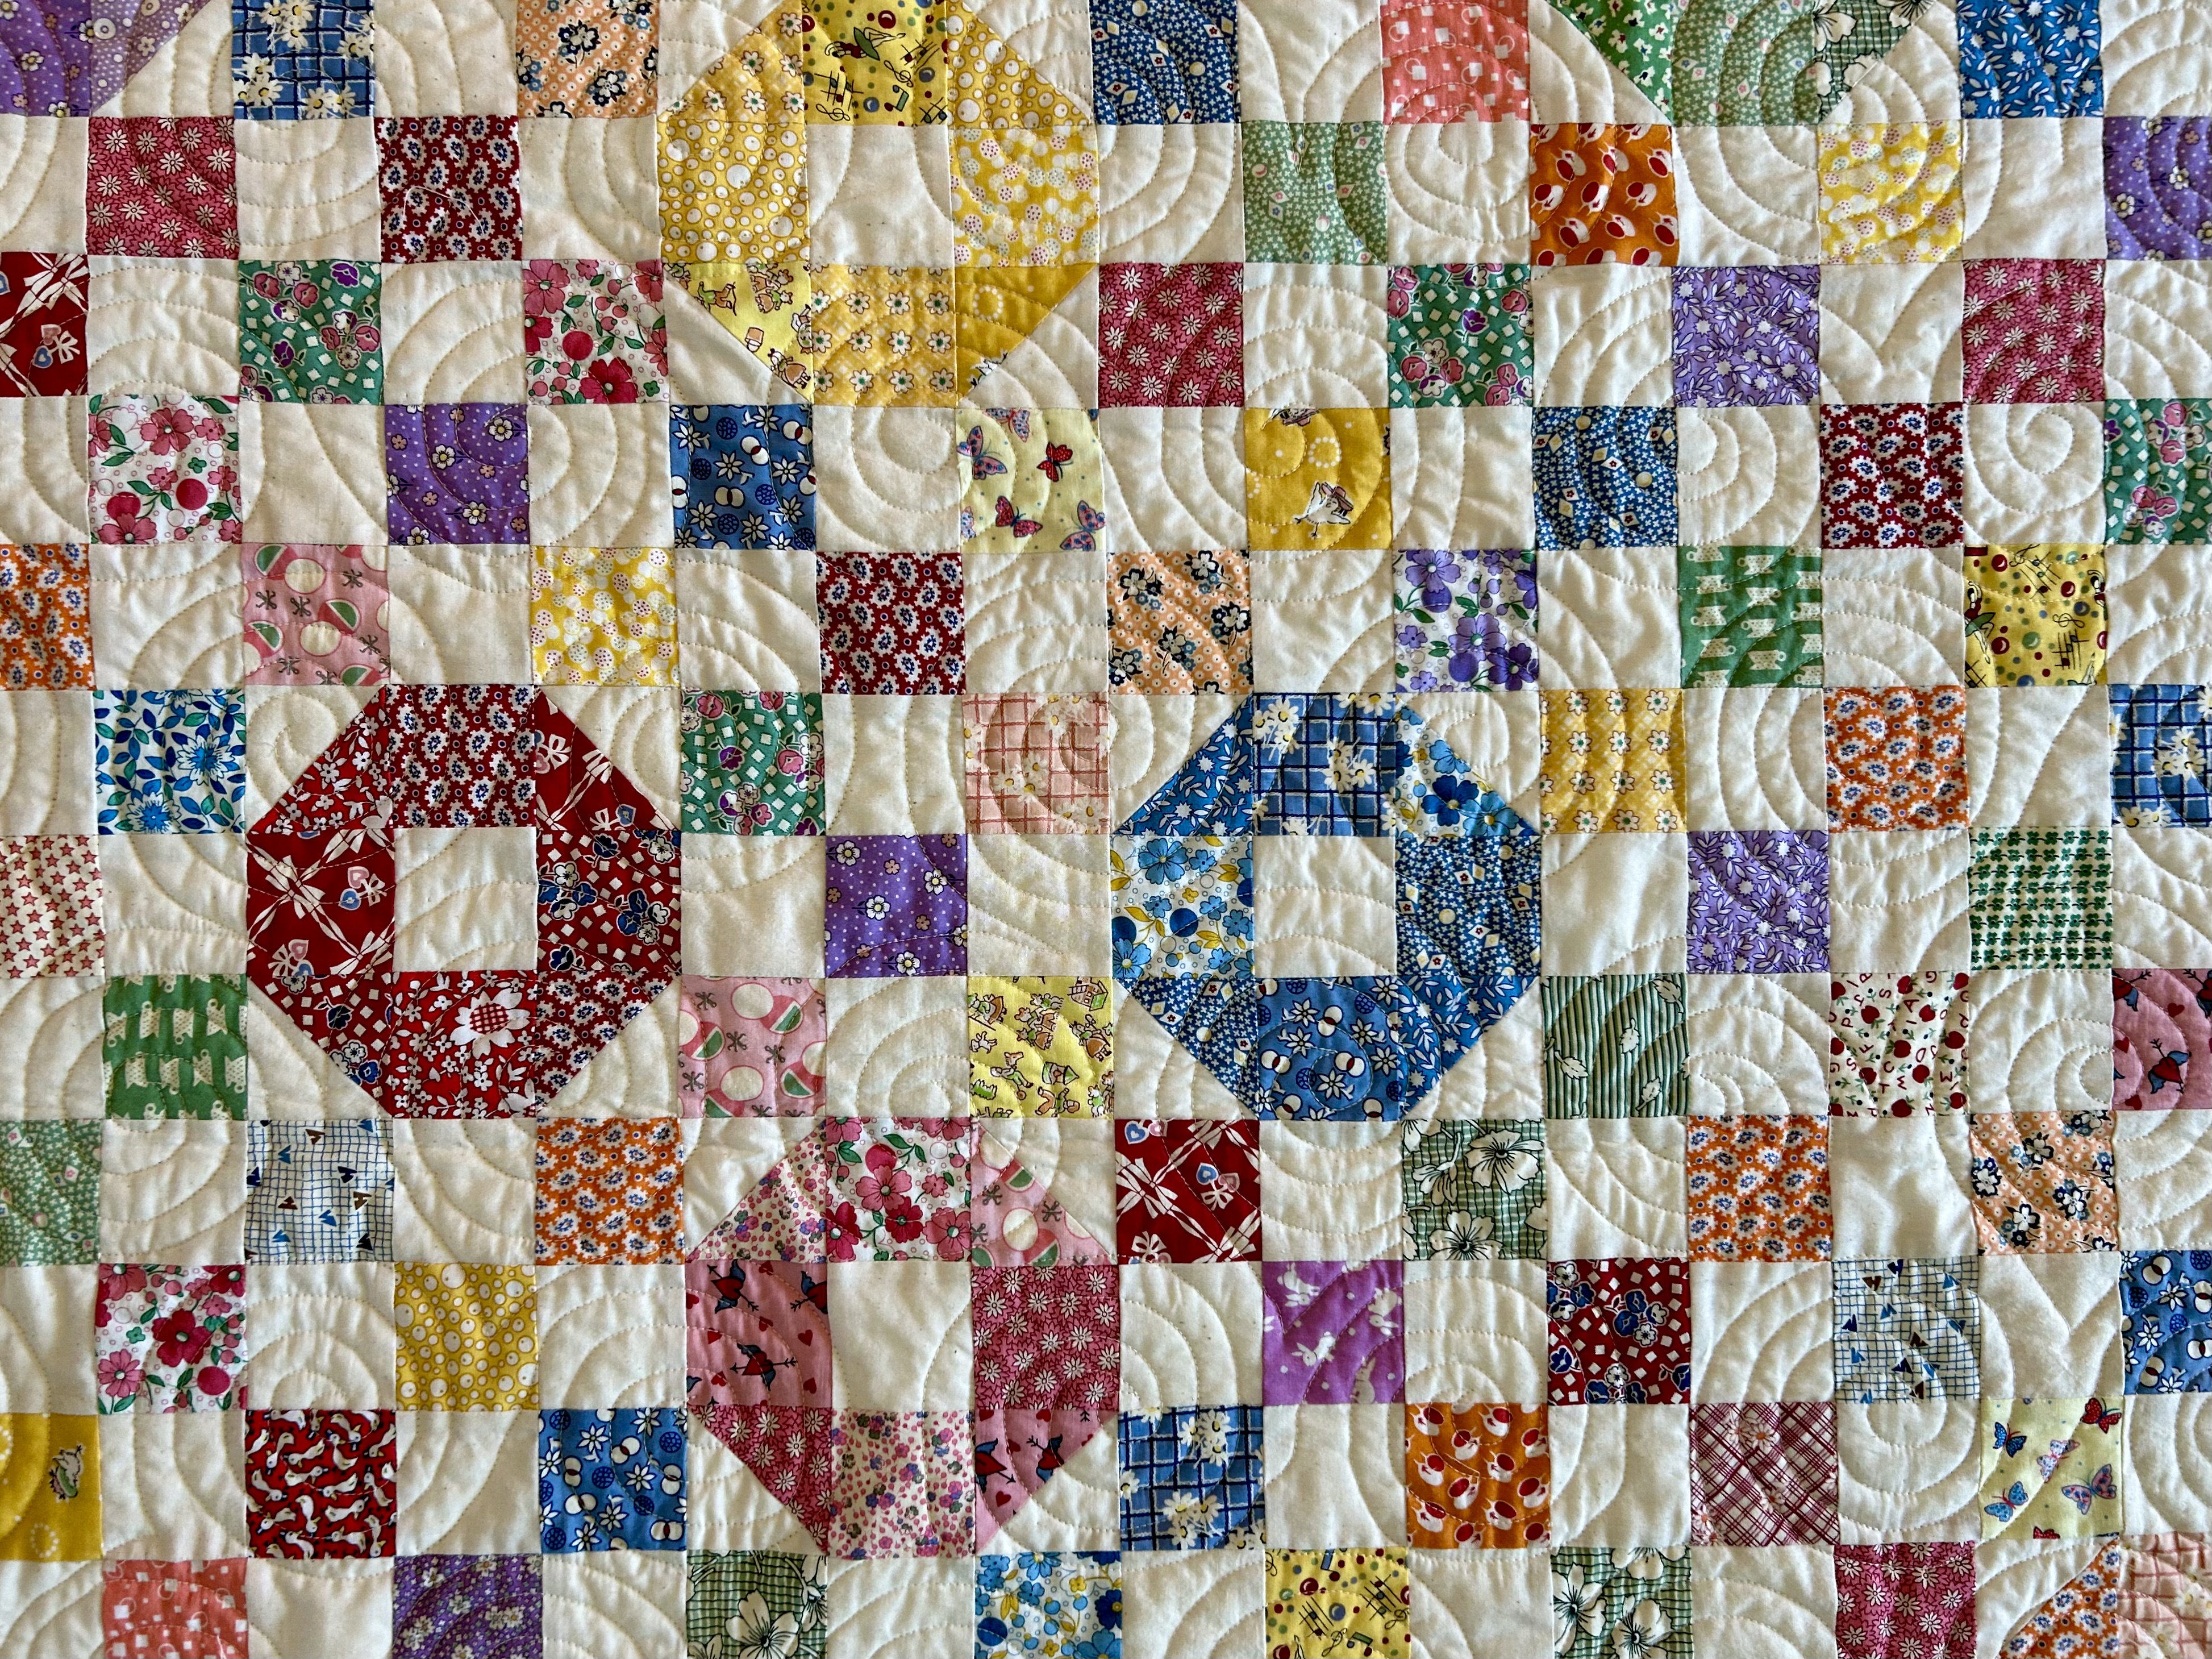
You all are probably tired of seeing pics of this quilt, but it is finally totally done. I called it “Vintage Feed Sack Wedding Rings.” I am intrigued that these vintage reproduction fabrics lend themselves to modern-looking quilts.
I used a pattern called “Modern Vintage” that I saw in vol. 16 of a Better Homes and Gardens book called Quilt Lovers Favorites (pages 86-89). The pattern may be available elsewhere by the designers Camille Roskelley and Bonnie Olaveson. Also, this block is actually a traditional single wedding ring block and is easy to find online.
Expert longarm quilter Wendy Currie recommended the pantograph “Garden Frills Too,” among others, and I loved the texture.
You can see the wonderful texture on the back as well.
For the second quilt in the series, I used the round part of the wedding ring block and the squares. I called this quilt “Bubbles,” as I wanted to see bubbles rising upwards on the diagonal. It’s 48 by 48, so a perfect baby quilt size.
I used the pantograph “Circle of Life” by Patricia Ritter.
I like how this pantograph turned out as well.
Meanwhile, I had a timing issue on my Innova, so I had to wait for the nearest repairman to come help me, and that happened Thursday. Jimmy Hernandez and his friend came from Greenville, NC, which is 3.5 hours away and where Jimmy and his wife Dale own the Carolina Quilt Studio. Jimmy was AWESOME. He fixed Innova’s timing, which was off (remember when I sewed my finger?) and replaced a part that needed replacing, and was so helpful and fixed some other issues.
So, this week I will put the third quilt on Innova and finish the 4th top. And then, I promise, whatever fabric is left will go into the stash!!!