I finished the half-square triangle quilt made mostly with solid scraps–at least it started that way. But soon I did have to cut some fabric from my stash of bigger pieces as I got picky about balancing colors around the quilt. And don’t laugh, but I did order a few colors I felt I needed when some ran out. The colors in this quilt are way more vibrant than I am able to capture on my phone and in a room where it is tricky to get light where I need it for pictures.
The blocks are 9 inches finished, so it will measure out about 82 inches square. I am thinking of naming it “Inspired by Tara Faughnan,” since that is the truth and since I adore her quilts. She just released a lovely pattern made with solid half-square triangles–but without internal sashing. However, I was drawn to my idea below by a quilt that hangs behind her on some pictures and videos.
I am totally in love with the secondary patterns that form, depending upon how one places these half-square units. Dynamic designs are totally possible–and that’s without getting to color choices beyond just light/dark units. I had such a good time with this one. It tantalizes the eyes.
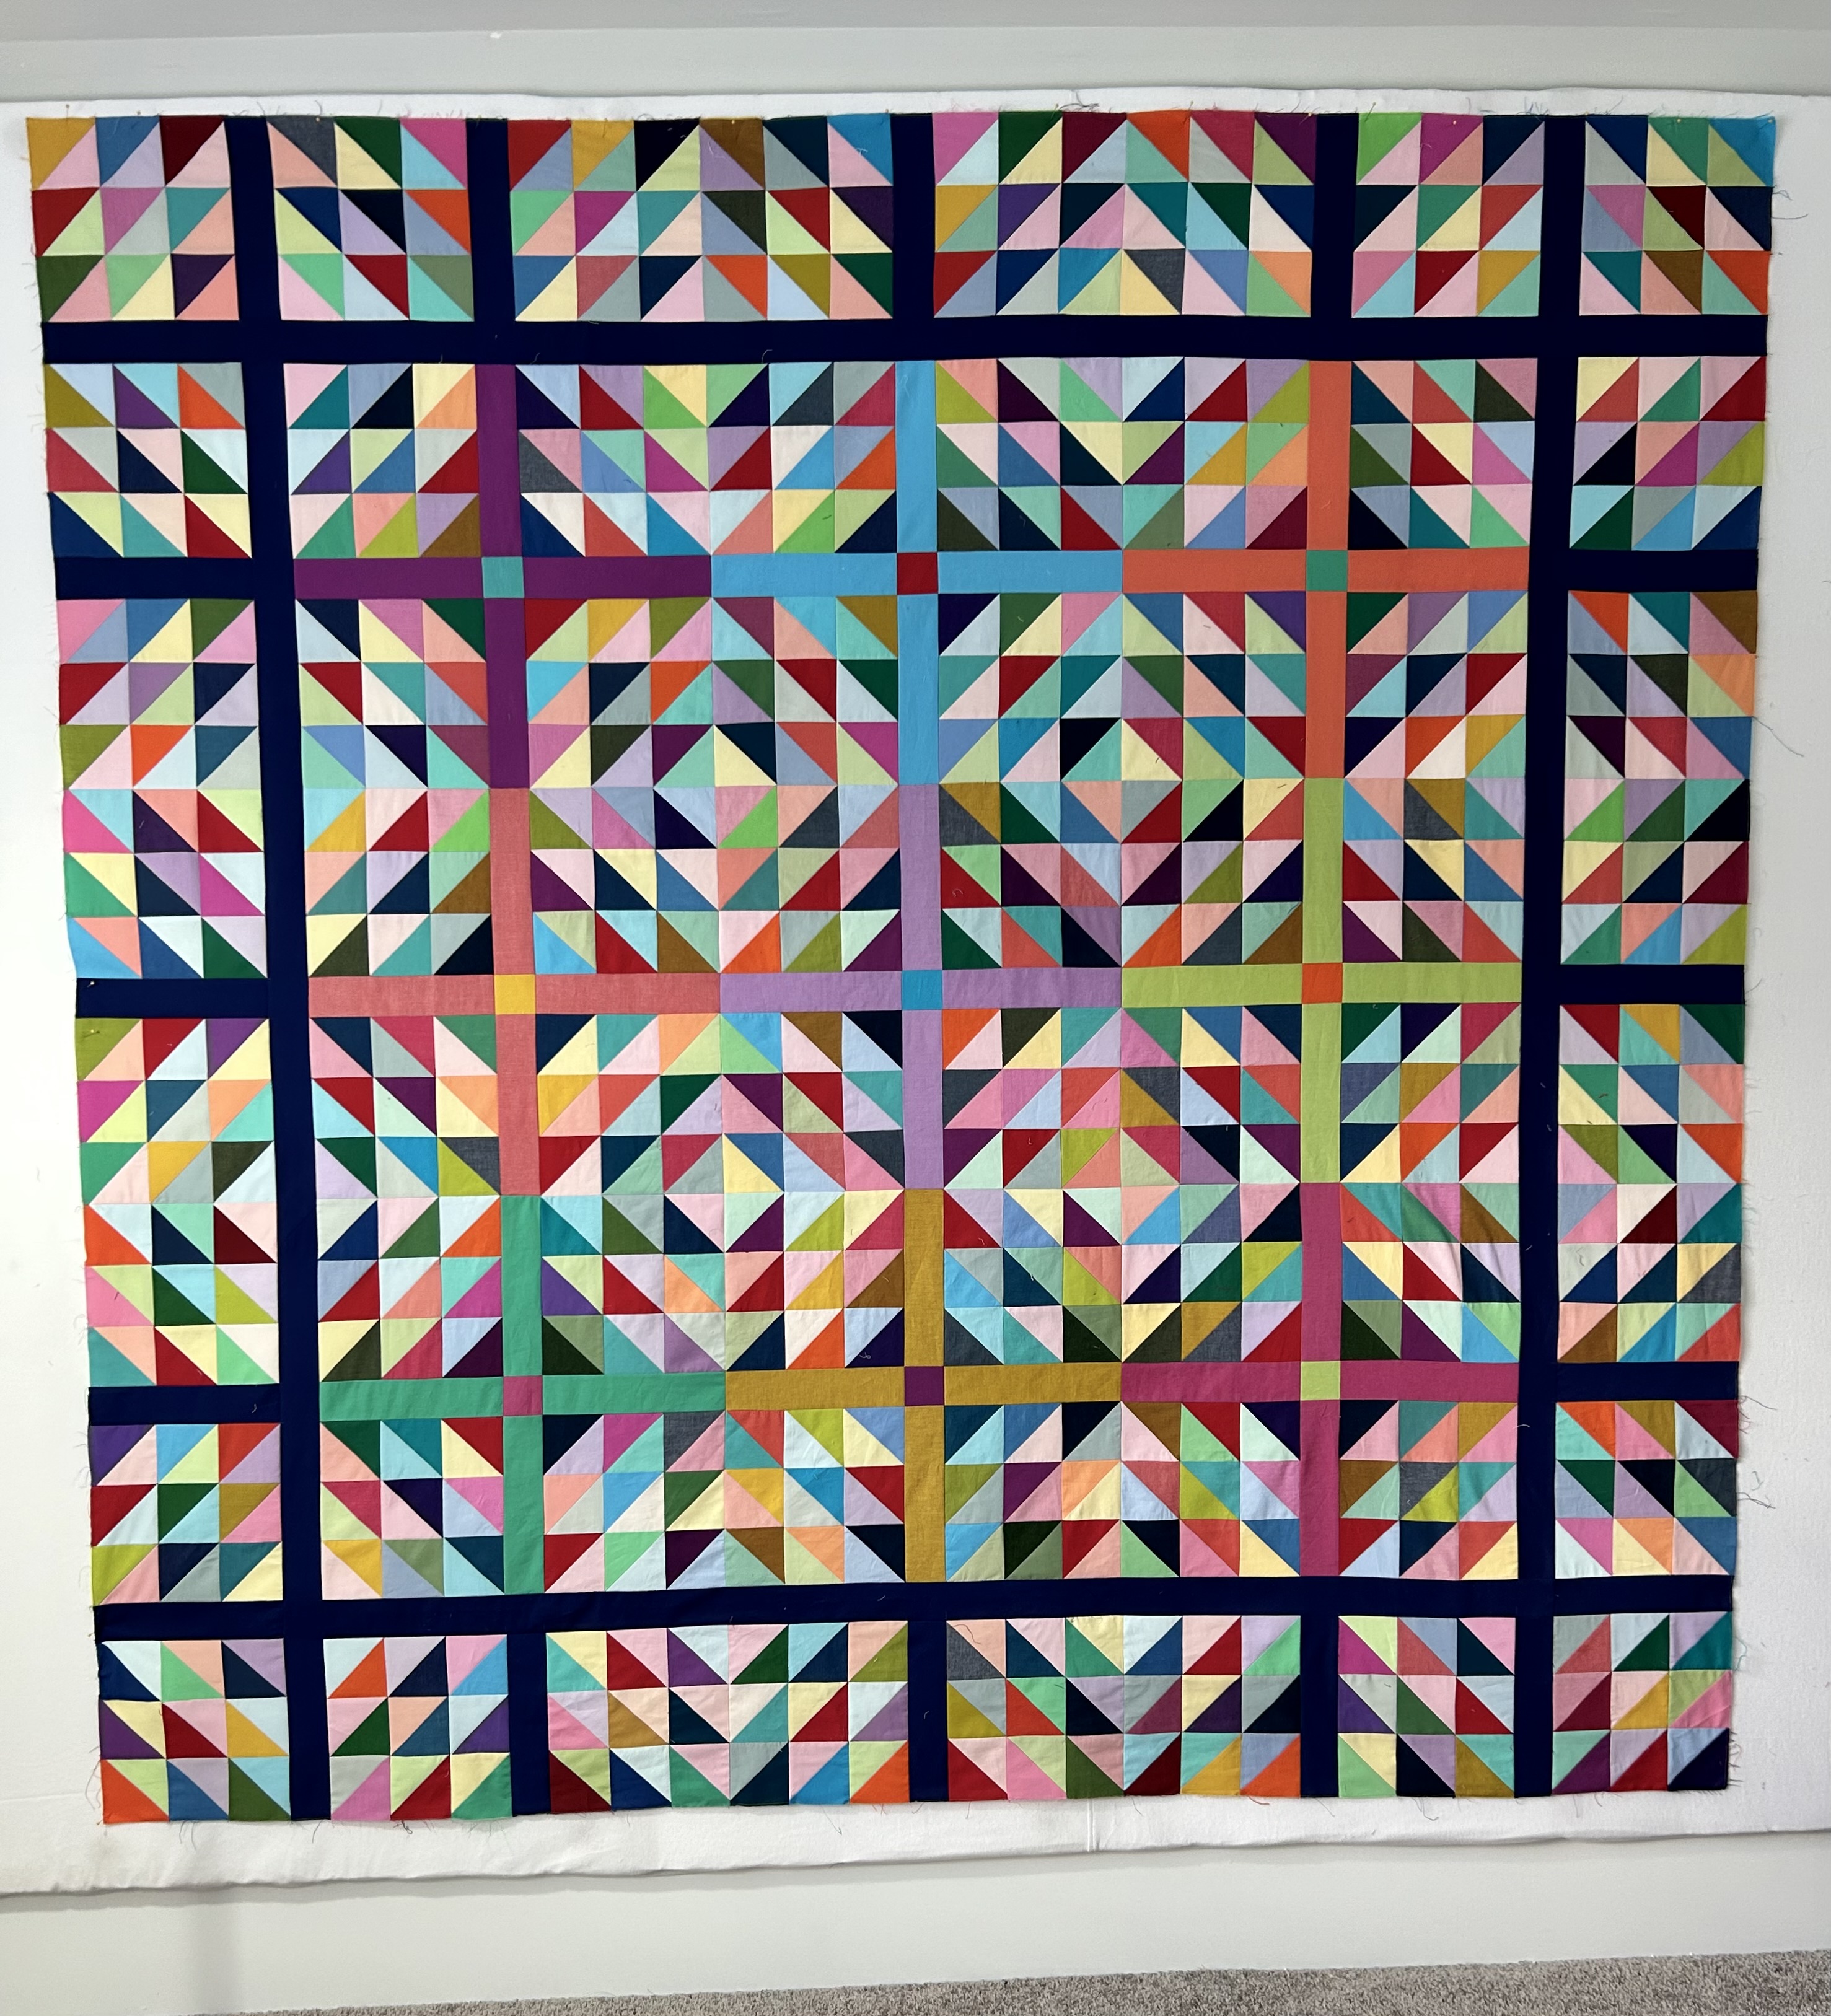
I will likely put it on the longarm pretty soon as I have a backing for it that I like a lot. I have no idea about a binding. Maybe the dark midnight purple of the internal sashing, a Kona color I love, but whose name escapes me for the moment.
Then, YEAH!!!: here is the FINISHED QUILT TOP FROM HELL. The dark border just makes this quilt–in part I think because it draws out the internal dark shapes that repeat.
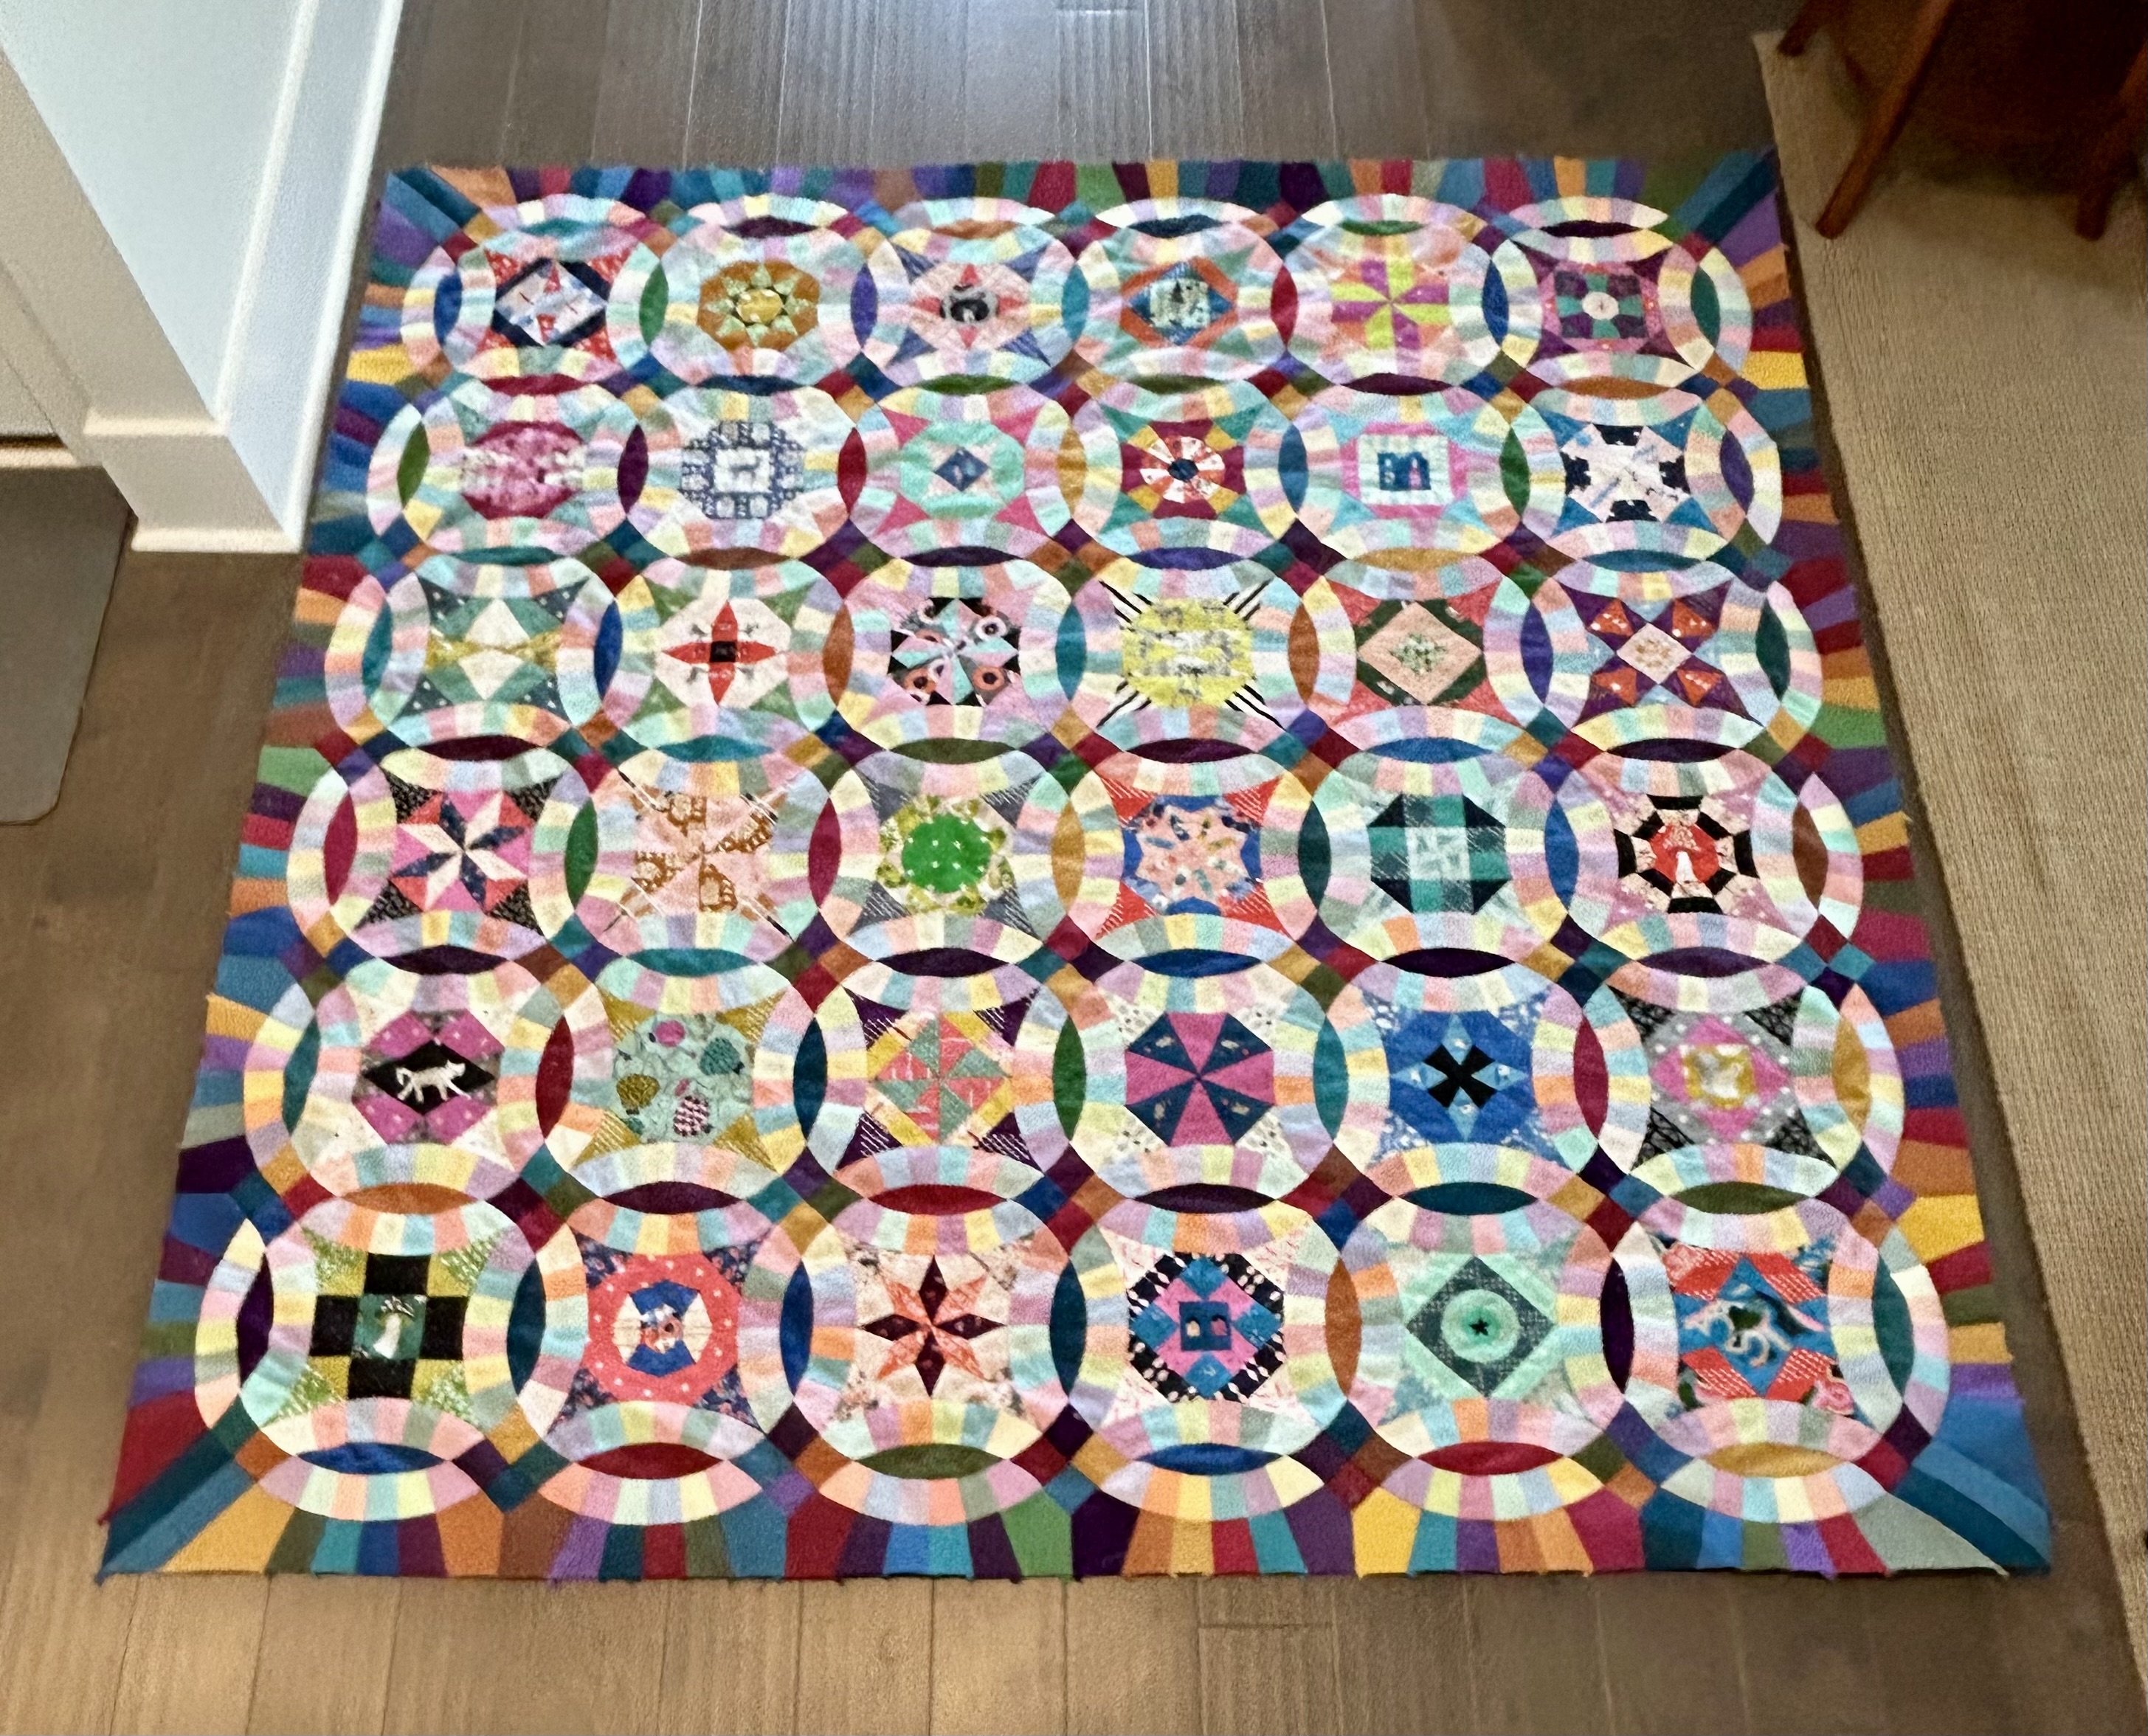
Here’s a close-up–the quilt is about 73 inches square when finished. And it has not been pressed since I took out the paper templates (except for the border). I’ll press the border really well and then remove the final paper templates. Then I’ll press it again and likely baste it for hand quilting on the longarm–maybe before “Inspired” gets quilted as basting on a longarm does not take up much time.

I started this quilt in June 2018 and there are, literally, a hundred thousand or more tiny stitches in it. The prepping of all the templates also took many, many hours. Five years, and she isn’t totally finished yet. But, soon… And she needs a happy name–maybe even “Happy”–as in “I’m happy this one is finally over.” I’ll put on a hanging sleeve before I bind her. And she is the last of the handmade quilts for my seven grandchildren. Now there are seven of these handmade quilts.
Big Red (that will NOT be its name) is now on the design wall. It’s hard to get the color red to show well in my pictures. This quilt made from Kaffe Fasset prints bought in a kit many, many years ago. The reds are vibrant and not at all muddy. The lavender (Kona Thistle) will be the 1-inch sashing and the binding. The 8-wide 10-inch blocks will go right to the edge, so using the same-color sashing fabric for binding will pull everything together. Right now it would finish at 87 wide, but I might go at least one more row long so it wouldn’t be square. I’m not planning to use corner stones between the rows, but you never know what will happen. And of course I’ll move blocks around like crazy as I add them.
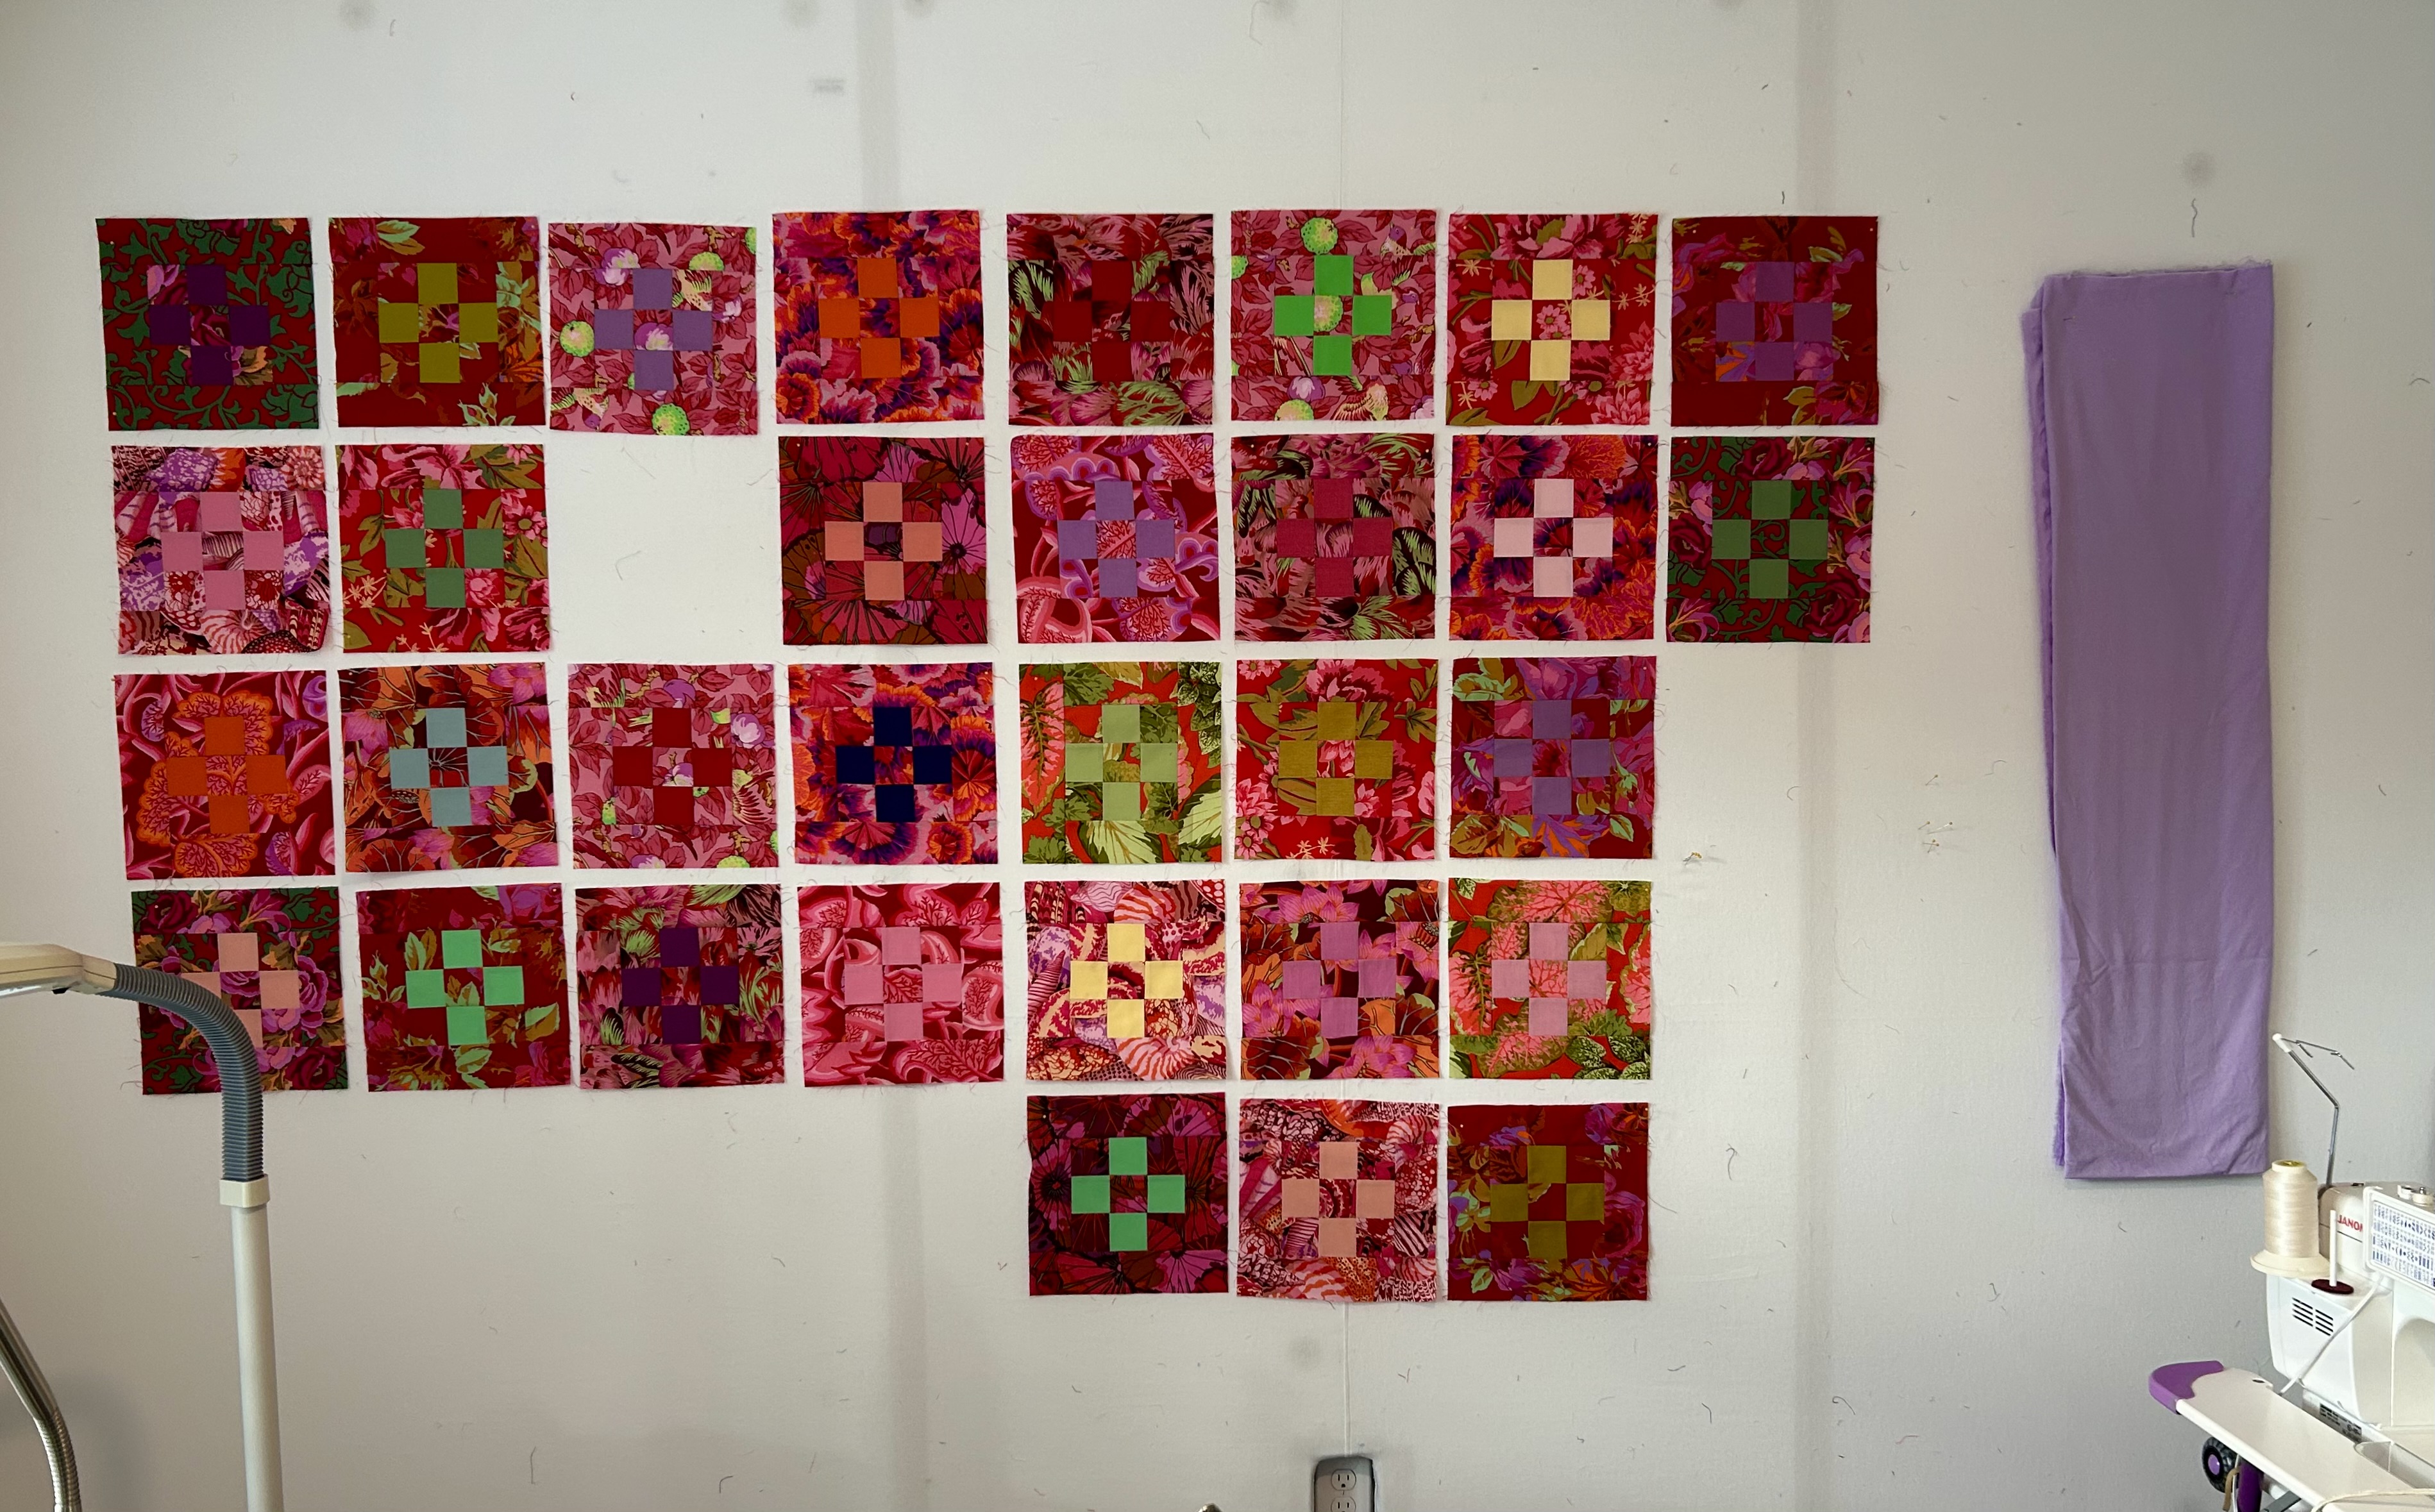
I’m so excited about putting the Modern Quilt Society’s “Summer Camp” mystery quilt blocks on the design wall–so I’ll likely do that as soon as this red top is all together. That mystery quilt reveal for the public will be September 1st, which will arrive pretty fast, given that I have so many projects happening.
I brought Traverse downstairs yesterday, and I’ll start hand-quilting it as soon as I have the paper templates out of “Happy”–which may happen tonight.
I’m so looking forward to trying out new hand-quilting skills gleaned from Tara Faughnan’s online hand-quilting class. I have a thinner backing (Cotton Couture), a thinner batting (Dream Cotton Request), a new thimble with a ridged top, some new needles, some of those little finger guard circles for the finger under the quilt that has to meet the needle point, some new thread conditioner, some new thread, and a whole lot of excitement.