Rachel Hauser of the Stitched in Color blog is starting a new online sewalong, starting May 11th. Rachel is predominately a scrappy quilter, and I love her work. You may recall I did her “Scrap Cabin” quiltalong some months back–as I fell in love with her border for that quilt.
Well…
Her new sewalong features her quilt “Parsnips”–which has a sashing treatment with which I also fell in love. Her green sashing color is much more intense than I could get my camera to capture from the front of her downloaded pattern.
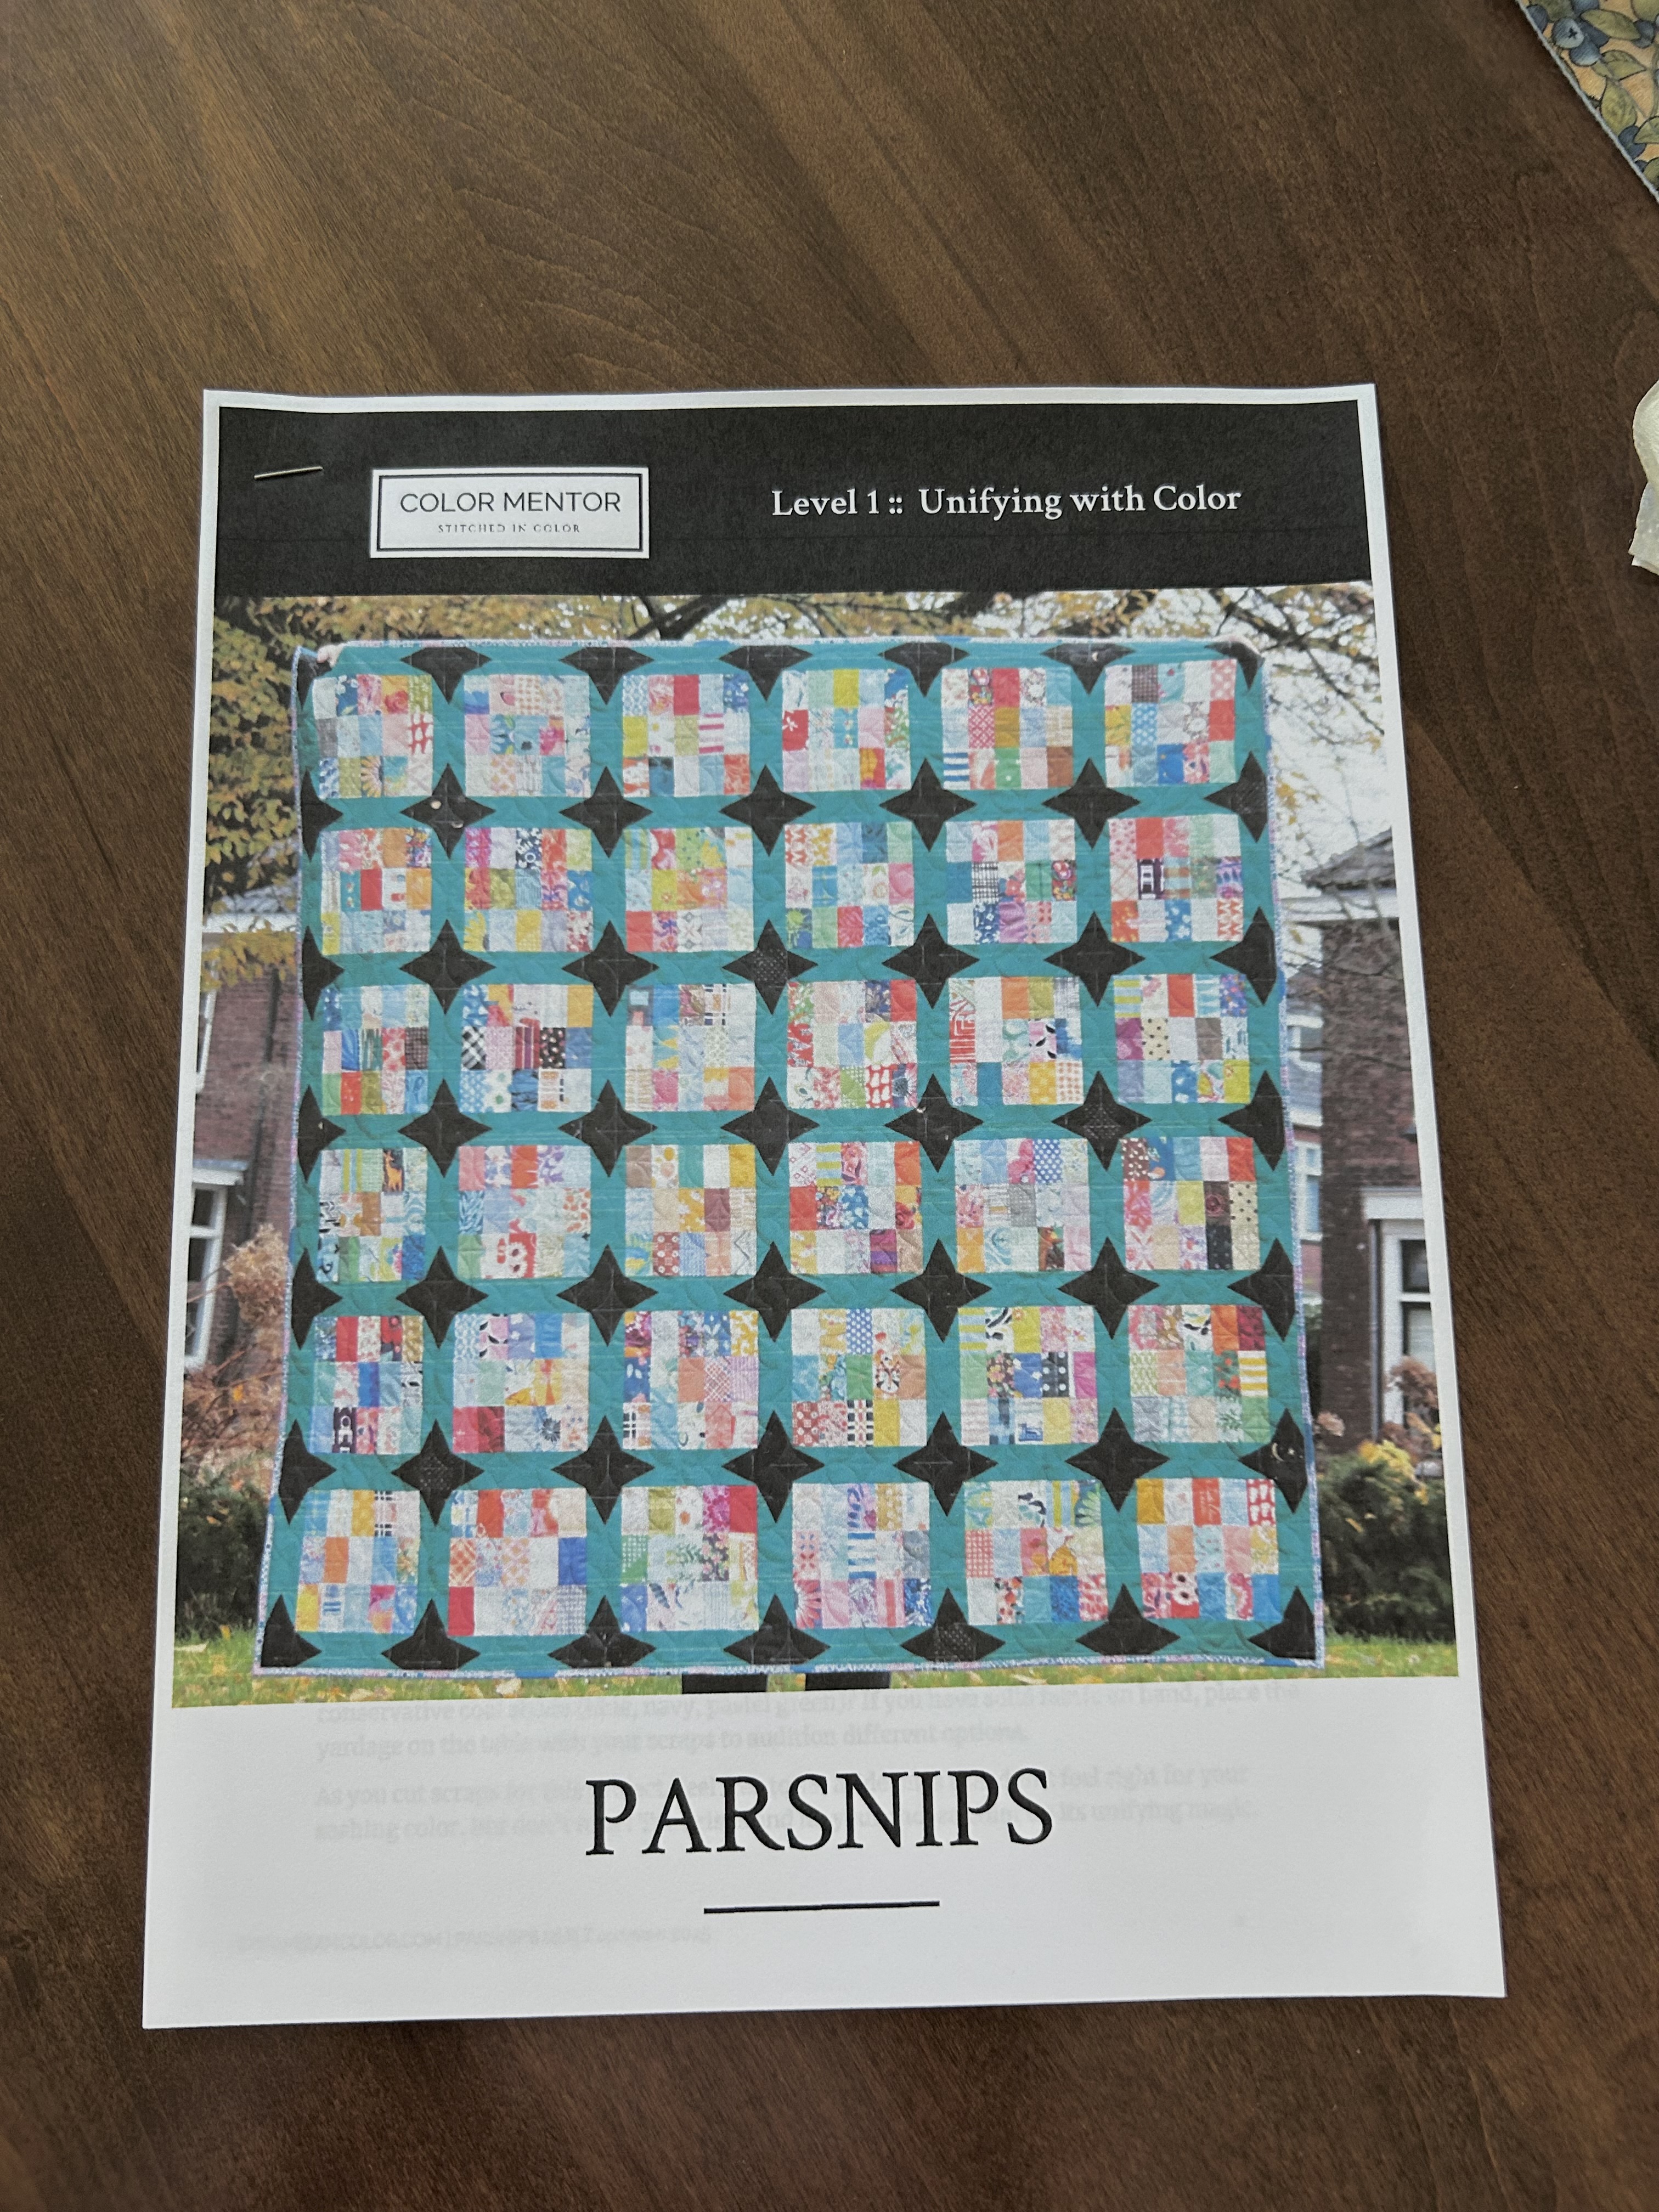
Here’s a better picture of how she used colors:

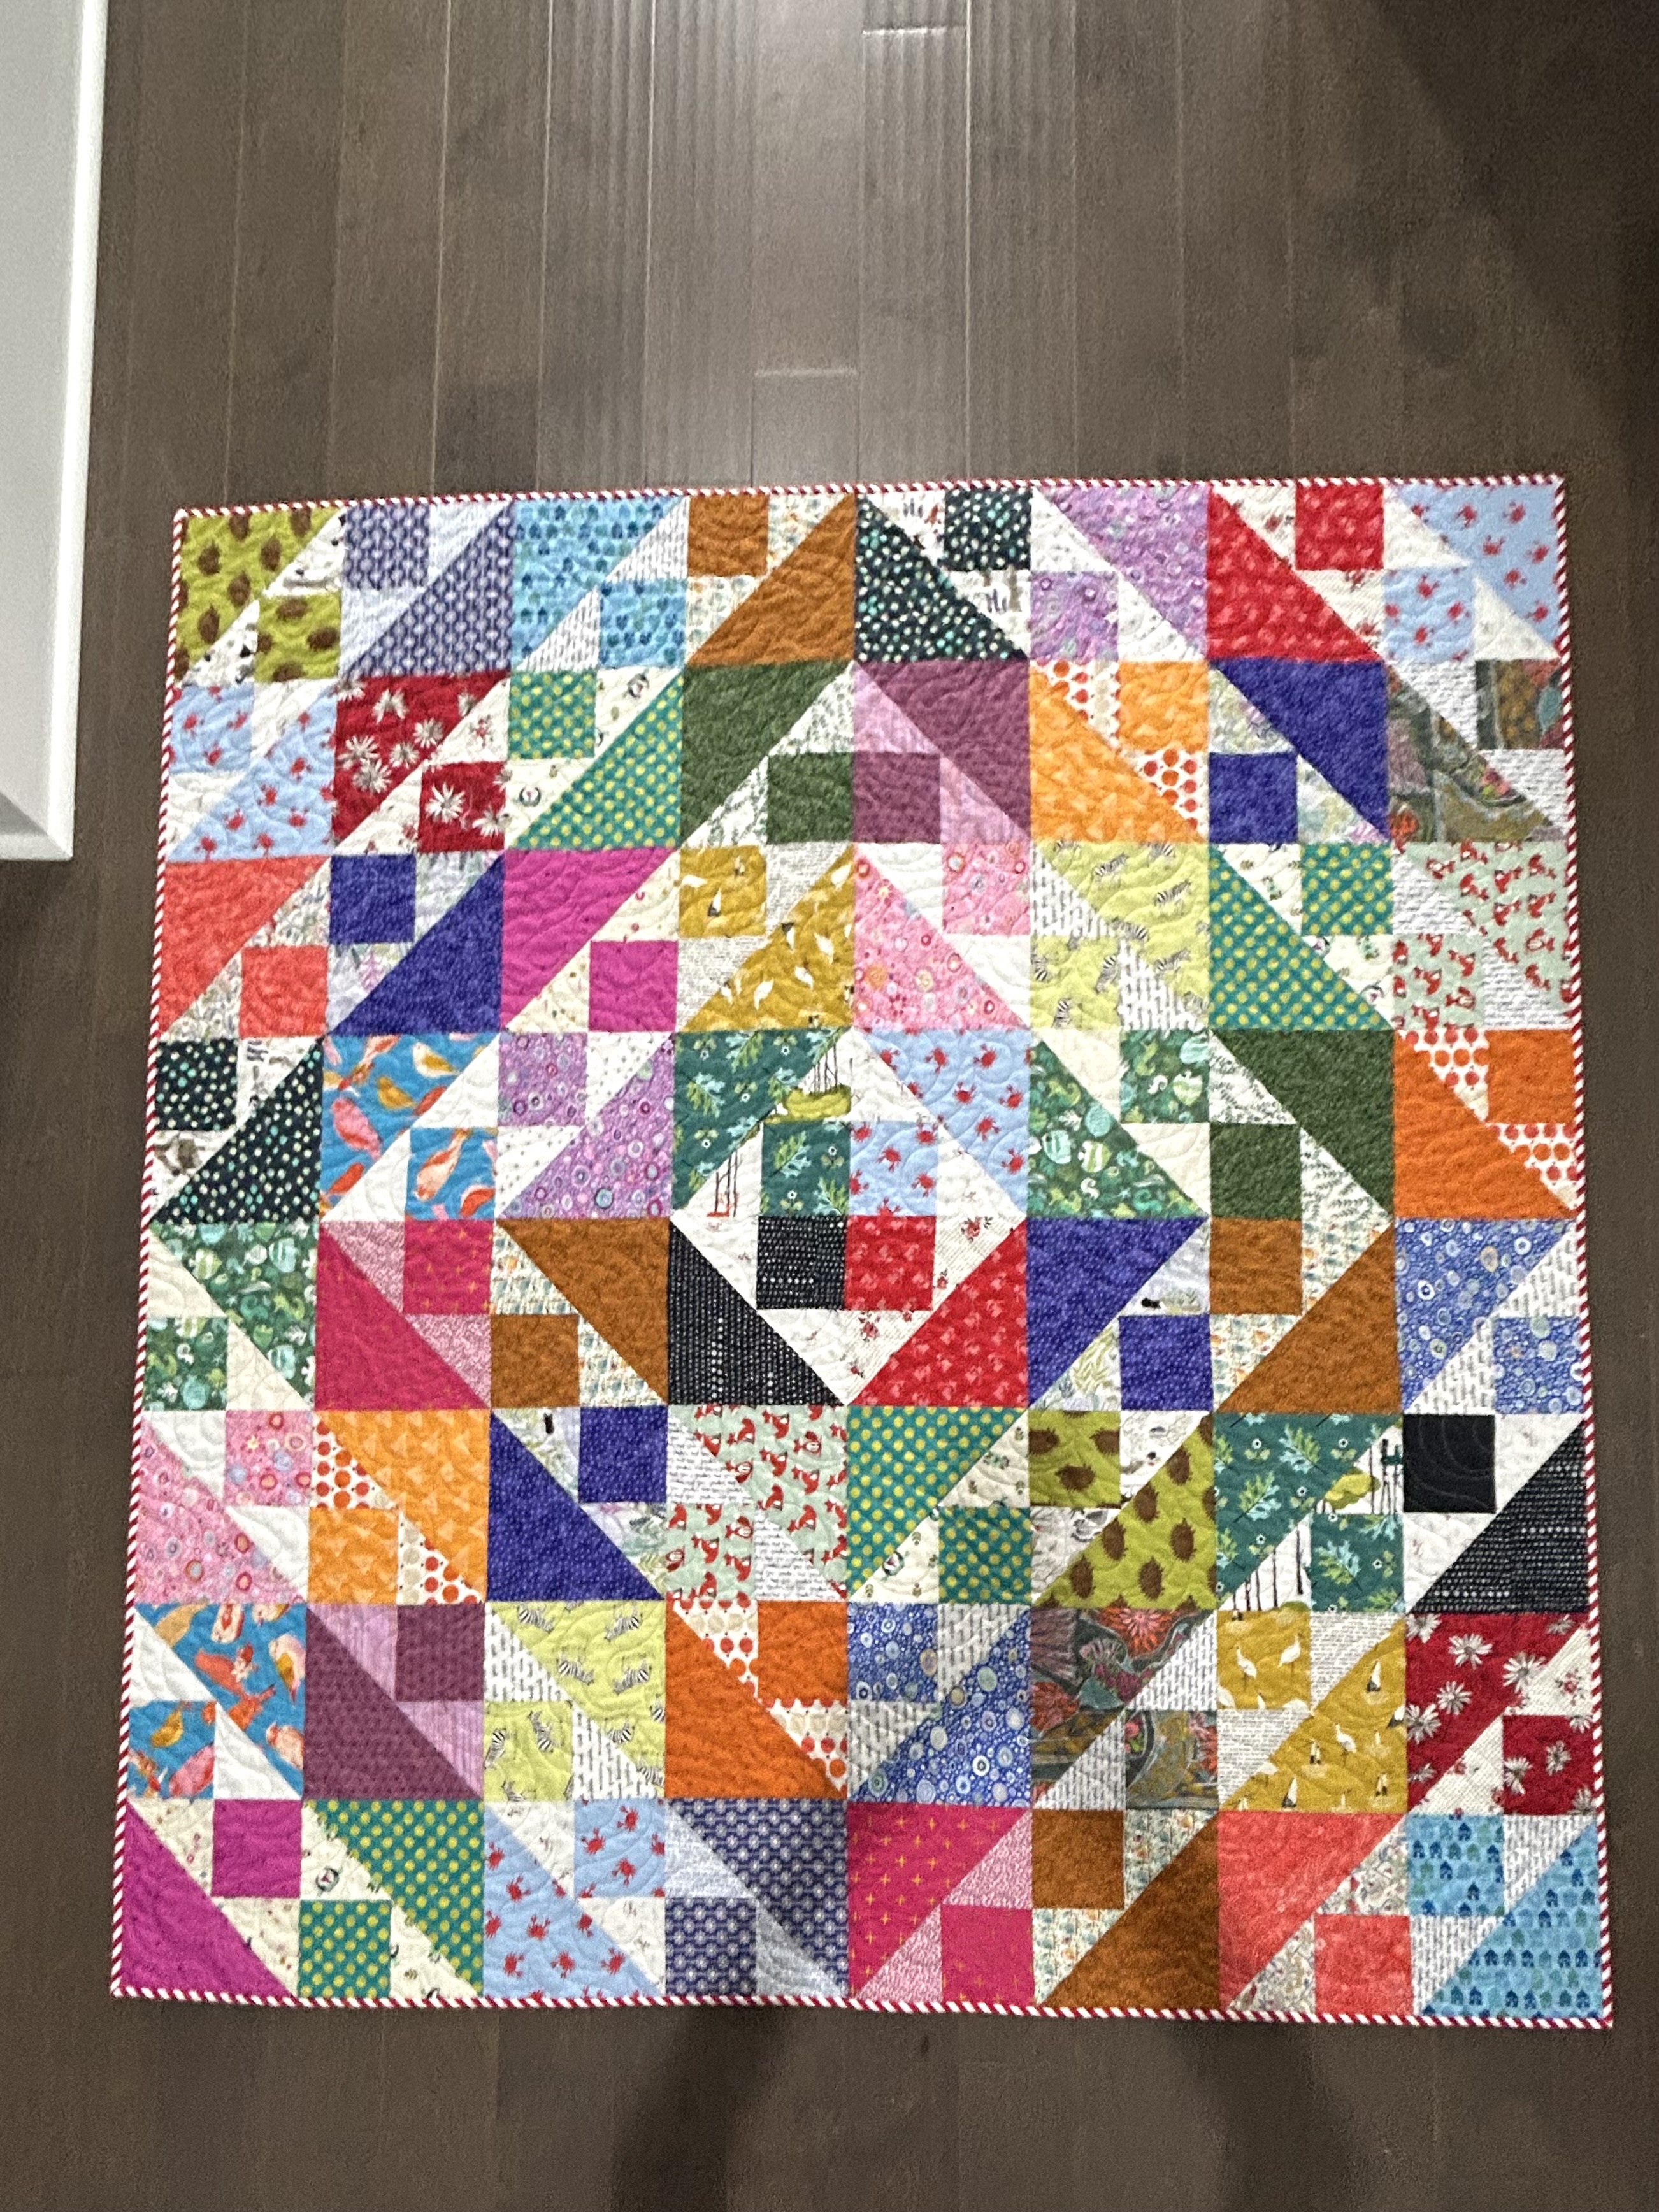
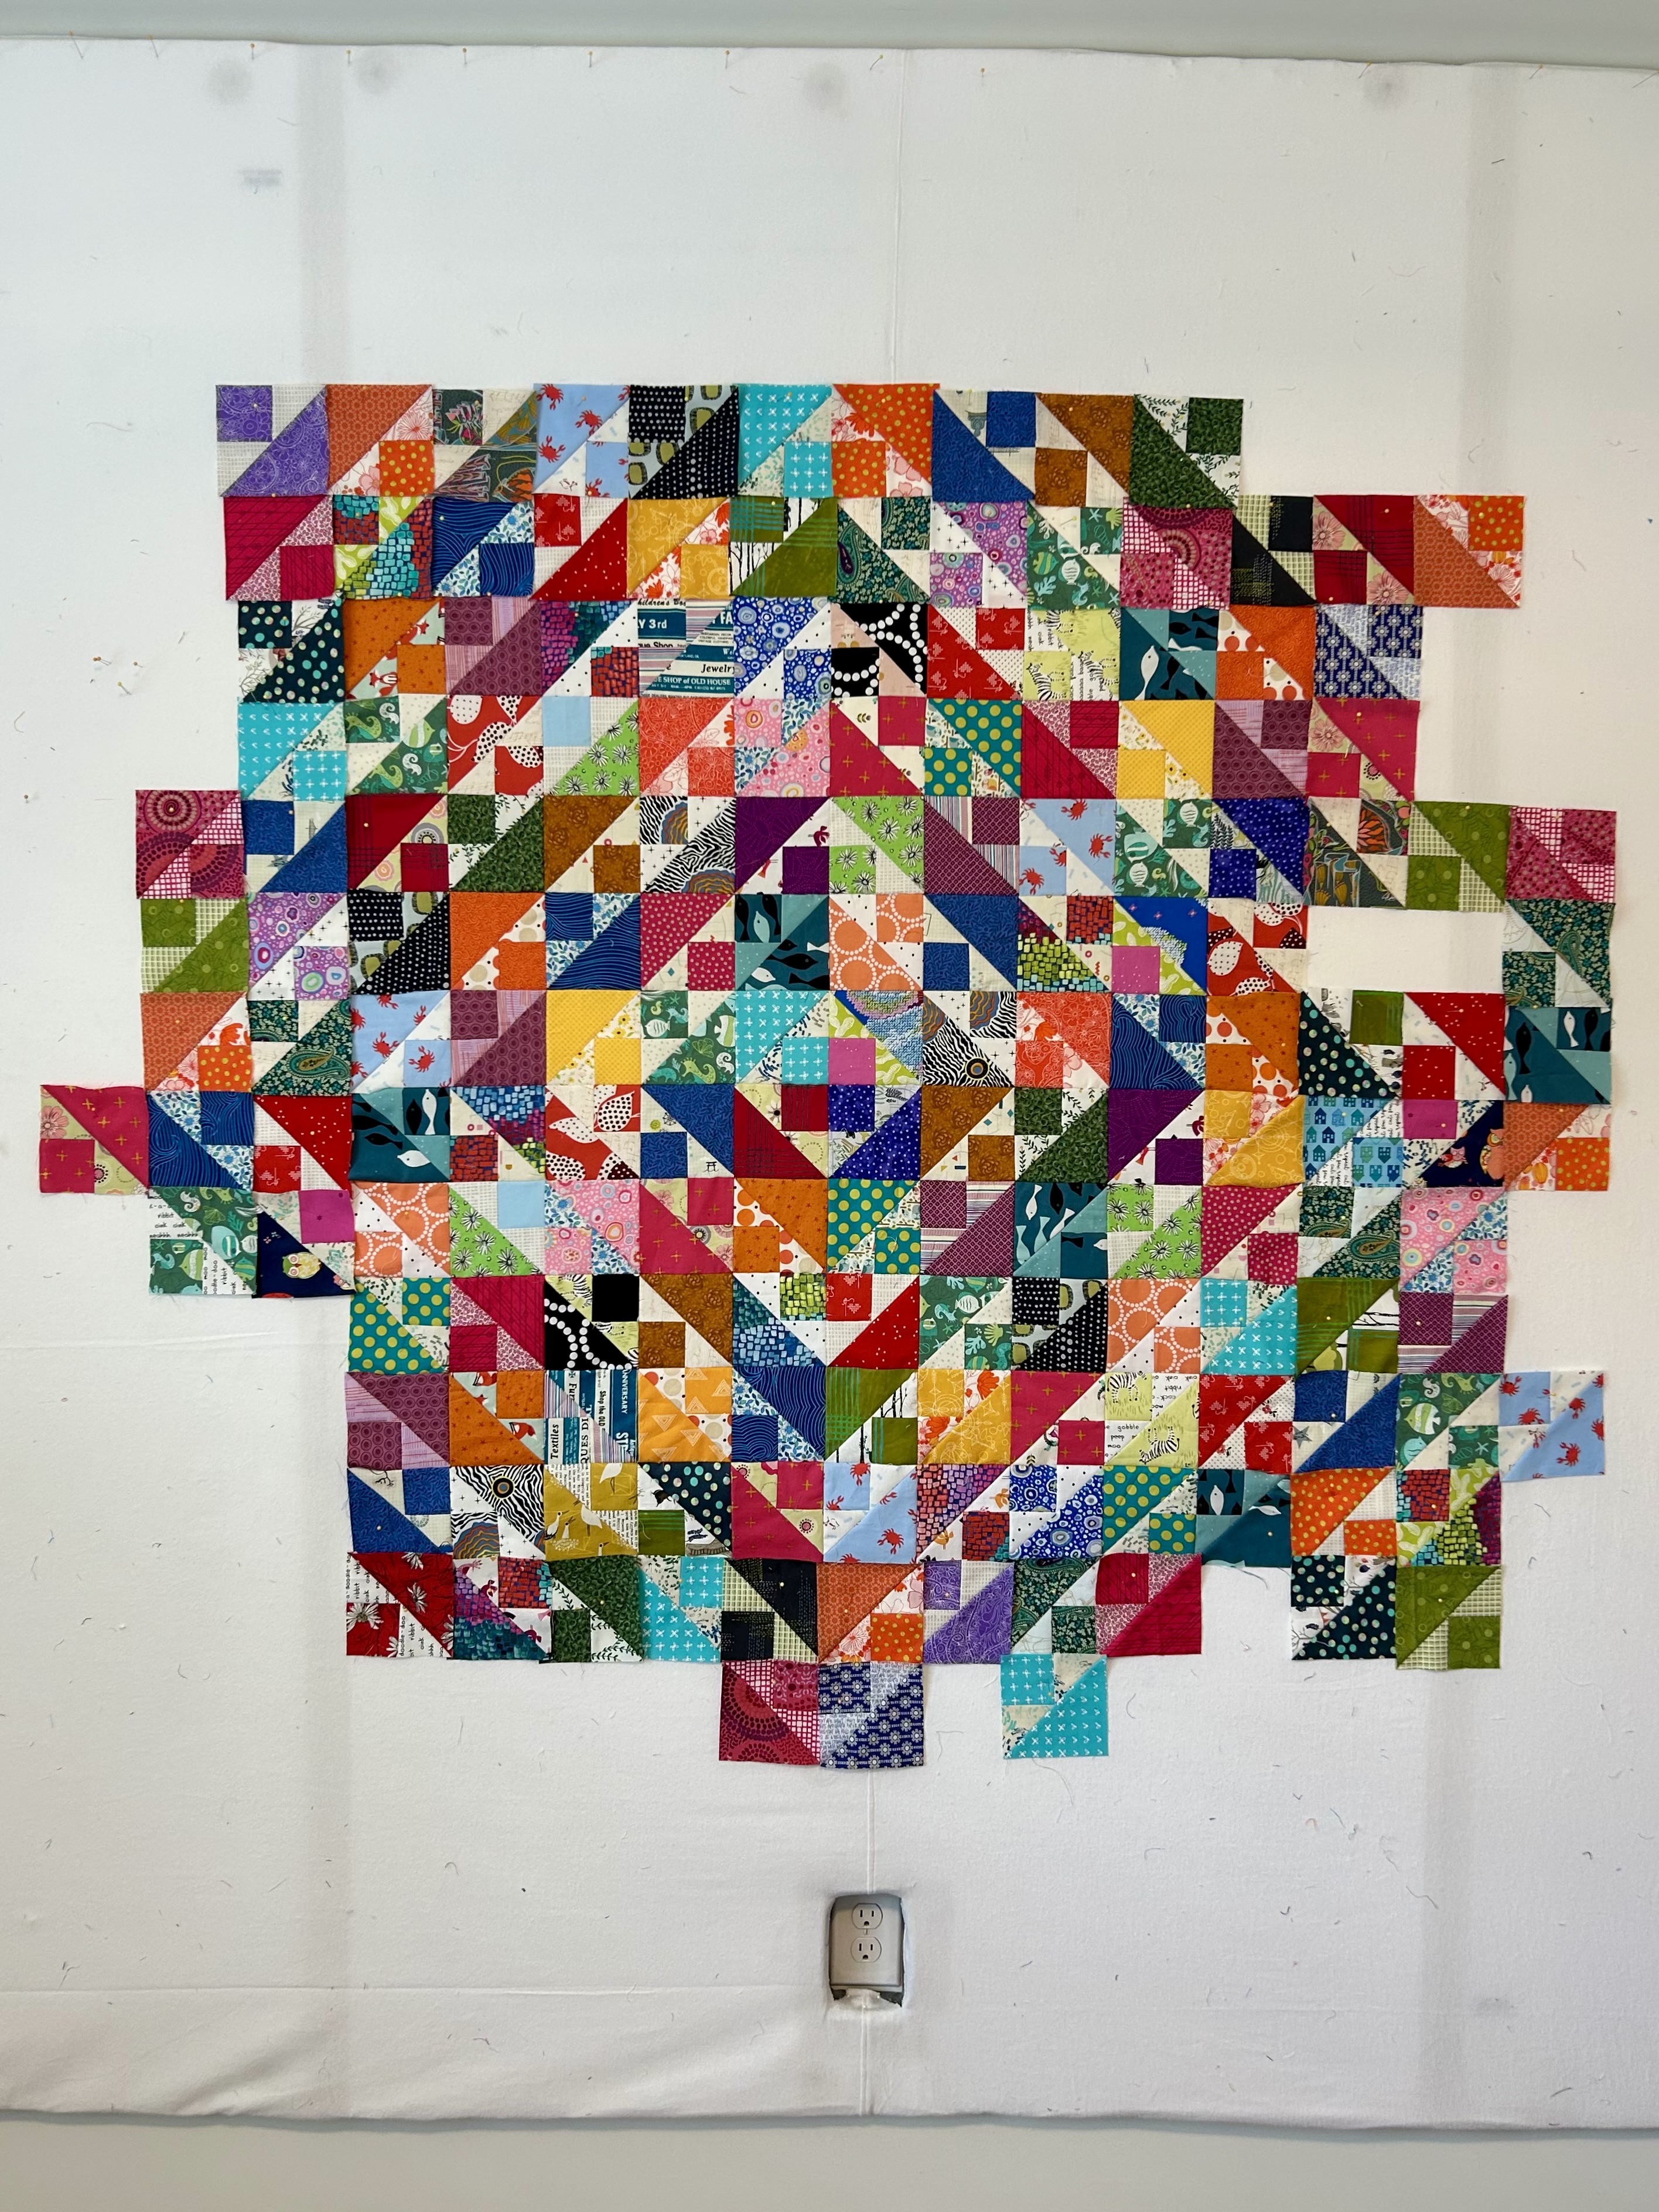
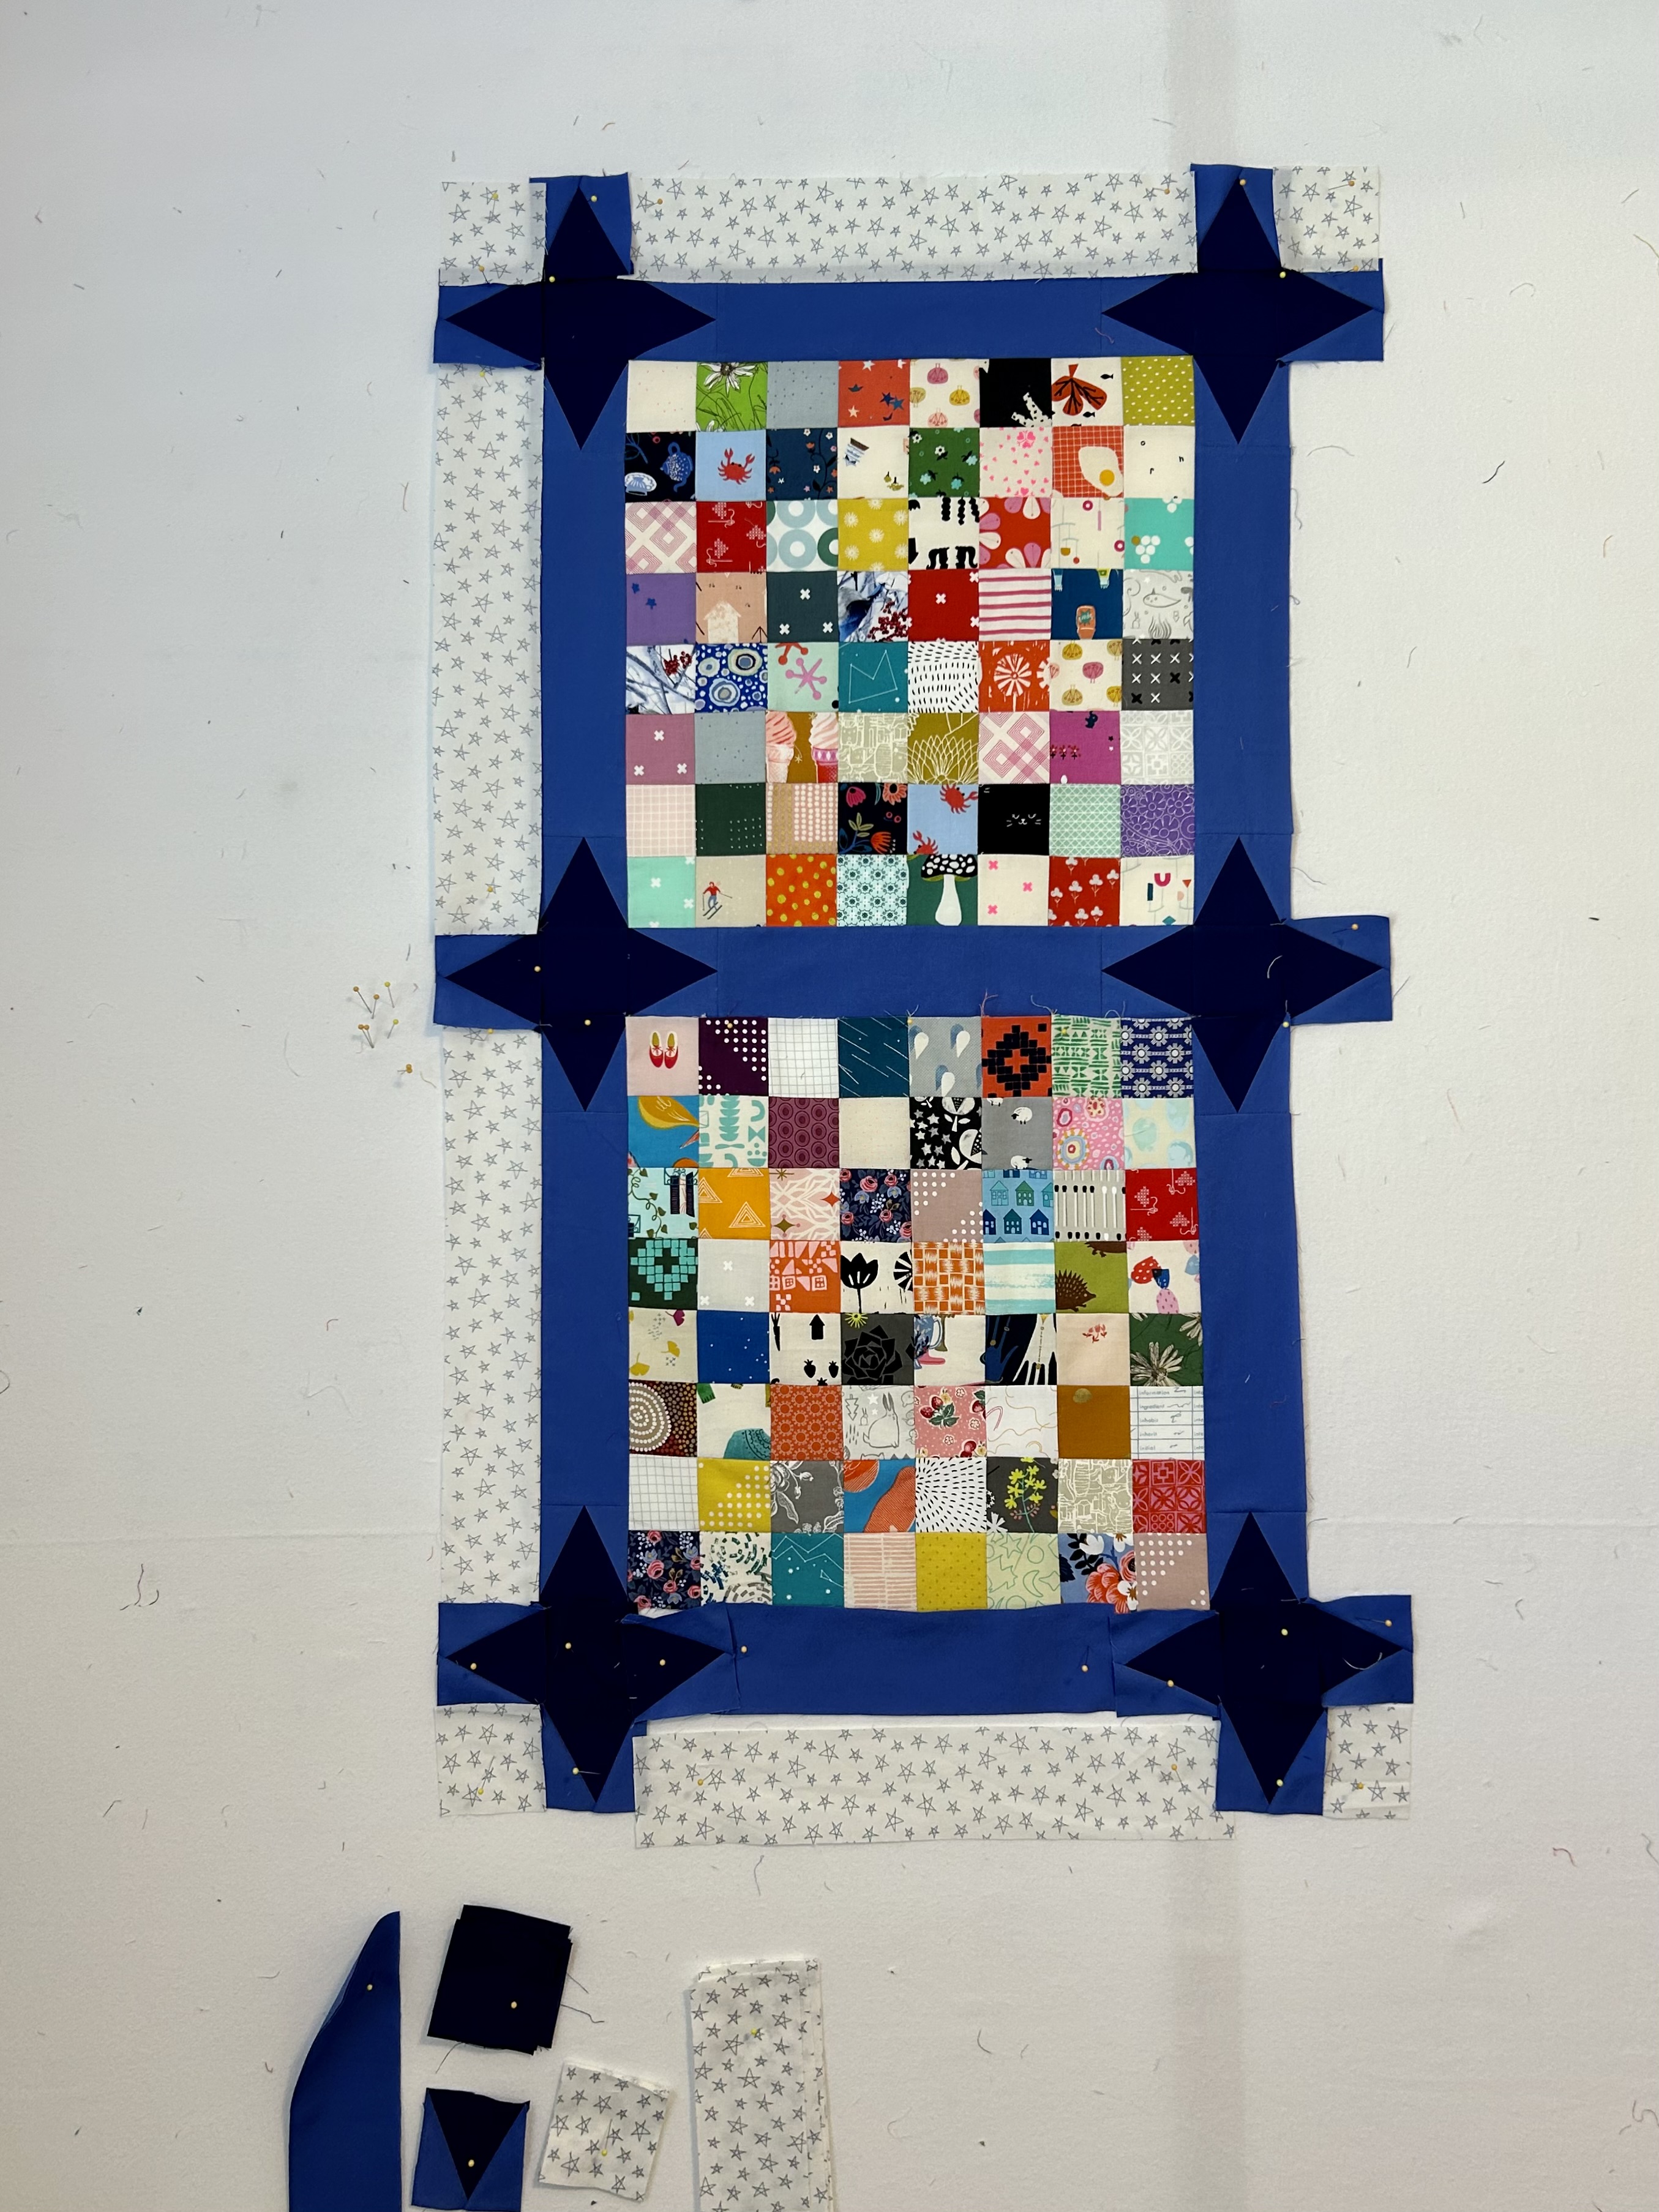
Rachel used rectangles, but I have a bin that has a ton of 2.5-inch squares, so I’m going to use squares.

And I was guessing the size of her sashings before she released her pattern, so mine are just a bit bigger. I’m using my “Tri Rec” rulers to make my triangle sashing blocks, but Rachel has included templates in her pattern.
I’m sewing together my squares as a leader/ender project for right now. And I’m adding an outer neutral border so I can have the whole of these cute stars along the edges. My block of squares measures 16 inches and I’m sewing it in 4 pieces. I don’t know yet how big I’ll make this quilt.
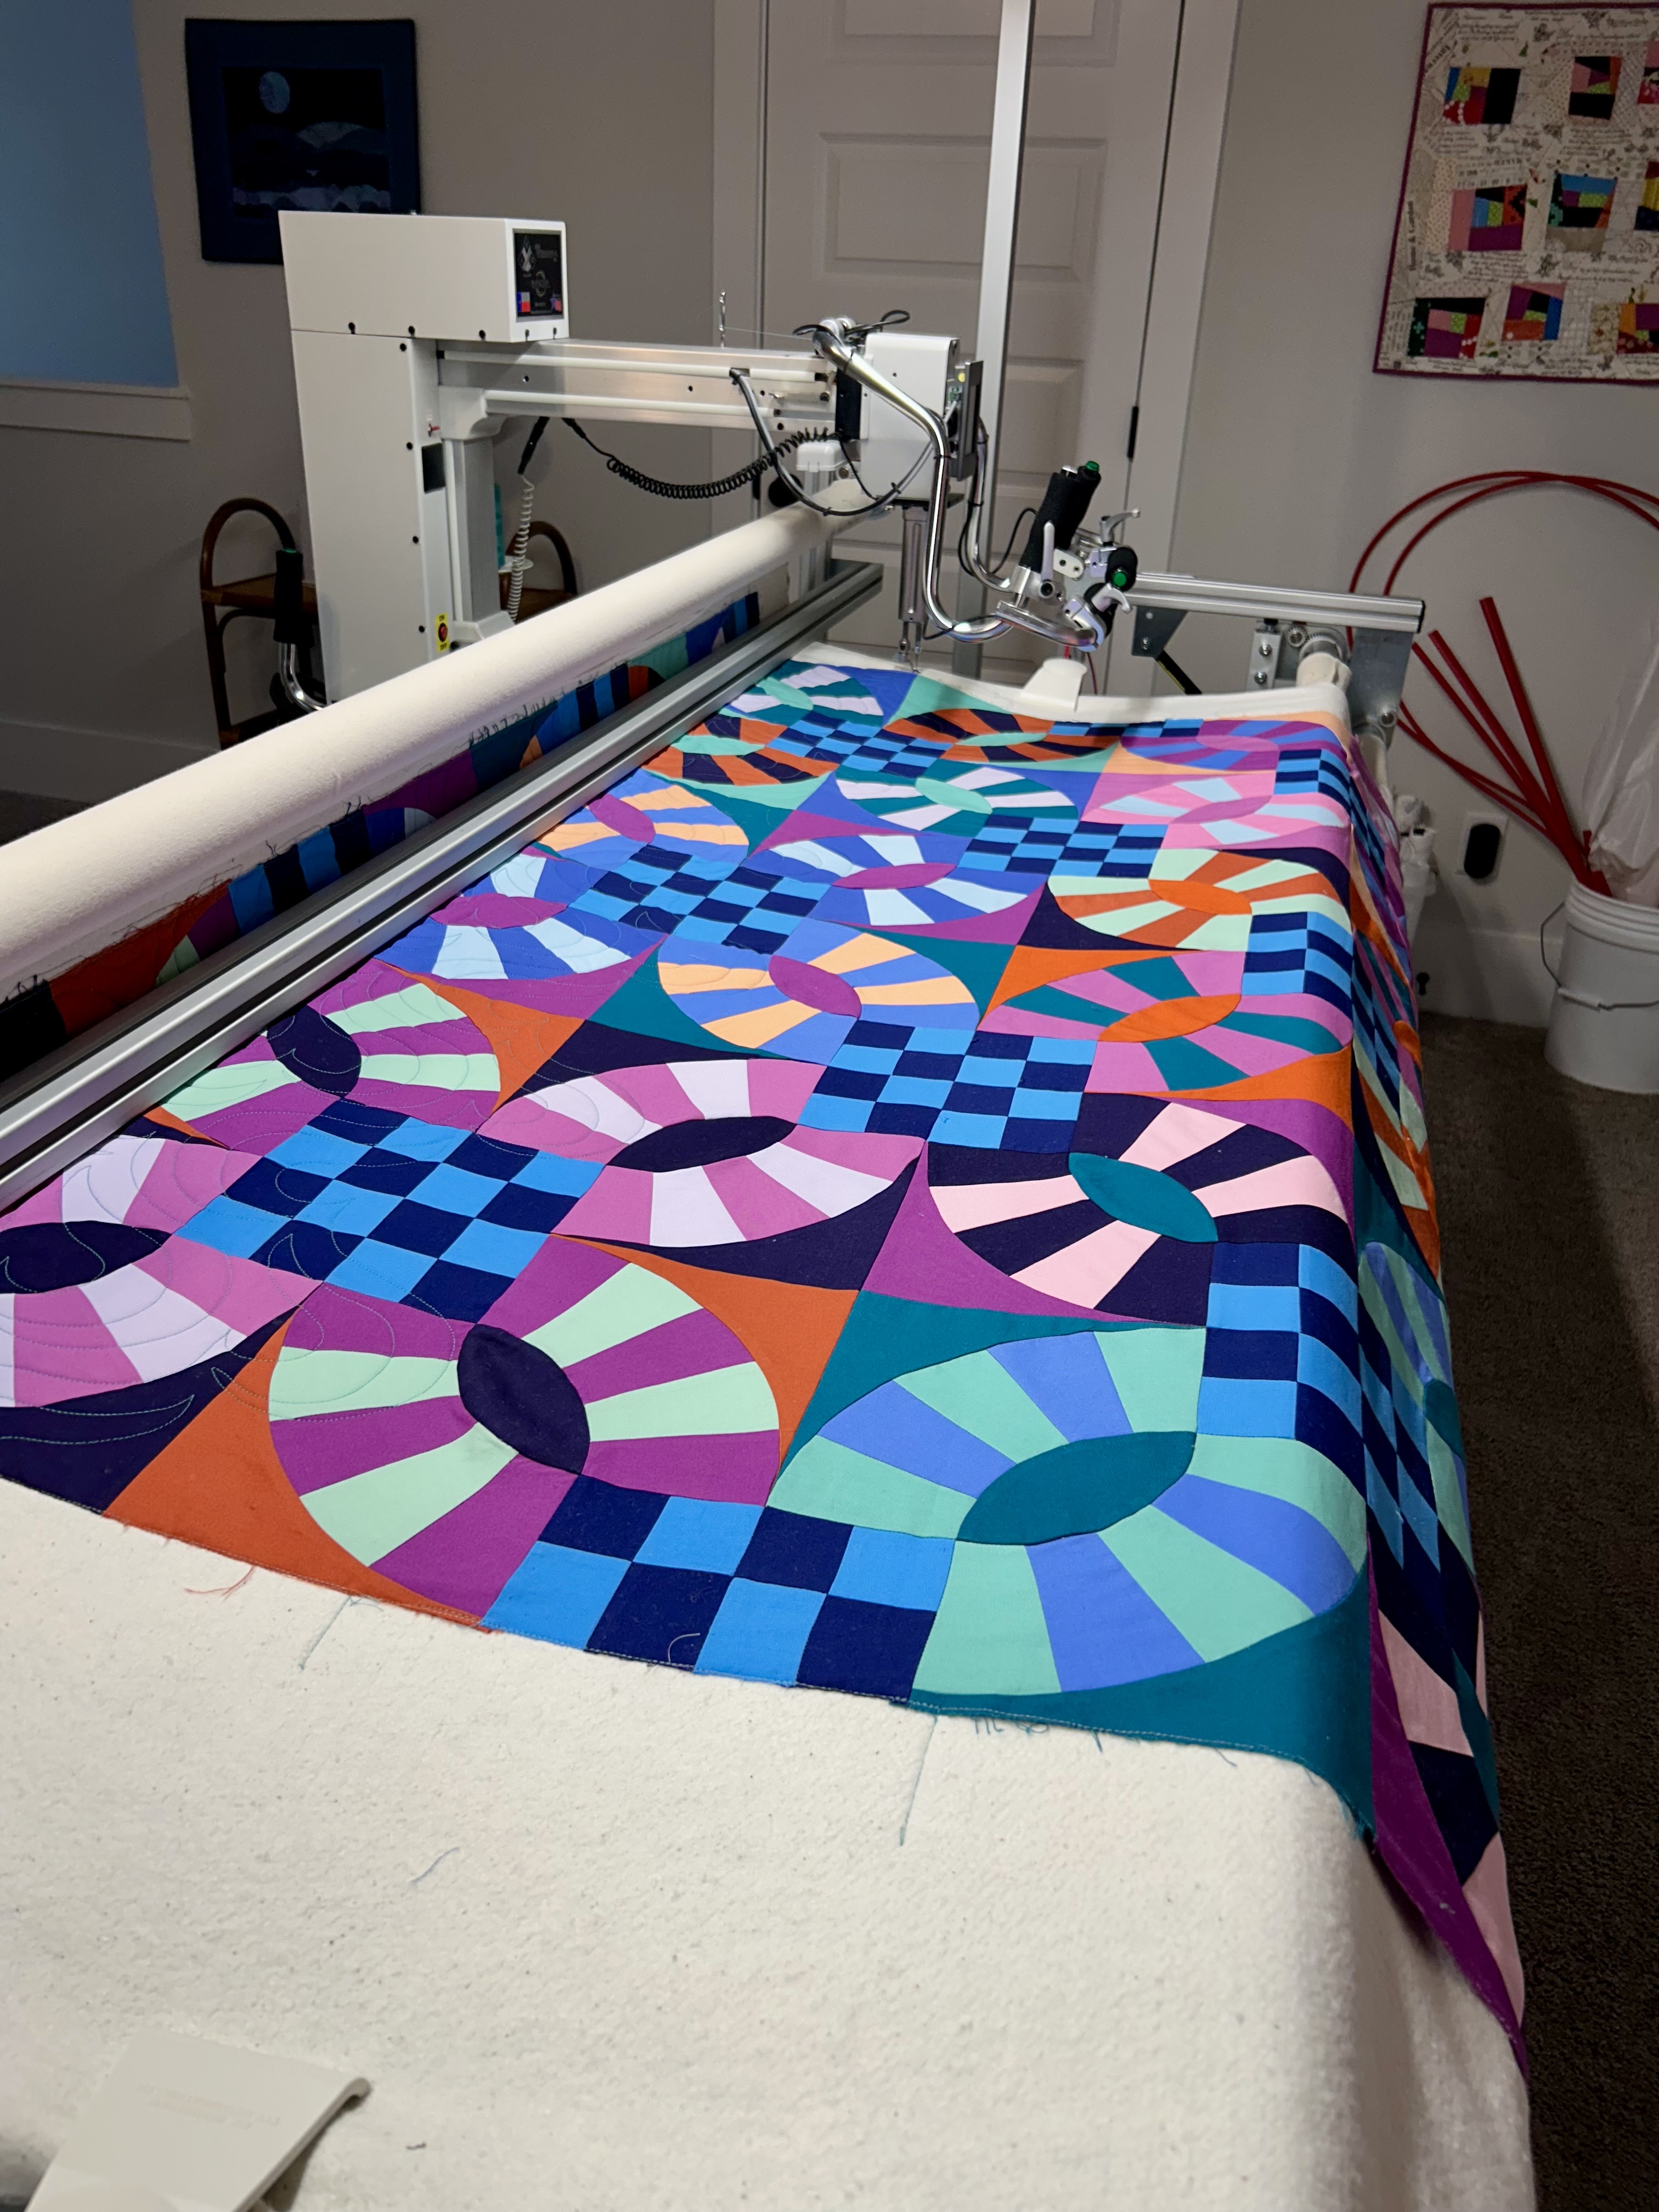
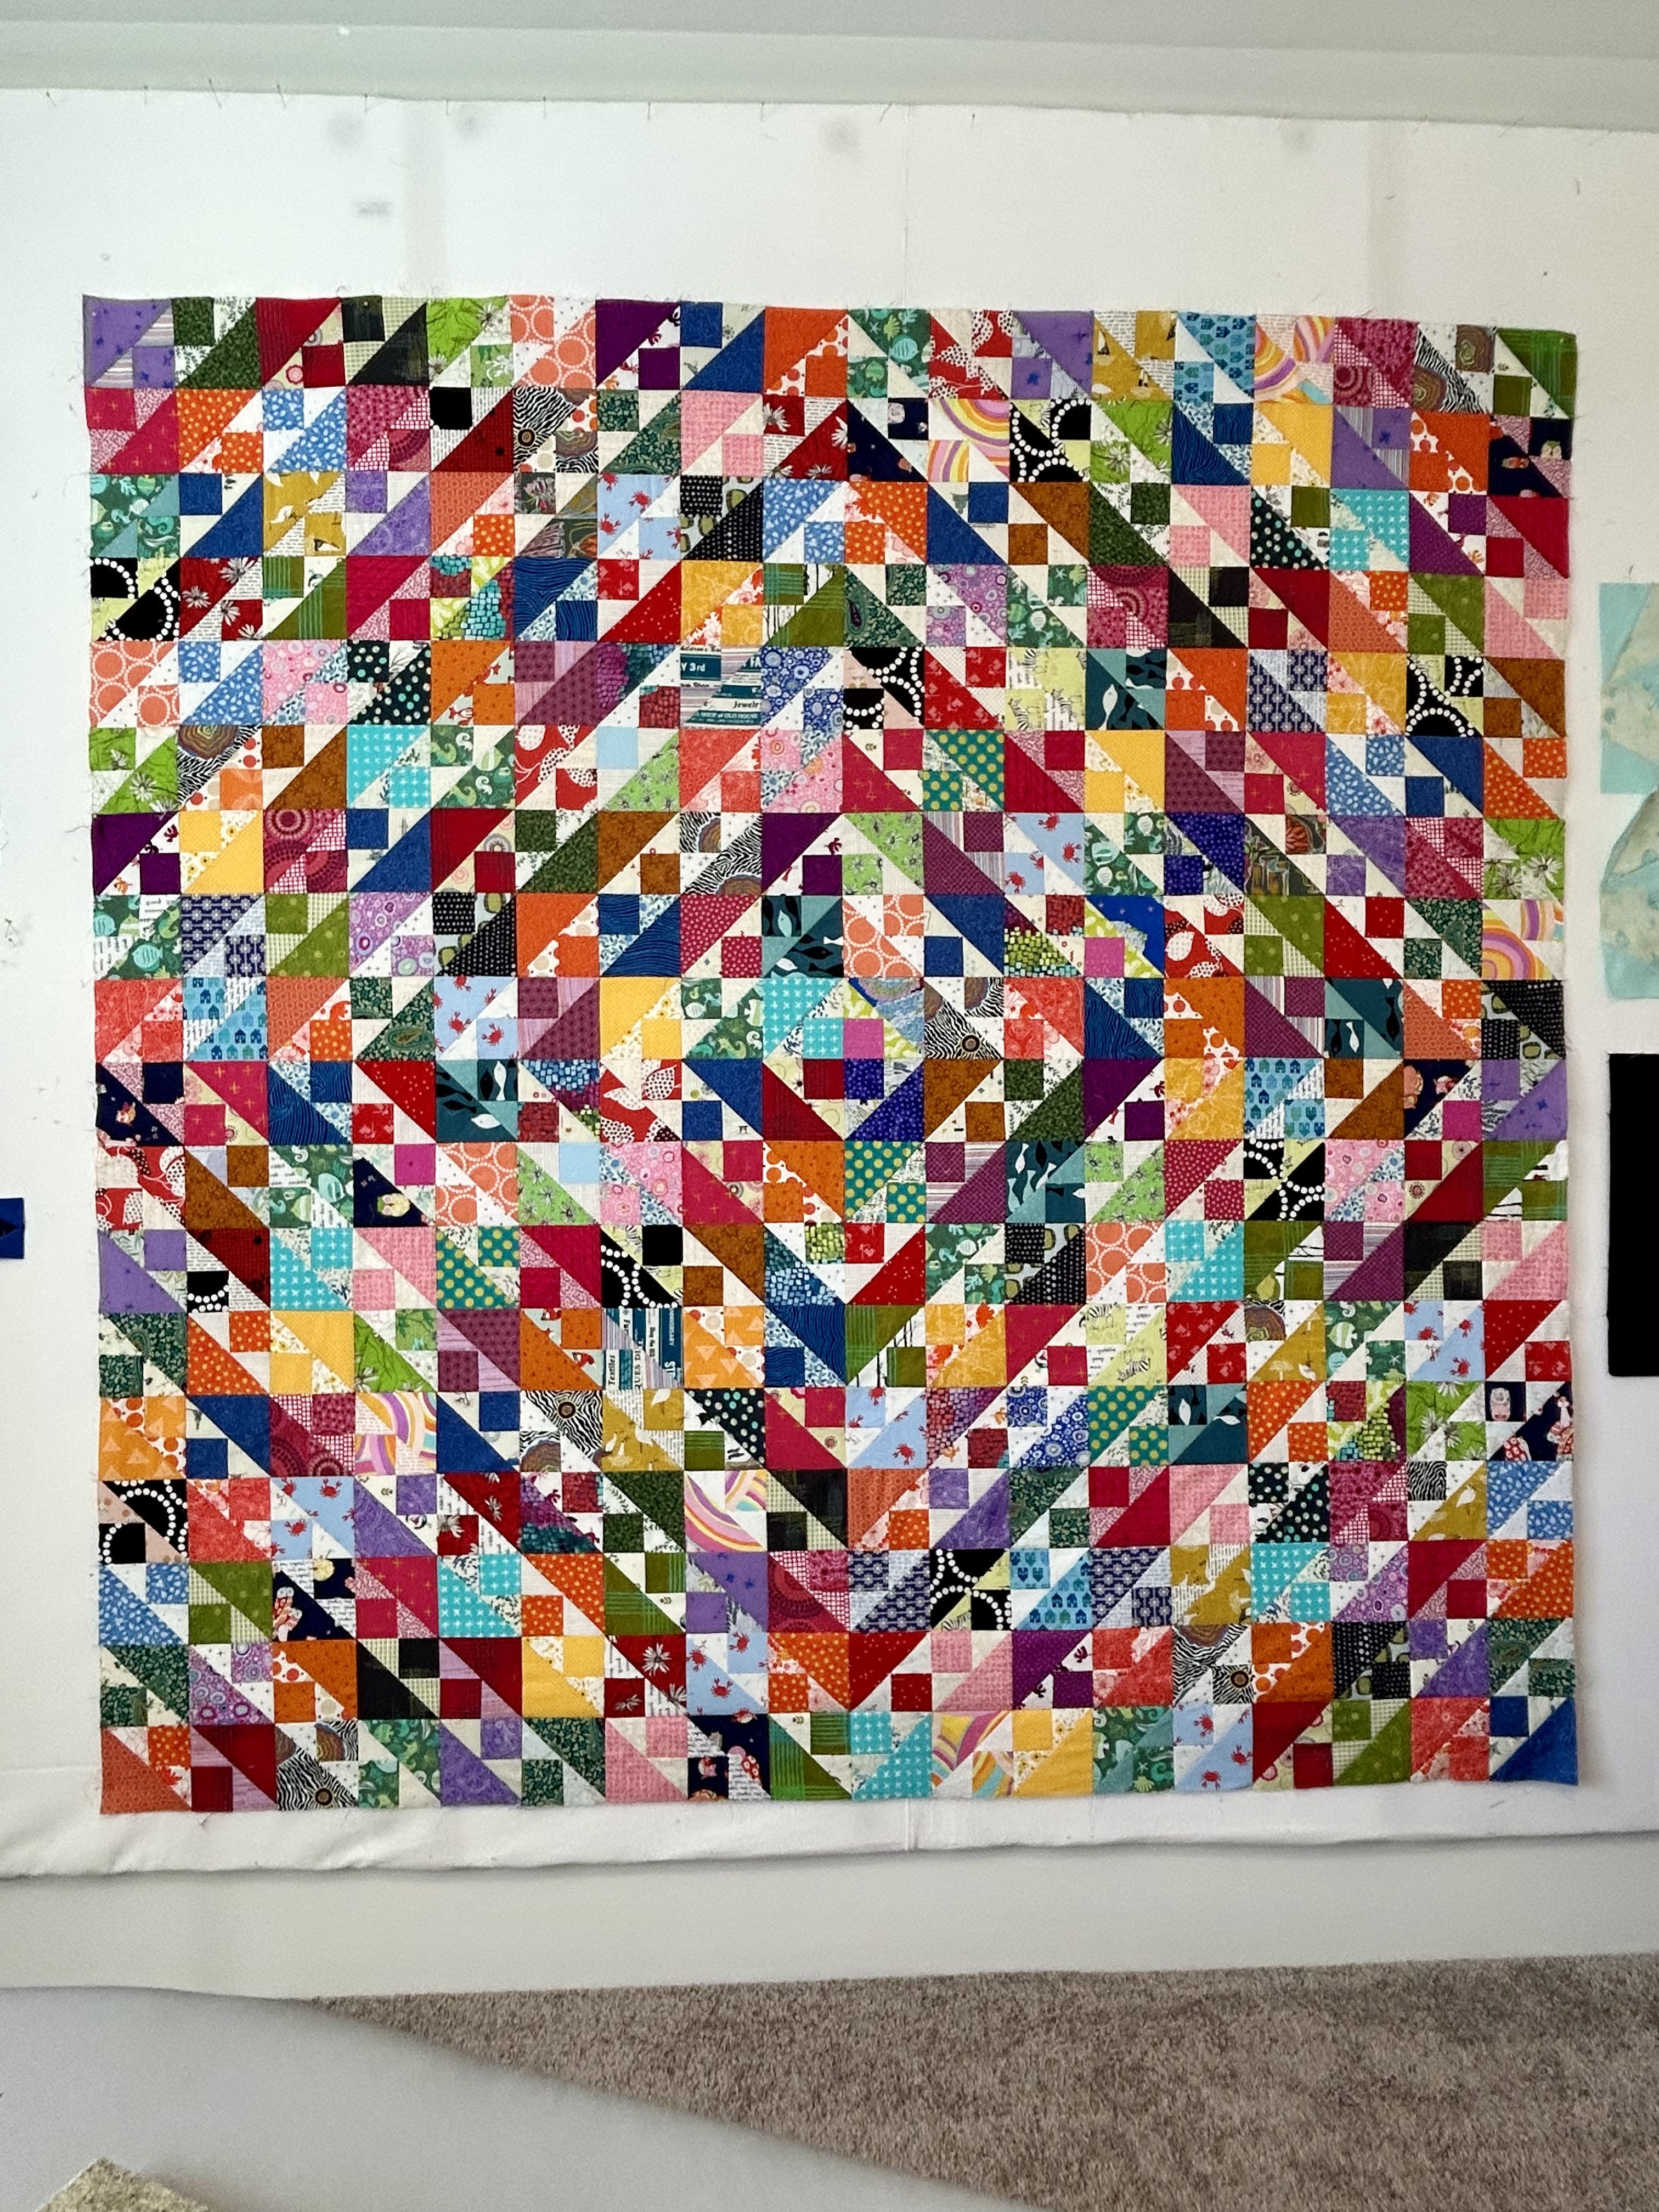
Clearly I’ve never met a ruler I didn’t like. I recently saw an involved quilt that used the kite block, and I was so intrigued that I ordered the recommended 5-inch version.
In the process of trying out the ruler–it’s awesome–I seem to have started a quilt using a kite block. I’ve drawn a plan now and am cutting out more sets of 4 blocks.
I really like the movement in this arrangement and will use the single rows as if they are sashings. I already see where I want to move that light blue single row–I think it needs to be a block on its own and there need to be more blocks with light kites and stronger outside pieces. And that’s how my quilting goes…

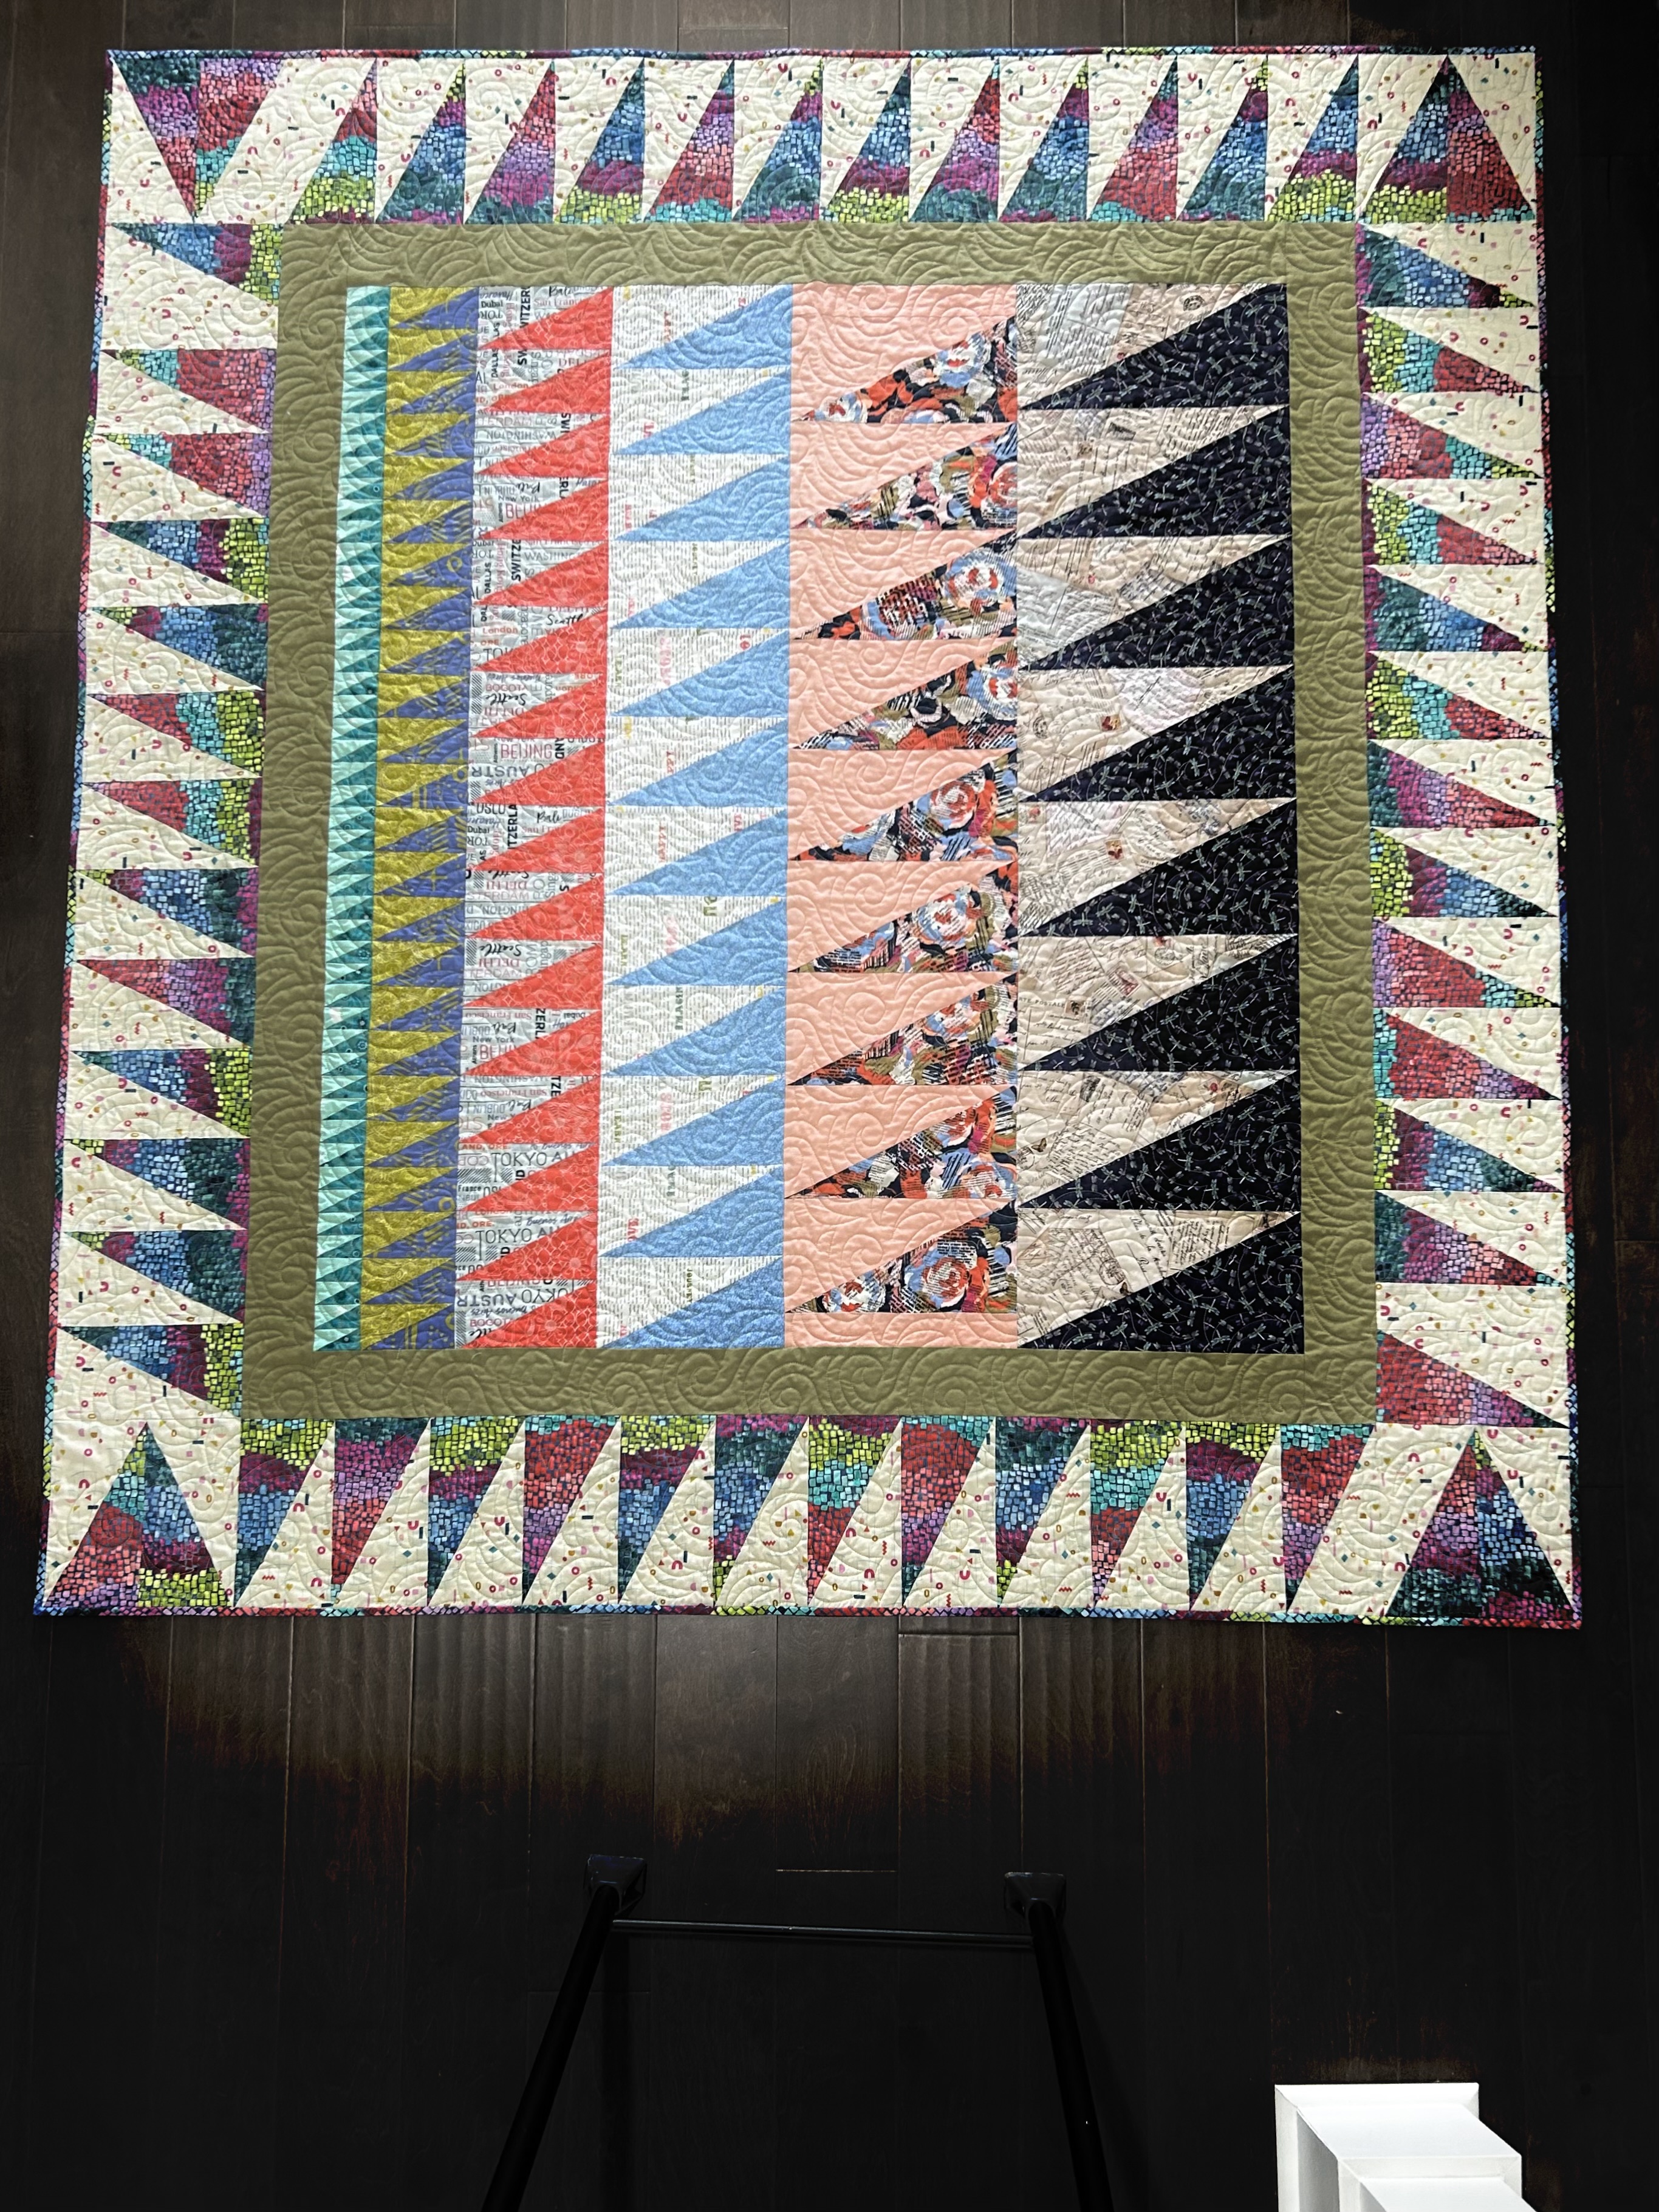
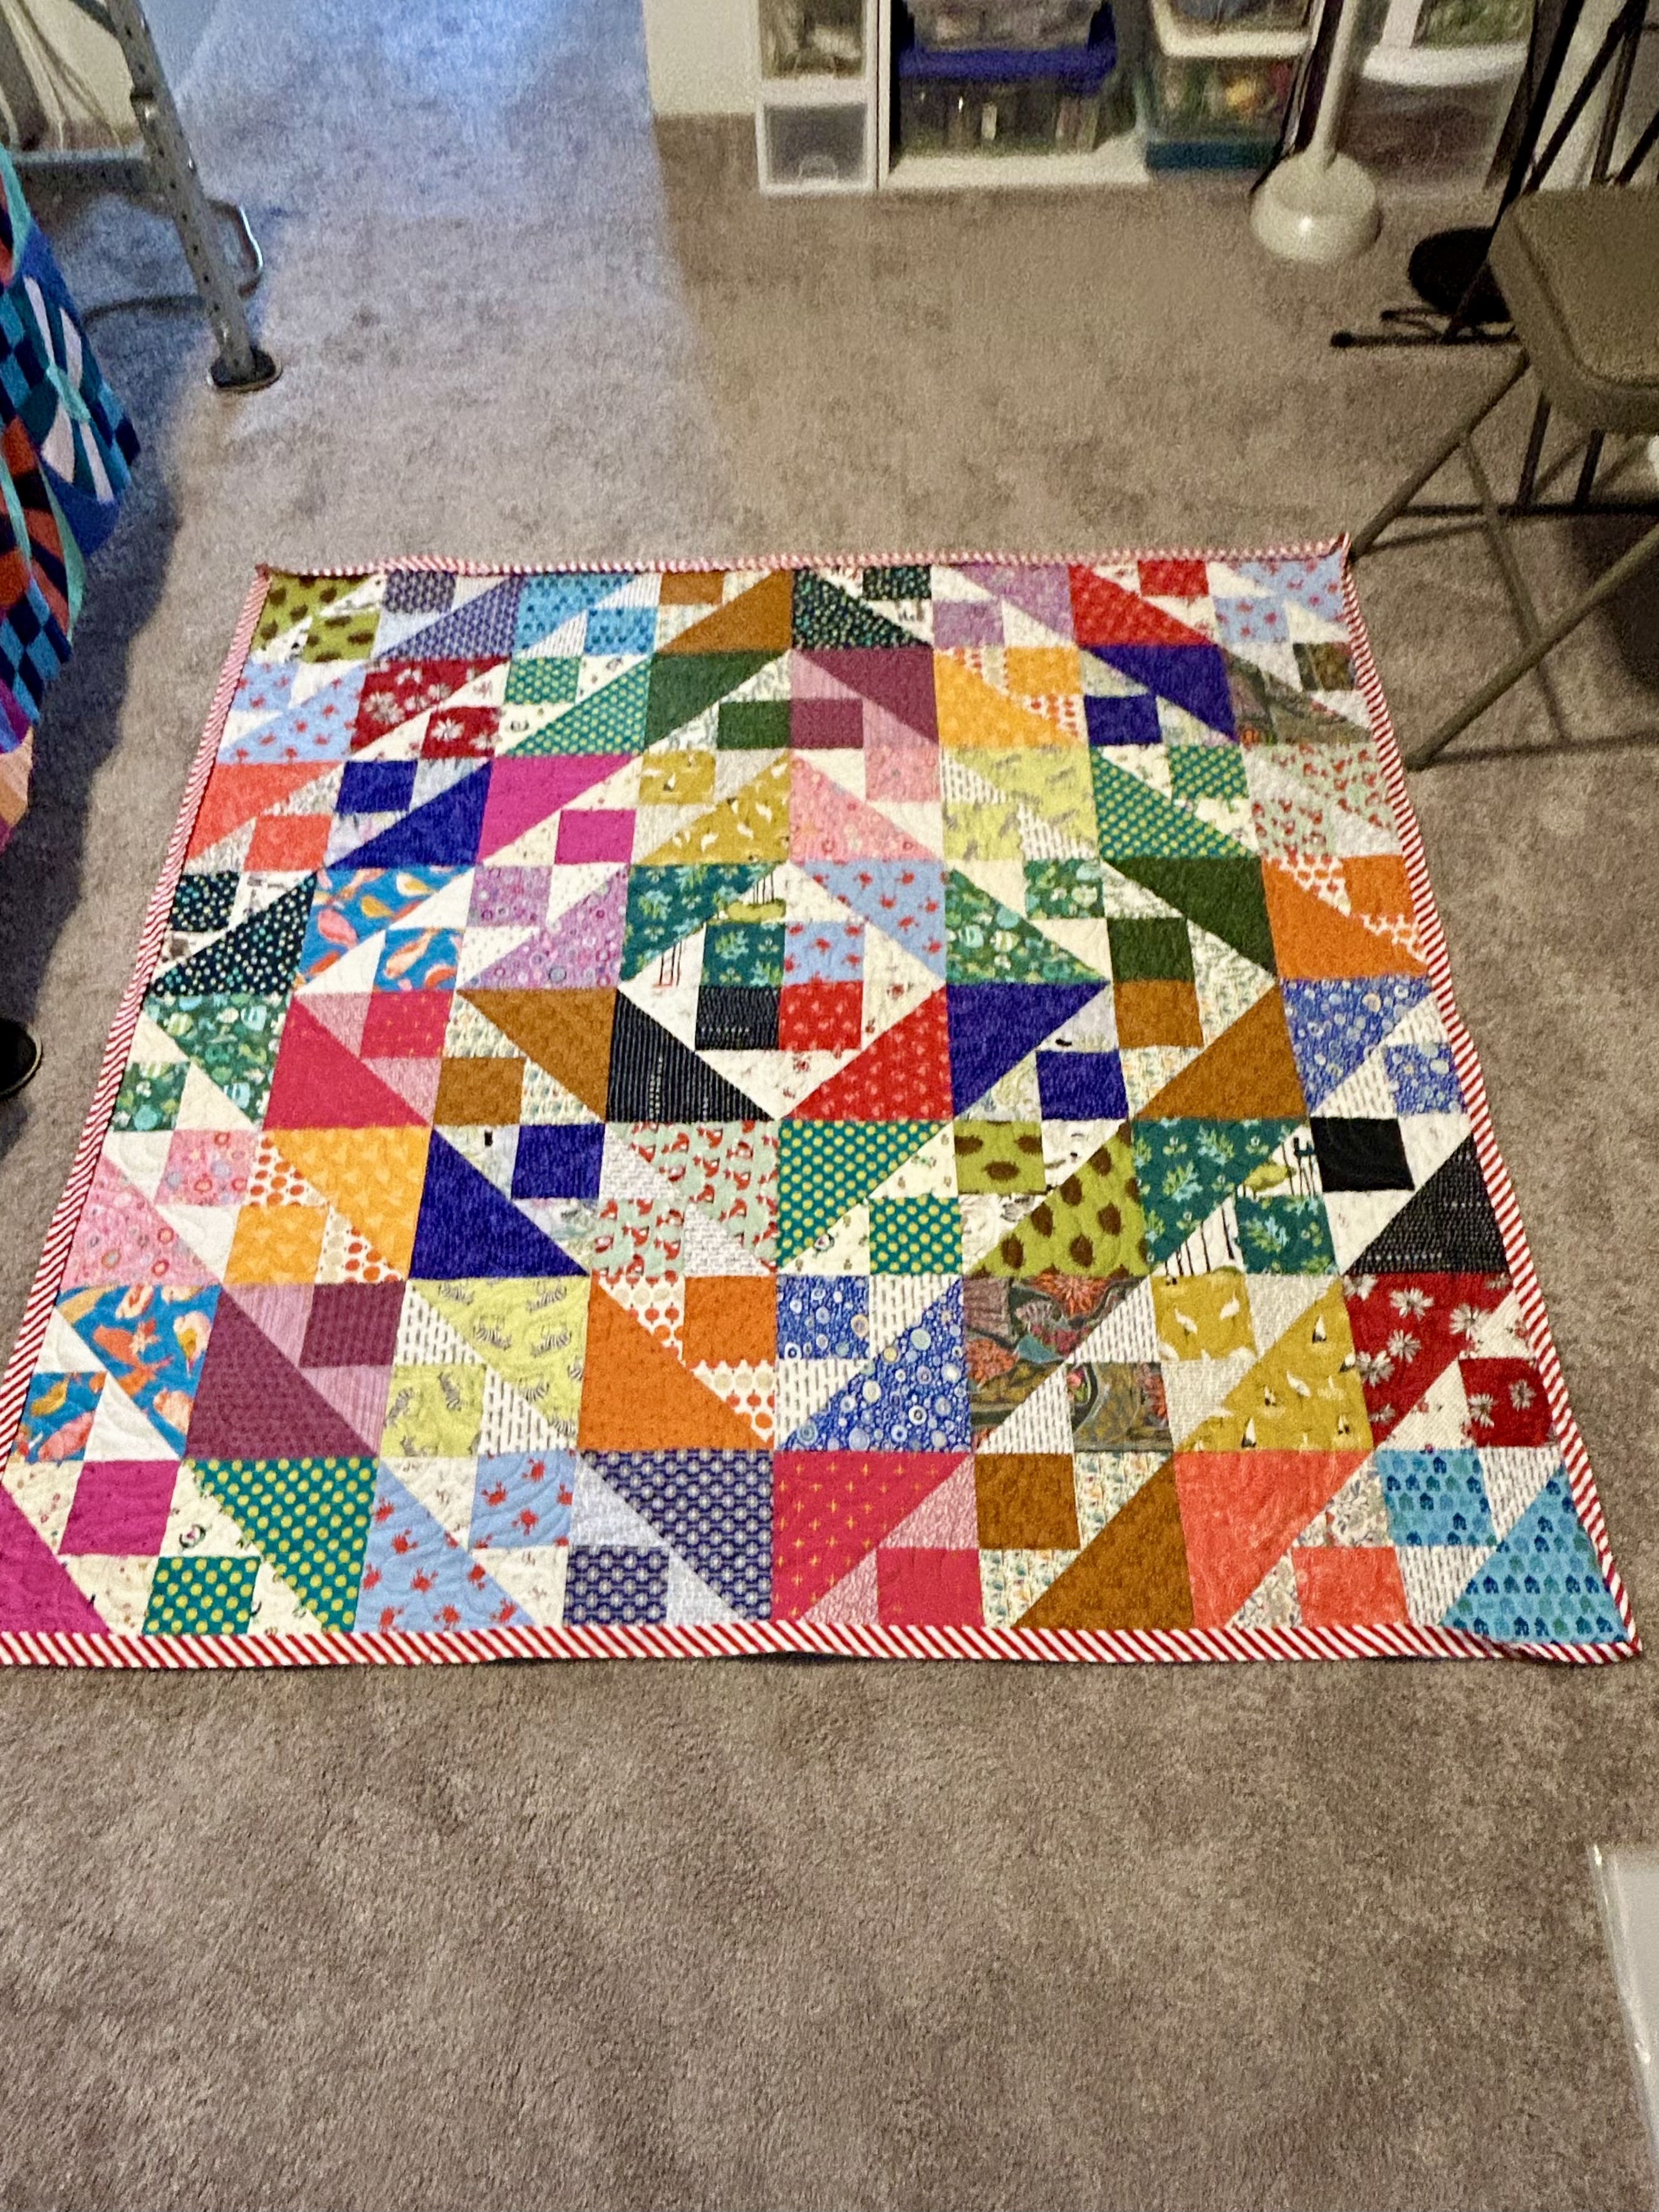
The 4-inch Cat’s Cradle quilt top is done, ironed, and pinned to the design wall while it waits for its backing and for its turn on the longarm–which gave me the design wall room to play with Parsnip and the kites.
This quilt needs a name. Right now, I have no idea…
And I will say I’m not done at all with playing with these Cat’s Cradle rulers. There are so many different settings in the “Cat’itude” little book by Deb Heatherly.
This week is flying by so fast…
Now I need to stop and get “Big Slice” done and off the longarm. But that means I need to stop playing, which is always so hard for me to do.