This curved leaf potholder from Amira Ameruddin–found on Instagram (amira__little mushroom cap)–really needs a bias binding. Note that I made my top and bottom as Amira showed, then used a freezer paper template to cut out my leaf as I was hopeless with freehand cutting.
Start binding on the right side of the bottom of your leaf–after choosing which side you want to be the top side of your potholder. At the pointed upper end, treat that like a normal mitered quilt corner. ***Note that when I am almost to the end, I folded the binding at the start over.
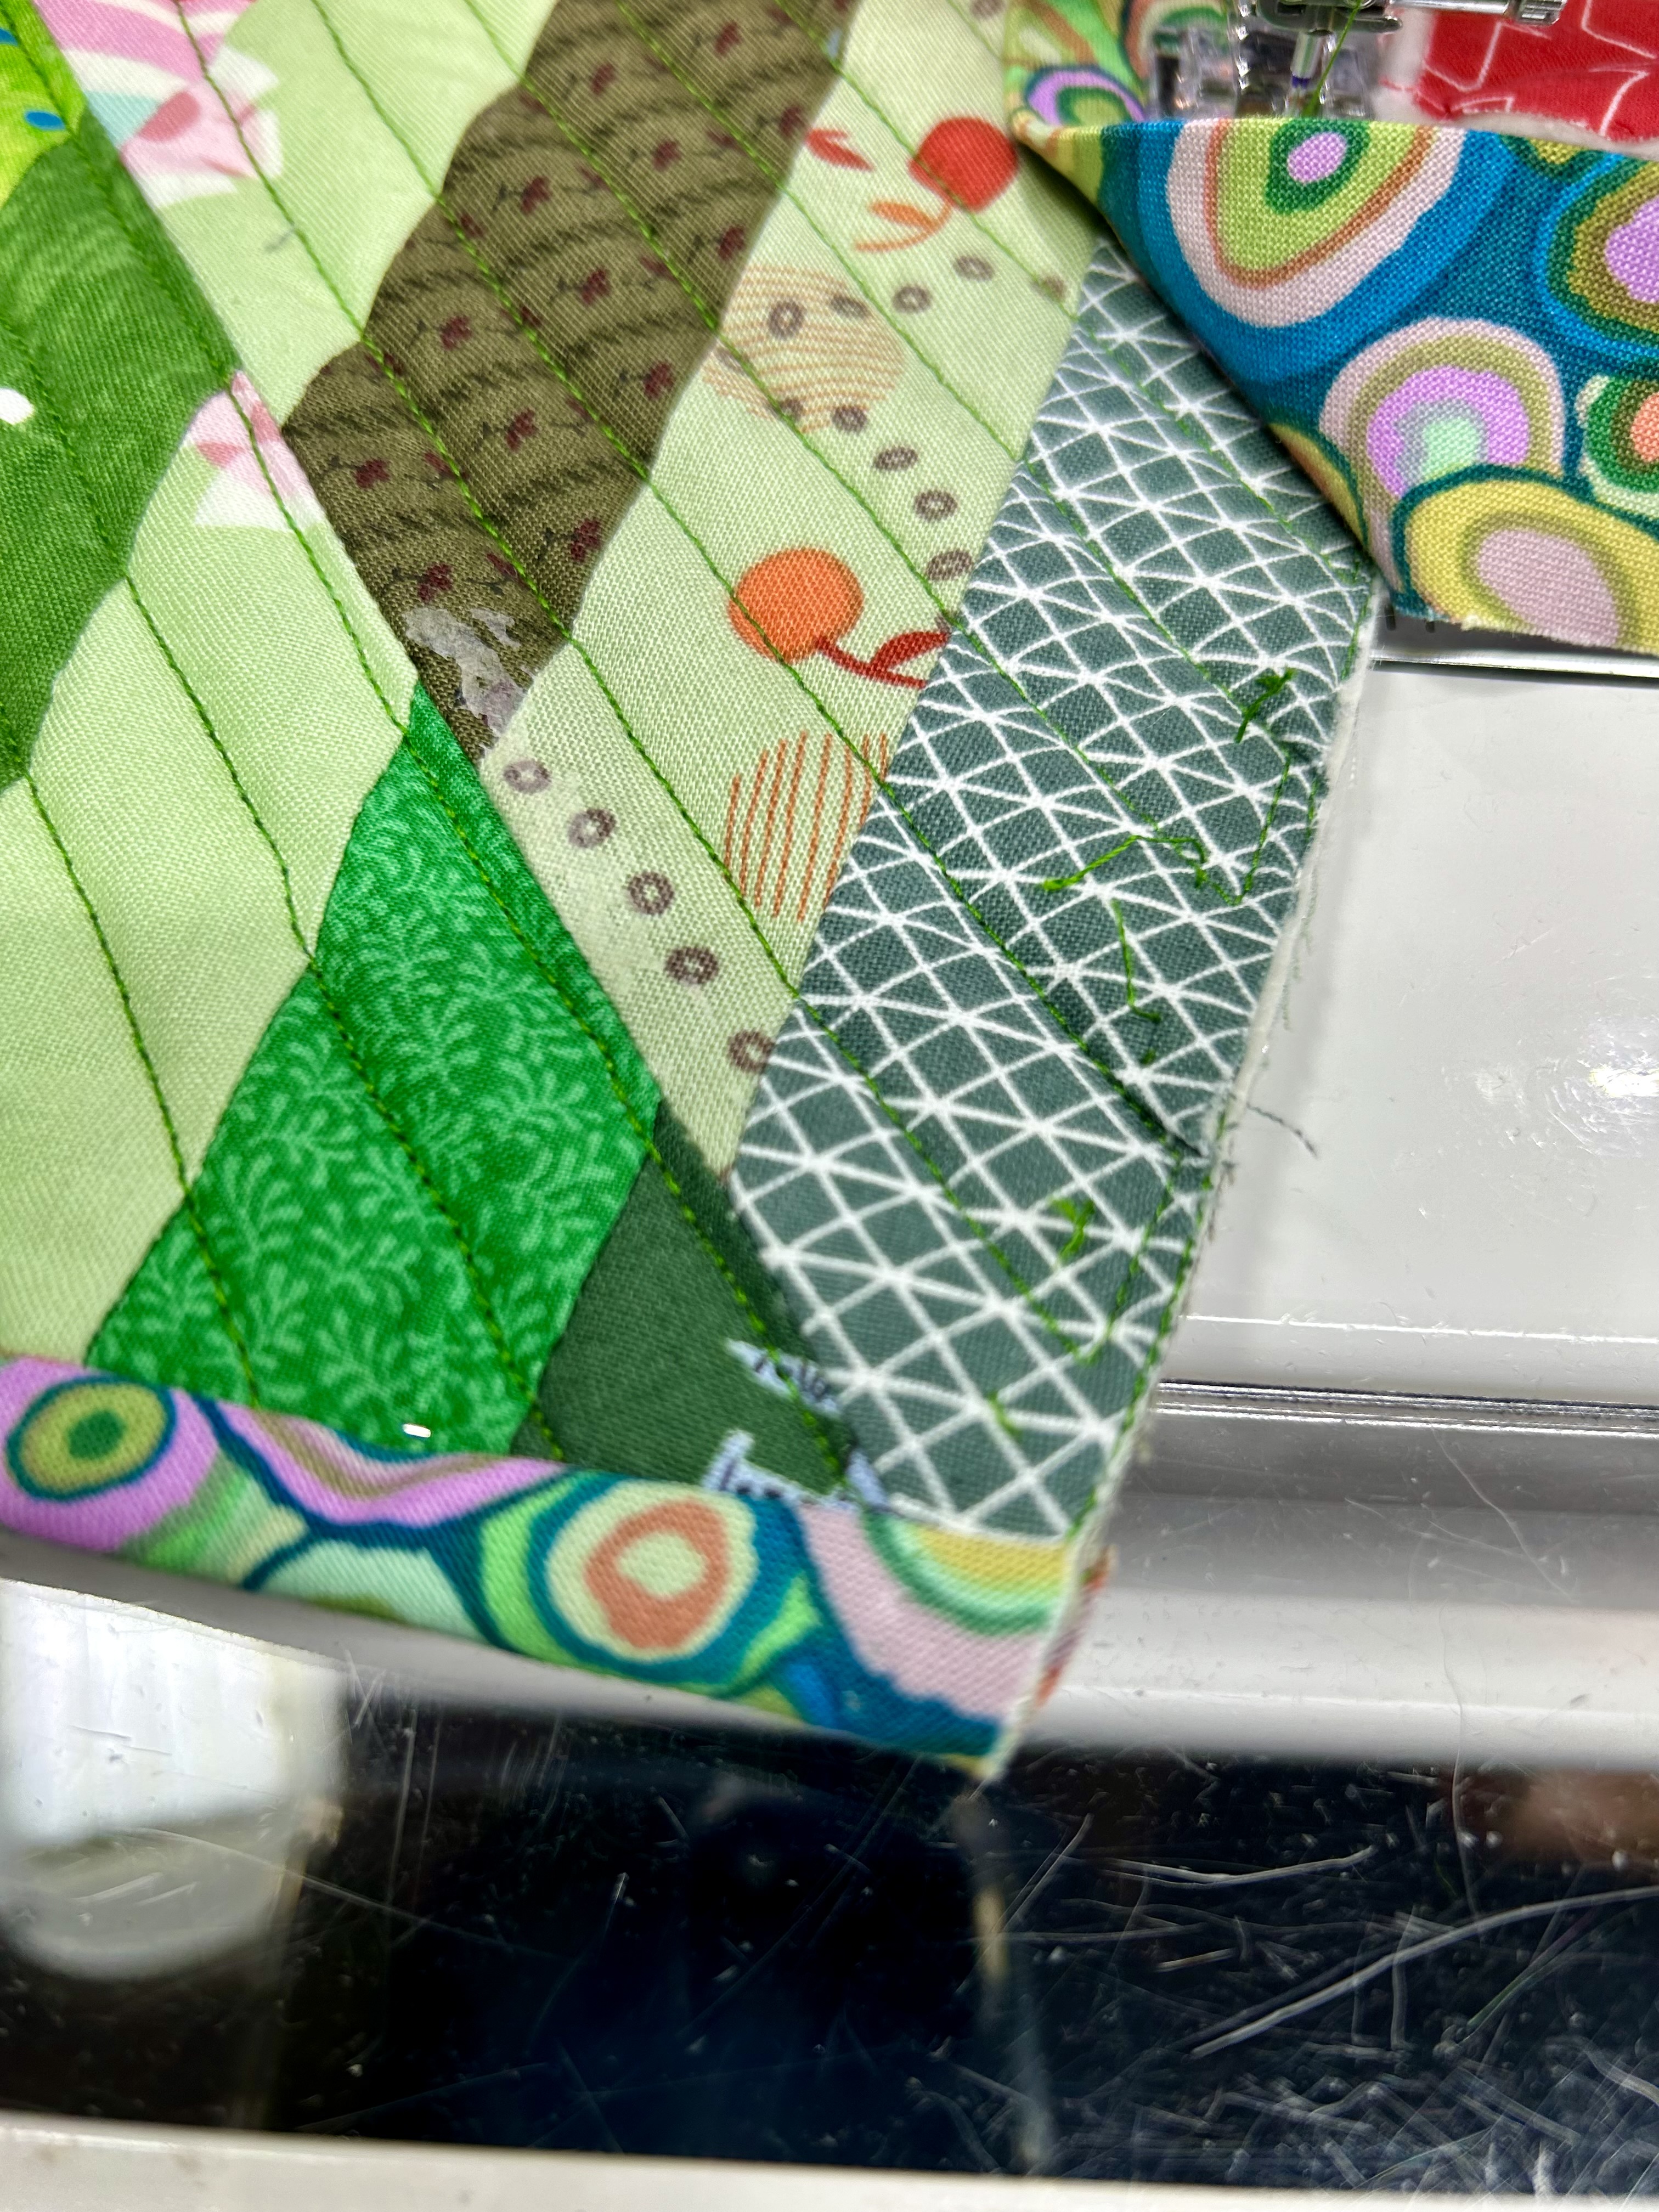
Overlap the binding and sew to the end of the potholder edge.

Back up to reinforce.

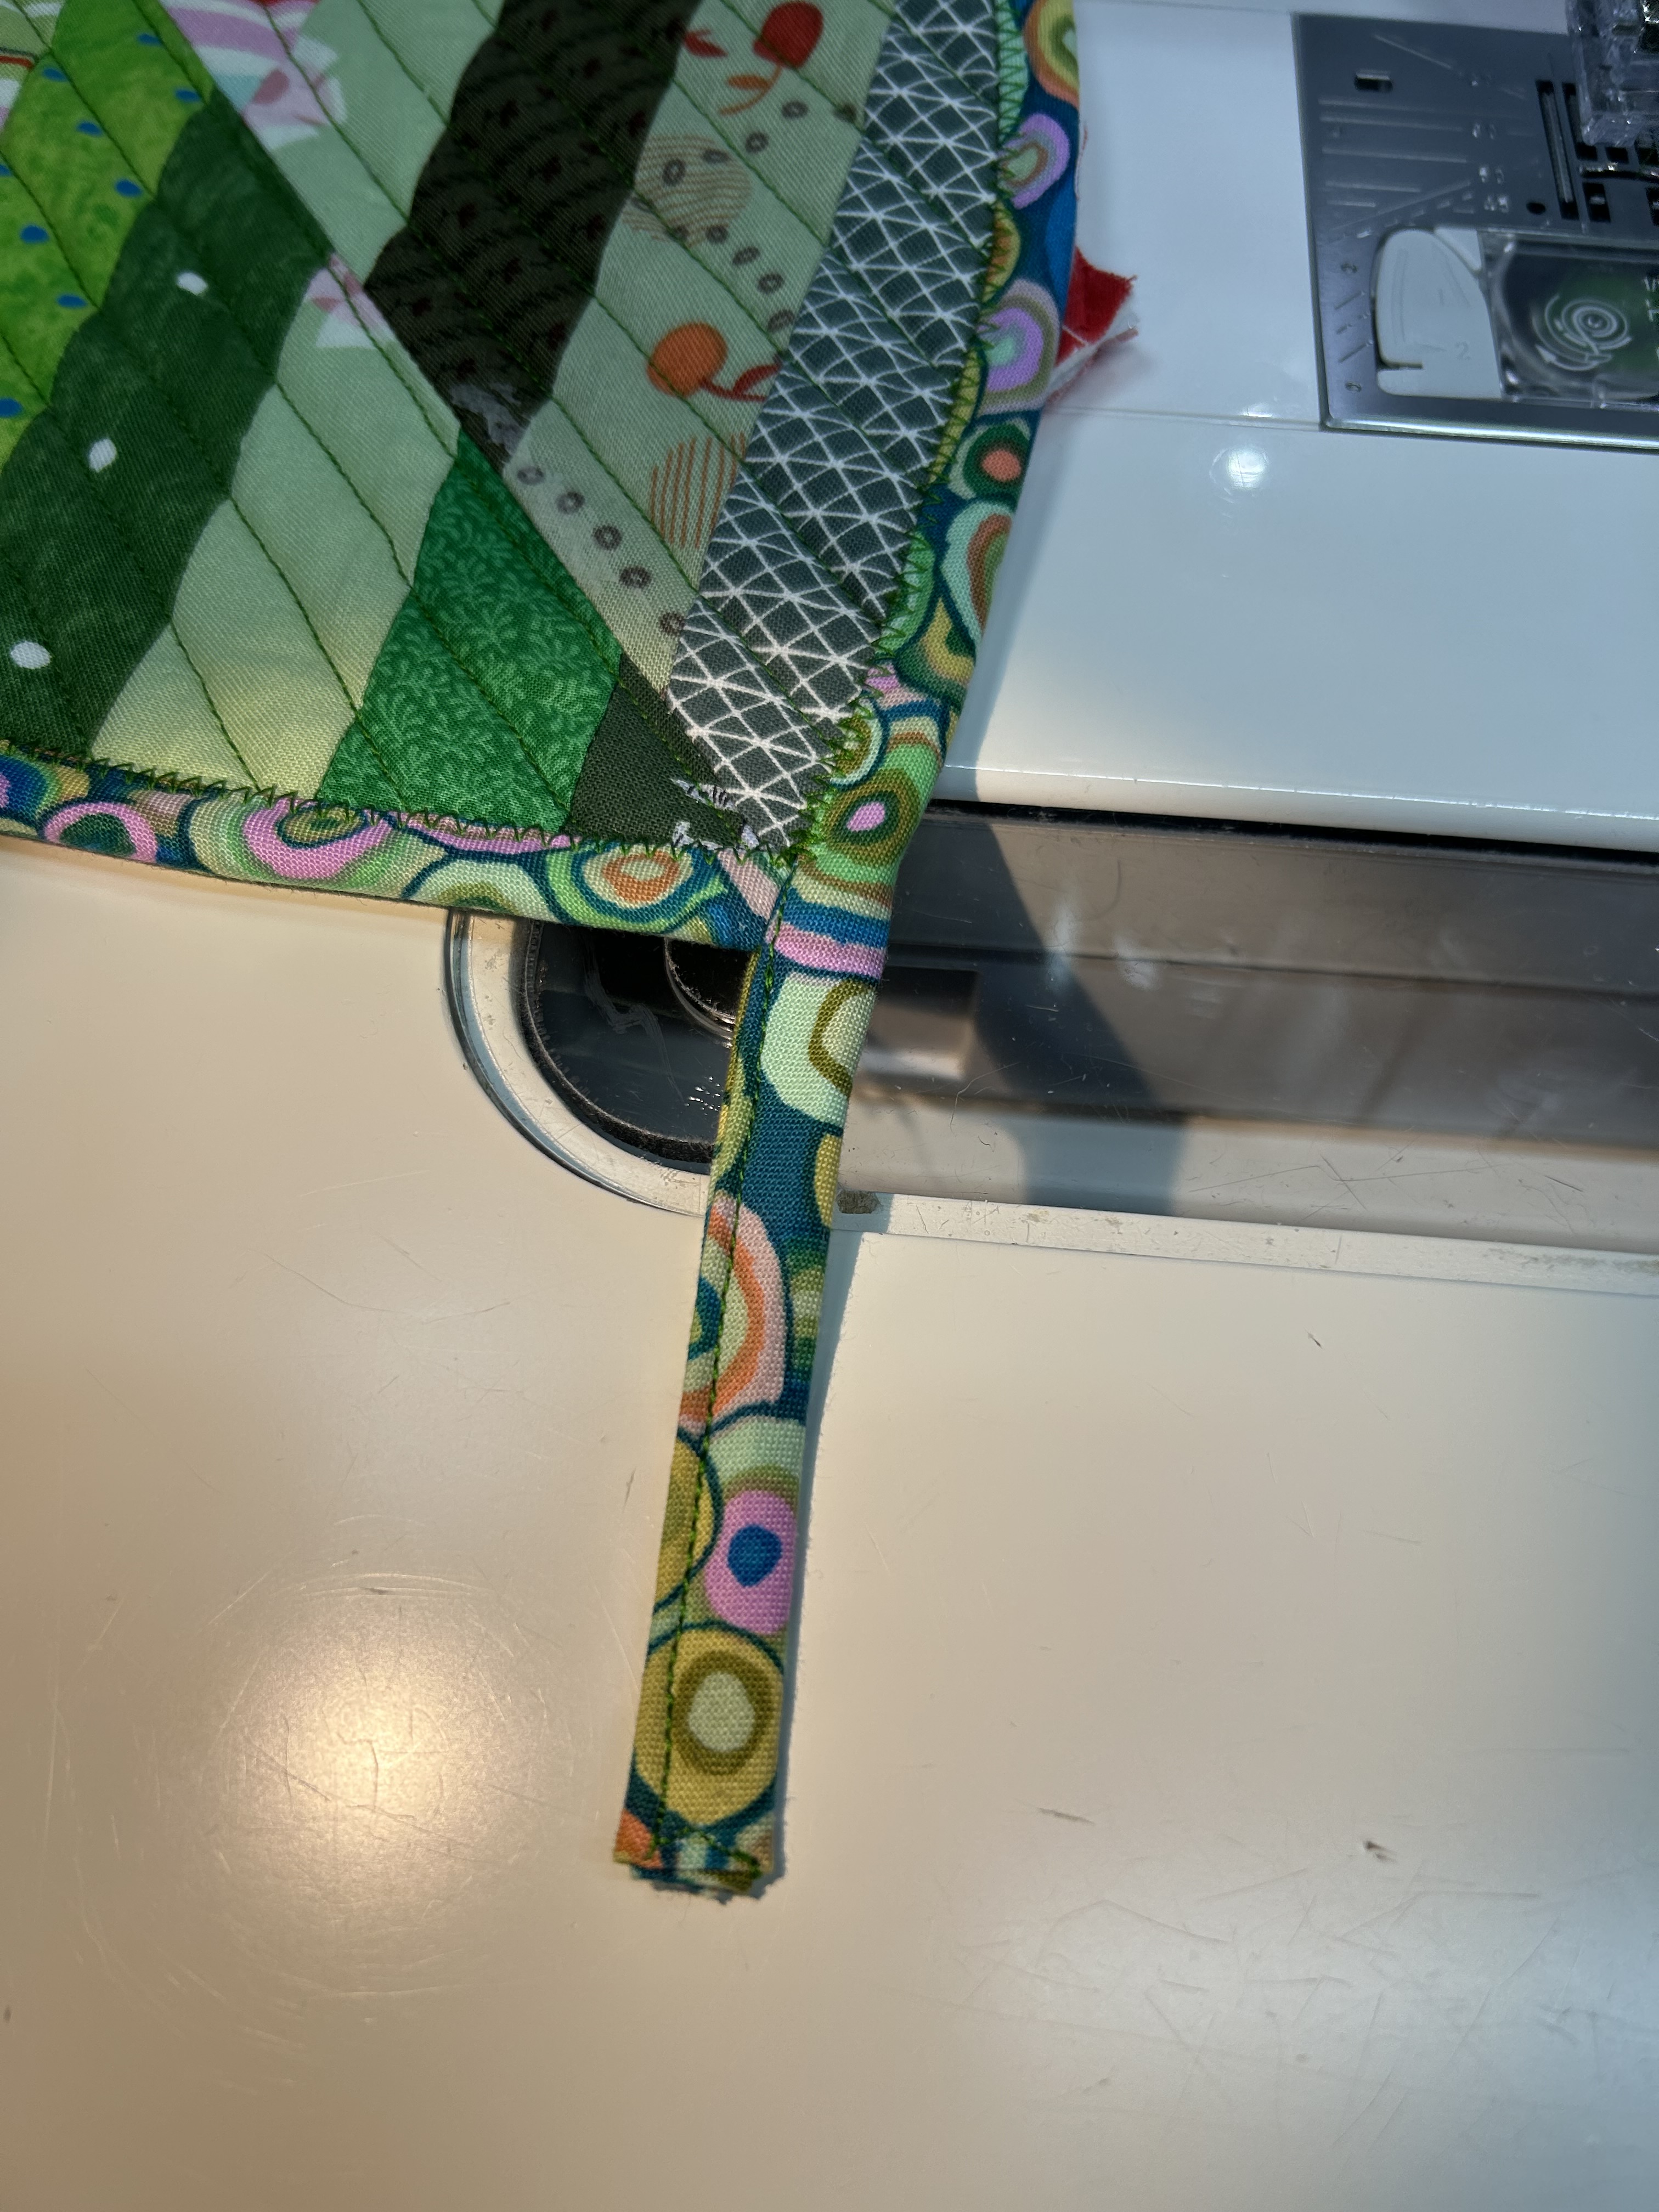
Trim the hanging strip–and turn under and press the end you just trimmed. **Note that I trimmed this one a bit shorter than I should have.
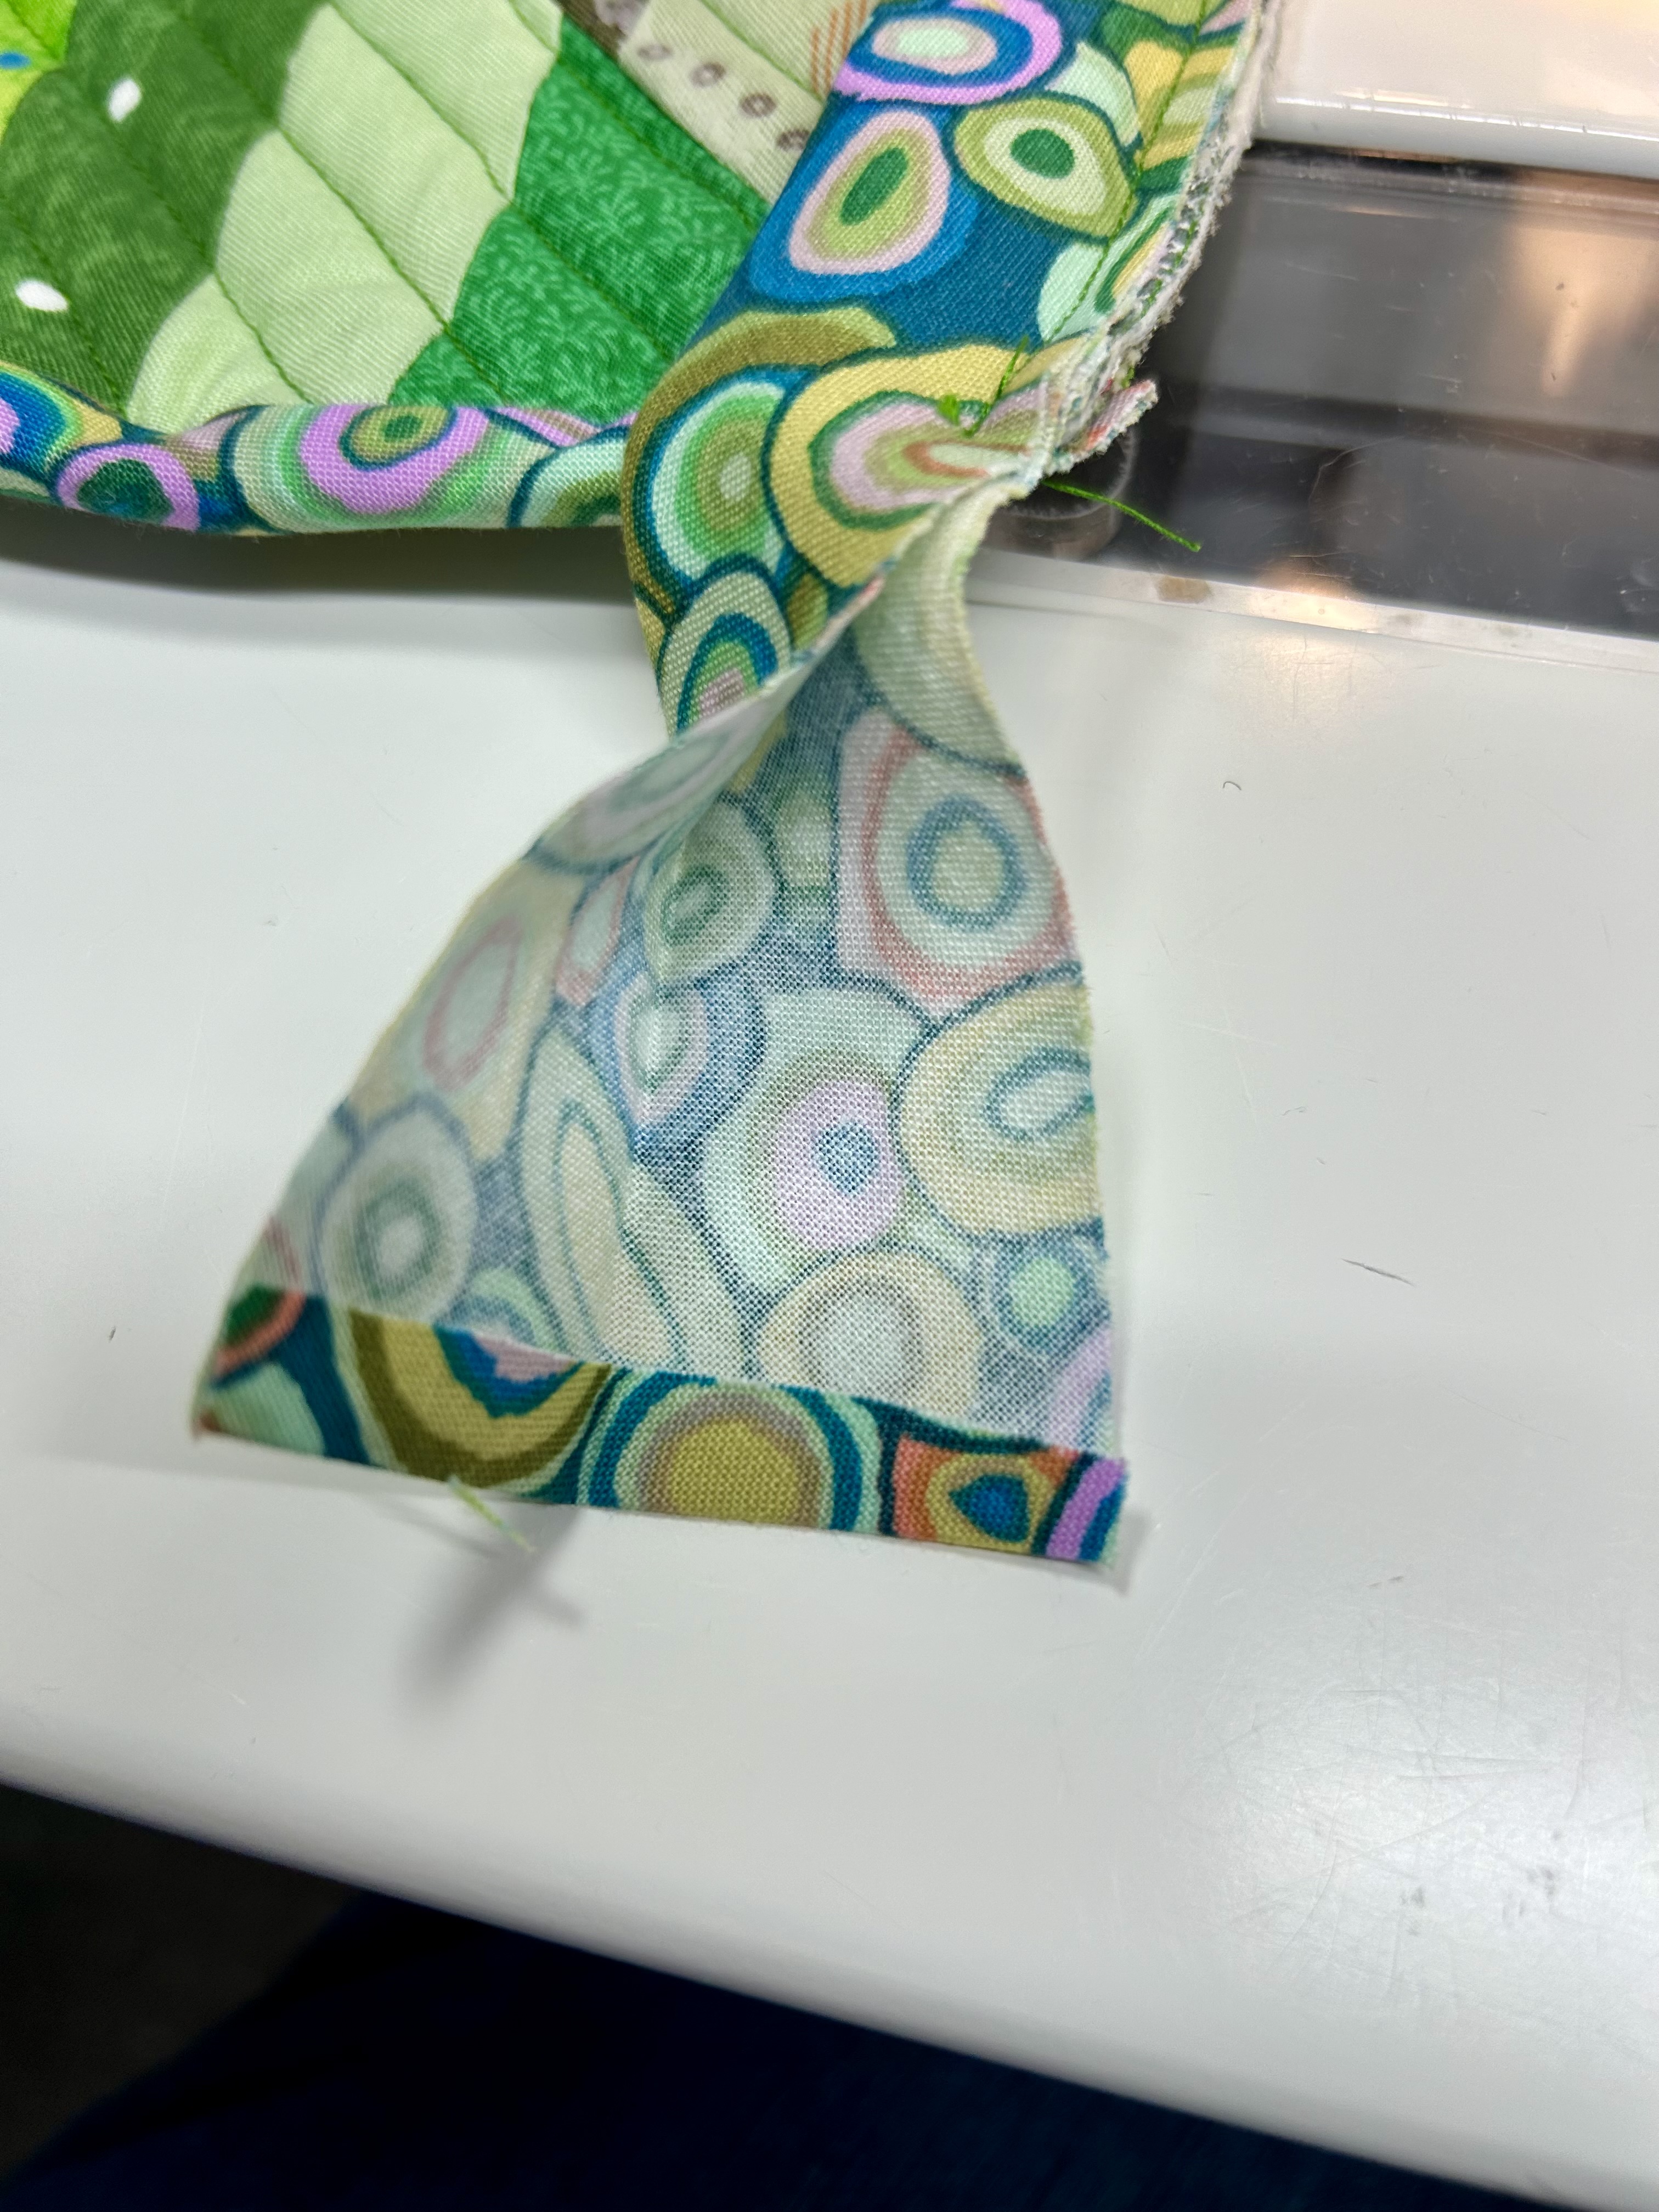
Fold the strip in half and press it so you get a center line.

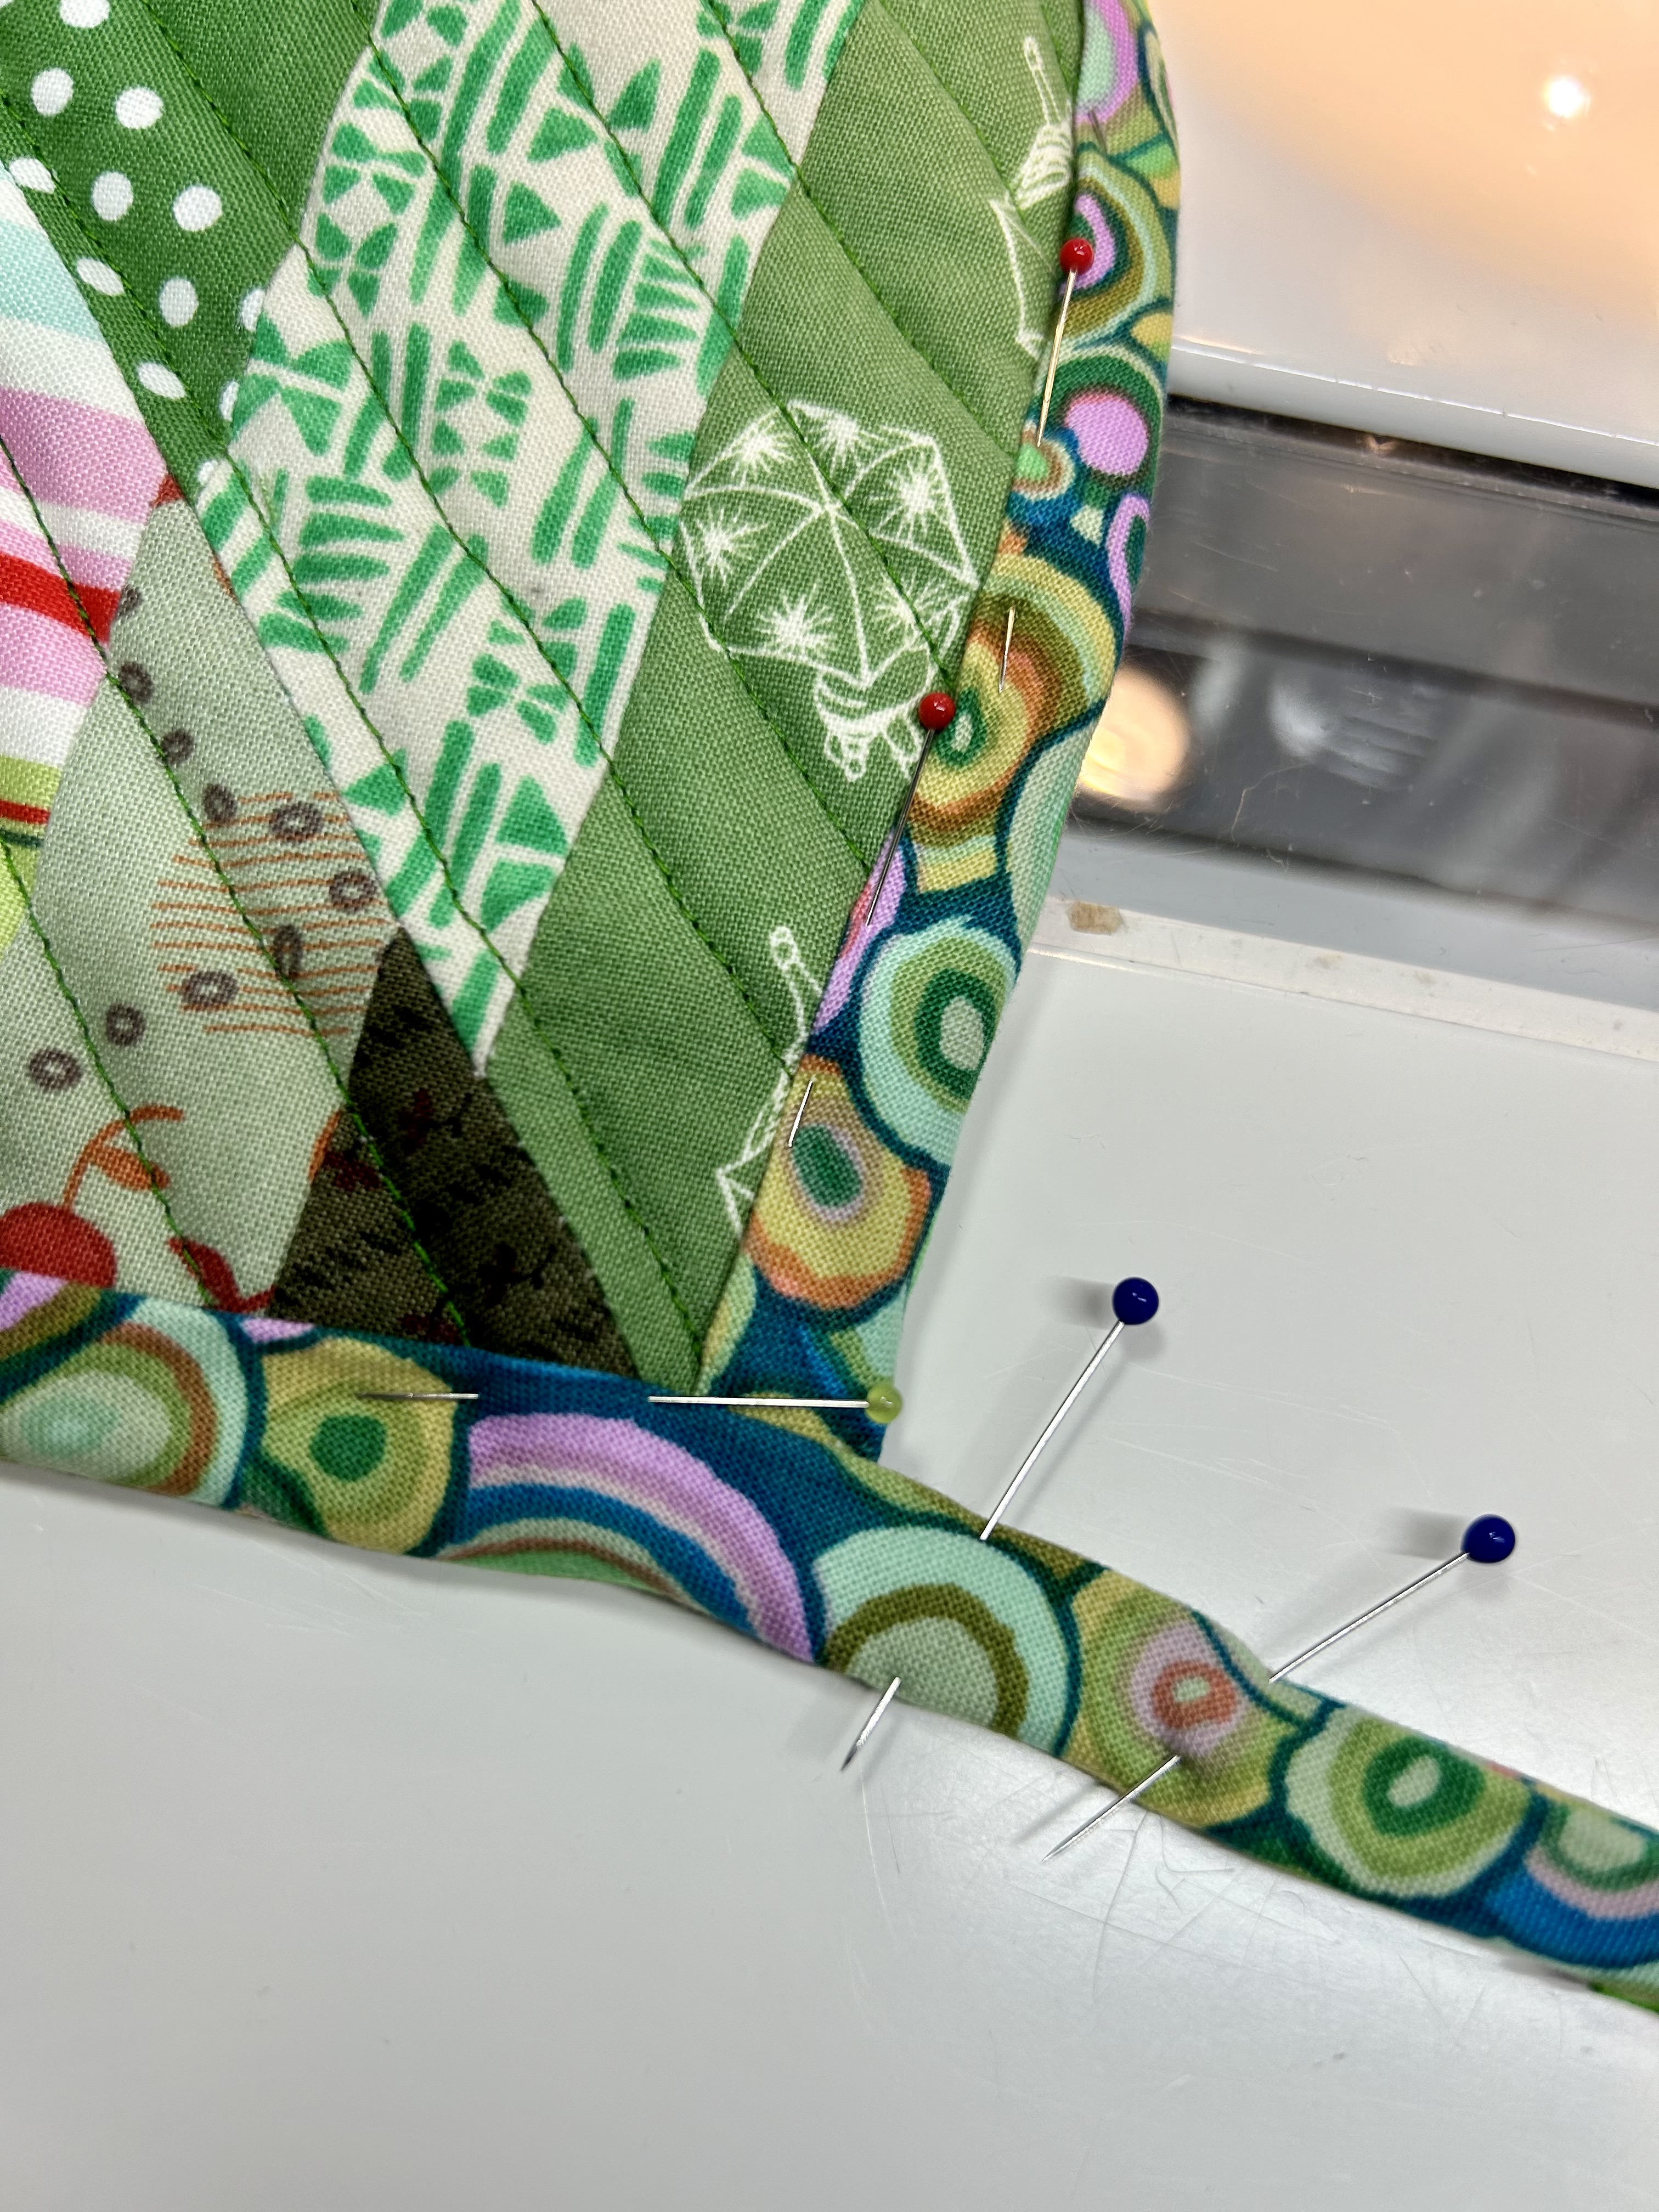
Line up the cut edge with your pressed fold center line.
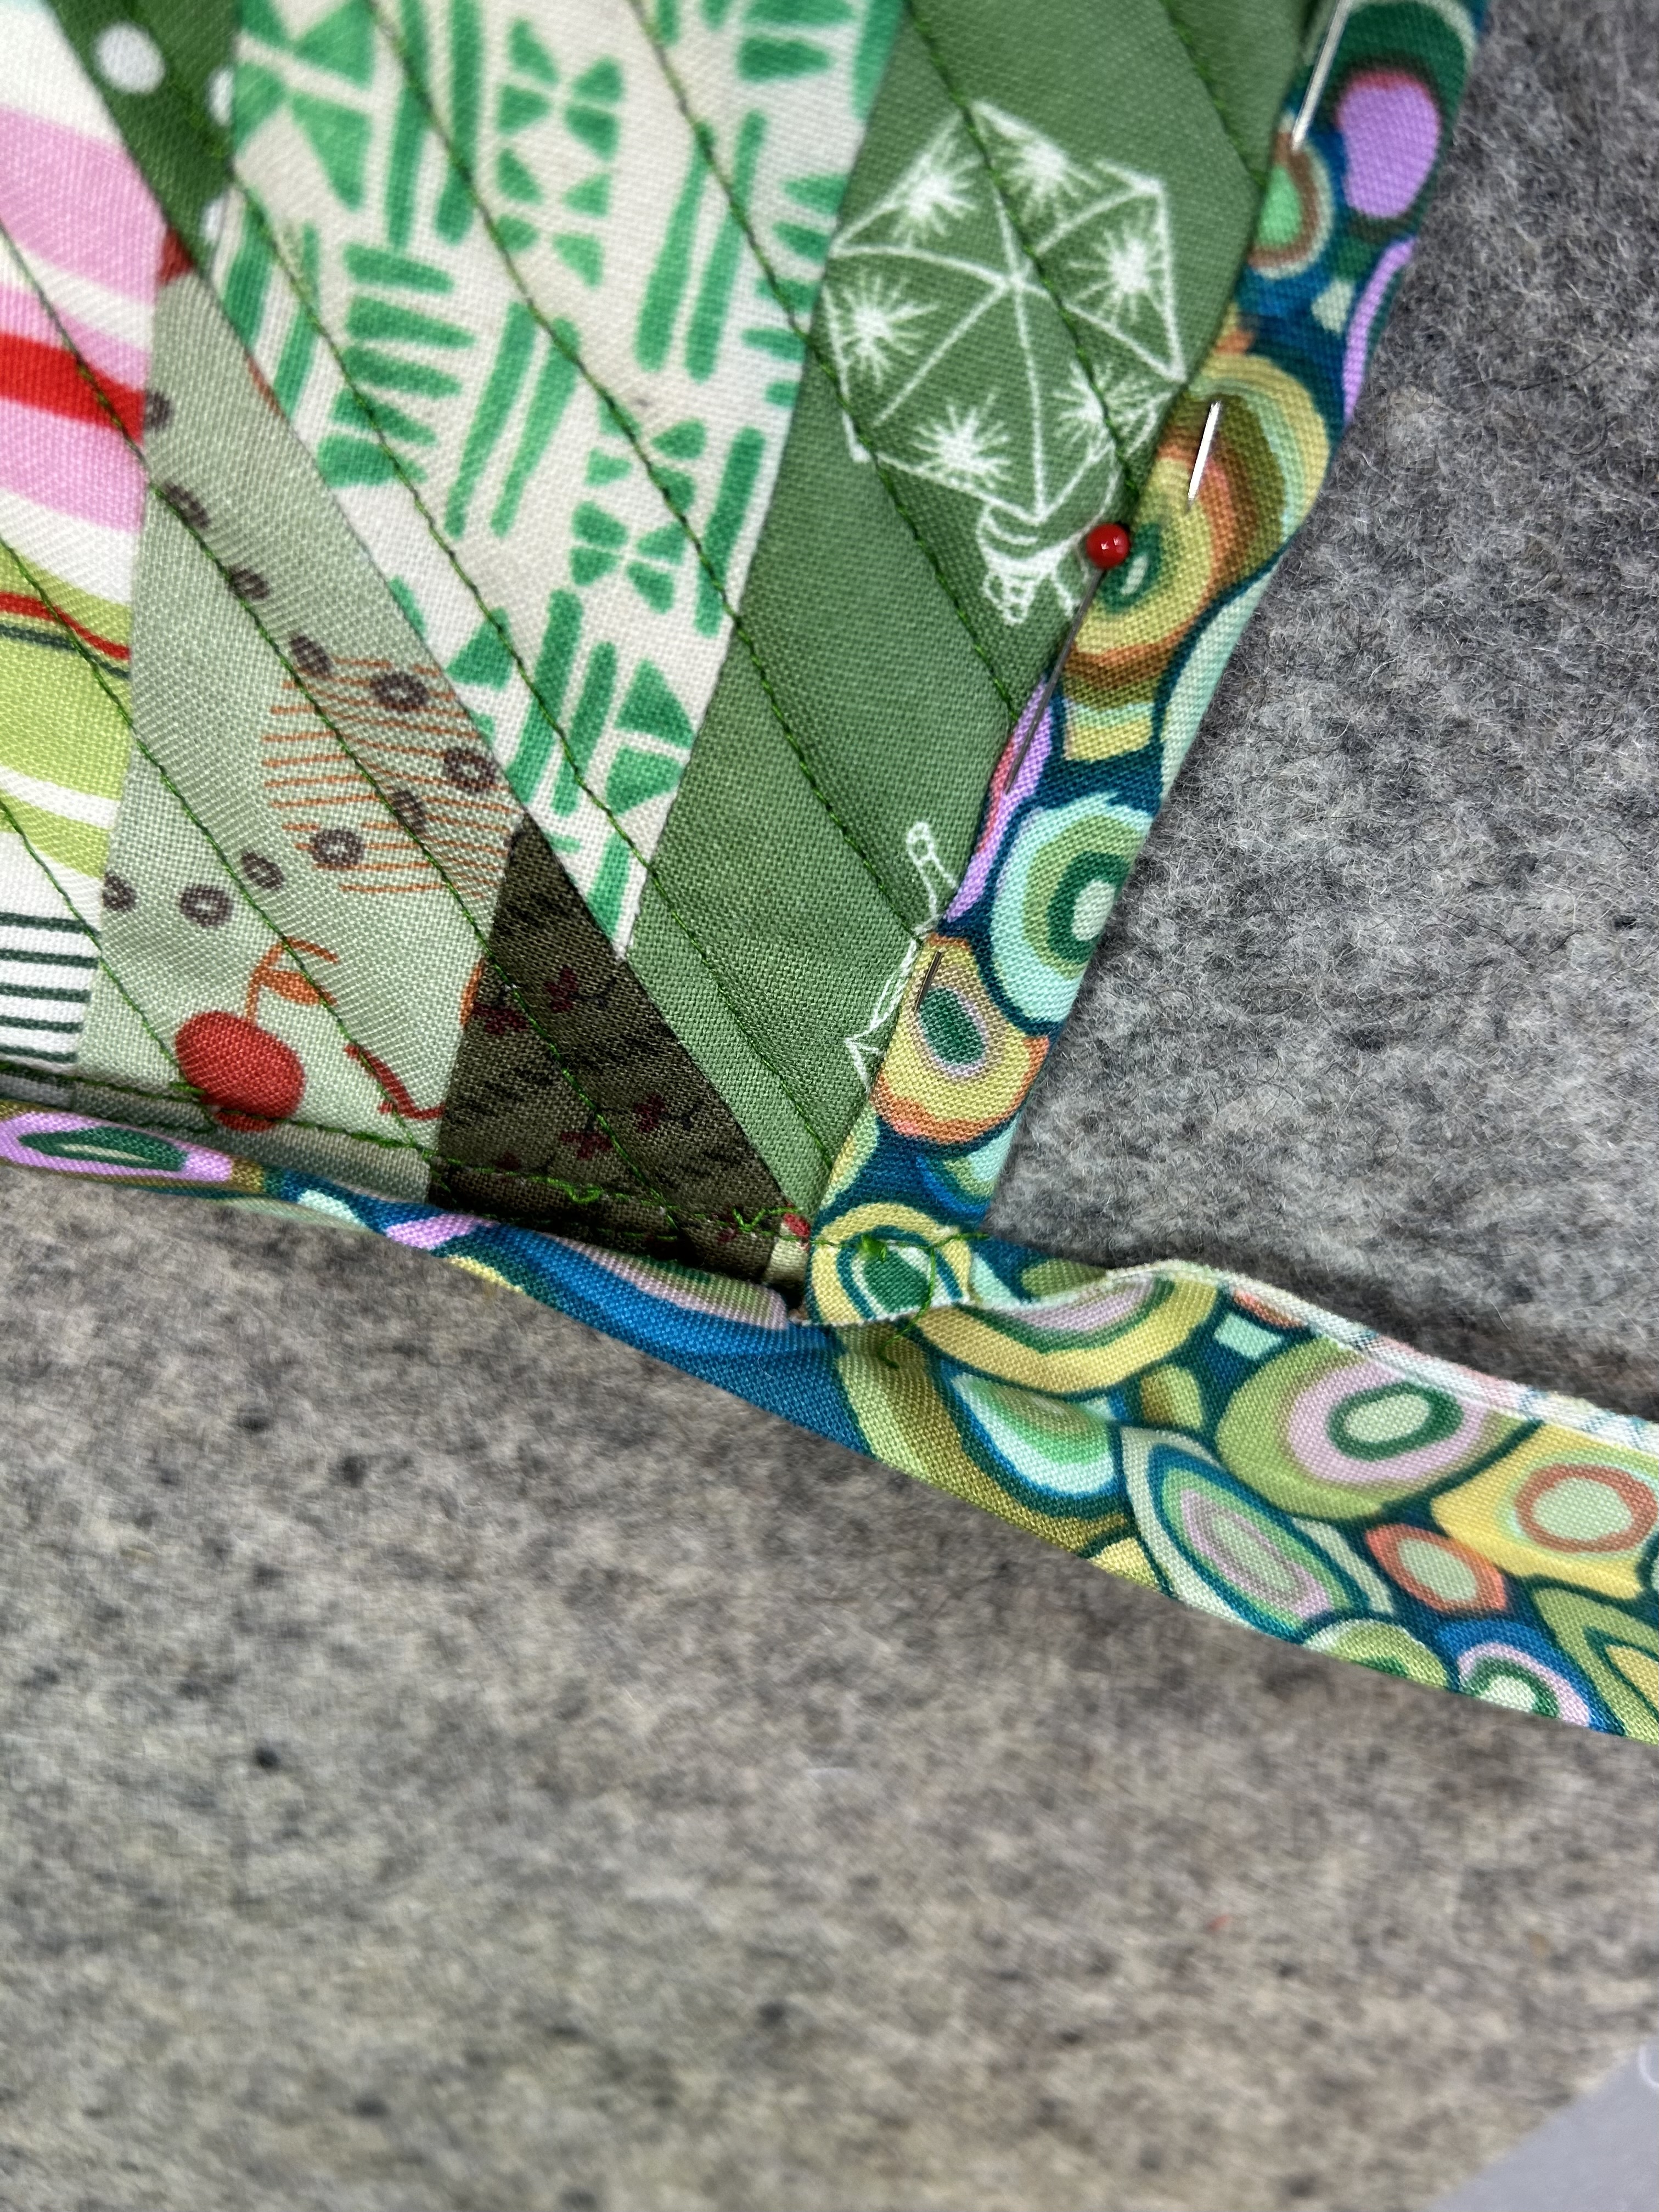
Press and pin the hanging strip together.

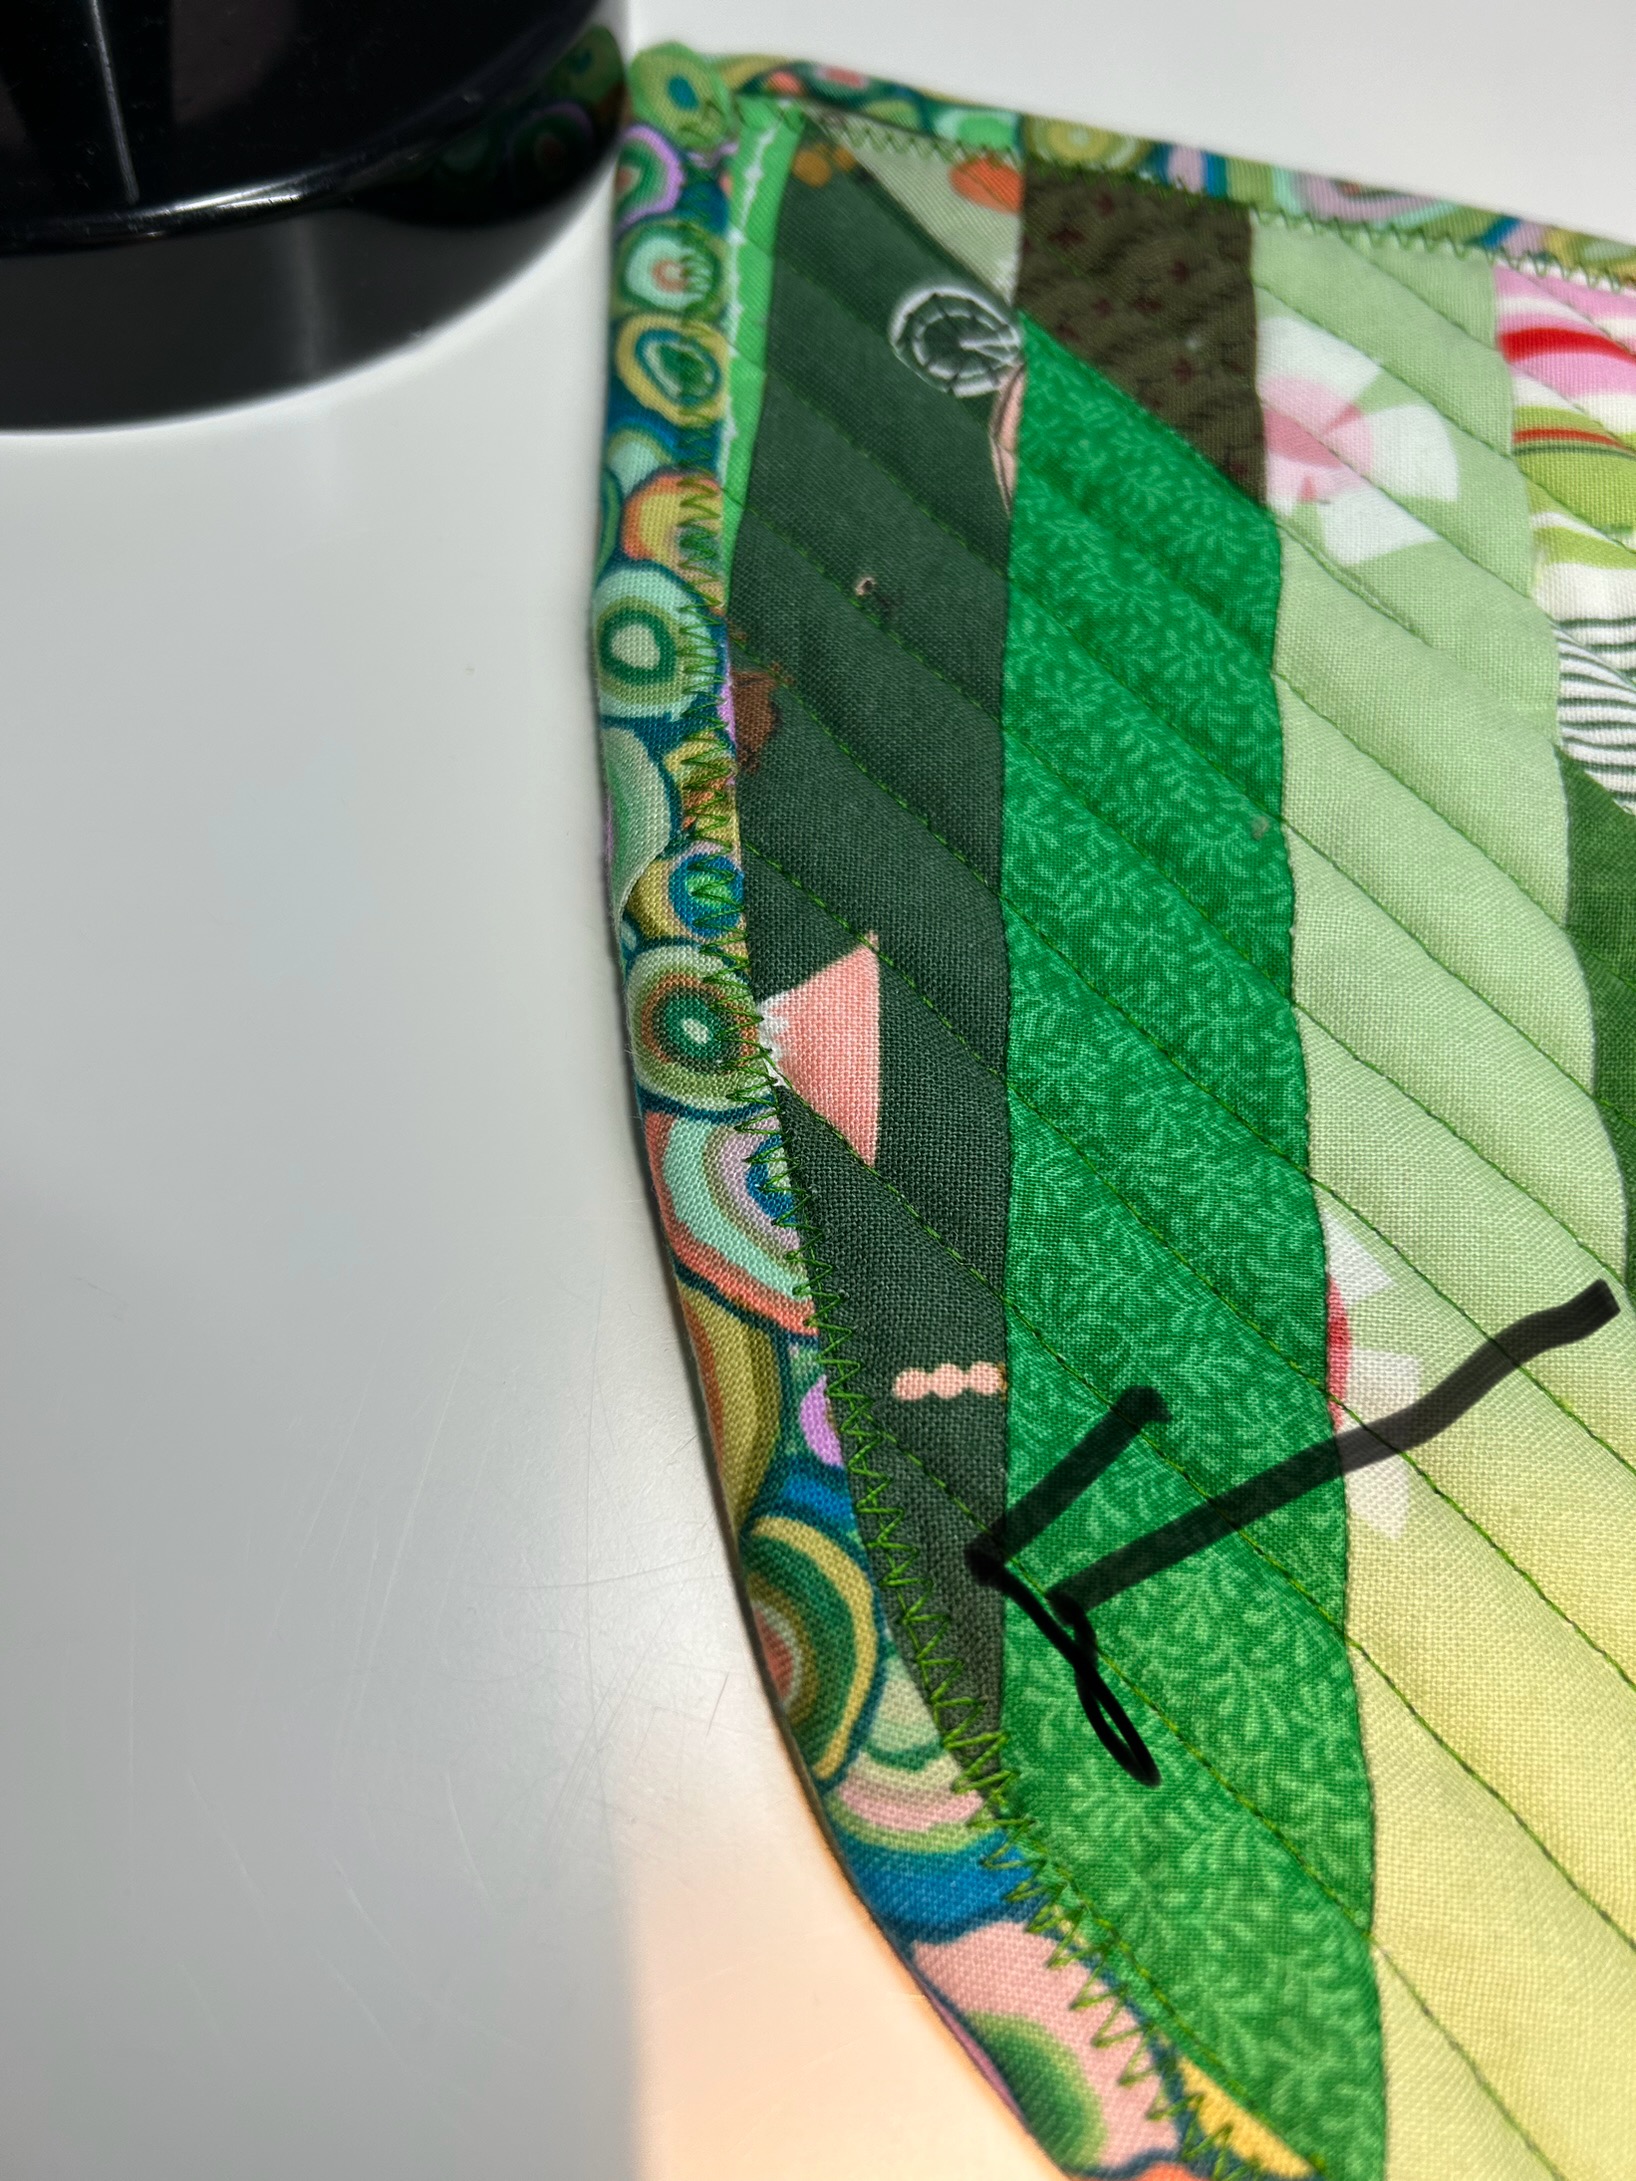
Close up the bottom side and pin. ***Note that to zig-zag (or however you want to sew down your binding) you will be doing that from the top side AND ***you will want your pins to be pinned with the heads on the bottom as you sew, so you can easily pull them out as you proceed. So, my pin below will need to be reversed when I pin the binding down.
On the top side, sew down the binding. I use a zig-zag stitch–and I remove the pins as I go around. ***Start at the side that is underneath where the binding ends–not the strip side. And just start at the edge of where the top binding lies–not on that upper binding.

When you get back to that starting point, change to a straight stitch and go down the length of your hanging strip. Sew down the folded end as best you can. It can be tricky to handle the thickness, but if you turn the potholder and use something to help the feed dogs grab the bulk, you’ll be ok. I suppose whip stitching that end closed is not a bad idea either.
Turn the loop and sew it down. ***Turn to whichever side you think would be the best back side. I found that sewing it down outside the bulk of the binding was easier.

If you missed grabbing some part of the binding, just catch it with a hidden whip stitch done by hand. I am terrible at this machine sewing down of binding–and on this curved leaf potholder with the added layer of the Insul-Brite, I think maybe is also a factor of making the binding thicker and trimming well before turning the binding and sewing it down.
This machine sewing of a binding has been a learning curve for me.
I’m getting there with each try. And these potholders are visually forgiving and will be used and washed, so there’s no need to be crazy about perfection.

SO helpful! Thank you. I need to dig through my scraps and make a few for some Christmas gifts. Even a nice hostess gift for Thanksgiving.
Thank you for the tutorial! I’m looking forward to making some of these leaves.
I’m late to reply but thank you so much for this tutorial. I can’t wait to try it out once the silly season is over. Jocelyn