We’ve had good rain, the grass and garden plants are thriving, and it’s much cooler for the moment. Some heat is coming in later in the coming week, but cooler heat as we slide into September.
The Air Conditioning system went out yesterday (again), and the local repairman is enroute as I write. Why is it always on the weekend that appliances and systems stop working?
It’s “clean sheet” day, and the dirty sheets are already washed and dried and put away. The washing machine and dryer are whirring away with other loads, and my bed looks so pretty with its fresh crispness. I love “clean sheet” day. And I love a neatly made bed, which I do first thing every morning.
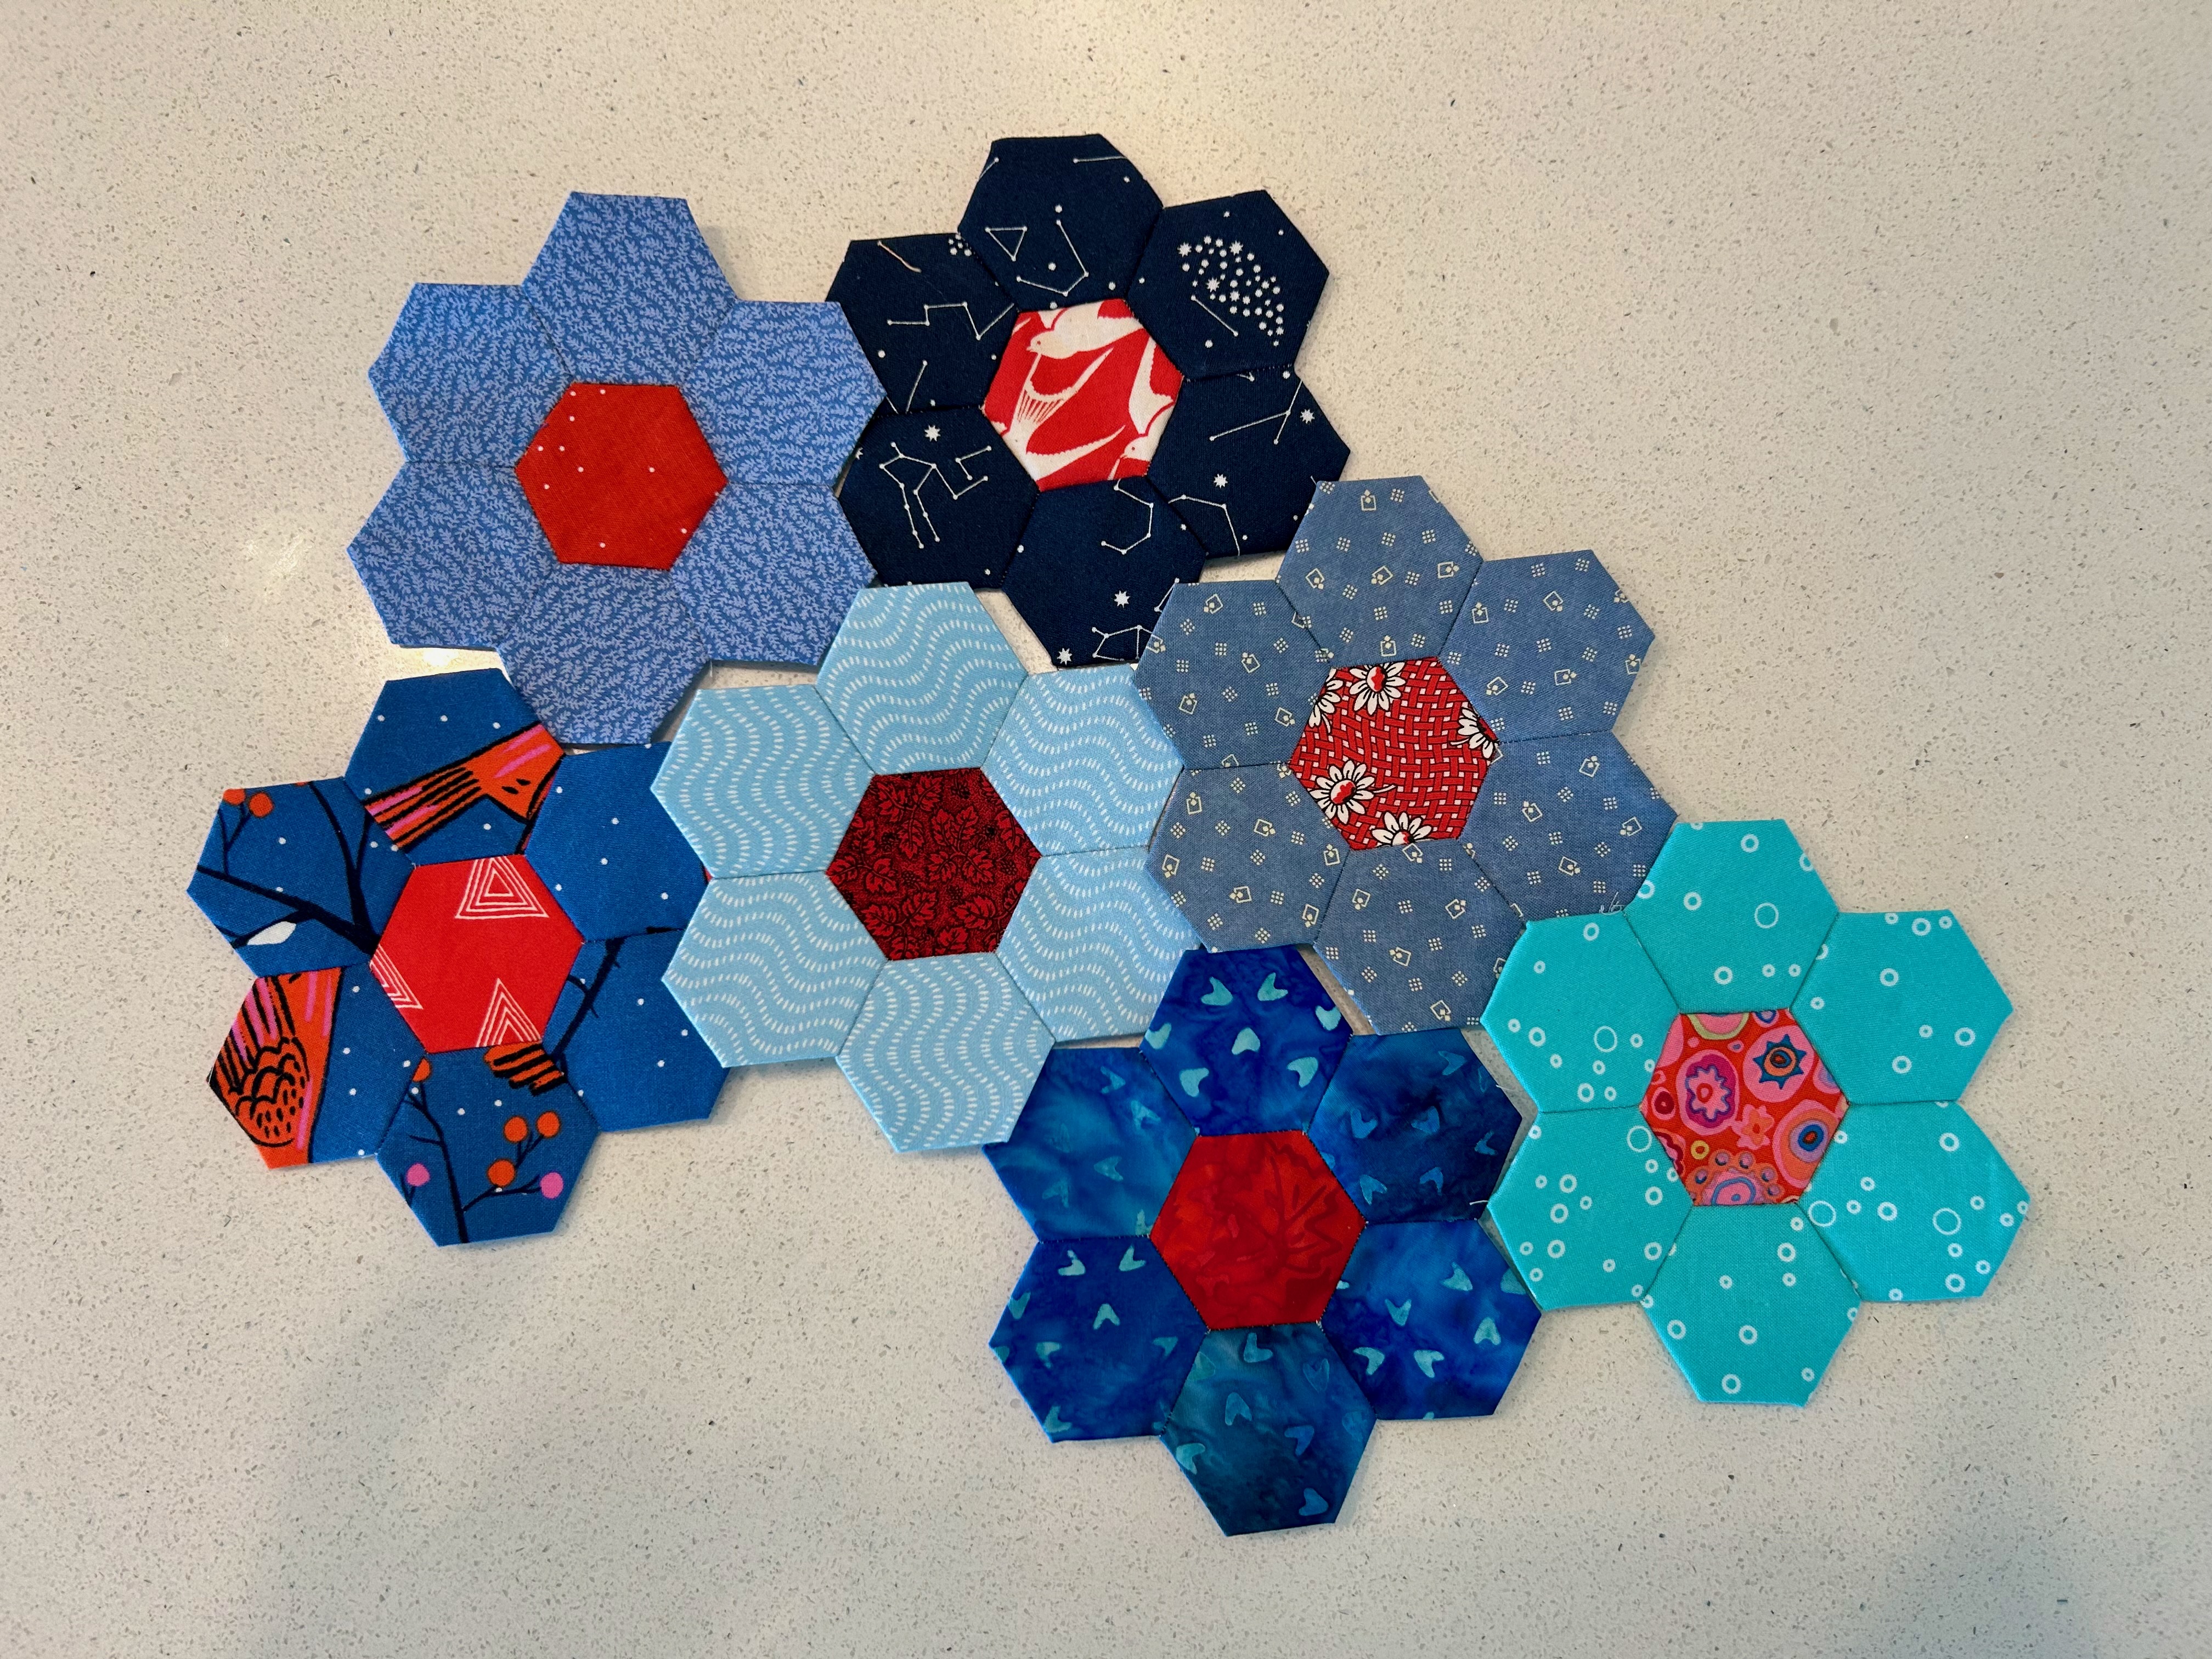
I didn’t have any night hand sewing as I am between quilts for binding work. So, after many years, I seem to have started another English Paper Piecing (EPP) project. You may recall that I burned myself out on EPP and took a 3-year break apparently.
It will be scrappy blues with red centers.
Will it be a winter table topper for my ongoing project of having a table topper for each month of the year? Probably.
And for the first time, I’m not using glue but am hand basting fabric to the paper pieces. It’s working fine, and I actually like that part of the hand sewing.
Ah, the repairman is here, so that’s a big moment of joy found in today’s offerings.
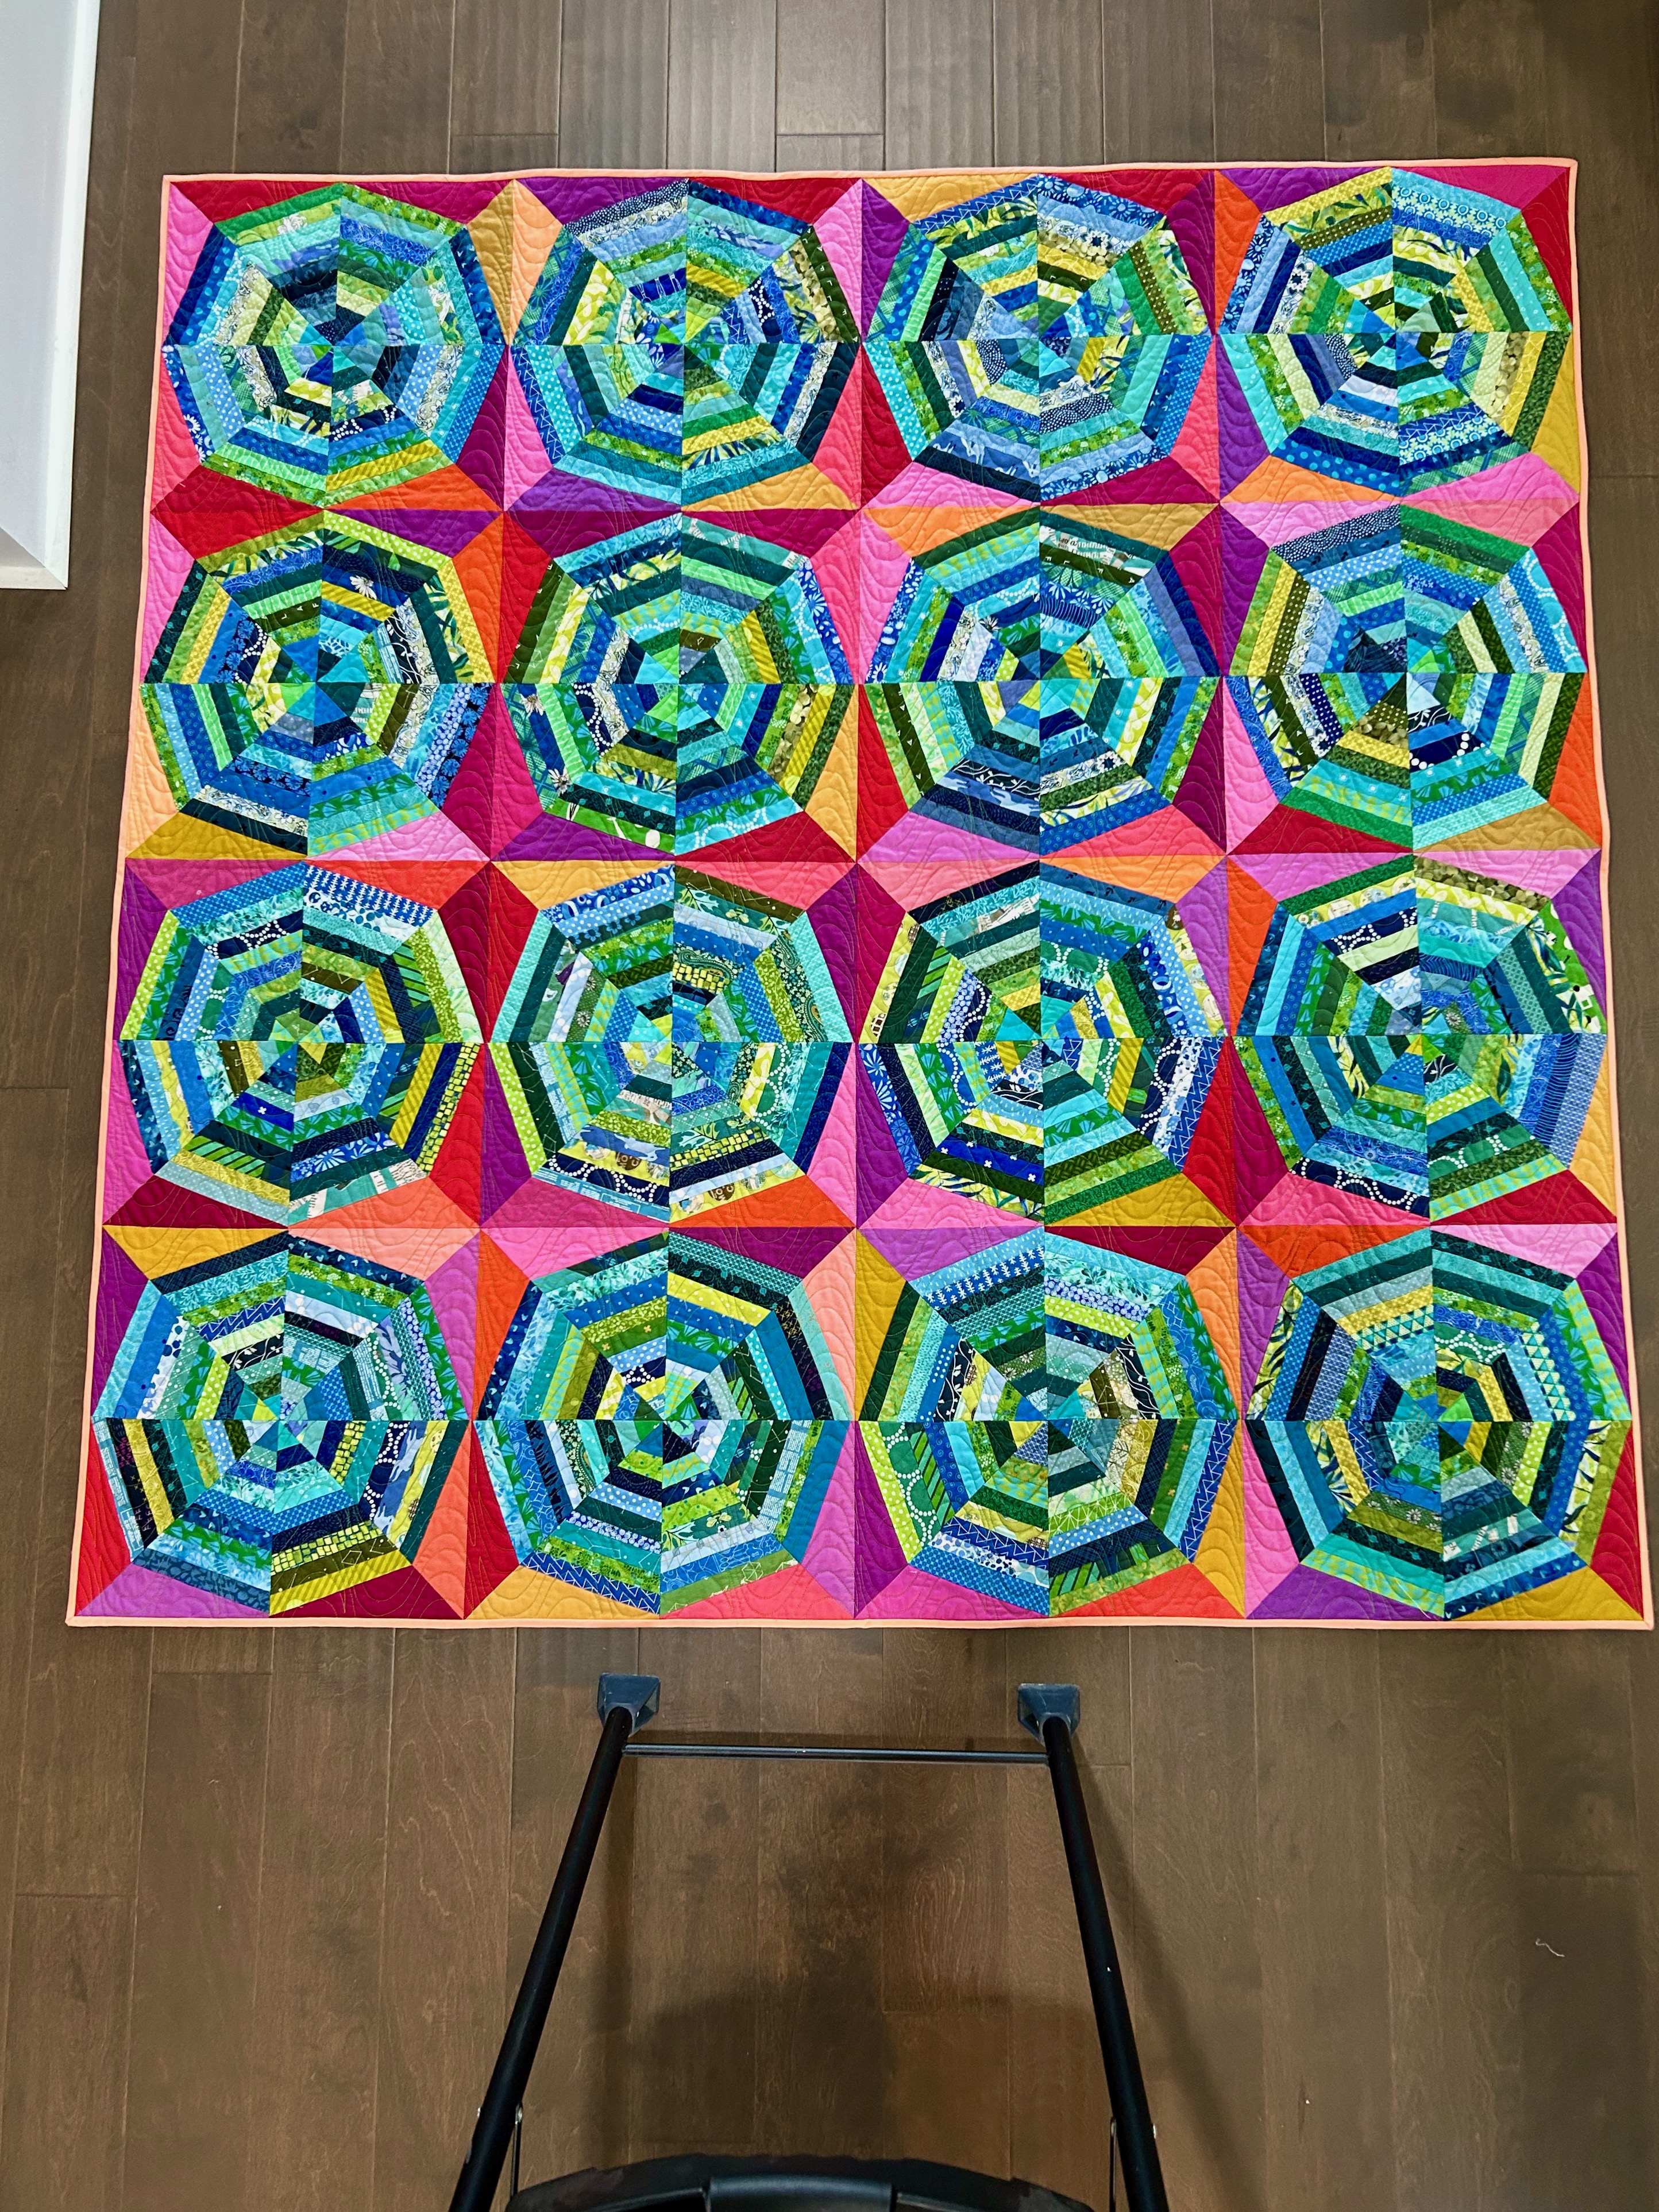
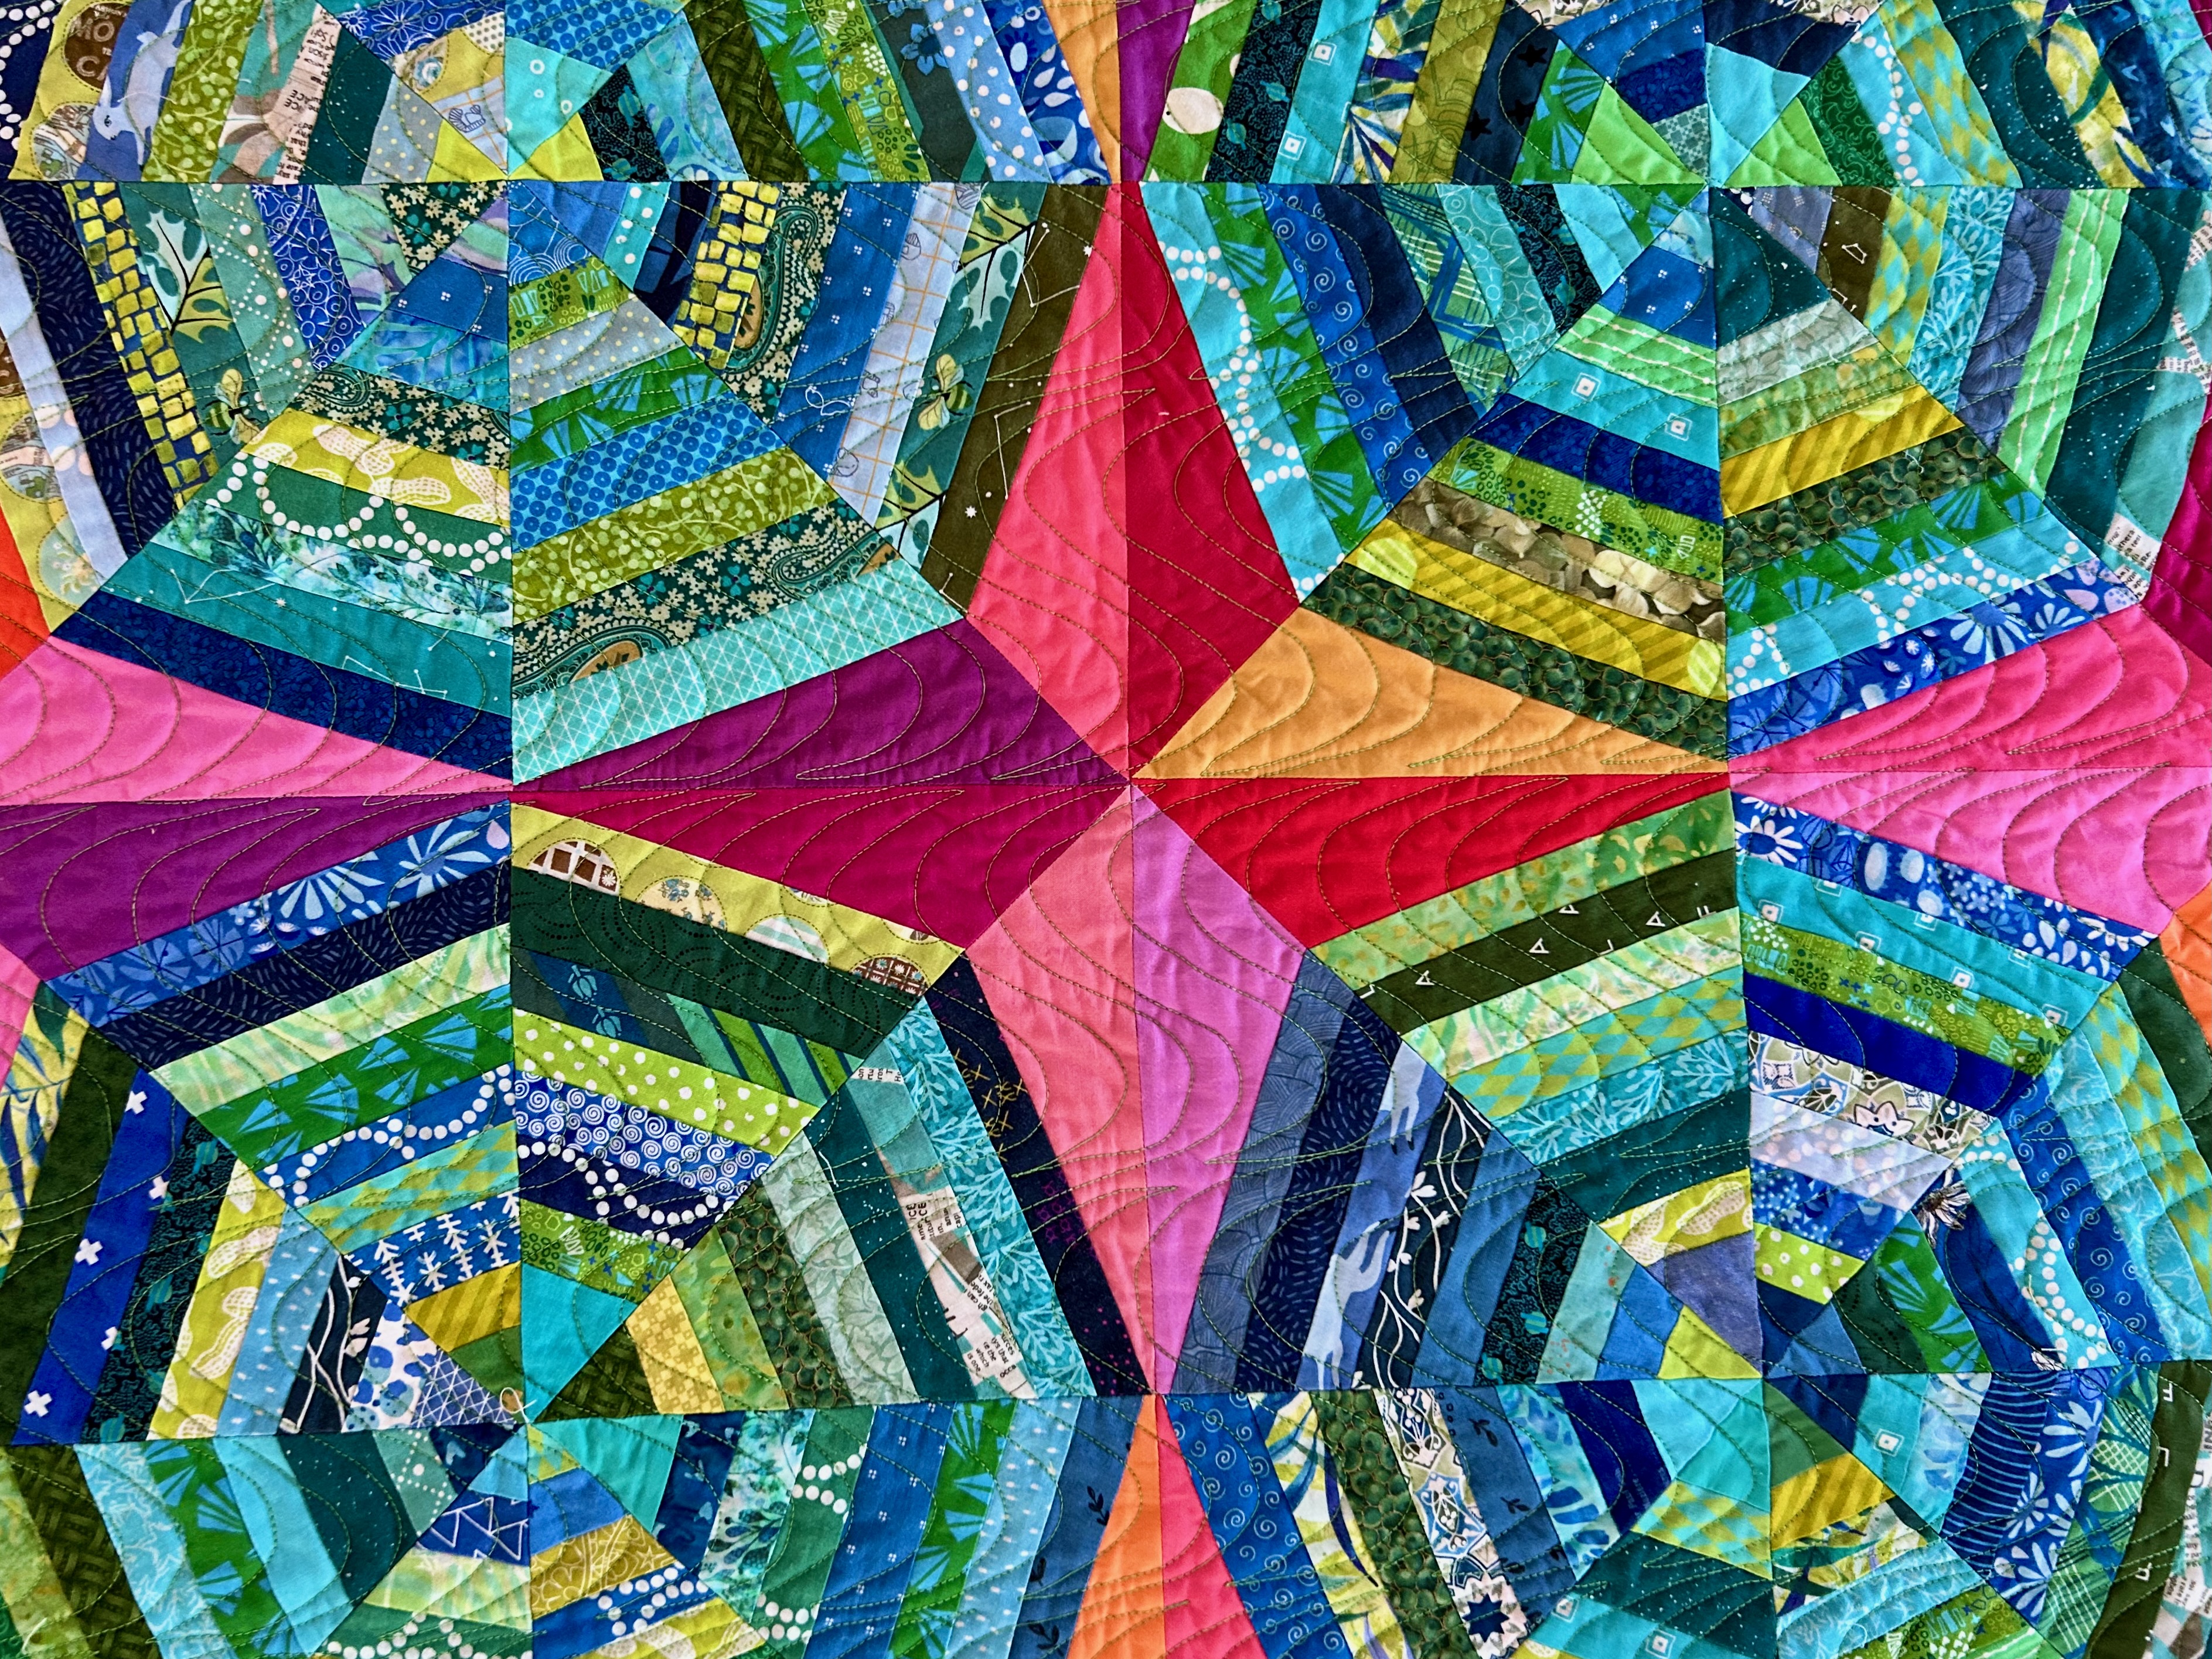
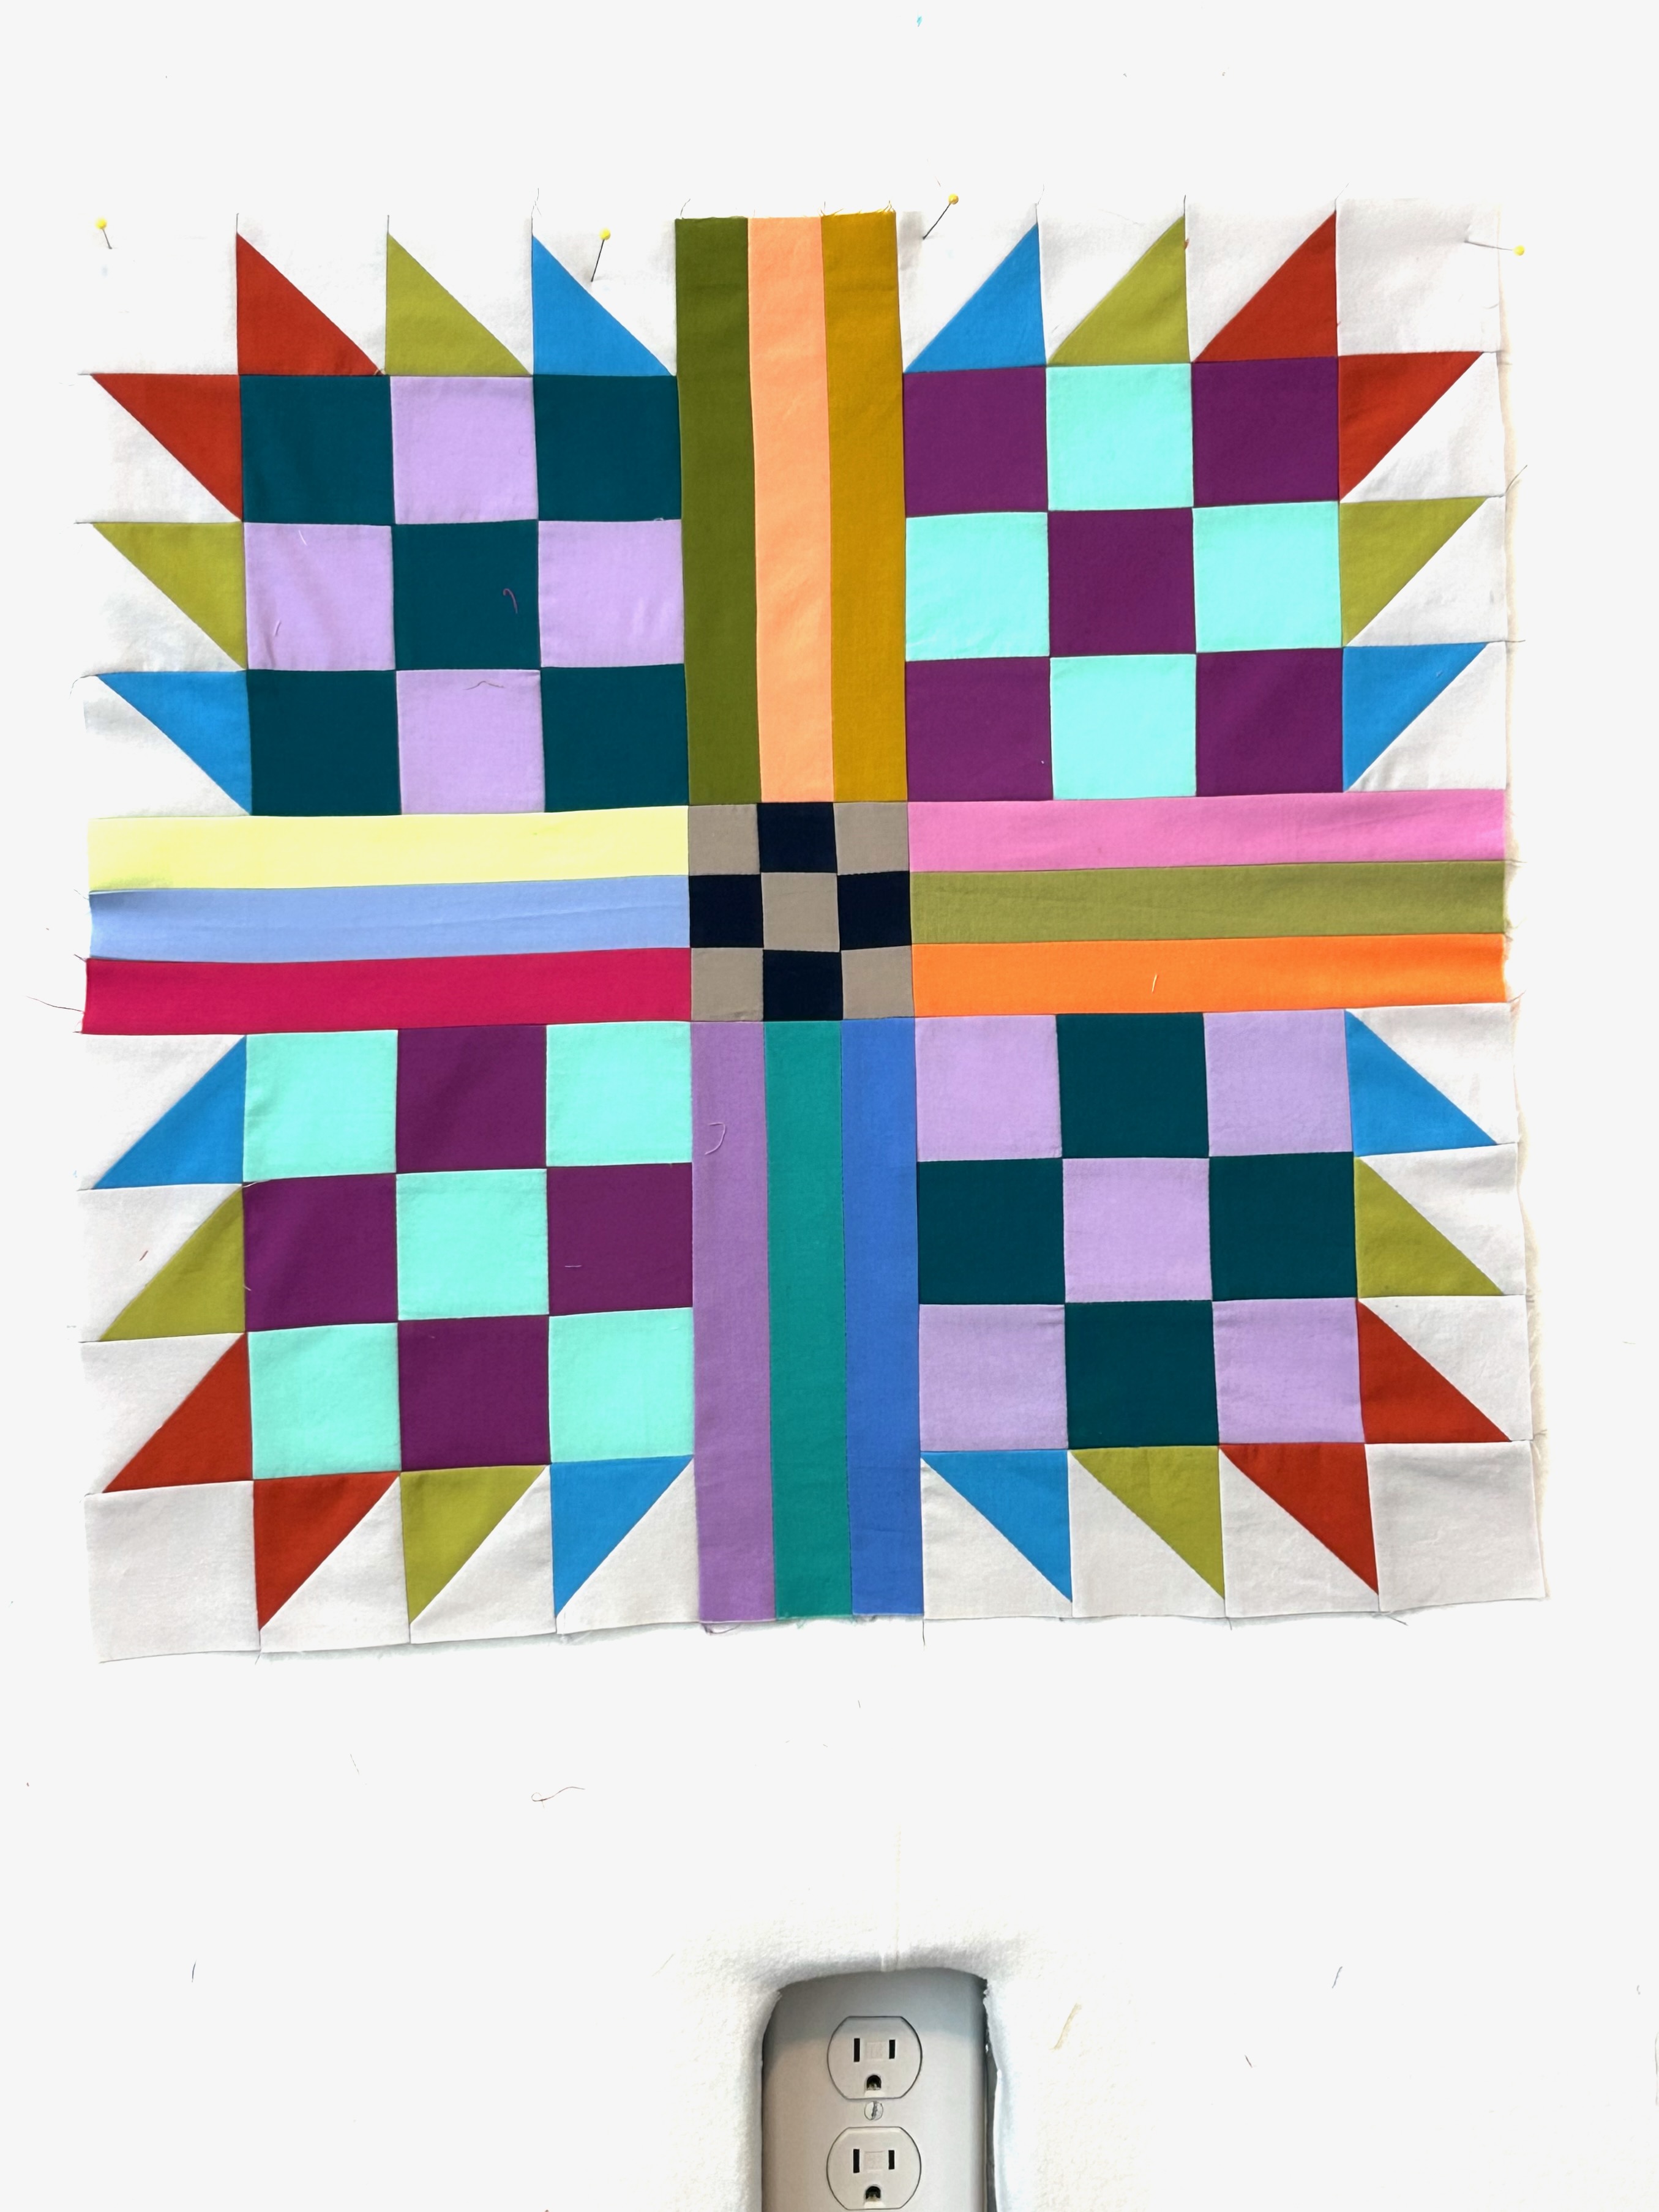
Rachel LaBour of Stitched in Color designed this block and called it “Spinny.” But my longtime friend in Colorado said it looked like umbrellas to her, so that instantly became its name. I used solids for the block edges rather than prints, and I like how that worked.
Rachel’s “rule” for her first quilt was cool inside strips with warm outside edges, but she left open the idea of reversing to warm insides and cool outsides. Earlier, I made a trial block with warm strips and cool edges, and Im still intrigued with that idea–and with maybe using ONE solid color for the edges.
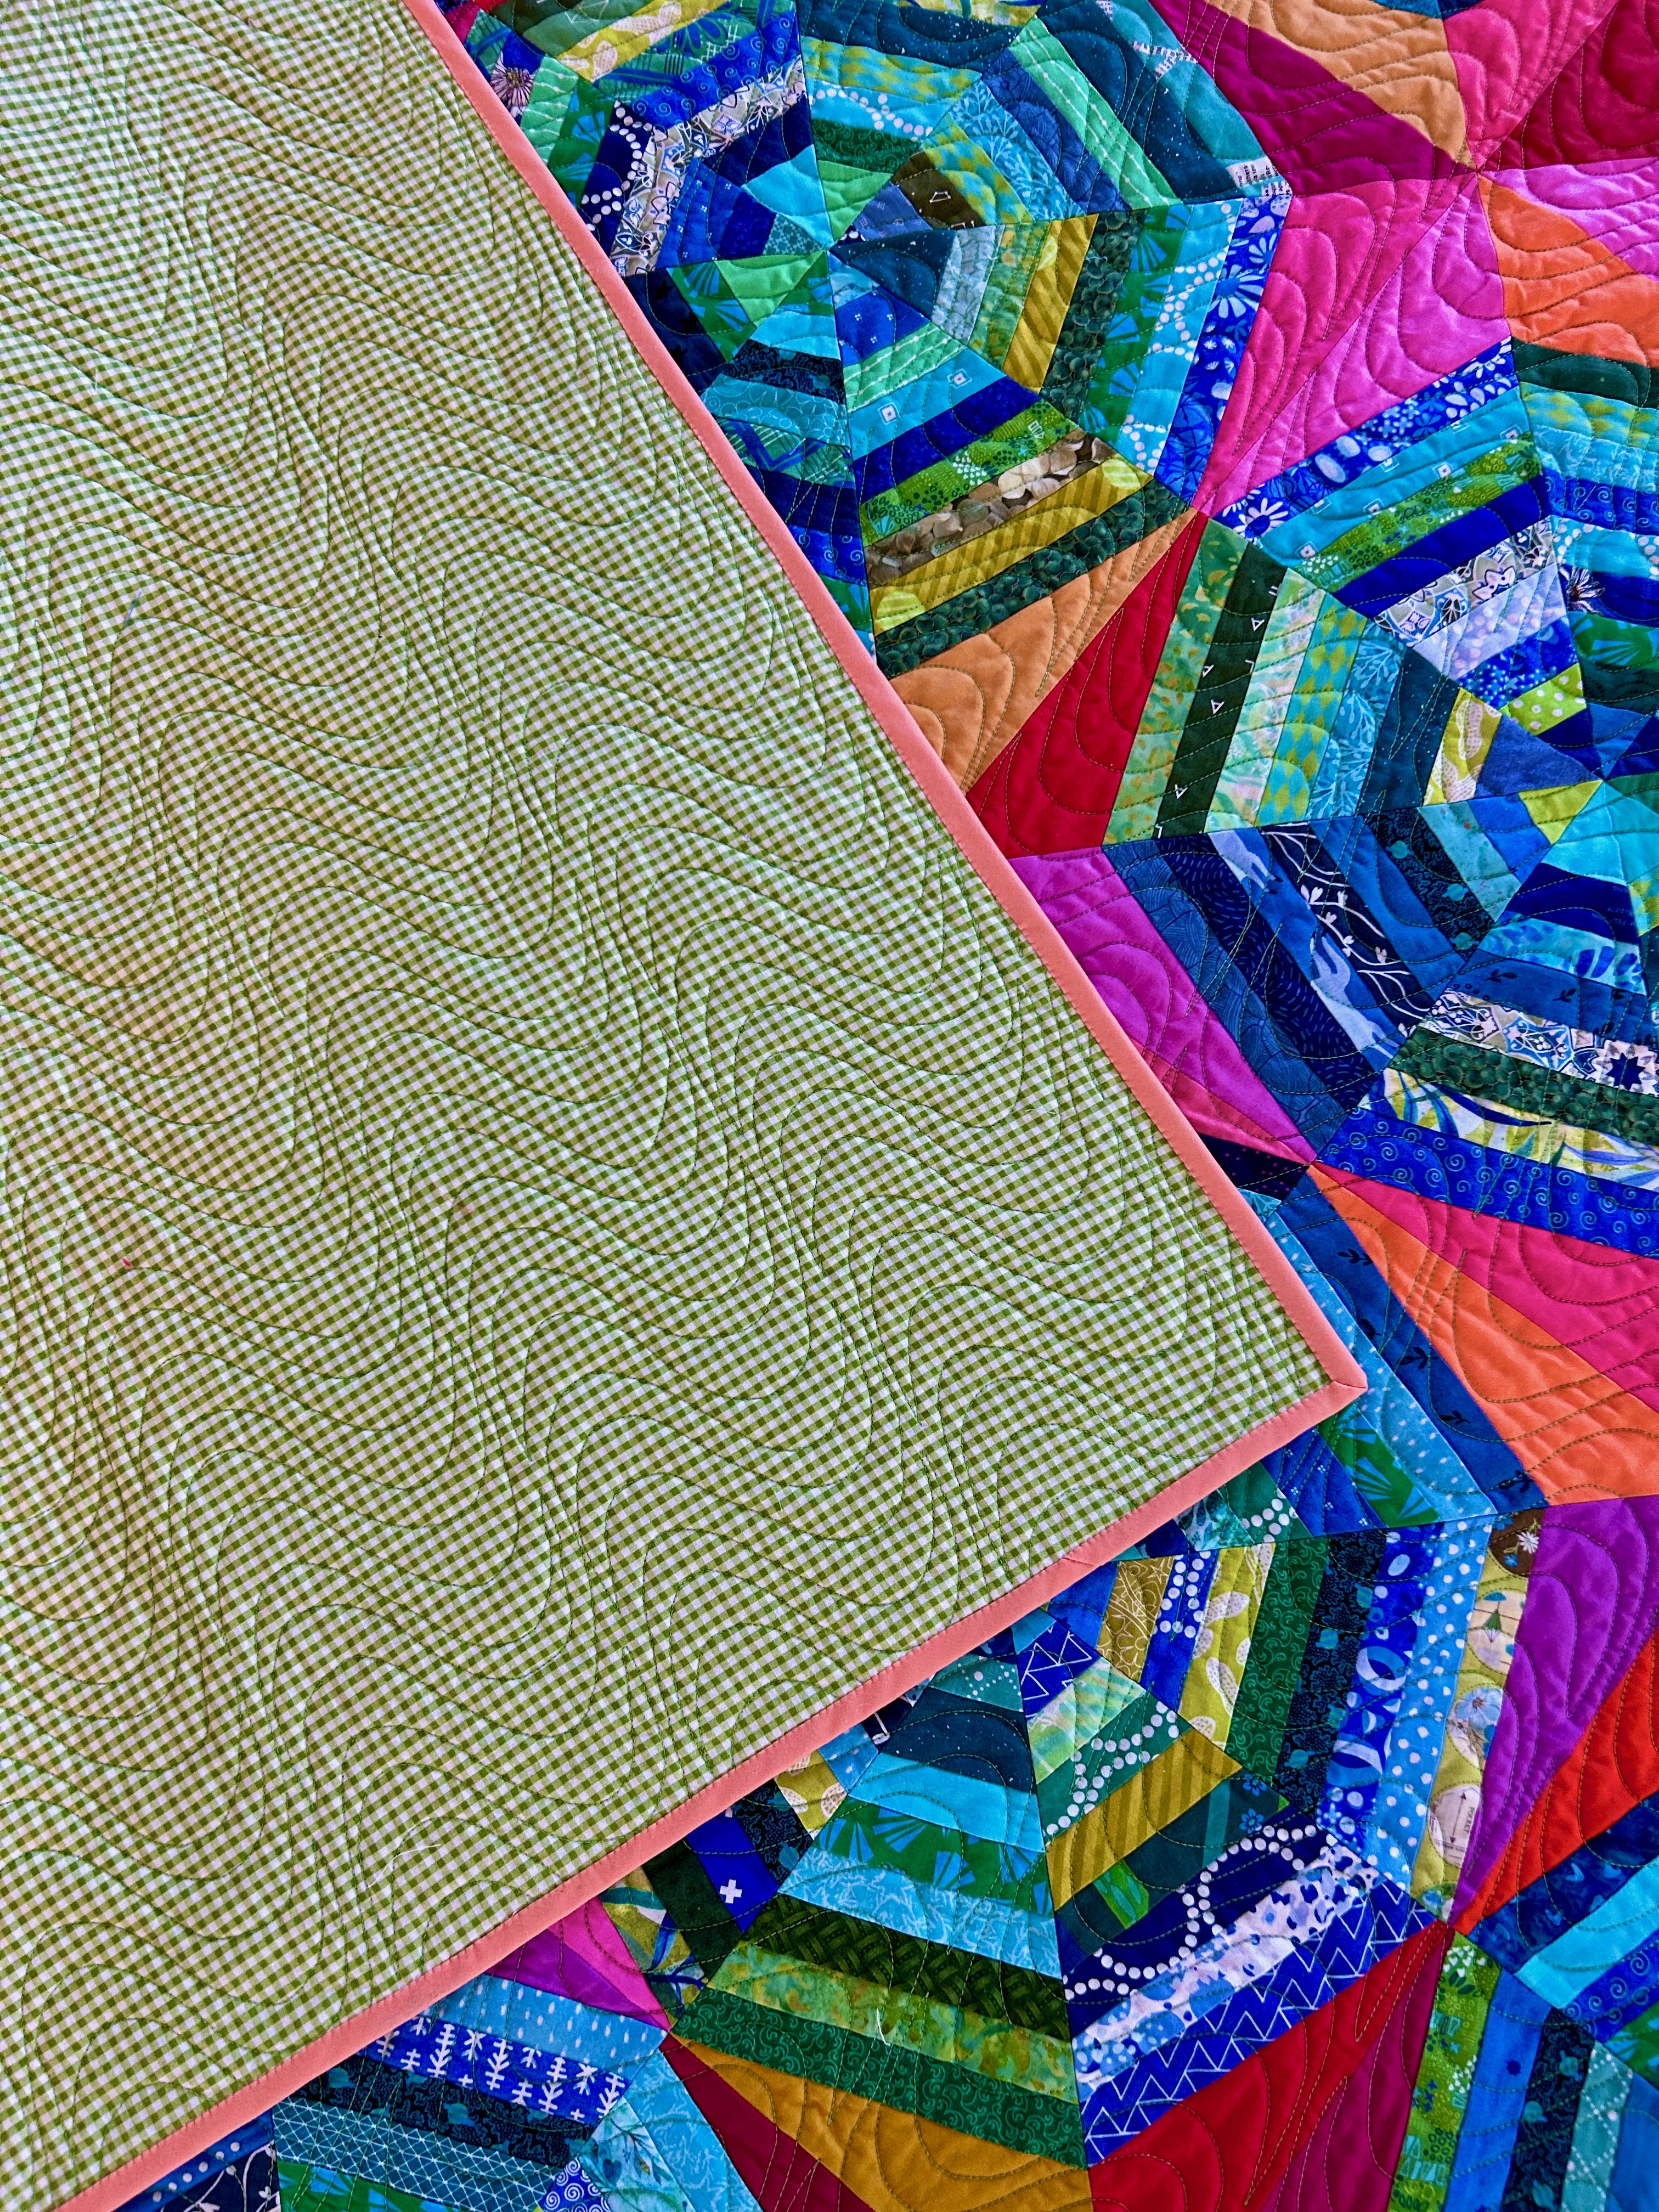
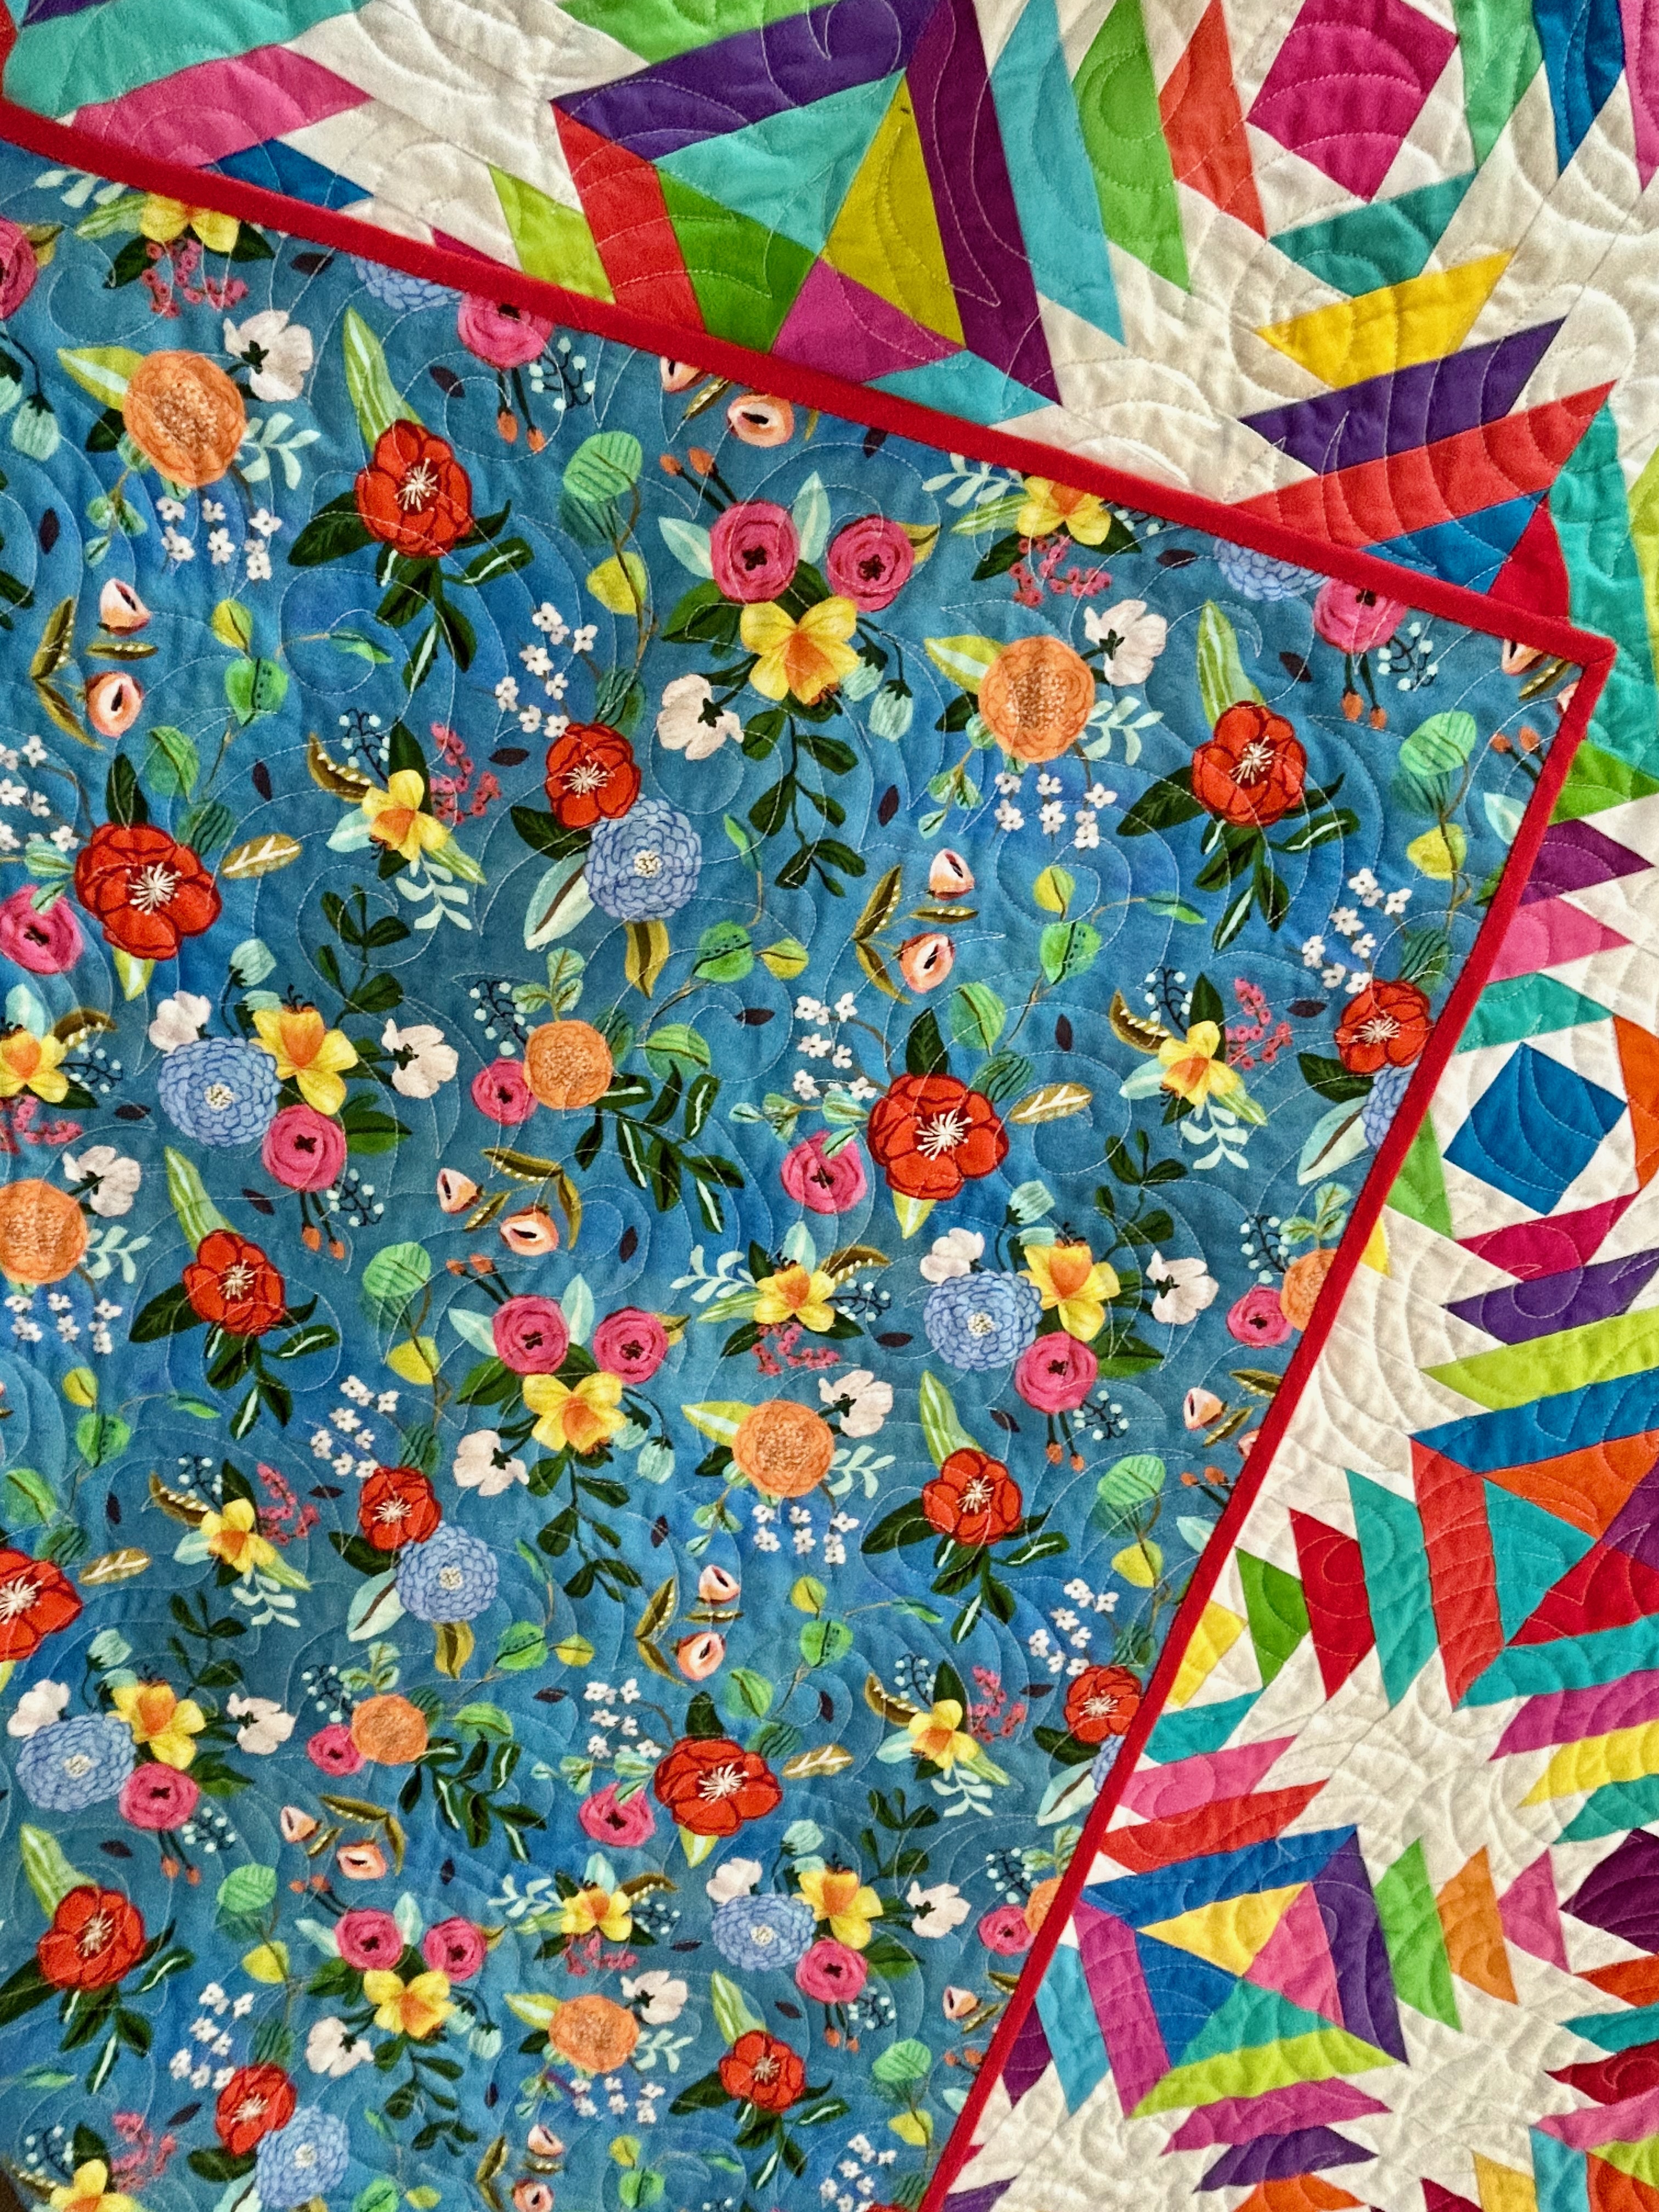
The quilt top is busy, so I thought a plain gingham backing would work well, and I chose this lime green. It’s Riley Blake Designs, C440 @2013. The binding is Kona Cantaloupe, and the quilting thread is Signature “lime.” The pantograph is “New Wave” by Willow Leaf Designs. The block size is 16 inches and the quilt size is 64 by 64.
I put a hanging sleeve on “Umbrellas” and may replace a quilt hanging in my quilt studio gallery with it. Time will tell. I love the star that forms in the center of 4 blocks.
Here’s a picture of the trial block I did before Rachel released her pattern, which had the right measurements.
Note that the block is made by sewing on to a cut fabric underlayer, so it is…heavy. But not too heavy for a cold winter night.
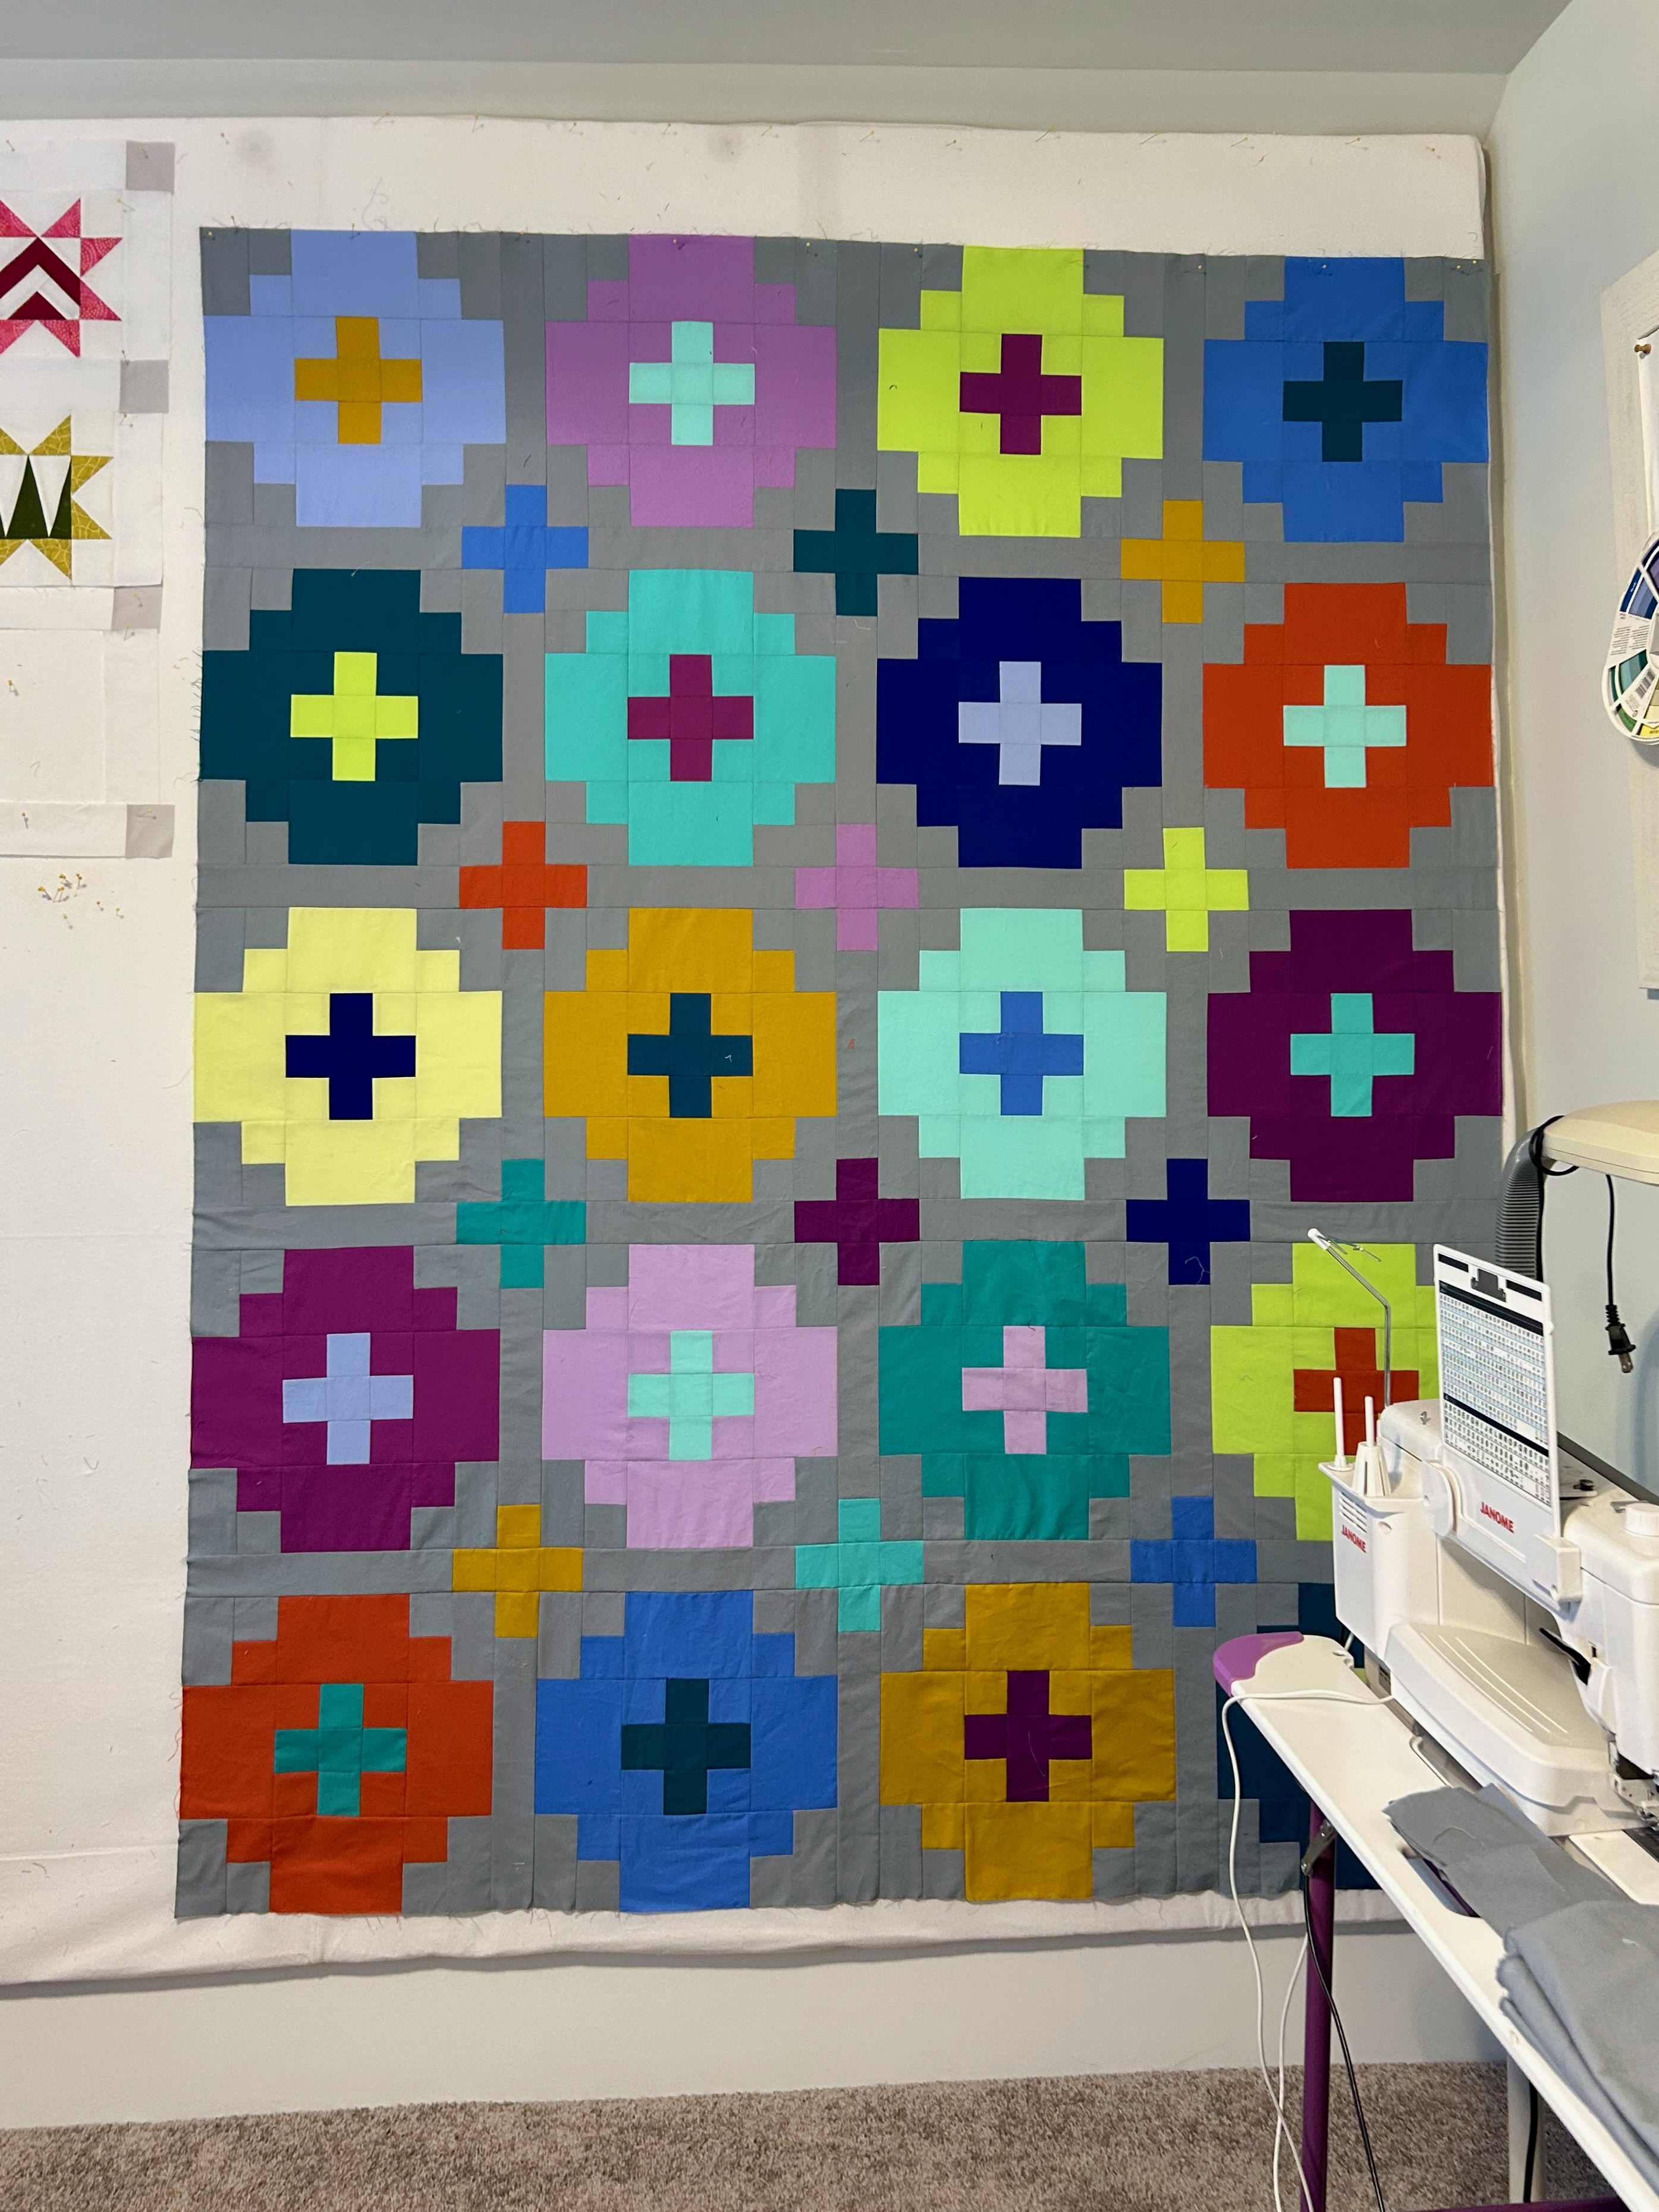
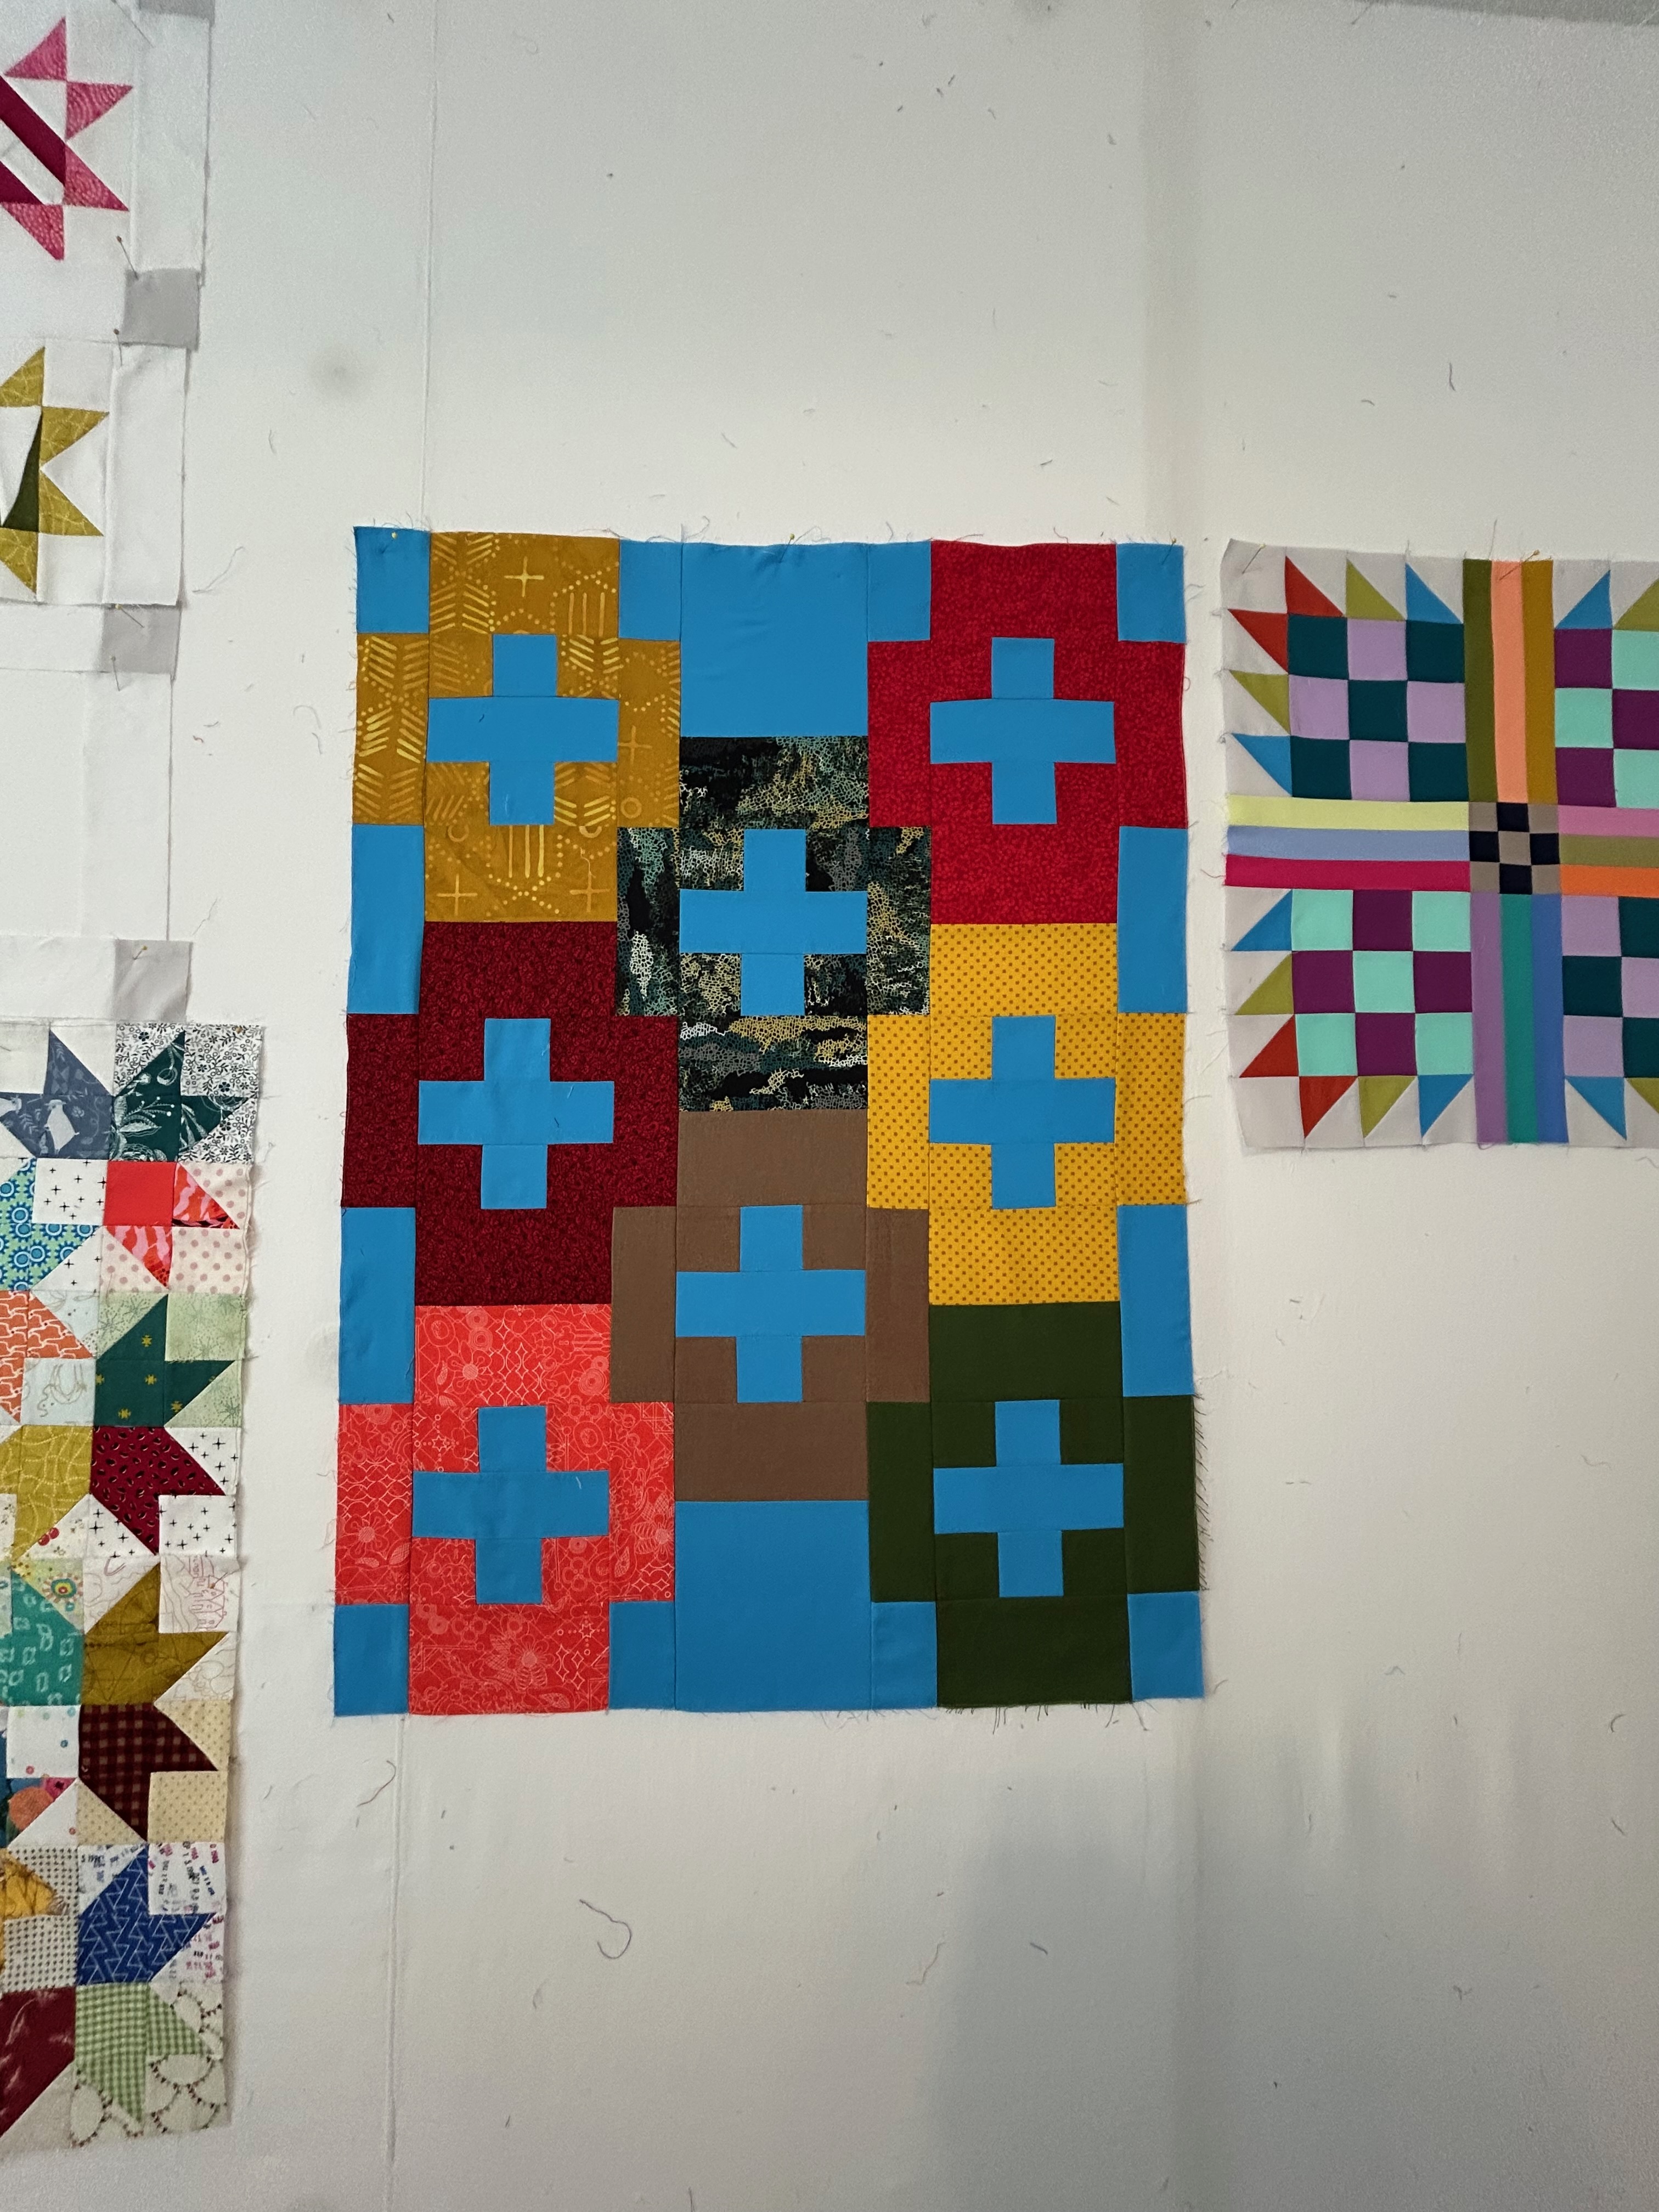
Yesterday, it was time to reorganize the design wall as “Cross Tiles” (Quilty Love) is now going on the longarm. Yesterday I sewed the backing and loaded it, ironed the batting, and laid the top on the sandwich. I will finish that set-up process later today and will start quilting. I am still trying to decide which pantograph to use.
Here’s a reminder of what “Cross Tiles” looks like:
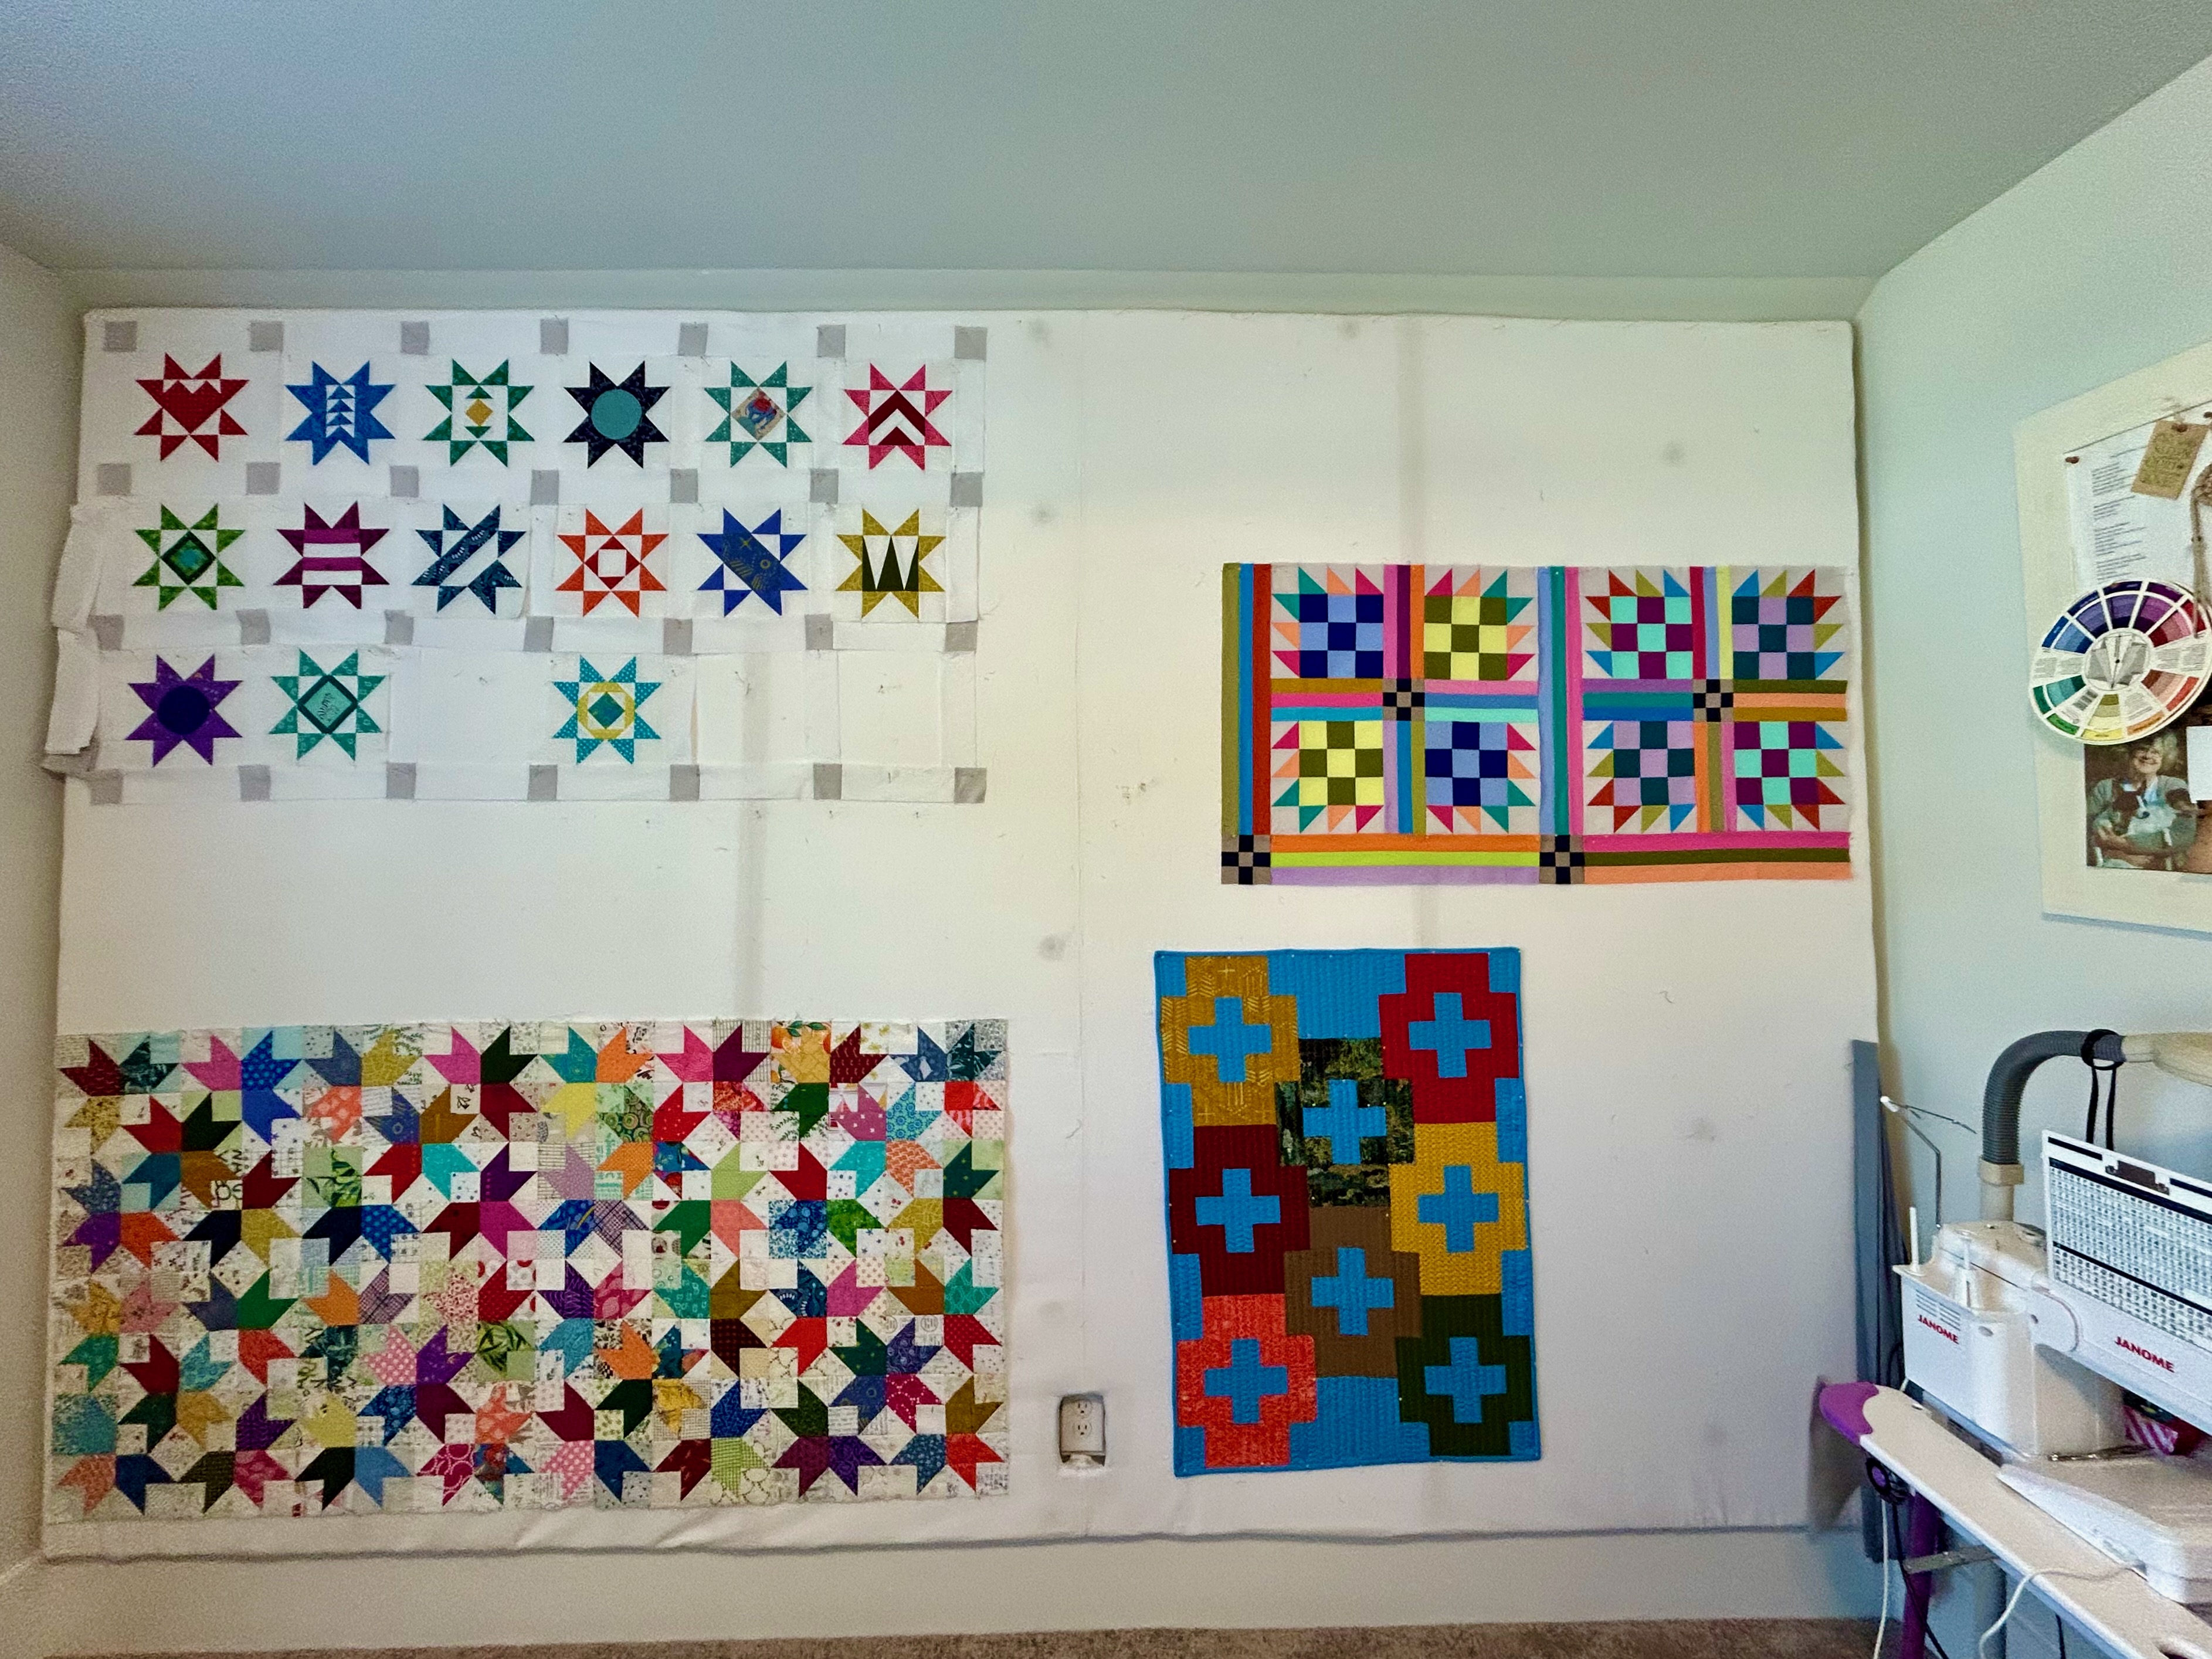
So, here’s the design wall now. On the upper left are Leila Gardunia’s “Scrappy Stars” blocks. Yesterday I made three more and expanded space for another row. I’m planning on six rows. By the way, Leila now has patterns for scrappy diamonds.
On the upper right are two blocks of Then Came June’s “Goldie” pattern. I have a third cut and ready to sew. I am loving this quilt block as the pattern takes shape, but it requires precision sewing so that each unit must meaure perfectly.
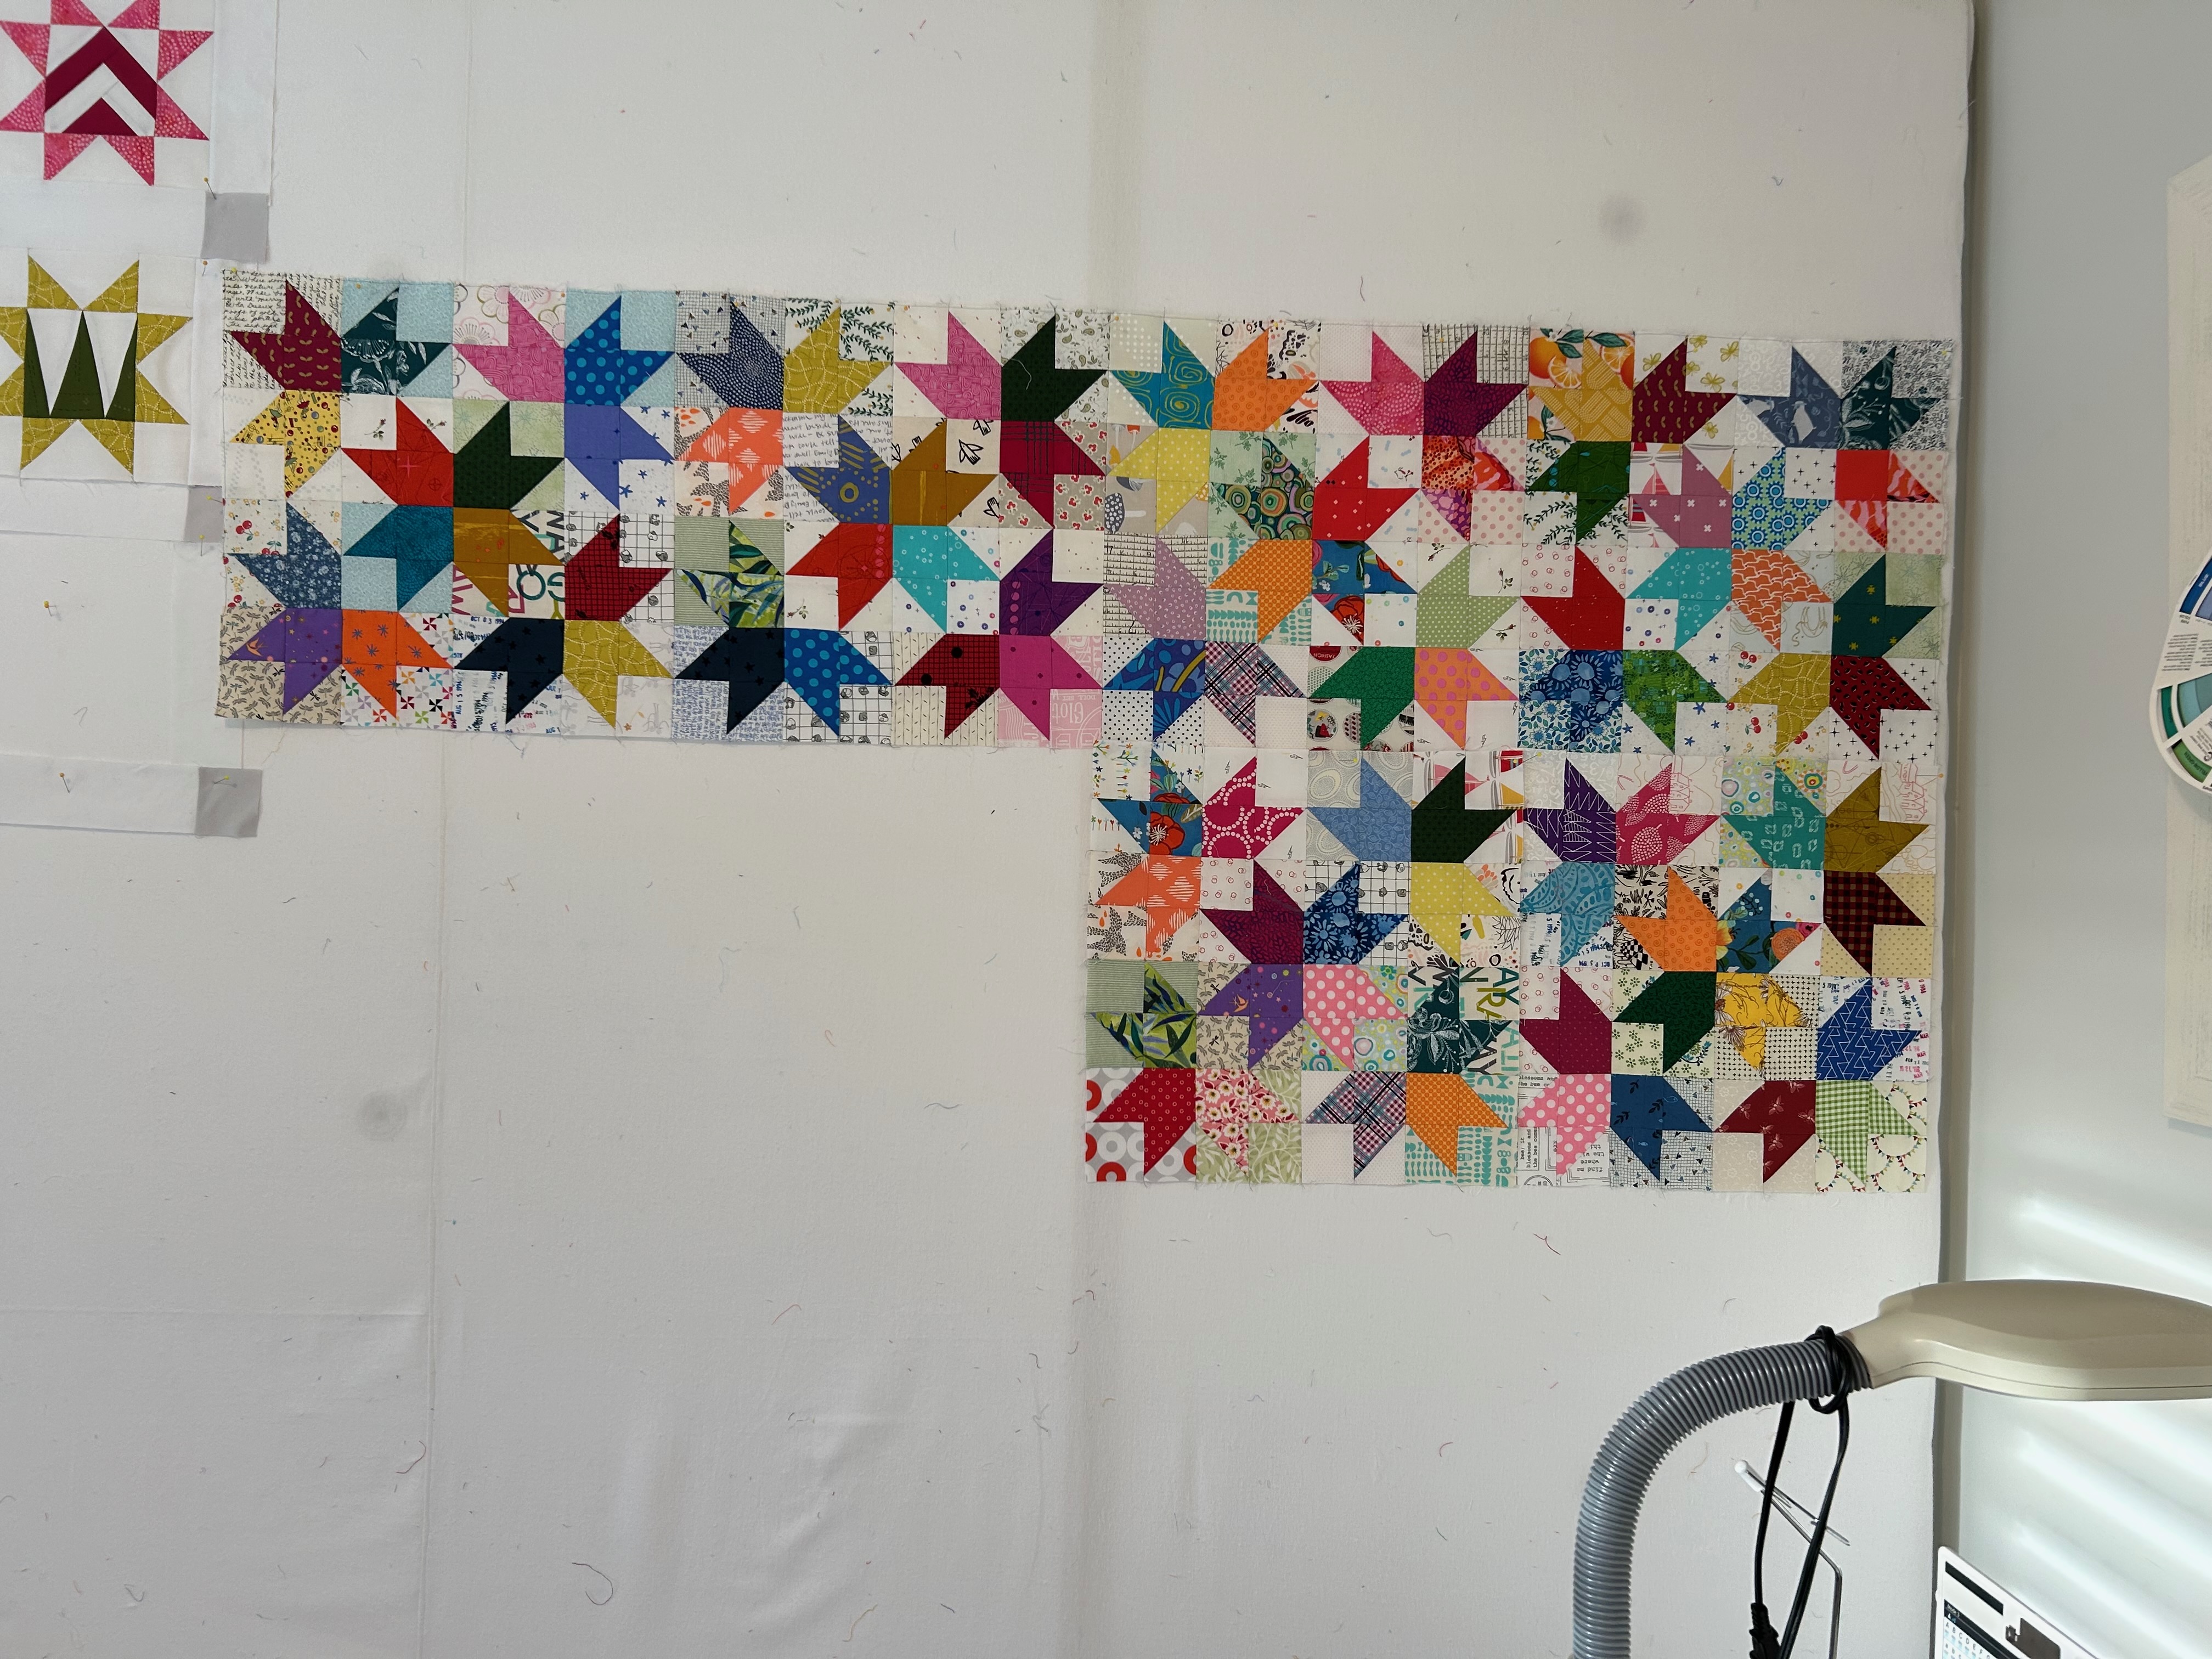
The scrappy “Tulip Swirl” blocks-Bonnie Hunter’s 2026 free leader/ender block–are moved out of the way. I need to make many more blocks to have enough for the third row. They make up fast as leader/ender projects though.
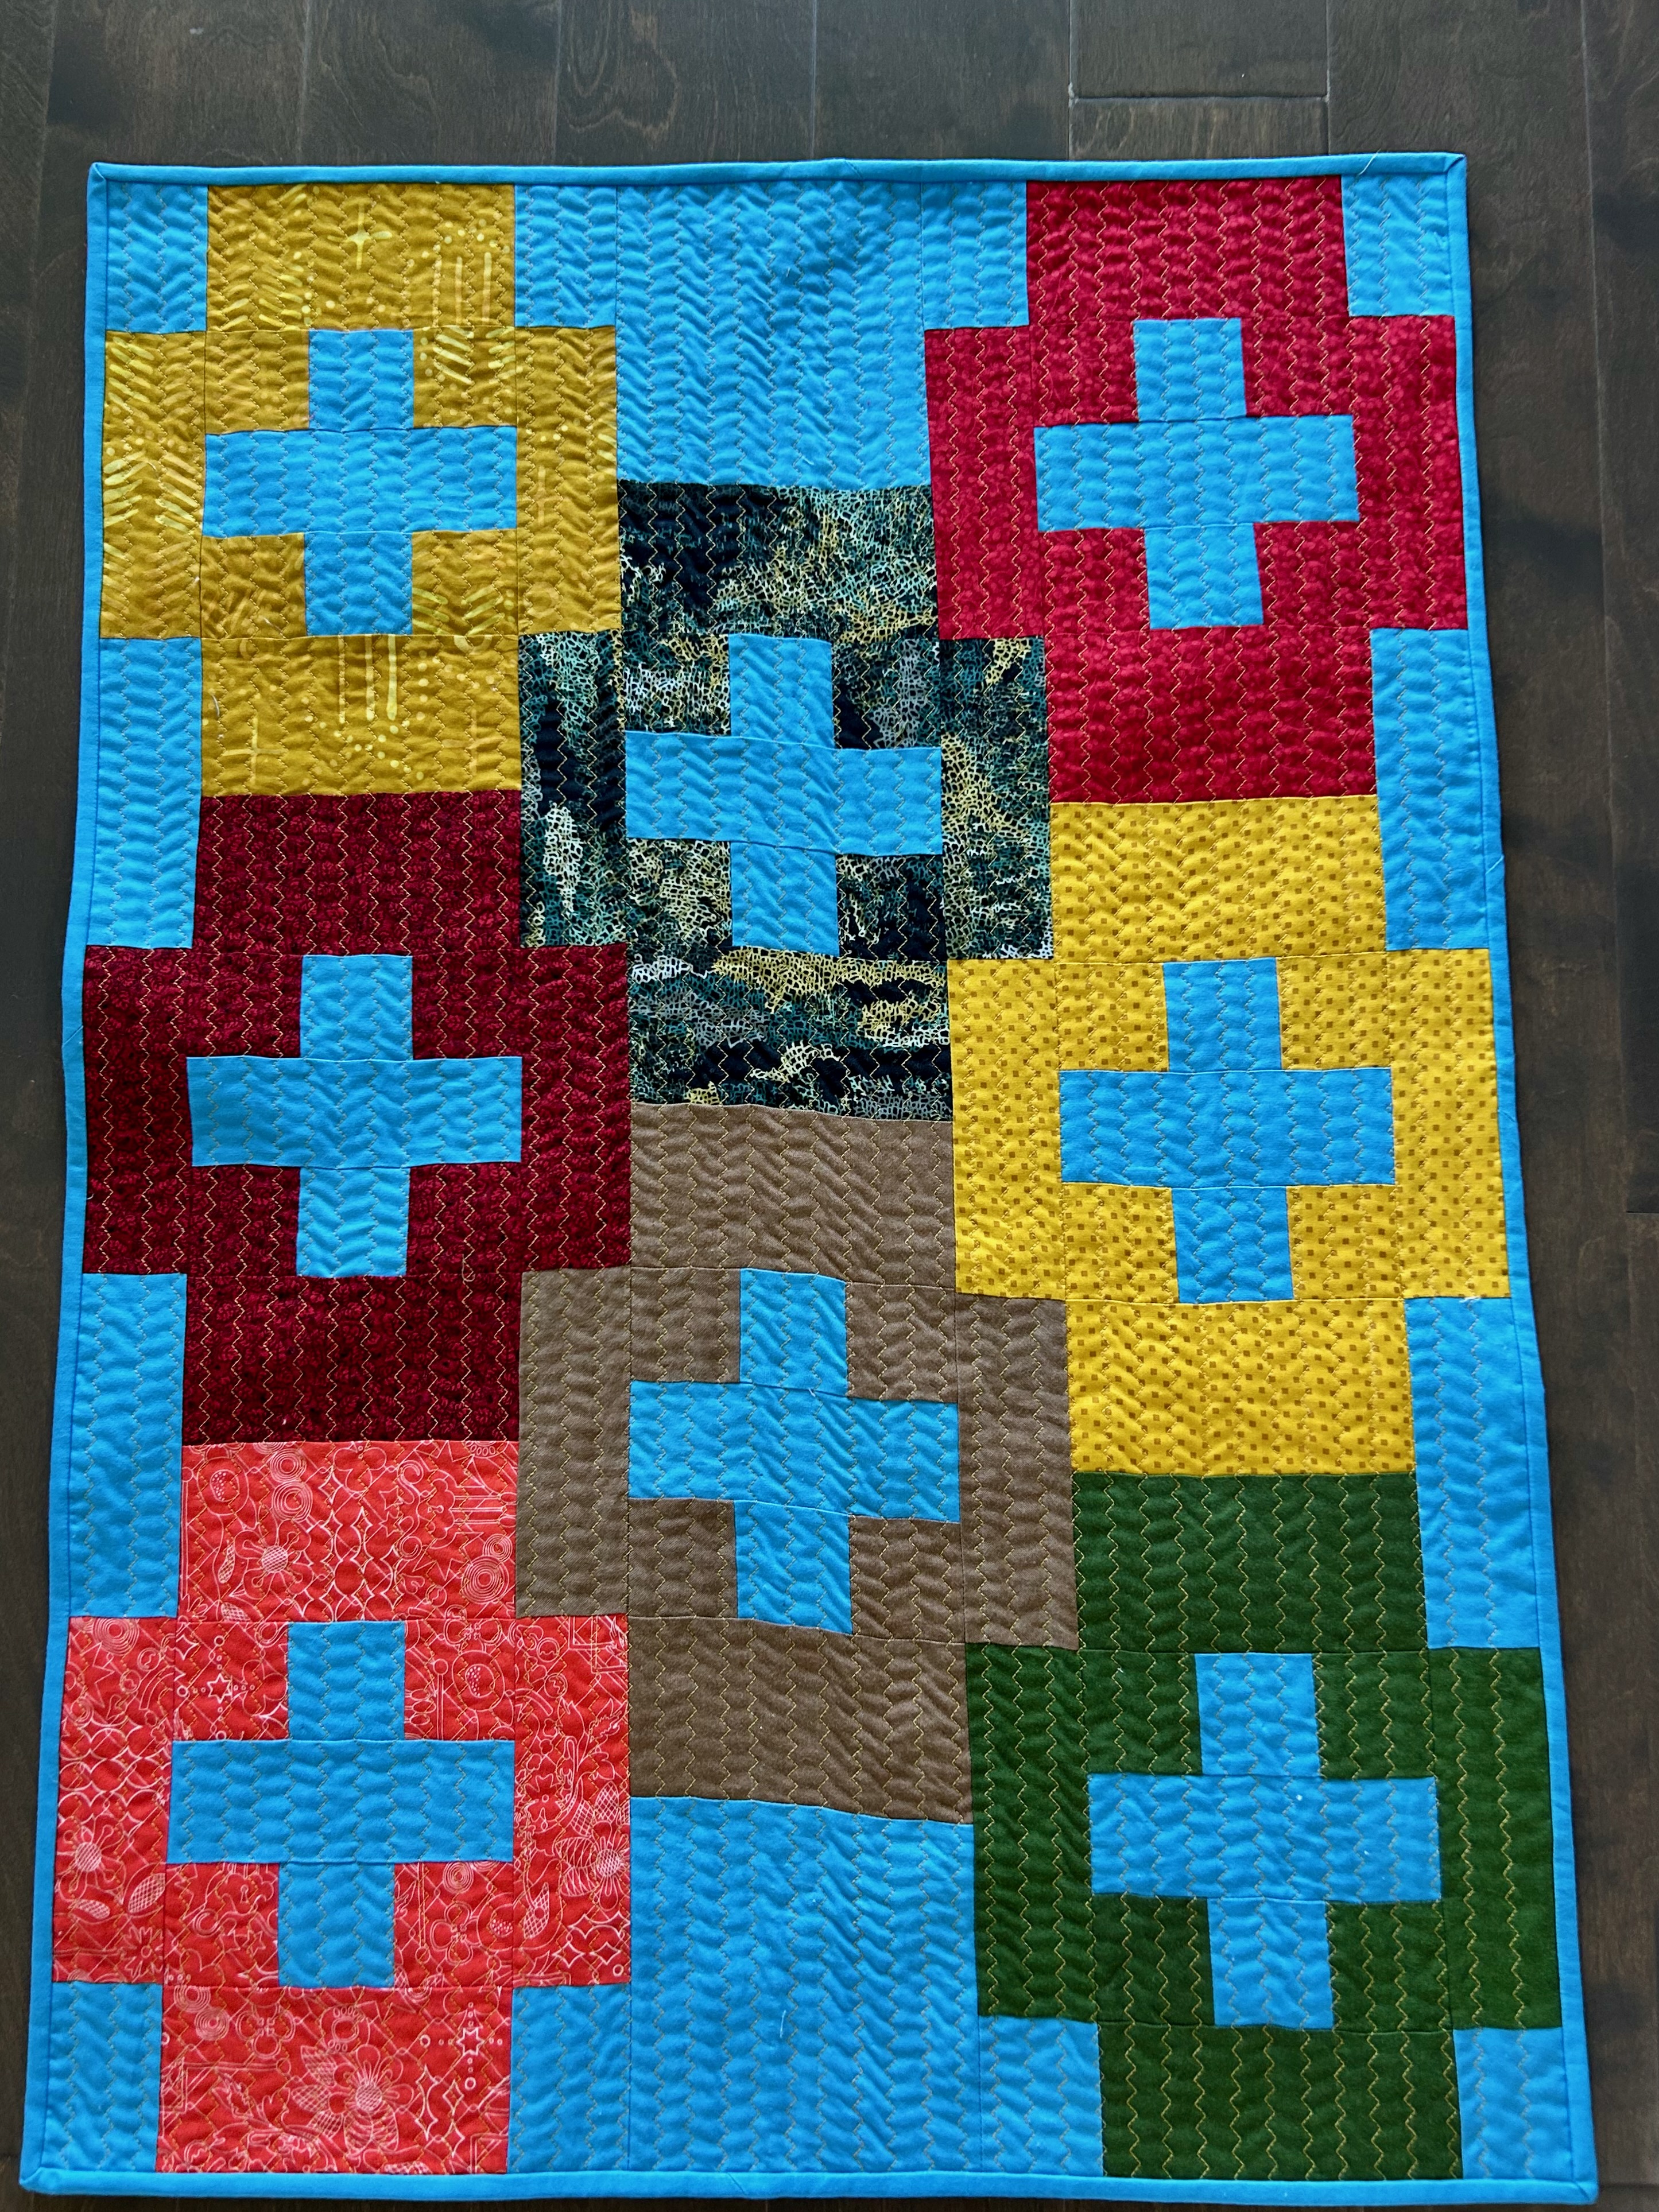
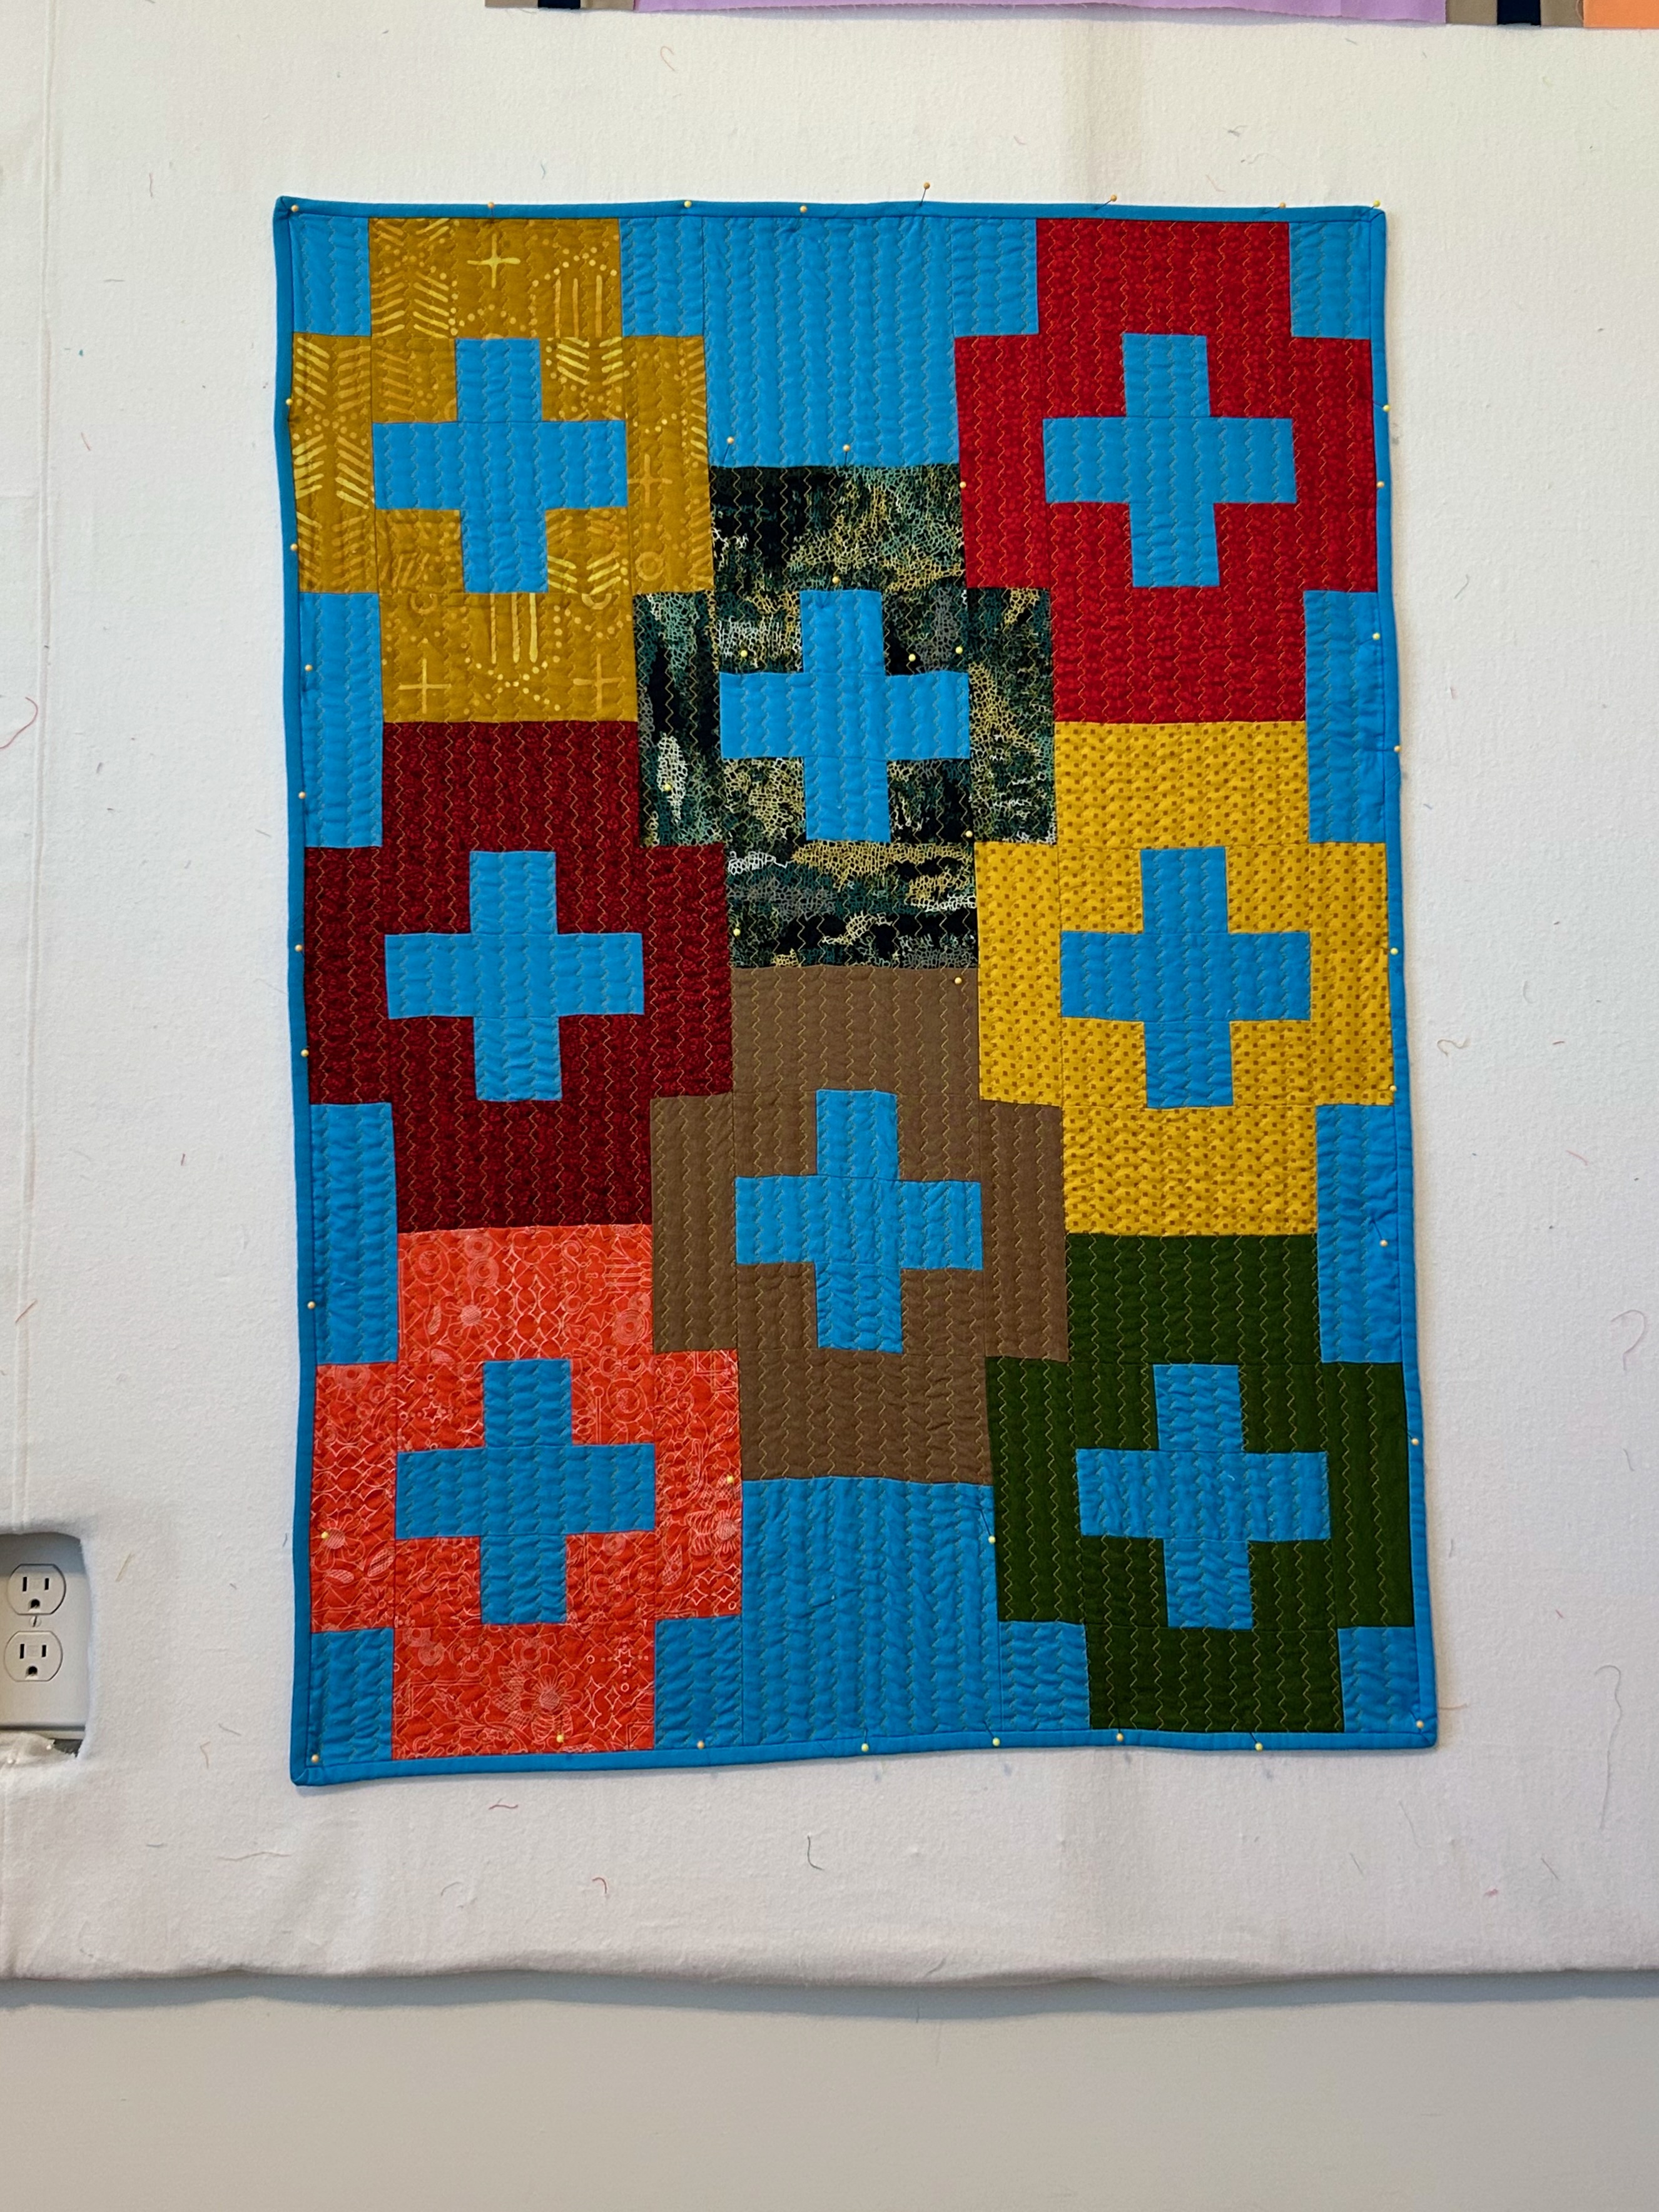
And then there is a story on this “Plus and Minus” (Quilty Love) project. I want to make a table topper for each month of the year as I seem to have made about six now. And I want to use this “Plus and Minus” project in a bigger quilt, so I thought to trial the block for September’s table topper. AND, I wanted to use the extended zig-zag stitch on my machine–having seen Emily Davis (Quilty Love) use it recently. It makes the most gorgeous texture.
HOWEVER, I encountered TWO issues that I had not thought would happen. First, the first zig-zag quilt lines (sewn an inch apart with the idea of returning when all were done to include 1/2-inch lines) pulled the center quilt blocks off-line, distorting the blocks. I had pinned the project quite a bit, but maybe not in the right places. Second, I usually make smaller blocks, which make this kind of distortion a bit harder to occur. (Or so it seems to me.). The enlarged zig-zag stitch, though, was perfect and beautiful.
After thinking on this issue for a few days, I put the finished quilt into the washing machine on a rinse and spin cycle and then blocked it as best as I could on the design wall. That helped a lot, as you can see. It helped enough that I can live with this project.
BUT, I’ve noted to myself that on big blocks, I will check to make sure that connecting seams are perfectly straight as I go. And I know the longarm will not pull these big blocks “off” while the top is quilted. I do still REALLY like that zig-zag stitch for a small quilt top though and am thinking…about how best to manage it. I am not sure how it would look on smaller blocks that are really scrappy, for instance.
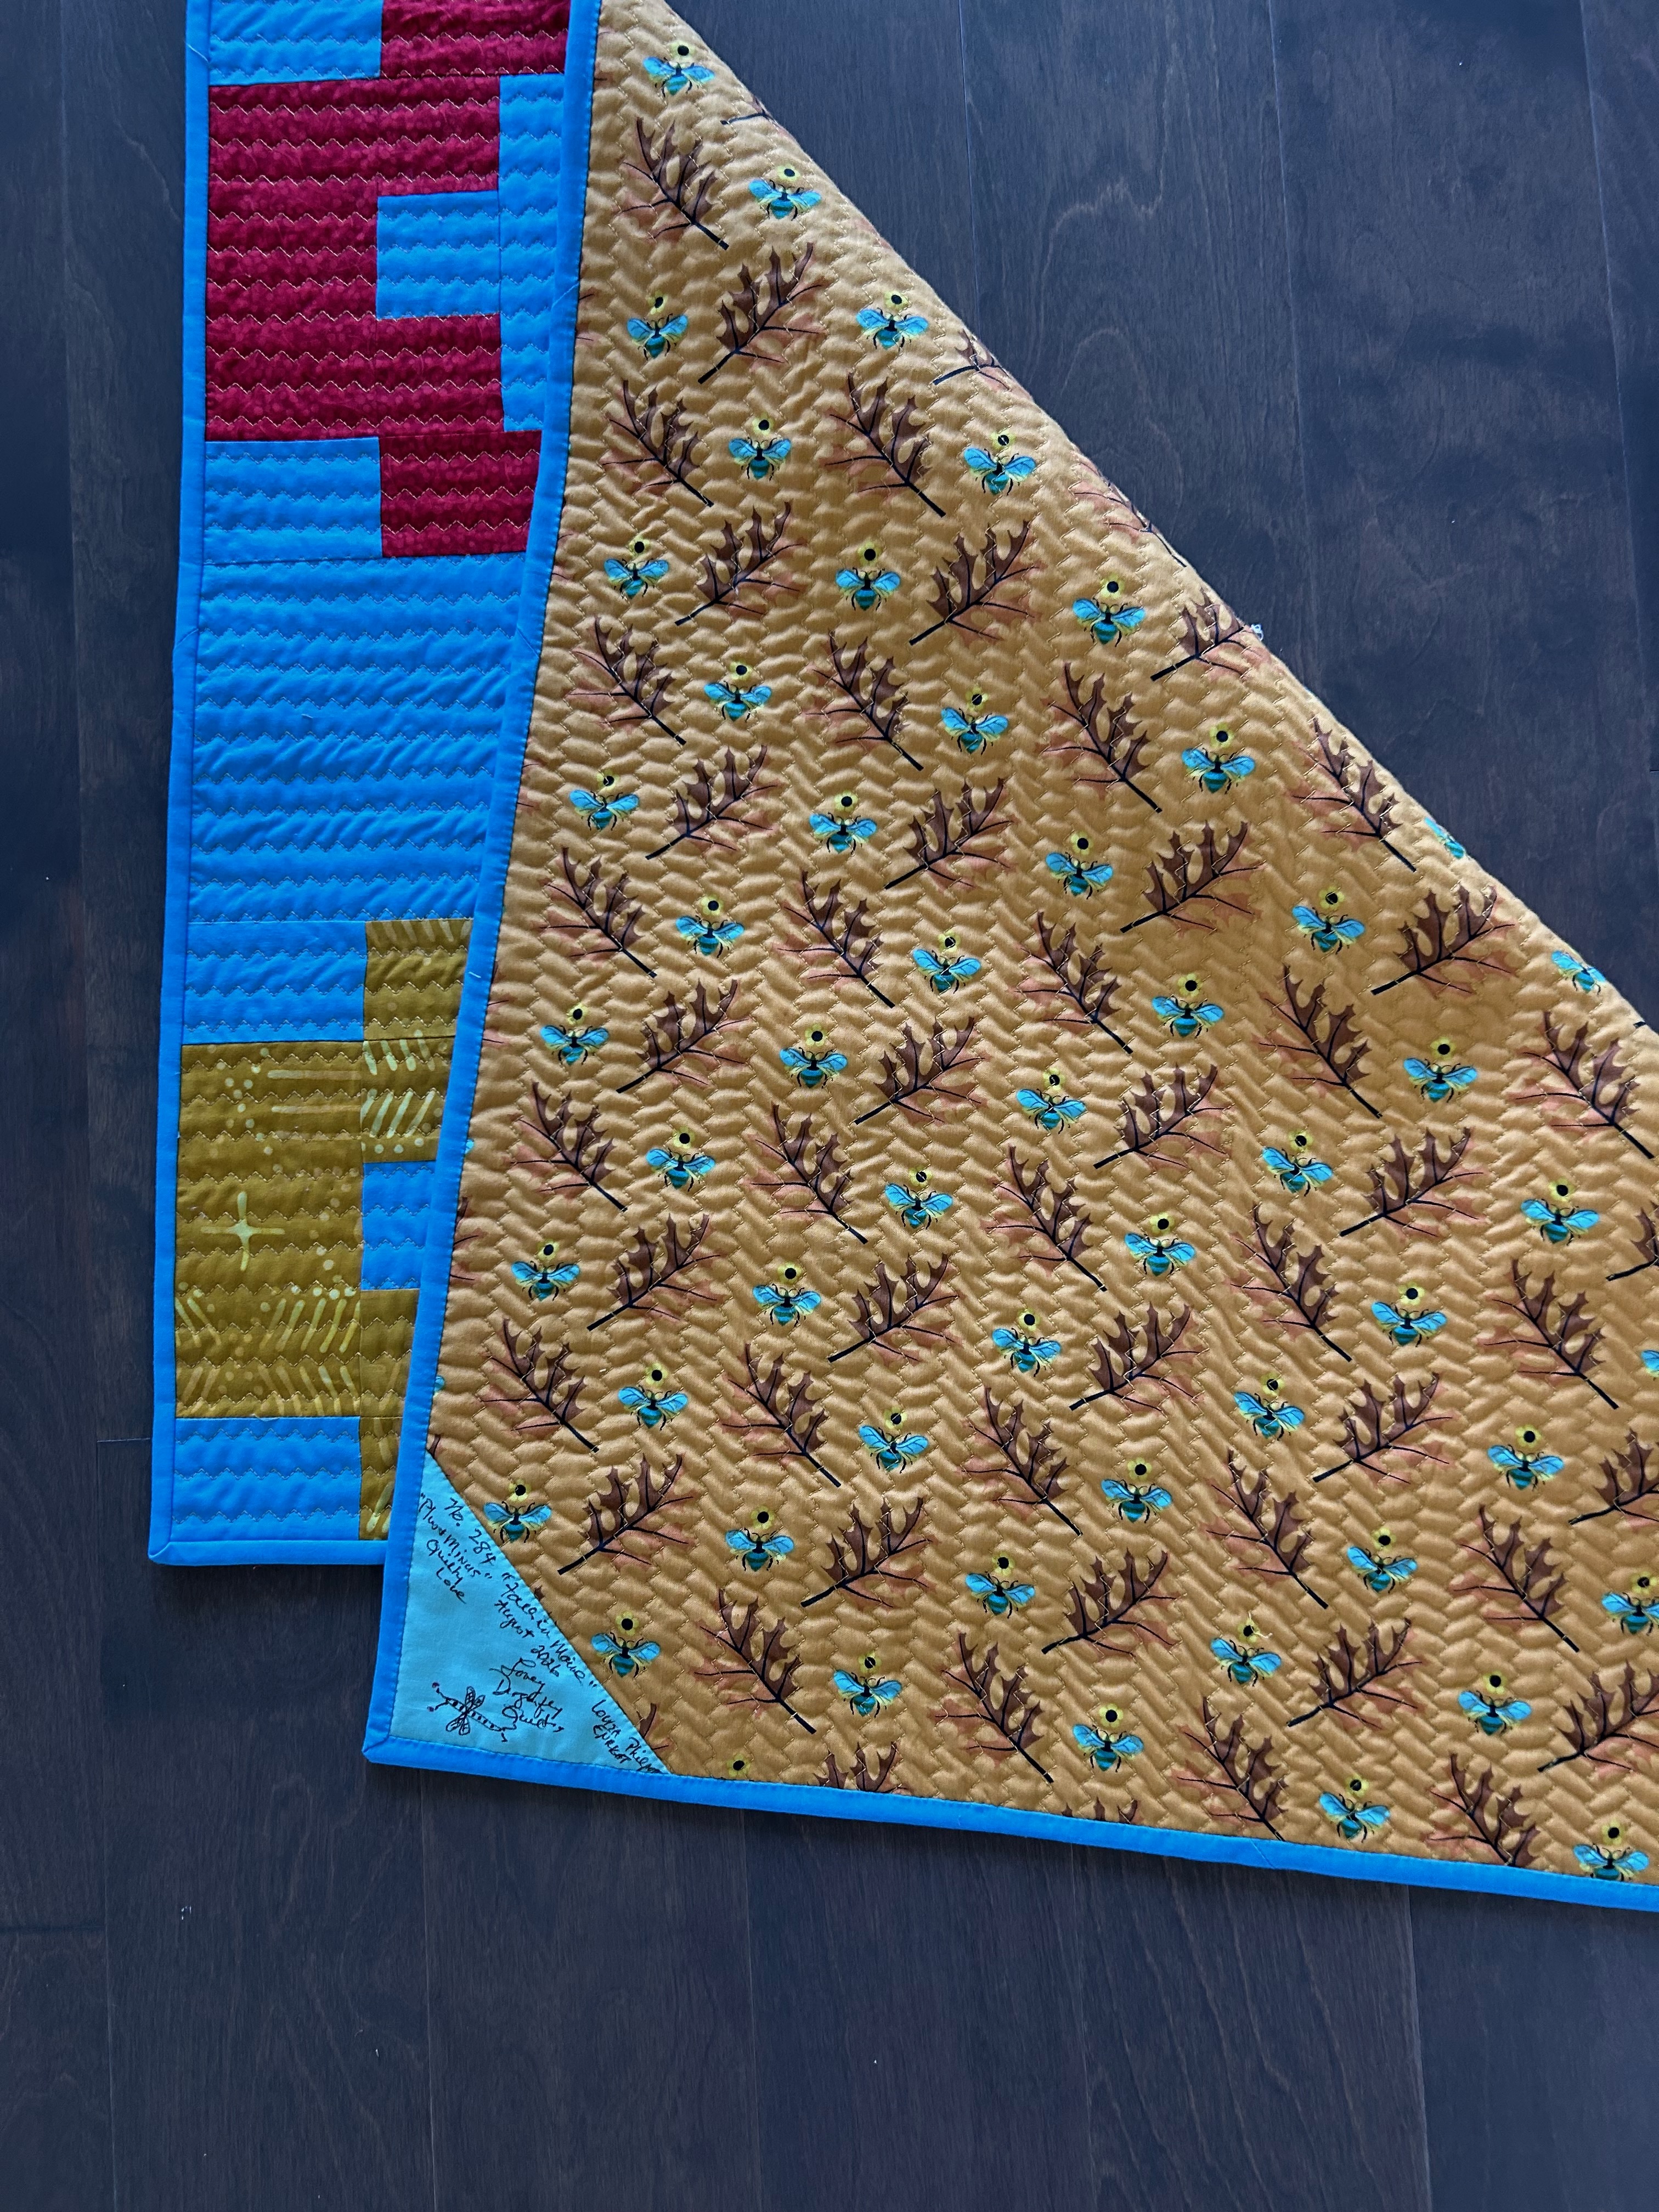
Here’s the backing for “Fall in Maine”–a piece that has been in my stash for years and years. I have no idea who made it back in the day, but it is perfect for this little quilt.
And now I’m wanting to start the bigger “Plus and Minus” quilt I want to make, but…room on the design wall is lacking for right now. Hmmm… I could put “Tulip Swirl” aside for the moment…
Yesterday I gave “Pillars” a rest from it’s duty under the flowers and brought “Shift” onto the job. It’s so fun to move quilts around the house, and I recently moved more of them, which adds interest, even if just for me.
Yesterday it was cool enough to have my noon main meal in my “outdoor room” screened porch.
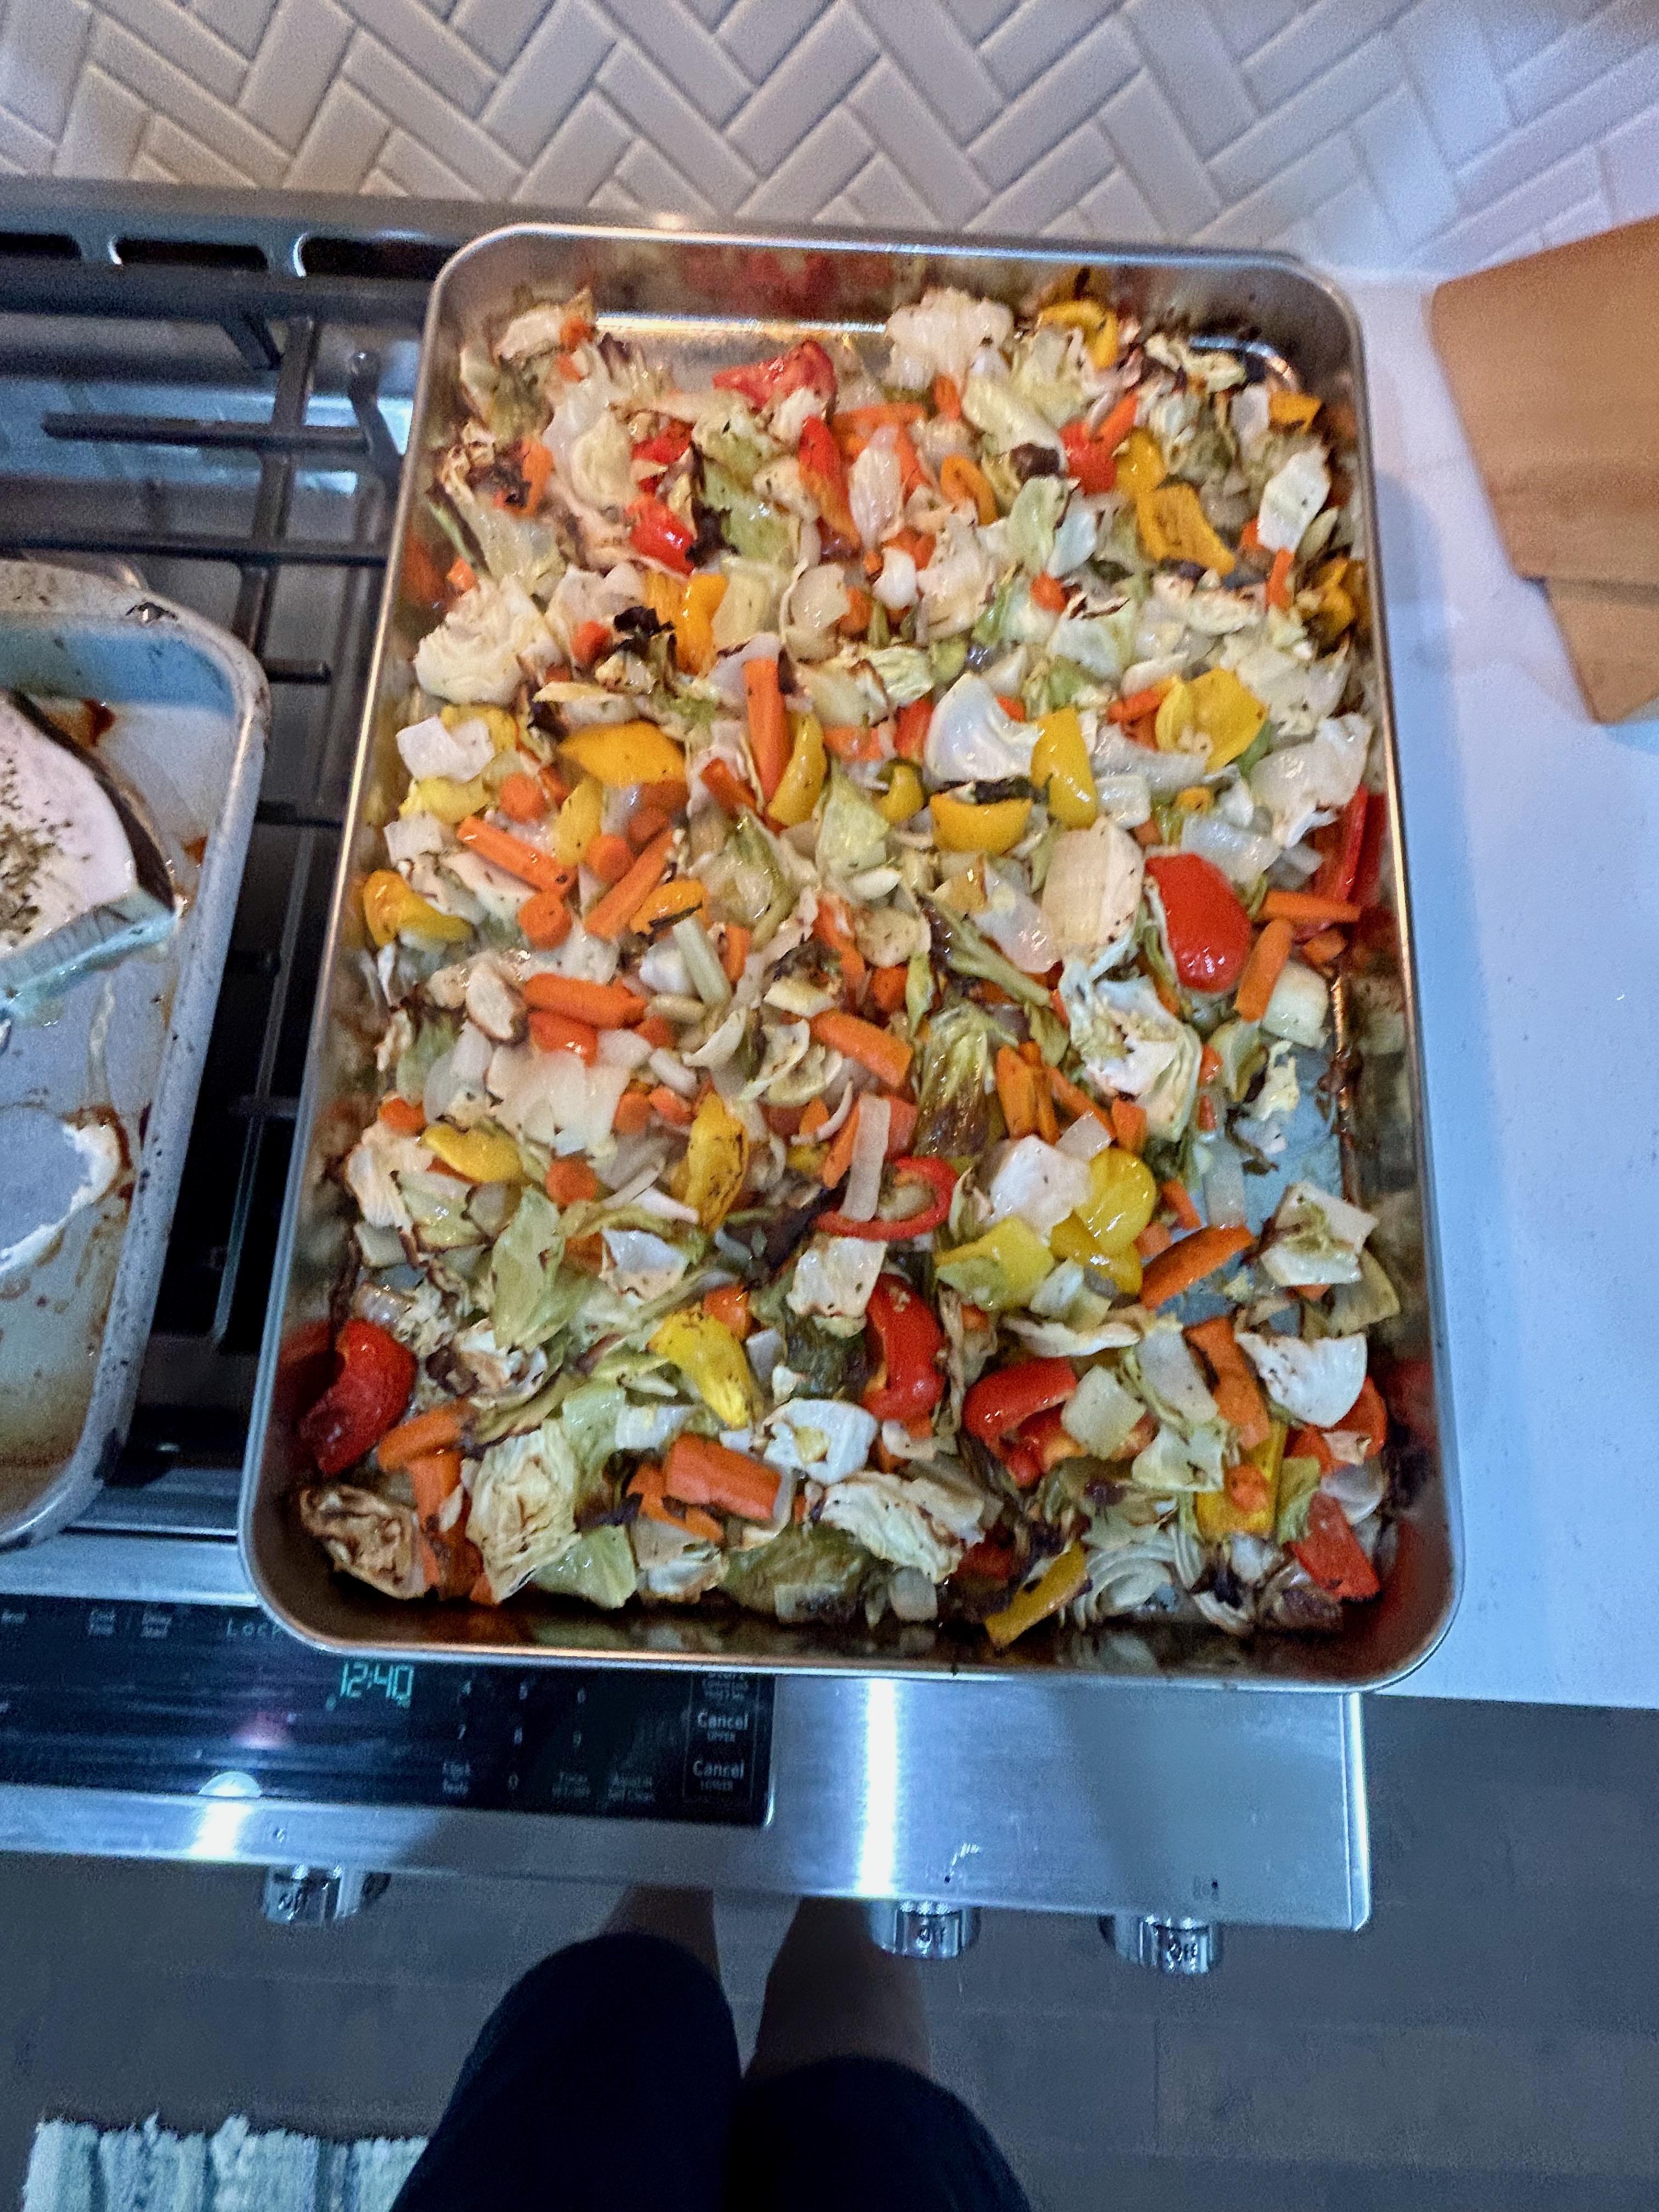
Recently I replaced my stainless steel “cookie” pans with new, larger ones. So I used one to roast the veggies I had on hand: cabbage, carrots, sweet peppers, onions, garlic–with butter as the fat.
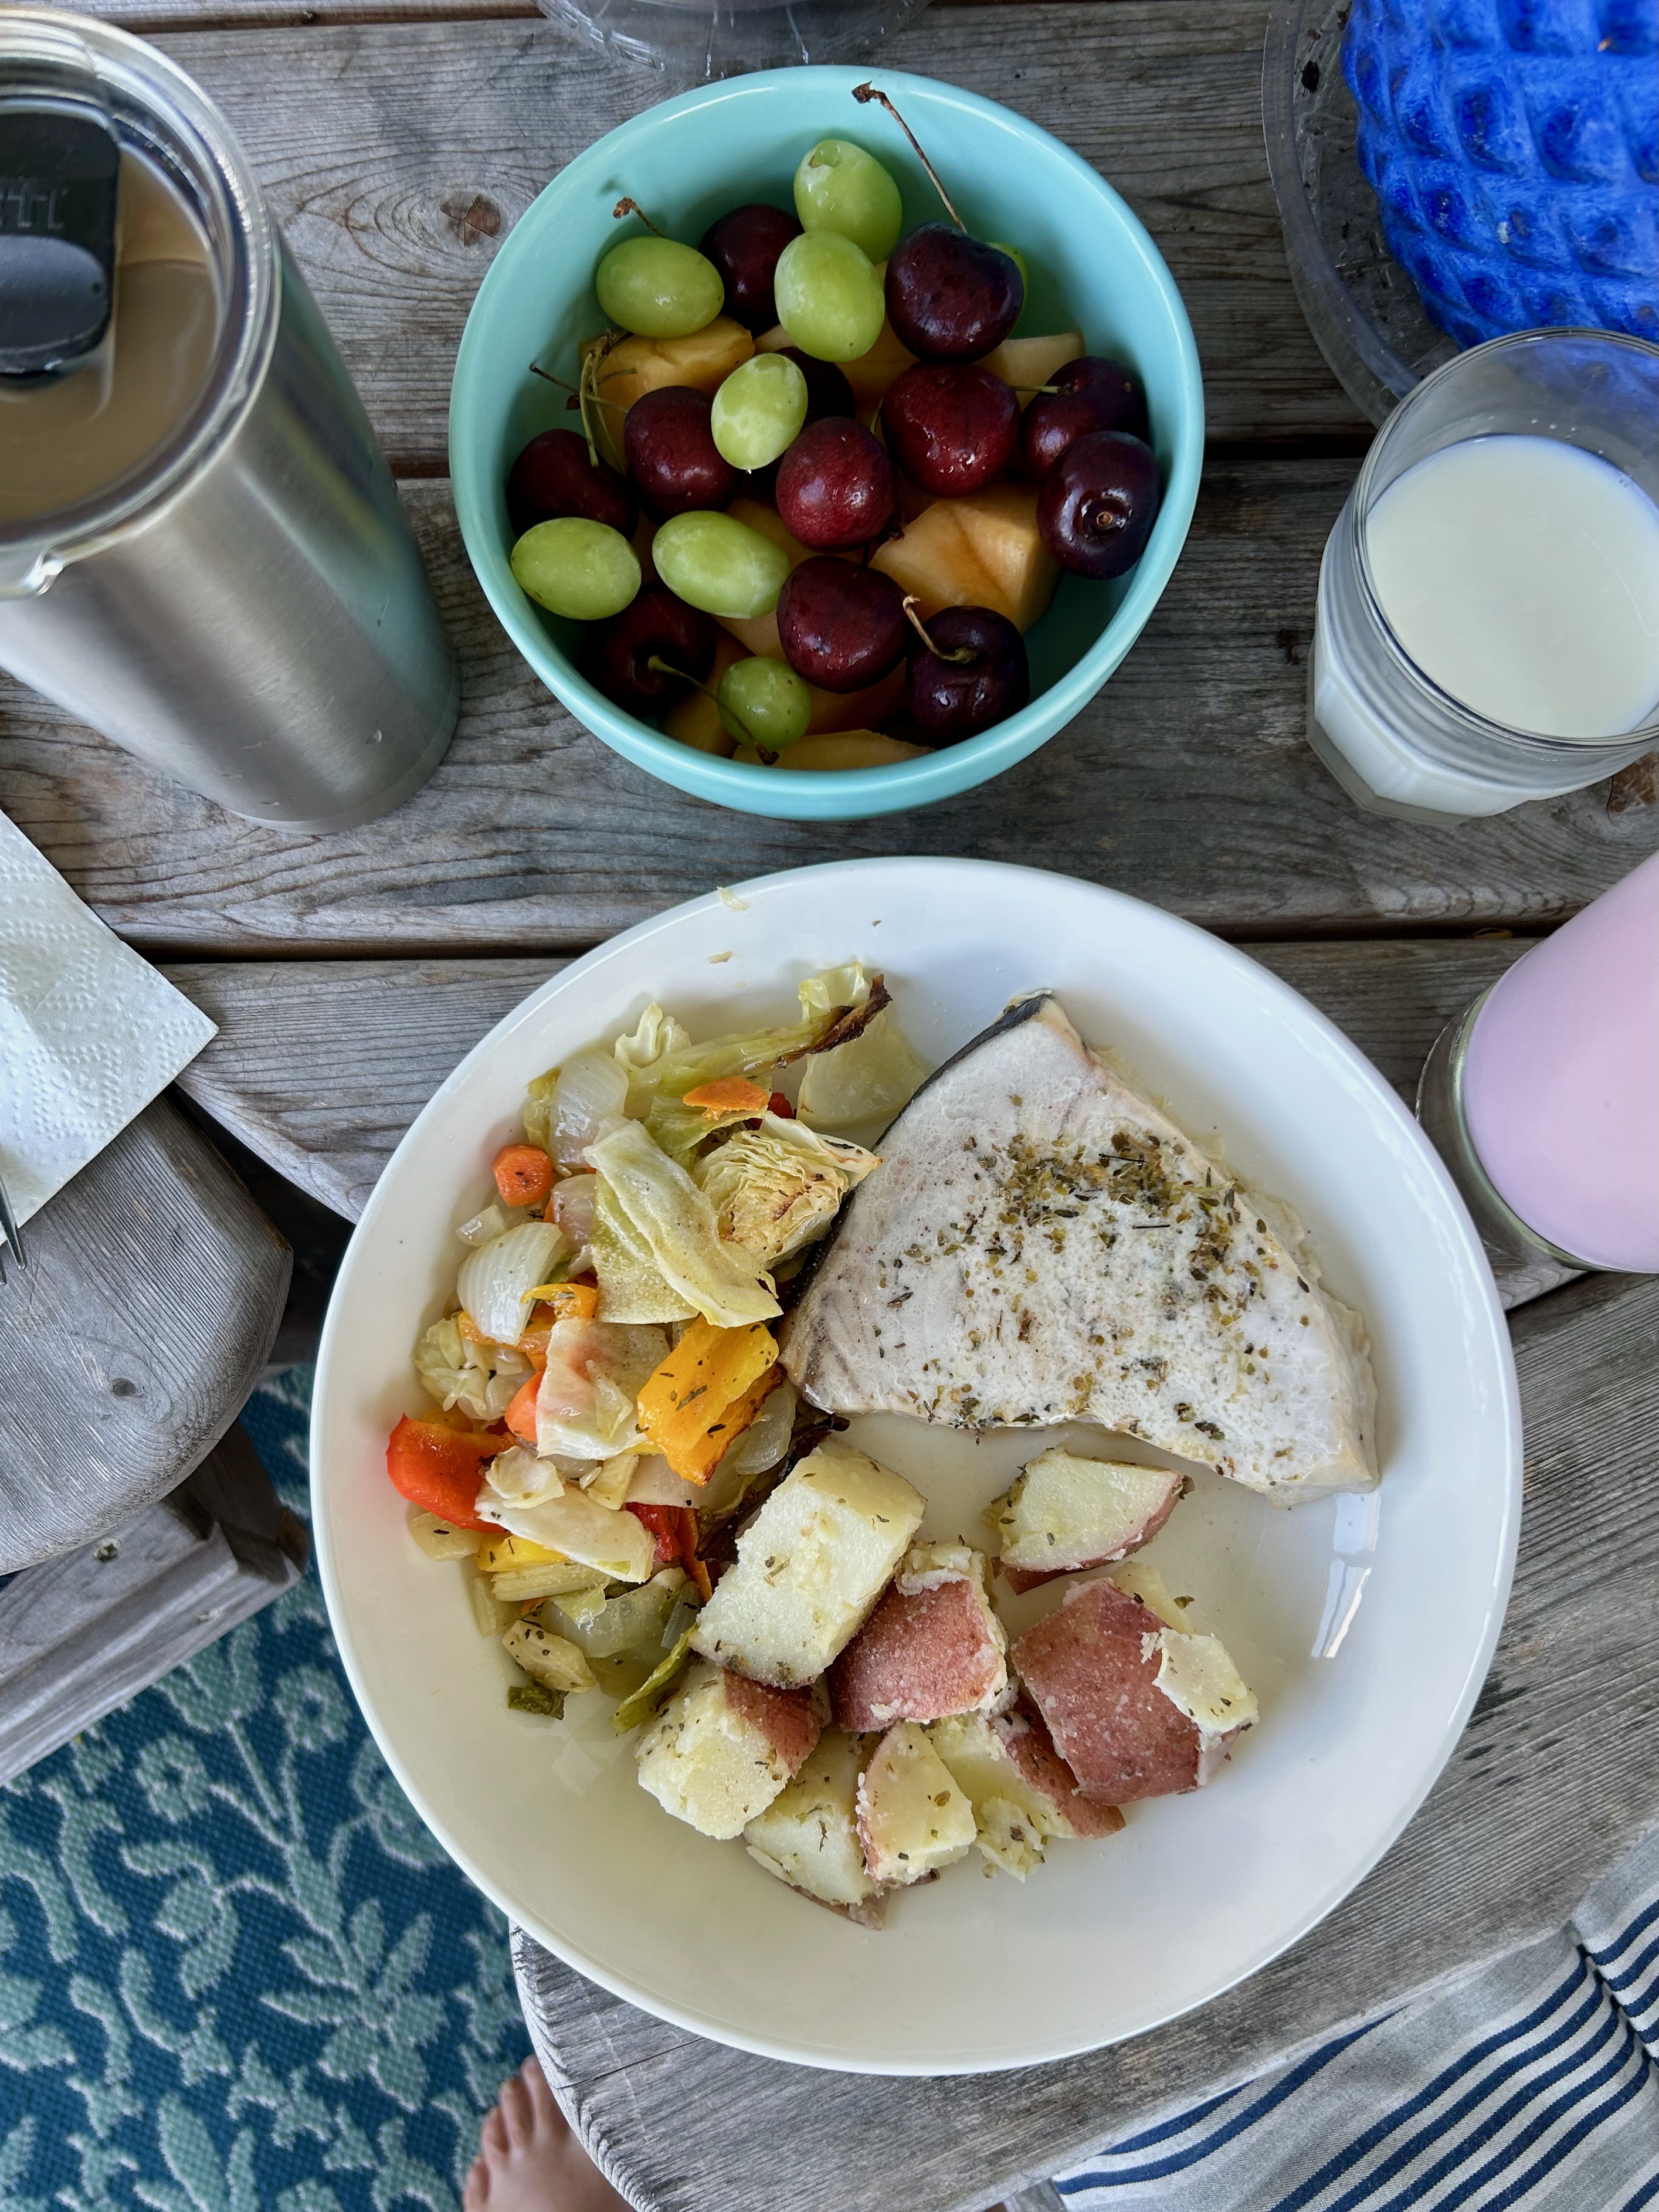
Noon Dinner–roasted swordfish, red potatoes cooked and cooled and with added olive oil and herbs, and the roasted veggies. The fruit medley included fresh red cherries, grapes, and canteloupe.
Did you know that fruit has enough acid to soften your teeth for about 30 minutes after you eat it? Dairy can mitigate the acid, like a cube of good cheese for instance. I use some raw whole milk as I can’t eat most cheeses as they are fermented. Anyway, I learned recently that one should not brush your teeth for 30 minutes after eating fruit as the brushing can damage teeth enamel.
The new pan cleaned up like a dream. My old pans were rusting through whatever coating was on them. With this new pan, I am being really careful not to scratch it, but the task was so easy that no rough materials were needed. What a treat for me!
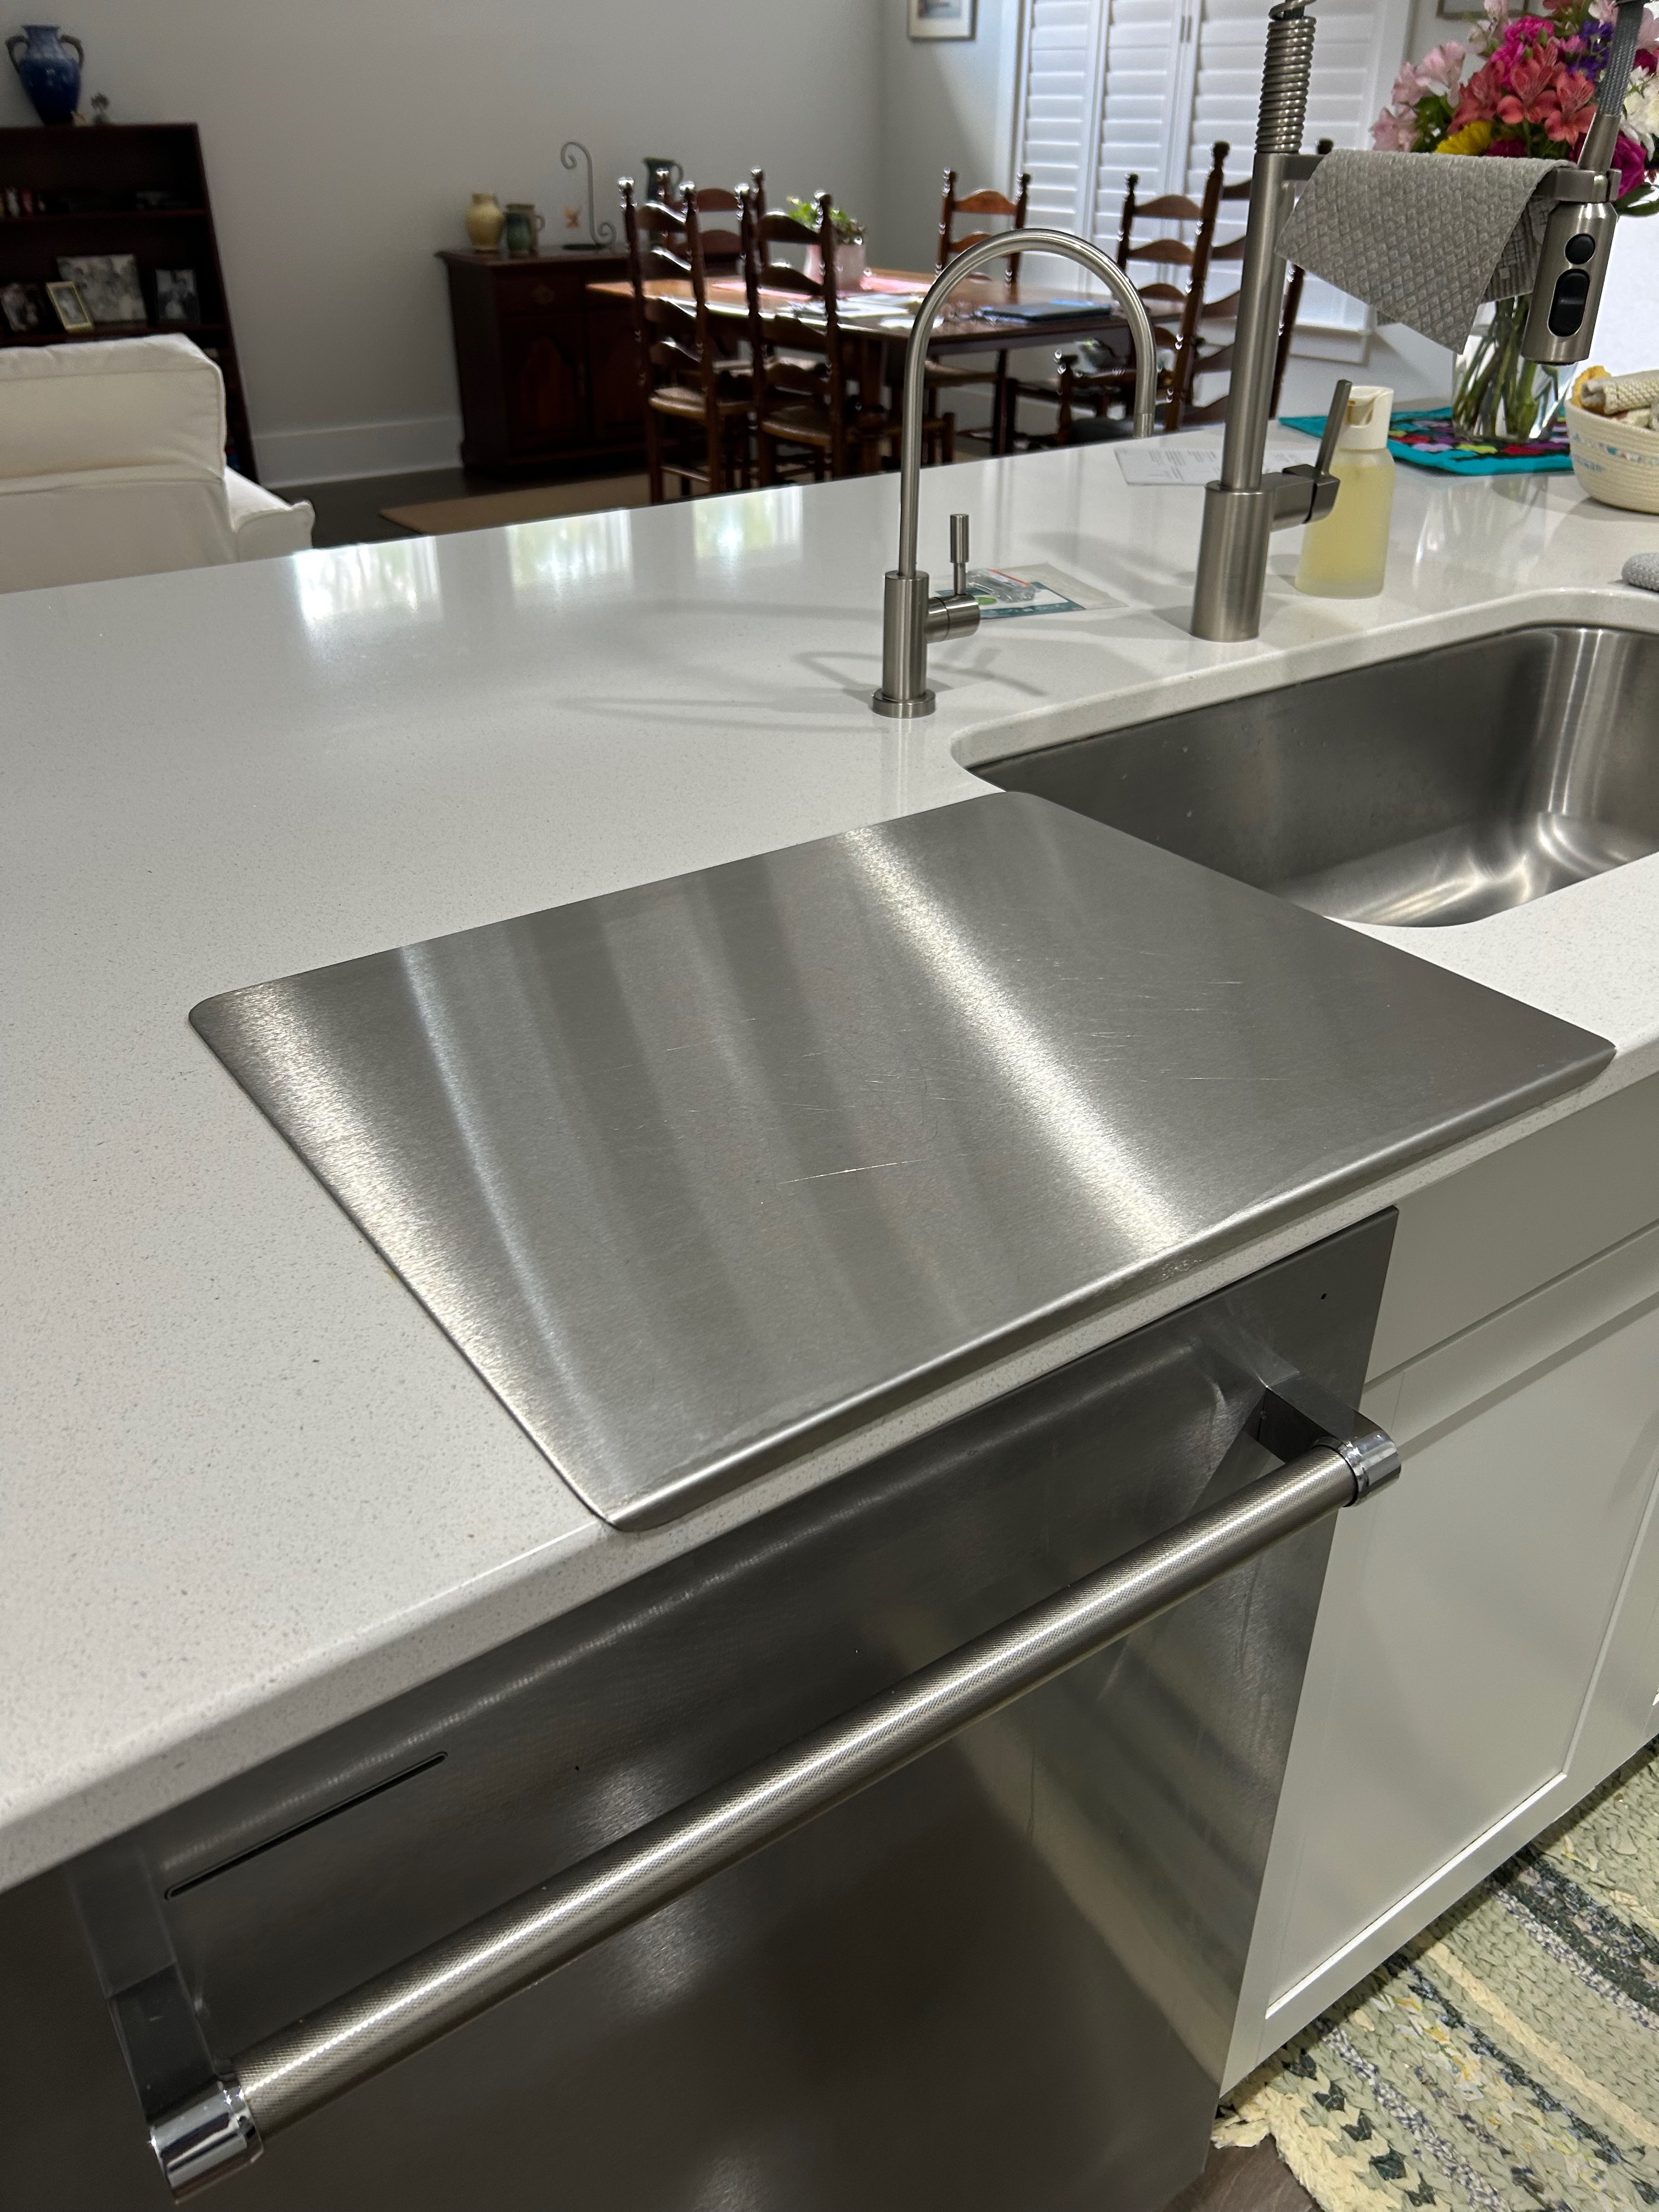
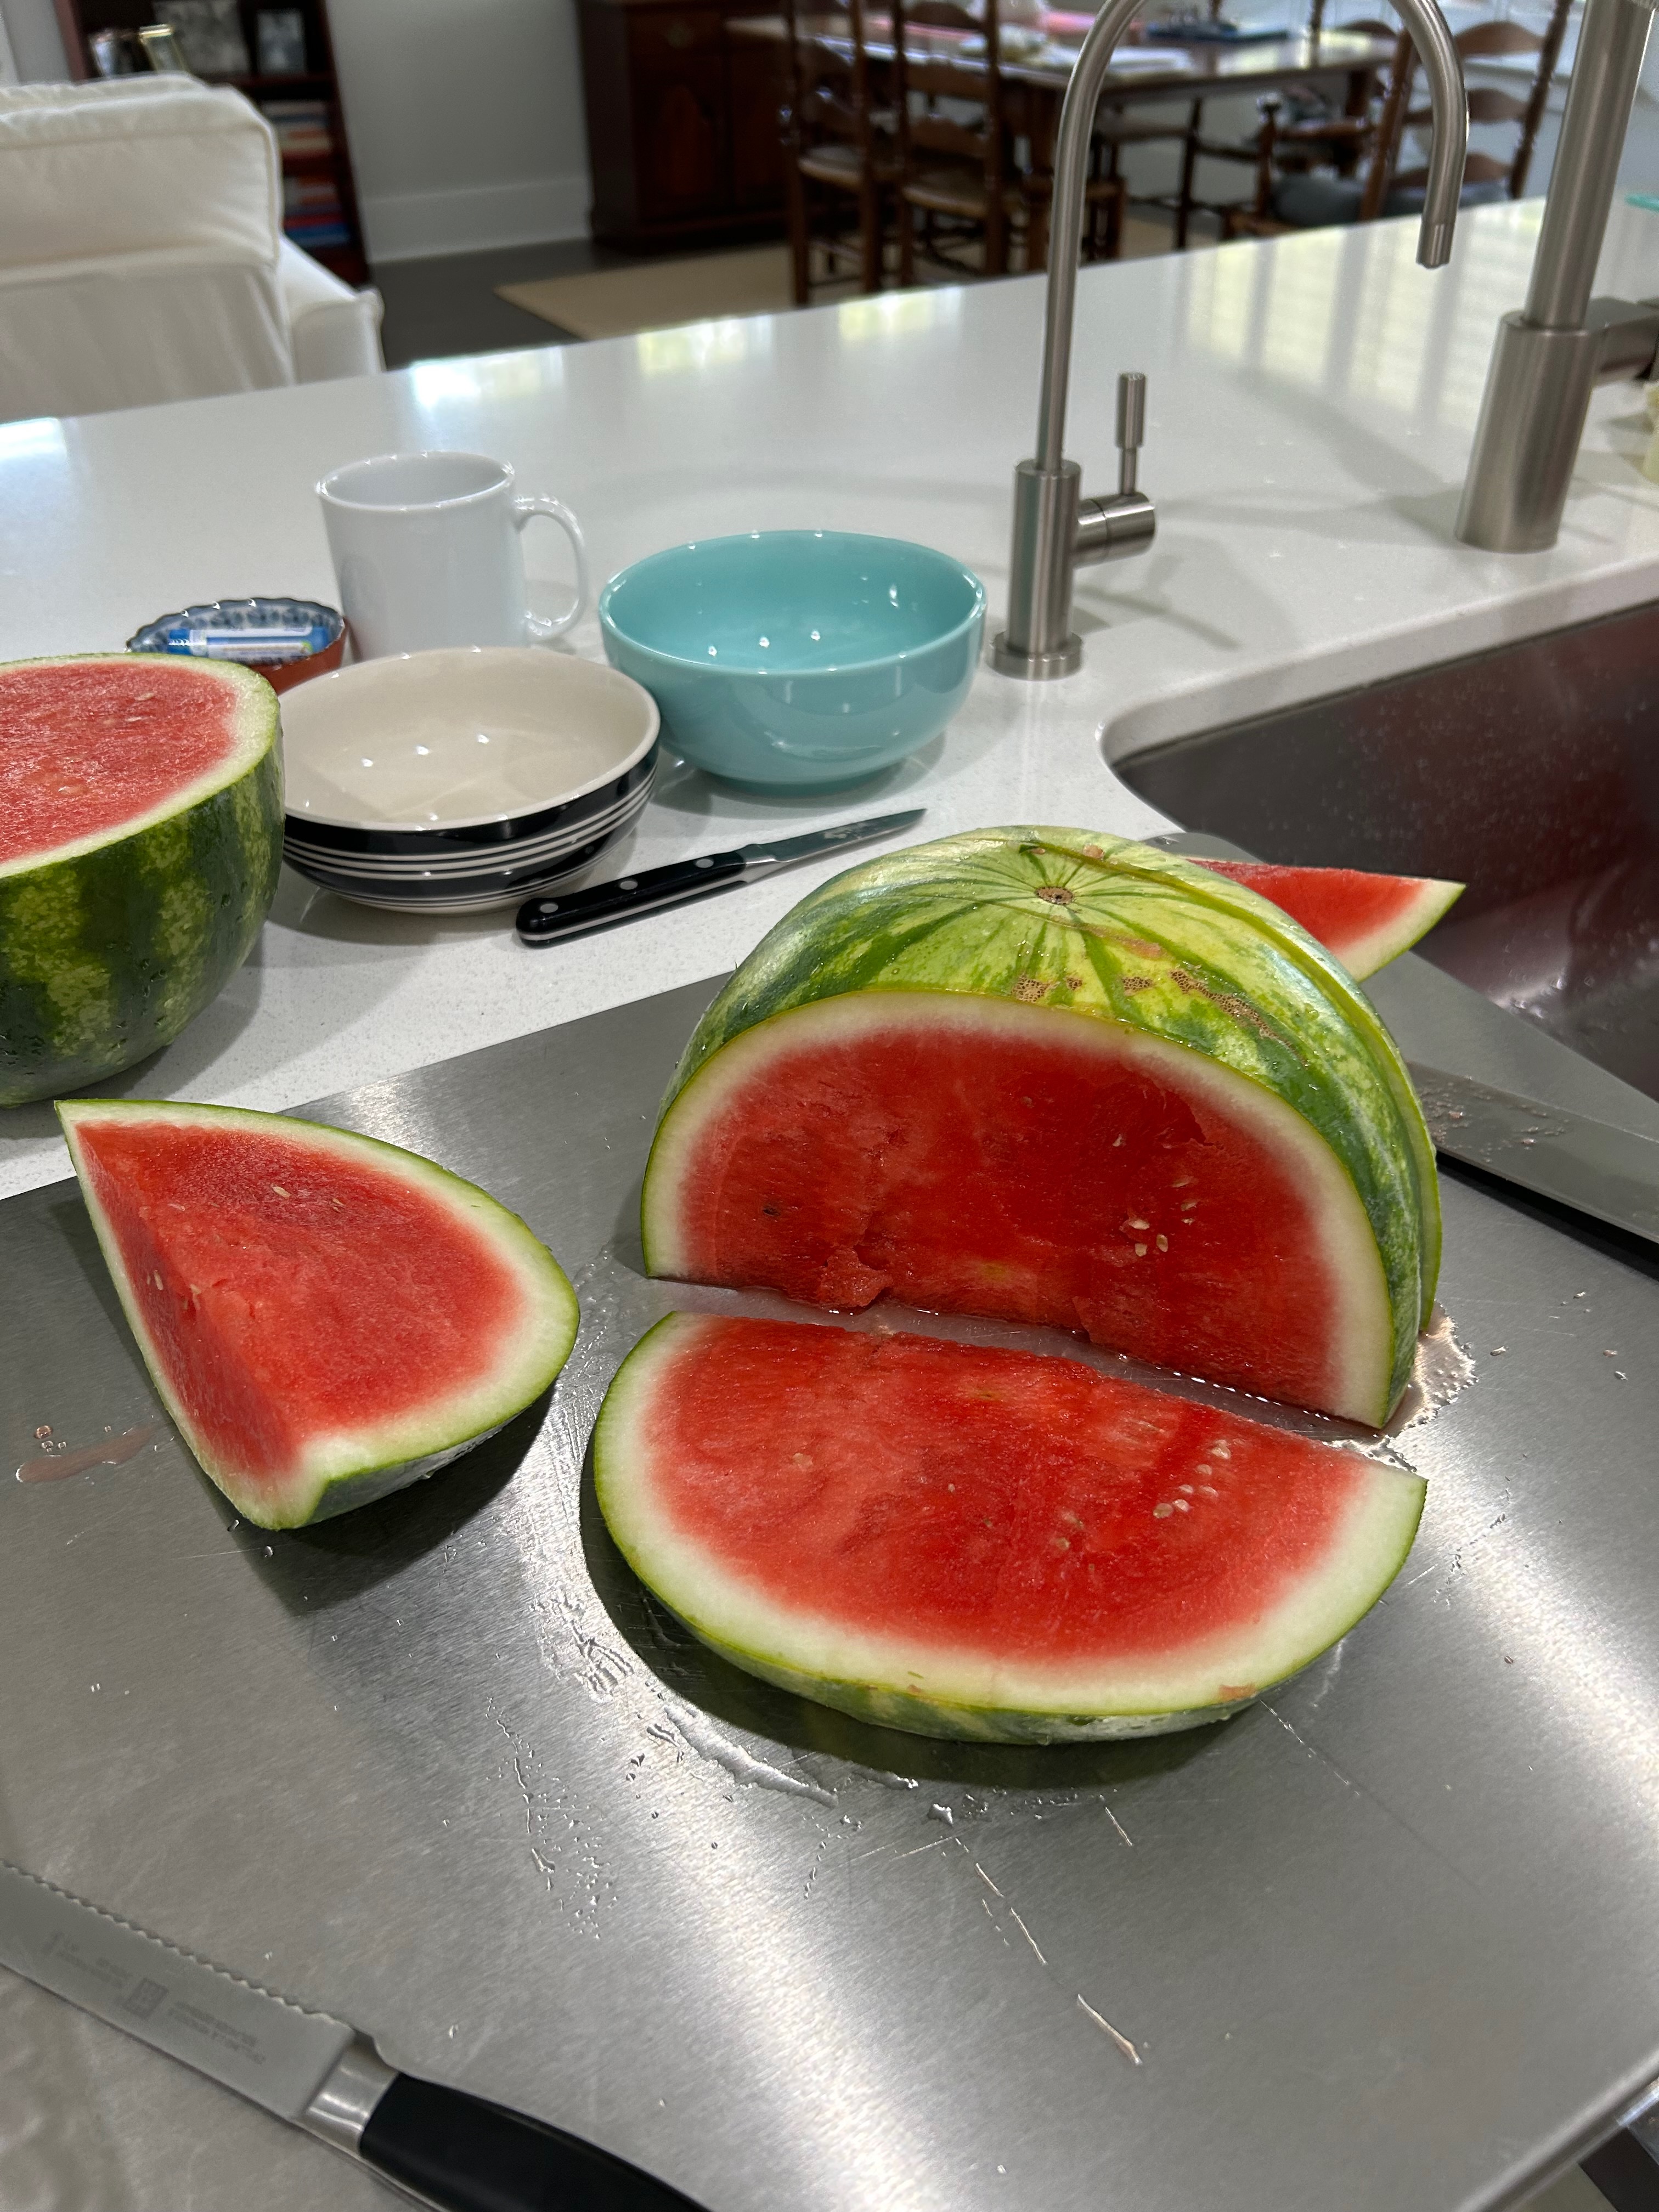
I have also added a new large metal cutting board to my counter. Here in coastal South Carolina, my more porous cutting boards get mold in the cracks the knifes make, and I have been unable to get the mold out even with soaking in pure clorox.
I love it! I have it where the edge is just a bit over the sink so that I can just sweep remnants into the sink. There is a pad underneath that keeps the metal rock solid on the counter. It does not…move.
The critique is that a metal pan will dull one’s knives, but, so far, I have not found my cutting to dull my very good knives worse than the old boards did. And, this new addition also serves as a kind of hot pad that protects the counter beneath.
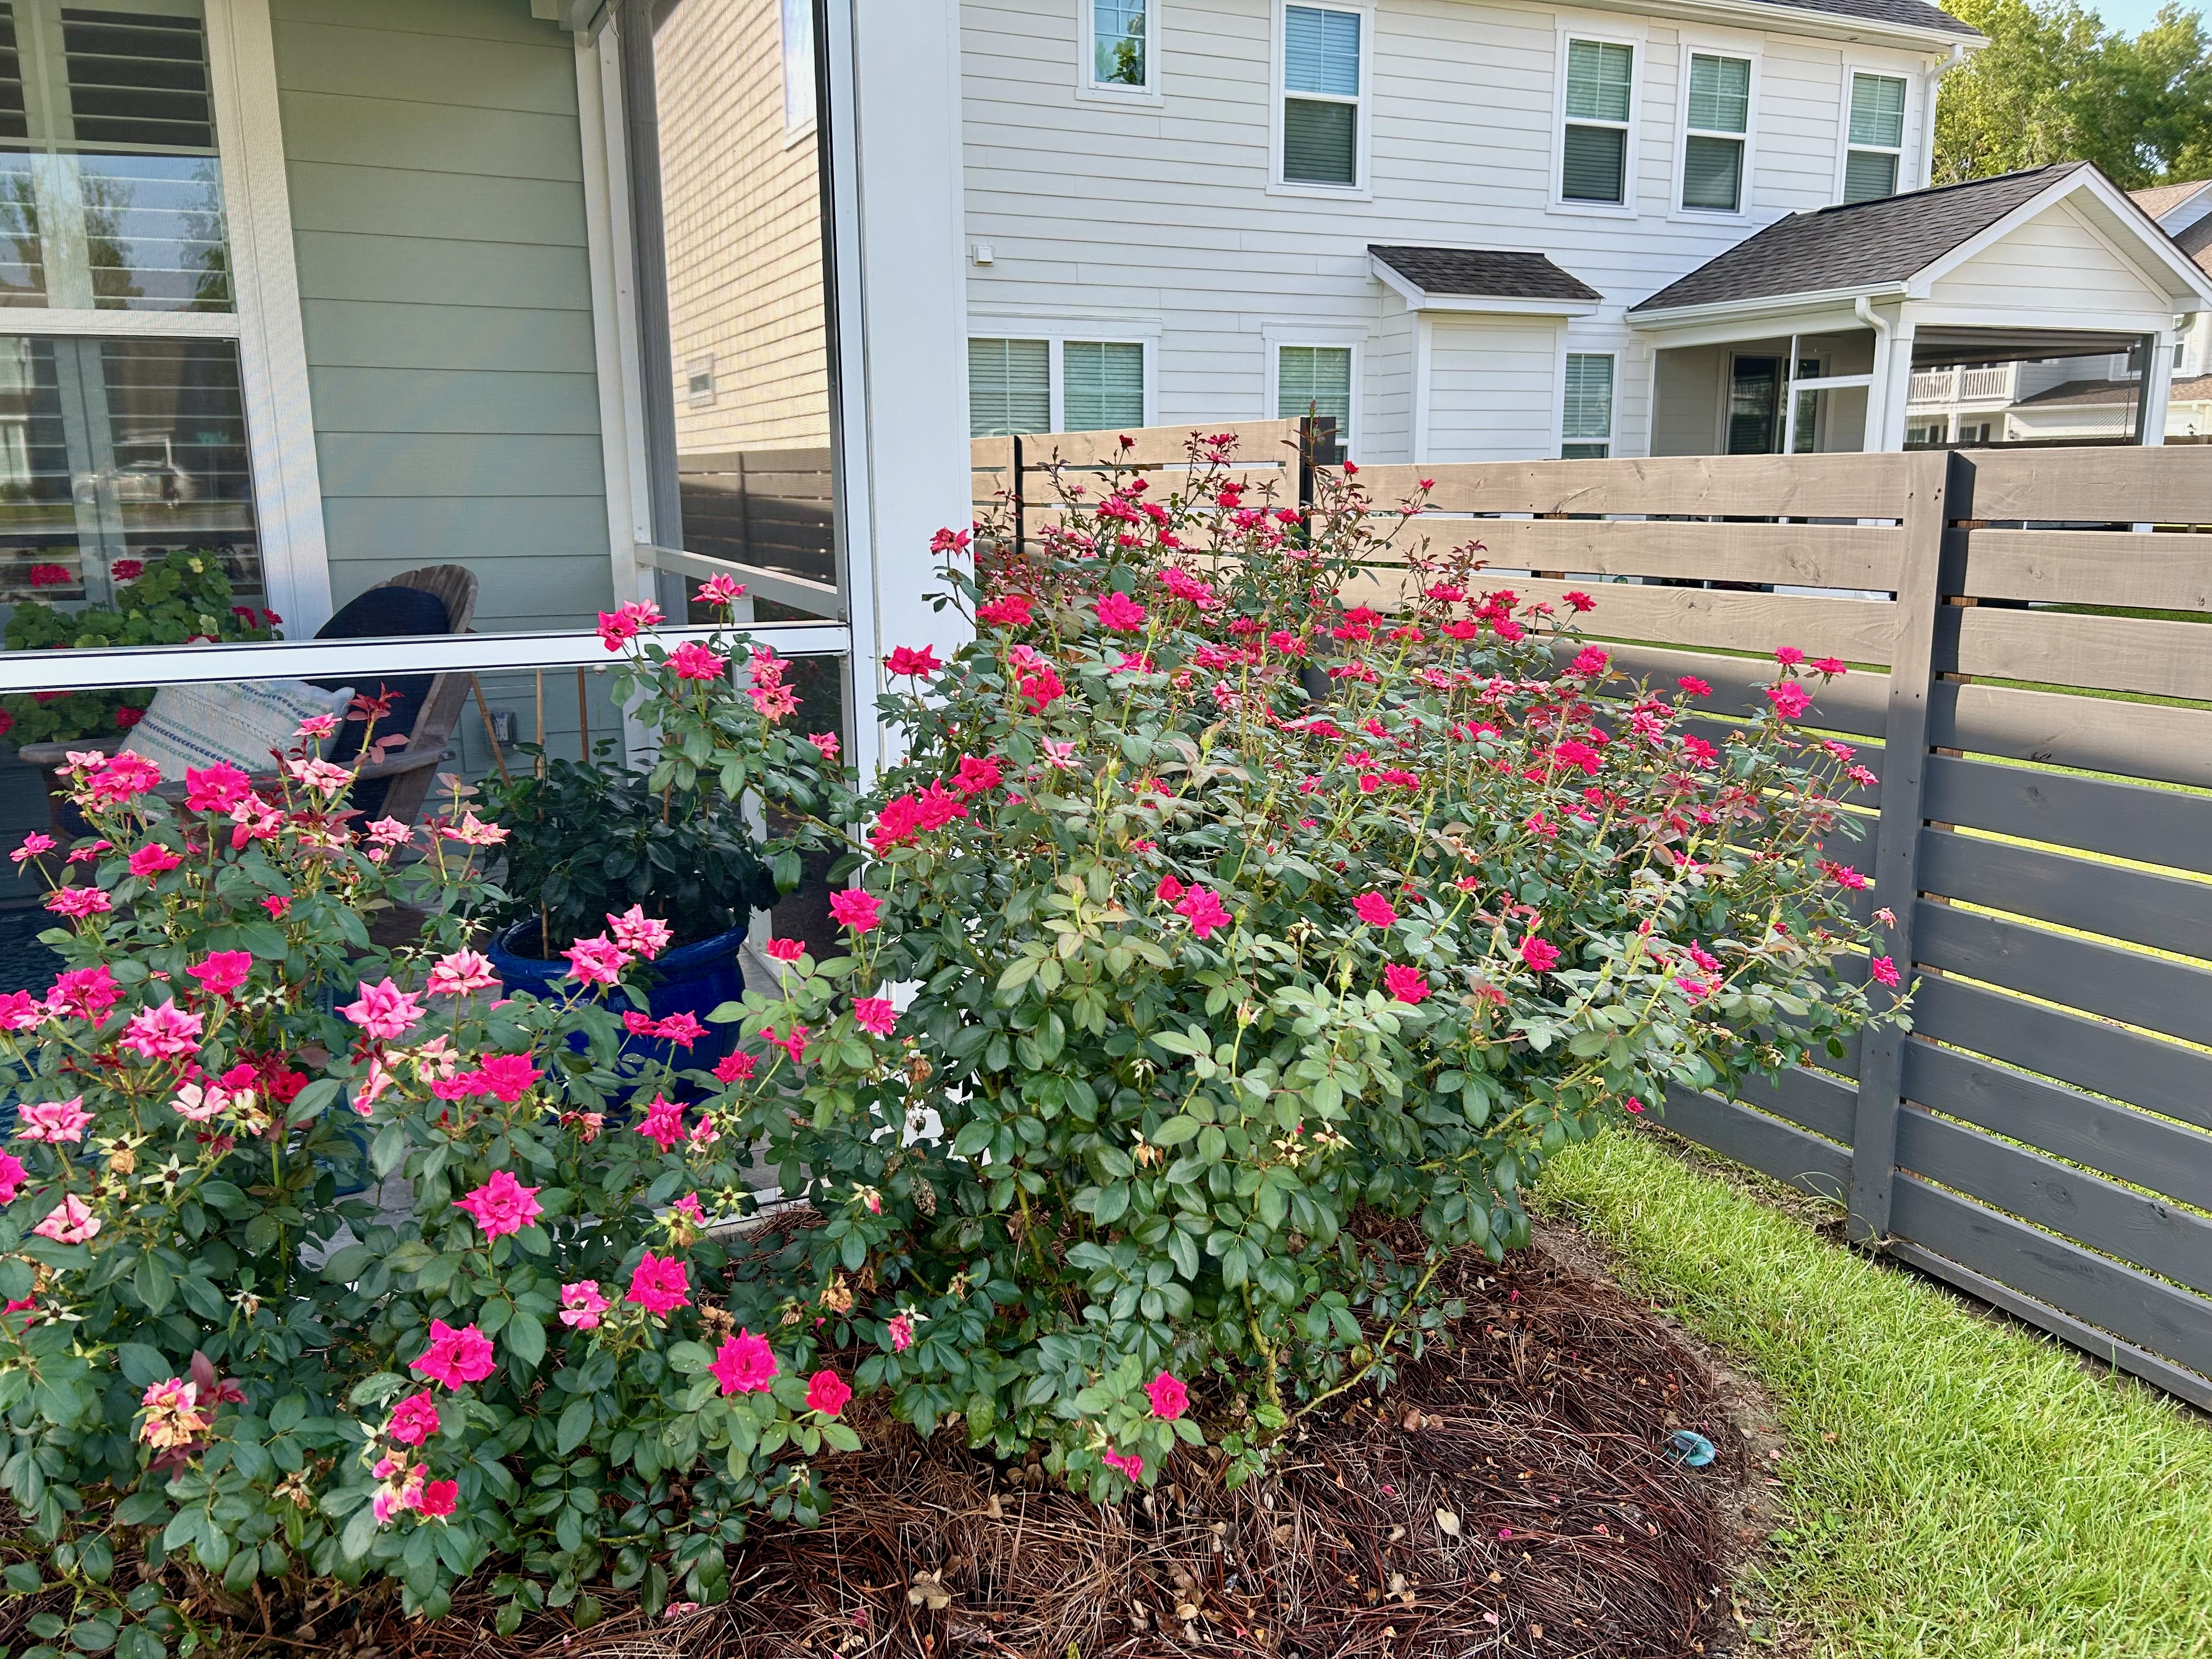
Today’s morning task should be drastically trimming back the scraggly red roses which are THRIVING as they are getting all the nutrients the Asian Jasmine was taking from them. Plus, we have had sufficient rain, including the 1-inch from last night’s thunderstorm.
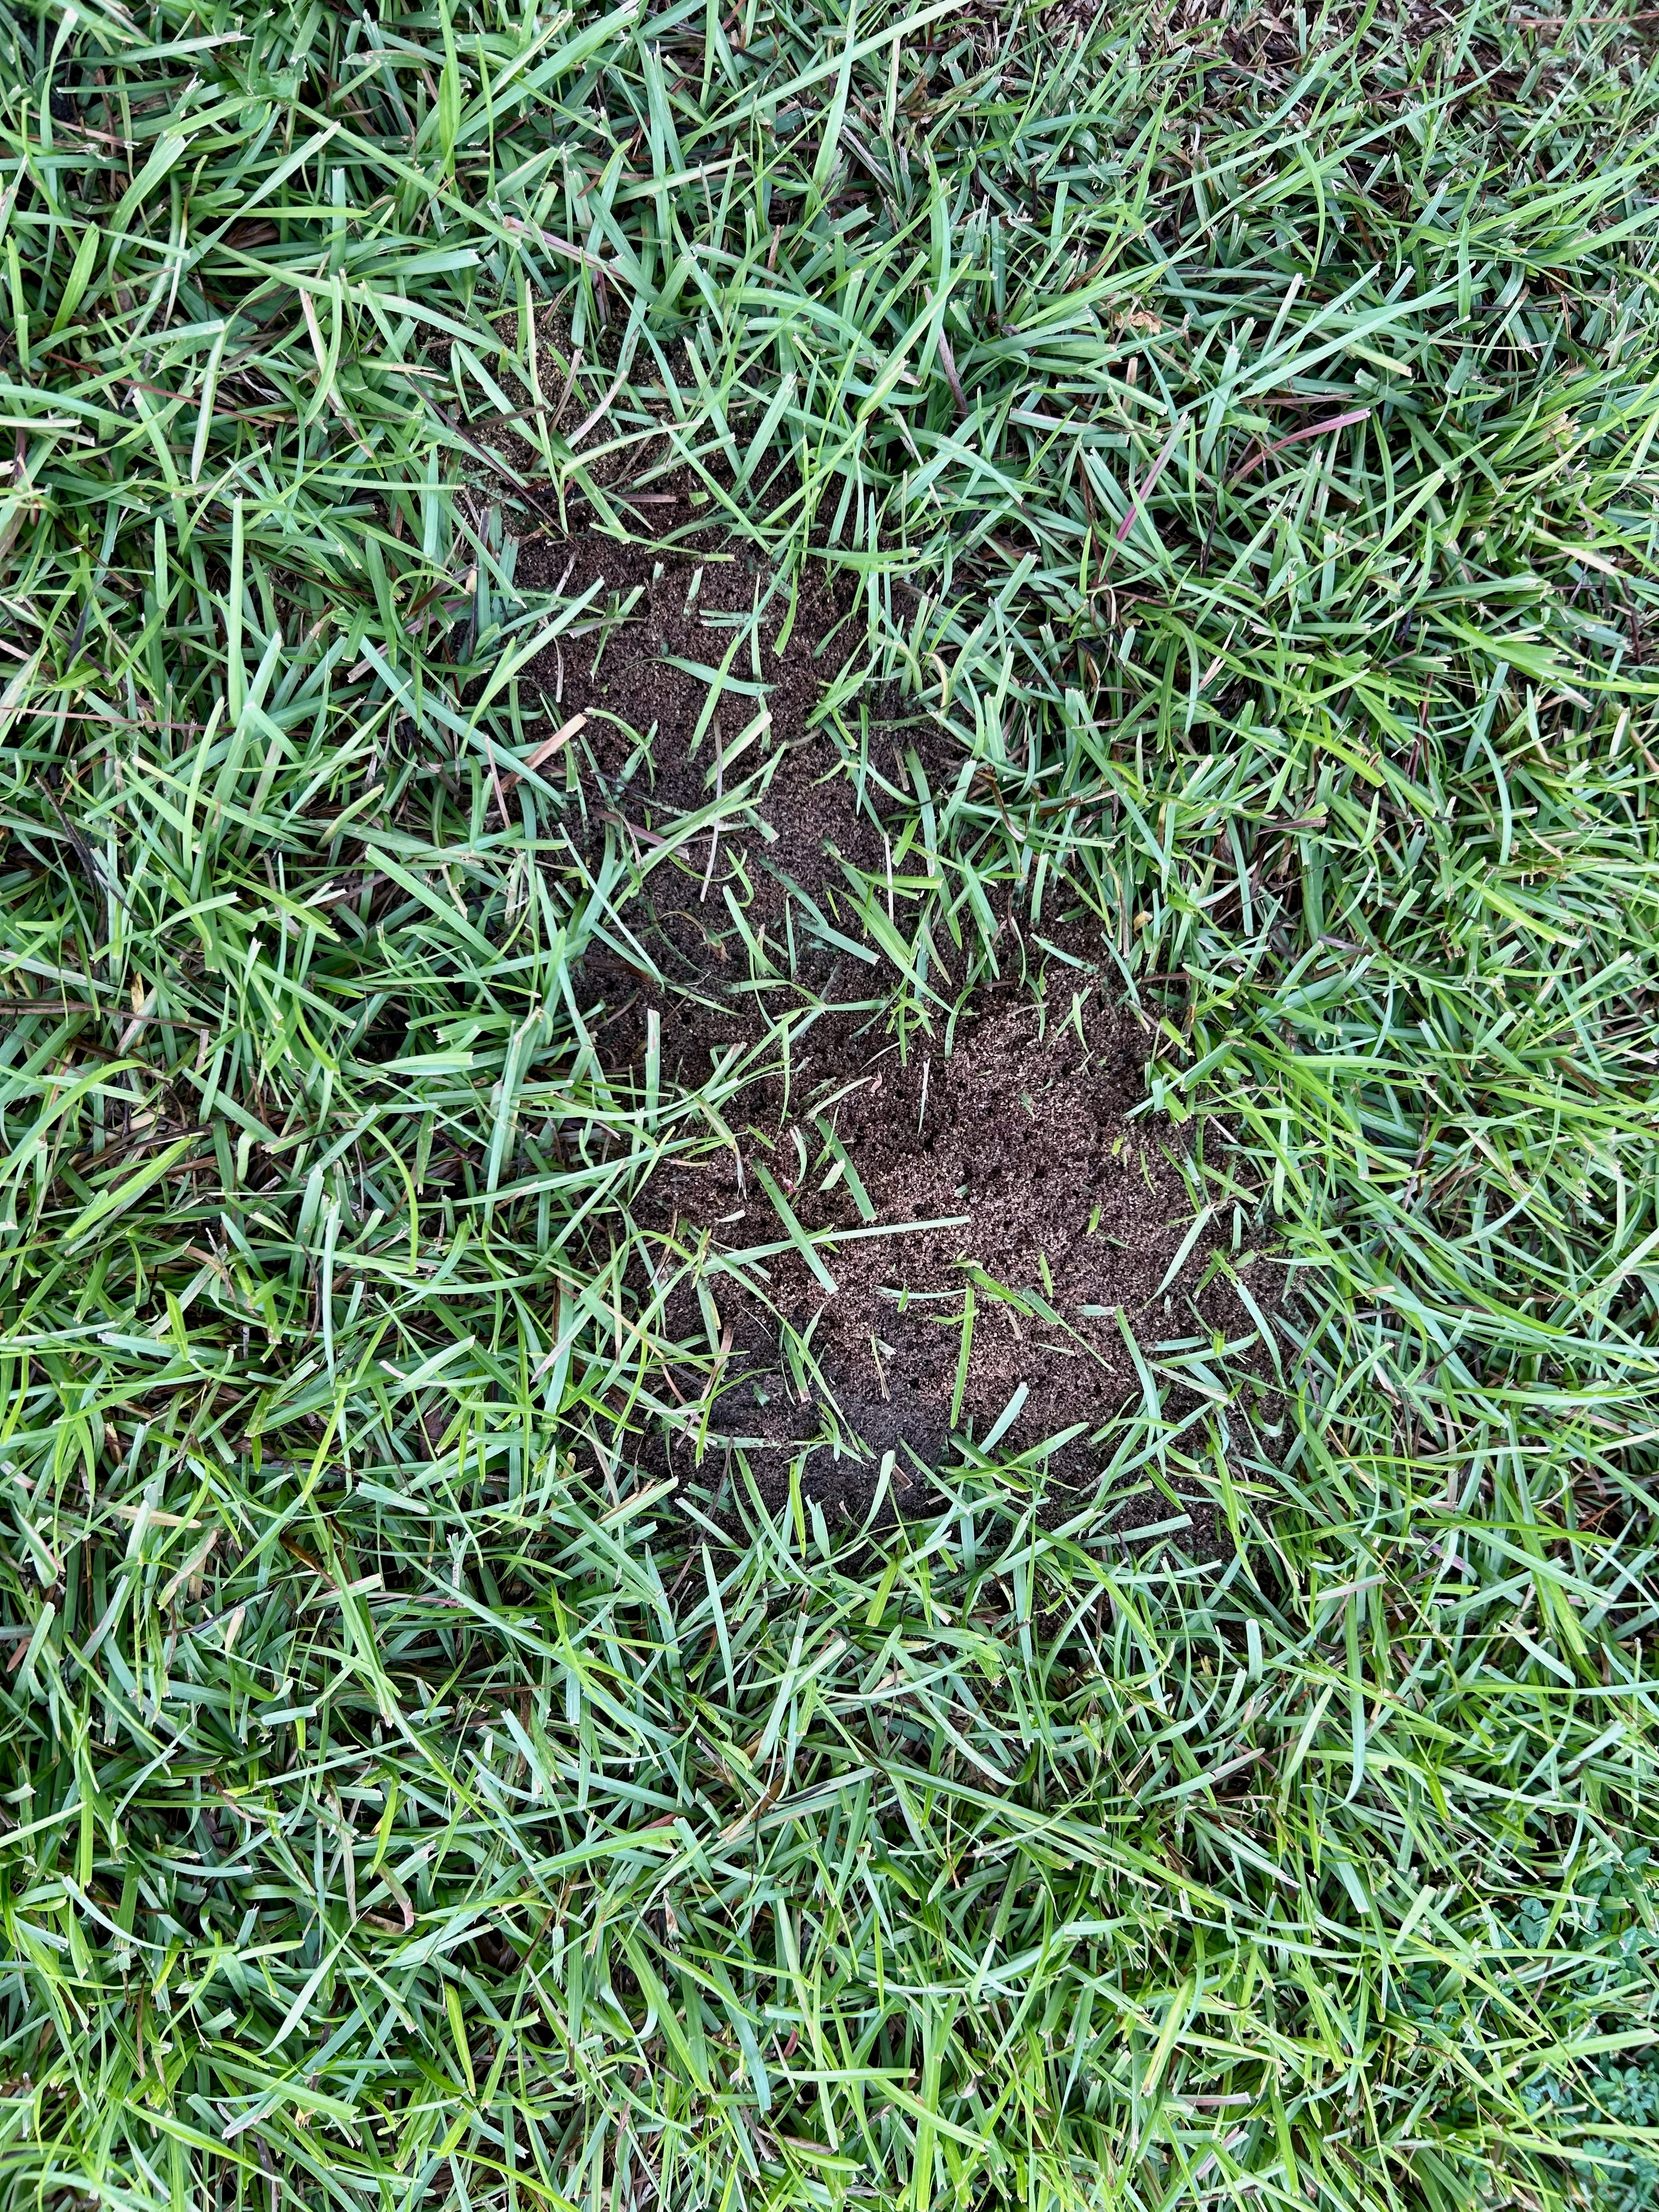
A large fire ant hill appeared near the roses overnight. I’ve already treated it as it will get higher and higher if left alone. The fire ants are no joke. Their bite/sting can be painful for hours and can leave blisters that take days to heal. They are small, but powerful.
This afternoon’s sewing task will be to put “Cross Tiles” (Quilty Love) on the longarm, which means ironing and sewing together the backing panels.
“Bright and Beautiful” blocks were made with a 10-inch pineapple ruler, which makes pineapple blocks easy peasy. The “rule” I followed was bright solids and Kona white. All the fabrics for the top came from my stash. The quilt is 60 by 60.
The backing works so well with the top. It’s “Teacup” from Windham Fabrics, designed by Kelly Angelovic, style #54216. The binding is Kona “lipstick,” #1194. The pantograph is “Check and Chase” by Hermione Agee. And the thread is Signature 40 wt. white. (I haven’t quilted with white in a long time, but it was perfect for this quilt.
Here’s a picture that shows the nice lap size against my 3-person sofa.
“Bright and Beautiful” was named by my longtime friend who lives in Colorado. And as I write, it is in the mail to her, for she is giving it to a dear neighbor. We met at Barksdale Air Force Base when we were in about 2nd or 3rd grade. She is a year older than me. Then when I was going into sixth grade, our families both were stationed at different bases, but we reunited in high school at Offutt Air Force Base in the Omaha, Nebraska, area, where I graduated in 1963.
That’s something like a 73 year friendship, for which I am so grateful.
Here in coastal South Carolina, local melons have been filling our markets.
But, how to tell if one is ripe and ready to cut?
For watermelons, look to the skin to see if the melon is starting to turn more yellow. Then make a fist and thump the melons in the storage bin. Move then around as needed. A ripe melon has a deep satisfying sound, not a sharp higher sound. You will be able to tell the difference immediately when you thump a ripe melon. Sometimes I go through a number of melons before I hear that deep sound. Also, inspect the melon to make sure it is not overly ripe so that it has too-ripe places starting to soften on the outside–which is more easily seen with cantaloupes.
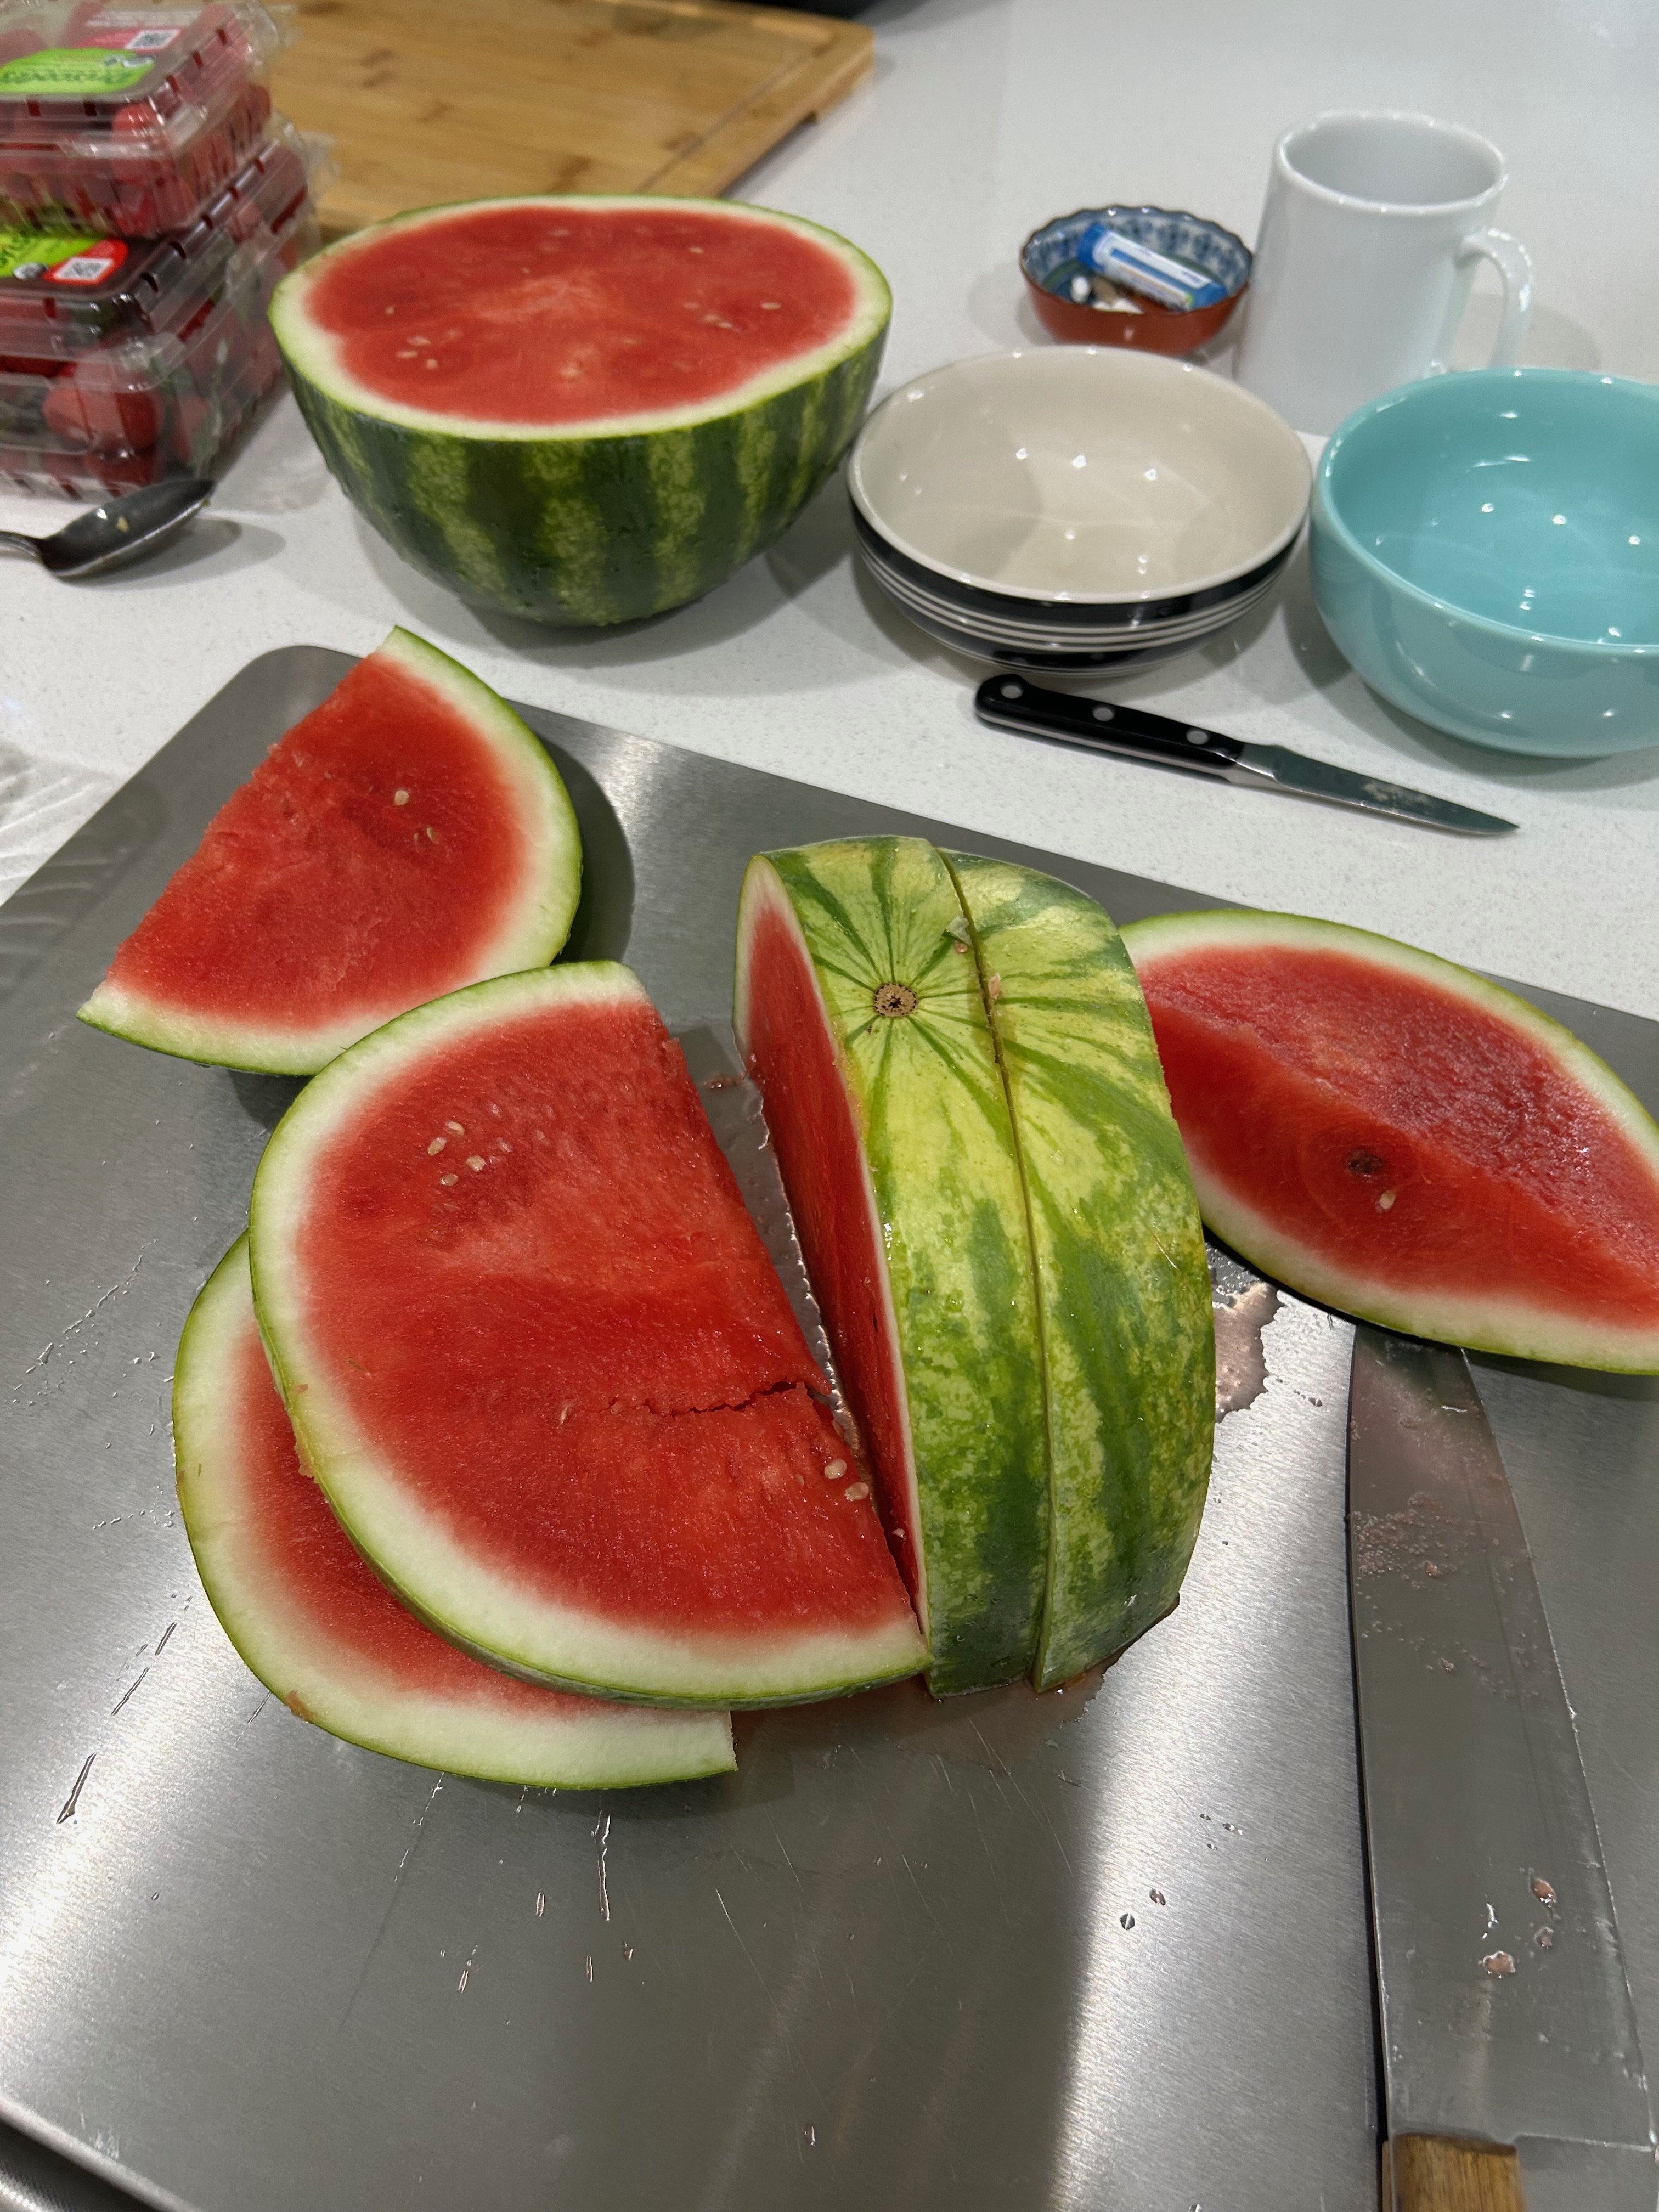
Look at this gorgeous, deep red, sweet watermelon!
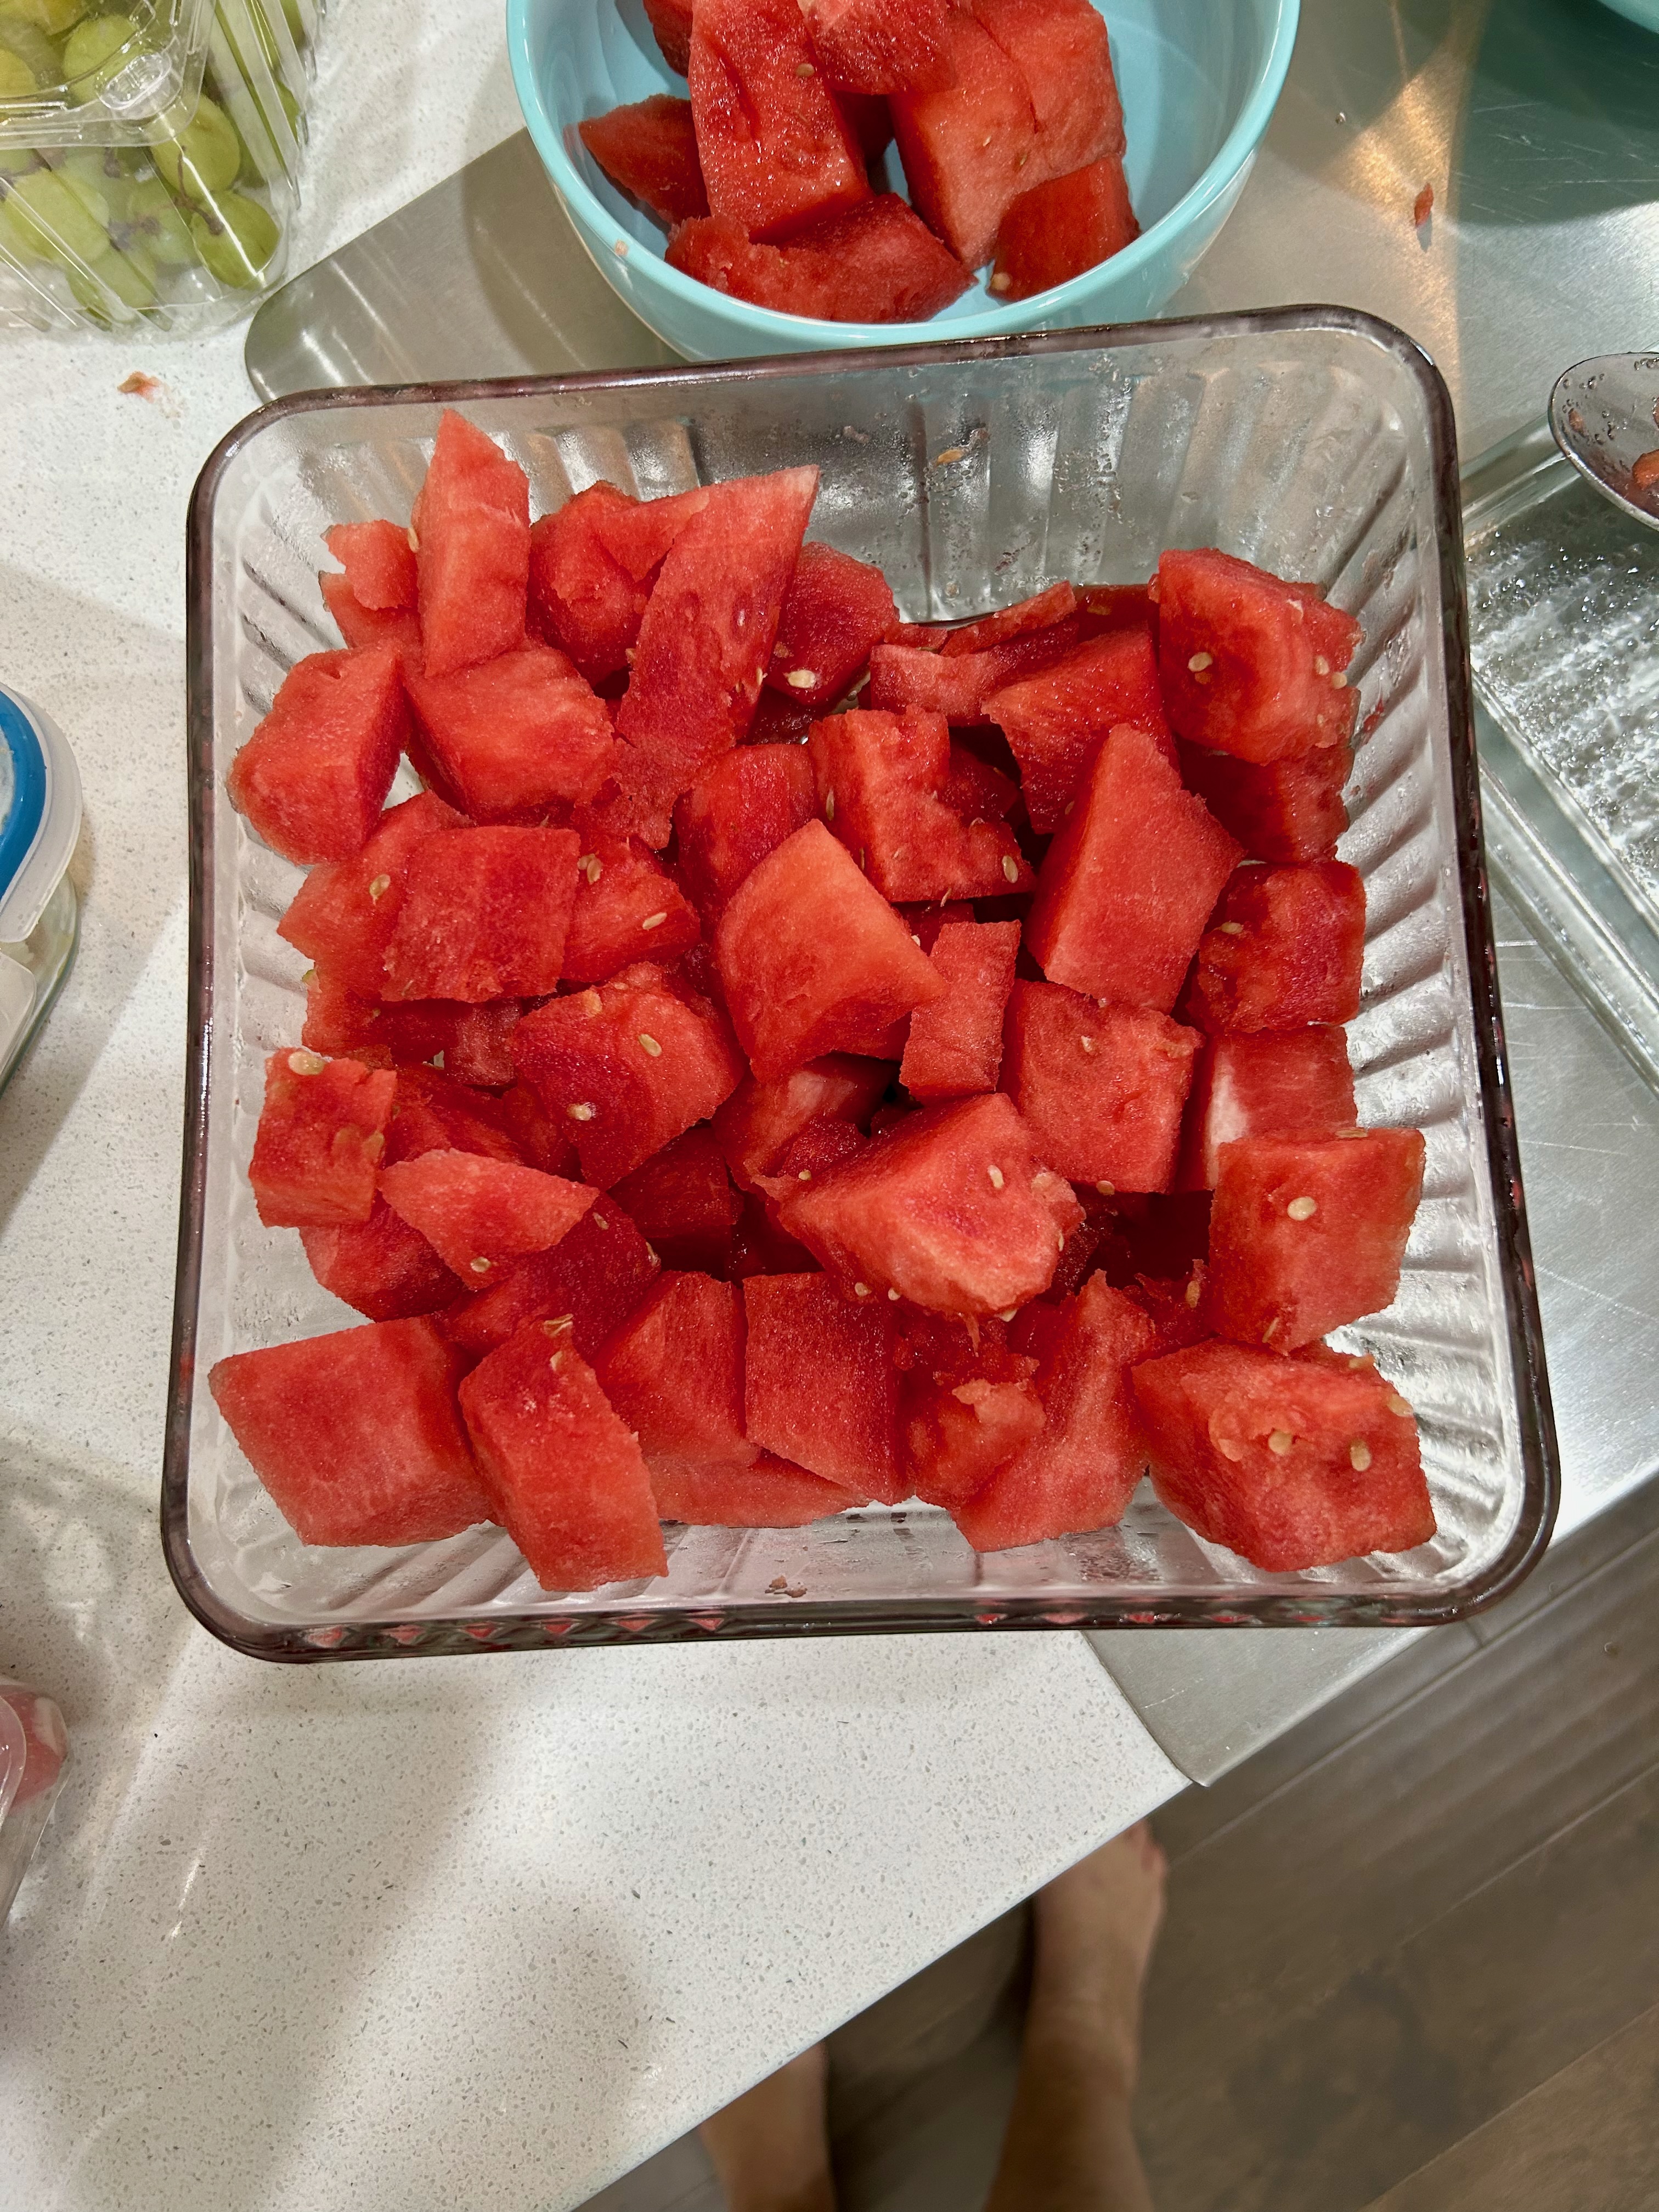
Cut whatever melon you have bought in half and then into slices. Take a small knife and cut away the rind of each piece. Then, cut the half-round pieces into bite-size pieces. For a big melon, I often just cover the top of the uncut half and store it in the refrigerator until I am ready to cut it up. It stores better that way.
I store my cut pieces in a covered glass container in the refrigerator.
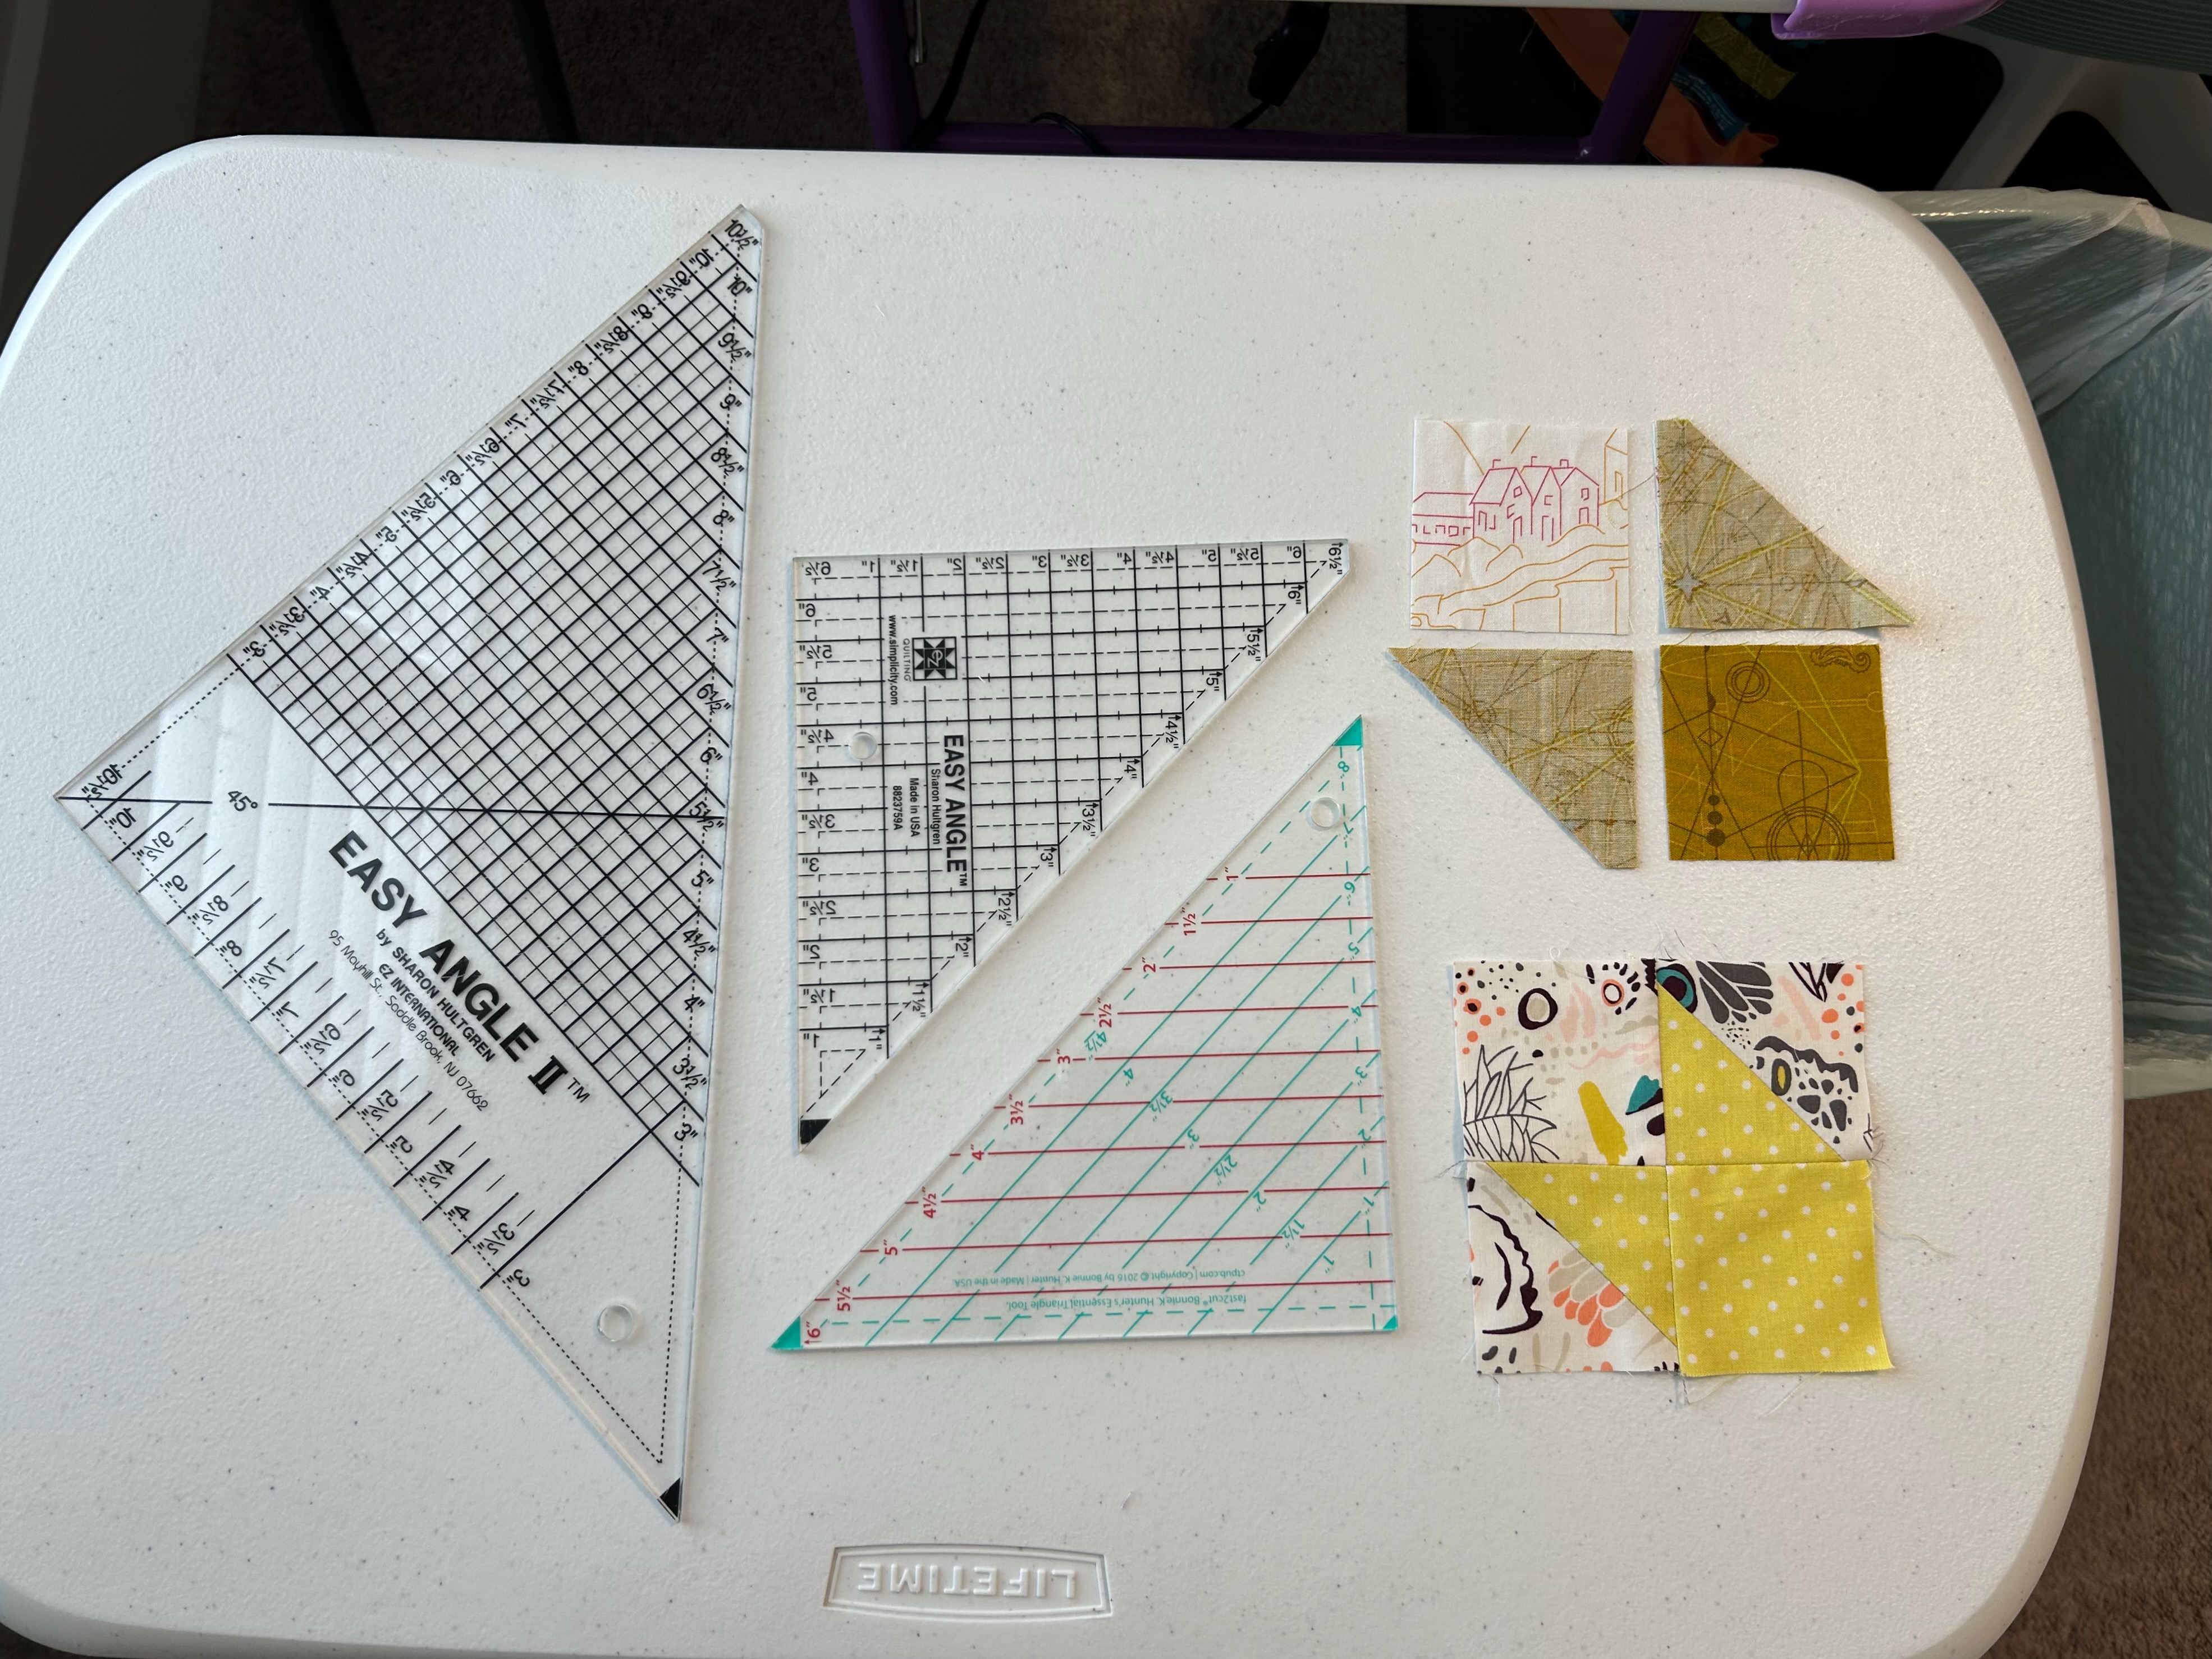
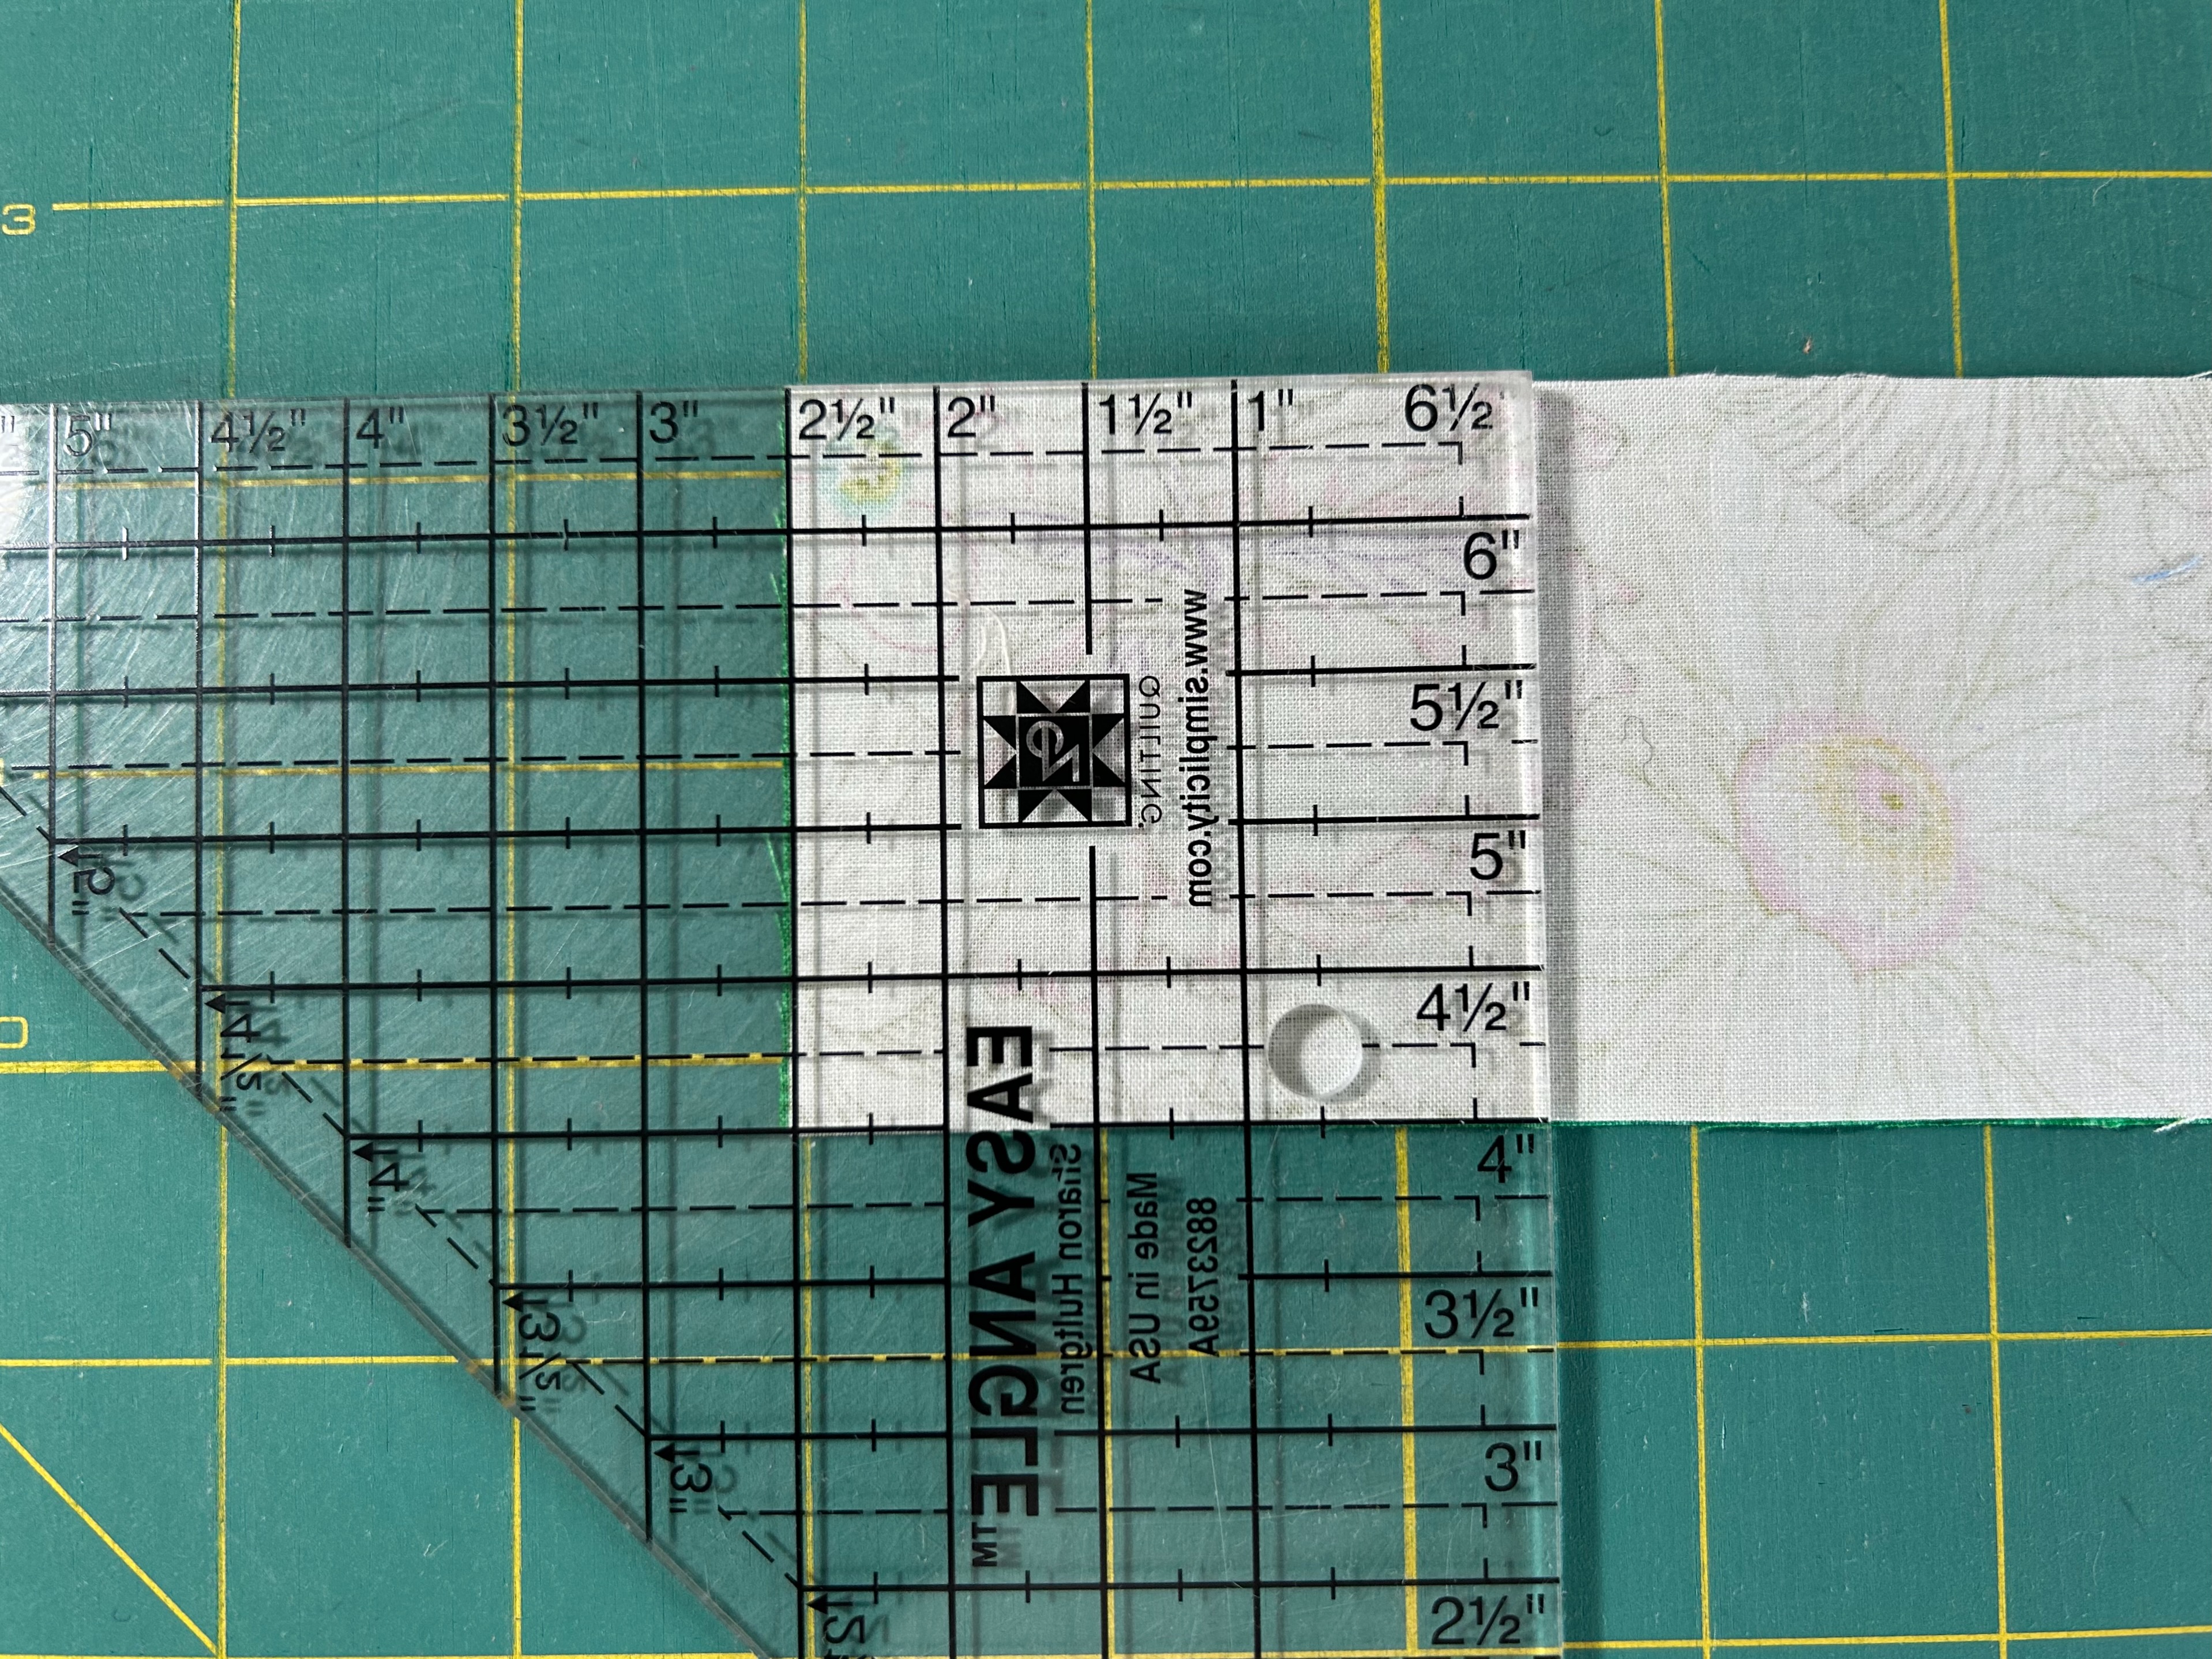
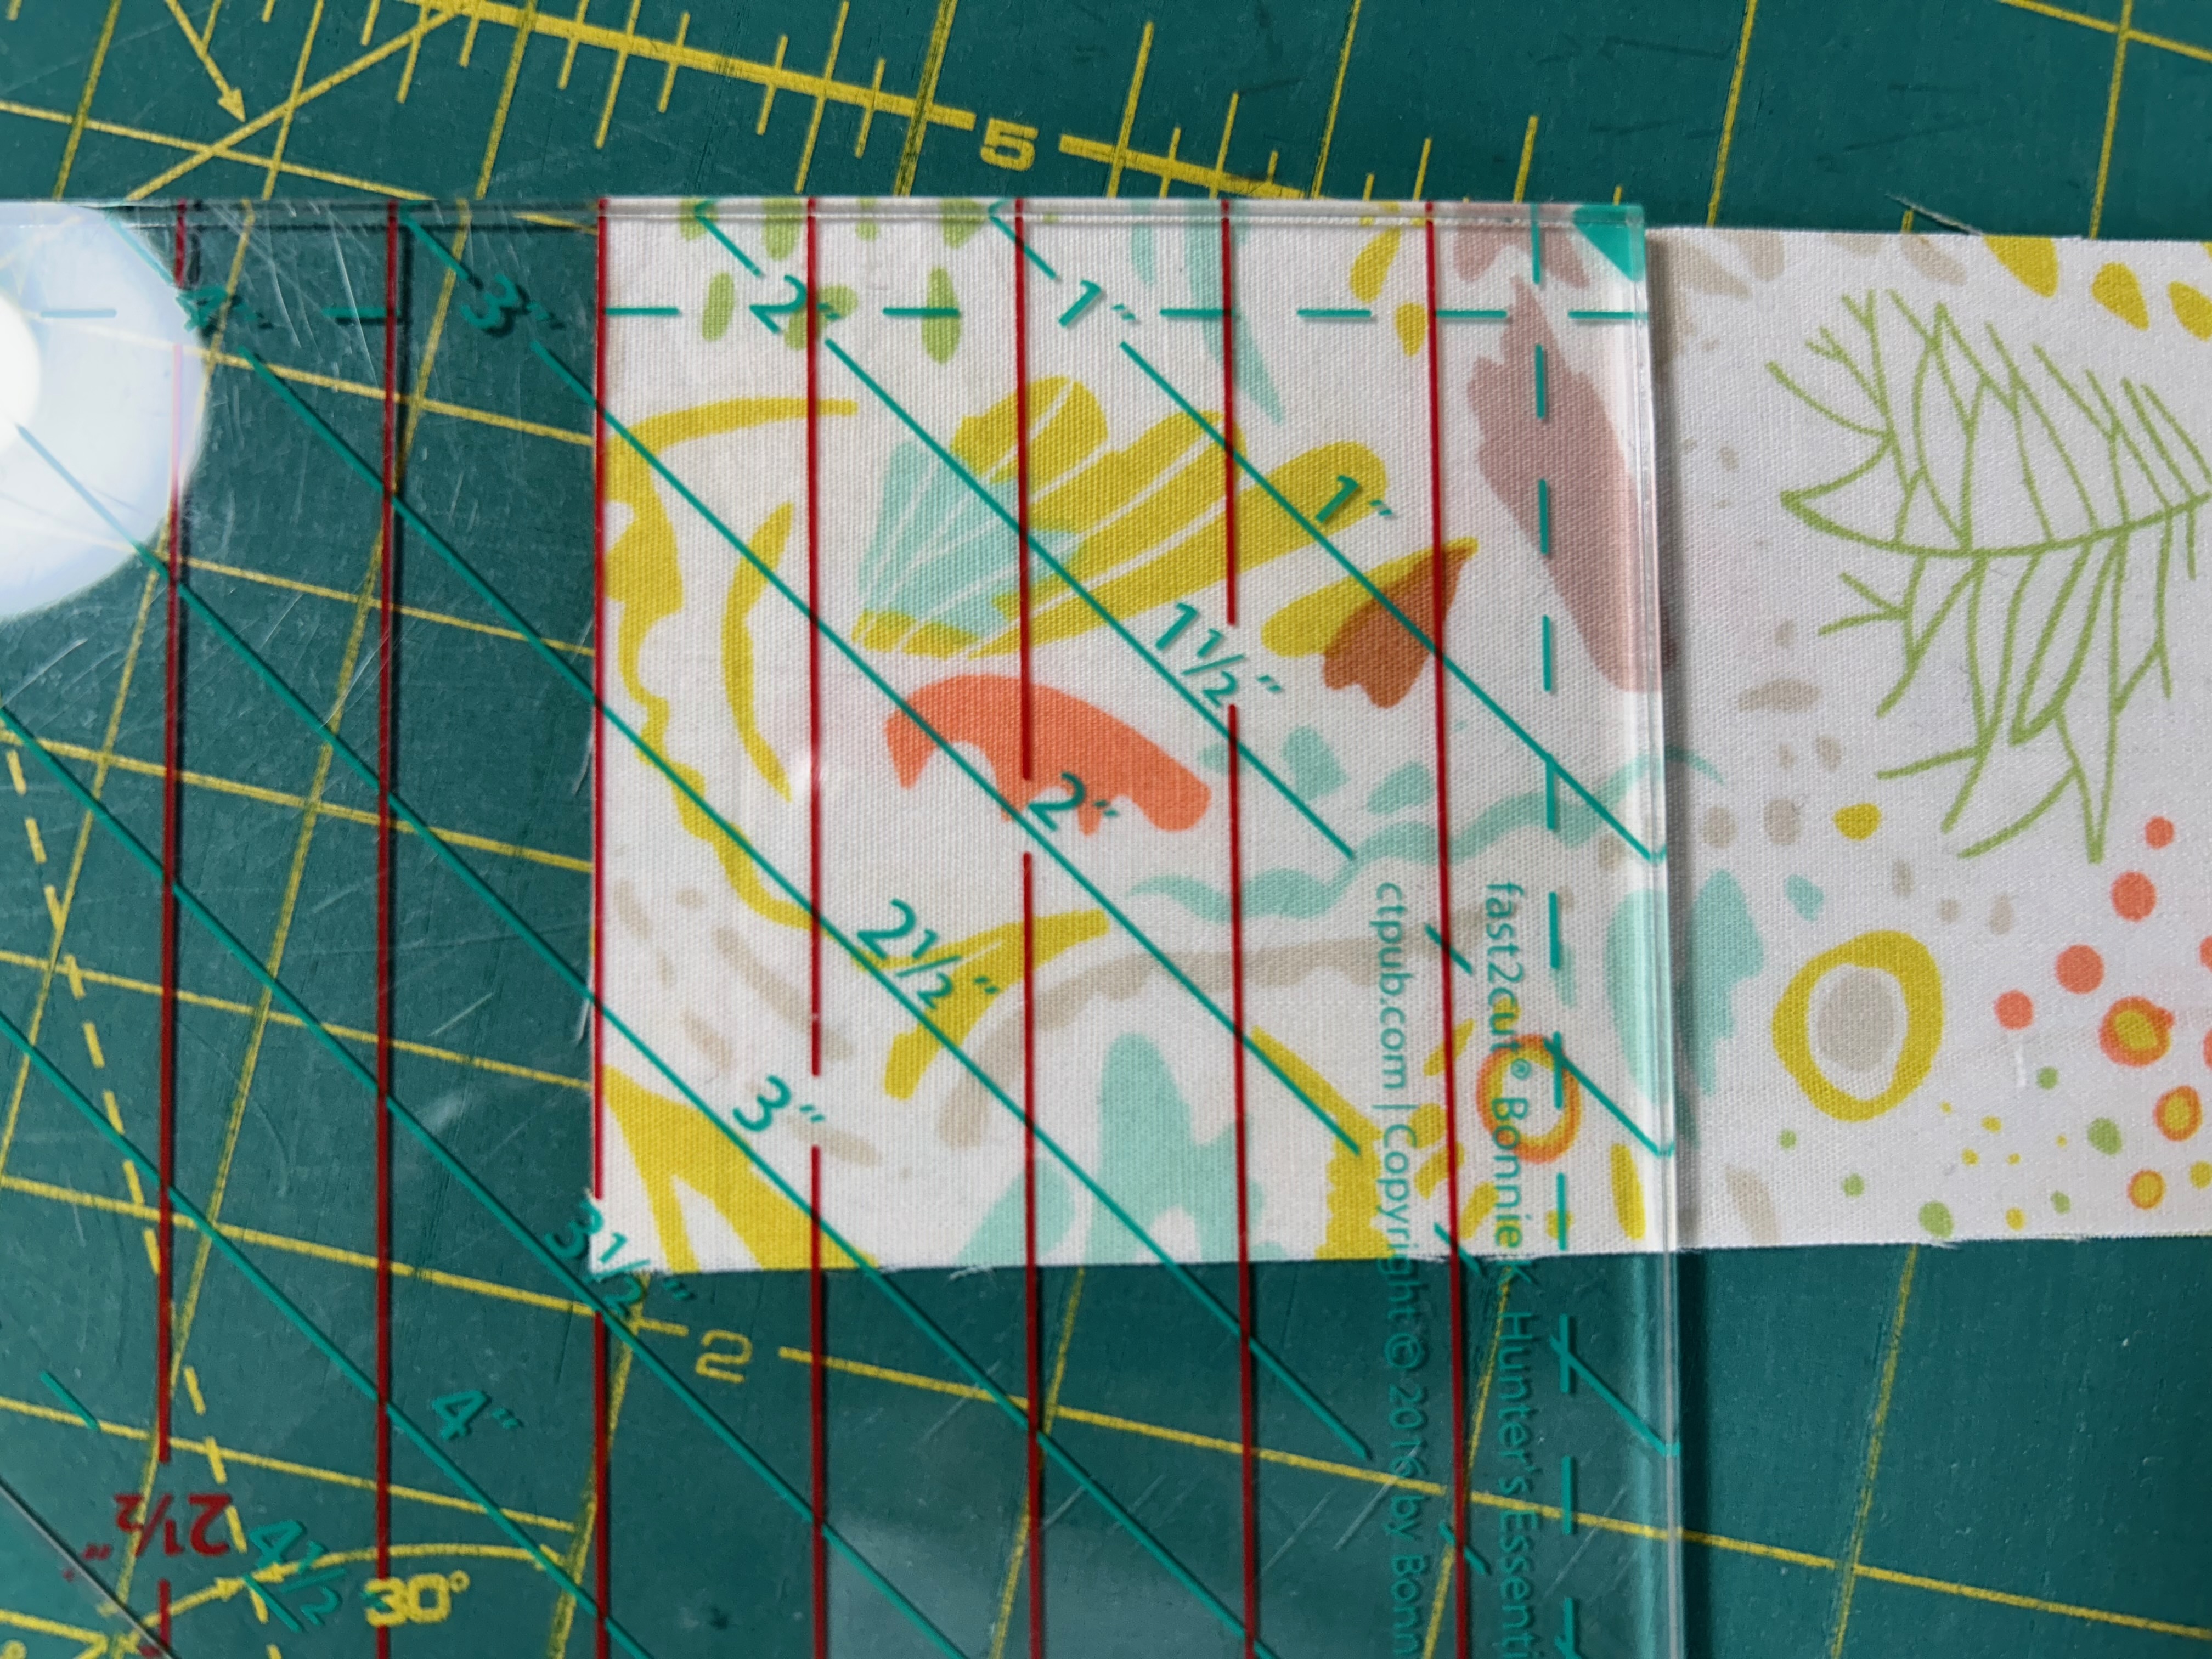
One of my most-used rulers is my Easy Angle Ruler–which I use to cut half-square triangles. There are so many ways to make half-square triangles, but I prefer using my rulers.
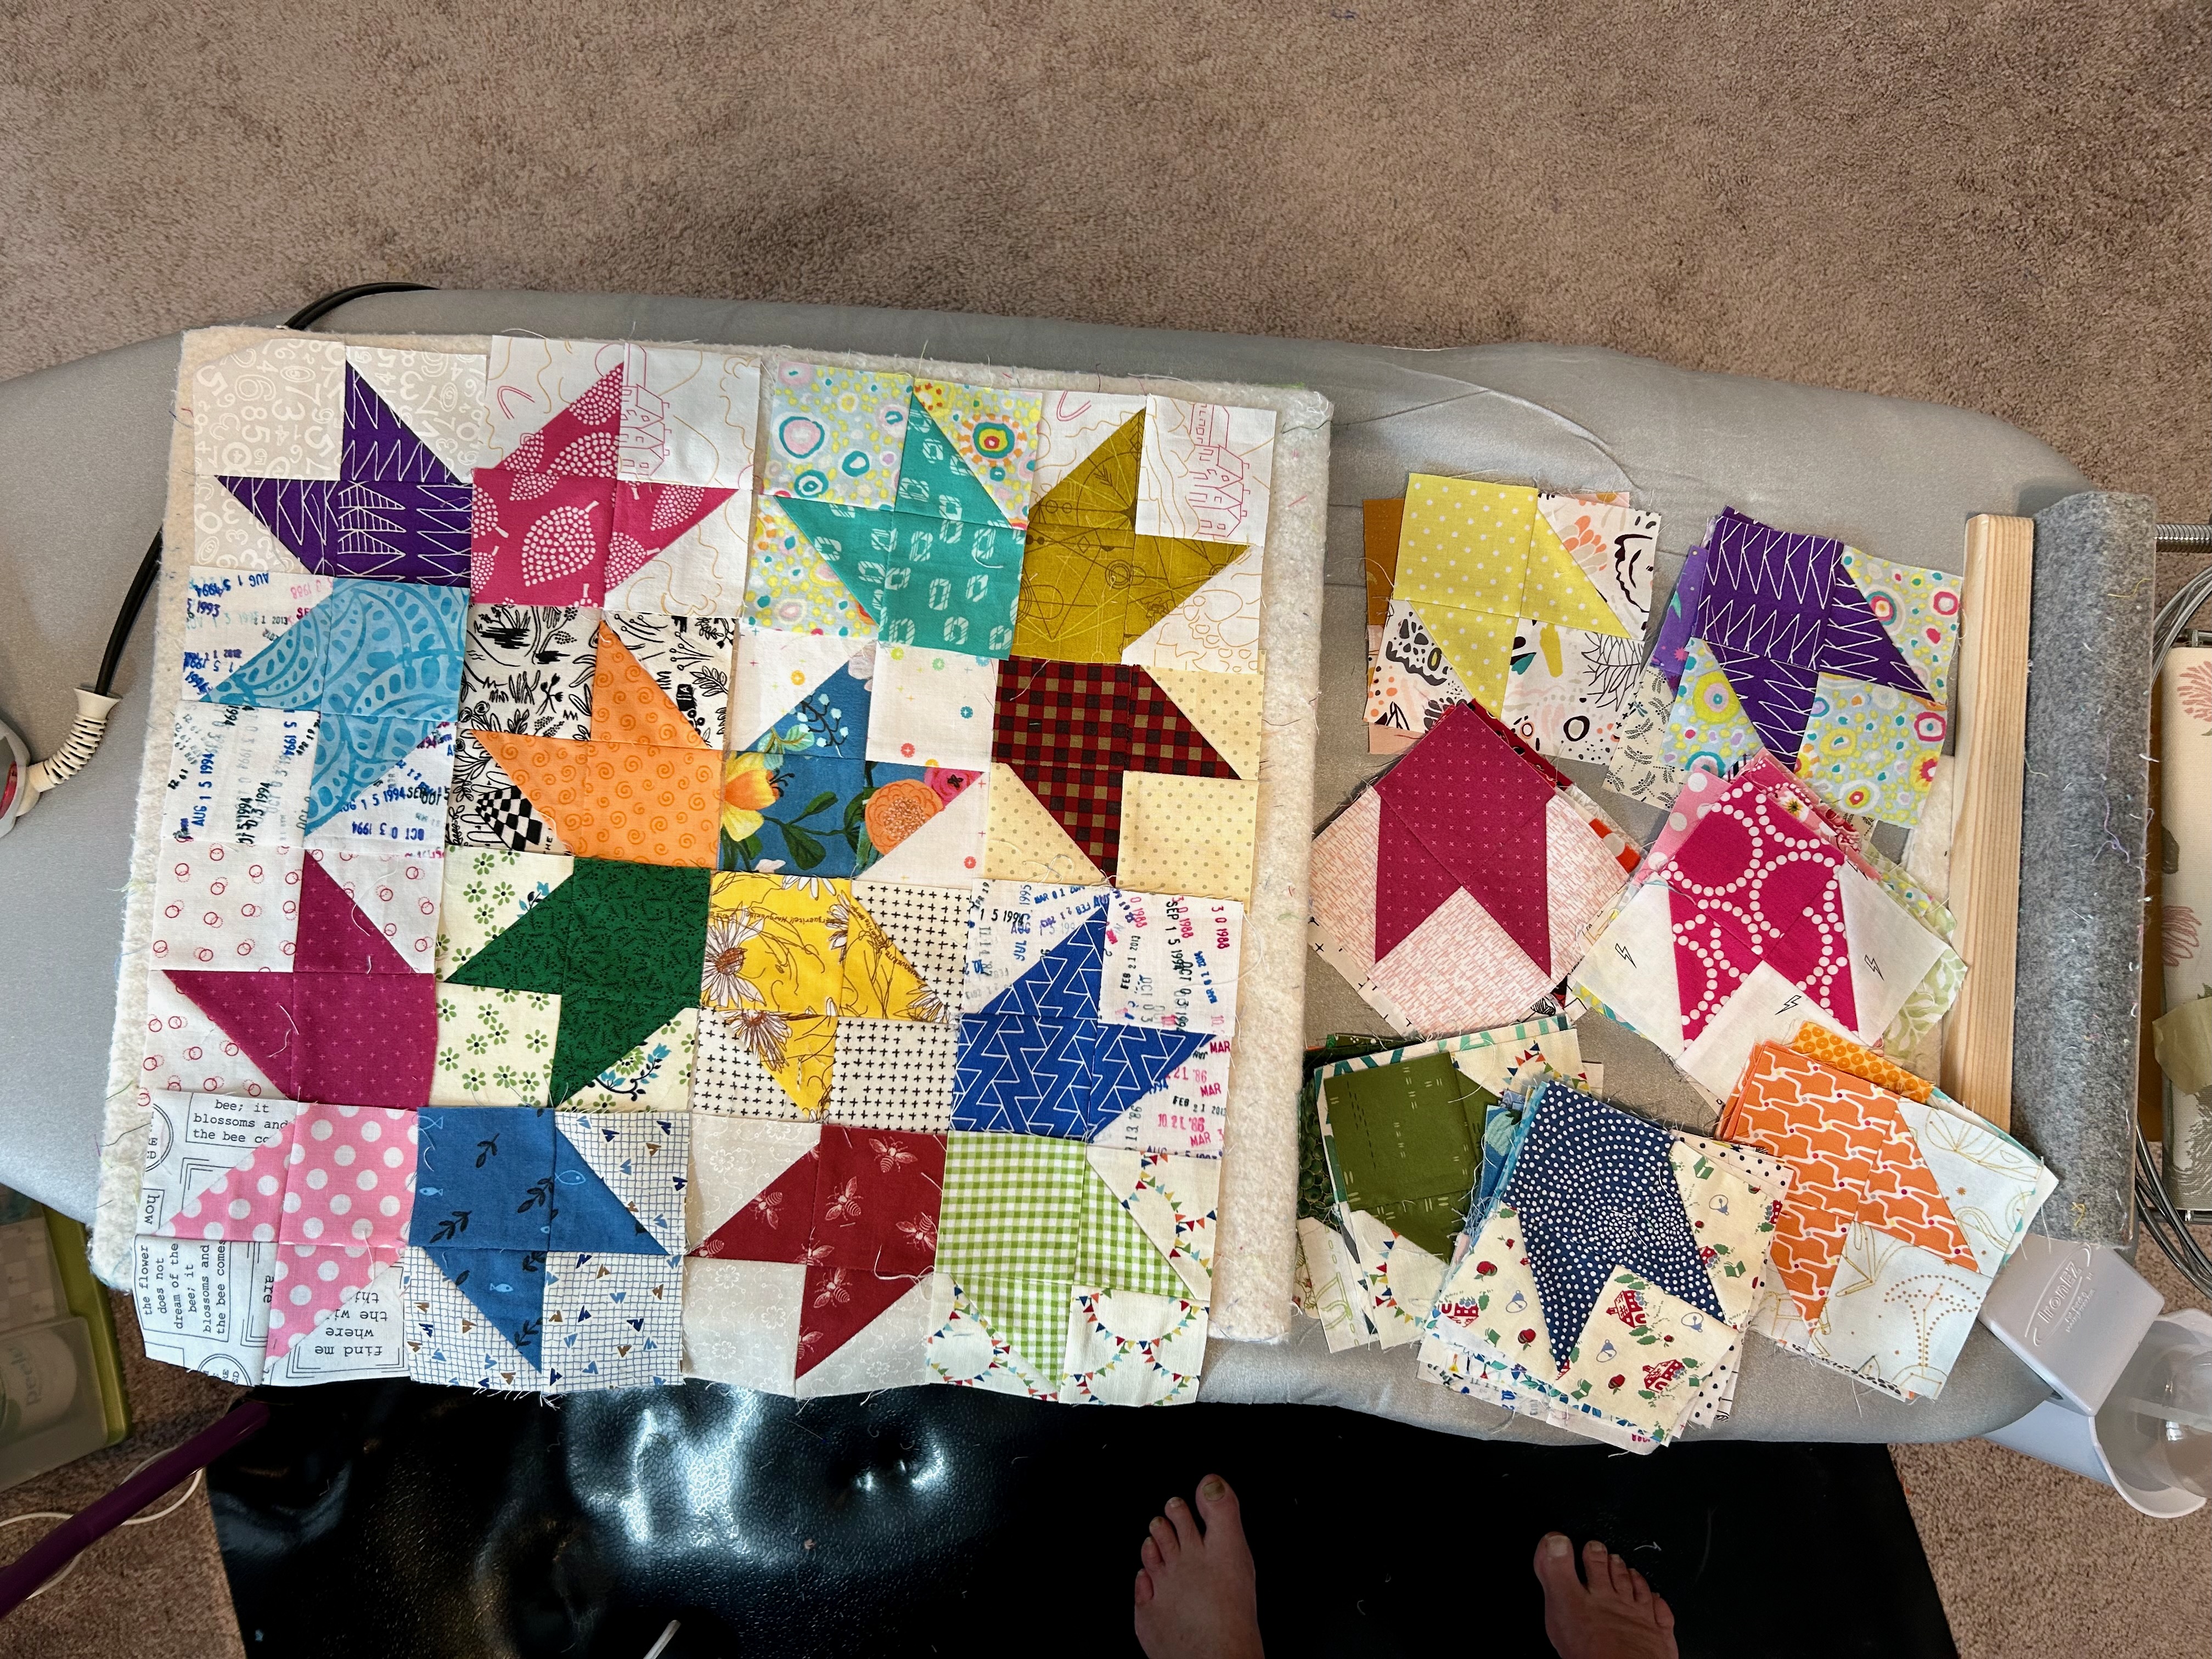
I currently have three of these rulers. The one with blue tips is quilter Bonnie Hunter’s. The yellow block is Bonnie Hunter’s 2026 annual free leader/ender block called “Tulip Swirl.” Above it are the block’s components, with the layered half-square triangles ready to sew together–cut from layered dark/light 2.5 inch wide strips.
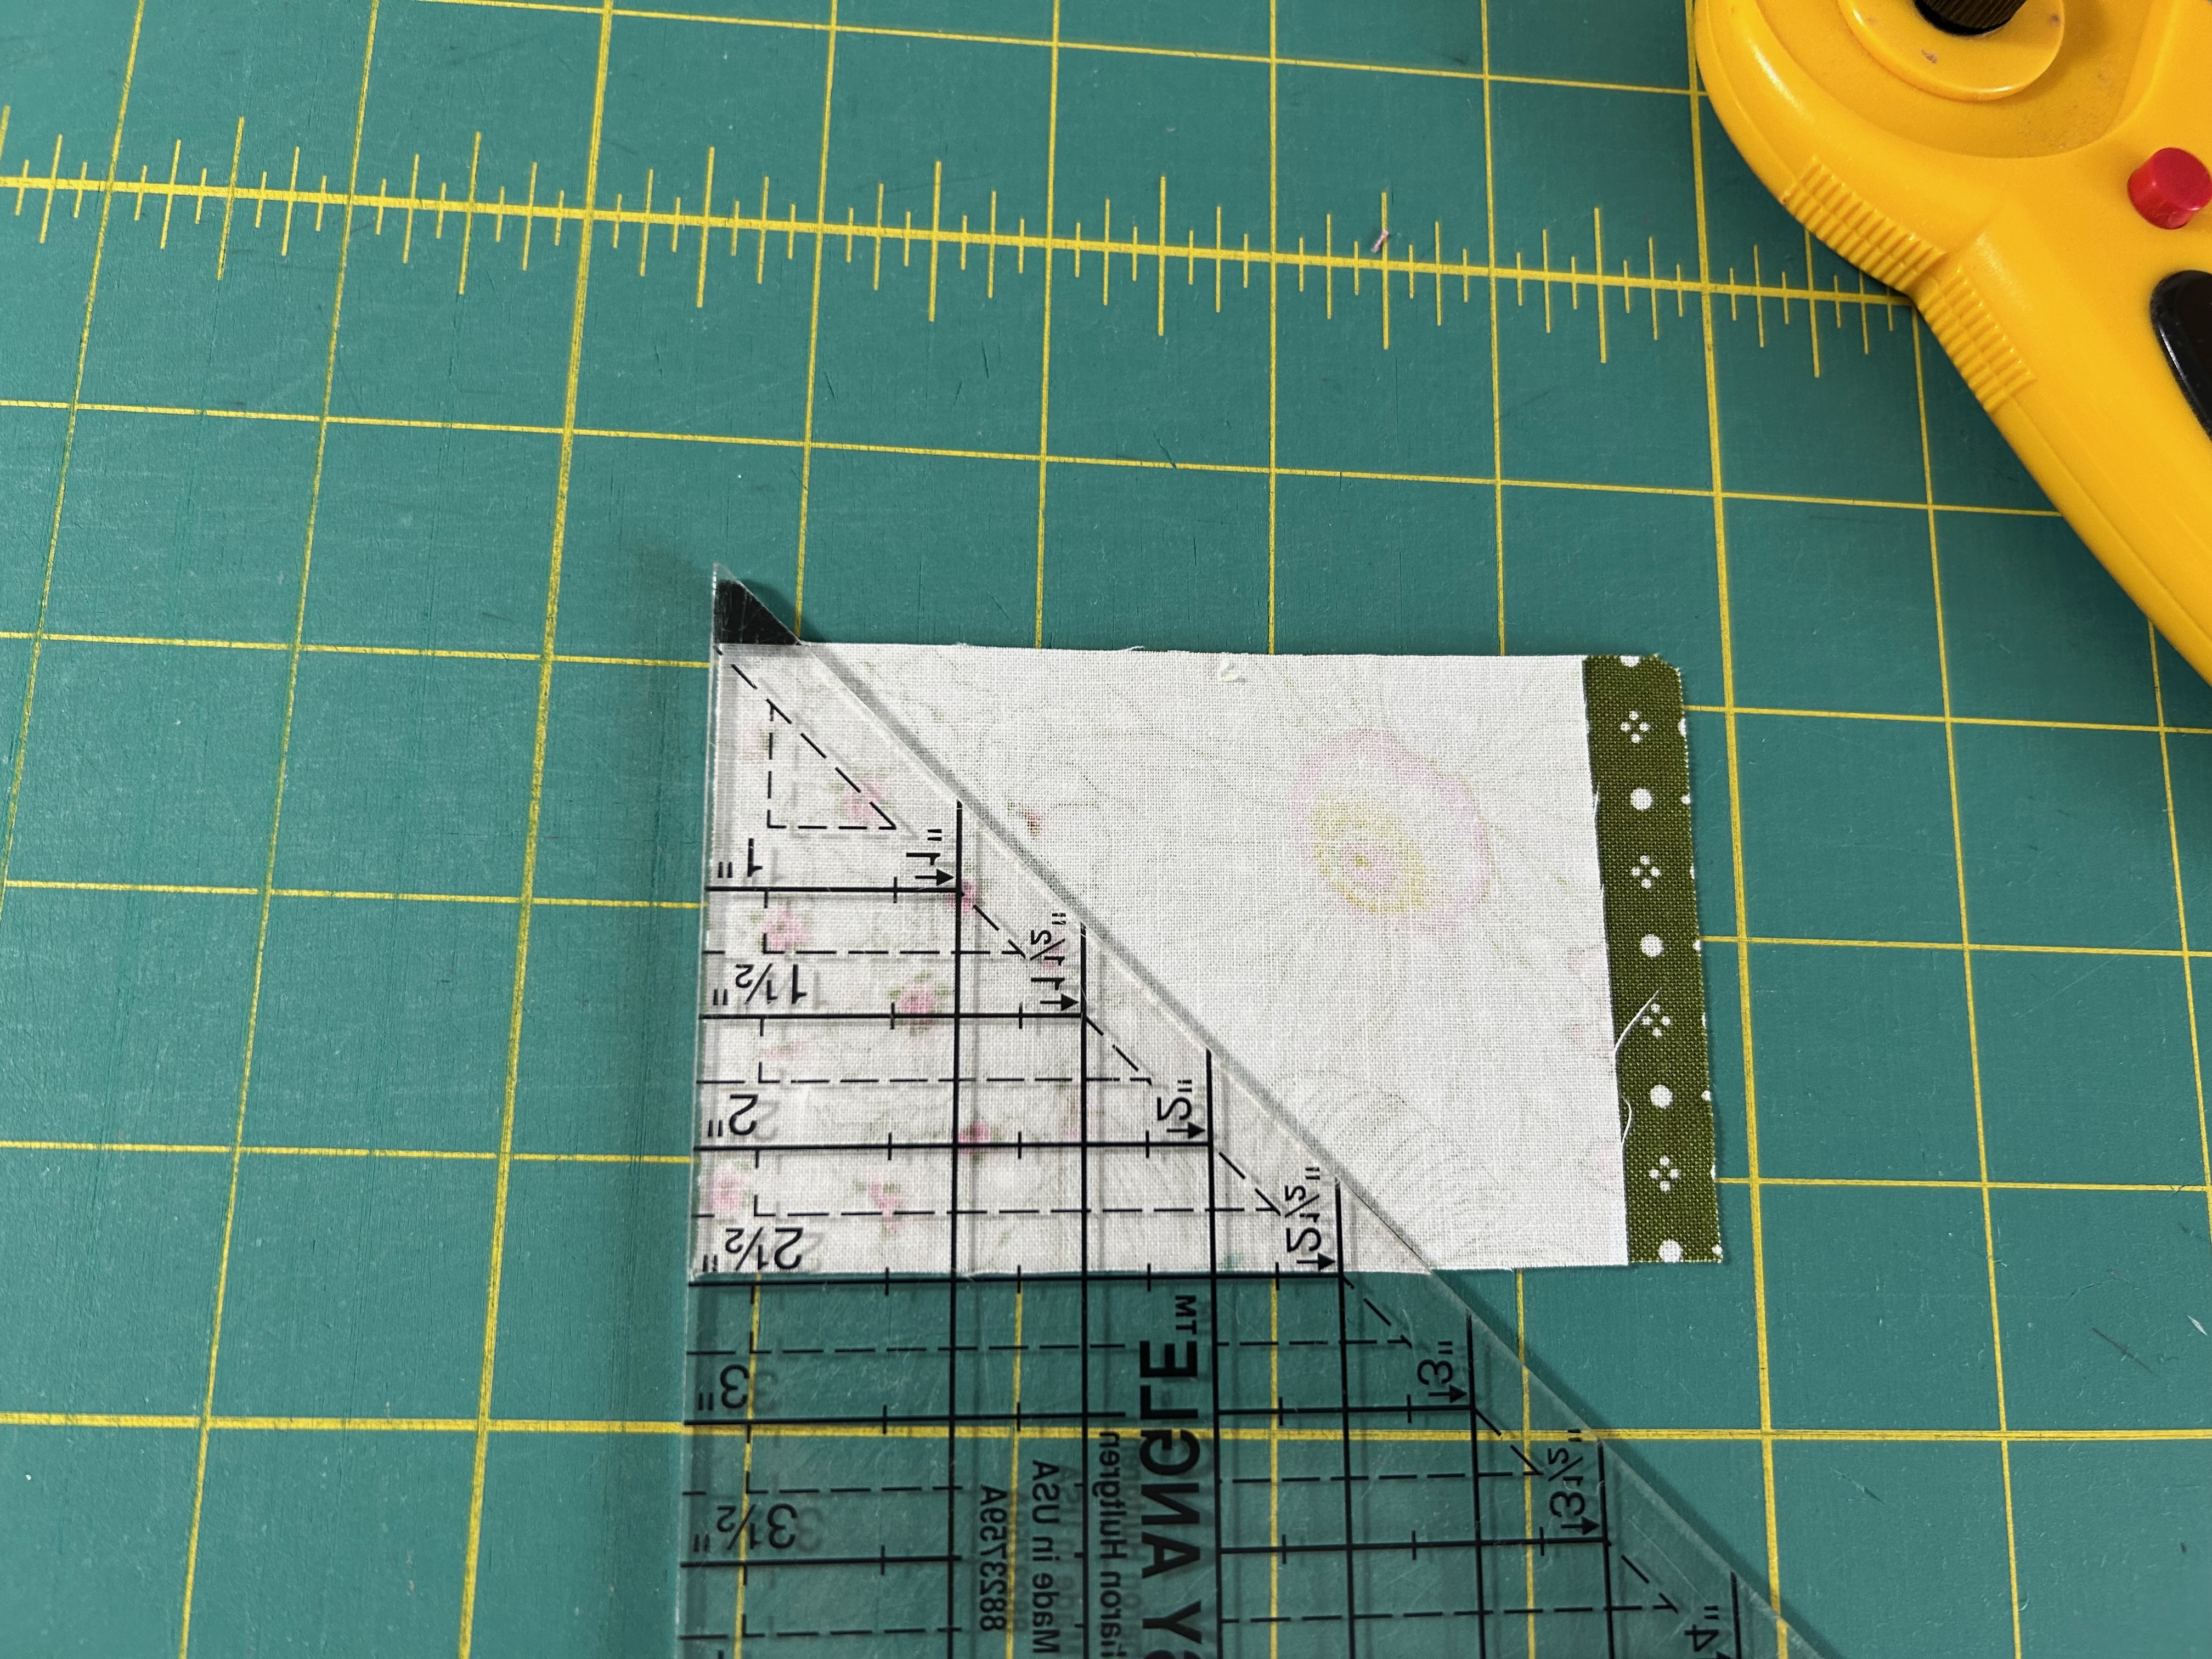
You can also cut squares with this ruler. But first layer 2 dark/light strips that are at least 6 inches long for each block–assuming you are using a variety of prints and want a scrappy quilt.
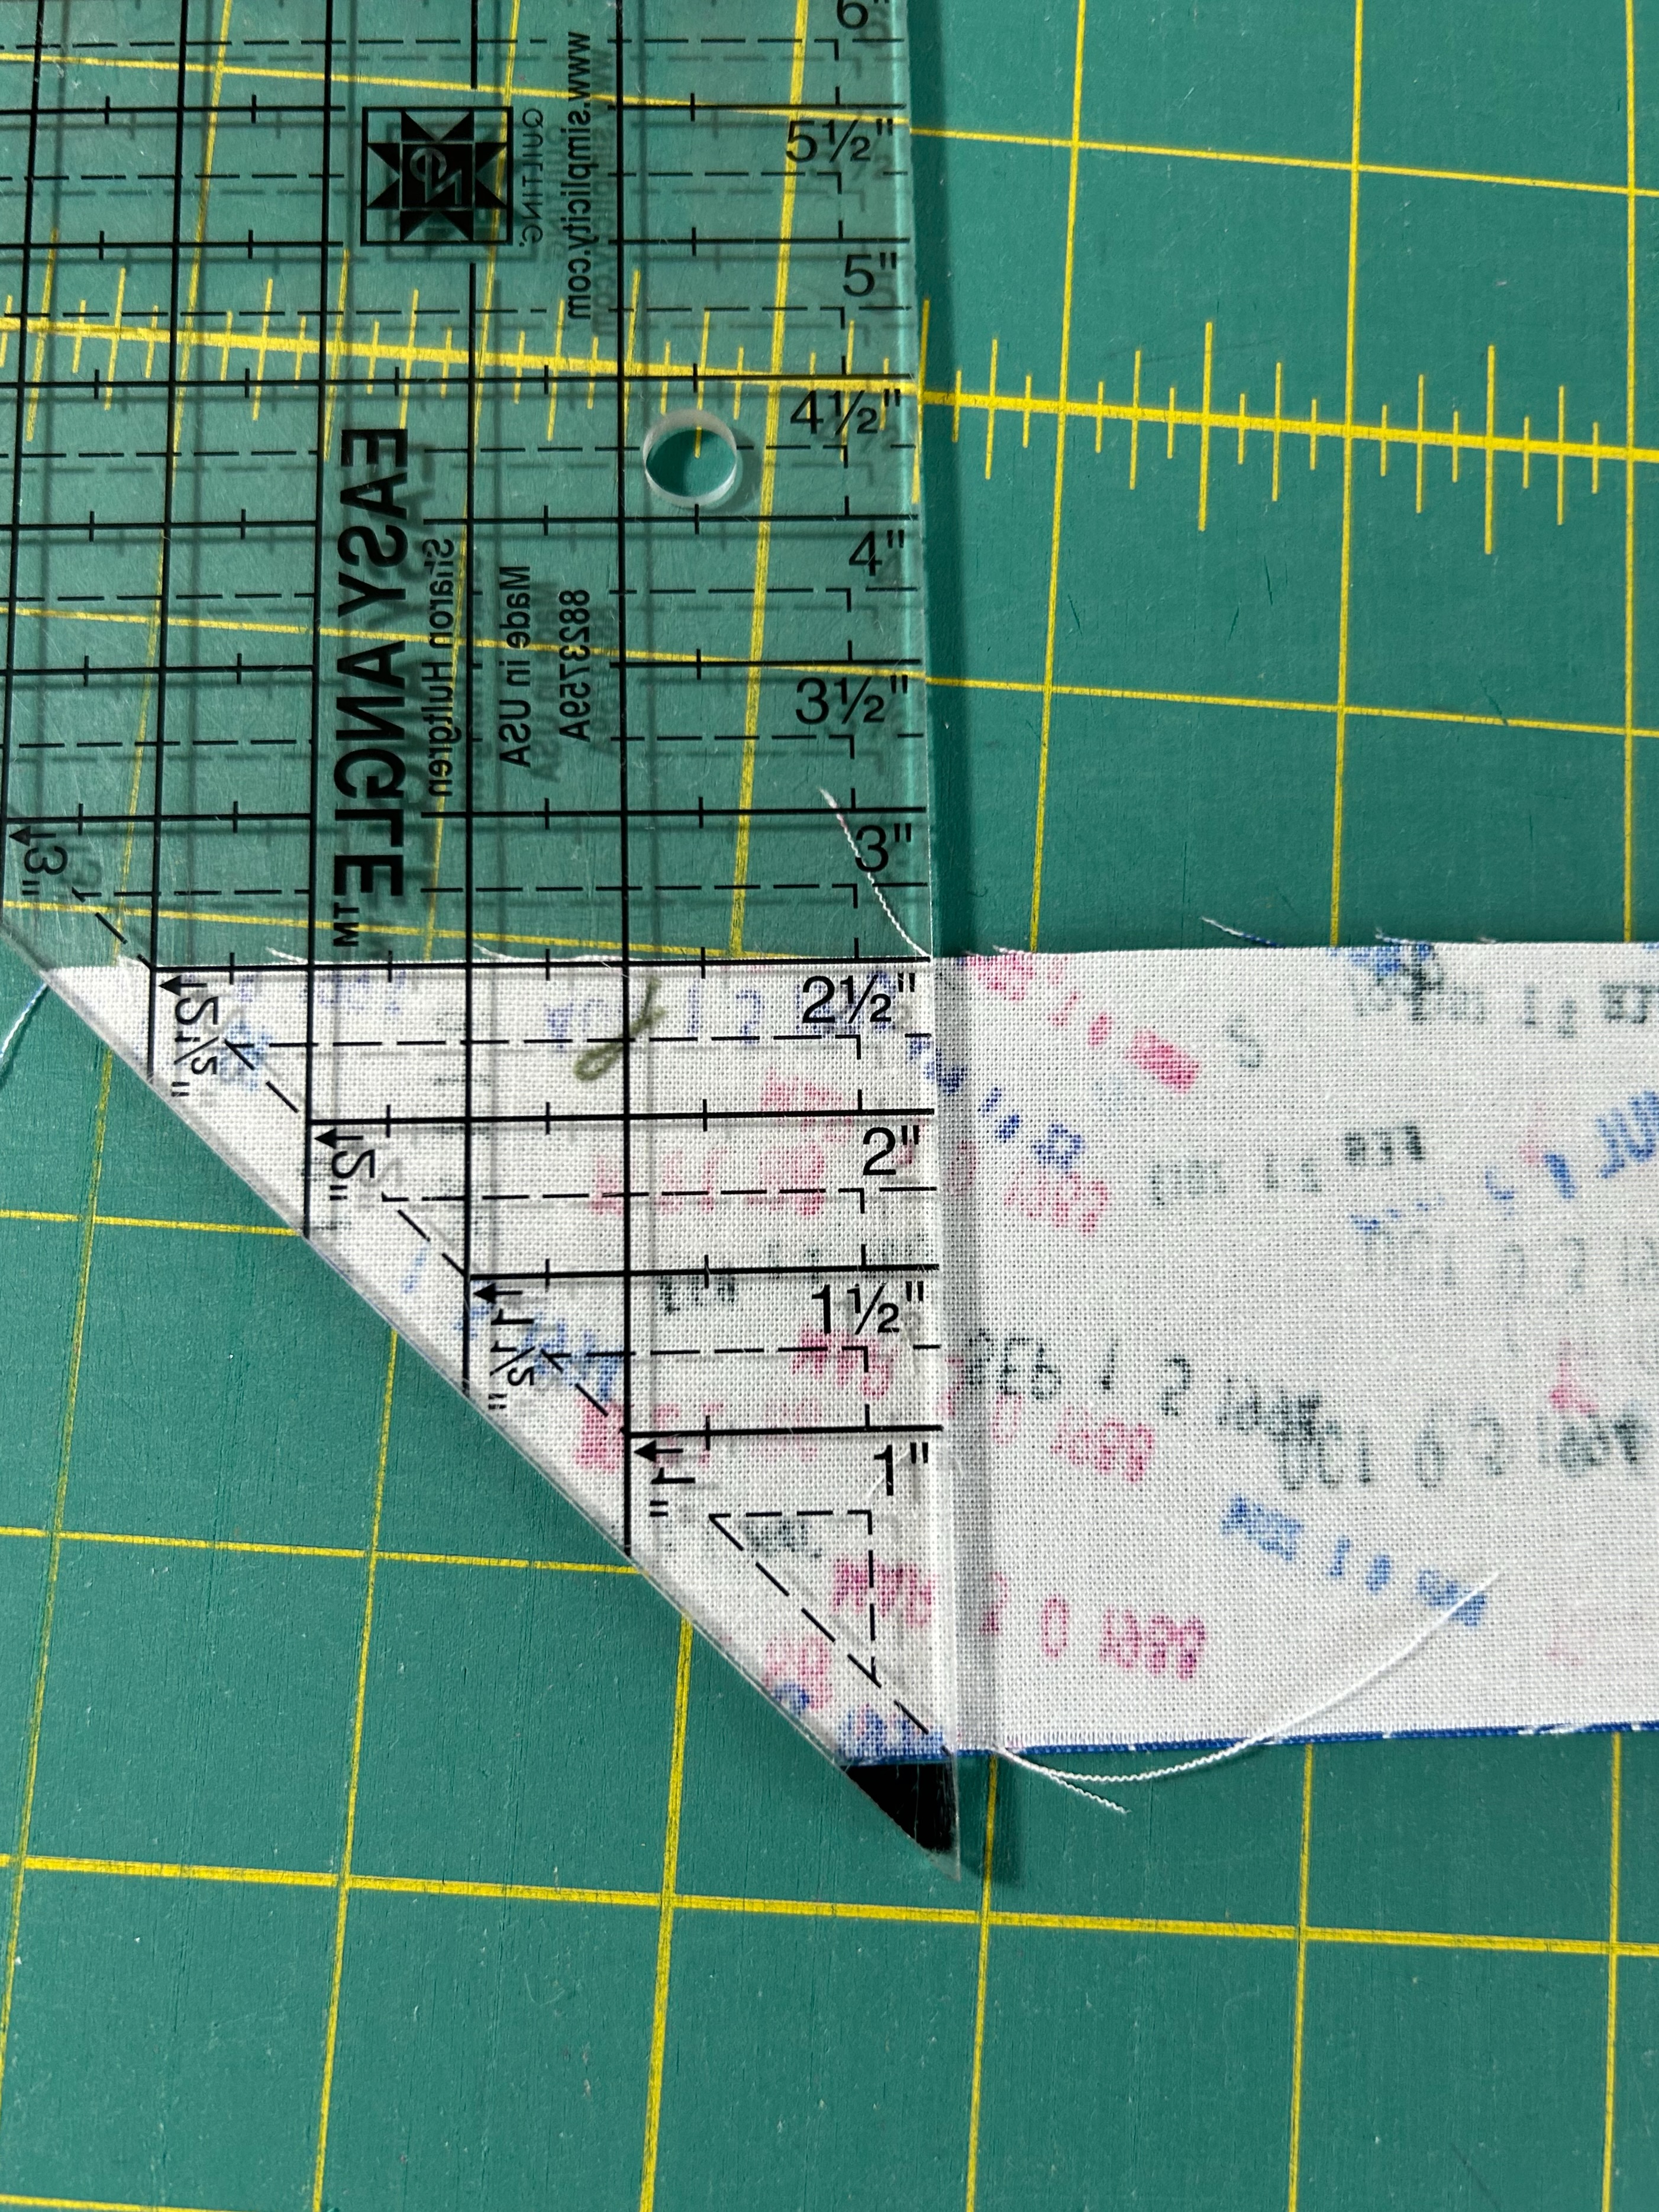
Next, turn the ruler over so that the black tip is at the top. (You will use BOTH sides of this ruler.) Lay the ruler’s edge along the side where you just cut the two squares. Note that the bottom line is at the 2.5 inch line on the ruler.
For the next cut put the black tip down so that the ruler’s edge is along the angle you just cut. After cutting, you will again have a straight edge, so you just turn the ruler again so the black tip is at the top. With a 6-inch strip, you would be done with that particular combination of two light/dark fabrics. For a project with a longer strip set, you would just keep going.
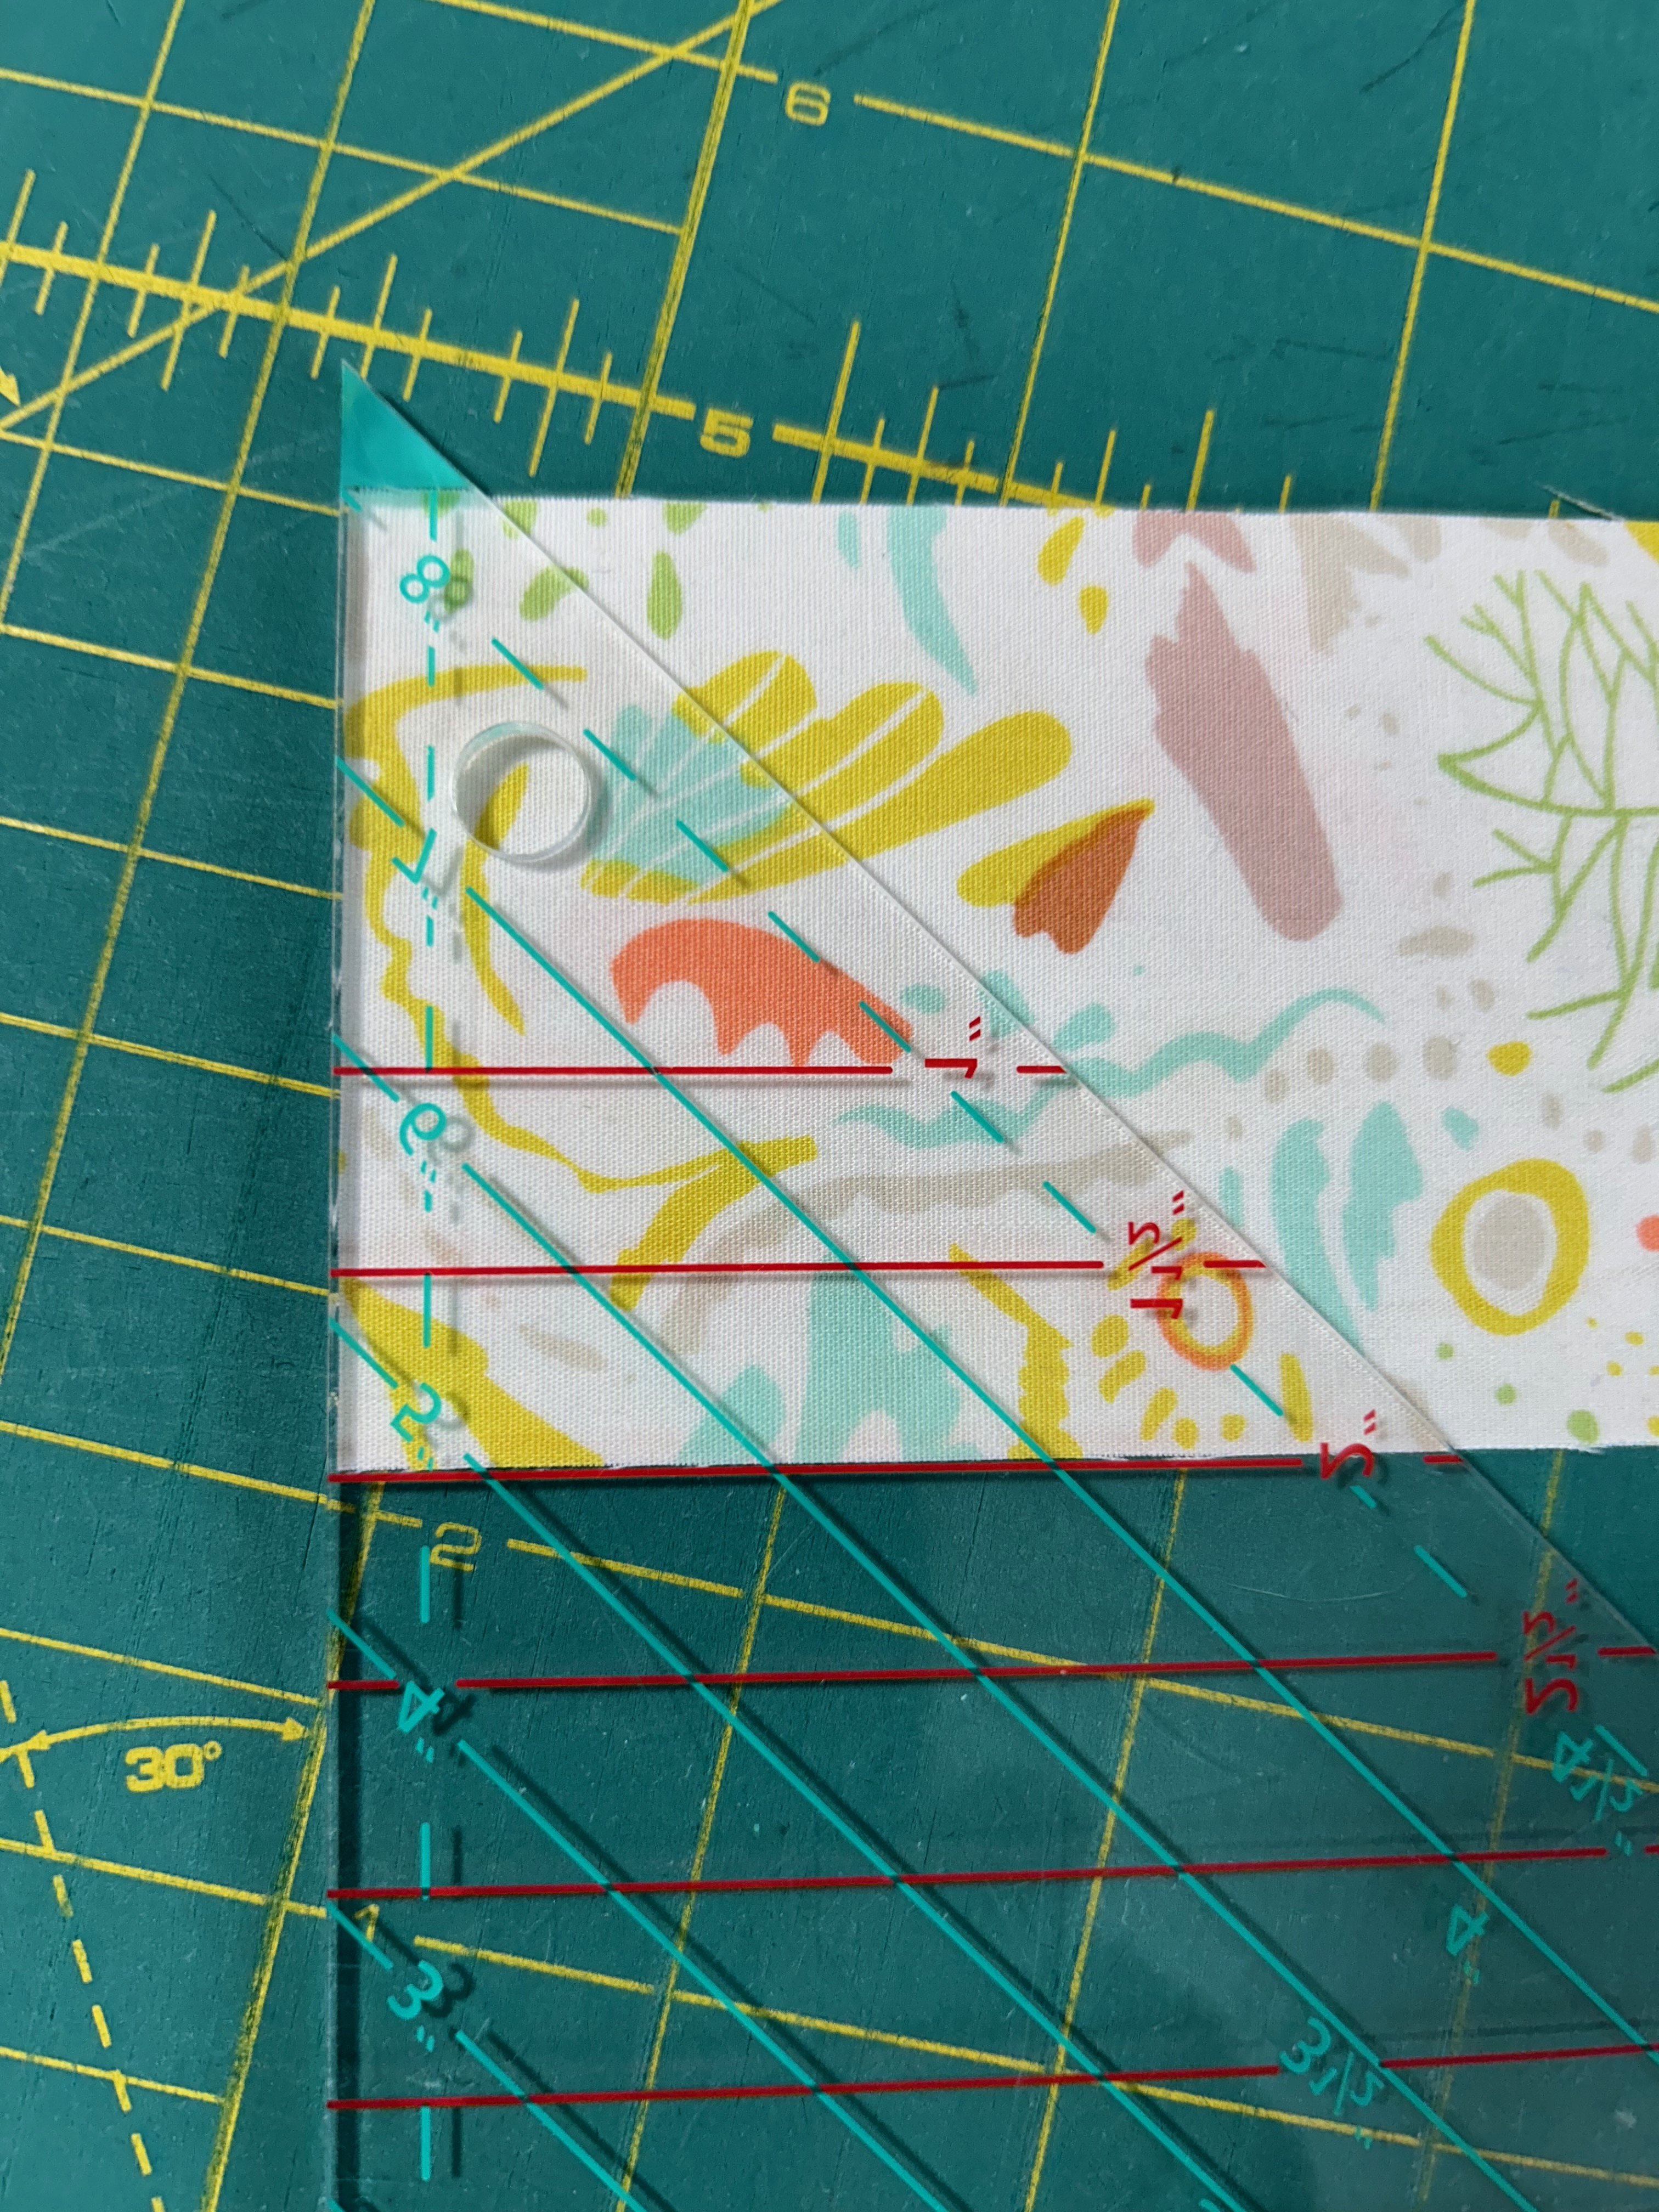
Bonnie Hunter also sells a half-triangle ruler. But note that you line up with the 2-inch line as that will be the FINISHED size of your block when the two sides (light/dark) are sewn into a square and sewn into your block. ***You would cut the fabric strip at 2.5 inches wide.
I think finding where to cut a square is just a bit harder on Bonnie’s ruler, but one would get used to it with use.
I sew these half-square triangles together with the pointed edge at the top as it just seems to be easier to feed the fabric under the sewing machine foot that way.
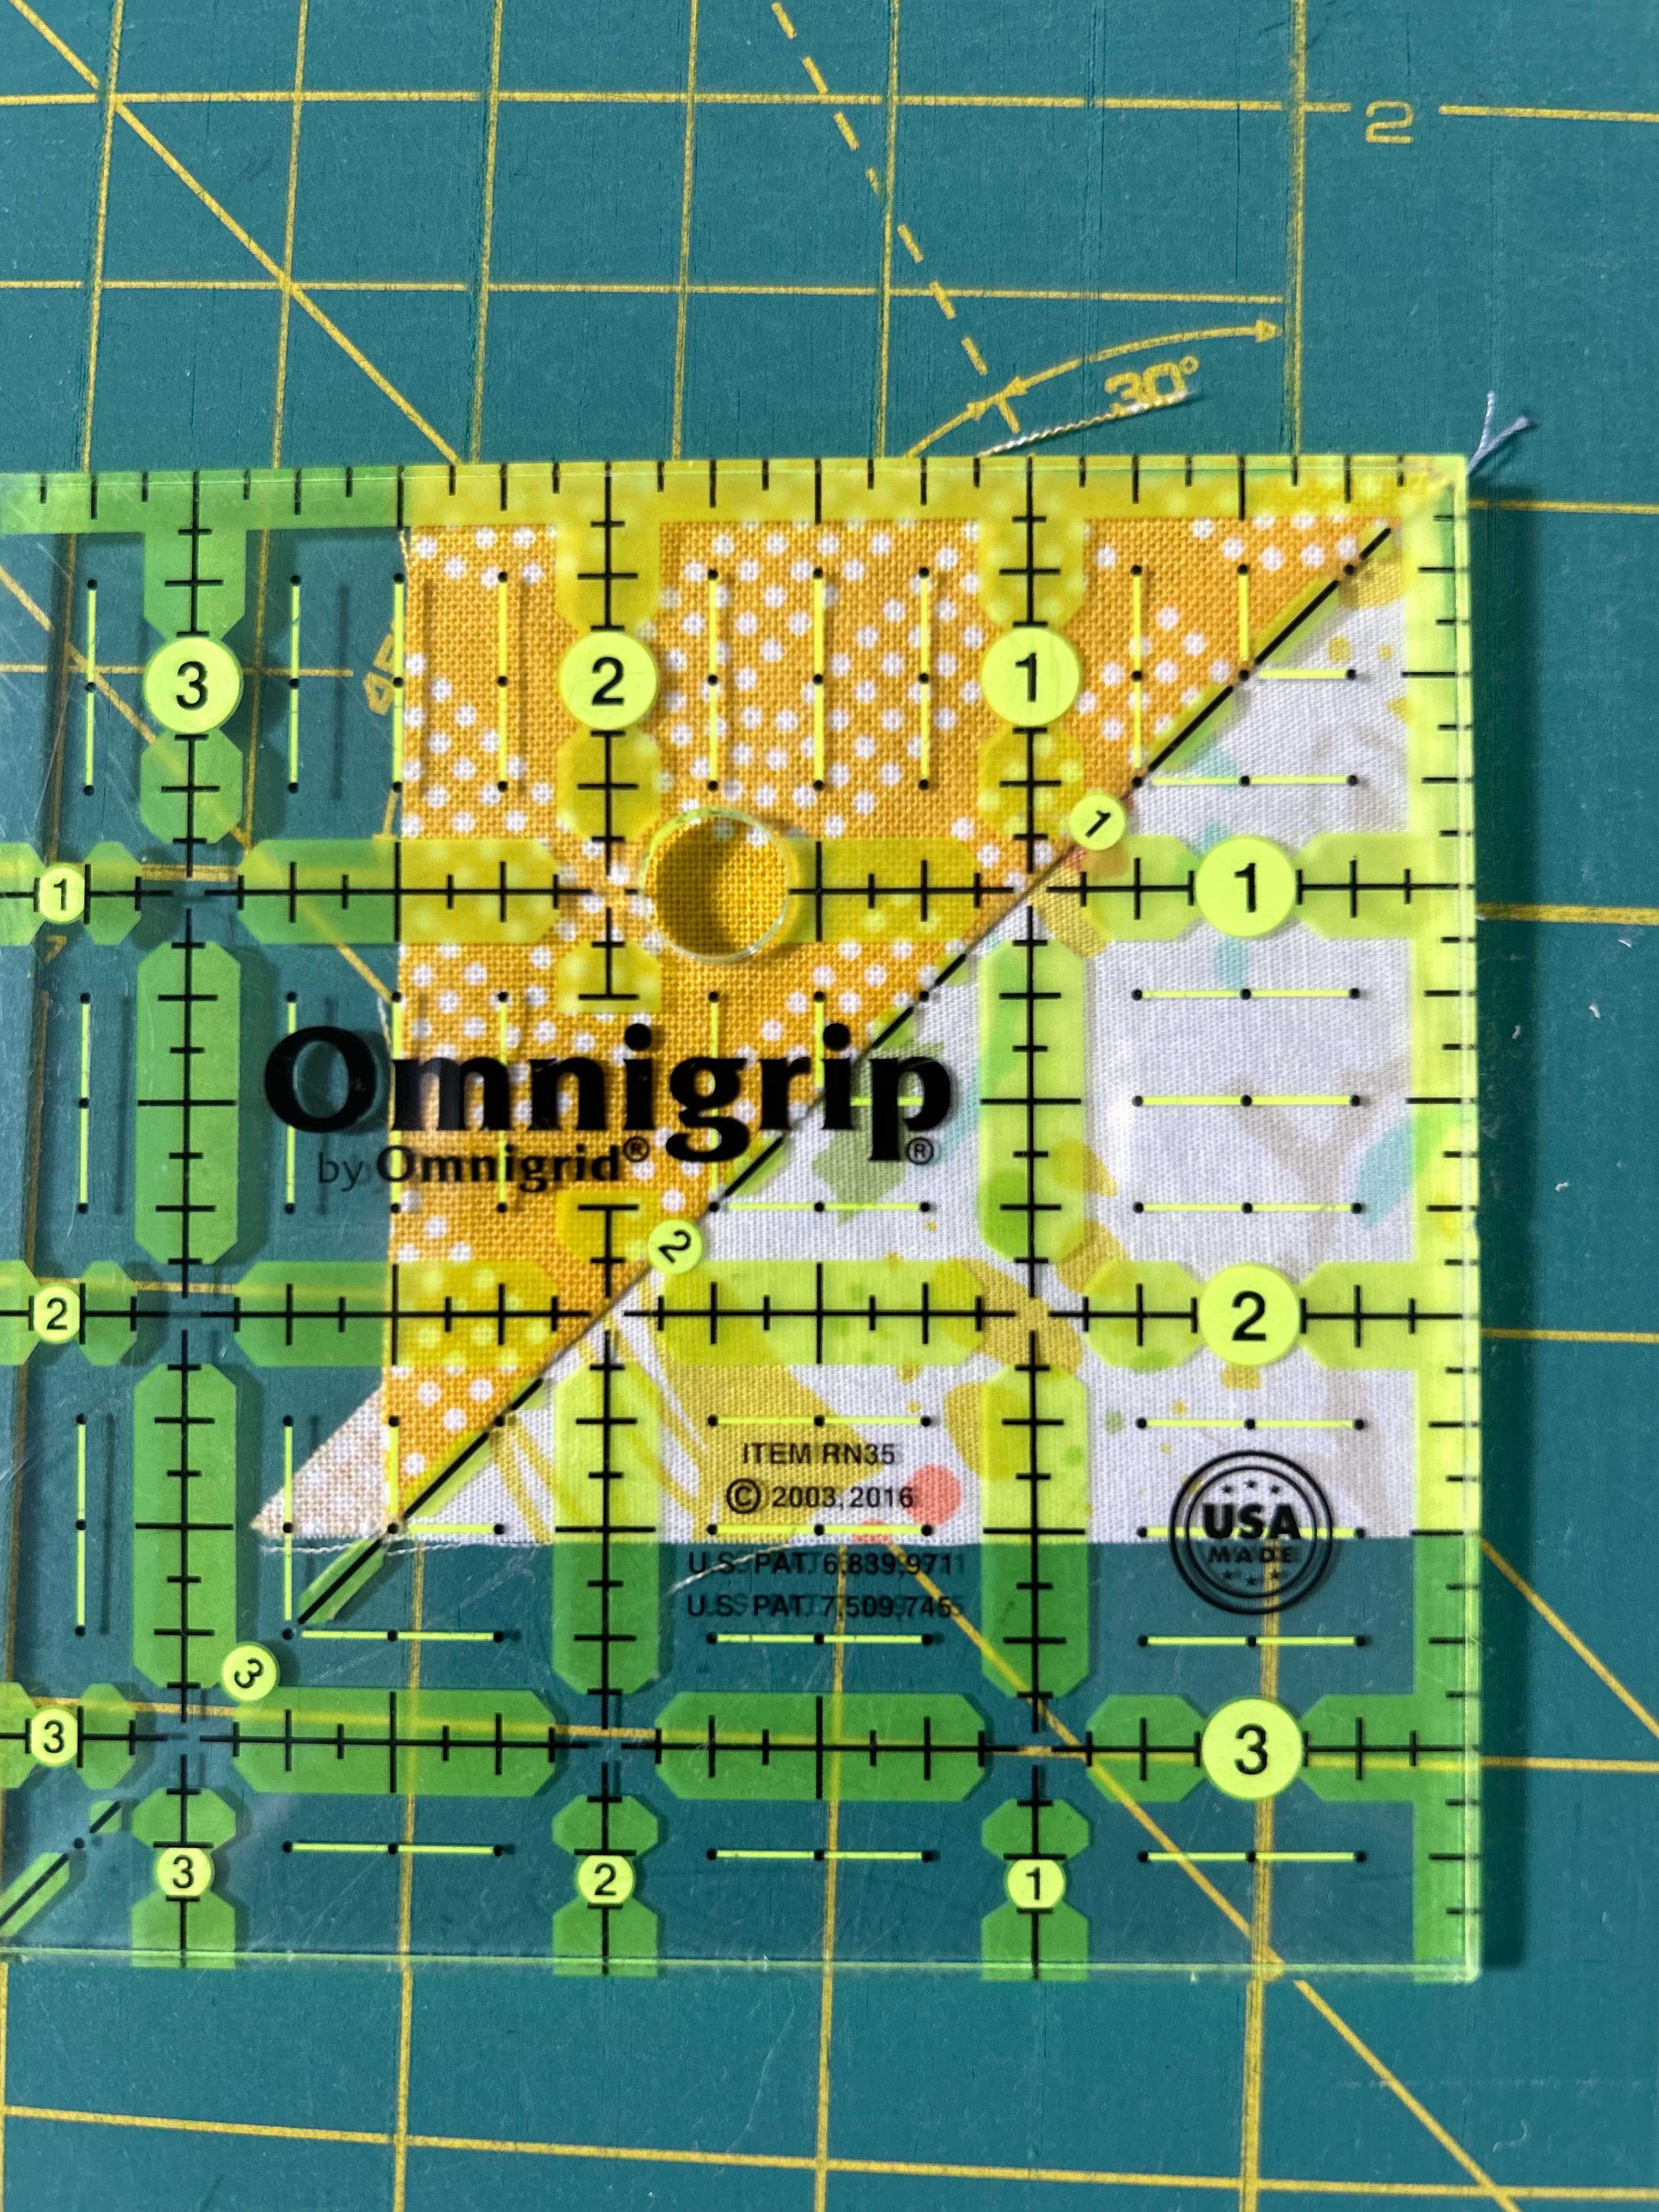
Press to the dark fabric, being careful not to stretch out the little block with steam and your iron pushing the fabric. And it is a good idea to do a quick check of the ironed square by placing a small square ruler over the block, with the ruler’s center diagonal line on the line of your small block. Sometimes just a smidge of sliver trimming is needed.
The Cornell Lab’s information on birds is…so fun. This little video arrived in my inbox this morning, and I was entranced for the length of the 4-minute video.
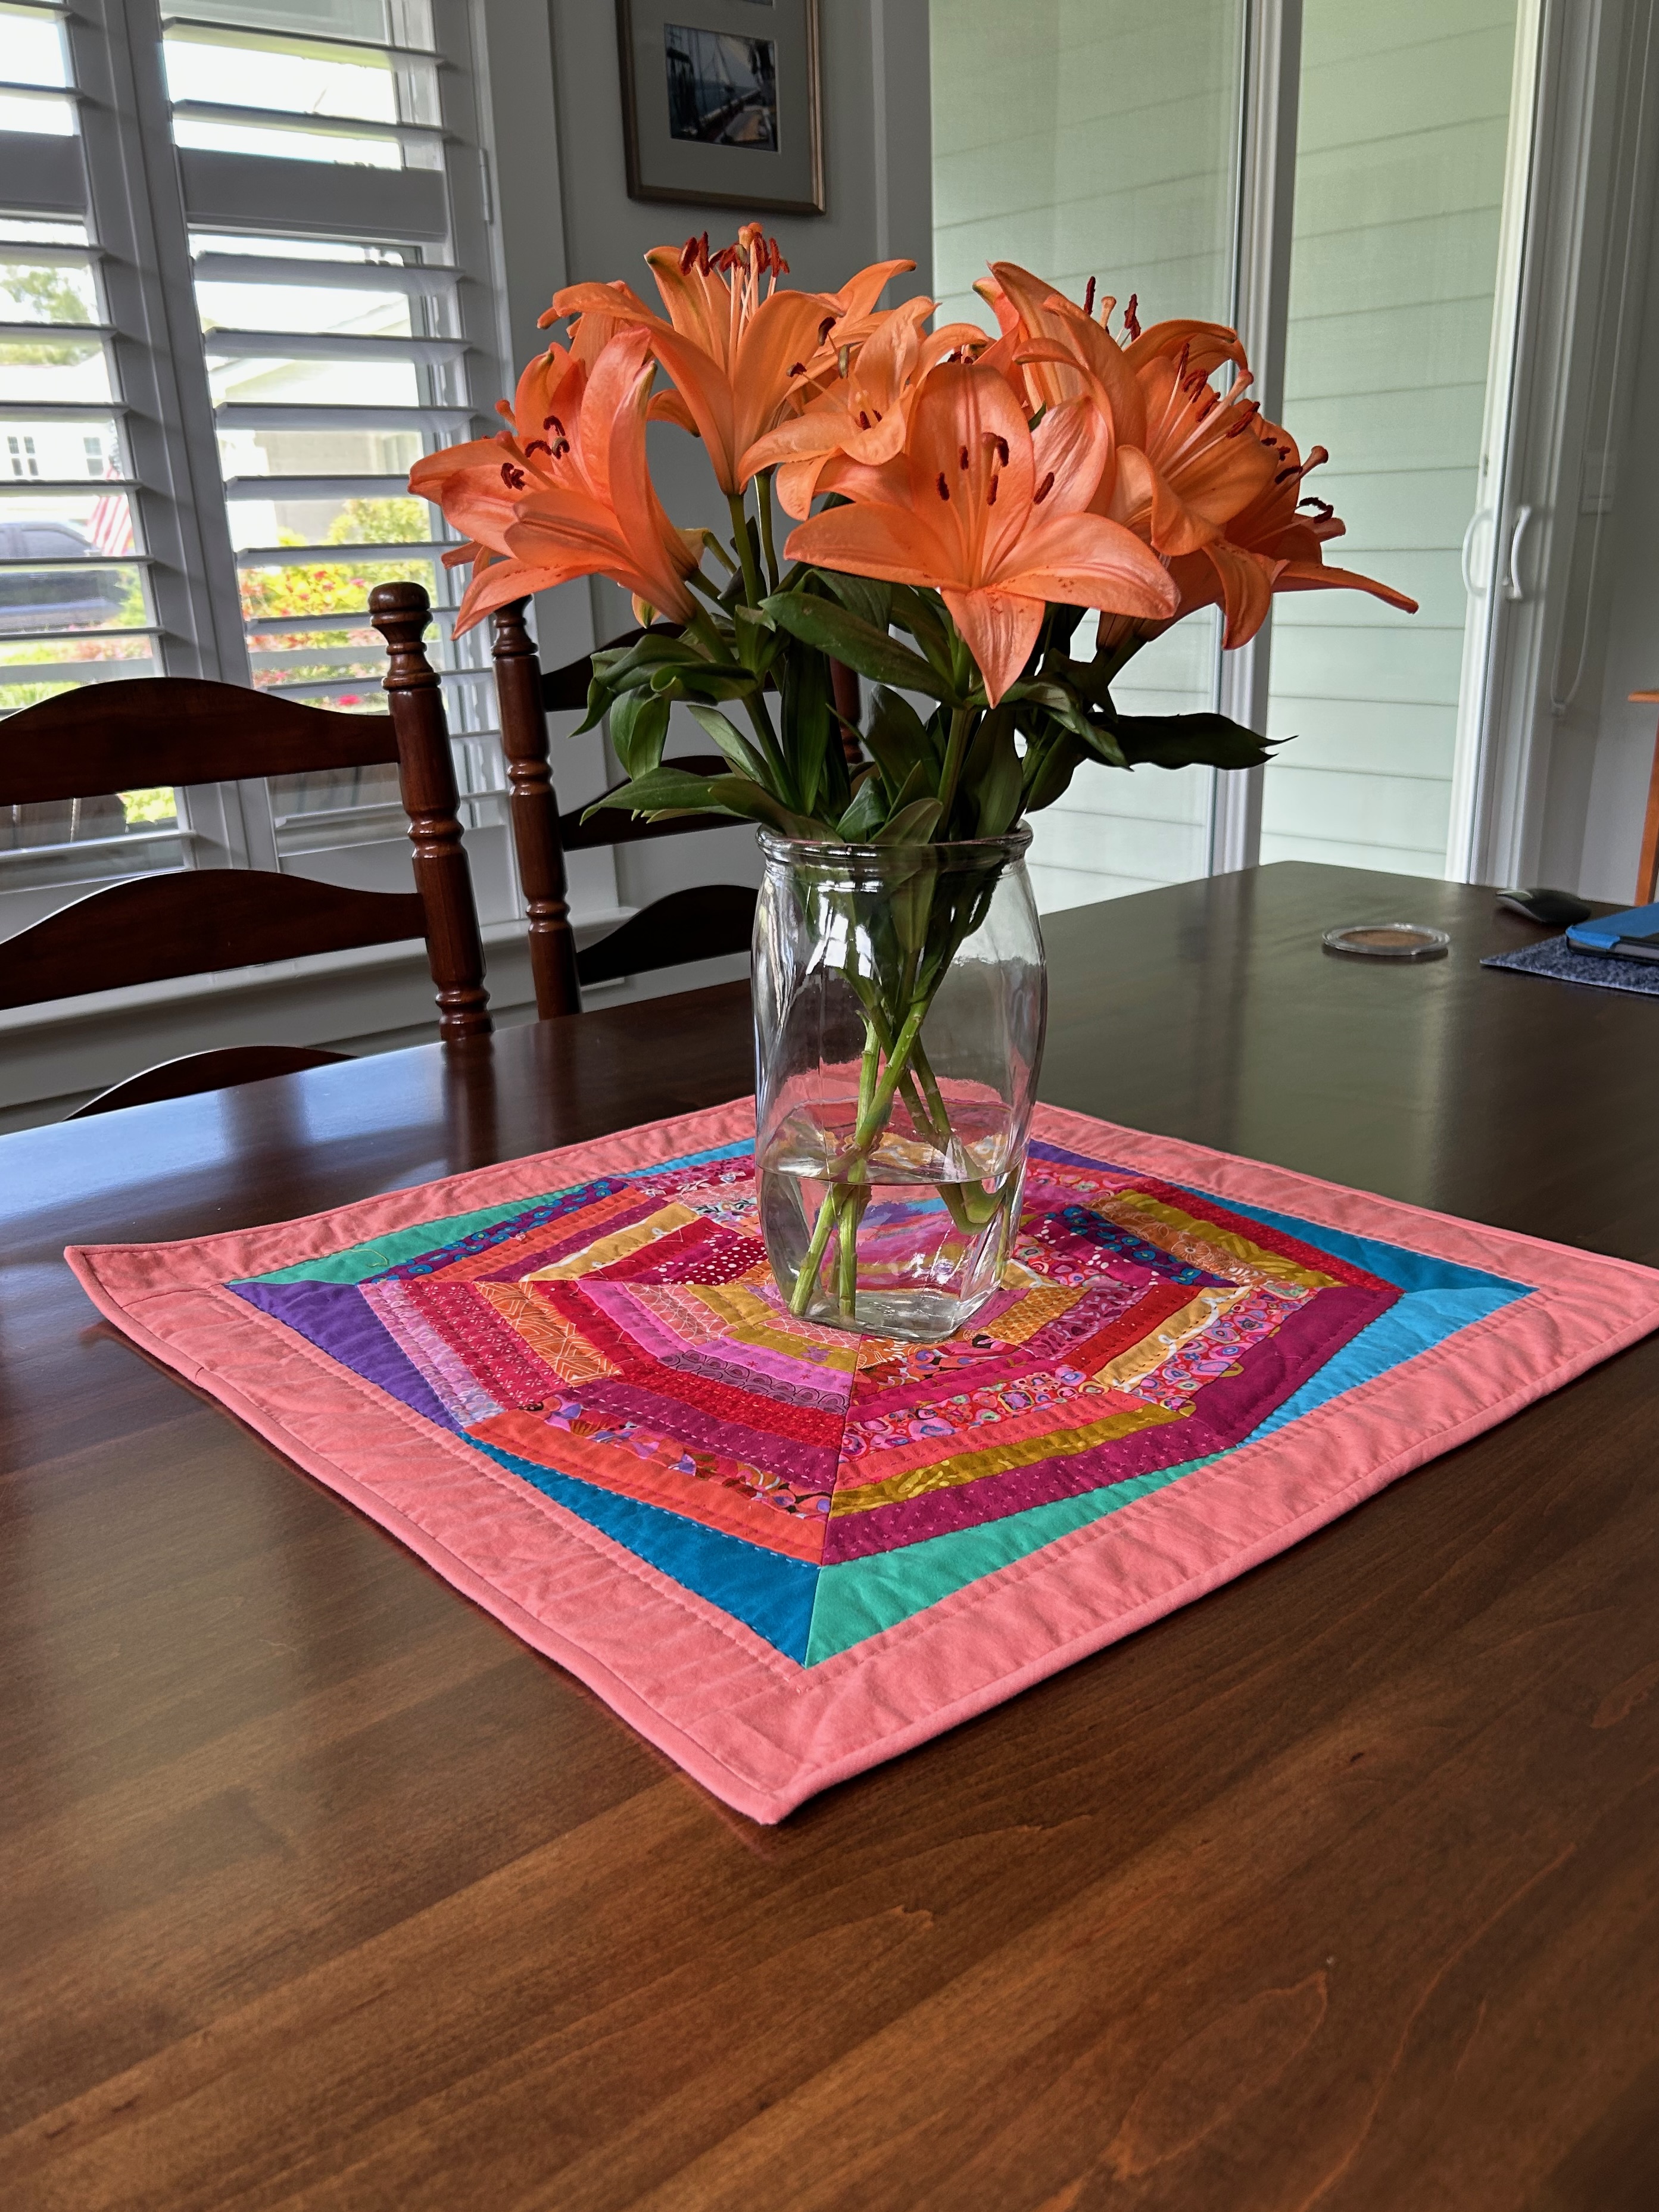
I switched out my table topper quilt August first.
What will I use in September? And wouldn’t it be fun to have a table-topper for every month? I already have 3 or 4 of these small quilts made in recent months.
The one below, which I made to trial “Plus and Minus” designed by Quilty Love. I chose these colors to reflect the bright, bright autumn leaves and densely blue autumn sky in Maine. (The future quilt I make from this pattern will be scrappy, but all one color family.) I’ve got this one layered now, and later today I’ll pin the layers. I plan to stitch lines on my domestic machine, not the longarm. I want to try an extended zig-zag stitch I’ve seen used, though I am tempted about hand quilting it.
On the right is my first block of “Goldie” by Then Came June. I fell in love with this quilt months and months ago, but am now just starting it with leftover solid pieces in my stash. Here it is up close–the block is 19.5 inches square. It’s a “bear paw” variant, and once you trial it and cut a lot of pieces, it goes pretty fast.
“Tulip Swirl,” Bonnie Hunter’s free pattern for her annual leader/ender block, is growing, little by little. Now I need to make more blocks in enough different colors to make the larger block.
I like to use color placement to move the eye around a quilt, so when I’m setting up a big block, I sort my small blocks by color family. See, below, how the red draws the eye around this block?
This week is going by so fast. I hope you are all having a good one.