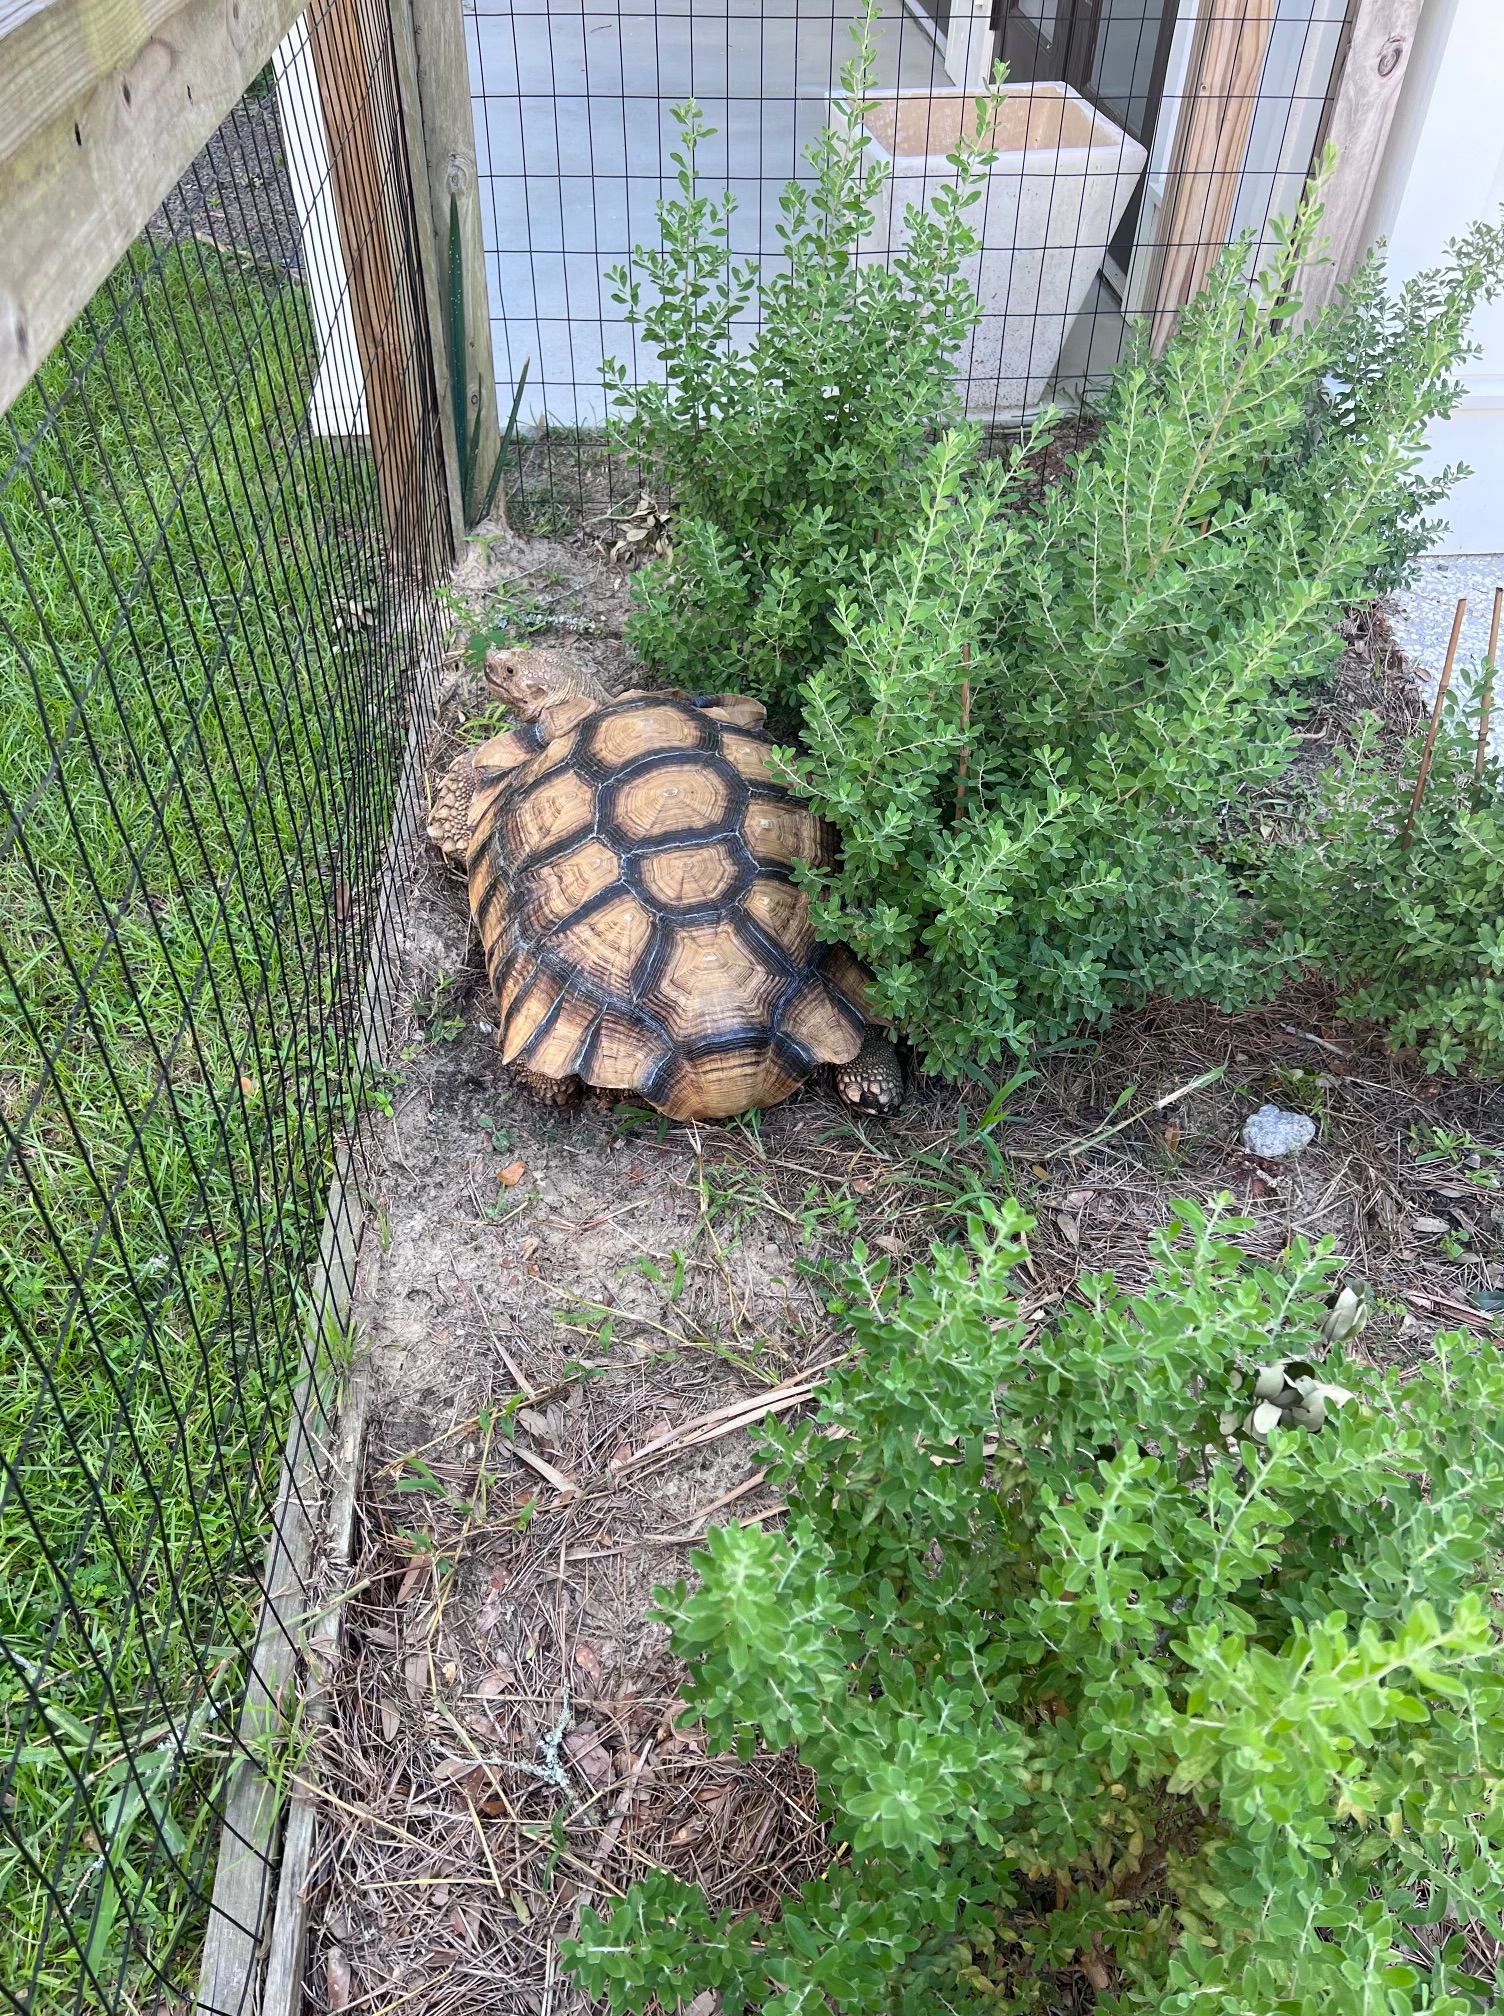
On Saturday Granddaughter Mina sent me a picture of this turtle, which was next door. She identified it as a “pet,” and I thought she was joking.
My first question: what kind of turtle is it?
She thought it a tortoise.
I could not find such a large tortoise in the list or images of native South Carolina turtles.
Along the google way I found this verbiage on identifying types of turtles: “If you know what to look for, you can spot the differences between freshwater, land, and sea turtles. Freshwater turtles are often small with flat feet. Land turtles, called tortoises, have big, round shells and flat feet. Sea turtles that have smooth, flat shells and flippers for swimming.” So tortoise is a category. But what kind of tortoise. Seems larger than the ones I looked at online.
And I found that the carapace pattern is called “rings.”
Aha! On Monday, I tried again and GOT IT. It’s a Sulcata Tortoise.
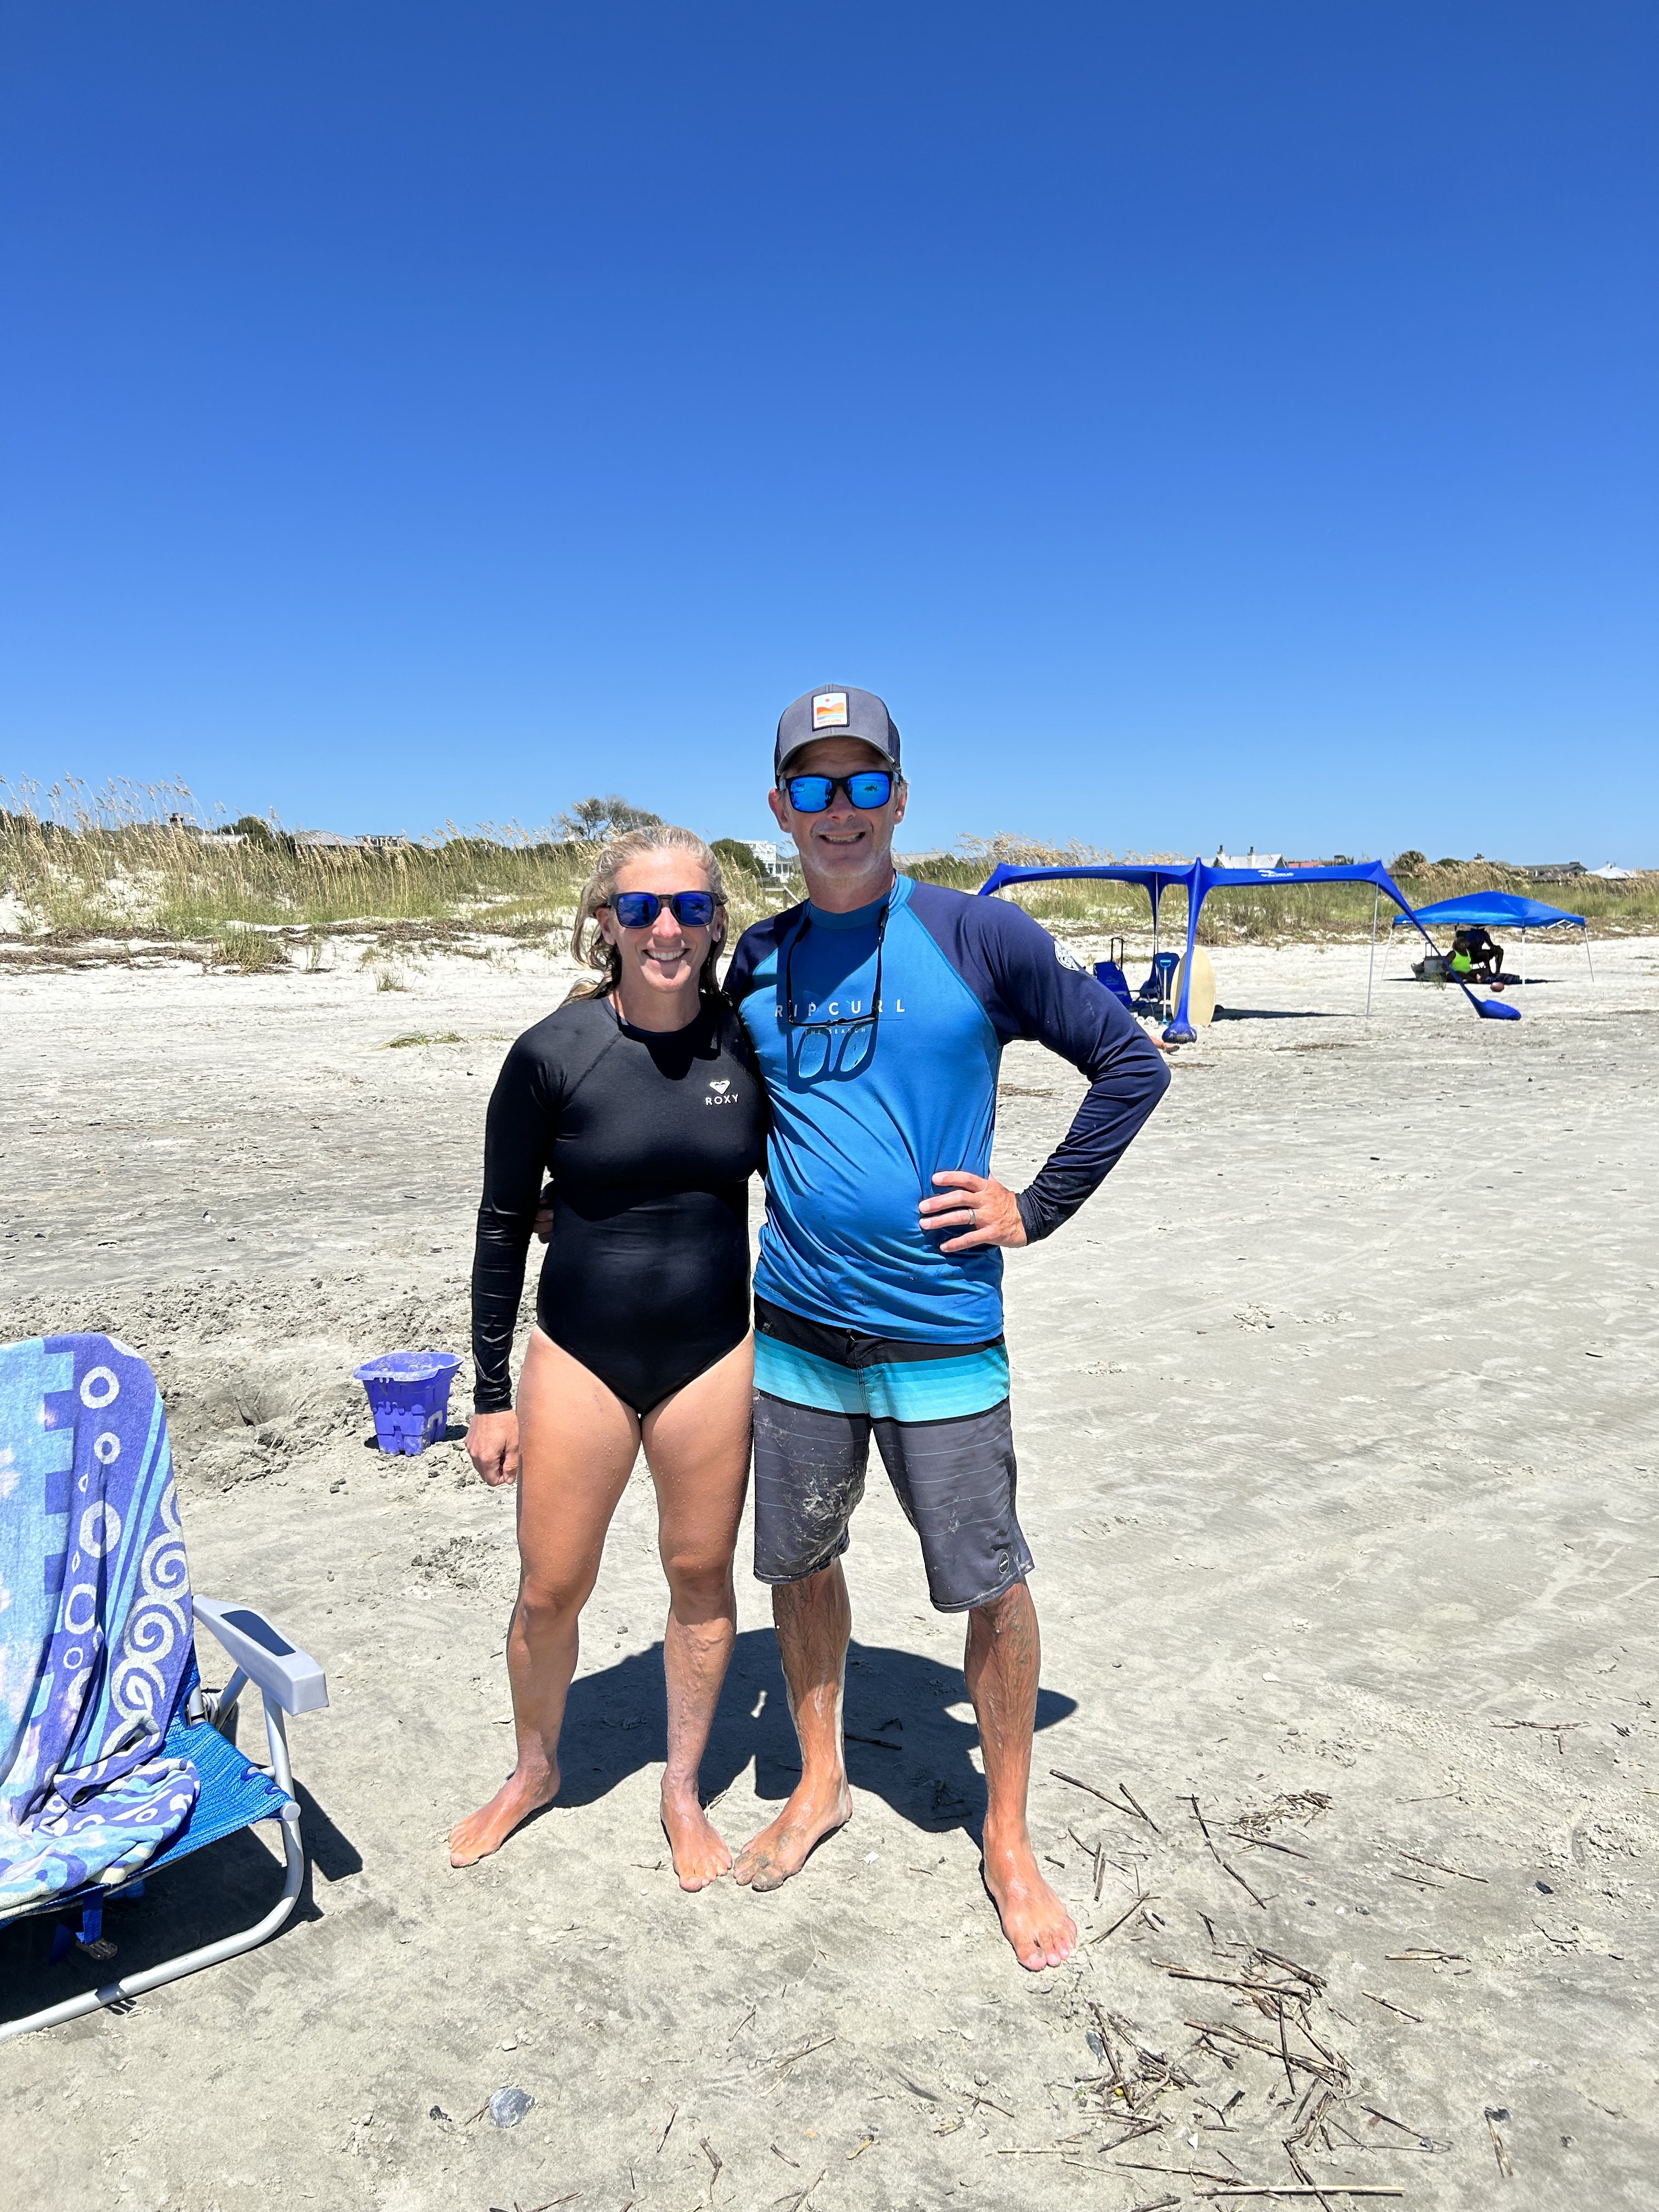
It’s finally cooler–so I went with son Bryan, Corinne, and two of the three girls to the Isle of Palms beach around 11:30. We arrived with chairs, lunches, water, and all the beach toys–which involves a ride to an access path on the golf cart, which also pulls a little blue cloth wagon filled with all one would need at the beach.
It was a wonderful outing, and I swam with Corinne and granddaughters. We all like to body surf, which I had not done for 30+ years. It was so much fun. It was full high tide with very little current, and the waves were perfect. Here I am with the granddaughters, just out of the surf.
Here are Bryan and Corinne–both of whom spent some time looking for shark’s teeth in the wake of the falling tide. But, more on shark teeth in another post. Note they wear sun-protective tops, which means that part of one’s body does not need sun screen. I have a good top too.
Corinne packs an awesome lunch for her family. Each has an individual Bento box filled with healthy food, and there are other snacks as well. (I bring my own lunch given my food issues.)
Here is Corinne unpacking the lunches. Her wide-brimmed hat protects her face, ears, and neck.
After lunch, the tide had dropped enough for Bryan to dig a hole that reached water, so he could make a sand castle. He loves doing that and has not had time this summer to make one, given all their summer trips away. This one is small compared to his usual sand castle efforts that are better started at a lower tide.
Building the sand castle becomes a family effort eventually. Those chairs in the background are ours, and you can see the blue wagon that carries everything but the surf boards, which go on top of the golf cart. I have a wagon like this one that I used for quilt retreats. They fold up and store so easily in a small space.
We swam again, we three wave riders, while Bryan built his sand castle.
I left them when I felt my Maine-white skin starting to get burned. My tan is better now, but not anywhere it needs to be for sun protection here. Once home I showered, washed all the beach clothing/towel, made a big espresso, and settled in to rest and read.
Idalia roared into Florida as a Category 4 hurricane last Tuesday and Wednesday. She was BIG and moved really fast. But, when she got to us here on the Charleston coast, sooner than predicted with the leading edge starting in earnest in the early afternoon Wednesday, she was a tropical storm.
We lucked out. The worst of Idalia, the center, was just to our west. Still, we got lots of bands that were “red” and “yellow”–denoting severe weather. And the local weather people were very wary of tornados developing. She did NOT depart land here at Charleston as predicted, and when we got the last of the bands in the early morning Thursday, her leading edge had reached Virginia Beach.
I have a little rain gauge out front–and the sheets of water filled its five inches in no time at all. So, in total, we got something north of 6 inches at my house. And, yes, the wind was bad, but not, according to son Bryan who lives on Isle of Palms, at hurricane force. He said they actually got a good night’s sleep.
One of the fun things for me, sometime in the mid-afternoon, was hearing local children playing outside. They were riding their bikes in the steady rain and with the wind diminished for that moment. They were whooping and laughing and careening their bikes through the sheet of steady rain. It was a moment of pure joy to see them having such fun.
I had defrosted a soup to have on hand–thinking I could eat it cold if I lost power. Fortunately, I was able to have a nice hot bowl of soup for dinner and supper. I augmented what I had frozen with 4 more chicken thighs I also had frozen. I threw in the handful of organic mixed salad greens I had left in the refrigerator, which included hearty baby greens like spinach, kale, and chard.
Later in the afternoon, my phone started what can only be called a siren. It was a tornado warning, and I was advised to take shelter immediately in an interior room. Later, there were reports and a video of a tornado picking up a car and hurling it off a local freeway.
At 7:30, the power went out for two hours. My little lantern, about which I blogged recently, was wonderful company. And neighbors called to check up on me and offered refuge in their houses. This picture is from the blog. I actually used the more expensive lantern as it is larger, more powerful, has a rechargeable battery that can work also with installed batteries, and can recharge a phone if needed.
When the power returned, everything came back online just fine–unlike the power outage some months back that caused the refrigerator breaker to trip. Fortunately I found it not on fairly quickly.
Basically, I spent the day in my little tv sitting room reading SWIMMING LESSONS, by Mary Alice Monroe. It was a sweet story about a young woman who lives on Isle of Palms and who gets involved with caring for the big loggerhead turtles that nest on these barrier islands each year. She goes on to pioneer the turtle rescue hospital at the Charleston Aquarium–with lots of help of course.
Today, there are many volunteers who work in this turtle arena, and it was fun to read what all they do in this fictional tale. They walk the beaches in the early morning to find turtle tracks and to locate and mark a nest of eggs that is buried around 2-feet deep. When it is time for that nest to hatch, volunteers sit up all night to wait for the eruption of baby turtles from the nest and to make sure they get to the water–which must be done on their own. Beach side houses do not turn on outside lights at this time of year as those lights can make the turtles turn toward the houses and not the water.
It turns out that Mary Alice Monroe, affectionally known as MAM, lives on Isle of Palms and, herself, has helped pioneer these turtle efforts. Today, the Charleston Aquarium is world famous for its turtle hospital.
My new little crape myrtle tree was whipped around in the wind like crazy. Here’s a picture I took a day or so before the storm. Look at all those blooms.
The branches are very pliable and bend easily in the wind, which we all have to do to survive life, right? Some of the blossoms got stripped, but the tree is fine and probably loved all the rain going down to her roots.
Hurricanes that hit this coast mostly develop off the coast of North Africa. There is one the weather people are watching now: Katia. I am holding my breath.
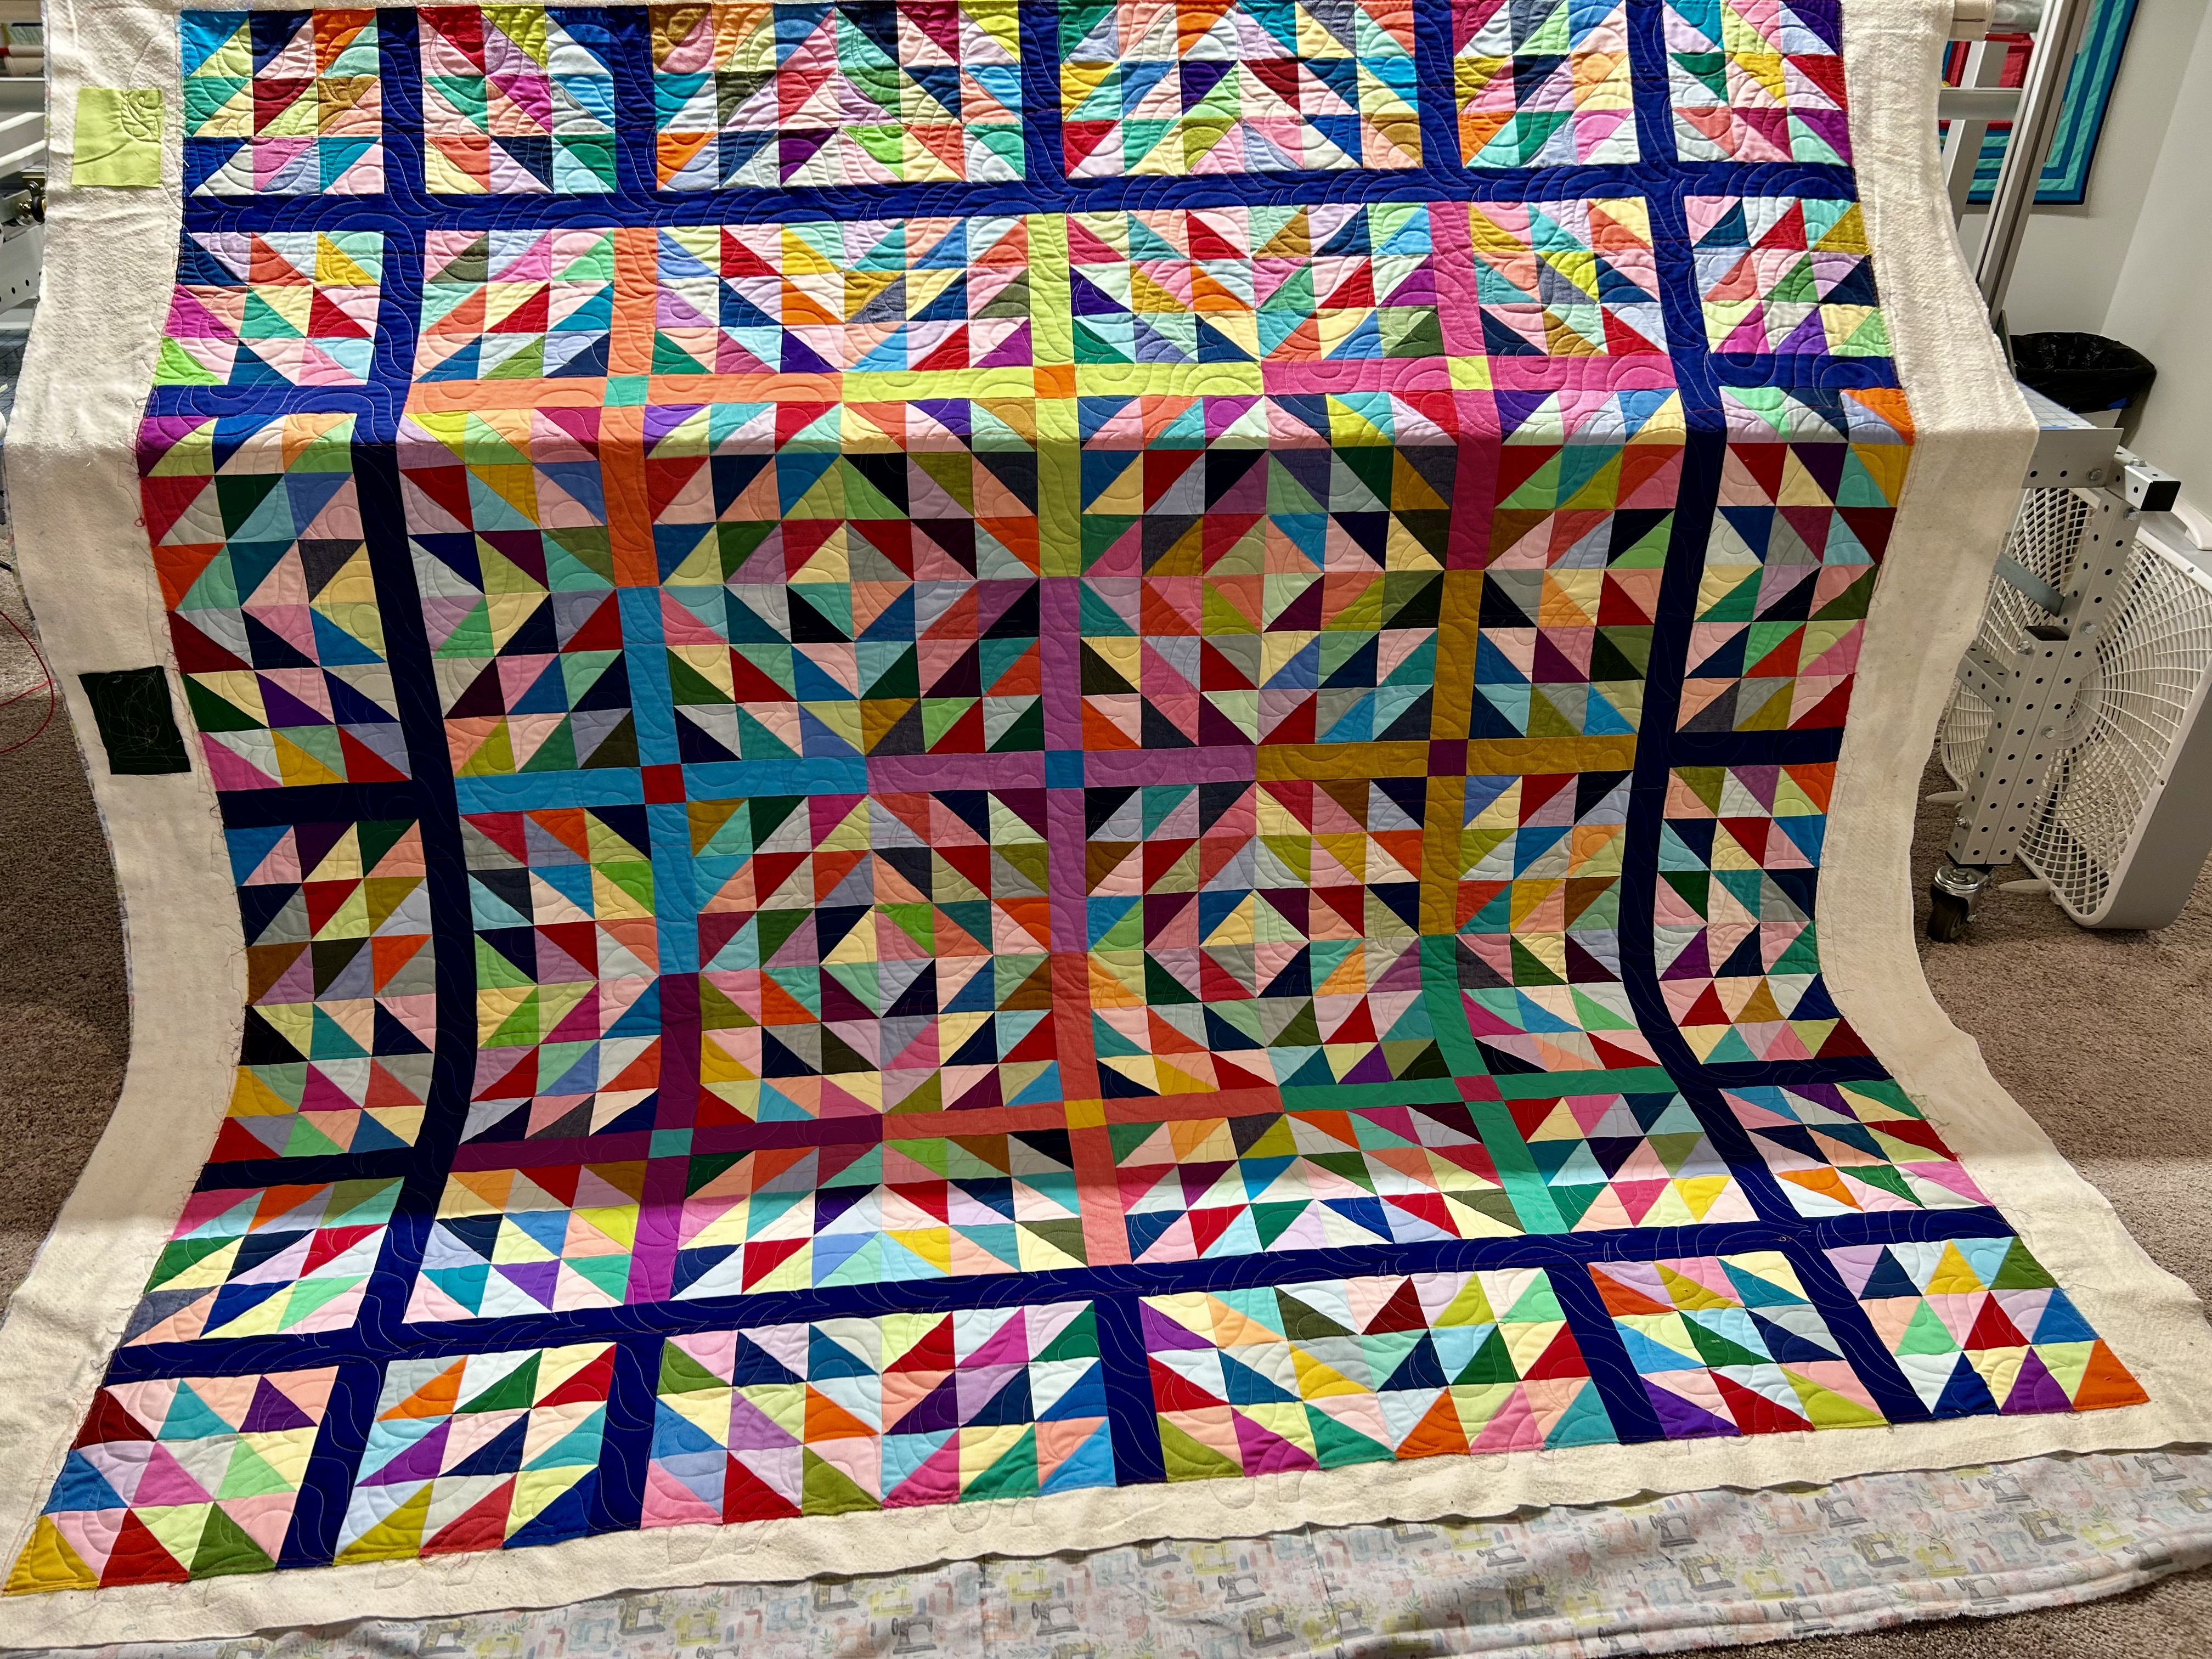
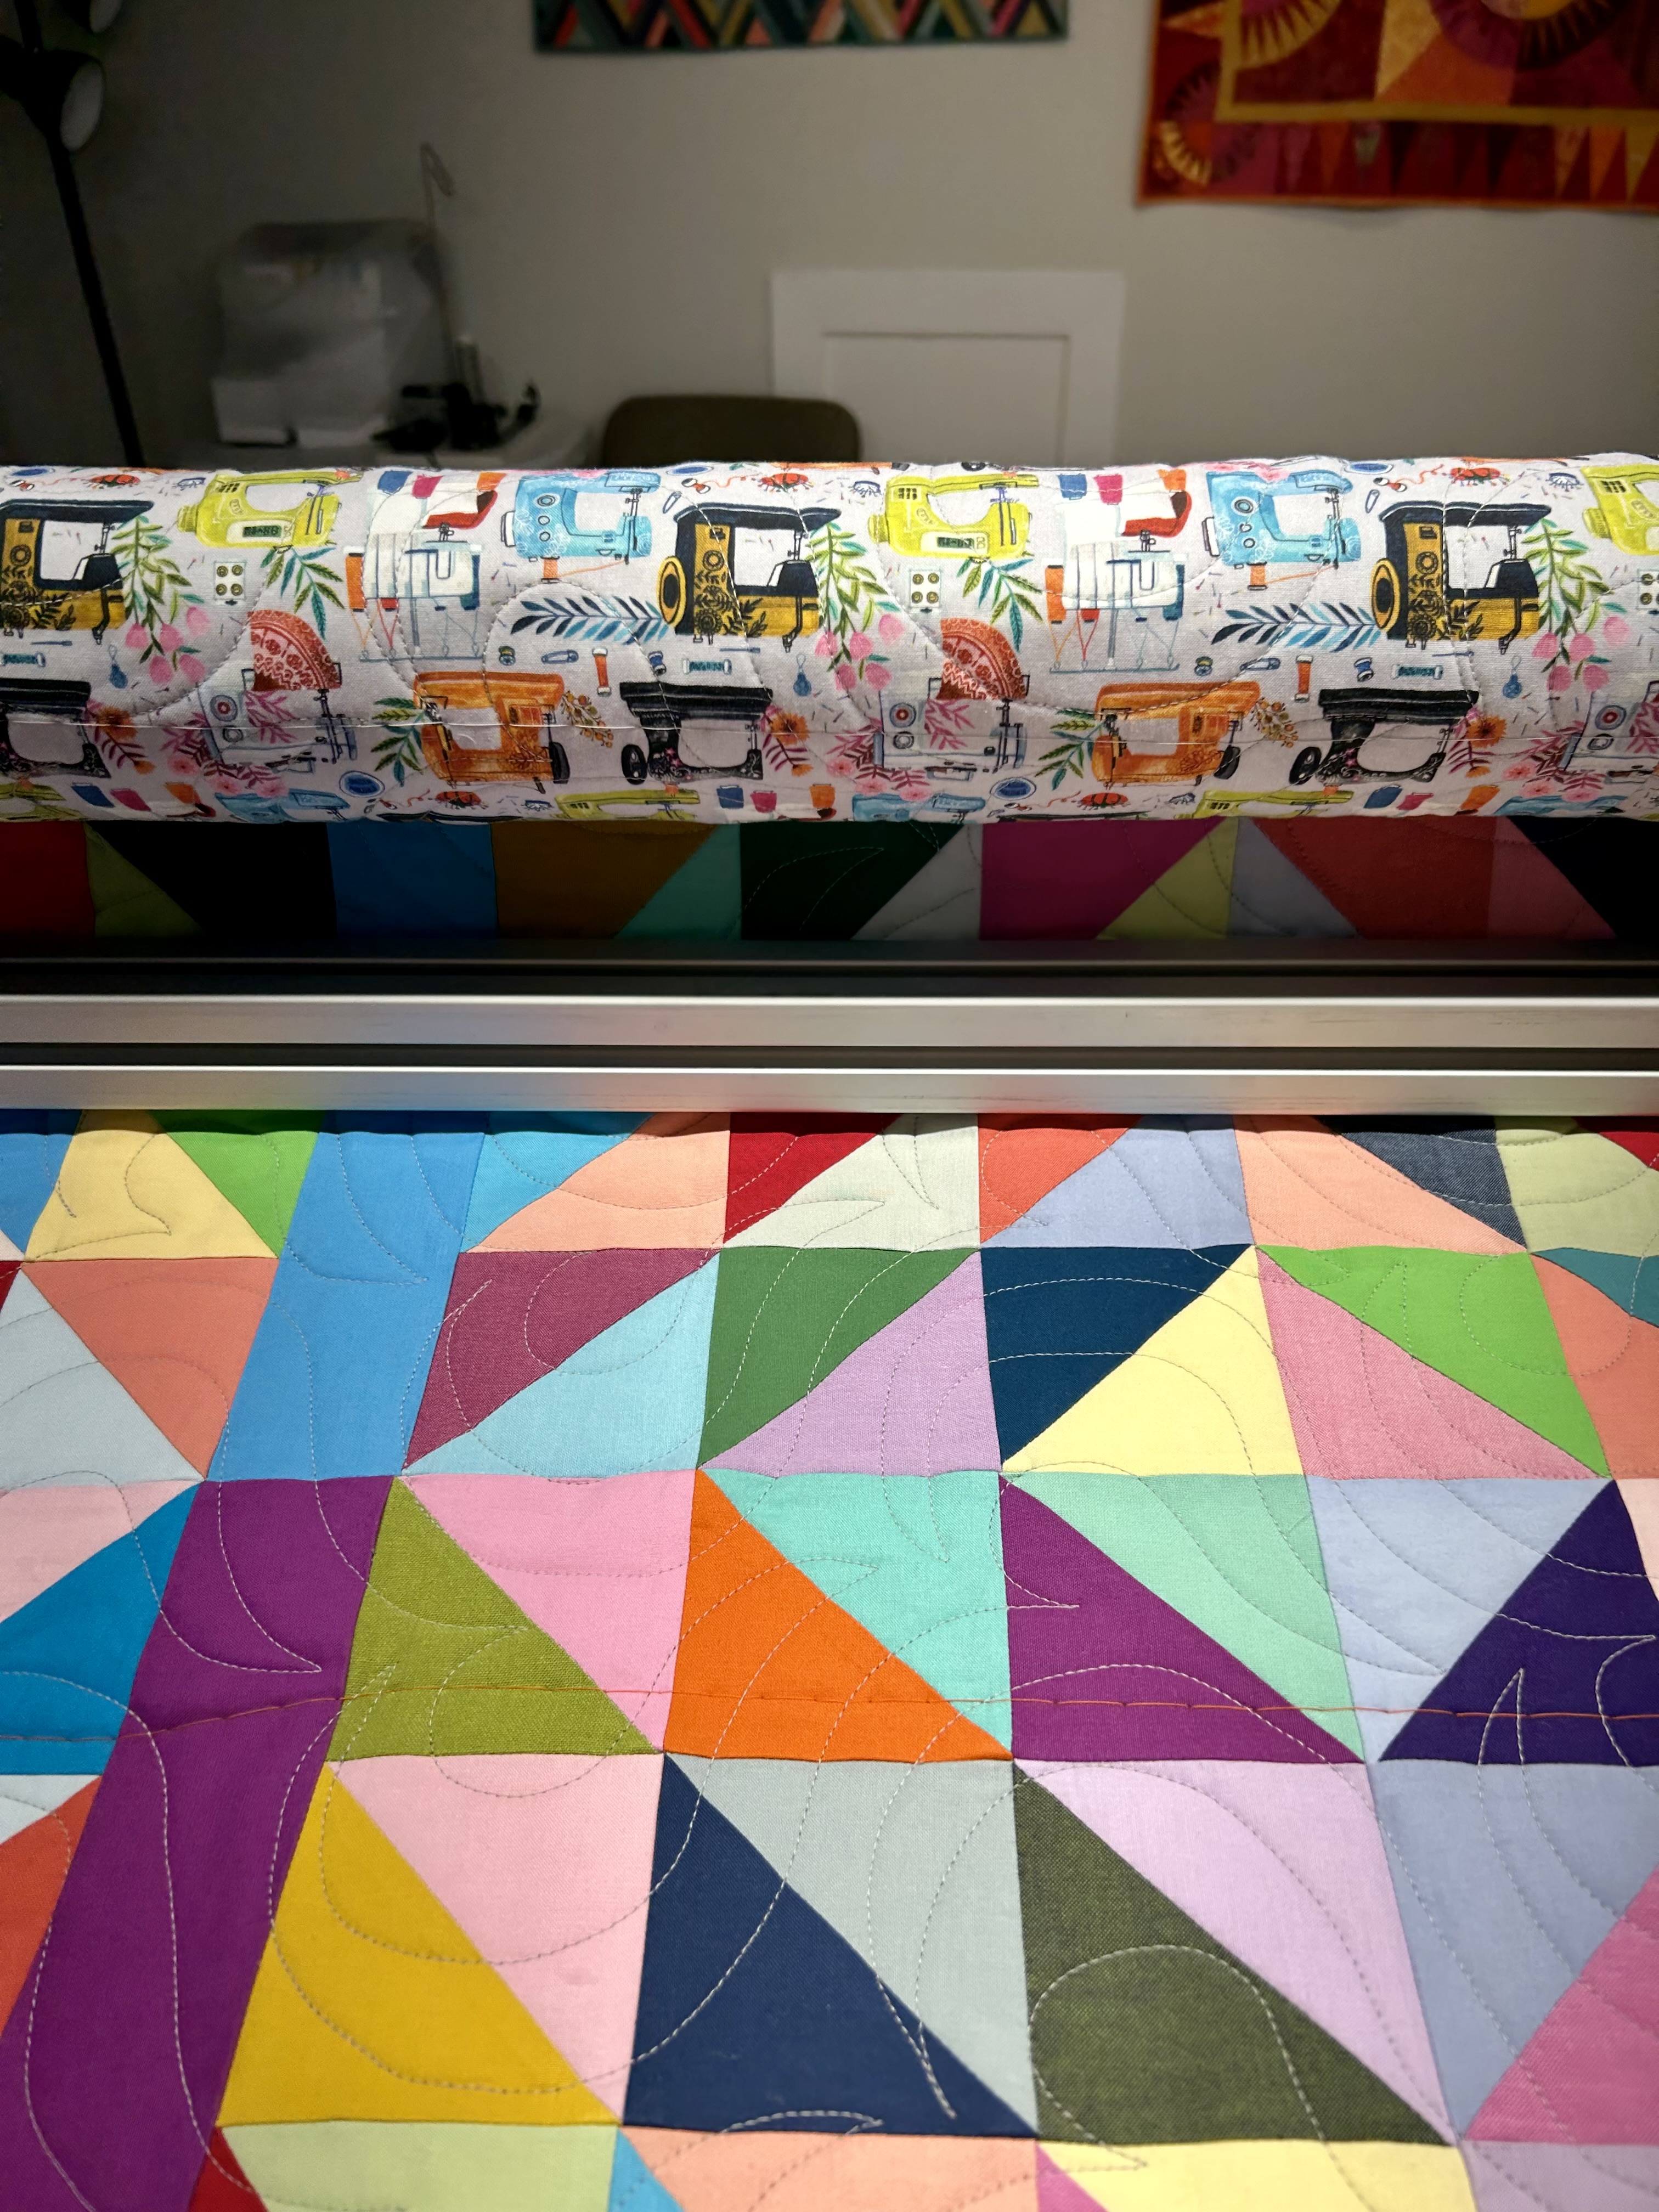
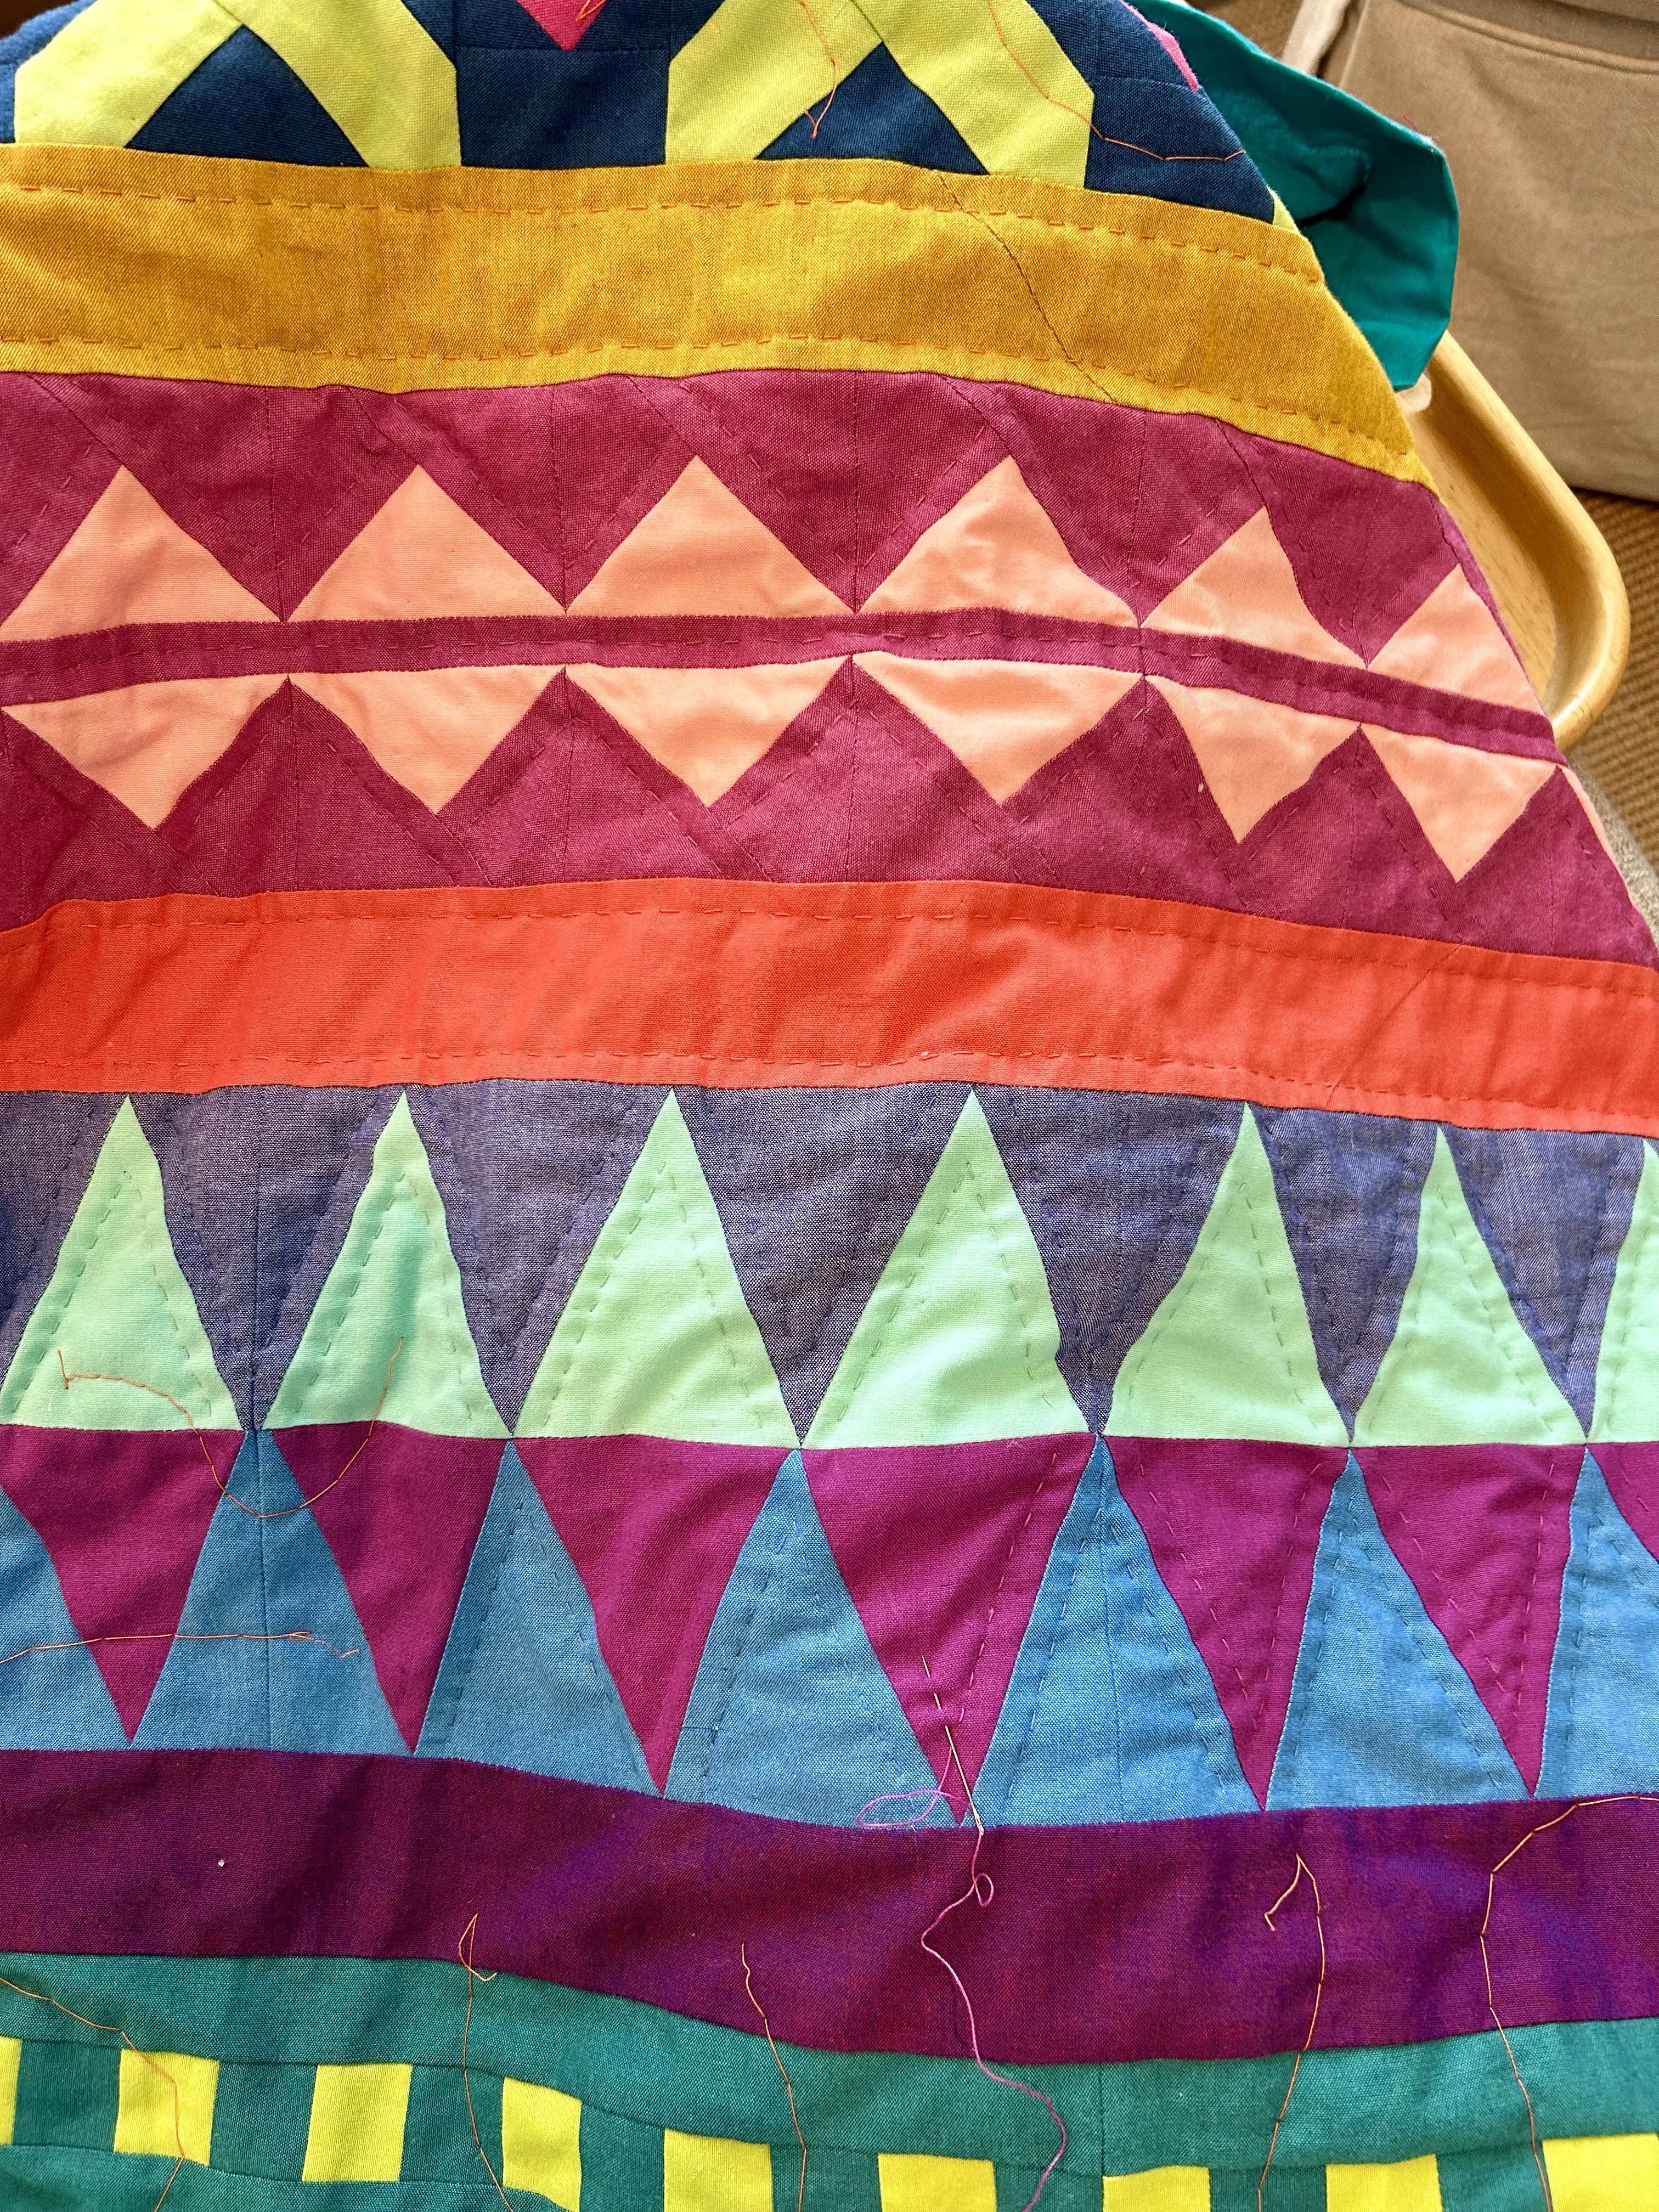
I took “Bonanza” off the longarm early evening last night.
And, WOW, she is beautiful.
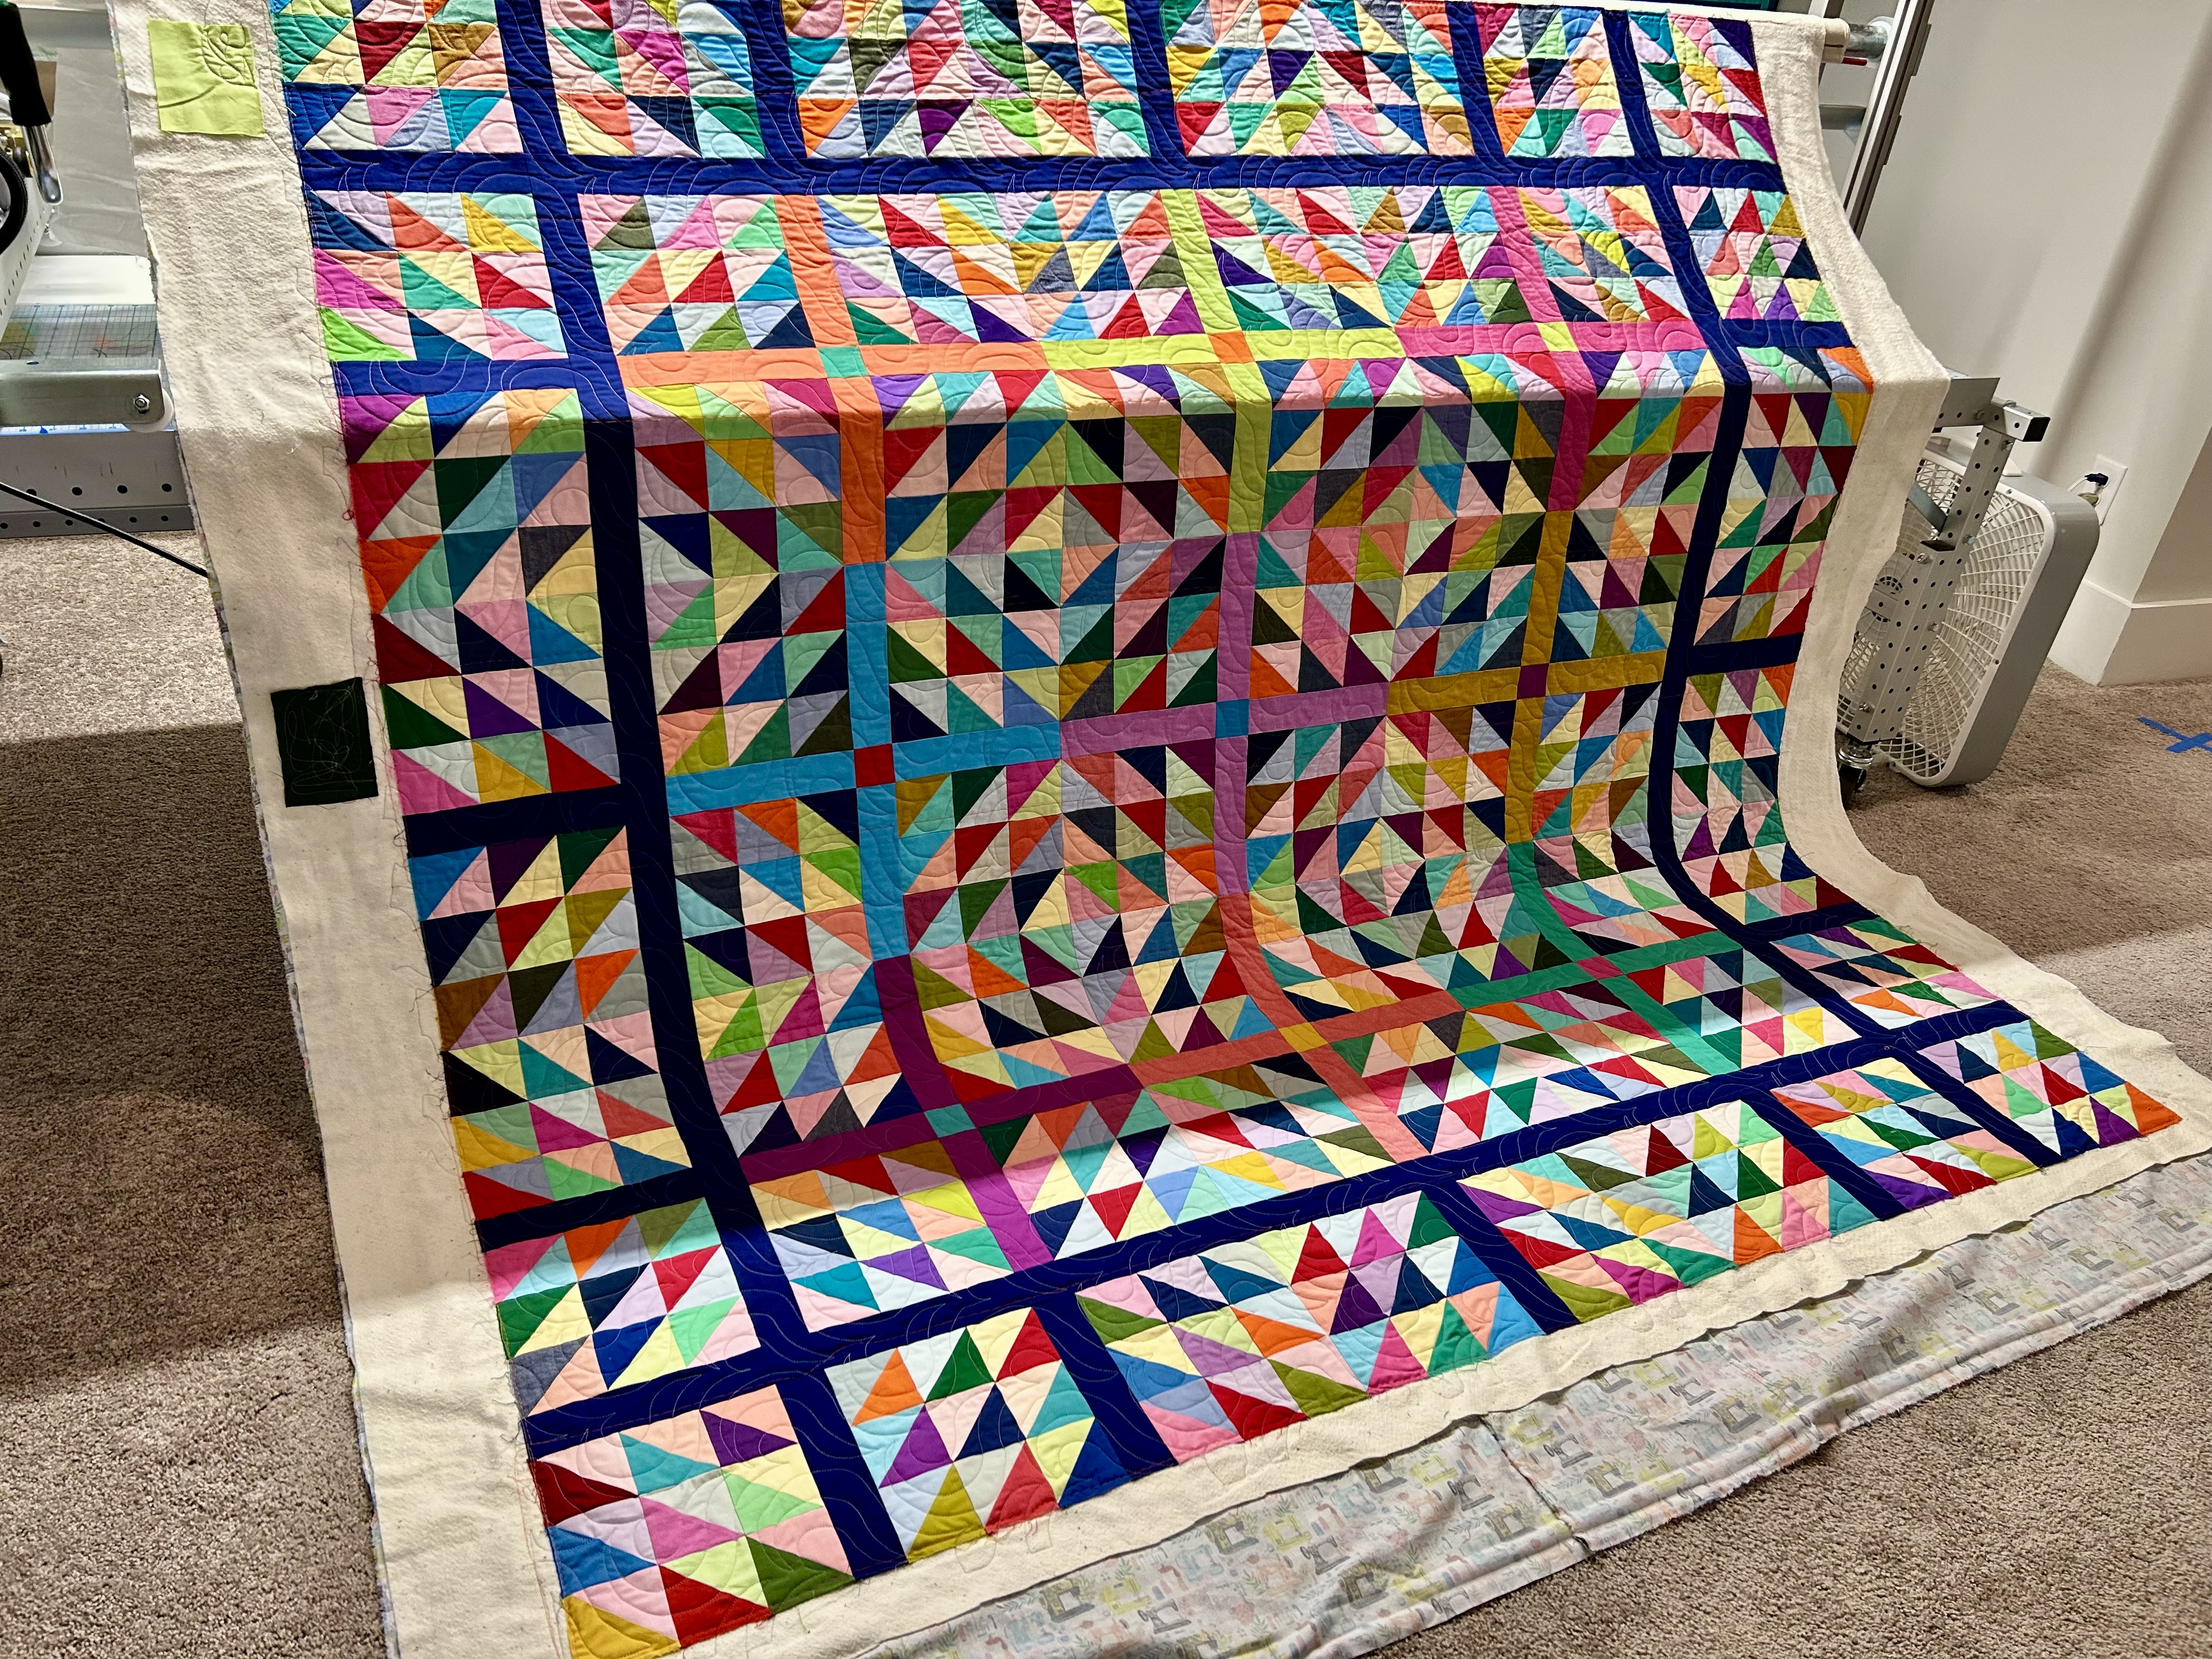
I called her “Bonanza” because she is made with leftover solid scraps from my fabric stash. The backing was there too–bought two years ago with birthday money from my younger son and his sweet wife. I would also like to say that “Bonanza” was inspired by designer Tara Faughnan’s recent work with half-square triangles. She has a new pattern out featuring them–which you can see on her web site.
I am fascinated with the secondary patterns that emerge with the use of light/dark half-square triangles. And that’s how this quilt got to be 83 inches square.
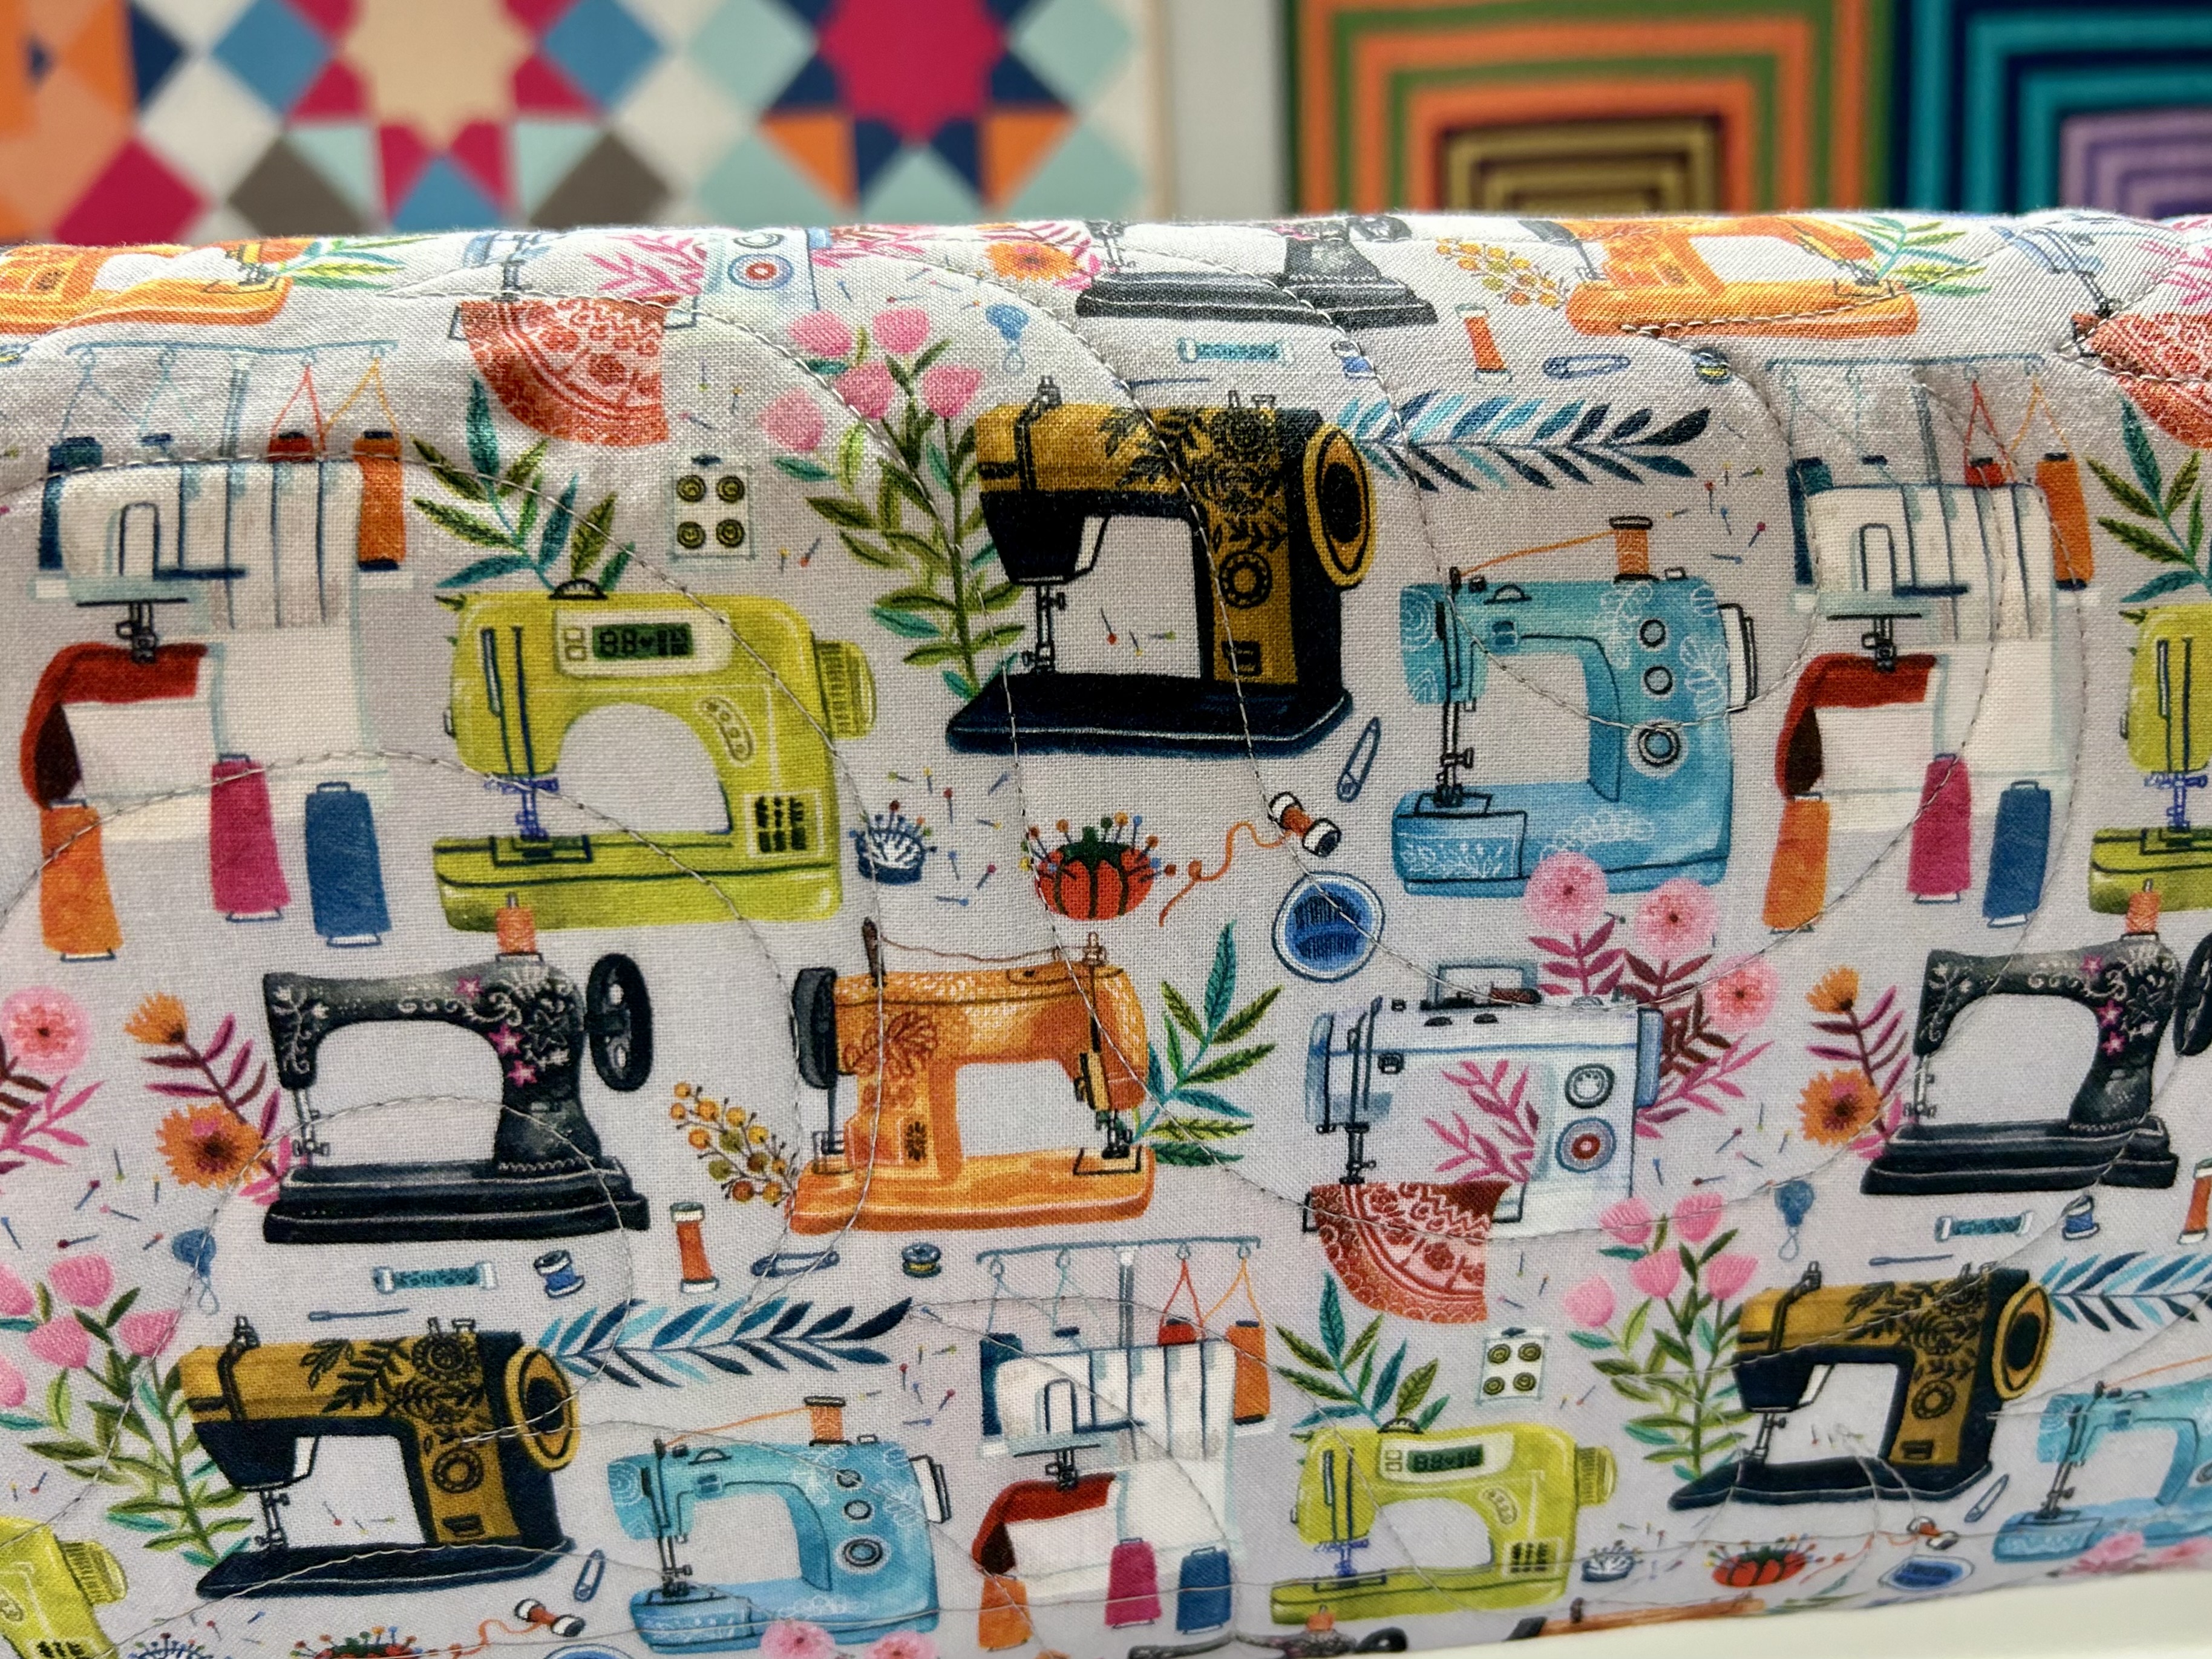
Here’s the backing:
You can see how the colors support the quilt top:
The pantograph, sewn in light grey thread, is “Bayside.” I wanted a pattern that would just lay down solid coverage that wasn’t too intense. “Bayside” is always a good choice.
Here’s a pic of the texture Bayside provides.
And here’s the quilt from another angle. The light is not great in the room where my longarm lives–especially when it is getting dark outside. But I have great light on my longarm from its light bar. And I can drag in other light if needed, but so far, I have not.
I am going to bind in the same dark “midnight” blue/purple used (Kona Nightfall) in the sashing. I have enough of this fabric in my stash, and I’ll cut and make that binding today–after I trim “Bonanza” on the back of the longarm. I’ll likely go ahead and install the binding as that will stabilize the edges of this quilt.
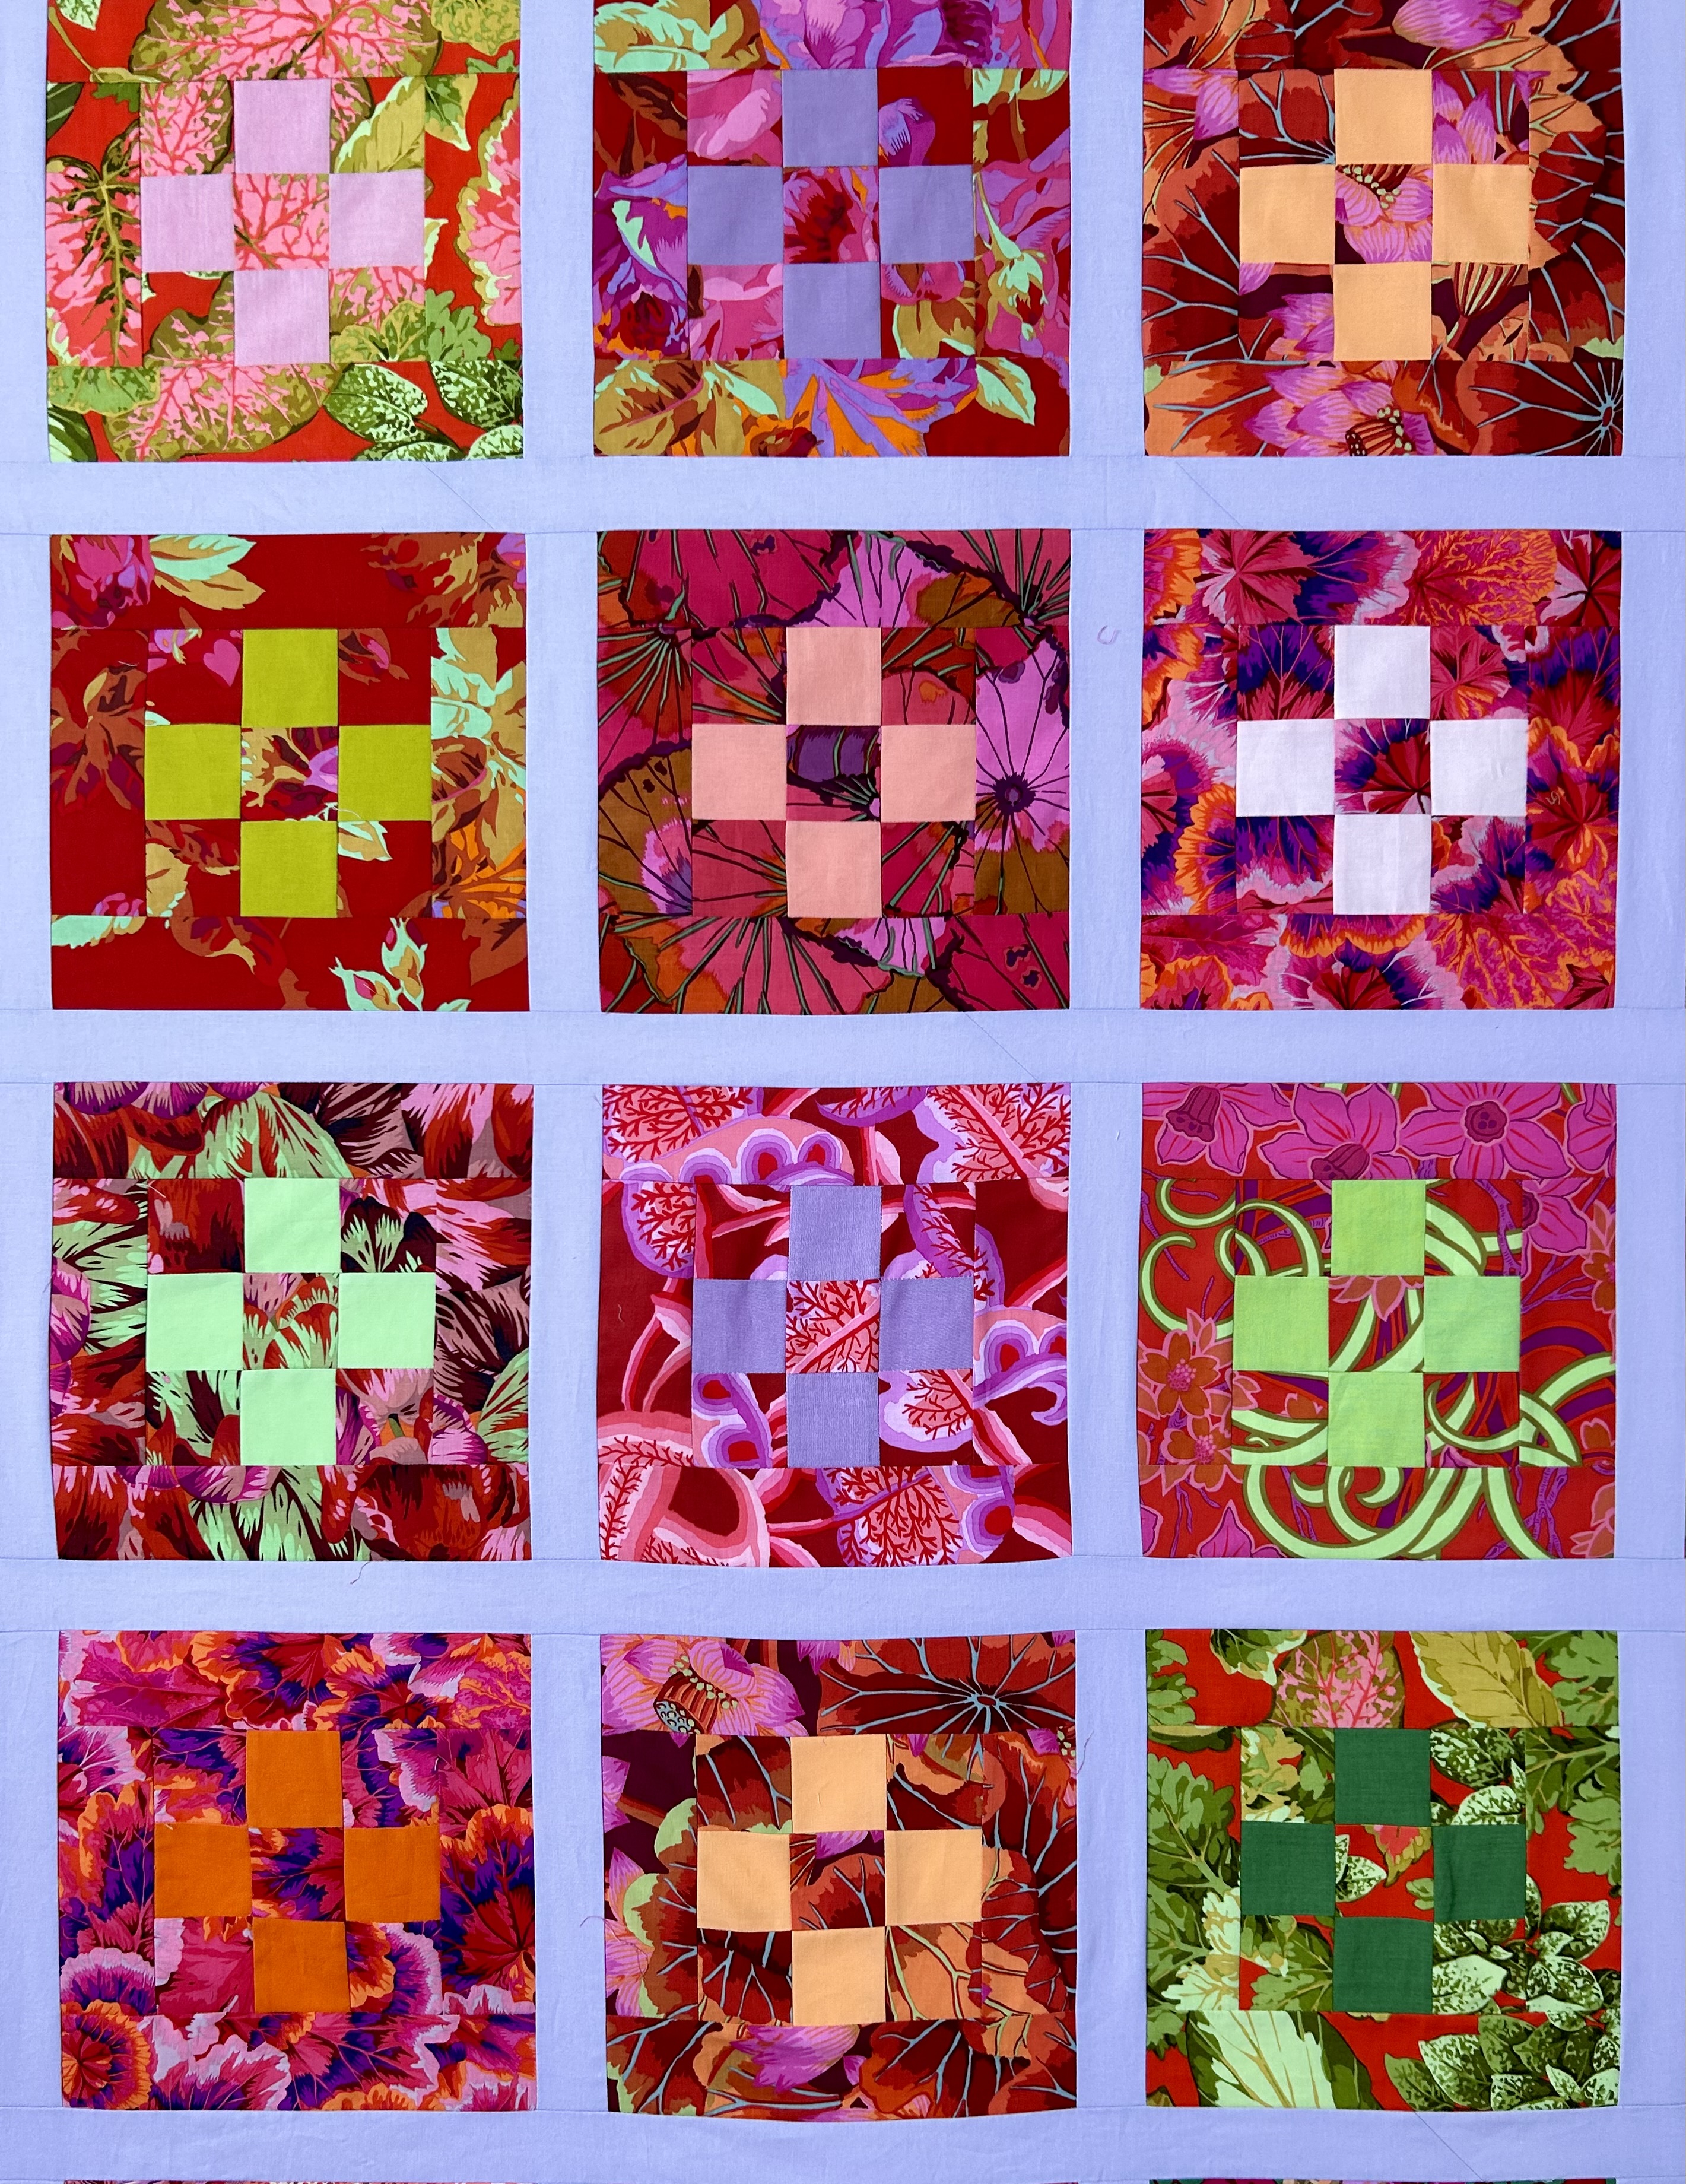
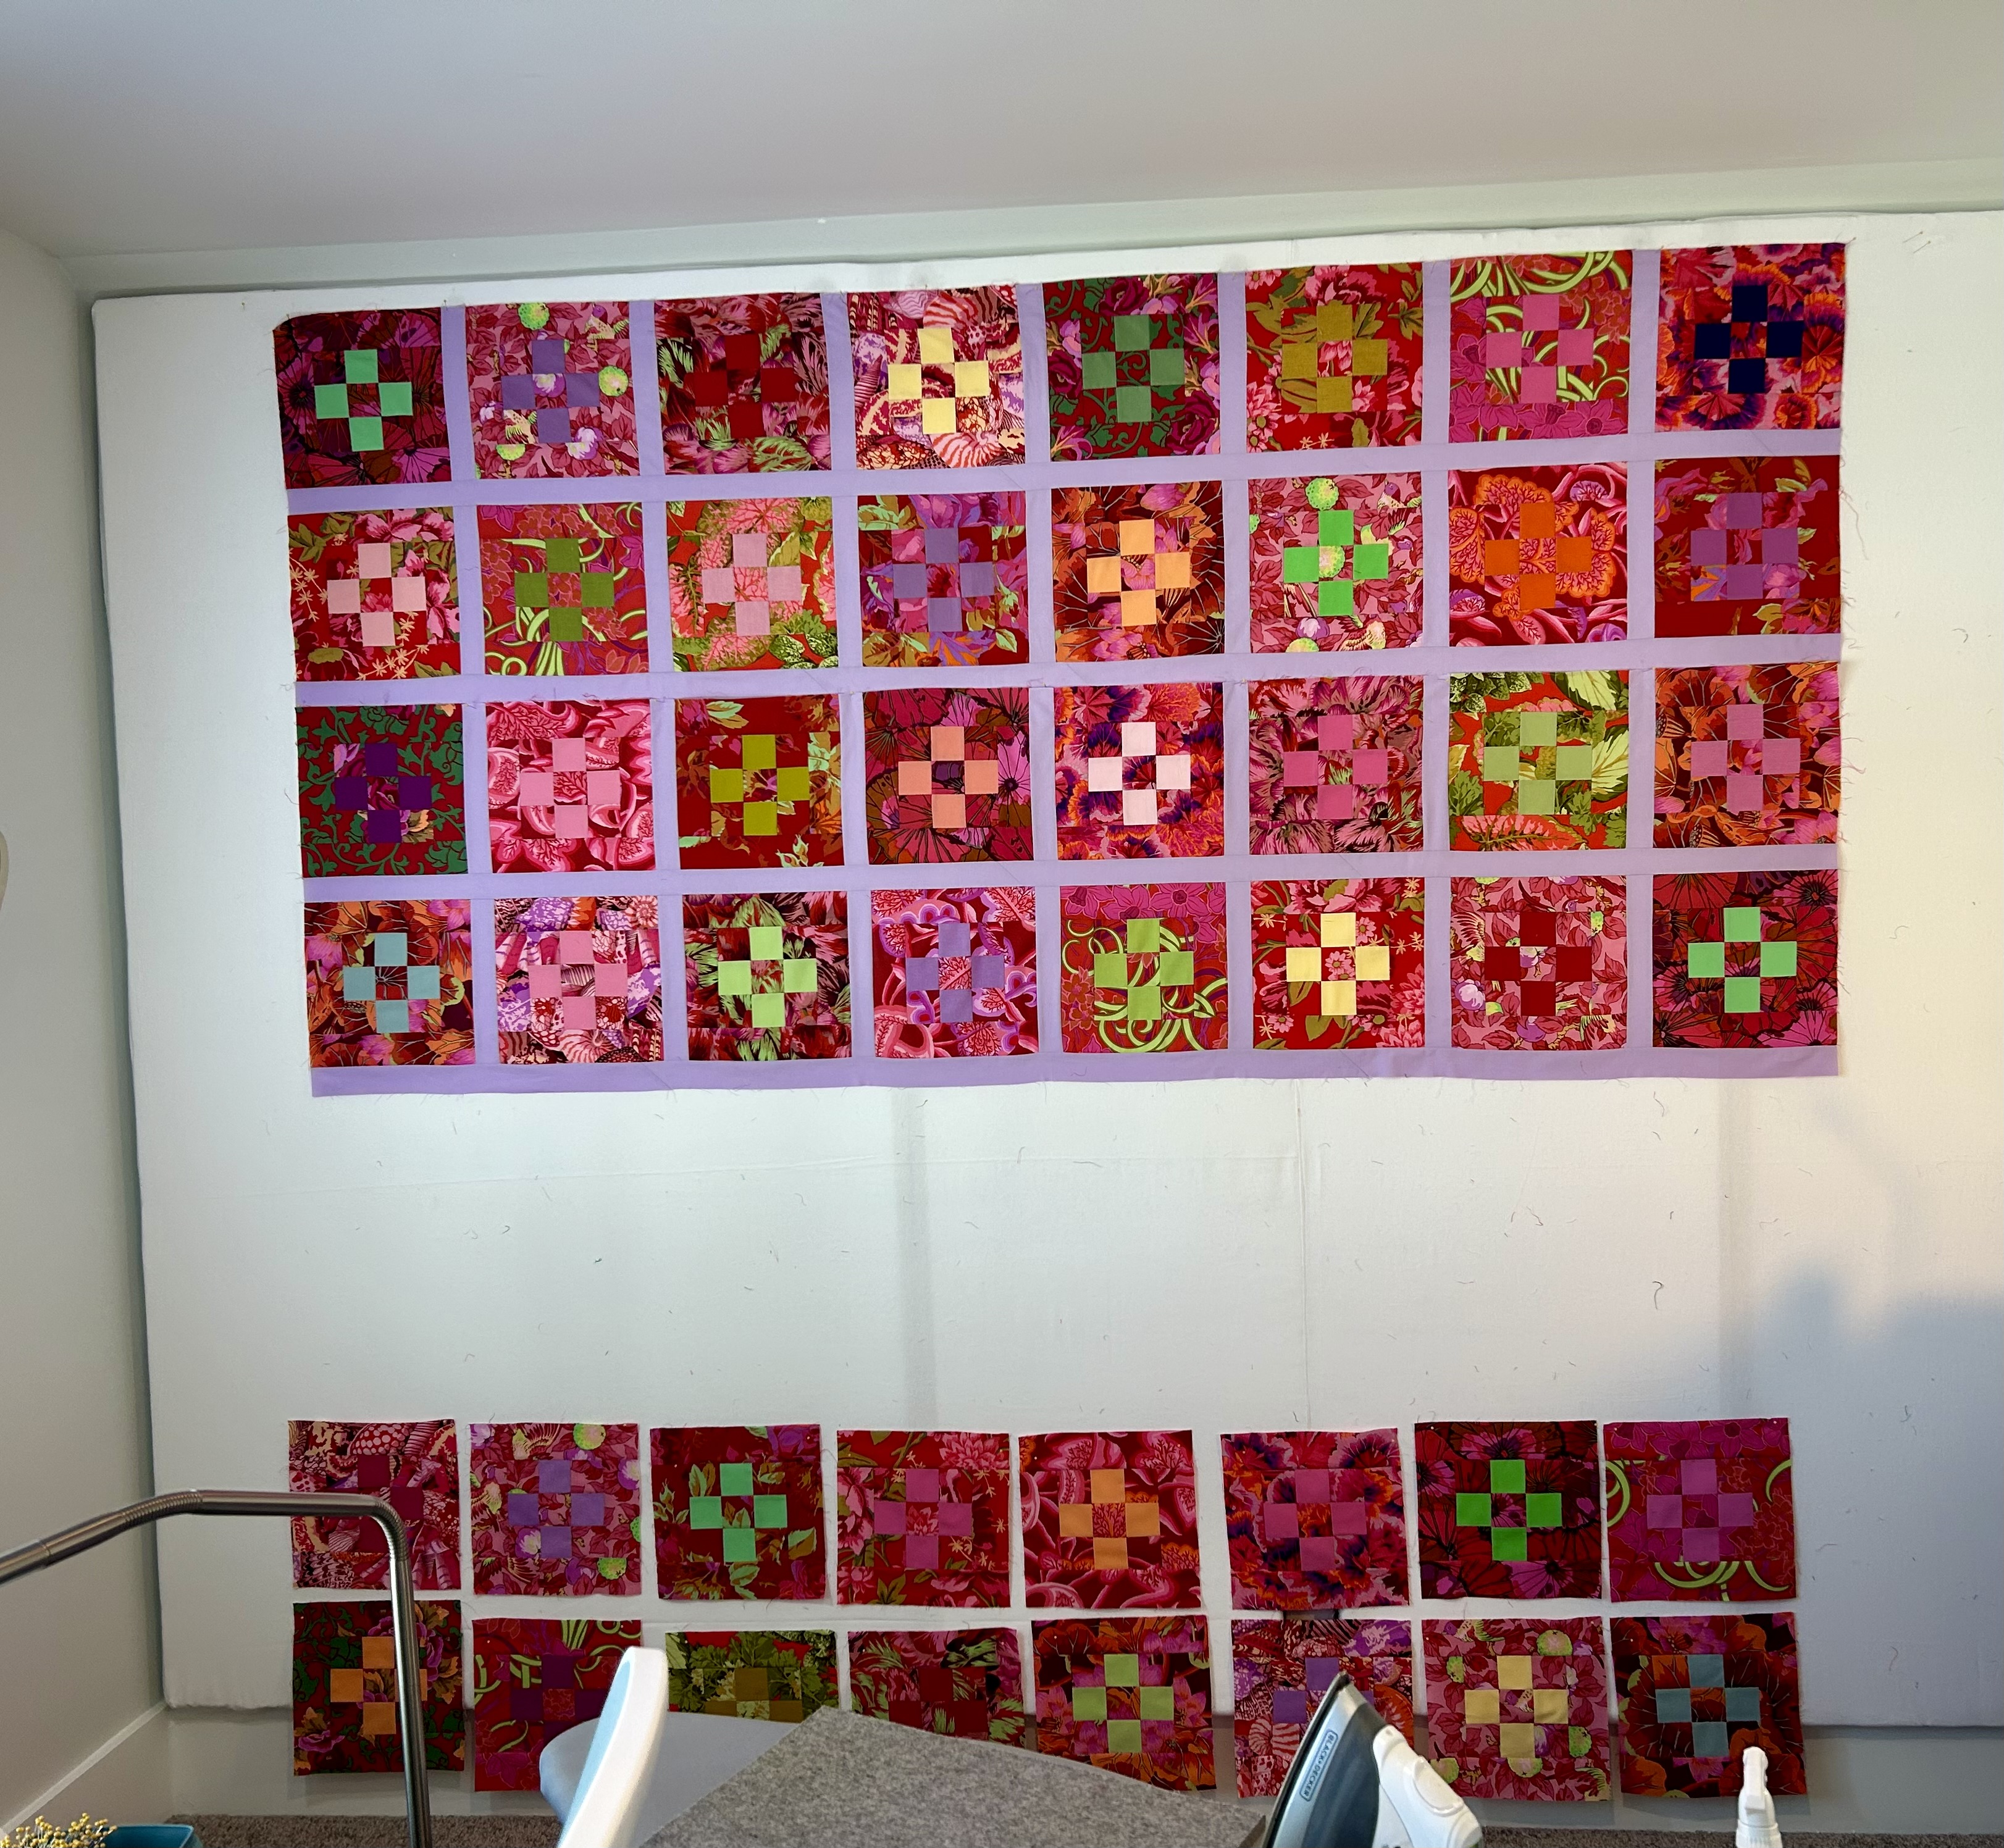
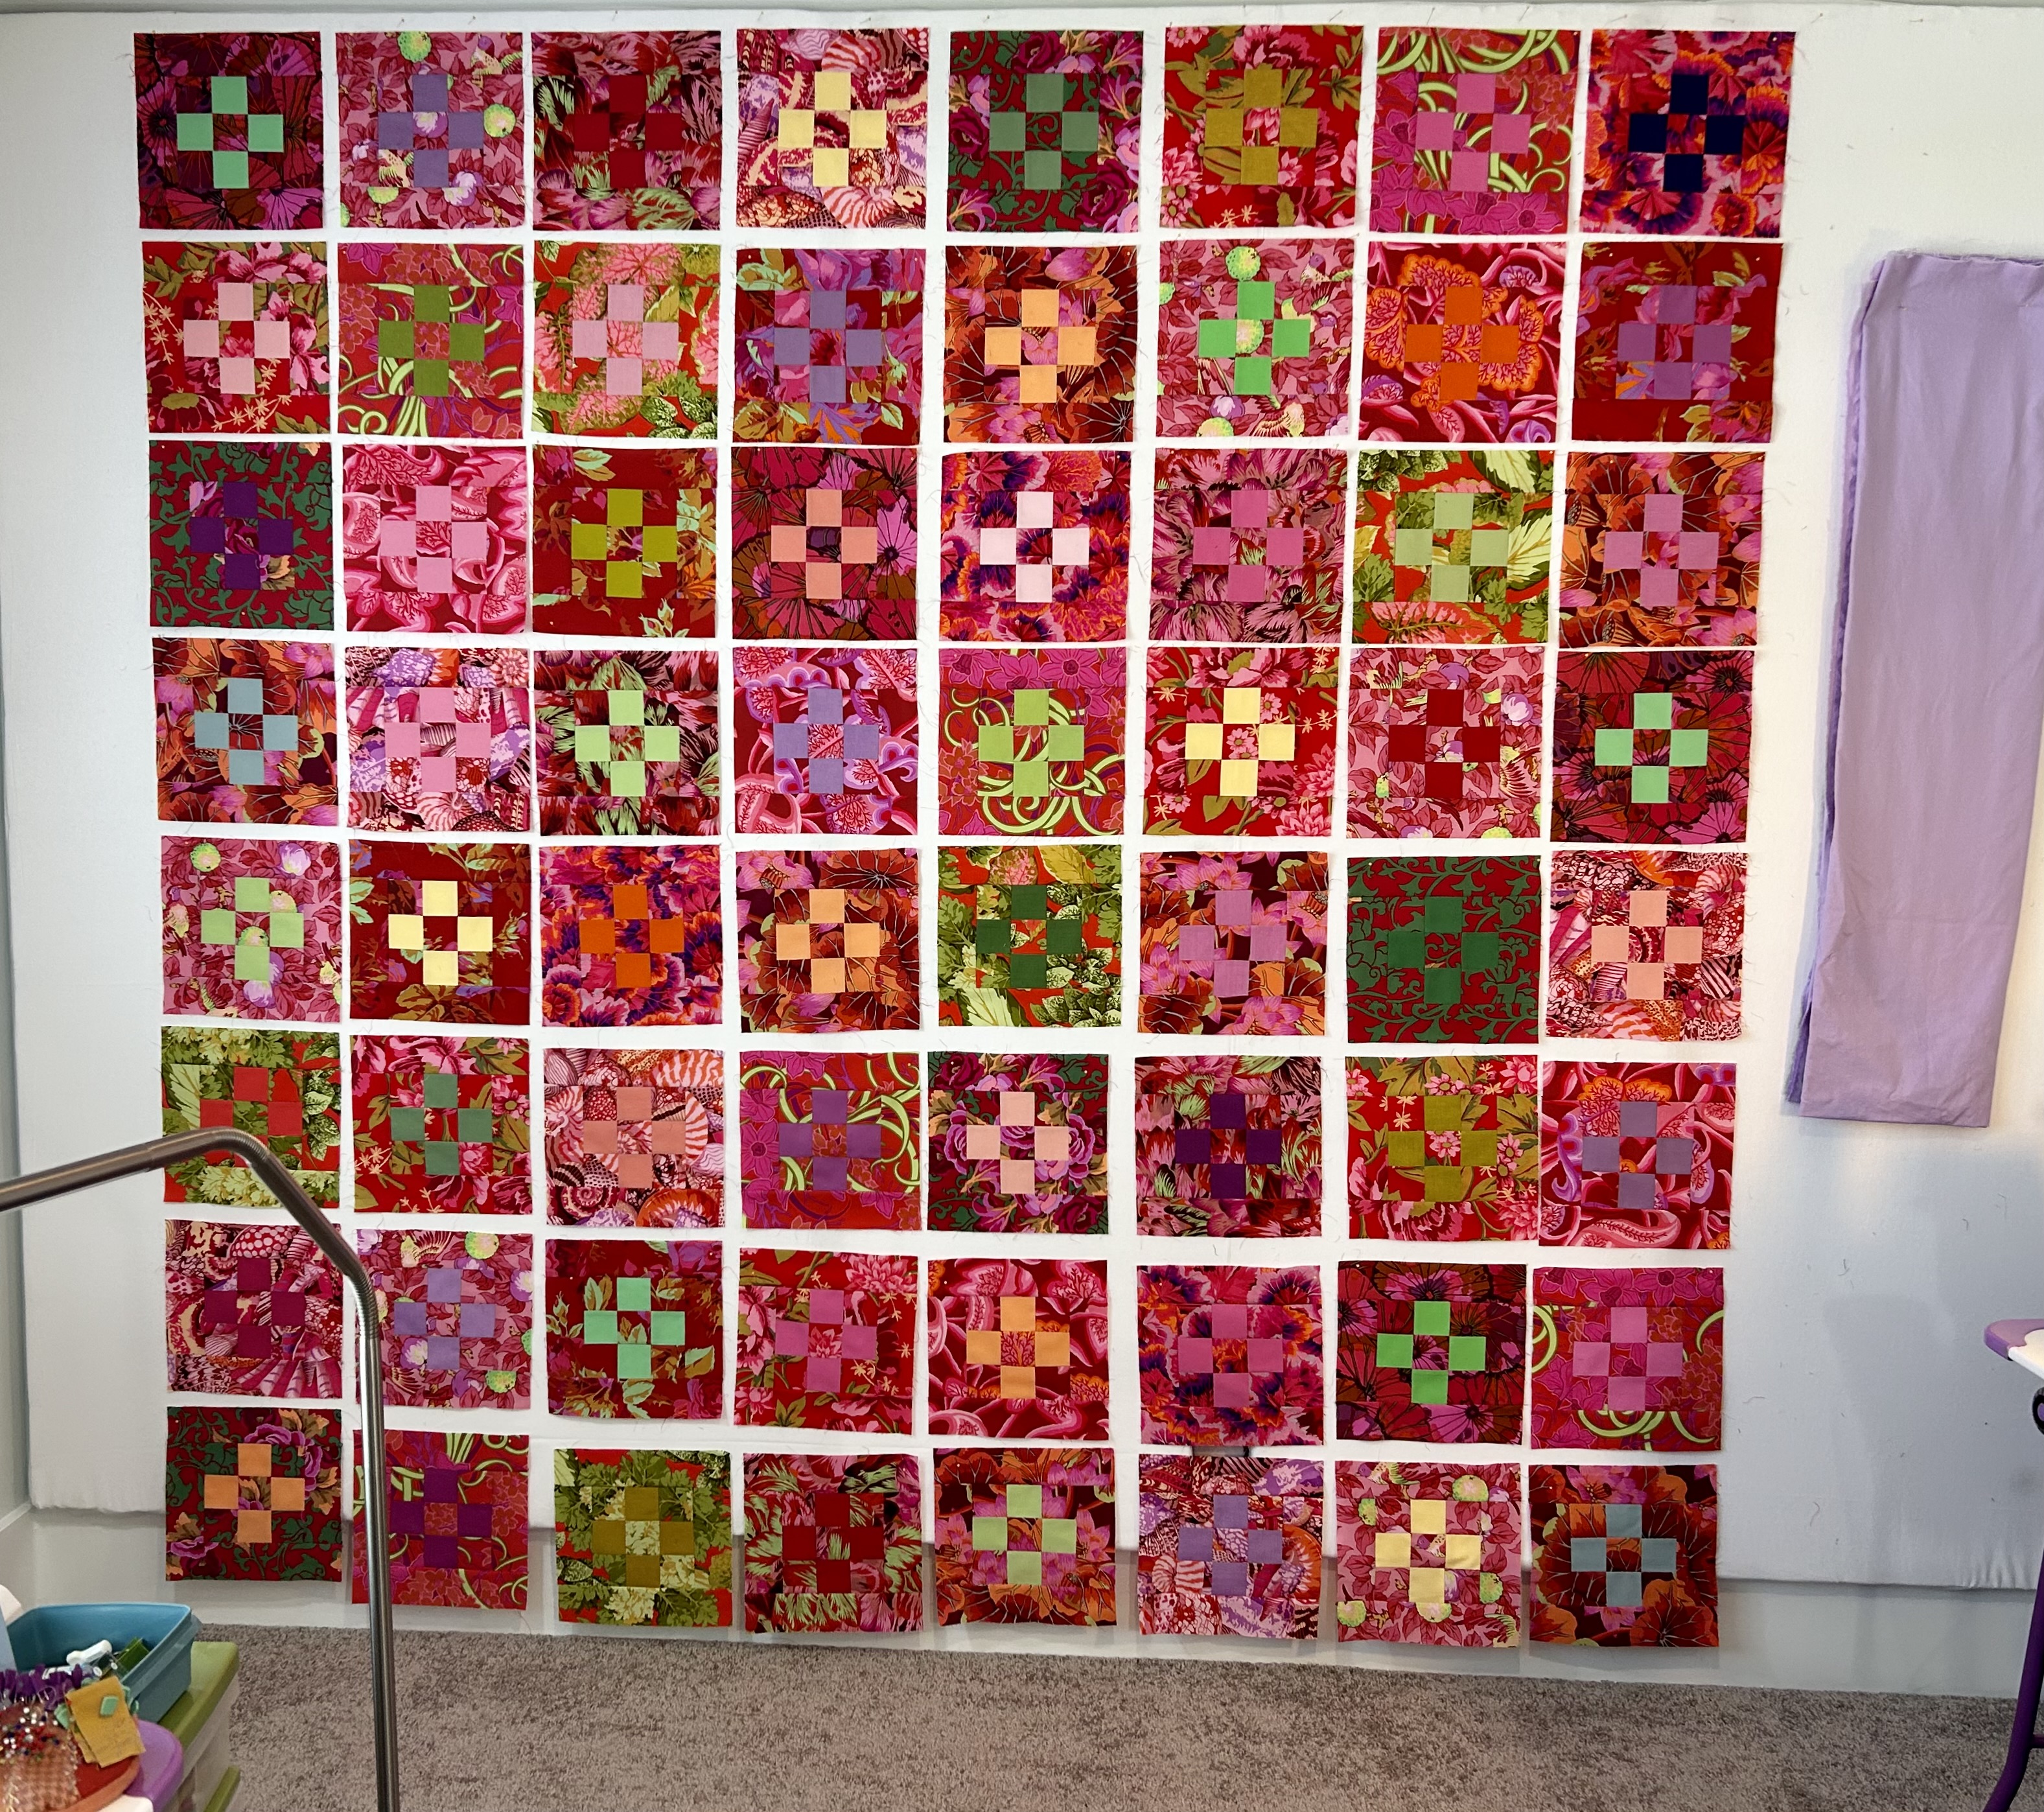
Meanwhile, the Summer Camp mystery quilt blocks are going up on the design wall. When I get them up I’ll let them sit for a bit so I can move around blocks as I see what needs moving. I’ll prep “Happy’s” backing (the quilt from hell) and put her on the longarm to be basted for hand quilting. And “Red Positivity” awaits her turn on the longarm–so named by a blog reader who noted the plus signs in the middle of each block.
As summer draws to a close, my summer quilty work is also gradually finishing up. It’s been a good summer.
It is a “murky” kind of Wednesday morning here today. And the temps are cooler. Maybe we will get a bit of rain. Maybe I will have dinner on the porch today.
On Monday morning, I took my grill propane tank to the local True Value hardware store to have it refilled.
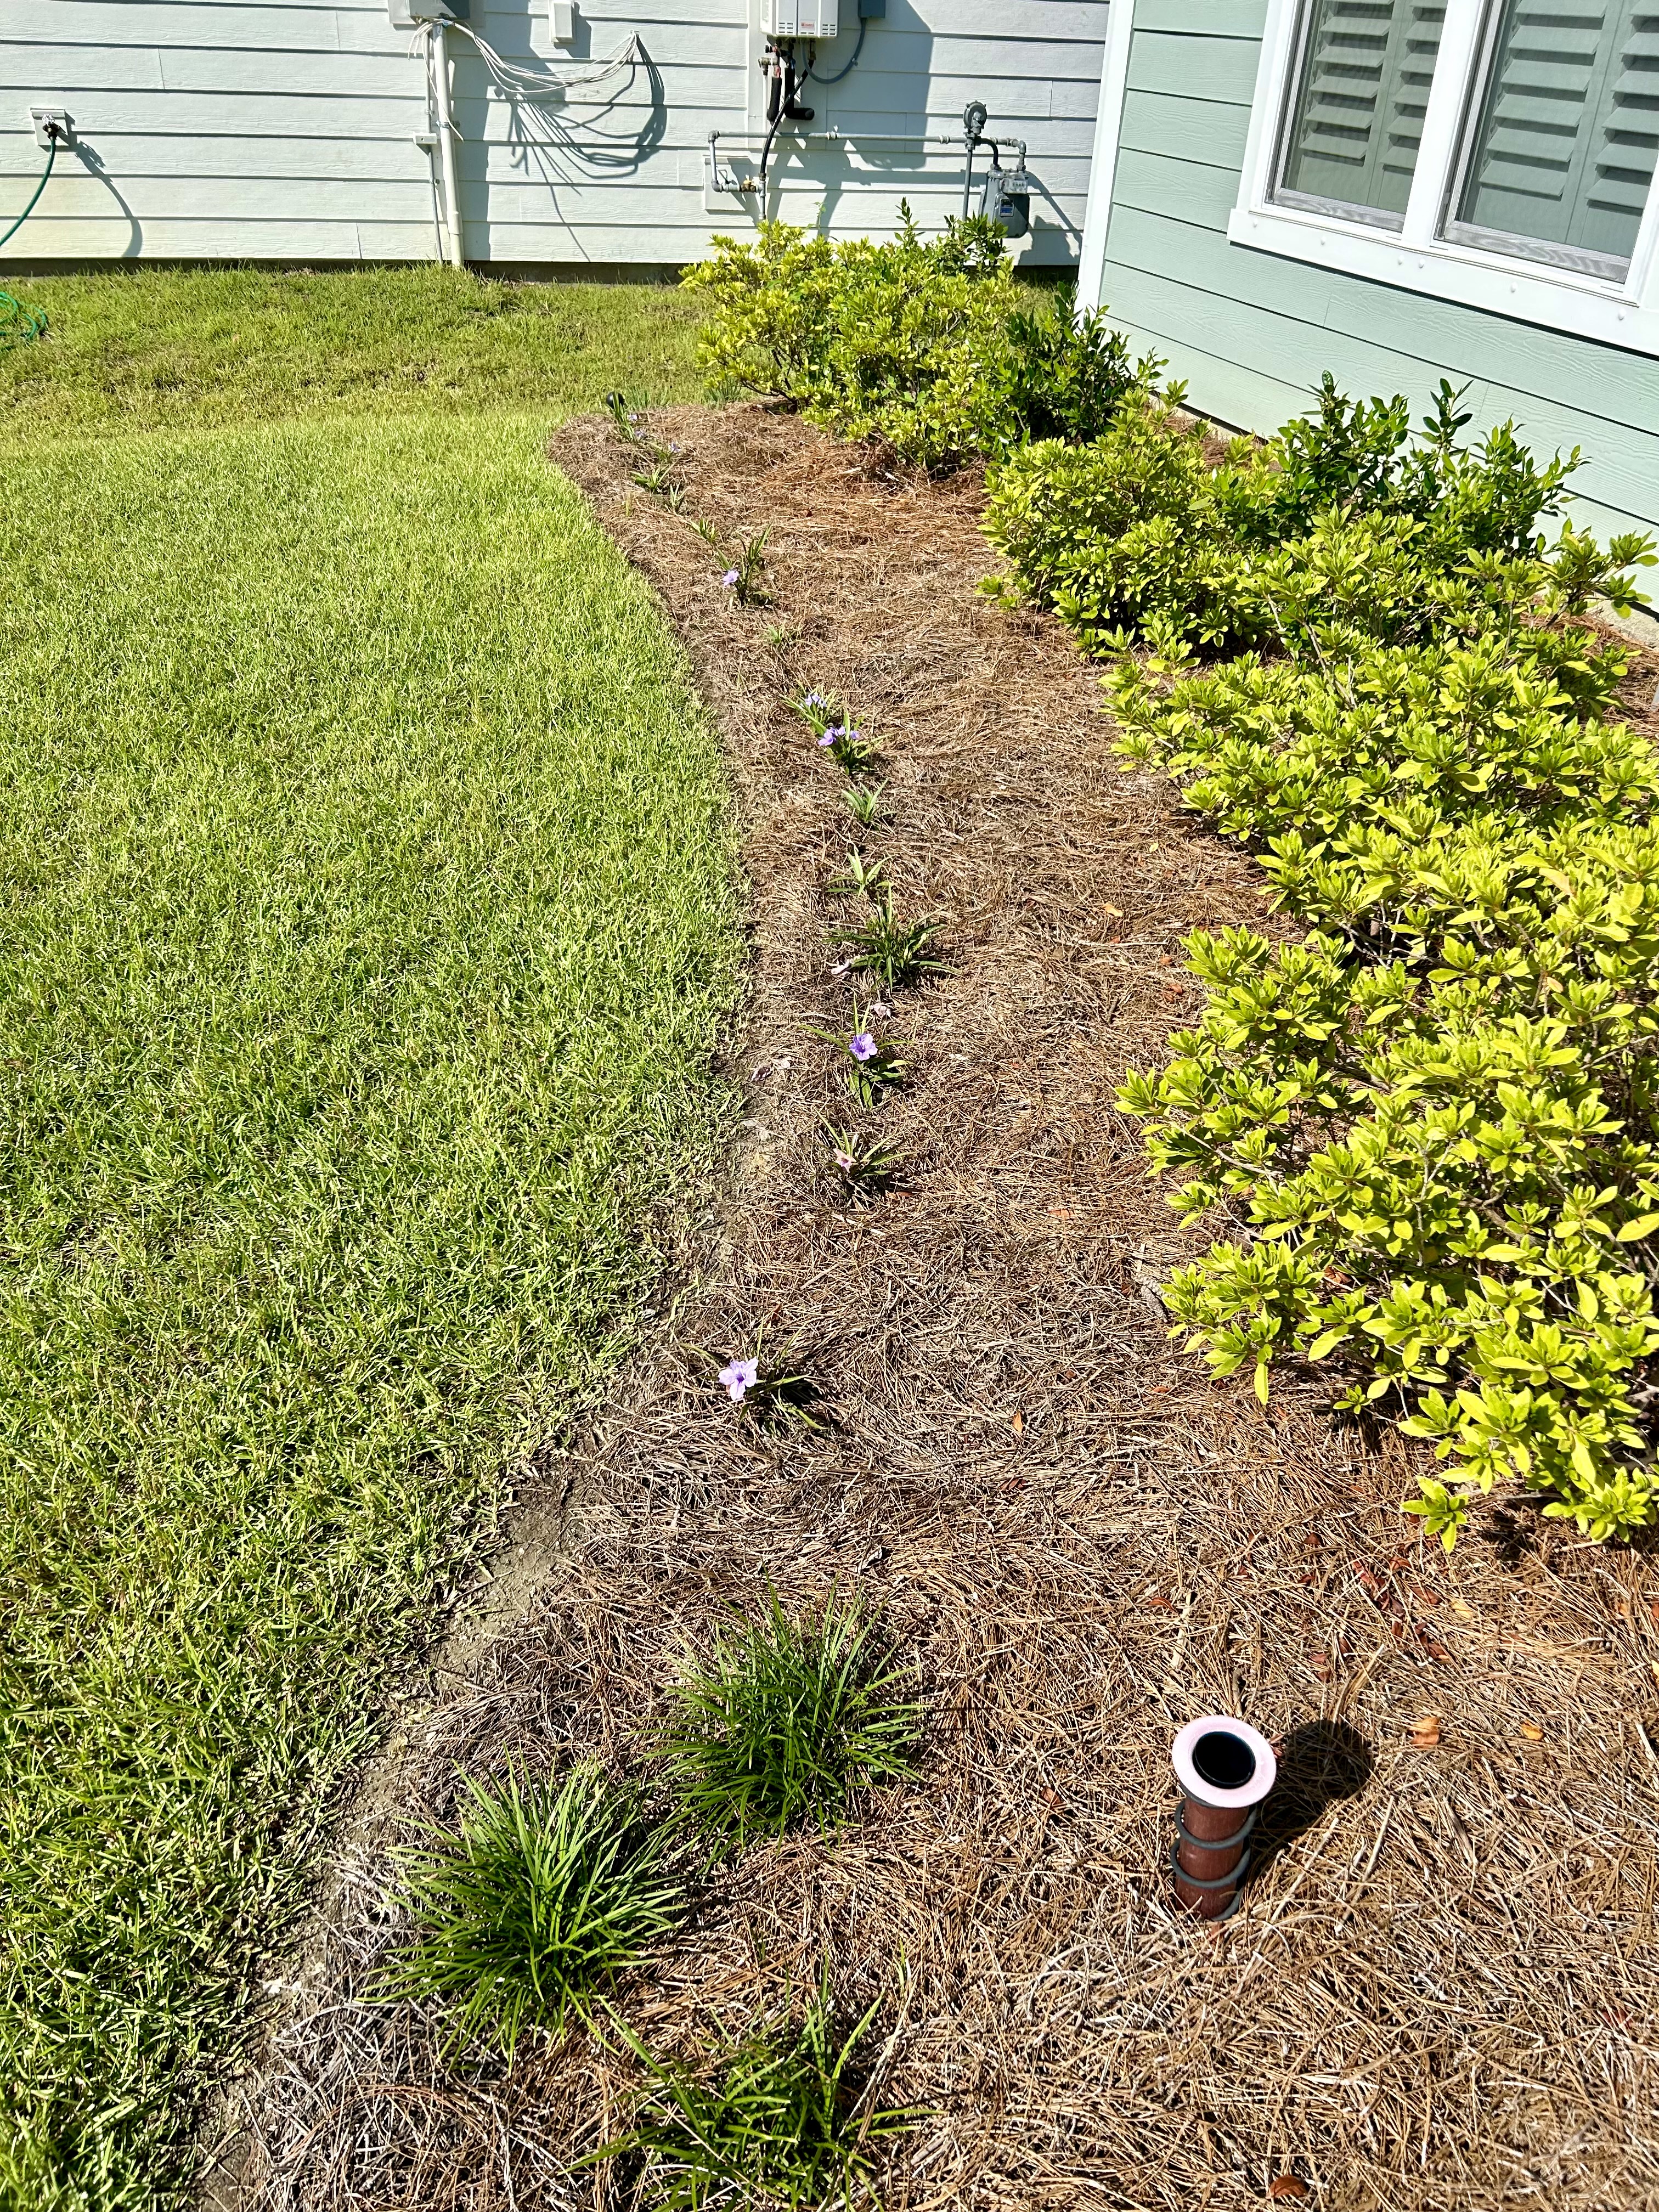
Look what is growing along the fence surrounding the propane station: full size Mexican Petunias. This plant is extremely hardy and aggressive.
My little dwarf version is thriving out front, and these are just the cutest little plants which bloom their hearts out. They will spread, yes, but I want them to fill up the bed where they are–as a sturdy and colorful border.
I finished the “big red” quilt top last night–I have not yet come up with a name I like. I really like the soft Kona Thistle sashing and will bind with it.
Here is a close-up. “Red Delight” maybe?
I finished the backing for “Bonanza,” the big half-square triangle quilt last night and will start loading this project on the longarm today likely. “Happy” (formerly known as “the quilt from hell”) is waiting to go on the longarm for hand-sewing basting.
Now, I am putting the “Summer Camp” mystery blocks from the Modern Quilt Society on the design wall and will leave them up there for a while as I know I’ll move those blocks around a lot before I commit to their final placement. Already I am moving the blocks around in the rows that are going up.
The hand-quilting on Traverse is going well–I’ve almost finished the green row with chartreuse squares. I’m liking the texture that is not trying to cover up the block patterns. And my hand quilting with Tara Faughnan’s method is getting way more reliable, so I don’t have to check the back so often.
And that’s all the news fit to share here for today!
I can still remember vividly when I got my first library card at the library at Barksdale Air Force Base in Shreveport, Louisiana. I was about 9 or 10 I think and could ride my bike there on my own. I have never lost my wonder and excitement about libraries, which eventually led to the time I spent in the stacks at George Mason University’s campus library and libraries also available to me in the Washington, DC, area, like the big national library downtown.
My local library here is the Wando Mt. Pleasant Public Library. It is less than 10 minutes from my house–depending on how many red lights one encounters. It is very near Wando High School, which makes sense. Wando is a big name here–for one of the three BIG rivers that reach the coast around Charleston: the Wando, the Cooper, and the Ashley.
I visited the library one day this past week to get some new “pleasure” books to read. I read nonfiction all the time, but mostly online now. I also wanted to check out this local library more thoroughly than I had before now. The local library can tell you a lot about one’s community.
There is a kiosk in the front of the library where you can pay $1 for any books there you want to buy. There are always good books on that kiosk. Basically, I “rent” some books so I don’t have the pressure of reading them in a hurry. When I’m done with these books, I’ll return them to the library. These days, I read at my noon dinner and afterwards with my espresso coffee–as I hand-sew at night, often until quite late, while watching something on tv.
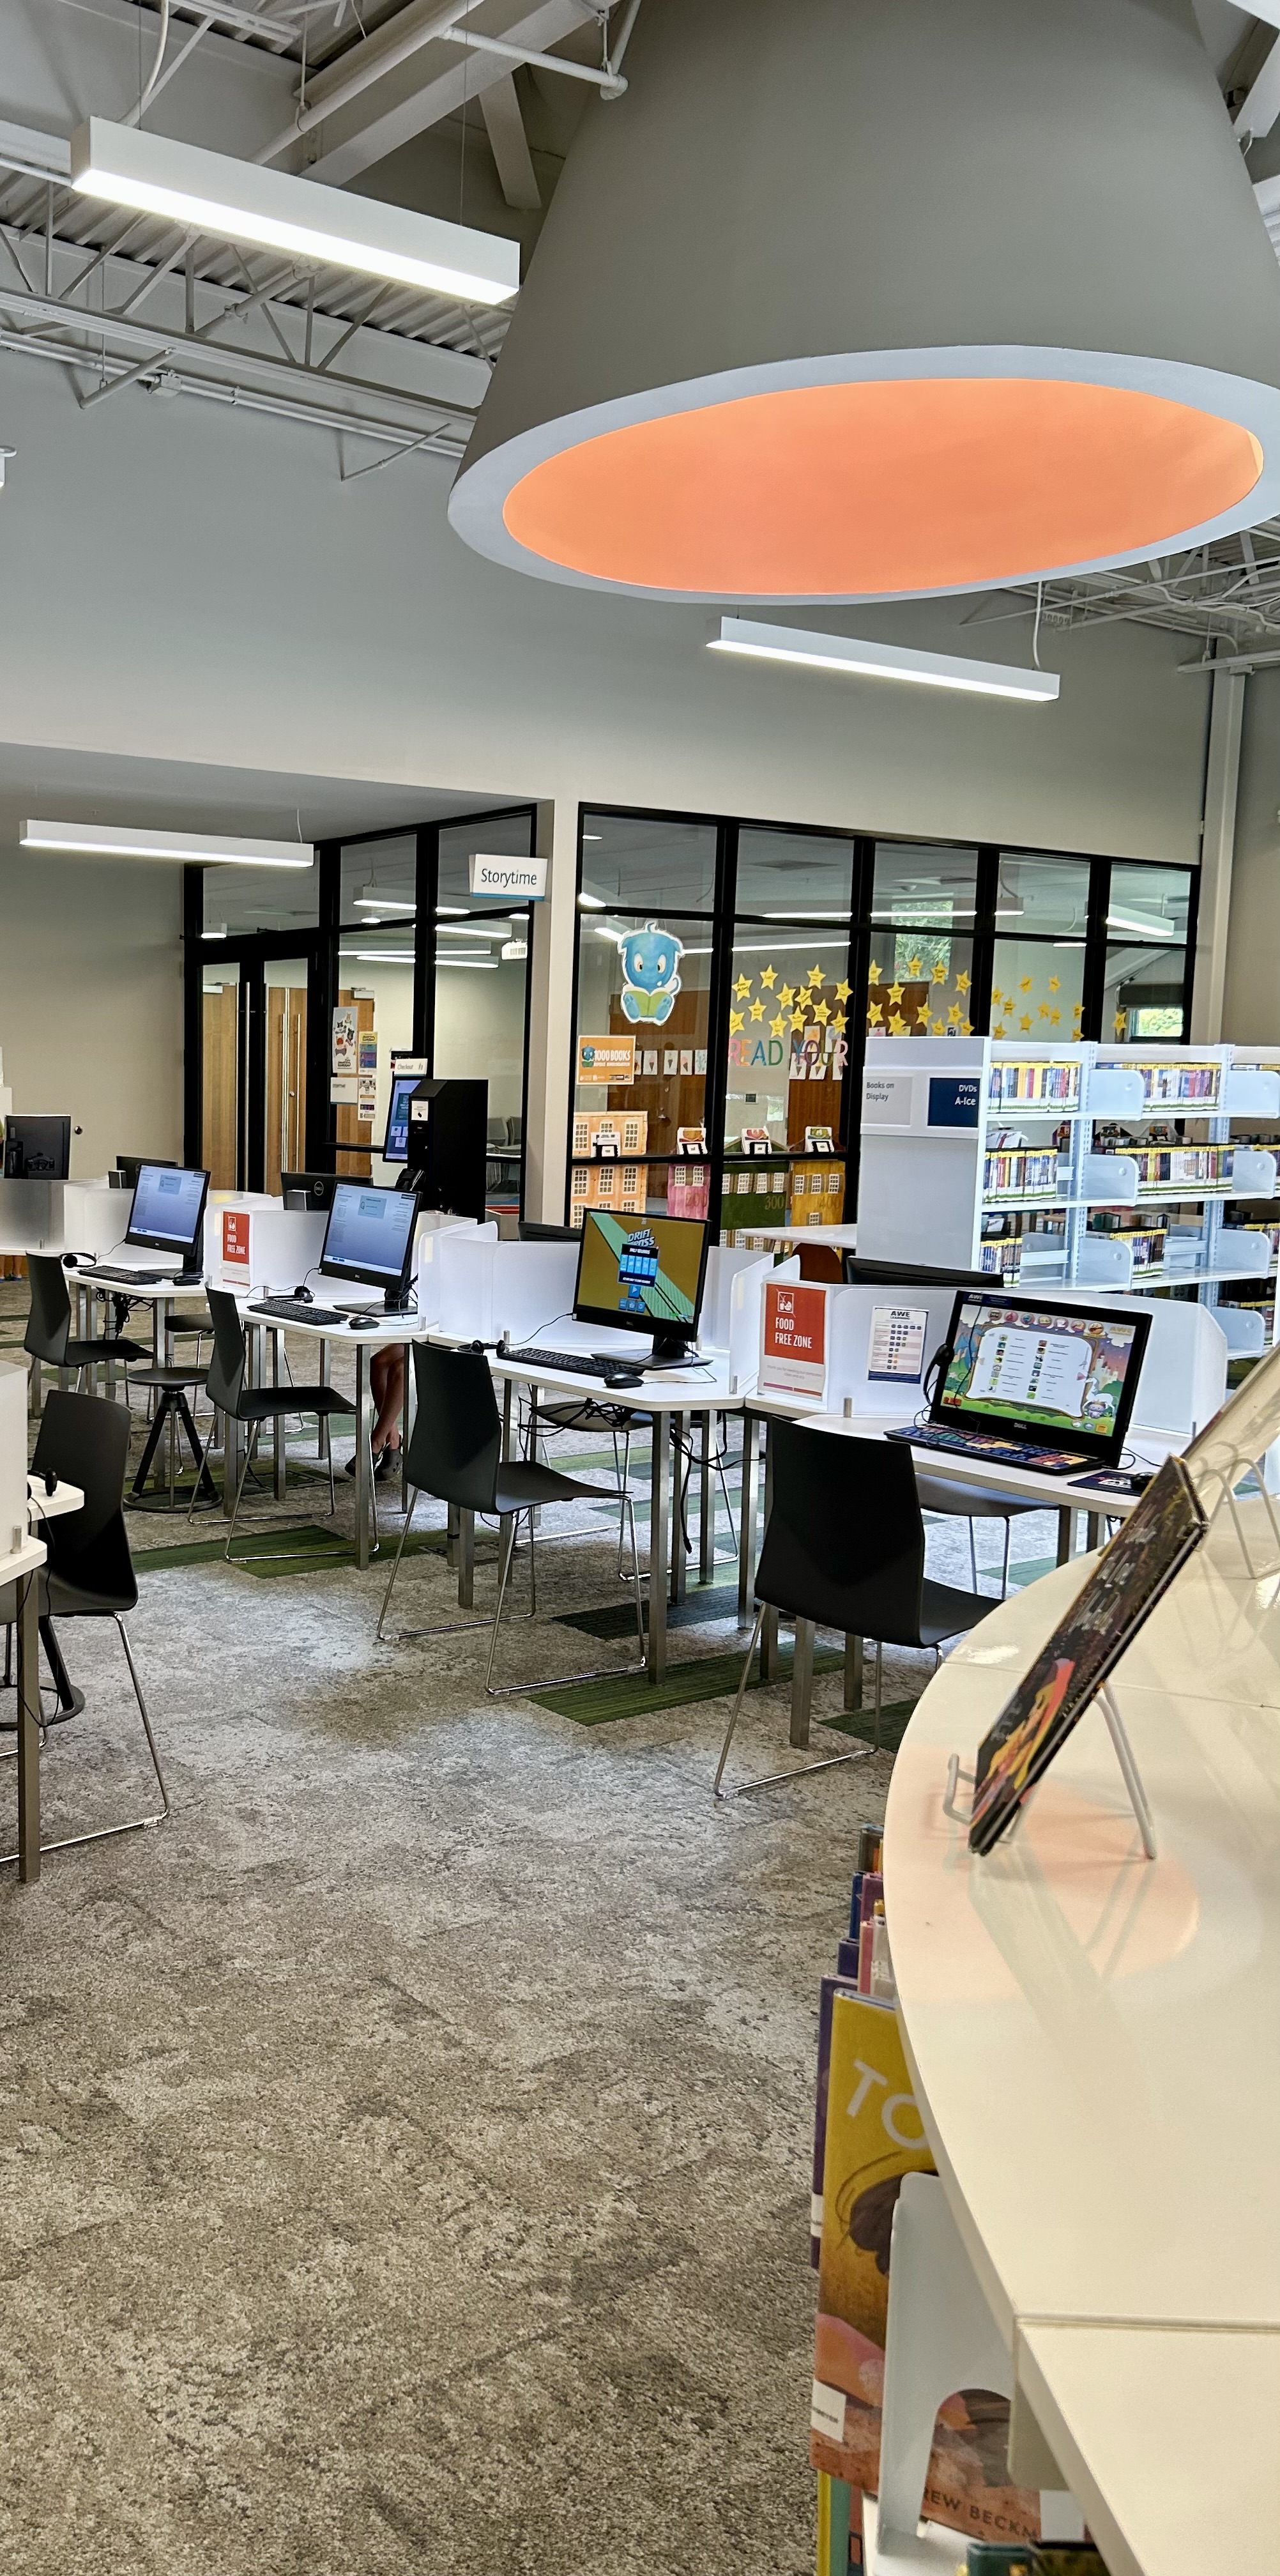
From the outside, the building is low and not impressive, with lots of parking. Inside, the spaces are filled with light, color, and exciting places to investigate, especially for young children. There are so many windows, each with a nice view. *Note: I can’t have (library policy) and don’t want people in any of my pictures, so I cropped the pictures I took to take out people. A person’s right to privacy is a cherished issue for me.
Here, in the children’s section, there are wonderful nooks that invite exploration. On a weekday morning, I was surprised by how many parents, including lots of dads, and how many children were in the library. This nook has some entrances that are low to the floor, which must surely call to a child. The “balloons” rise to the sky, which is very high in this alcove.
There were LOTS of cushioned reading places in front of windows–and only this one was not occupied by a parent reading to a child.
The inside of the children’s section has two very long swirling, serpentine shelves of books, each topped with books that, hopefully, draw a busy child’s attention. And note the little table nestled into one of the curves.
The ceiling is high and industrial which gives the library a sense of space and light. Note the meeting room in the far right corner. There are lots of these meeting rooms scattered across the library, some big, some small.
There are banks of computers everywhere in the library–two banks here, but I cropped one bank out of the picture as children were seated there.
The juvenile/young adult section is more traditional, but here, too, there is color and whimsy and a beautiful view.
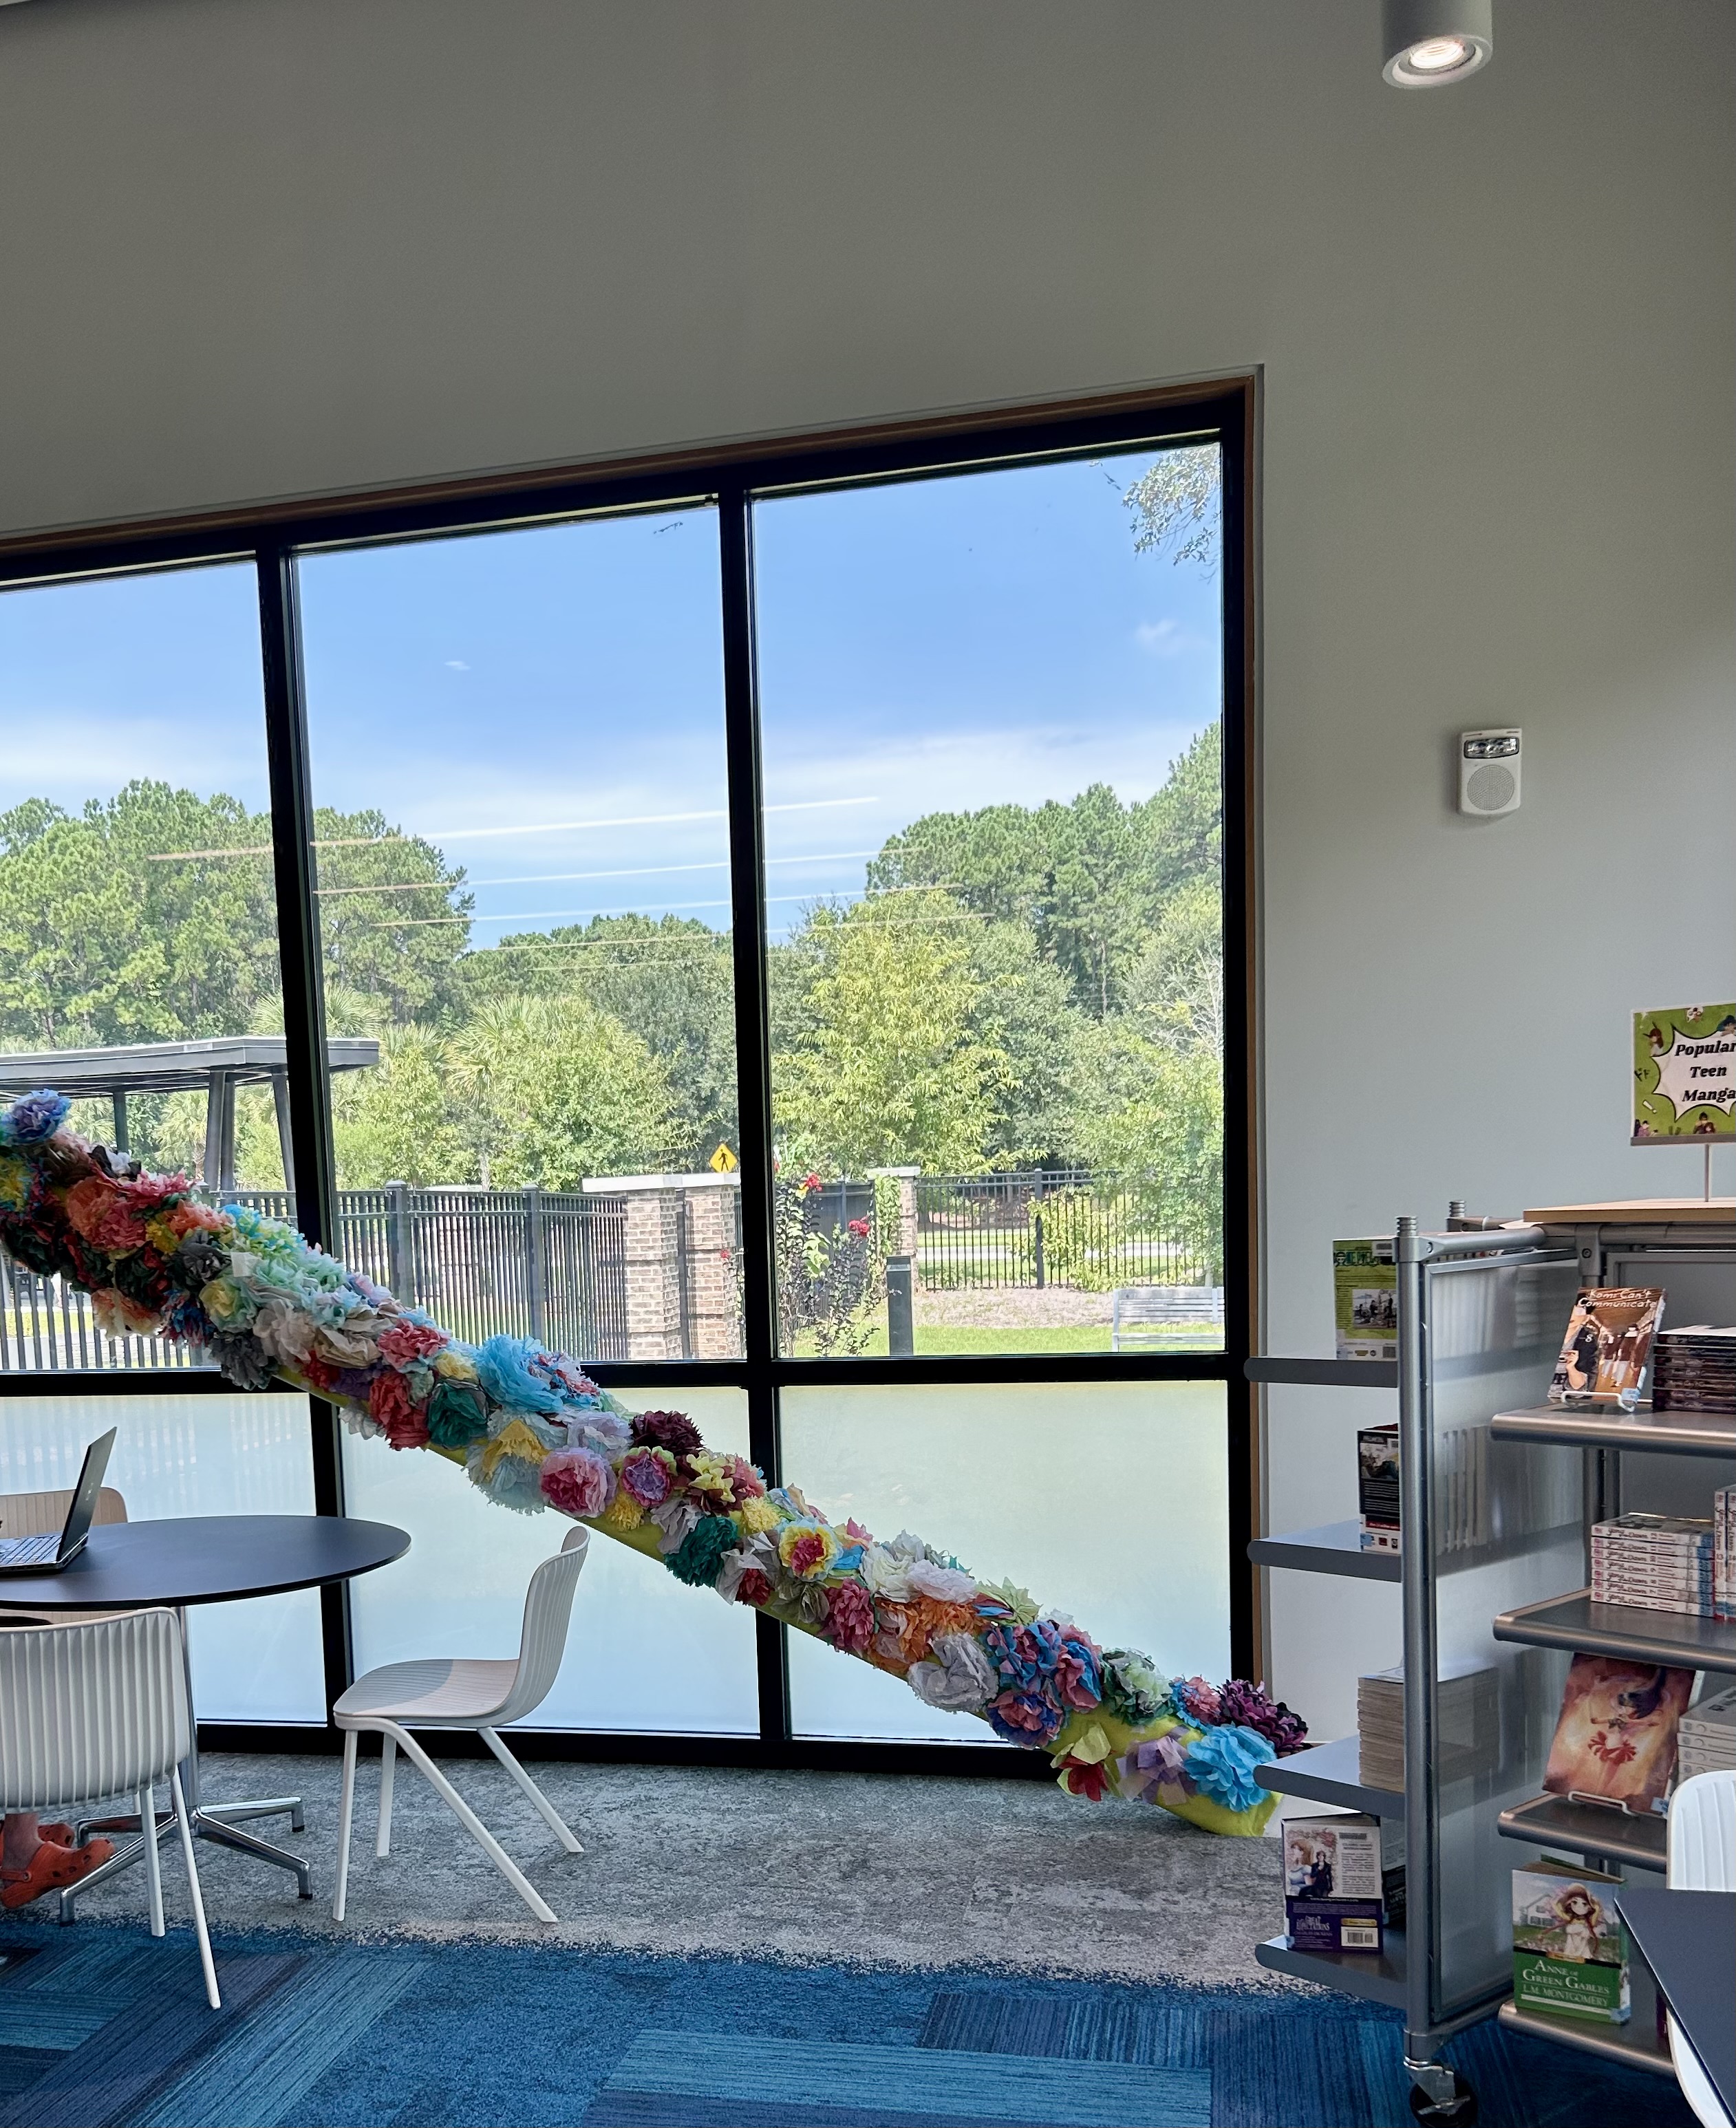
And look what I found as I wandered the halls and passed meeting rooms: a whole room of sewing machines that one can use!!! And there was a woman using one.
The adult section, which one encounters upon entering the library, is also quite large. And I returned to it to look more closely at the kiosk where I could buy some books.
I came home with three books that I am looking forward to reading. And as I said above, after I am done, I will return them to the library so someone else can “buy” them to read.
It is slowly getting cooler, so I am, again, thinking of walking the beach. And, maybe, swimming again, too. But today I need to make a run to Costco and to return a split hose extension to Loews.
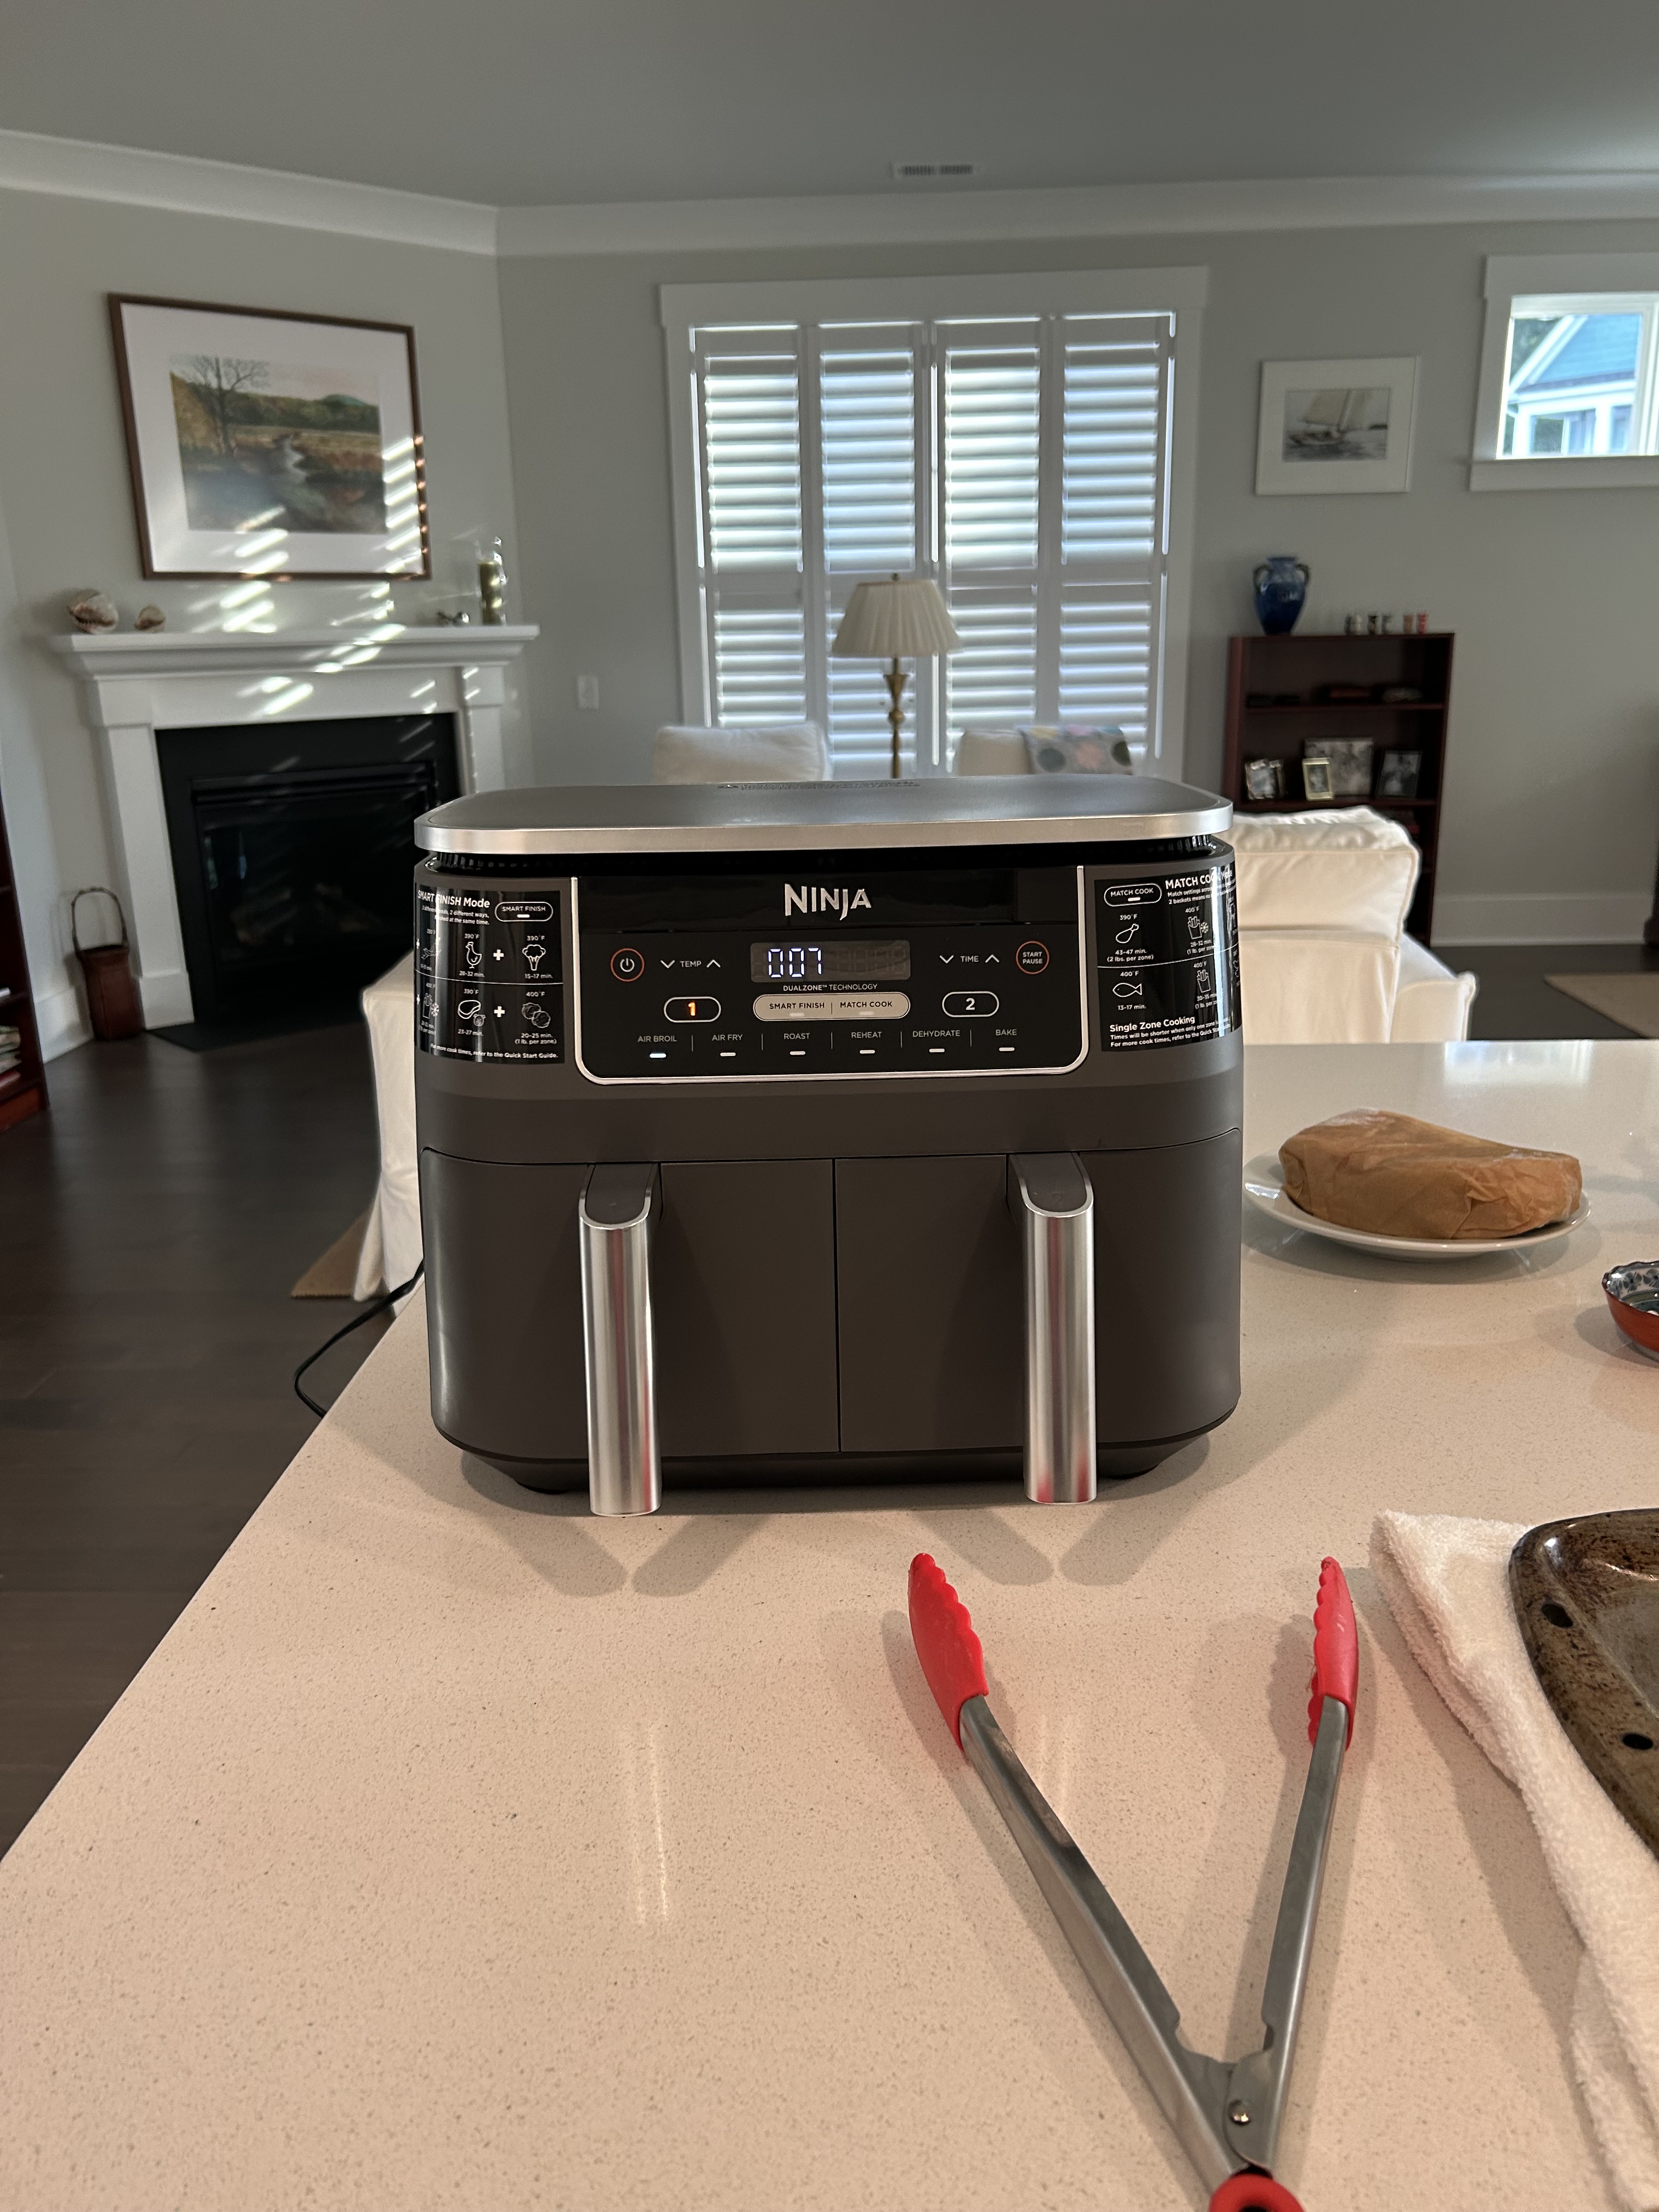
Yesterday I used the air fryer to cook chicken, some corn on the cob, and a broccoli/carrot mixture–so I have food for today, which makes it a “free” day for me.
The big red blocks (10 inches) are getting sashed. Four rows are done, and sets of two are sewn together. I have to use a ladder to reach the top of the design wall, so I won’t sew those two top rows to the others until the last rows are done and connected.
I looked at some of the selvages more closely while cutting, and not all of these fabrics are Kaffe Fasset, which is ok. Remember that I bought two kits 18 or 19 years ago in Maine as I wanted to make a big red quilt, but never made the kits. I am using most of the kit fabrics, but not following the kit plan. I wanted something more modern–and I think I have a “modern traditional” quilt going here. The label doesn’t matter to me really as I am liking the quilt.
I’m really liking the soft lavender sashing–and I learned a way to set a long sashing strip so that the vertical lines match from videos on the Modern Quilt Studio web site via their Summer Camp mystery quilt. (They have a you-tube channel for their videos and these videos are very helpful for all levels of quilt competency.) I will bind with the lavender (Kona Thistle). And I have a soft grey wide-back for the backing and can use a medium grey to quilt.
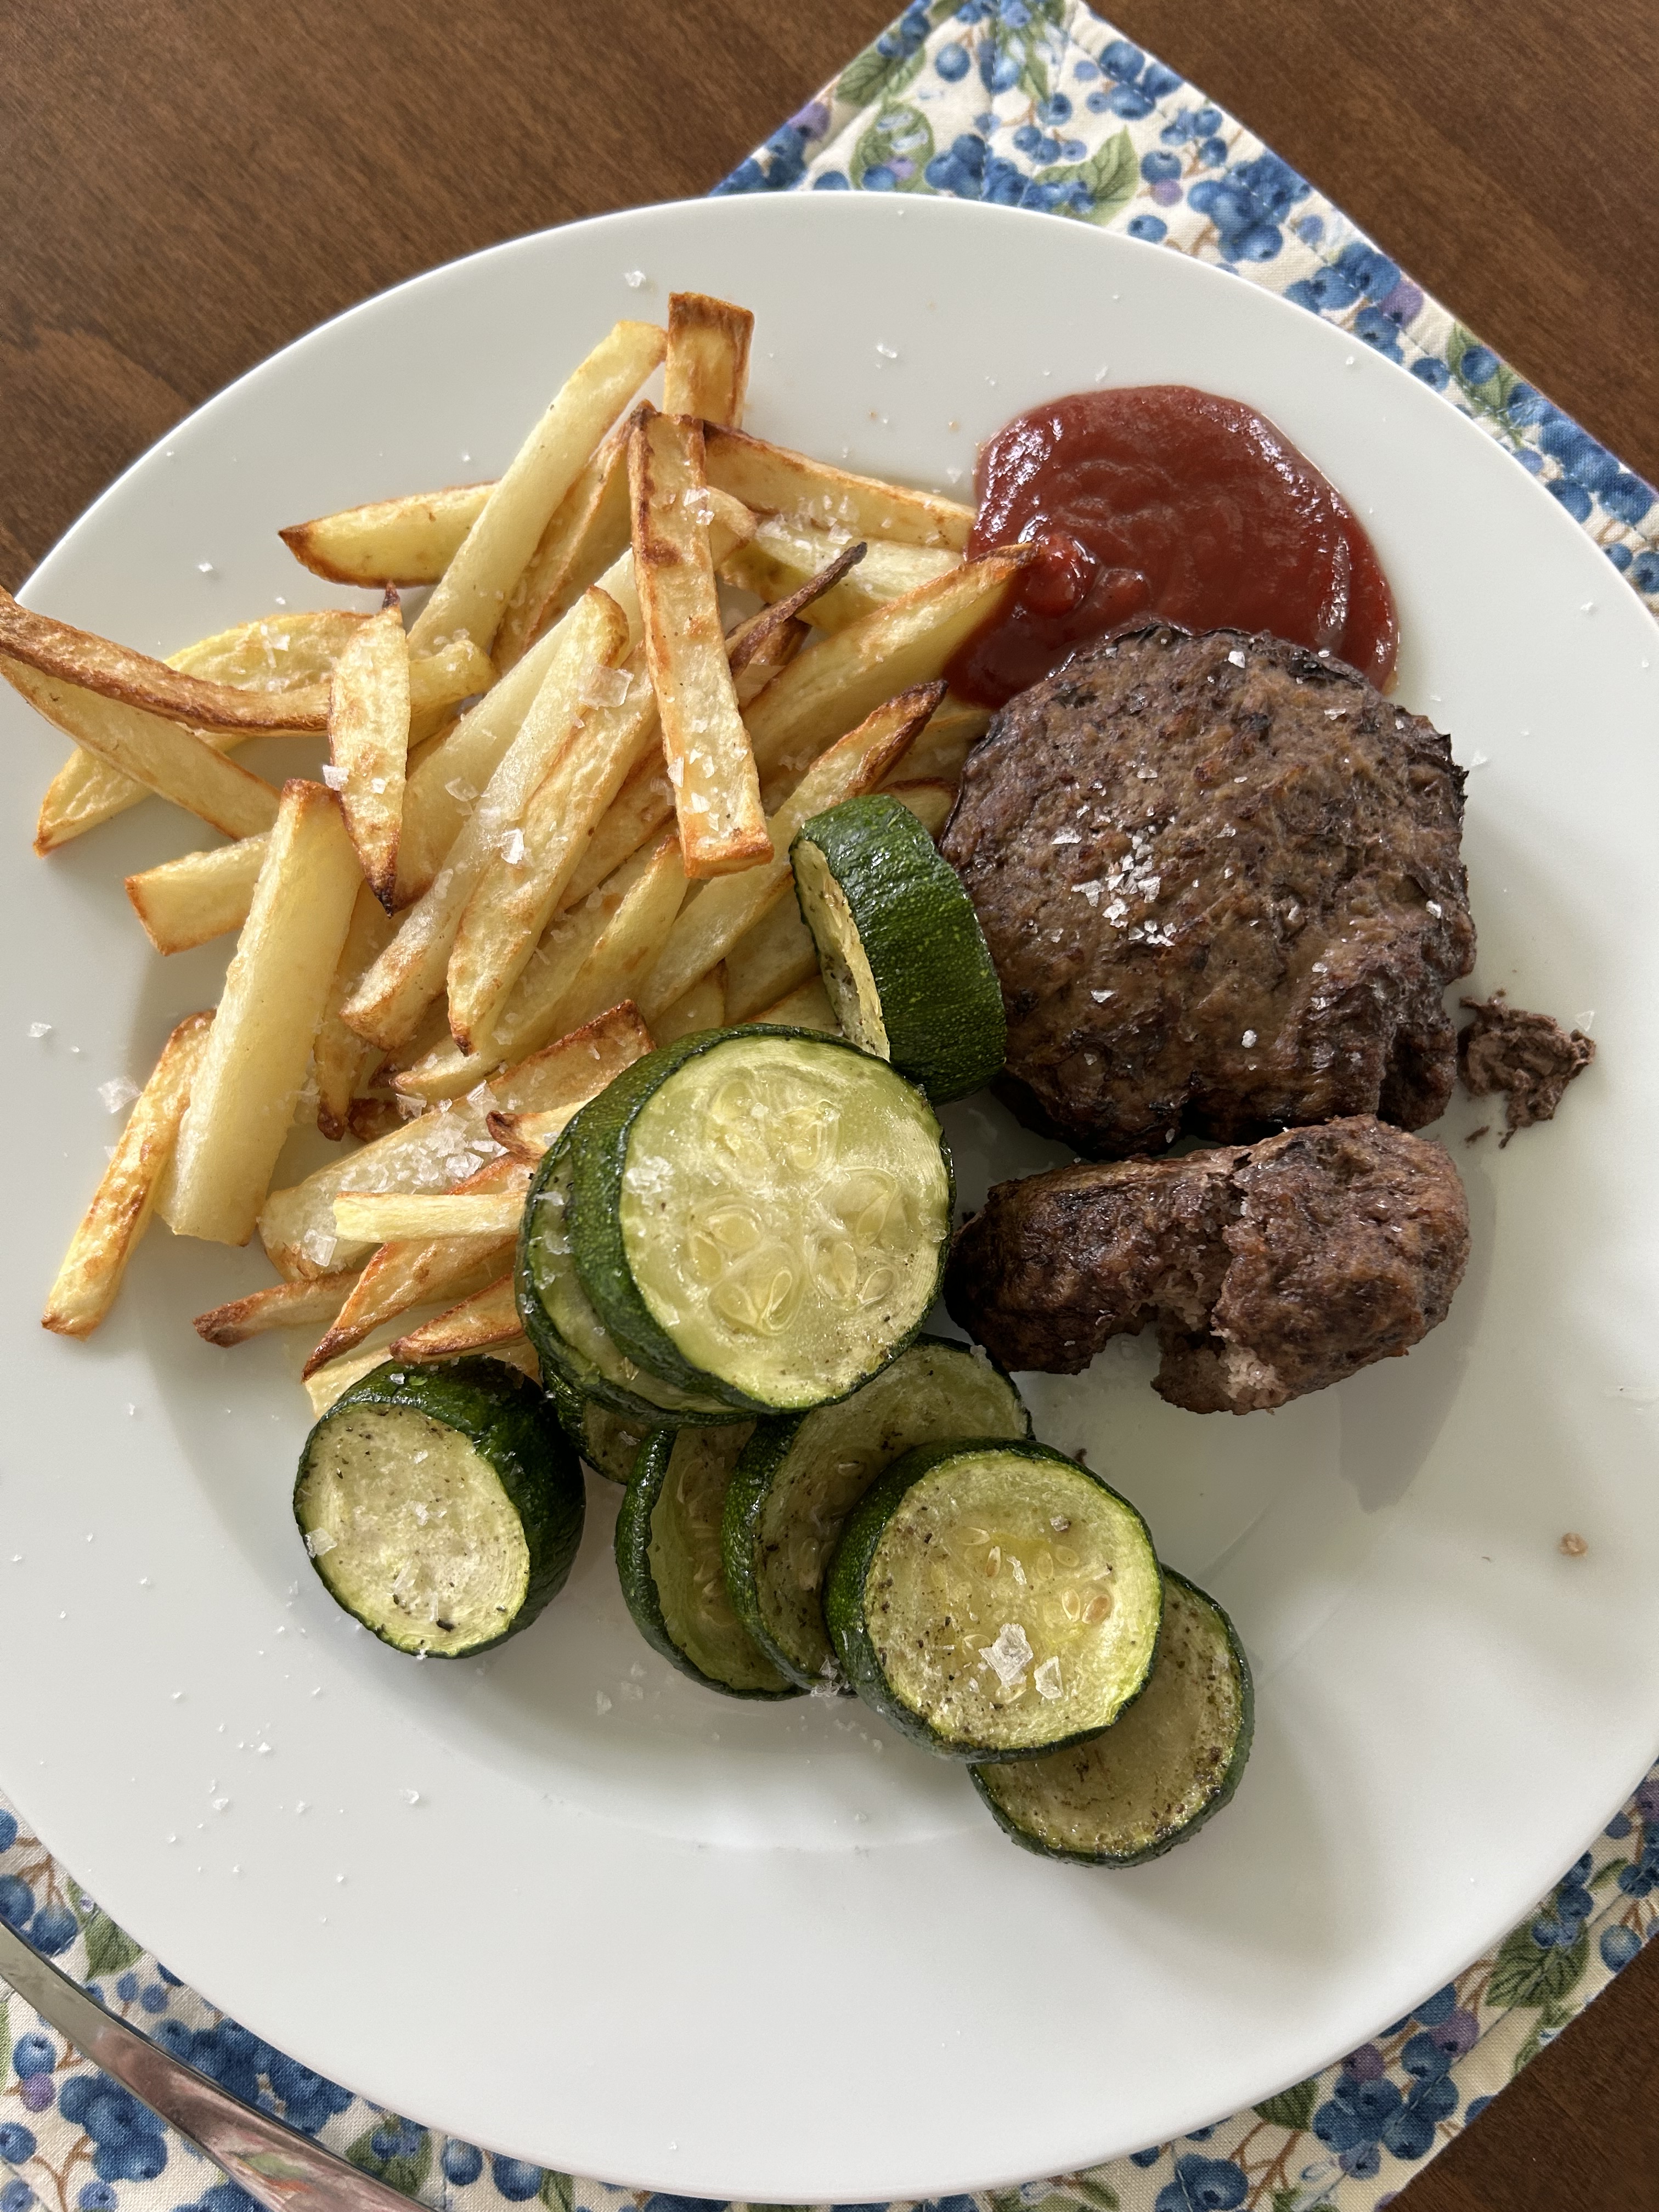
Oh my! I am in huge trouble diet wise. I tried air frying French fries yesterday –I cut my own russet potatoes, soaked them in ice water for 30 minutes, dried them in a towel, and used a little duck fat which I melted for the fat coating, and salted them. I had preheated the air fryer–and 15 minutes later, and after shaking the drawer hard a few times, I had these DELICIOUS fries.
In the other drawer, I reheated a hamburger patty and the zucchini rounds I air fried the other day. I over-cooked the hamburger pattyies I made and should have paid attention to my own instincts. But the reheating went well and didn’t ruin either the zucchini rounds or the hamburger patty by cooking them more beyond warming them. LOL, ketchup helped. (I don’t like well-done meat.)
We got about an inch of rain here in two nights and with a shower yesterday. And the temps are now falling into the 70s at night–with daytime temps in the 80s and low 90s. Still, I will water the new little tree out front later today–just to make sure. It is looking ok for now.
Have a wonderful weekend everyone! I am hoping for a beach walk, but the high tide is now in the morning, and I sew late afternoon.
And it is HOT and dry here. We really need rain again. So, my watering duties have increased. But the new Crape Myrtle tree seems to be doing ok. I’m hoping the daily water when needed will help this new tree develop a good root system and will get it through the summer heat.
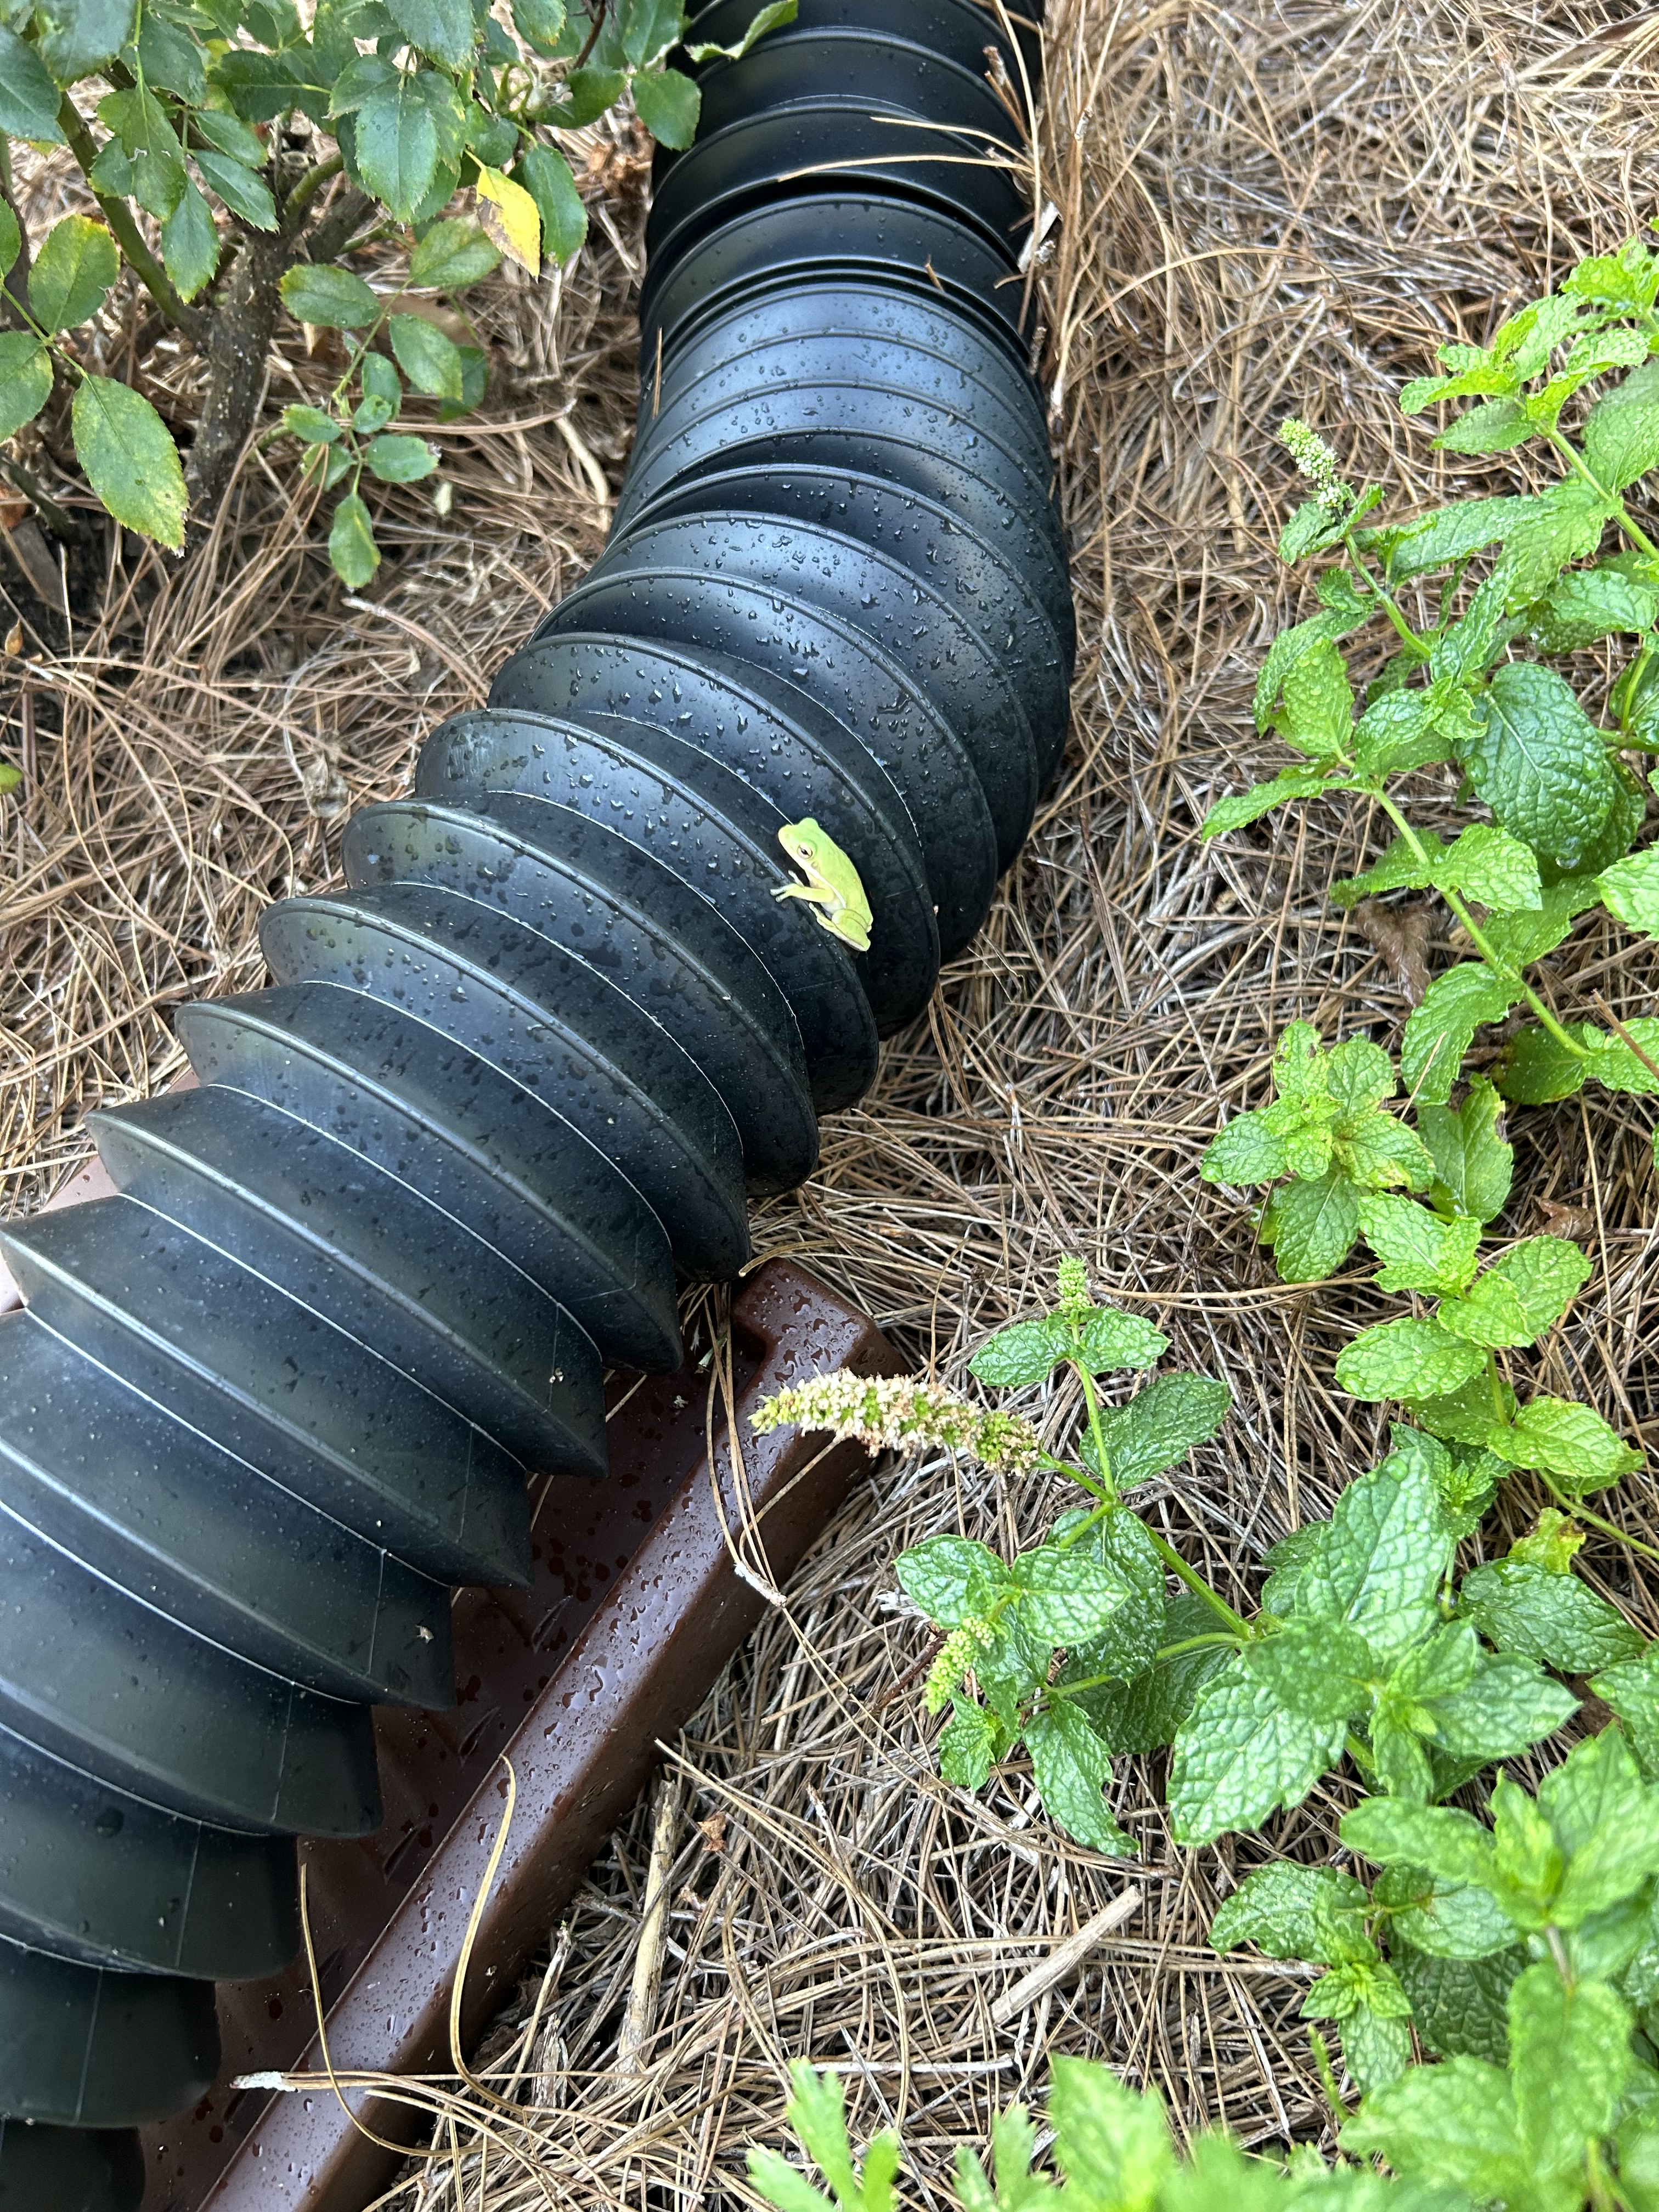
Lately, these little rain/tree frogs are in my garden–and around other neighbors’ houses. They are so cute, so vividly green. There is a darker brown version too. I haven’t tried to catch one to see if s/he has suckers on the feet, but it sure looks like they do. The downside: they have huge poops that they leave on the sides of our houses when they seek shelter away from the vegetation.
I googled and now believe these little frogs are American Green Tree Frogs, so yes, there are suckers on their feet. If you want to read more, here is a link. Yes, they can also have a darker brown color.
I finished all the blocks for the big red quilt yesterday, with 18 extras which can be used for a smaller lap quilt. I have some extra fabric as well, so I could have 20 blocks down the road. I’ll cut the violet sashings today–Kona Thistle. The blocks are 10-inches finished, and the sashings will finish at 1 1/2 inches, so this quilt will be 90 1/2 finished. I’m still thinking about wide-back backings–the reds seem an overkill and too traditional. Also, one has to think about thread quilting color when choosing a backing, and I don’t want to quilt with red thread. I’m now wondering about something in the gold tones. Or a darker grey. Or, one of the newsprint backings. I’m going to bind with the Kona Thistle so I have to think about that too,
I have not had a working oven since August 1st. Ugh! The control board on my Kitchen aid froze somehow, and I was unable to turn it off. I had to turn it off with its breaker, in the garage, which also turns off the microwave. This oven is a gas/electric oven. The Whirlpool repair man has been here twice now, and we have the oven on, but locked, which allows me to use the top taps. (Yeah, I can make espresso coffee again.) But on the last visit the oven techie discovered that both bottom sides have damage that one wouldn’t notice until the oven is pulled out. The damage impacts the bottom warming drawer which doesn’t slide in and out properly–and maybe is a factor in the control board, which definitely needs replacing. There will be paperwork from Whirlpool soon.
I’ve put in a warranty ticket with the builder for a replacement oven. It’s clear that it was damaged when it was installed.
This past week, to cope, I bought an Air Fryer to join my grill and my Instant Pot. So, there is now a new learning curve–and most of you know I kind of like learning curves. I have been tempted by friends loving their air fryers for several years now.
When not in use, this appliance can fit in this spot in my kitchen, which was vacant except for Alexis, which I never really use. I like clean counters that don’t have a lot of appliances on them, and the storage in this house allows me to store appliances I’m not using every day. But this one is getting used every day.
I cooked this first meal in 25 minutes right after I unpacked it and read all the instructions. The corn was delicious, and the chicken drum sticks were moist and browned. I cooked the asparagus in the microwave in 3 minutes. (I am not a fan of microwaves, but necessity now makes its use needed.) I cooked 4 ears of corn and took the kernels off the other two ears for use in salads.
I can’t wait to try some handcut French fries with duck fat as the fat, rather than the bad veggie oils on the frozen fries in the grocery store.
Prior to the Air Fryer’s arrival, I used my Instant Pot to cook a whole chicken. I added more liquid so I would have some good broth–and with some of the meat, the broth, some frozen veggies, and some cooked veggies in my refrigerator, I made a whole pot of soup.
The soup was nourishing and made for two days of easy meals. The extra meat I used to vary the soup with some fresh salads.
I am making progress on hand-quilting Traverse, which I’m very much enjoying. I got in a lot of sewing time on it this past week while waiting downstairs for the electric and Whirlpool techies to show up. (Upstairs I can’t hear the doorbell.) I sewed and listened to my favorite music one day and an ongoing book another day.
My stitches are getting better with Tara Faughnan’s quilting method, and the back of the quilt is starting to look interesting. I like my strategy of keeping thread colors quiet on the front since I don’t want to take away or hide the patterns or colors in each row. So far I have most of the right colors for the colors in the quilt.
I’m happy. And now, hungry. It is time to organize my dinner and make my supper salad. I’m going to try roasting some cauliflower and carrot in the Ninja Air Fryer.
Between the Mt. Pleasant, in Charleston County in South Carolina, and the string of outer barrier islands, lies a wide salt marsh.
Beaches and sand dune systems form on the side of a barrier island facing the ocean; the side facing the shore often contains marshes, tidal flats, and maritime forests.
The salt marsh here is beautiful, and here is a link to some pictures of salt marshes. I wanted to stop on the connector highway to take a picture for you, but I don’t feel safe to stop on the side of the busy connector, never mind getting out of the car.
When I arrived here last December, the salt marsh was dormant. The grasses had died back and were brown. Now they are a lush and tall verdant green.
The areas between the islands and the mainland are “tidal flat” wetlands. They can be mostly mud if near where a river comes into the sea. They are “swamps” if trees and big shrubs are involved. And they are salt marshes if they open, grassy, and lined with ribbons of canals.
These salt marshes are the ecological guardians of the coast. Their grassy and sinuous channels fill and drain with saltwater as the tides ebb and flow, providing food, shelter, and nursery grounds for birds, fish, and other wildlife, ranging from dolphins and otters to snails and turtles.
Healthy salt marshes cleanse the water by filtering runoff, and help other ecosystems, including oyster reefs and seagrass beds, thrive. Conserving salt marsh helps people, too. Marshes can reduce erosion, stabilize shorelines, protect against storm surge, and support species that are crucial to recreational and commercial fishing, hunting, birding, and other activities.
The above information is in the link below, if you want to read more.
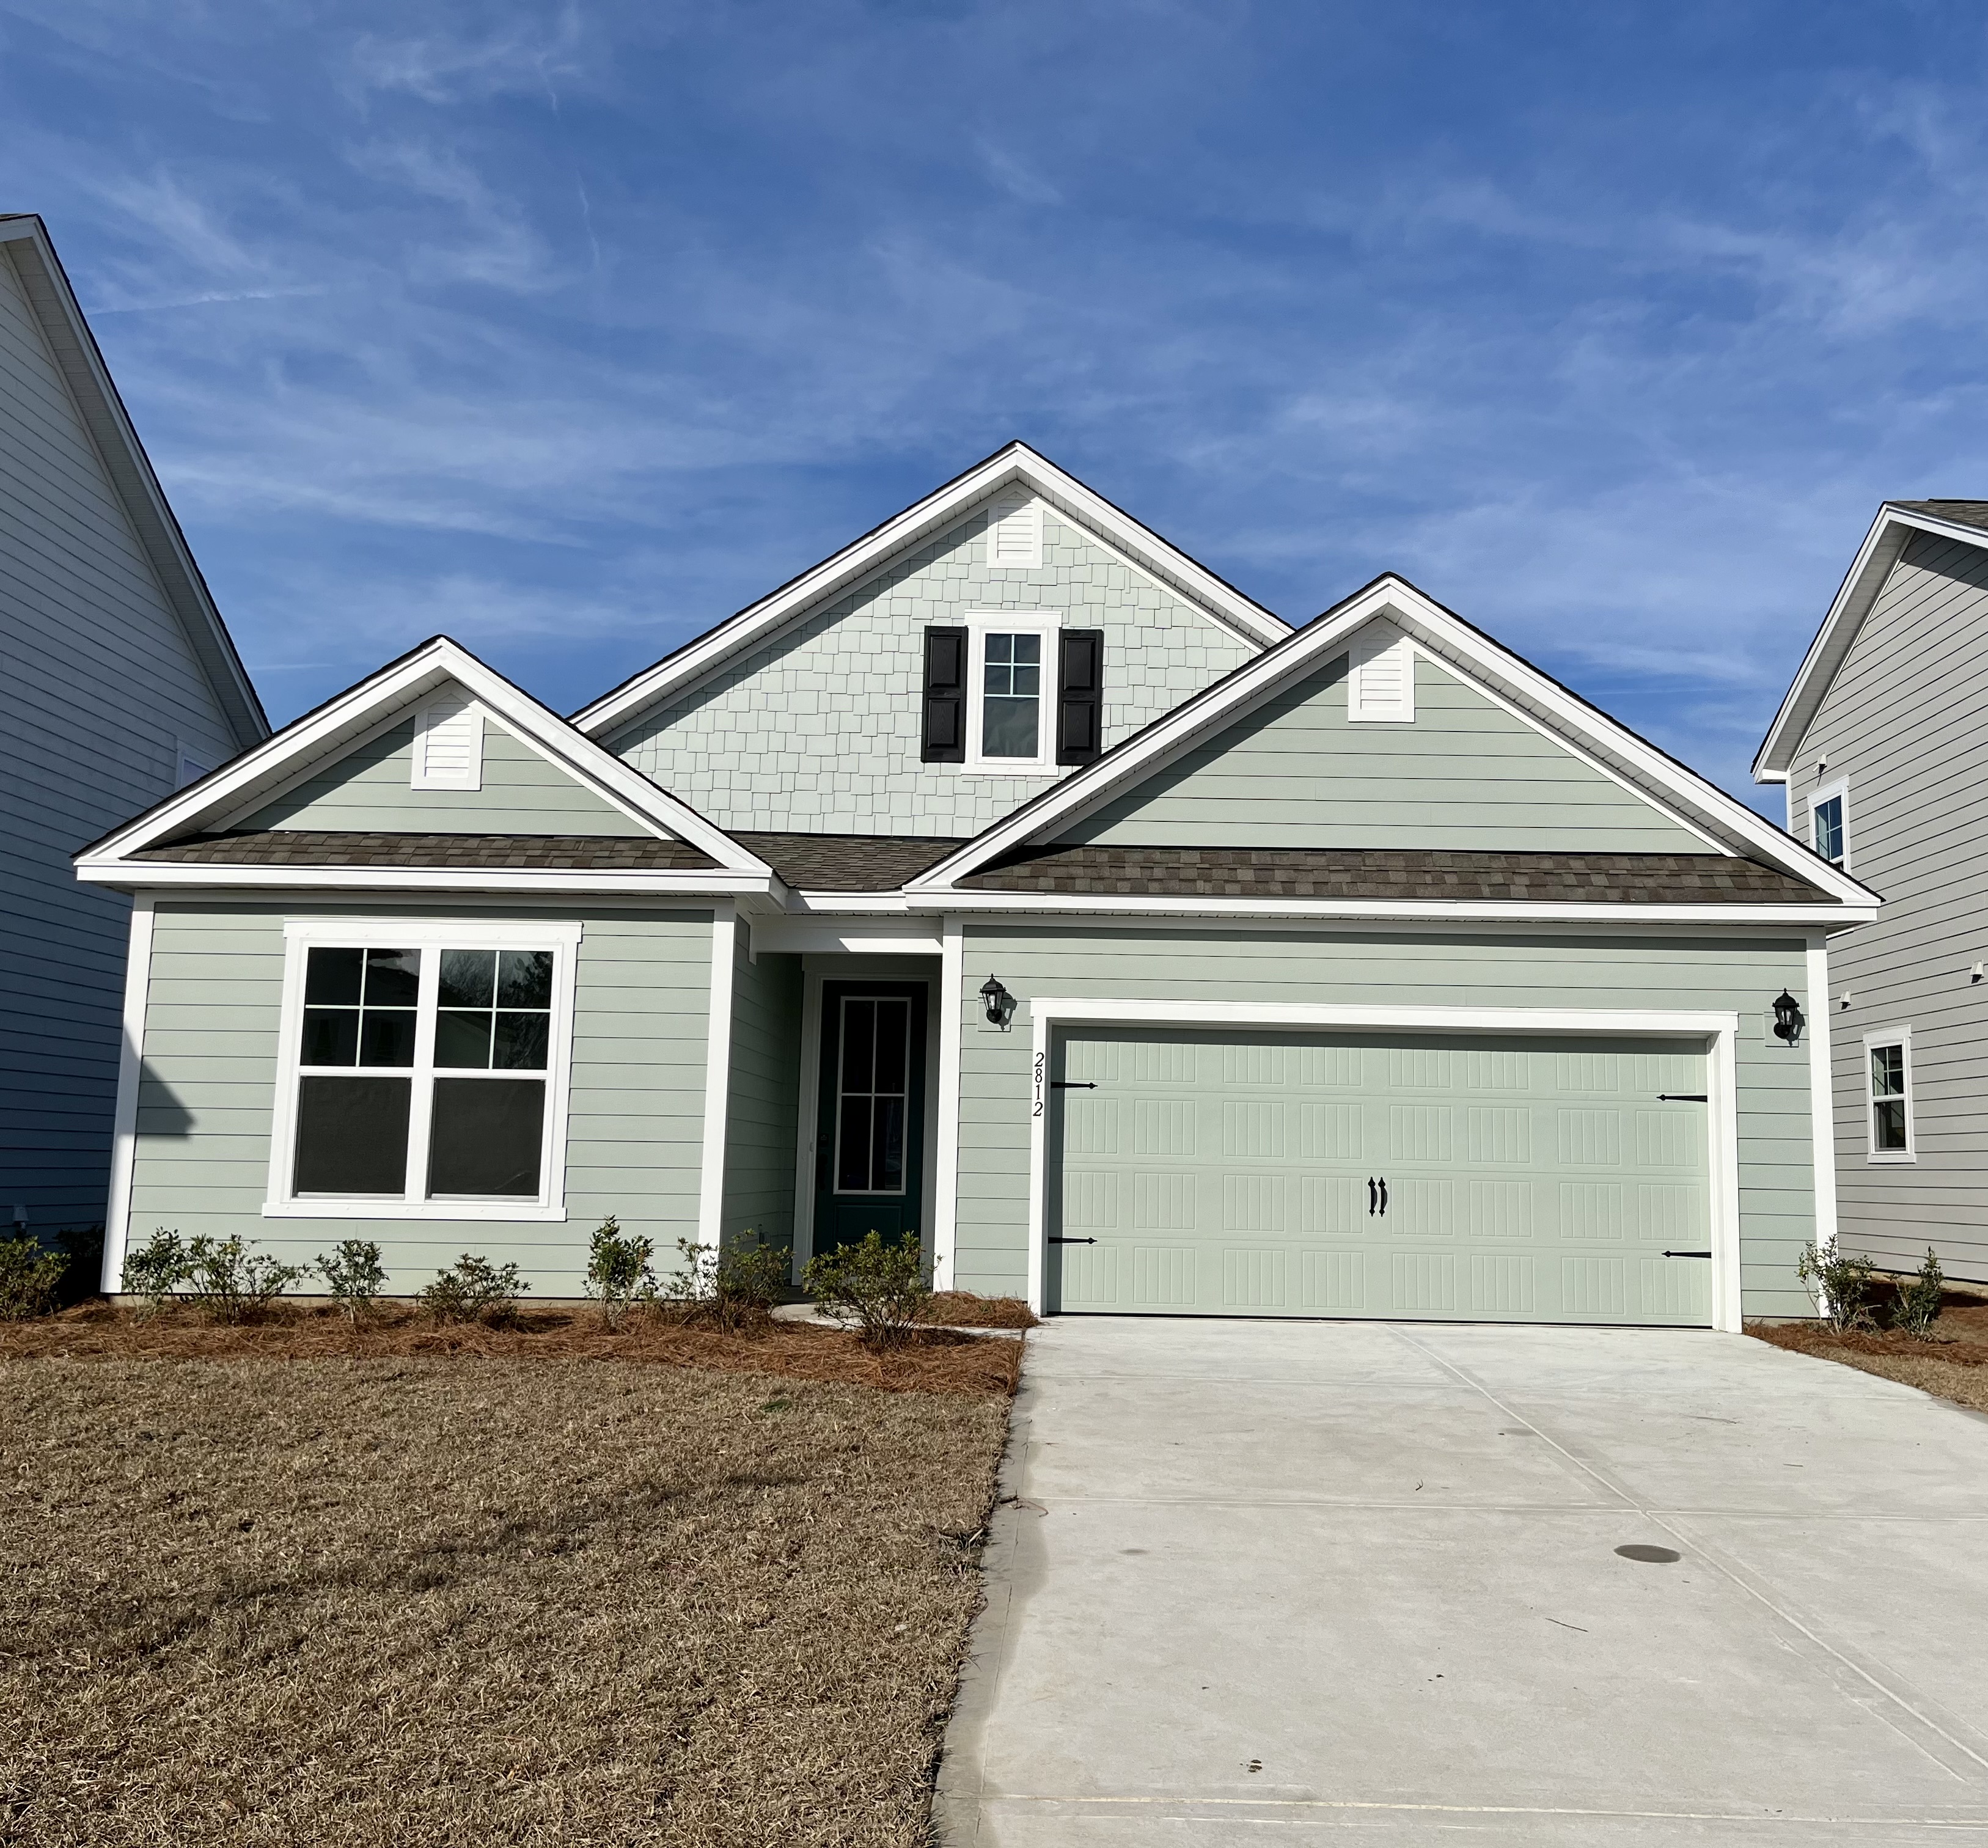
Recently I looked at pictures of my new house–just while searching for another picture. Here’s my home back in November when I put a contingency contract on it and was waiting for my Maine home to sell.
Here it is in late December when I closed on this new home and was waiting for my furniture to come from Maine. The lawn is sodded, but the Centipede grass was dormant. It will do that again this winter.
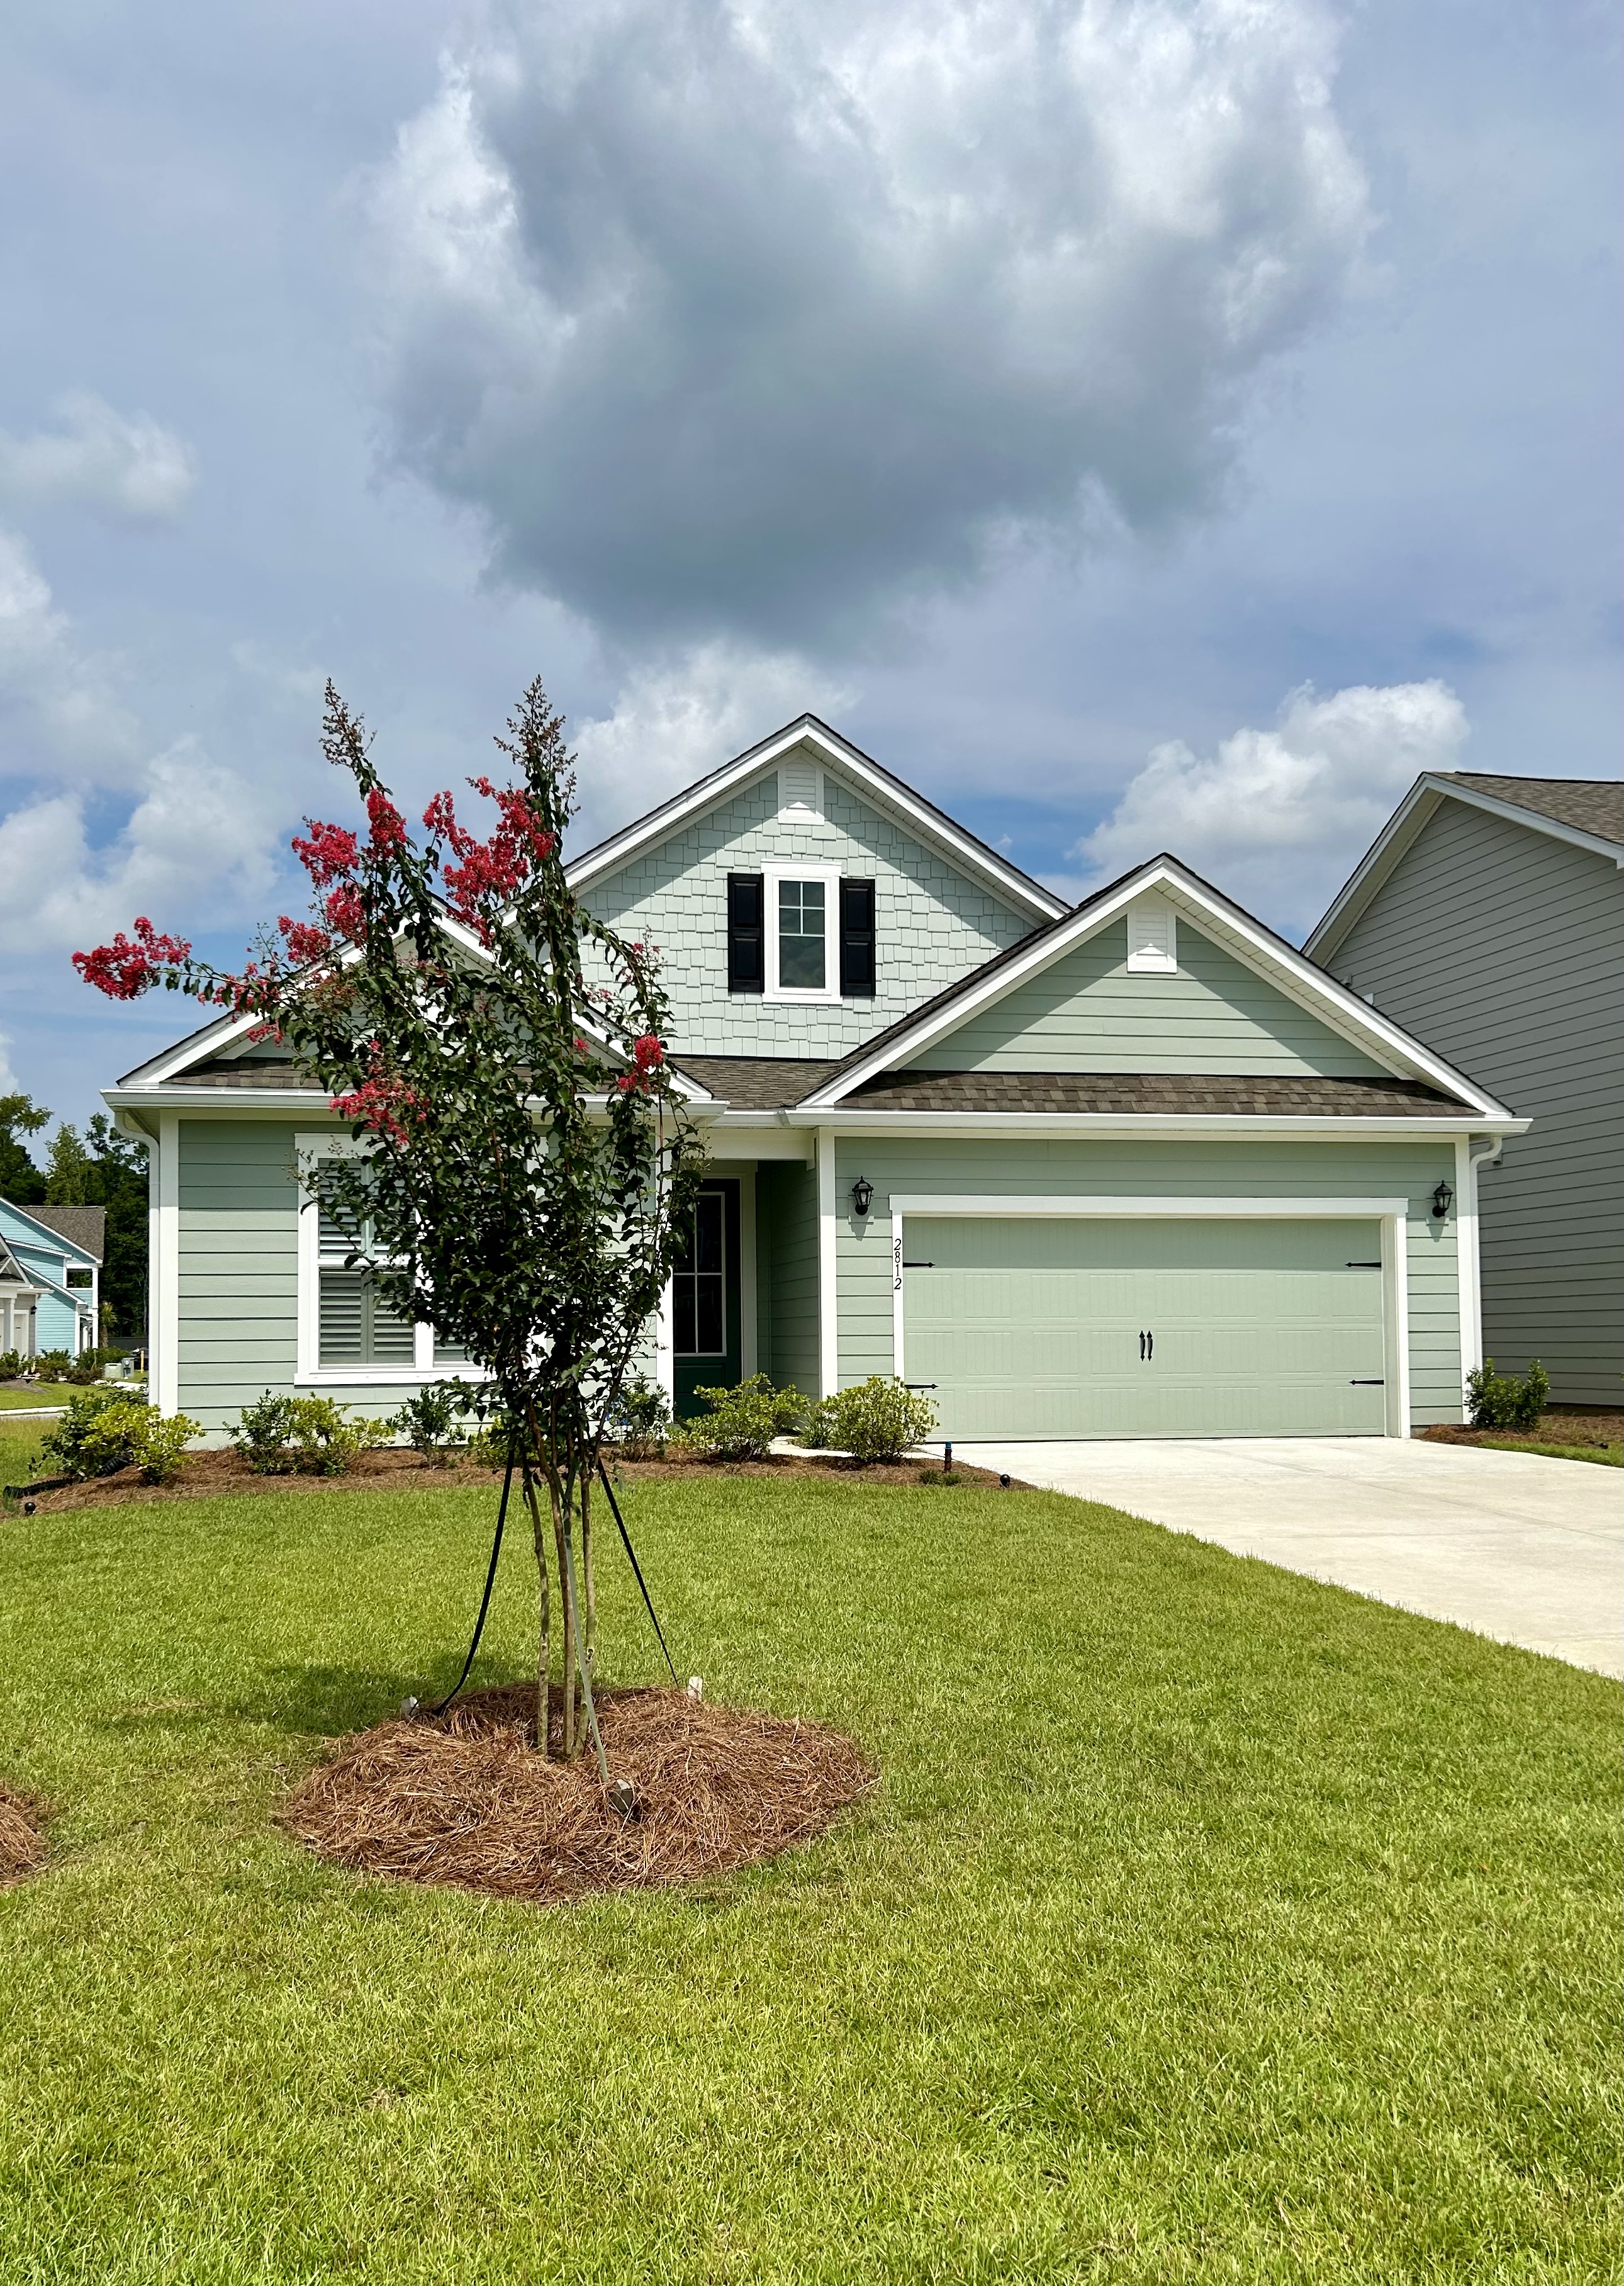
I took this picture the other day–with the new Crape Myrtle in place of the Willow Oak planted by the developer. Look at the size of the azaleas and hollies out front now. They are thriving. I’ve worked so hard on the grass with hand weeding and fertilizing and watering–and it shows. It’s now like a deep carpet in most places.
And you can’t see them from the street yet, but the 20 little Dwarf Mexican Petunias are thriving, growing, and starting to bloom. This morning three more had flowers that had opened.
They are all the pretty violet/blue I wanted.
It is a bit cooler here these past few days. And we’ve had good rain, but I’m going out to water the new Crape Myrtle now as it does not have a developed root system yet.