This mystery was designed by Bill Kerr and Weeks Ringle of the Modern Quilt Studio. No quilt in this mystery is going to look identical to anyone else’s quilt.
We all chose our own palettes while considering our field/background fabric—and there were really helpful videos for all the steps along the way. I’ve quilted for decades, and my current quilts are now numbering in the low 200s. But I learned a whole lot from Bill and Weeks with this quilt.
There were 6 weekly releases of blocks—and each week we had 4 sets of 2 blocks to do, BUT we would chose ONE of the two blocks in each set to make. In each set of two blocks, one block often would be more complicated than the other. So there was a nice range of difficulty. Sometimes there were extra blocks we all did—or maybe we also had to manipulate further an earlier block. We made something like 20-30 blocks each week.
There was, also, a choice of three sizes of quilt to make and three different ways to create one’s final top. I chose the middle one. I was tempted by the more difficult one, but kept coming back to the one I did. And I love how it came out.
Those participating had a closed Facebook group where we could talk–and I so enjoyed the support, but also the fun–the sense of humor–that permeated this group. There were lots of posts describing which “cabin” they were currently in, that ranged from enjoying after-quilting eating/drinking pleasures in the “party” cabin to someone presently occupying something like the “thinking too hard” cabin. On and on it went and often sent me into chuckles of amusement.
The pattern for Summer Camp will be for sale on the Modern Quilt Studio web site–and you can also see there the other assembly versions and the quilts others have made.
This quilt is the second mystery quilt Bill and Weeks have designed. You can see the first one (“New Day,” made last winter) on their web site. That pattern is for sale now. And there have been hints that they will do another mystery quilt.
So, today I am, like others here along the South Carolina coast, waiting to see if Hurricane Lee does indeed make the predicted turn to the north.
While that turn north would make me happy, it would also mean that it likely would head to the Gulf of Maine coast, where so many of my friends live. They have had the wettest spring/summer on record, so the ground is soft and already wet. It is still raining every day or every few days in coastal Maine, say my friends. High wind would likely topple trees–so my Maine friends are worried.
I’ve seen quite a few of these beautiful butterflies soaring around my flowering beds in recent weeks.
What interesting patterns on the wing undersides:
It’s a Variegated Fritillary:
Variegated Fritillary. Identifying Characteristics: Variegated Fritillary butterflies have a wingspan of 1.75 to 2.25 inches. The coloring of this species is tawny brown to burnt orange with black dots and lines.
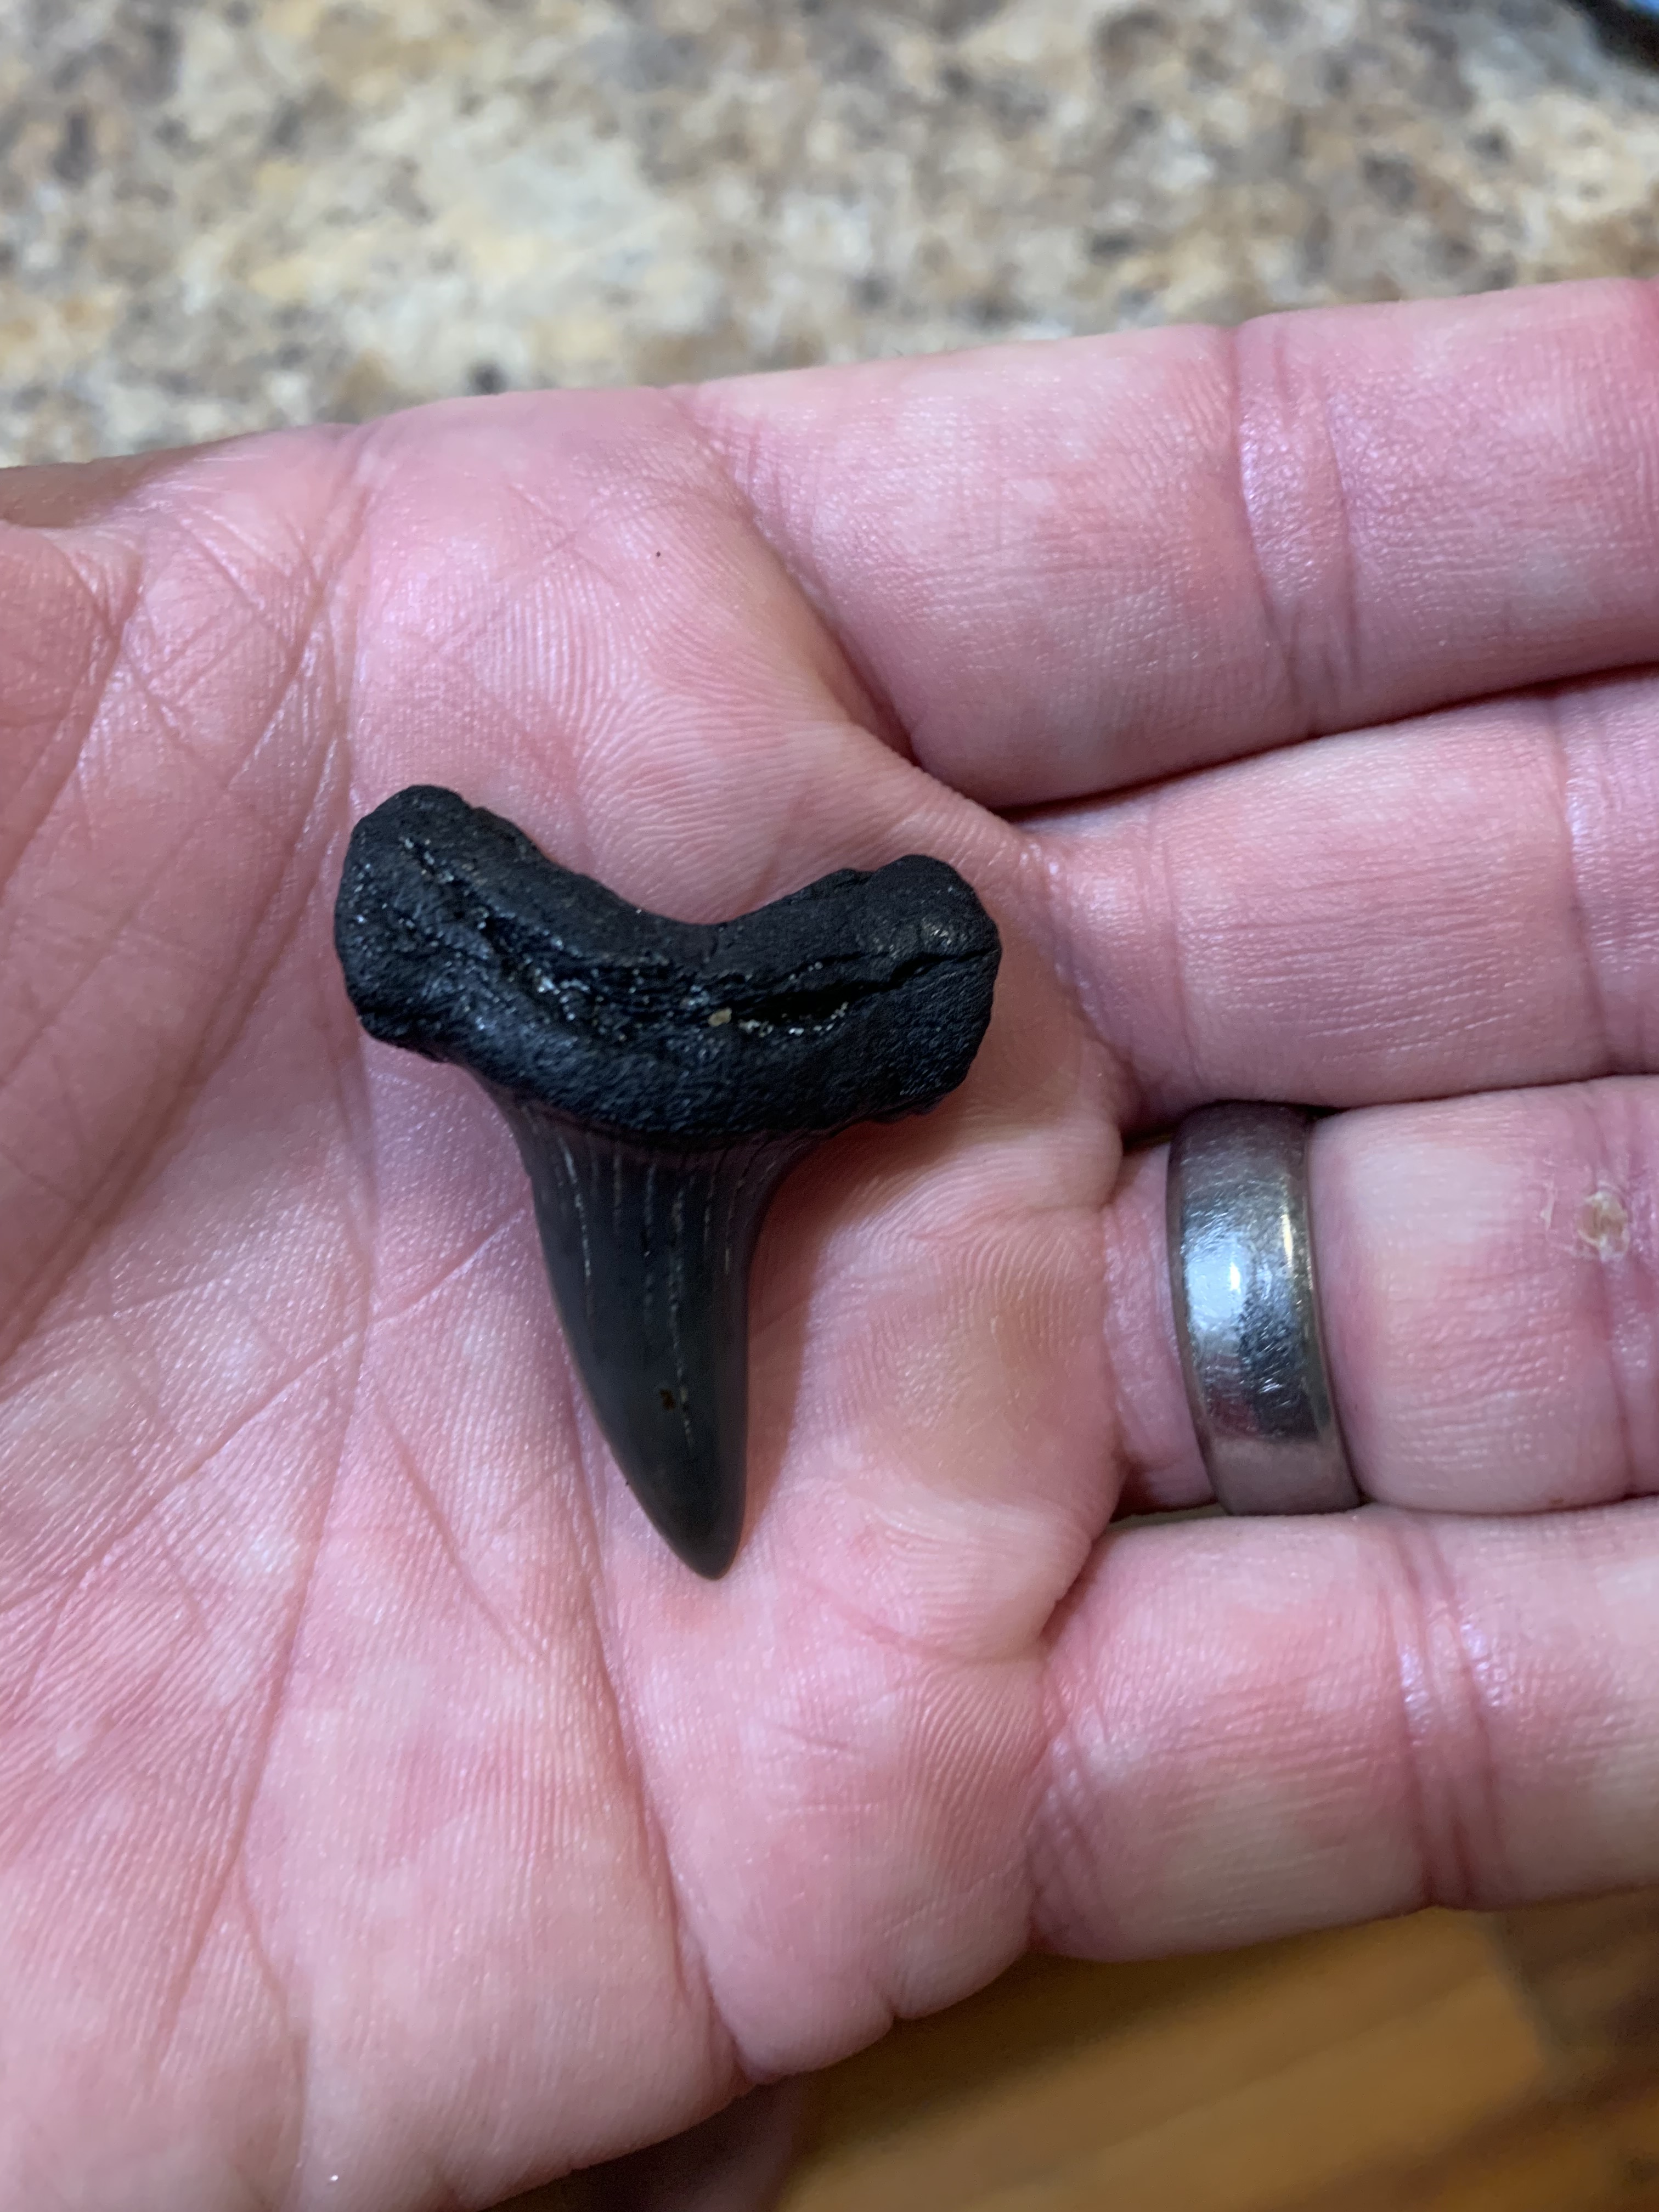
Son Bryan, DIL Corinne, and their three girls scour the beach when they arrive there, looking for prehistoric shark teeth.
This one, found recently, is a rare find–as it is SO BIG and not broken. It is from a GRANDPARENT to the famous Megalodon shark, an apex predator back in its time. (There are folks here who can identify these shark teeth.)
Megalodons were HUGE sharks, kin maybe to today’s Great White Sharks. Here’s info from Britannica about the size of this shark:
“This data suggests that mature adult megalodons had a mean length of 10.2 metres (about 33.5 feet), the largest specimens measuring 17.9 metres (58.7 feet) long. Some scientists, however, contend that the largest forms may have measured up to 25 metres (82 feet) long. Studies estimate that adult body mass ranged from roughly 30 metric tons (1 metric ton = 1,000 kg; about 66,000 pounds) to more than 65 metric tons (about 143,000 pounds), adult females being larger (in both length and mass) than adult males” (https://www.britannica.com/animal/megalodon).
Here is another recent find that is smaller but in good condition:
The idea of the great Megalodon sharks has sparked a novel that, in turn, has sparked several movies called THE MEG. Wikipedia explains:
I will confessed I watched the movie–I stumbled into it one night. And it was interesting to view how the movie portrayed the bigness of the Megalodon shark.
Here’s a link to more info on the Megalodon from wiki:
The Charleston regional quilt group is The Cobblestone Quilters, and yesterday morning I went to meet them–having joined online a few days before Saturday. The doors open at 9 am, and the meeting is from 9:30 to late morning and is followed by a lunch a member can purchase–or just attend with one’s own lunch. Classes can and do happen in the afternoons.
The CQ quilters meet in a church in Hananan, which is west of Mt. Pleasant and about a 25 minute drive. The WAZE app took me there without incident–though just as I got on the 526 interstate highway, the heavens unleashed a gully-washer downpour of sheets of much-needed rain.
I had made contact with the CQ membership chairperson online, and I met her immediately as I came through the door. And she introduced me to nearby gracious lovely women who, in turn, introduced me to other gracious lovely women. To say I was welcomed is an understatement.
This group of about 75 members is super well organized. The large room was lined with all sorts of tables filled with events and activities for members to participate in or just enjoy–each manned by member volunteers. This group does a lot of community out-reach, from making donation quilts for various charities to supporting another group’s filling and packing Christmas boxes for lonely sailors who arrive in the Charleston harbor over the holidays. Next time I will do a better job of taking illustrative pictures. I was kind of in shell-shock at the amount of goodness I saw displayed I think.
The large room was filled by the time the meeting started. And I started feeling a bit woozy with all the chemical smells that a packed room with lots of people causes me to have. But I made it through to the break before knowing I had to take Benadryl or I had to get some fresh air. The worry here is whether I can drive safely if I don’t make a change. So I made my apologies and, regretfully, left.
Why didn’t I take pictures of the part of Show and Tell I did see? There were amazing and gorgeous quilts of all kinds displayed by these excellent quilters. I have definitely found a great quilt group. For sure.
There are two Cobblestone “splinter groups” that meet here in Mt. Pleasant later in the month: the Patchwork Gals meet monthly in the morning at the Wando Library, about which I recently blogged; and the Indigo Quilters meet in the early evening not far from me. I met women who go to the Patchwork Gals at the CQ meeting. I will attend both of those meetings later this month.
Note: In my Northern Virginia regional quilt group of 20+ years ago, now called Quilters Unlimited, the small groups that met outside of the regional guild meeting were called “bees.” And in Maine, actual local groups formed that were group members of the Pine Tree State guild–like The Coastal Quilters that met in Camden, Maine. Our other group in Camden, Maine, The Mt. Battle Modern Quilt Guild, which I helped start , belonged to the Modern Quilt Guild, which is a different “parent” organization than the Pine Tree Quilters Guild.
So, I came home energized, but sad I had to leave early, and hungry–and to find that my neighborhood did not get more than one drop of rain. So, today I will need to water outside.
But first, here is more info on “the turtle”–learned from my family who live nearby. The turtle is likely VERY old. Three generations of the family who own her have taken care of this turtle: the grandmother passed the turtle to her daughter, who passed the turtle eventually to her daughter, the current owner. The turtle IS… VERY BIG. And, obviously, long-lived.
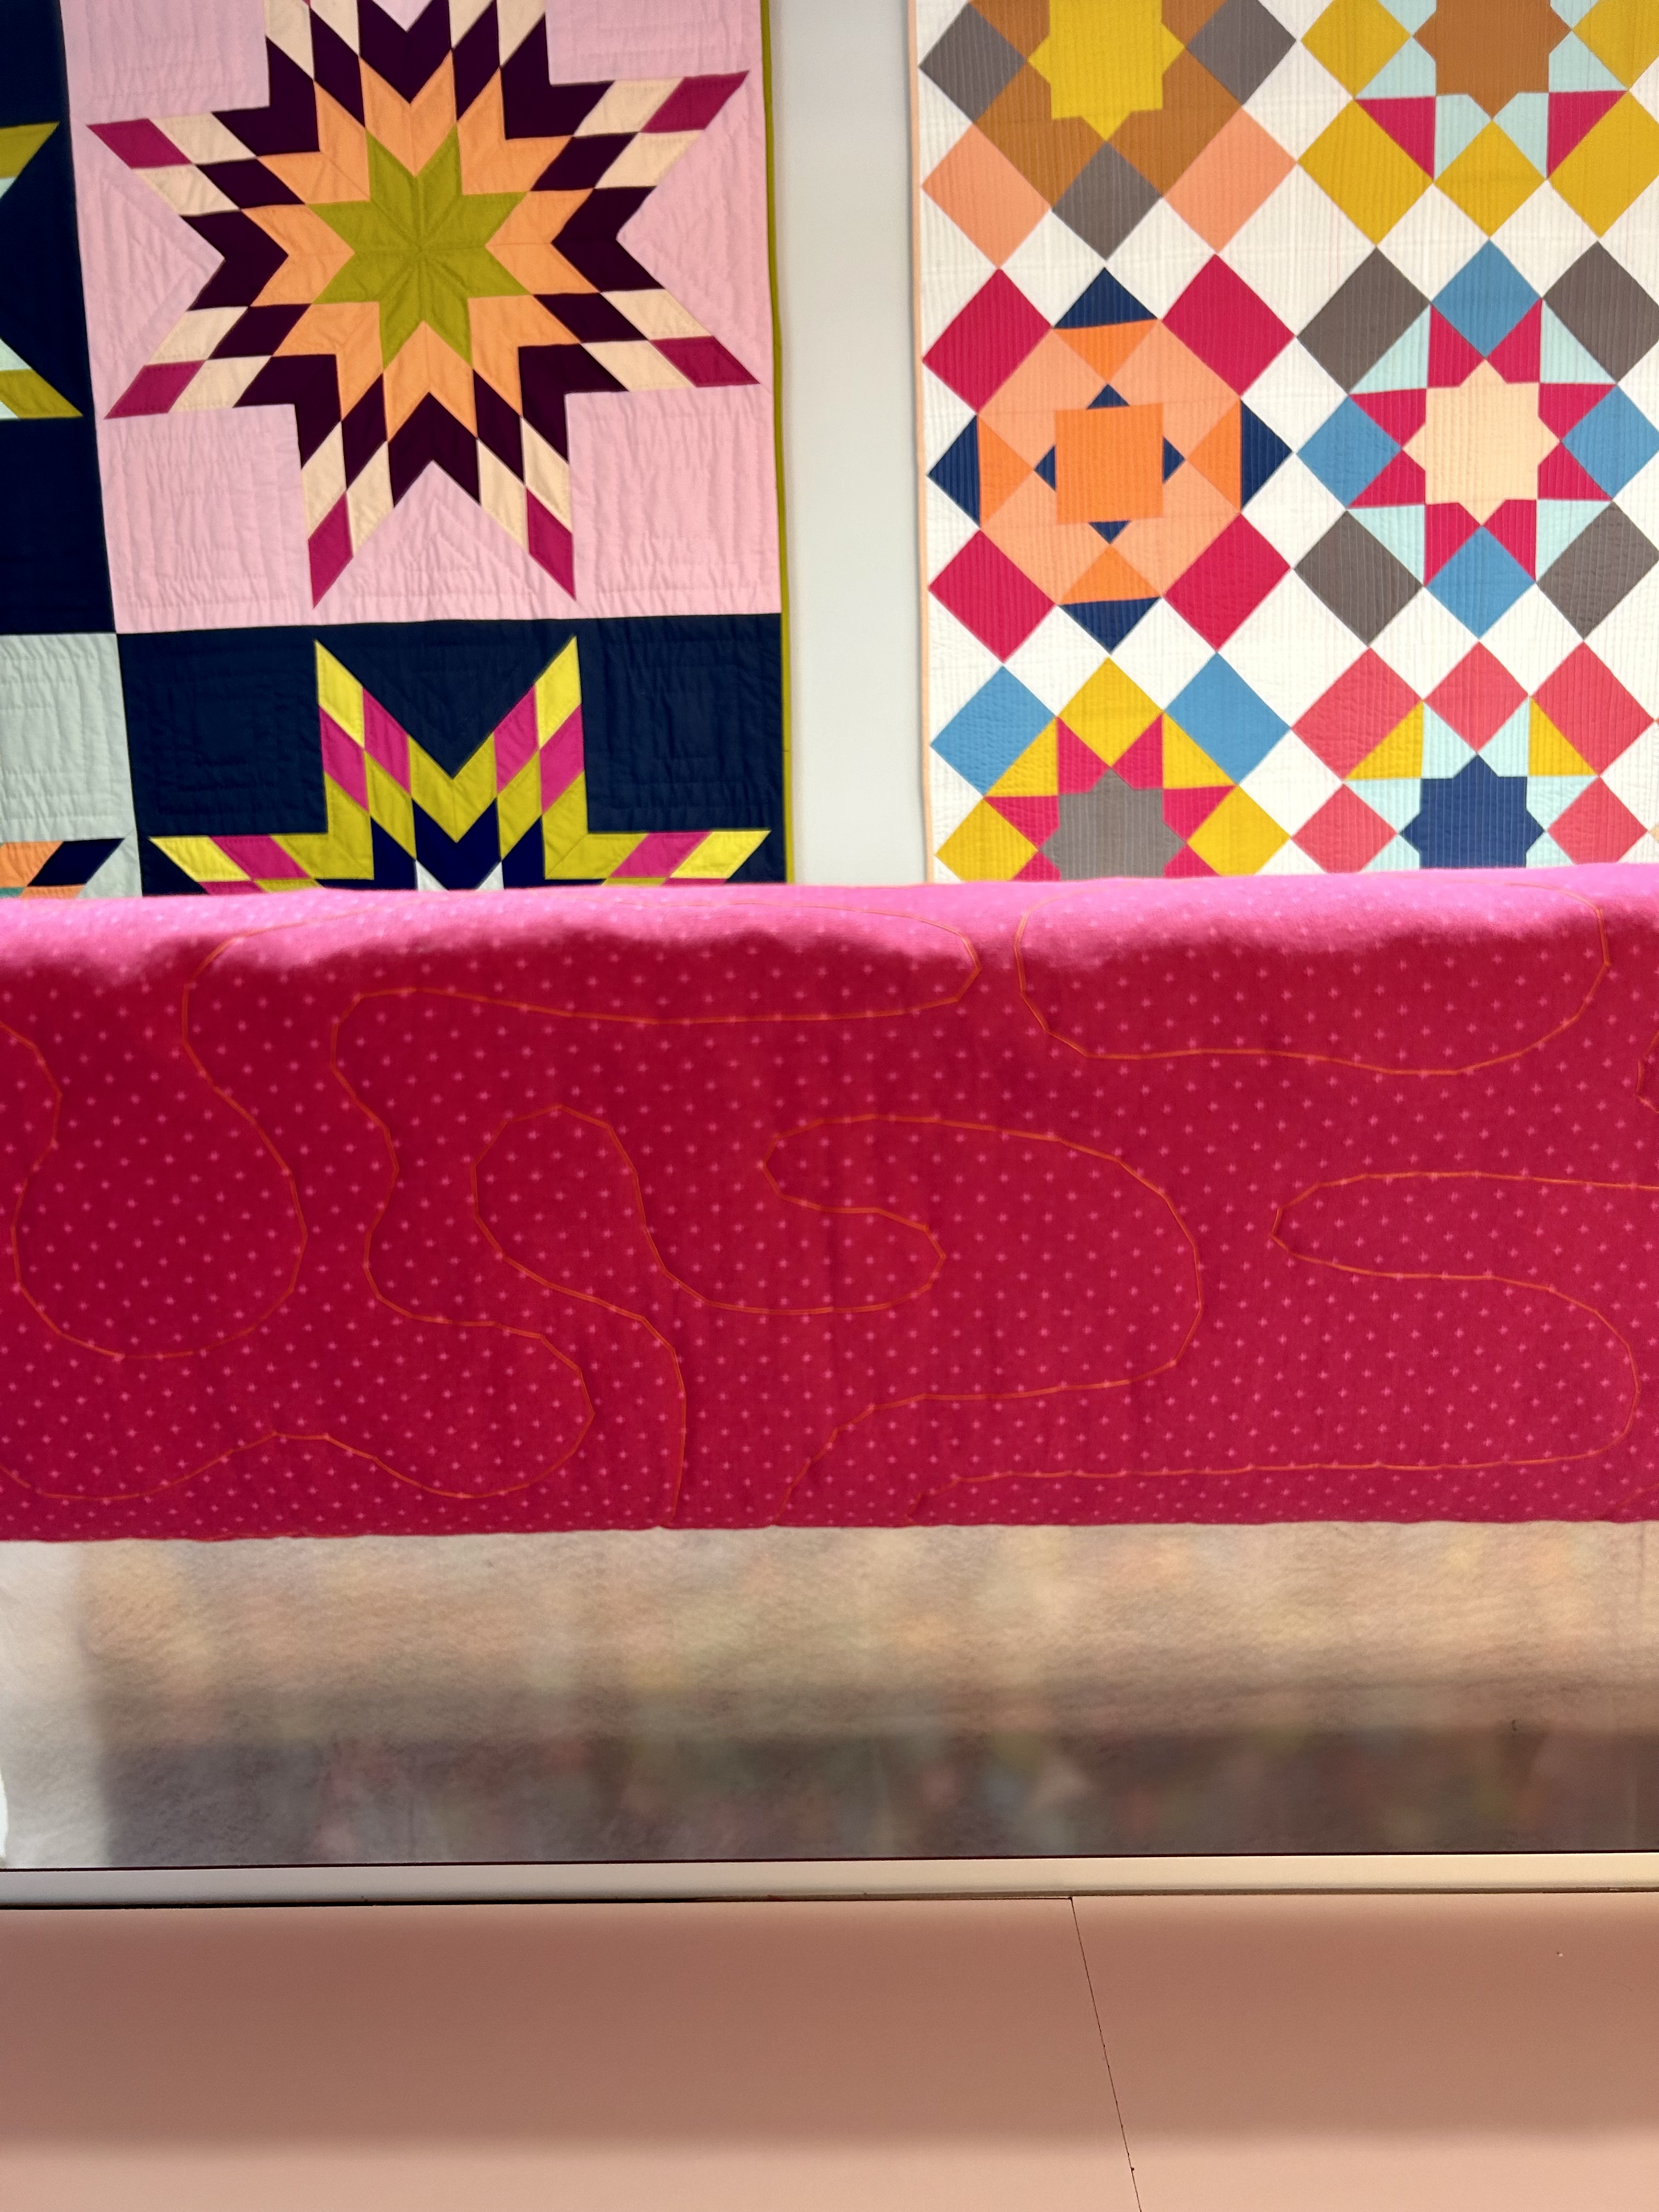
“Happy” is now basted and ready for hand quilting. Here she is on the longarm.
Below you can see the big basting stitches I can do on the longarm. And, this time I covered the quilt more densely than I did on Traverse. It is very easy to clip these threads when I need to do that.
The backing is this lovely Ruby Star Society fabric–which is in keeping with the Cotton+Steel/Ruby Star Society fabrics I used in the centers of the blocks on the front.
And here she is all done.
It is really hard to get enough light on a quilt in this room. But my longarm light bar gives me plenty of light.
I’m thinking I’ll need a dark solid for binding. I had wondered about the backing fabric for binding, but… I don’t think so. But I’m not sure about that yet.
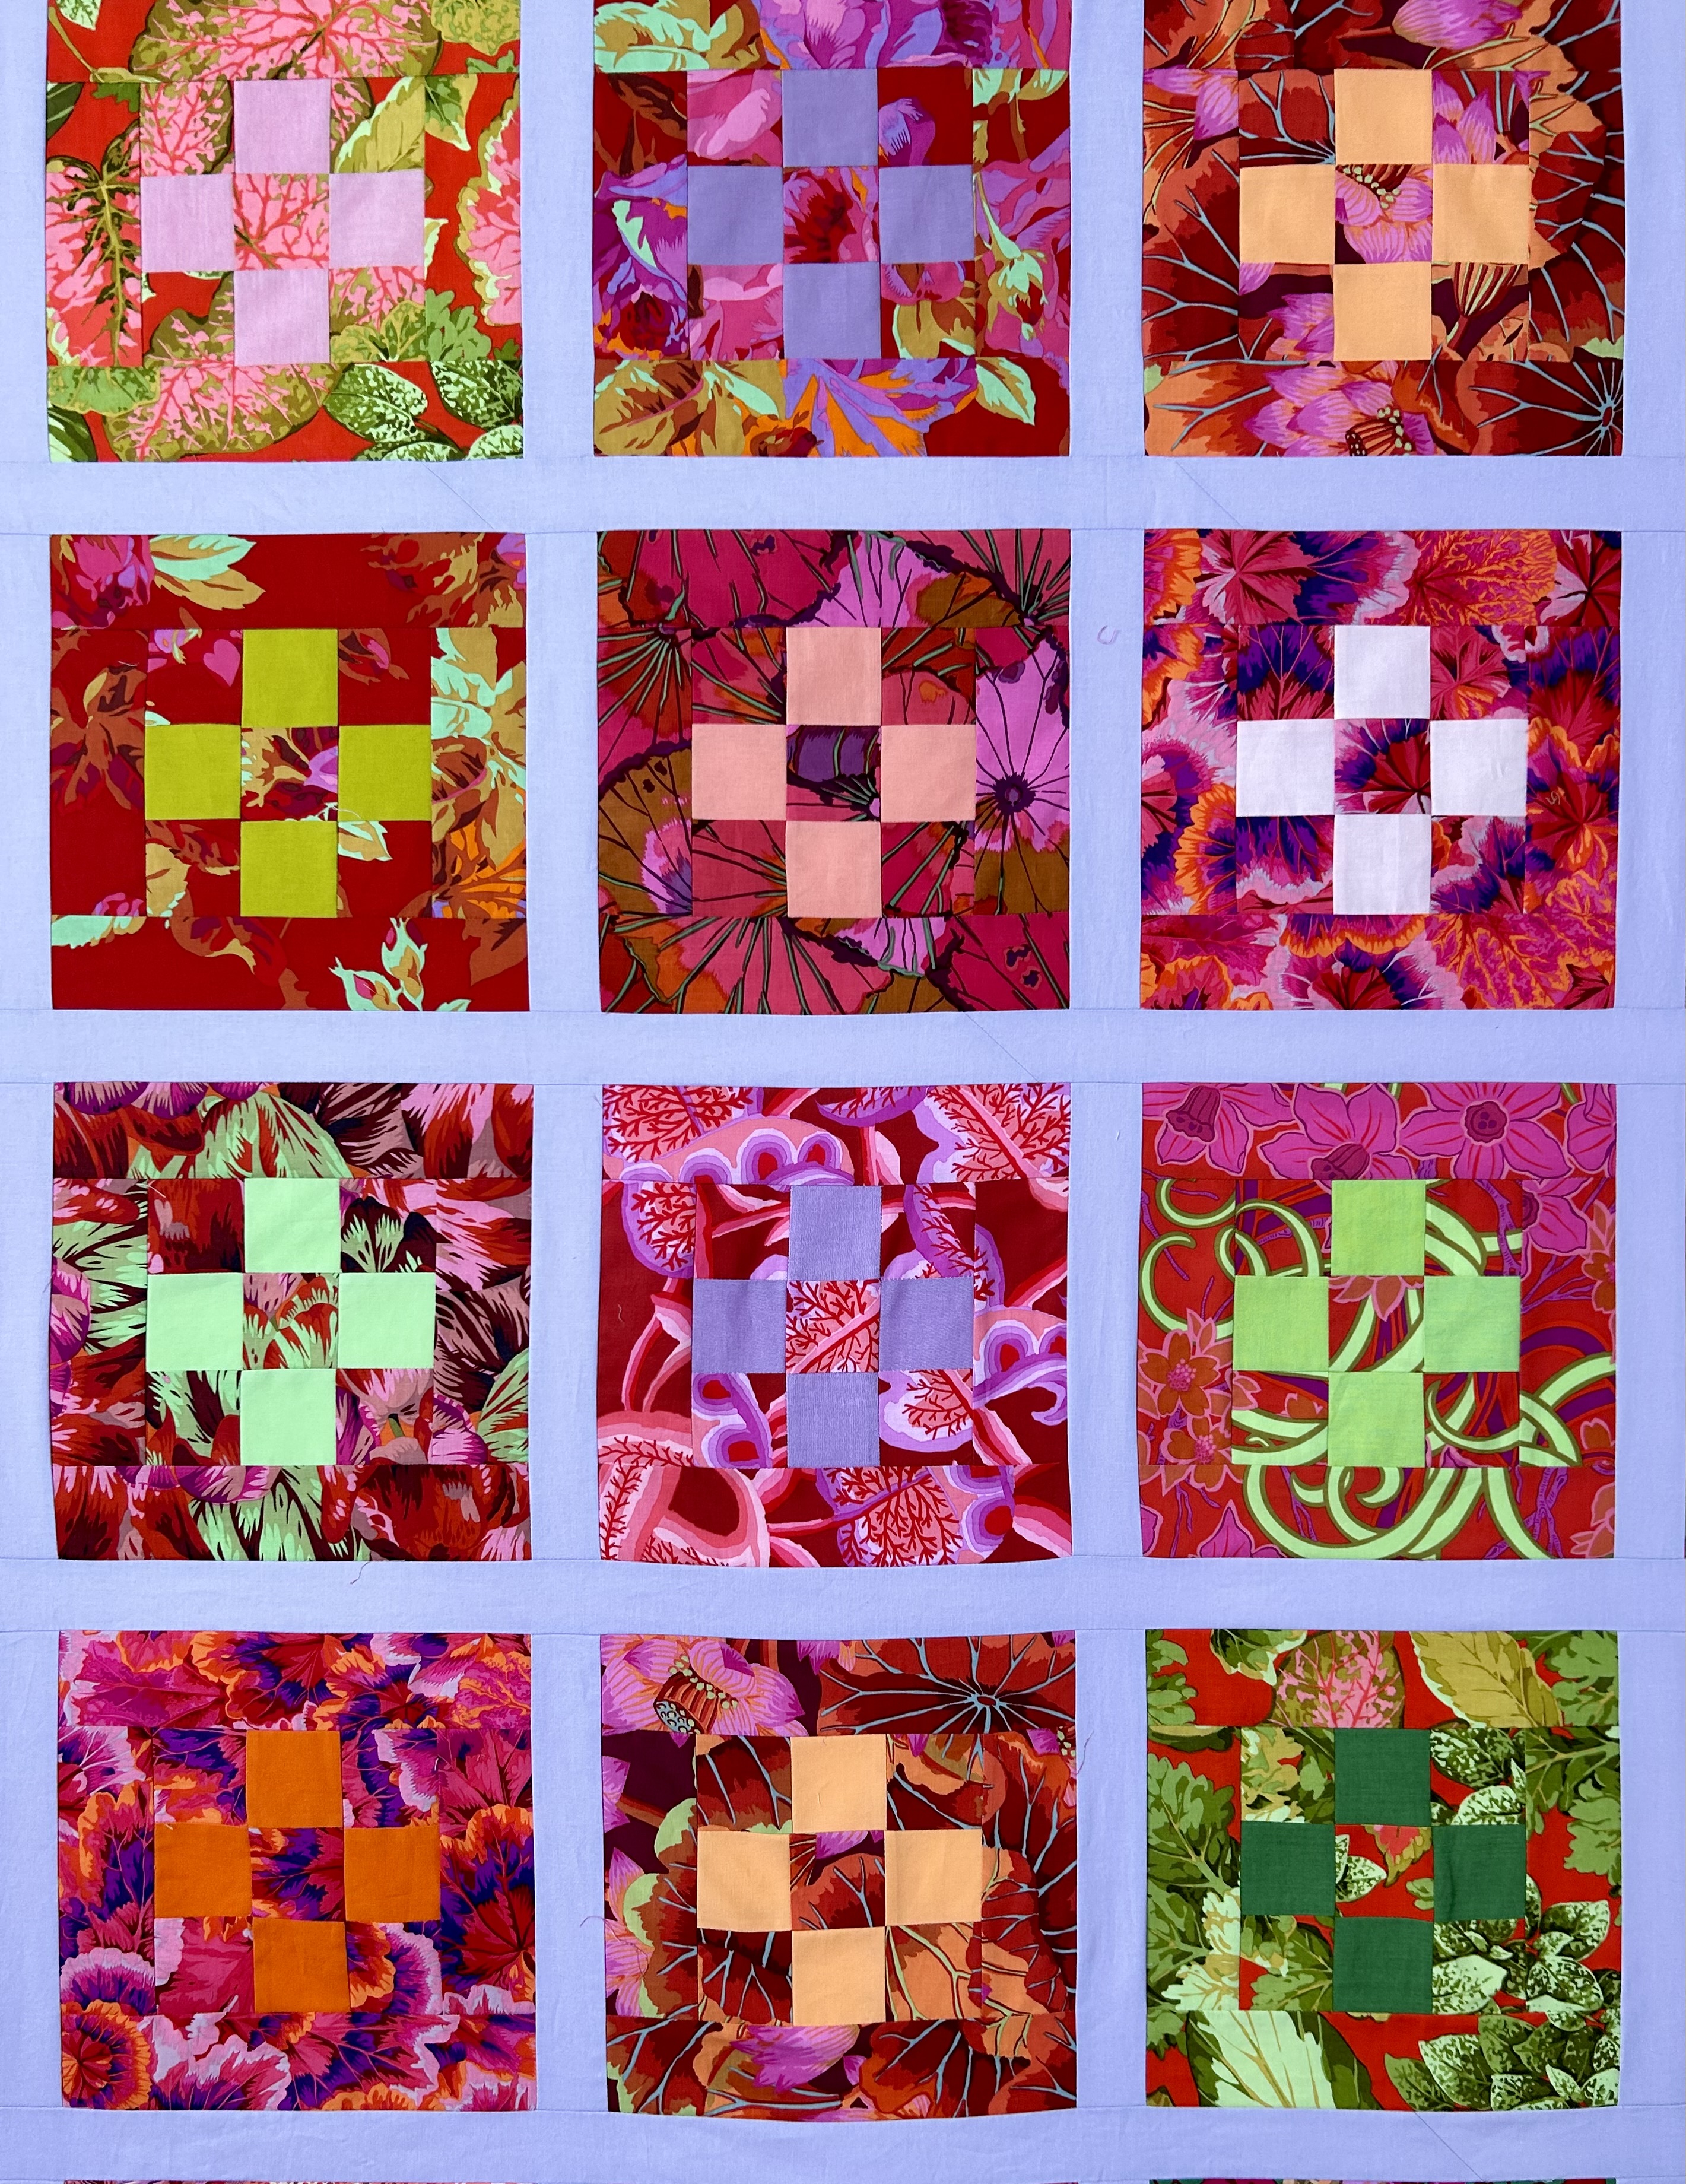
Now I’ll put Big Red on the longarm. Meanwhile, I think I’ve stopped moving around blocks on the “Summer Camp” mystery quilt from the Modern. Quilt Studio. Maybe it needs to be called “Summer Camp.”
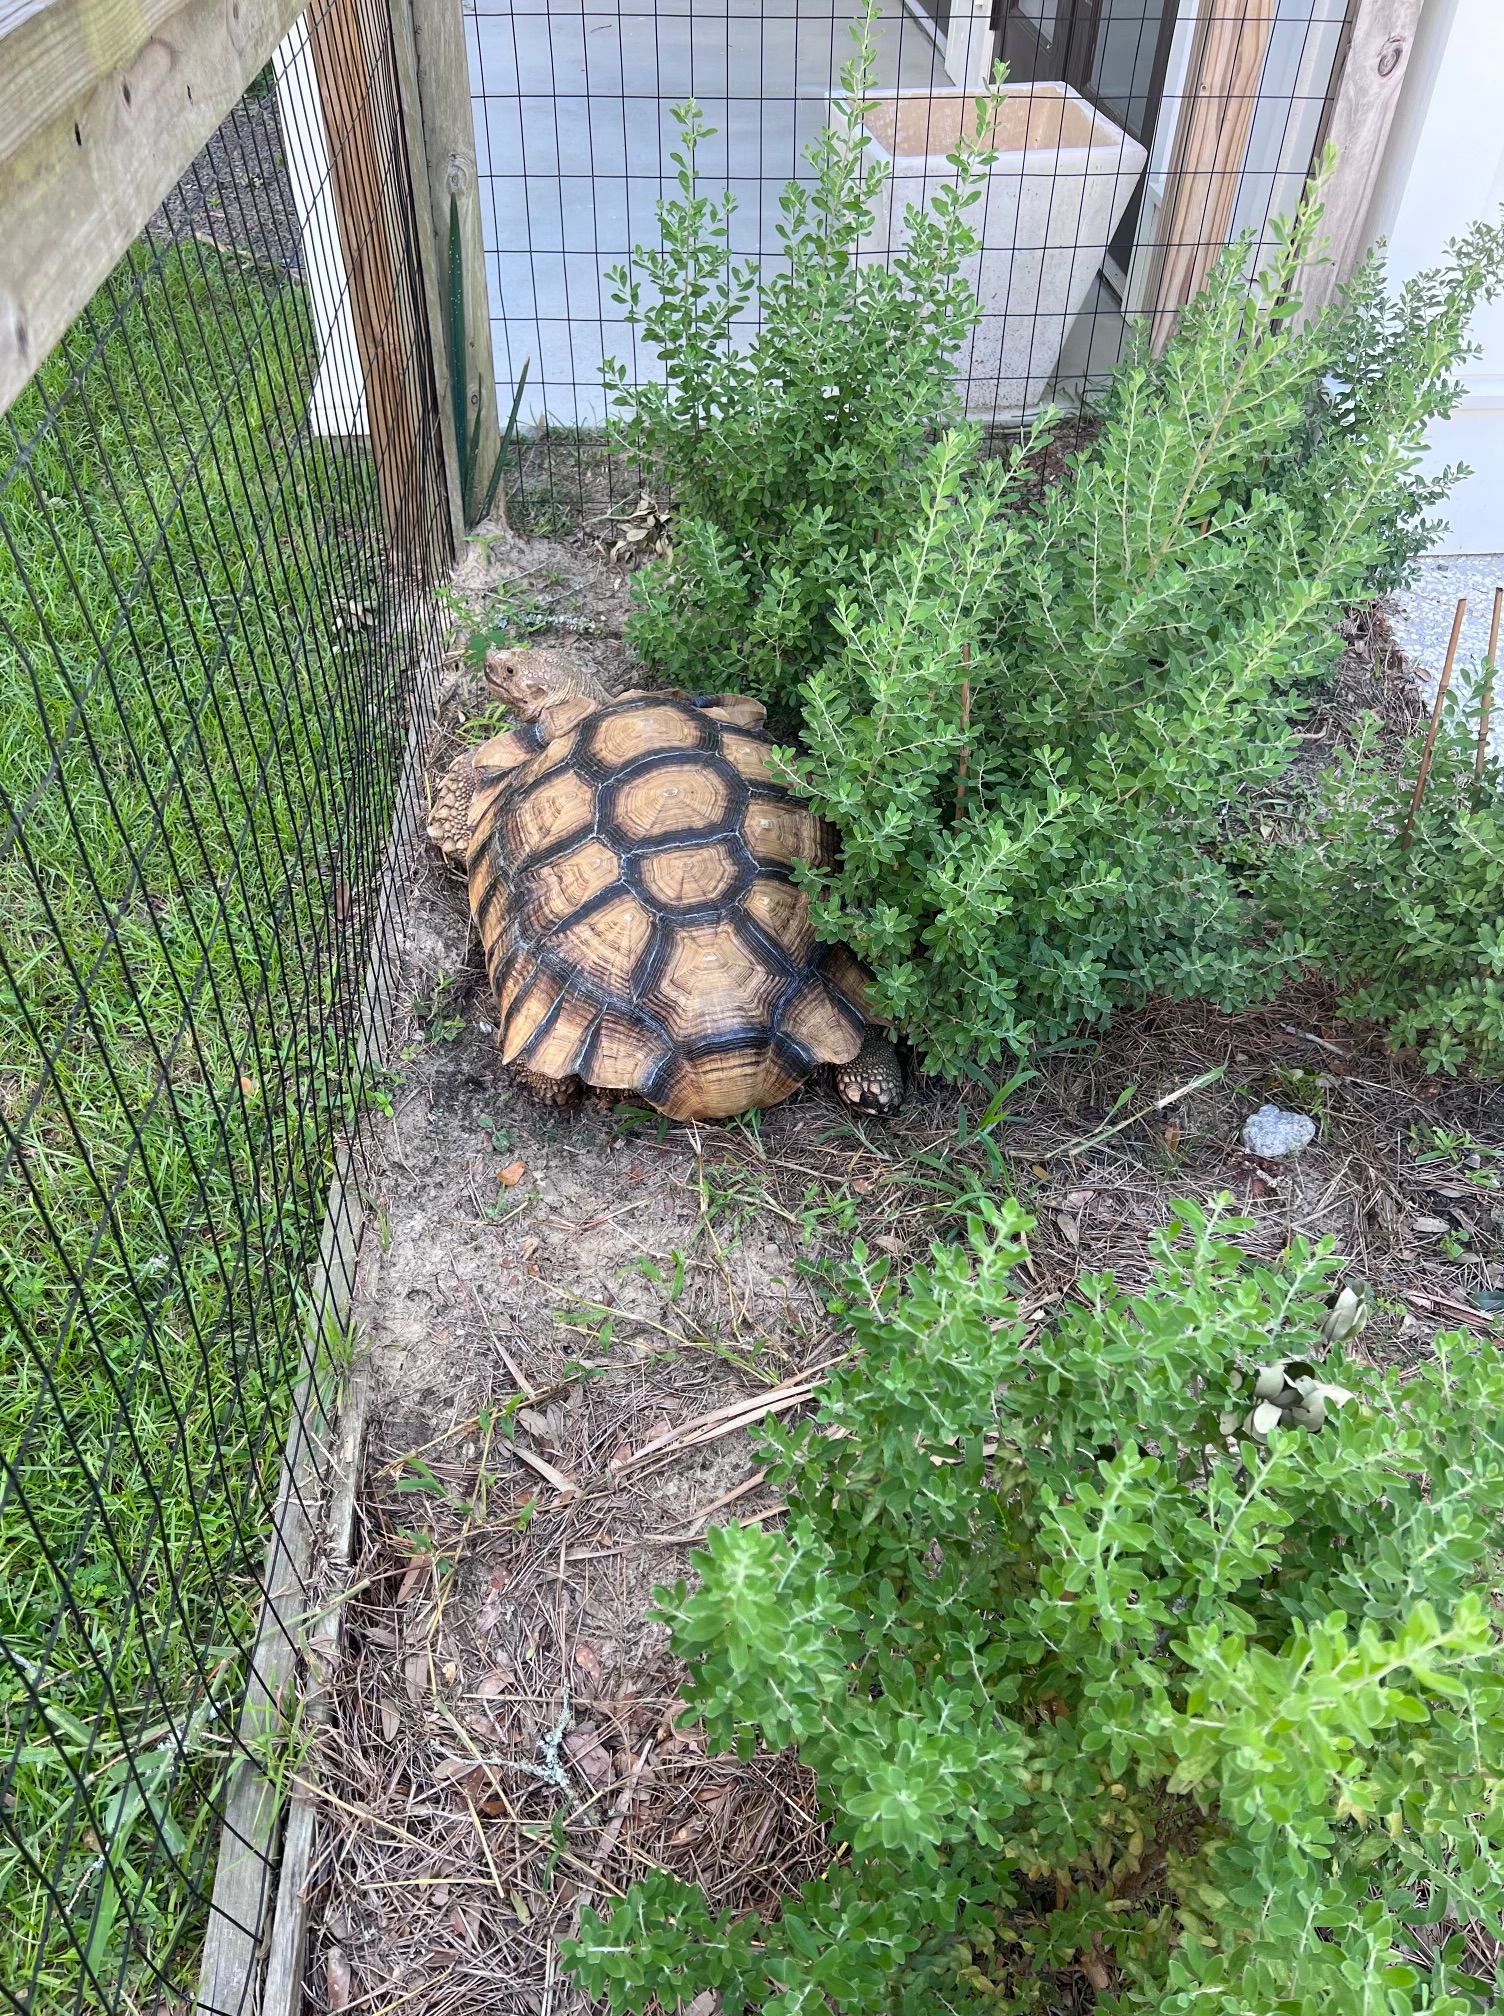
On Saturday Granddaughter Mina sent me a picture of this turtle, which was next door. She identified it as a “pet,” and I thought she was joking.
My first question: what kind of turtle is it?
She thought it a tortoise.
I could not find such a large tortoise in the list or images of native South Carolina turtles.
Along the google way I found this verbiage on identifying types of turtles: “If you know what to look for, you can spot the differences between freshwater, land, and sea turtles. Freshwater turtles are often small with flat feet. Land turtles, called tortoises, have big, round shells and flat feet. Sea turtles that have smooth, flat shells and flippers for swimming.” So tortoise is a category. But what kind of tortoise. Seems larger than the ones I looked at online.
And I found that the carapace pattern is called “rings.”
Aha! On Monday, I tried again and GOT IT. It’s a Sulcata Tortoise.
It’s finally cooler–so I went with son Bryan, Corinne, and two of the three girls to the Isle of Palms beach around 11:30. We arrived with chairs, lunches, water, and all the beach toys–which involves a ride to an access path on the golf cart, which also pulls a little blue cloth wagon filled with all one would need at the beach.
It was a wonderful outing, and I swam with Corinne and granddaughters. We all like to body surf, which I had not done for 30+ years. It was so much fun. It was full high tide with very little current, and the waves were perfect. Here I am with the granddaughters, just out of the surf.
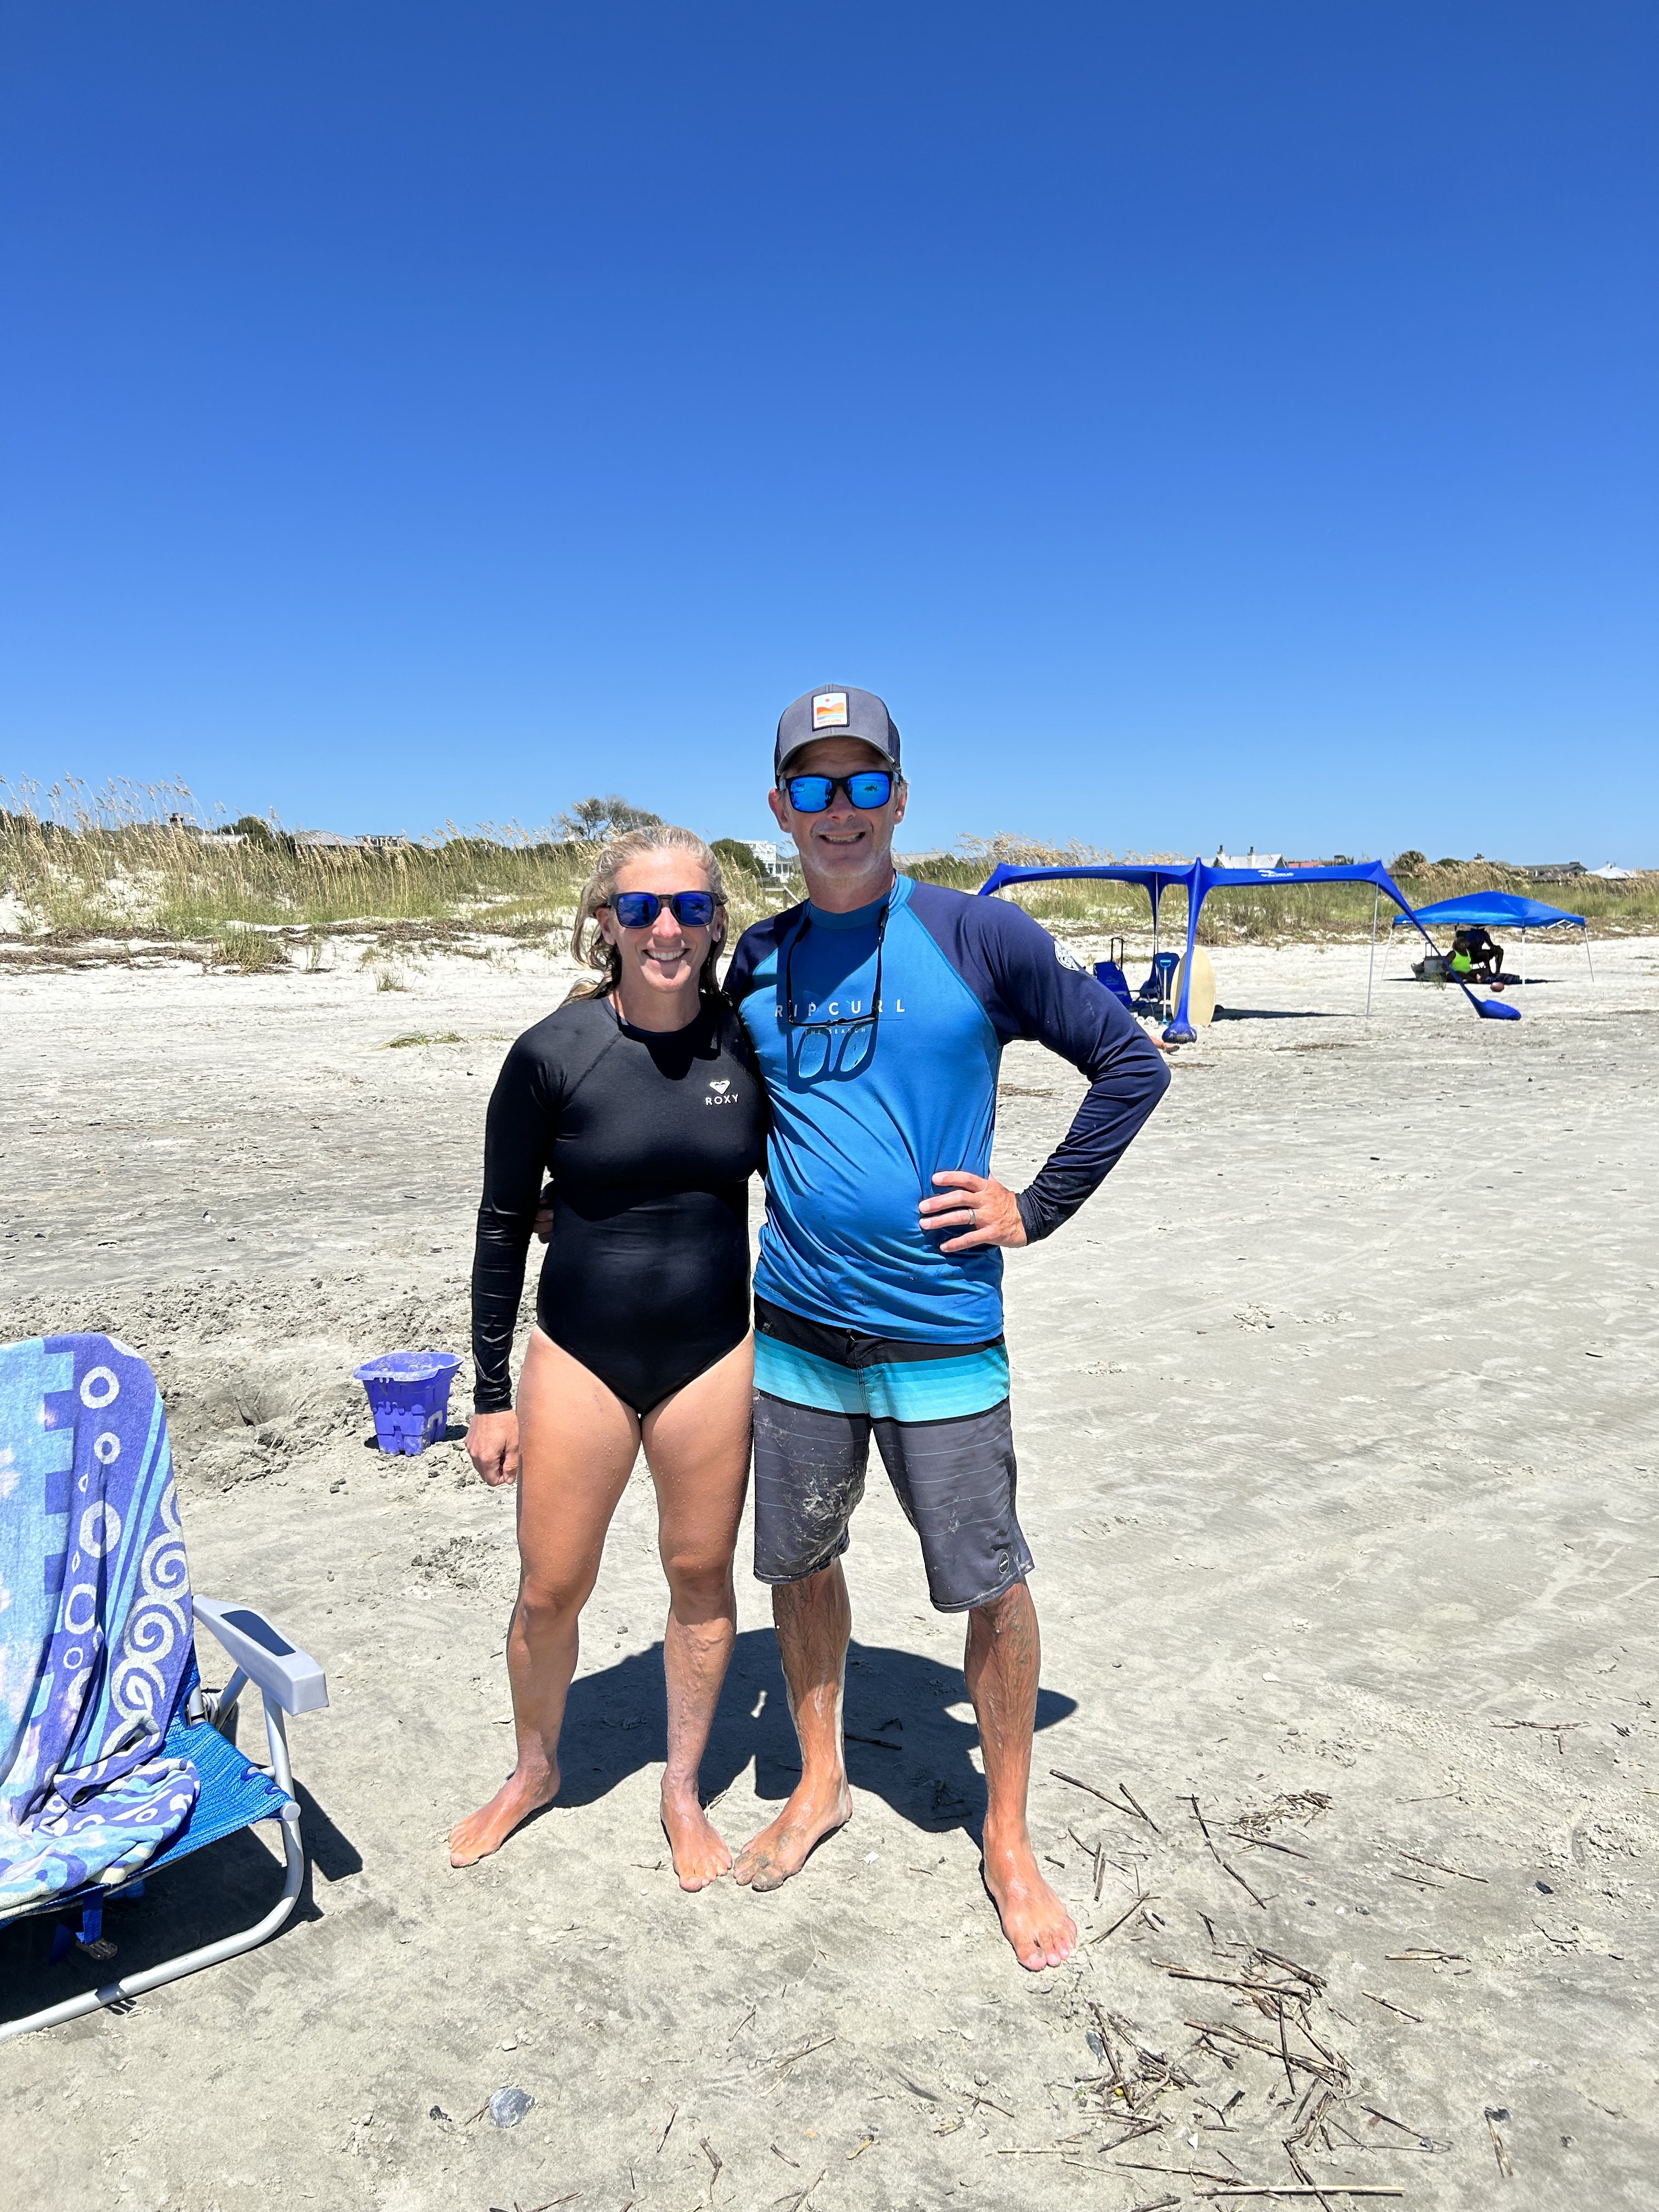
Here are Bryan and Corinne–both of whom spent some time looking for shark’s teeth in the wake of the falling tide. But, more on shark teeth in another post. Note they wear sun-protective tops, which means that part of one’s body does not need sun screen. I have a good top too.
Corinne packs an awesome lunch for her family. Each has an individual Bento box filled with healthy food, and there are other snacks as well. (I bring my own lunch given my food issues.)
Here is Corinne unpacking the lunches. Her wide-brimmed hat protects her face, ears, and neck.
After lunch, the tide had dropped enough for Bryan to dig a hole that reached water, so he could make a sand castle. He loves doing that and has not had time this summer to make one, given all their summer trips away. This one is small compared to his usual sand castle efforts that are better started at a lower tide.
Building the sand castle becomes a family effort eventually. Those chairs in the background are ours, and you can see the blue wagon that carries everything but the surf boards, which go on top of the golf cart. I have a wagon like this one that I used for quilt retreats. They fold up and store so easily in a small space.
We swam again, we three wave riders, while Bryan built his sand castle.
I left them when I felt my Maine-white skin starting to get burned. My tan is better now, but not anywhere it needs to be for sun protection here. Once home I showered, washed all the beach clothing/towel, made a big espresso, and settled in to rest and read.
Idalia roared into Florida as a Category 4 hurricane last Tuesday and Wednesday. She was BIG and moved really fast. But, when she got to us here on the Charleston coast, sooner than predicted with the leading edge starting in earnest in the early afternoon Wednesday, she was a tropical storm.
We lucked out. The worst of Idalia, the center, was just to our west. Still, we got lots of bands that were “red” and “yellow”–denoting severe weather. And the local weather people were very wary of tornados developing. She did NOT depart land here at Charleston as predicted, and when we got the last of the bands in the early morning Thursday, her leading edge had reached Virginia Beach.
I have a little rain gauge out front–and the sheets of water filled its five inches in no time at all. So, in total, we got something north of 6 inches at my house. And, yes, the wind was bad, but not, according to son Bryan who lives on Isle of Palms, at hurricane force. He said they actually got a good night’s sleep.
One of the fun things for me, sometime in the mid-afternoon, was hearing local children playing outside. They were riding their bikes in the steady rain and with the wind diminished for that moment. They were whooping and laughing and careening their bikes through the sheet of steady rain. It was a moment of pure joy to see them having such fun.
I had defrosted a soup to have on hand–thinking I could eat it cold if I lost power. Fortunately, I was able to have a nice hot bowl of soup for dinner and supper. I augmented what I had frozen with 4 more chicken thighs I also had frozen. I threw in the handful of organic mixed salad greens I had left in the refrigerator, which included hearty baby greens like spinach, kale, and chard.
Later in the afternoon, my phone started what can only be called a siren. It was a tornado warning, and I was advised to take shelter immediately in an interior room. Later, there were reports and a video of a tornado picking up a car and hurling it off a local freeway.
At 7:30, the power went out for two hours. My little lantern, about which I blogged recently, was wonderful company. And neighbors called to check up on me and offered refuge in their houses. This picture is from the blog. I actually used the more expensive lantern as it is larger, more powerful, has a rechargeable battery that can work also with installed batteries, and can recharge a phone if needed.
When the power returned, everything came back online just fine–unlike the power outage some months back that caused the refrigerator breaker to trip. Fortunately I found it not on fairly quickly.
Basically, I spent the day in my little tv sitting room reading SWIMMING LESSONS, by Mary Alice Monroe. It was a sweet story about a young woman who lives on Isle of Palms and who gets involved with caring for the big loggerhead turtles that nest on these barrier islands each year. She goes on to pioneer the turtle rescue hospital at the Charleston Aquarium–with lots of help of course.
Today, there are many volunteers who work in this turtle arena, and it was fun to read what all they do in this fictional tale. They walk the beaches in the early morning to find turtle tracks and to locate and mark a nest of eggs that is buried around 2-feet deep. When it is time for that nest to hatch, volunteers sit up all night to wait for the eruption of baby turtles from the nest and to make sure they get to the water–which must be done on their own. Beach side houses do not turn on outside lights at this time of year as those lights can make the turtles turn toward the houses and not the water.
It turns out that Mary Alice Monroe, affectionally known as MAM, lives on Isle of Palms and, herself, has helped pioneer these turtle efforts. Today, the Charleston Aquarium is world famous for its turtle hospital.
My new little crape myrtle tree was whipped around in the wind like crazy. Here’s a picture I took a day or so before the storm. Look at all those blooms.
The branches are very pliable and bend easily in the wind, which we all have to do to survive life, right? Some of the blossoms got stripped, but the tree is fine and probably loved all the rain going down to her roots.
Hurricanes that hit this coast mostly develop off the coast of North Africa. There is one the weather people are watching now: Katia. I am holding my breath.
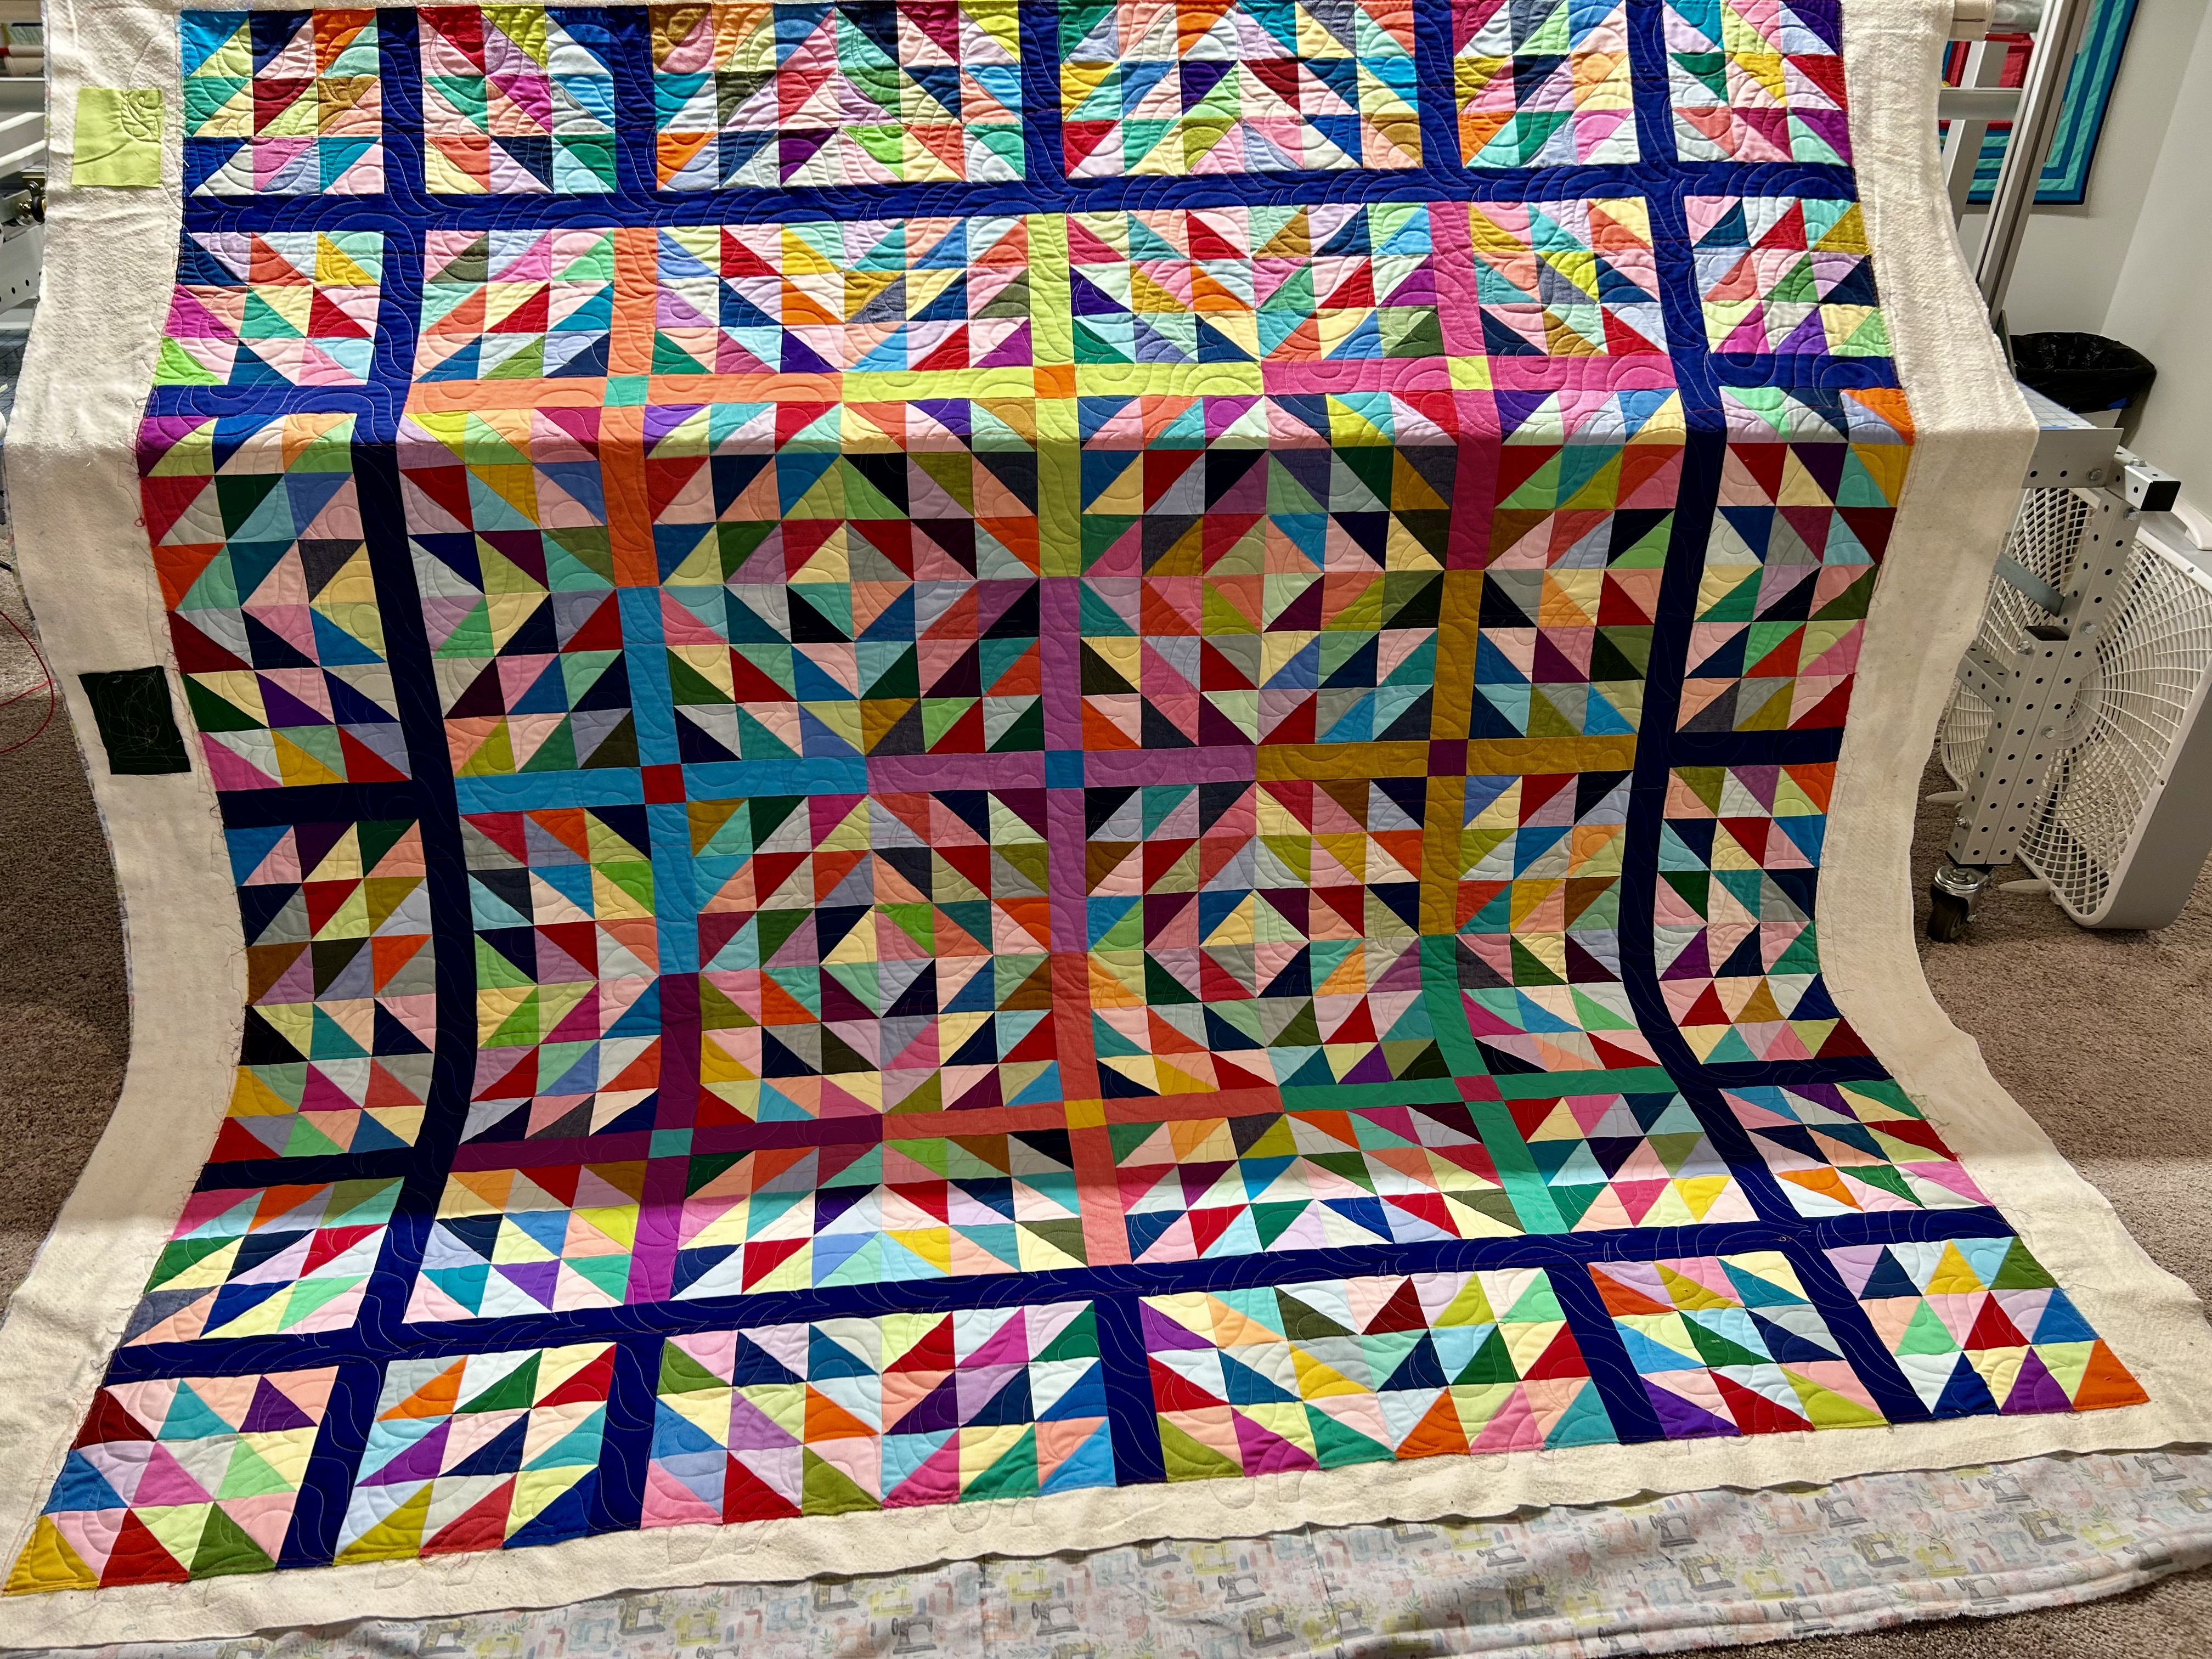
I took “Bonanza” off the longarm early evening last night.
And, WOW, she is beautiful.
I called her “Bonanza” because she is made with leftover solid scraps from my fabric stash. The backing was there too–bought two years ago with birthday money from my younger son and his sweet wife. I would also like to say that “Bonanza” was inspired by designer Tara Faughnan’s recent work with half-square triangles. She has a new pattern out featuring them–which you can see on her web site.
I am fascinated with the secondary patterns that emerge with the use of light/dark half-square triangles. And that’s how this quilt got to be 83 inches square.
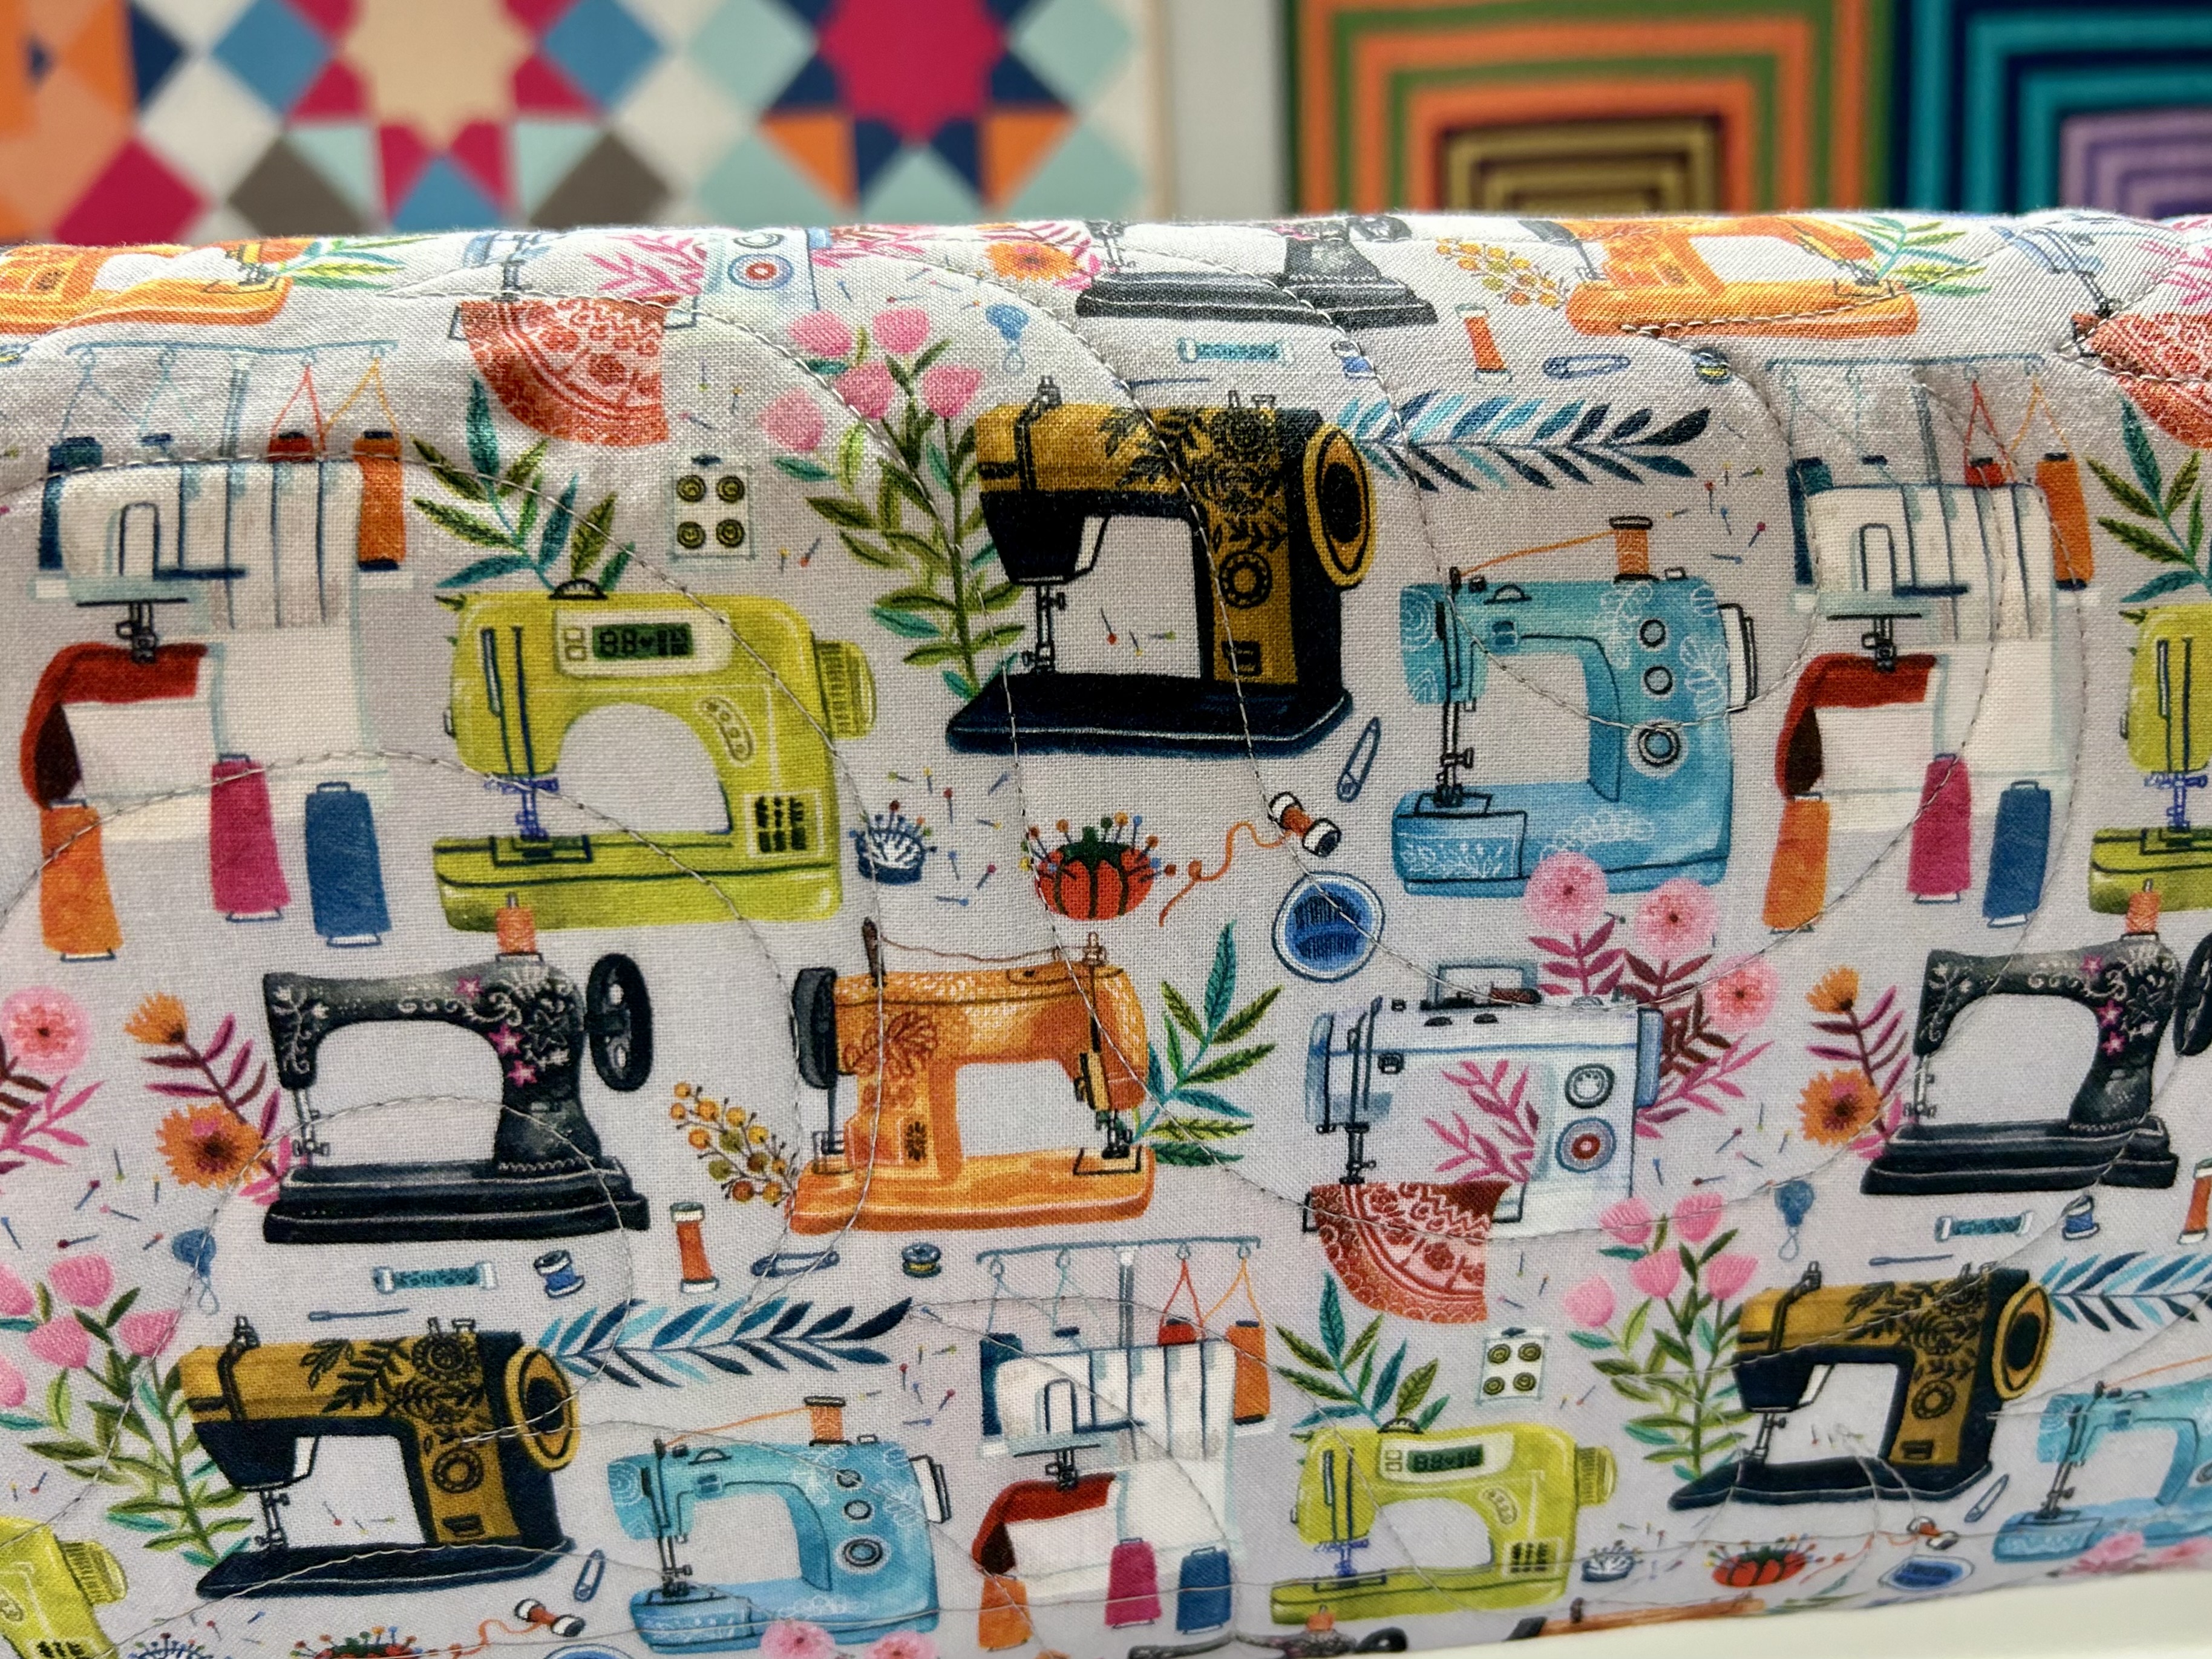
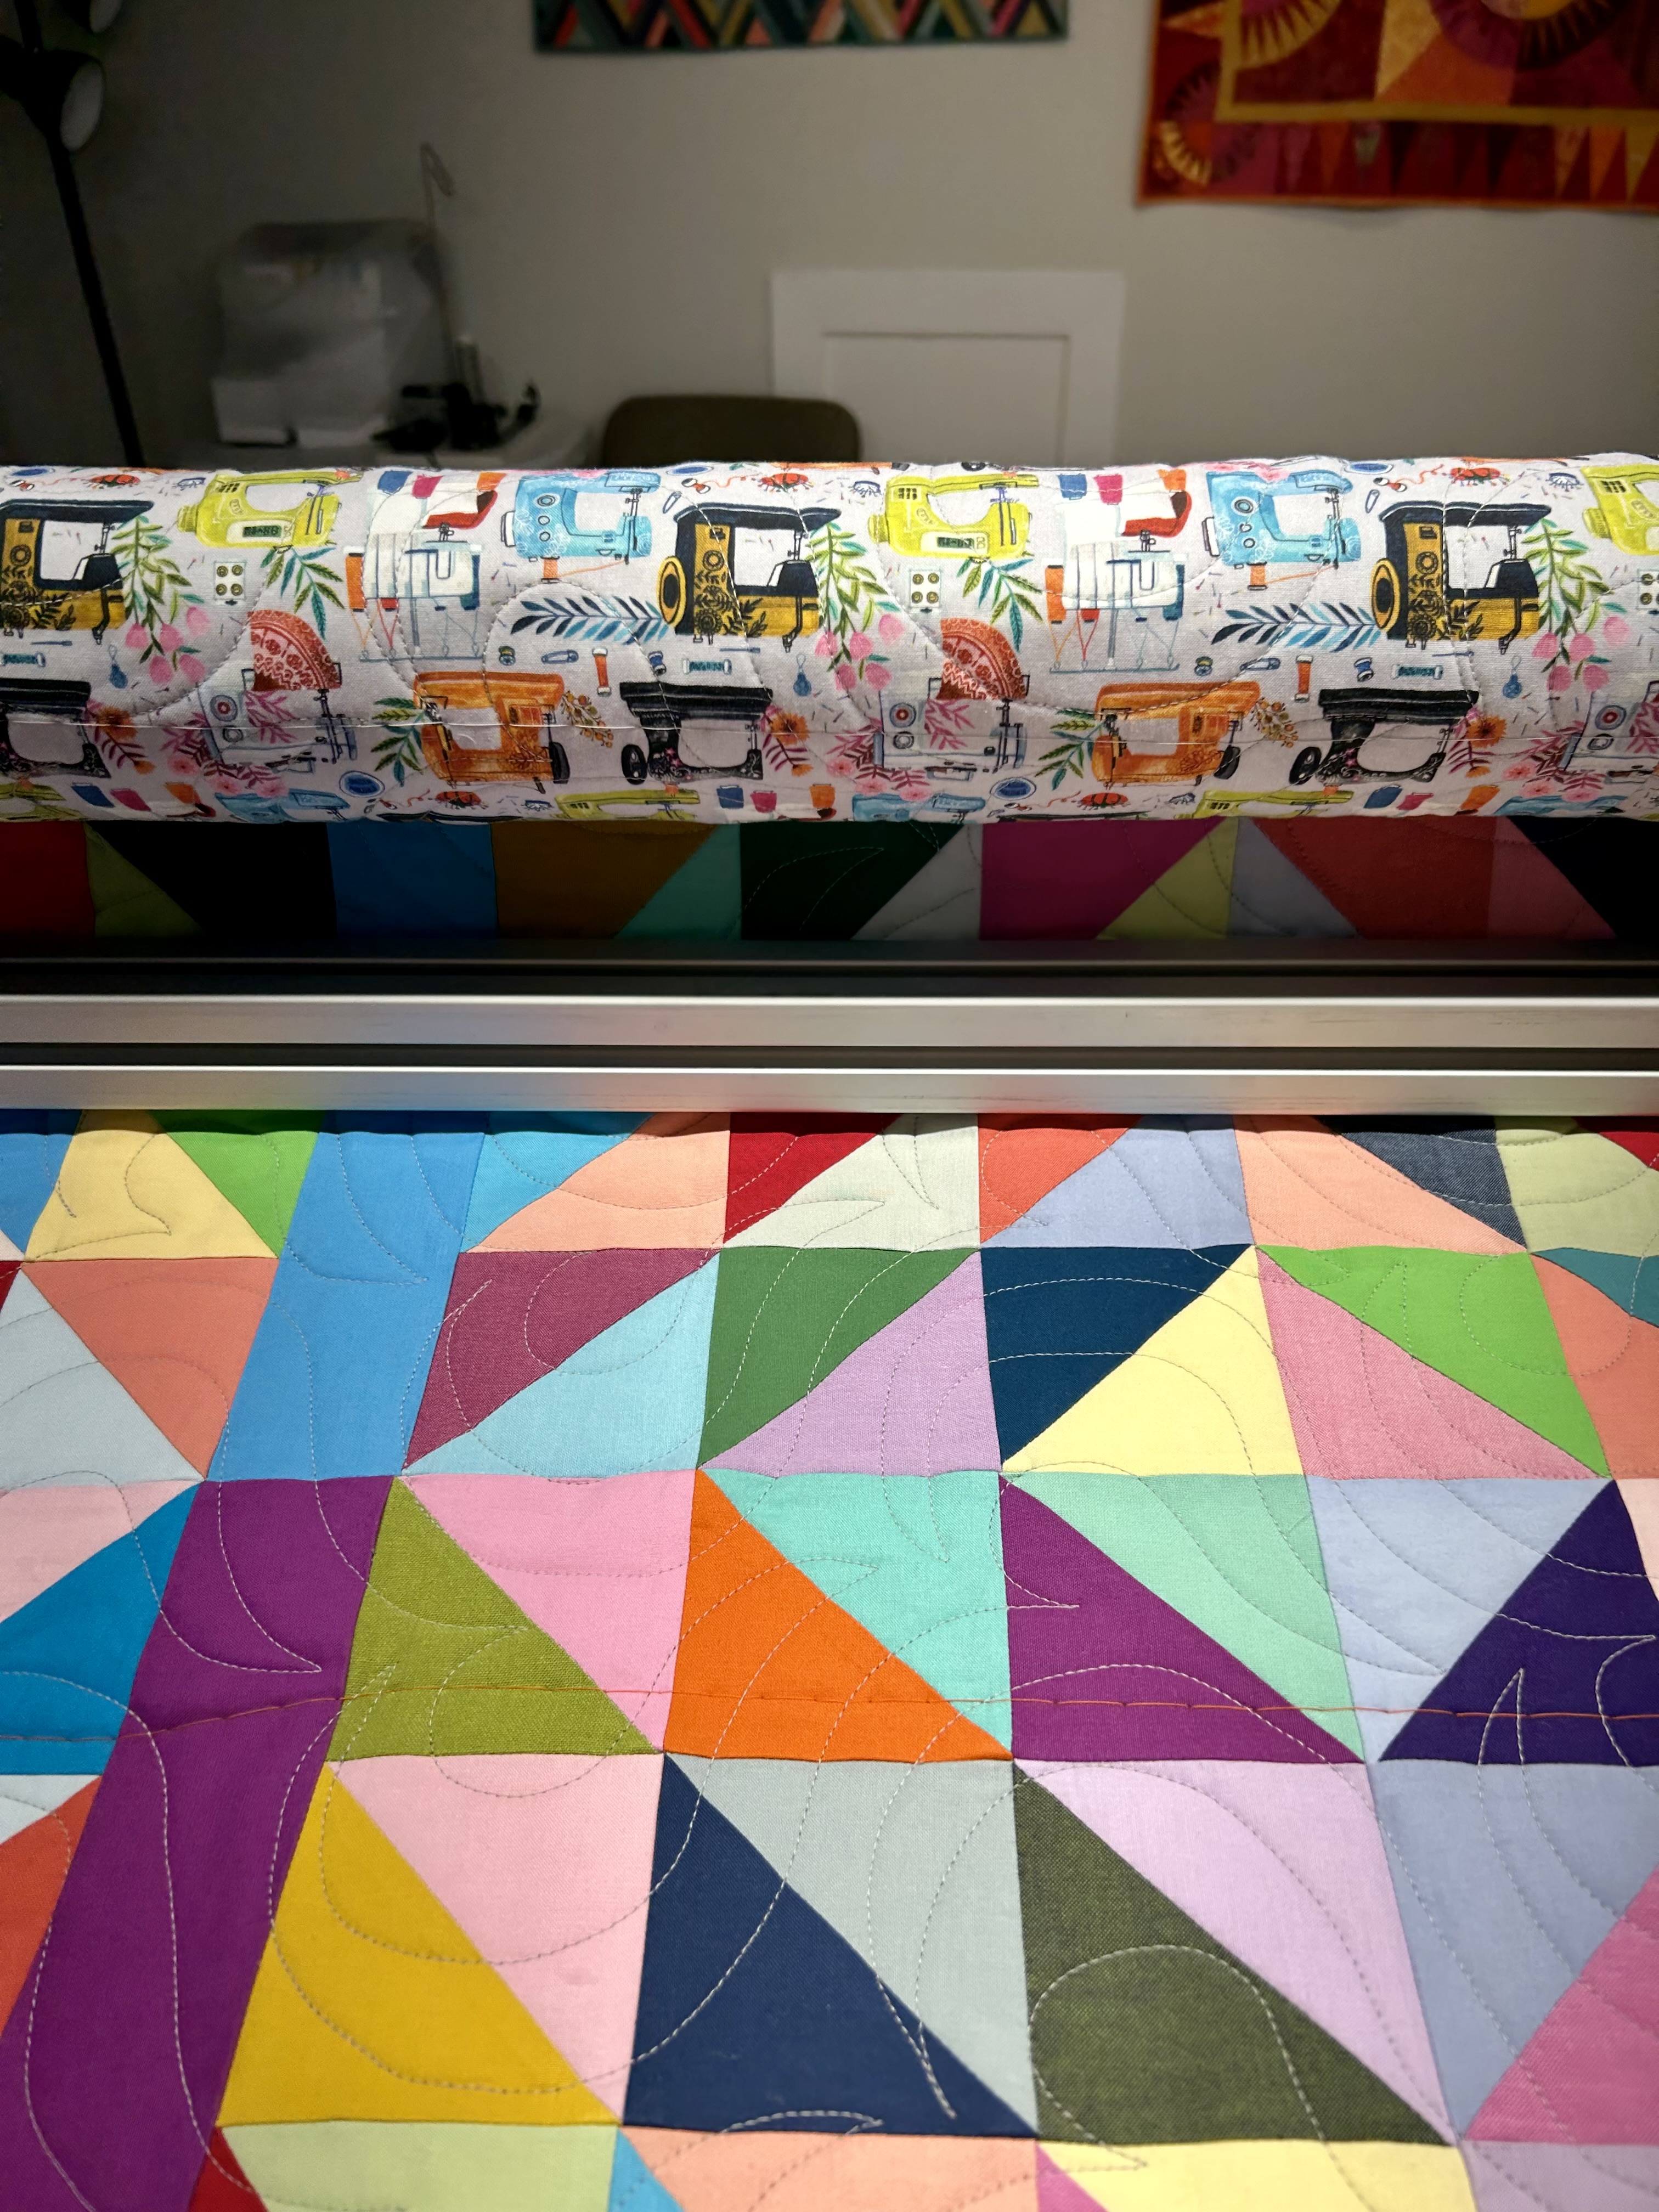
Here’s the backing:
You can see how the colors support the quilt top:
The pantograph, sewn in light grey thread, is “Bayside.” I wanted a pattern that would just lay down solid coverage that wasn’t too intense. “Bayside” is always a good choice.
Here’s a pic of the texture Bayside provides.
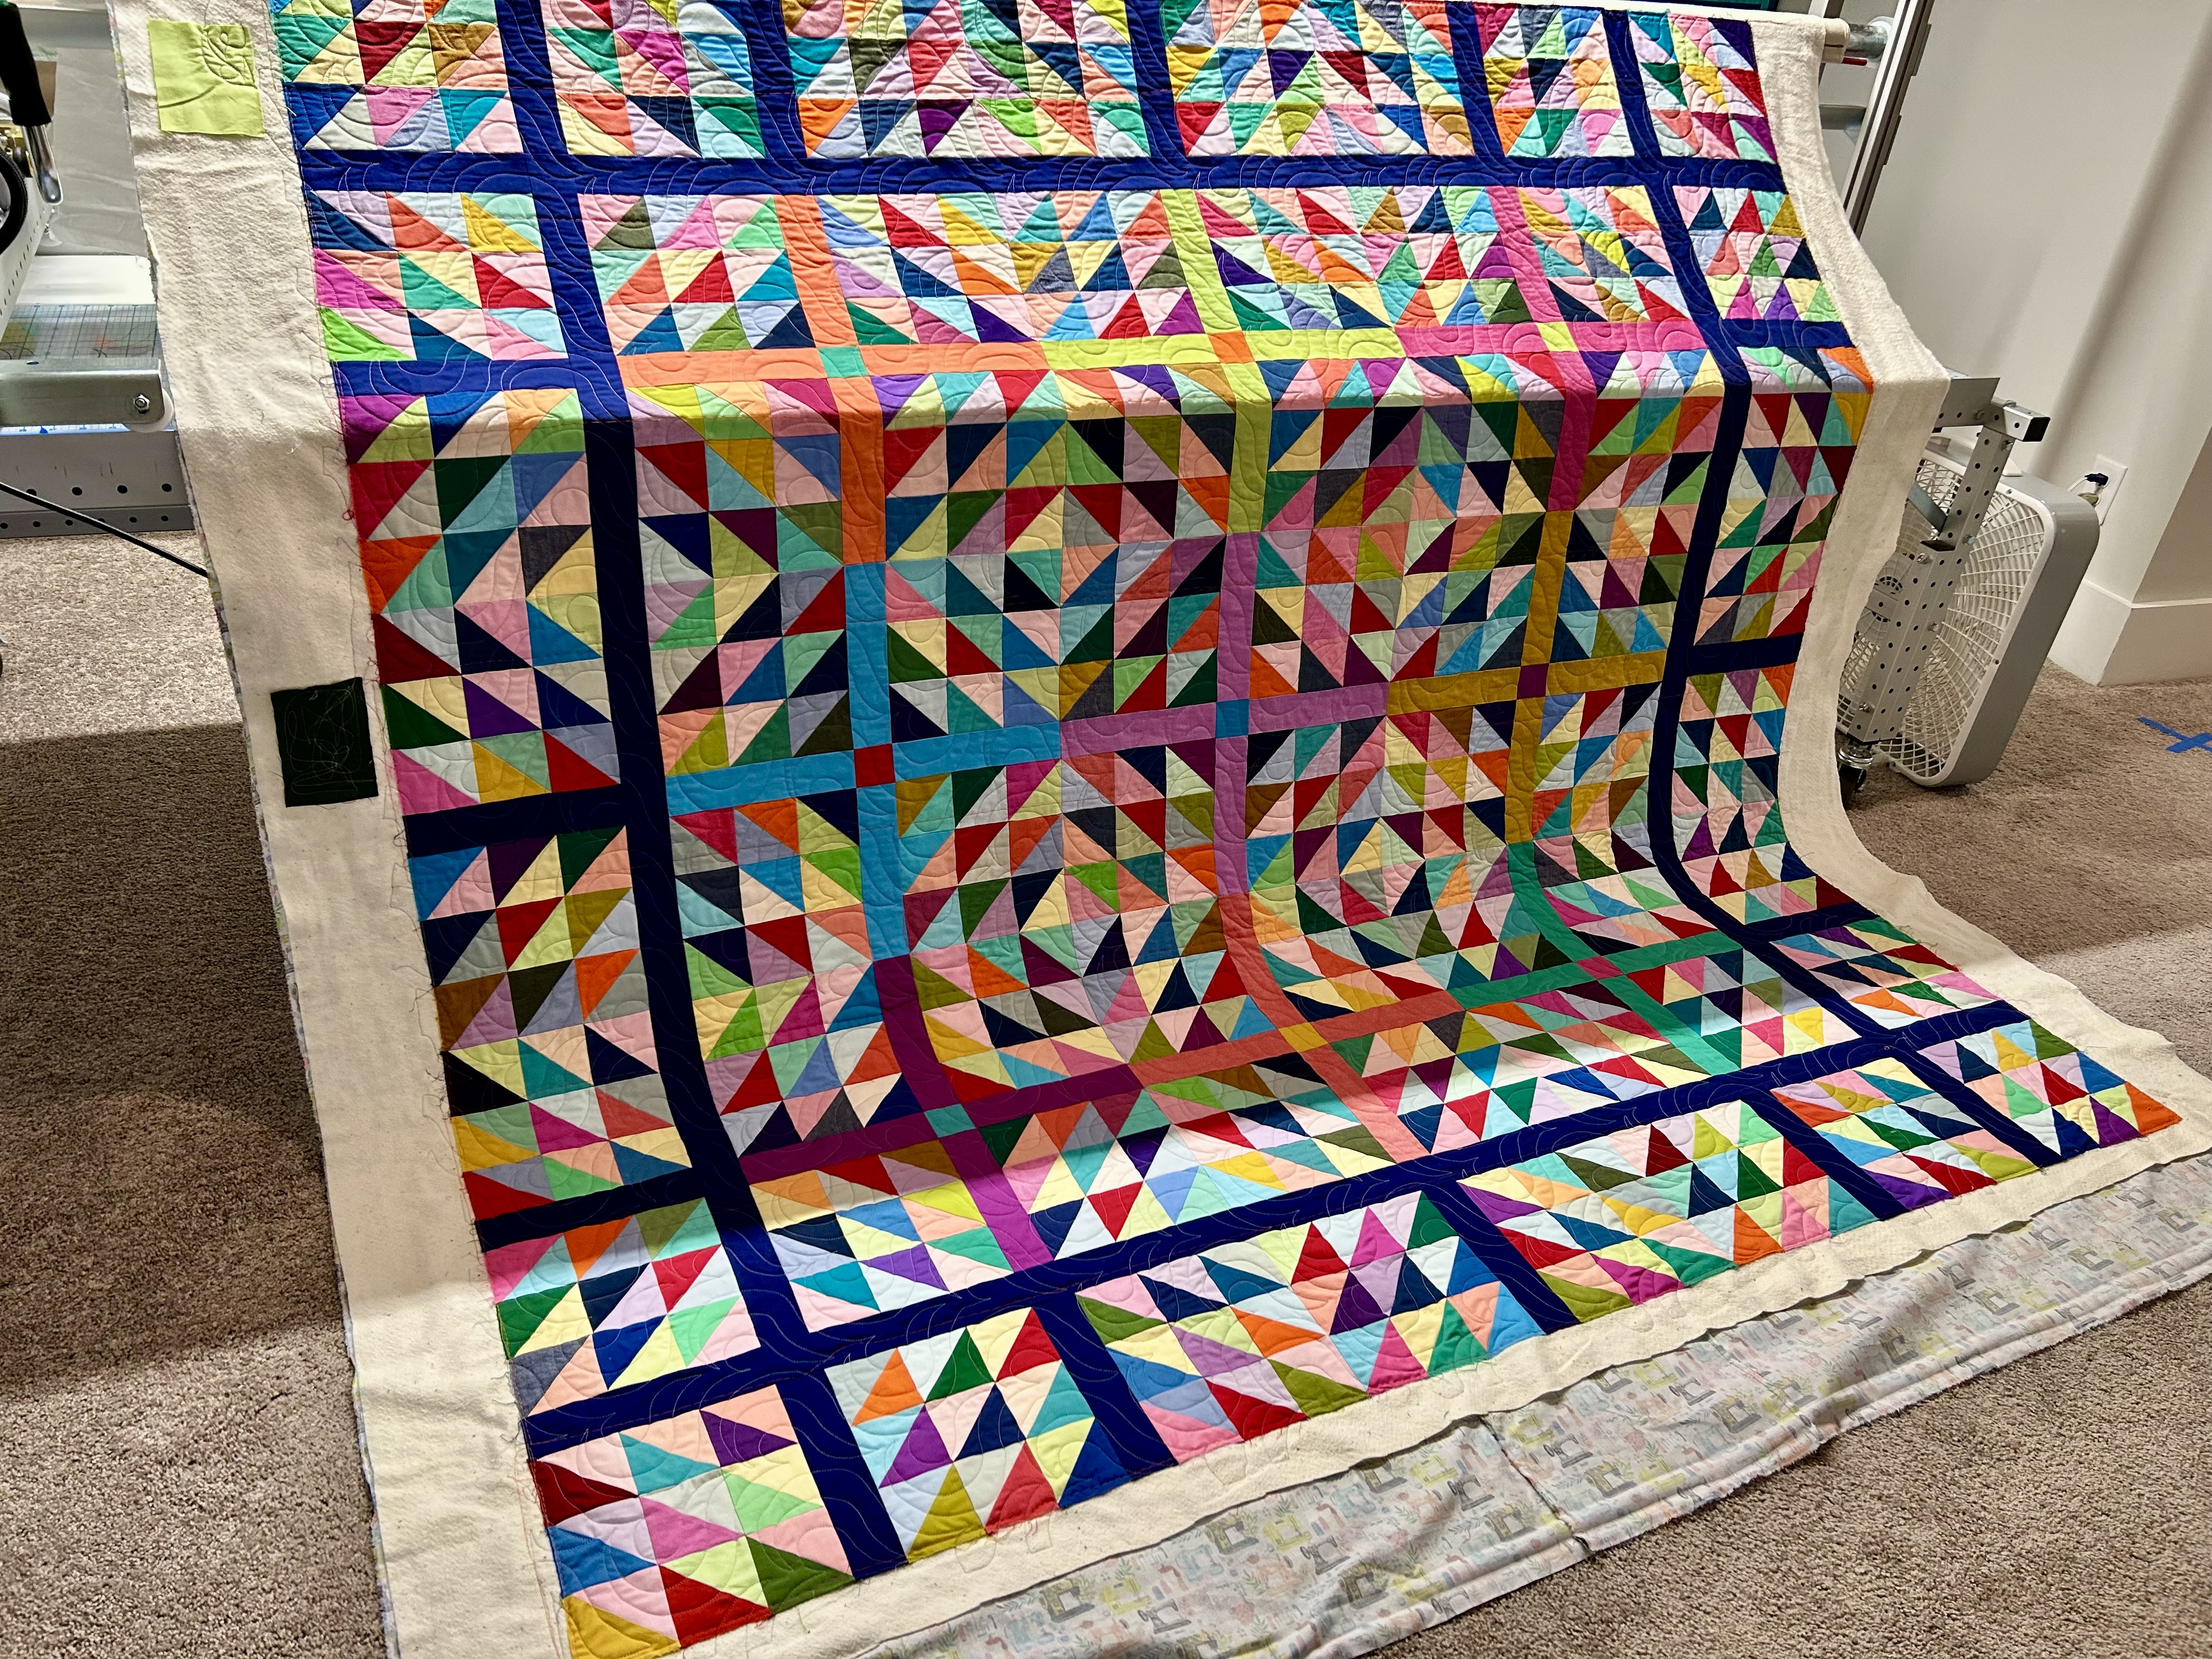
And here’s the quilt from another angle. The light is not great in the room where my longarm lives–especially when it is getting dark outside. But I have great light on my longarm from its light bar. And I can drag in other light if needed, but so far, I have not.
I am going to bind in the same dark “midnight” blue/purple used (Kona Nightfall) in the sashing. I have enough of this fabric in my stash, and I’ll cut and make that binding today–after I trim “Bonanza” on the back of the longarm. I’ll likely go ahead and install the binding as that will stabilize the edges of this quilt.
Meanwhile, the Summer Camp mystery quilt blocks are going up on the design wall. When I get them up I’ll let them sit for a bit so I can move around blocks as I see what needs moving. I’ll prep “Happy’s” backing (the quilt from hell) and put her on the longarm to be basted for hand quilting. And “Red Positivity” awaits her turn on the longarm–so named by a blog reader who noted the plus signs in the middle of each block.
As summer draws to a close, my summer quilty work is also gradually finishing up. It’s been a good summer.
It is a “murky” kind of Wednesday morning here today. And the temps are cooler. Maybe we will get a bit of rain. Maybe I will have dinner on the porch today.
On Monday morning, I took my grill propane tank to the local True Value hardware store to have it refilled.
Look what is growing along the fence surrounding the propane station: full size Mexican Petunias. This plant is extremely hardy and aggressive.
My little dwarf version is thriving out front, and these are just the cutest little plants which bloom their hearts out. They will spread, yes, but I want them to fill up the bed where they are–as a sturdy and colorful border.
I finished the “big red” quilt top last night–I have not yet come up with a name I like. I really like the soft Kona Thistle sashing and will bind with it.
Here is a close-up. “Red Delight” maybe?
I finished the backing for “Bonanza,” the big half-square triangle quilt last night and will start loading this project on the longarm today likely. “Happy” (formerly known as “the quilt from hell”) is waiting to go on the longarm for hand-sewing basting.
Now, I am putting the “Summer Camp” mystery blocks from the Modern Quilt Society on the design wall and will leave them up there for a while as I know I’ll move those blocks around a lot before I commit to their final placement. Already I am moving the blocks around in the rows that are going up.
The hand-quilting on Traverse is going well–I’ve almost finished the green row with chartreuse squares. I’m liking the texture that is not trying to cover up the block patterns. And my hand quilting with Tara Faughnan’s method is getting way more reliable, so I don’t have to check the back so often.
And that’s all the news fit to share here for today!