Turkey Tracks: November 16, 2020
How I Make a “Tree” Quilty Block
Several people have asked me now how I make my Quilty “Tree” Block. First let me say that this block was inspired by Amanda Jean Nyberg’s tree block quilt AND that I finally devised my own method after completing the “Mowed Lawn” block in the Sugaridoo Bernina Quilt-Along that just finished up this month. Up until the “Mowed Lawn” row, I just could not get my head around how to proceed easily with this kind of a block.
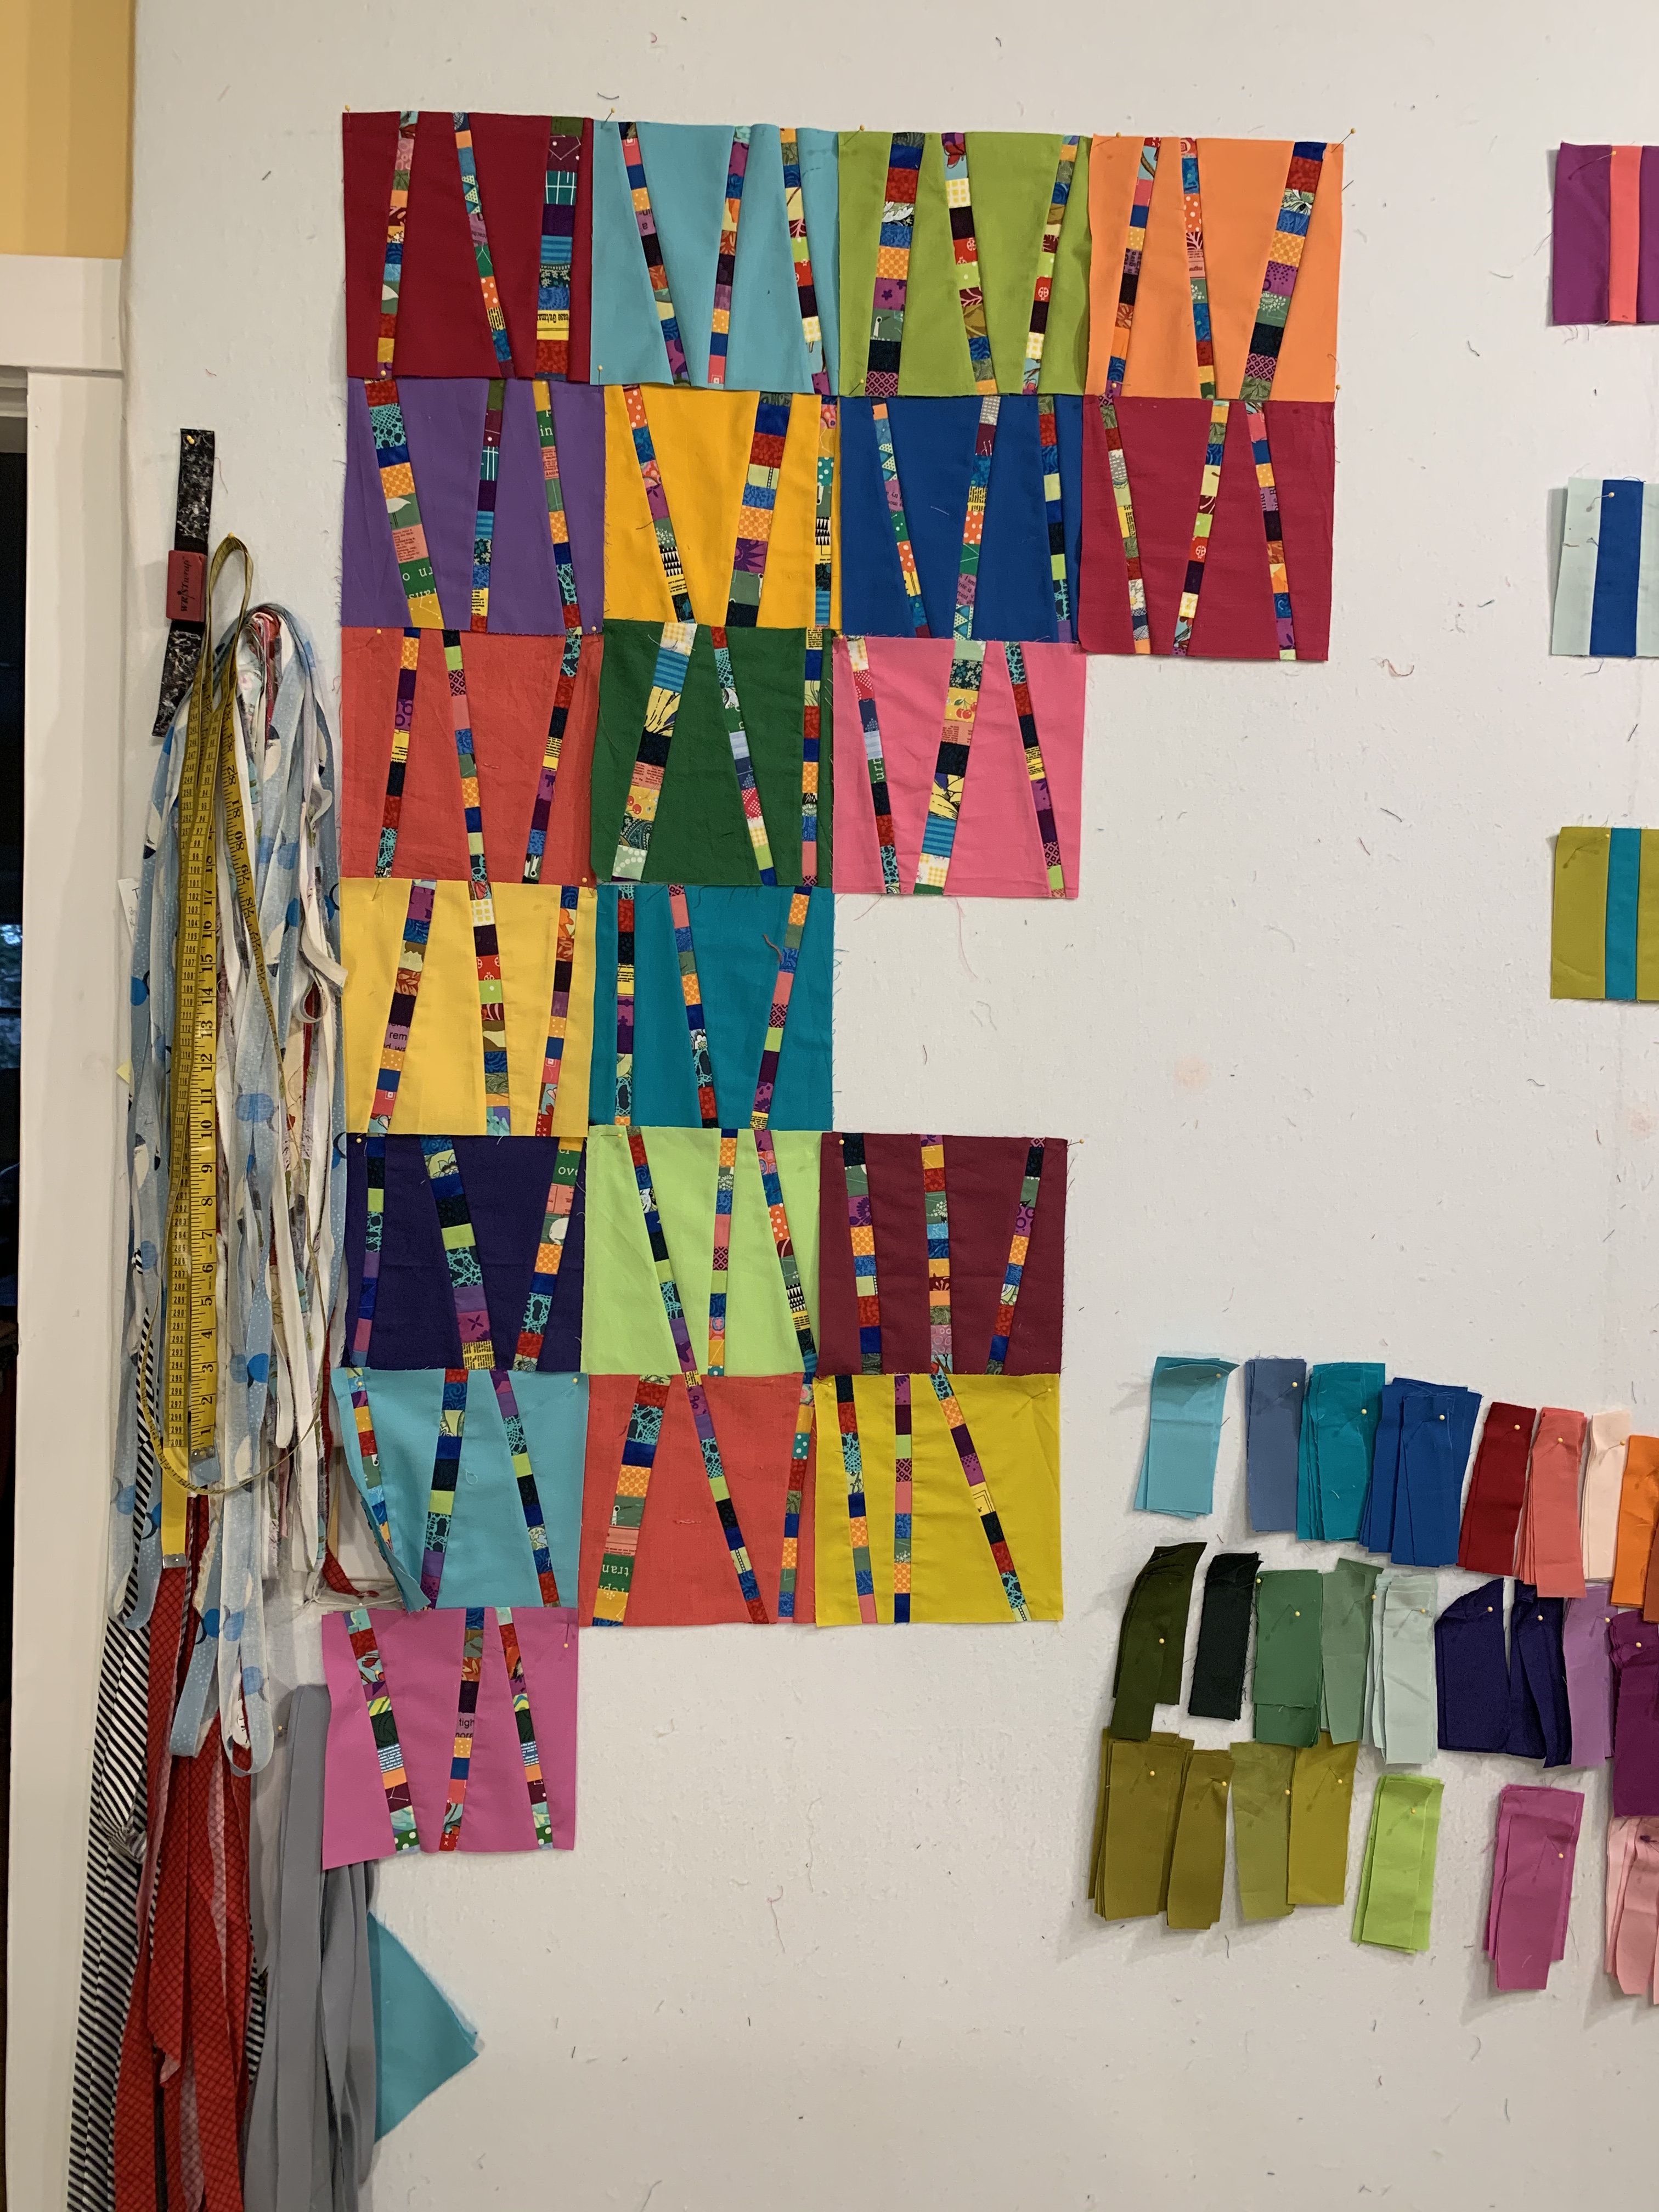
My own blocks are moving along quite nicely now as a leader/ender project, and I am pleased with how this project is shaping up. Note that I have used some different sizes of the “tree” trunks—for me about 2: a 1-inch cut and a 1 1/4 inch cut. And this arrangement will not likely remain after I have more blocks done. I’ll refine placement then by color and by how the trunks relate from block to block.
Start with a block that is ONE INCH bigger than your finished block size: for me that has been 8 1/2 inches. And it should have been 9 to finish at 8, but that was part of my own learning curve.

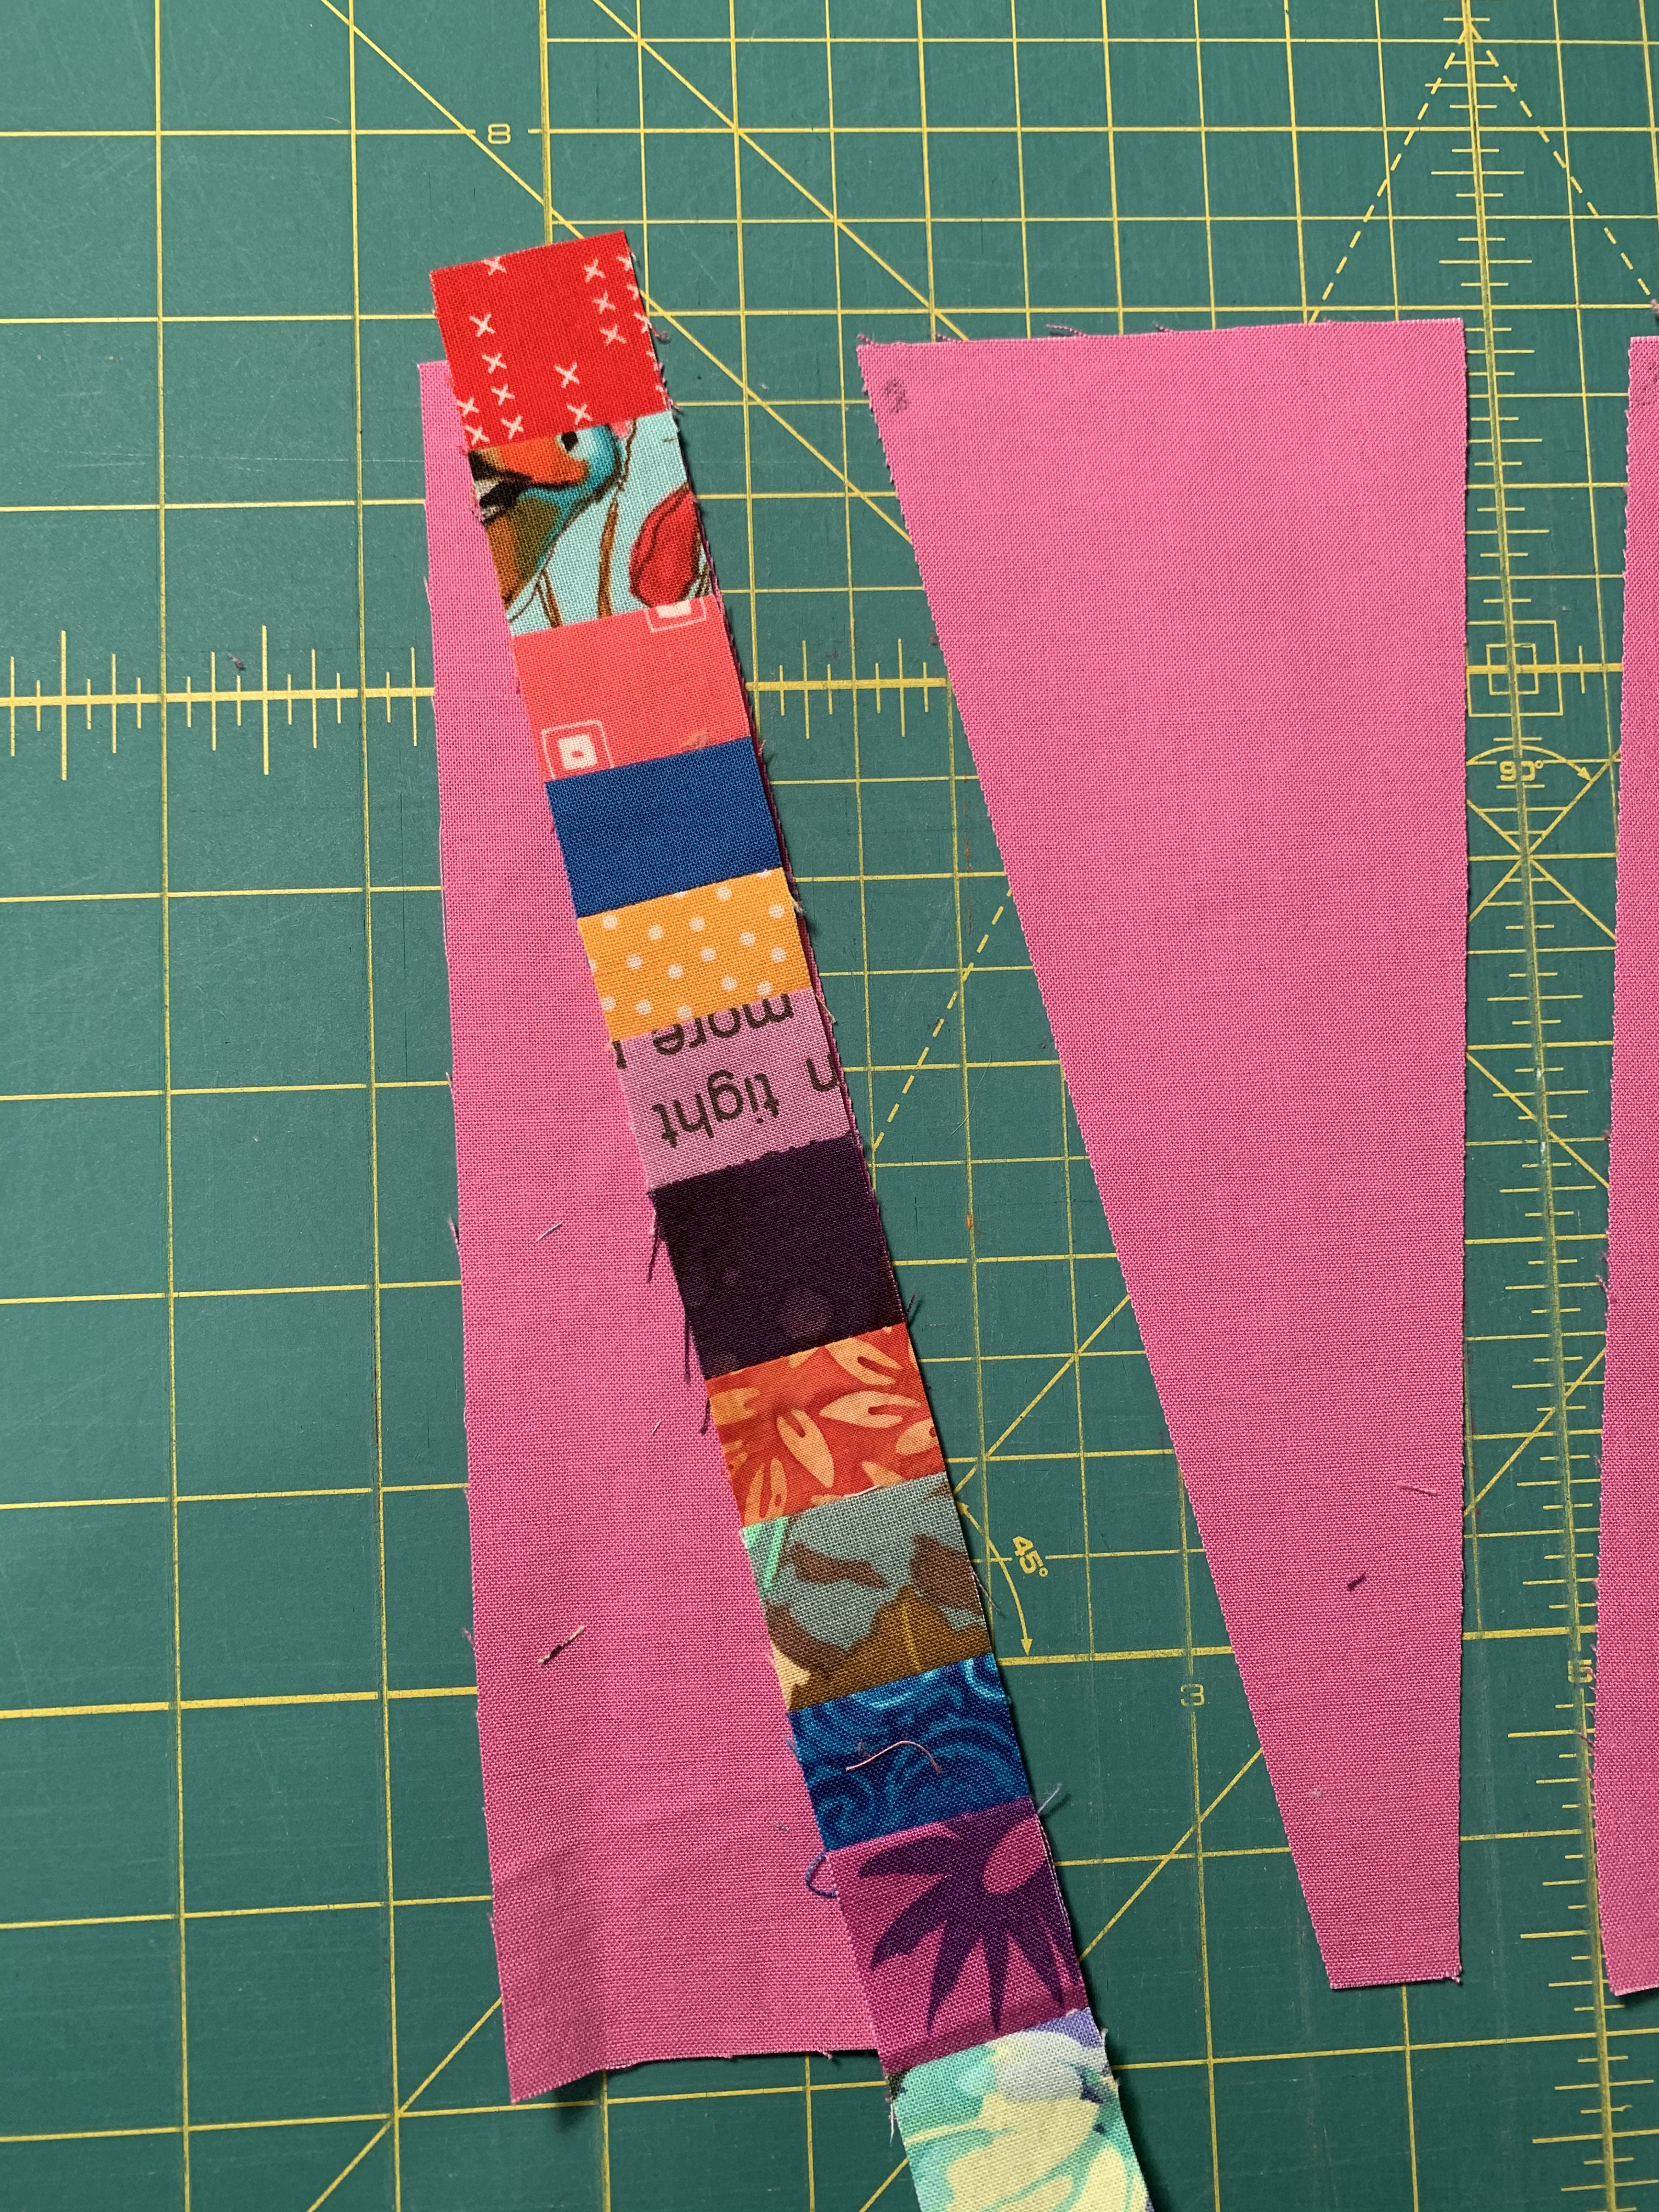
Cut the block into 4 pieces—without coming too close to where the seams that join the blocks will be on either side. Don’t make these angles too, too sharp or you will have trouble getting four pieces AND do vary the slant on the first cut—leaning to the left or the right differently for individual blocks. IMMEDIATELY put little numbers ON THE TOP marking each pieces placement. It is so easy to get confused really fast, especially with solids.

That is a “2” on the right strip. These little numbers disappear as you sew.

You will have already made a swatch of fabrics that will make the tree trucks. I cut these strips randomly at 1 inch up to 1 1/2 inches. Then I cut the trunks at 1 inch for most, but add in a few 1 1/4 inches. Again you can see how the widths work out in the first picture of my completed blocks.
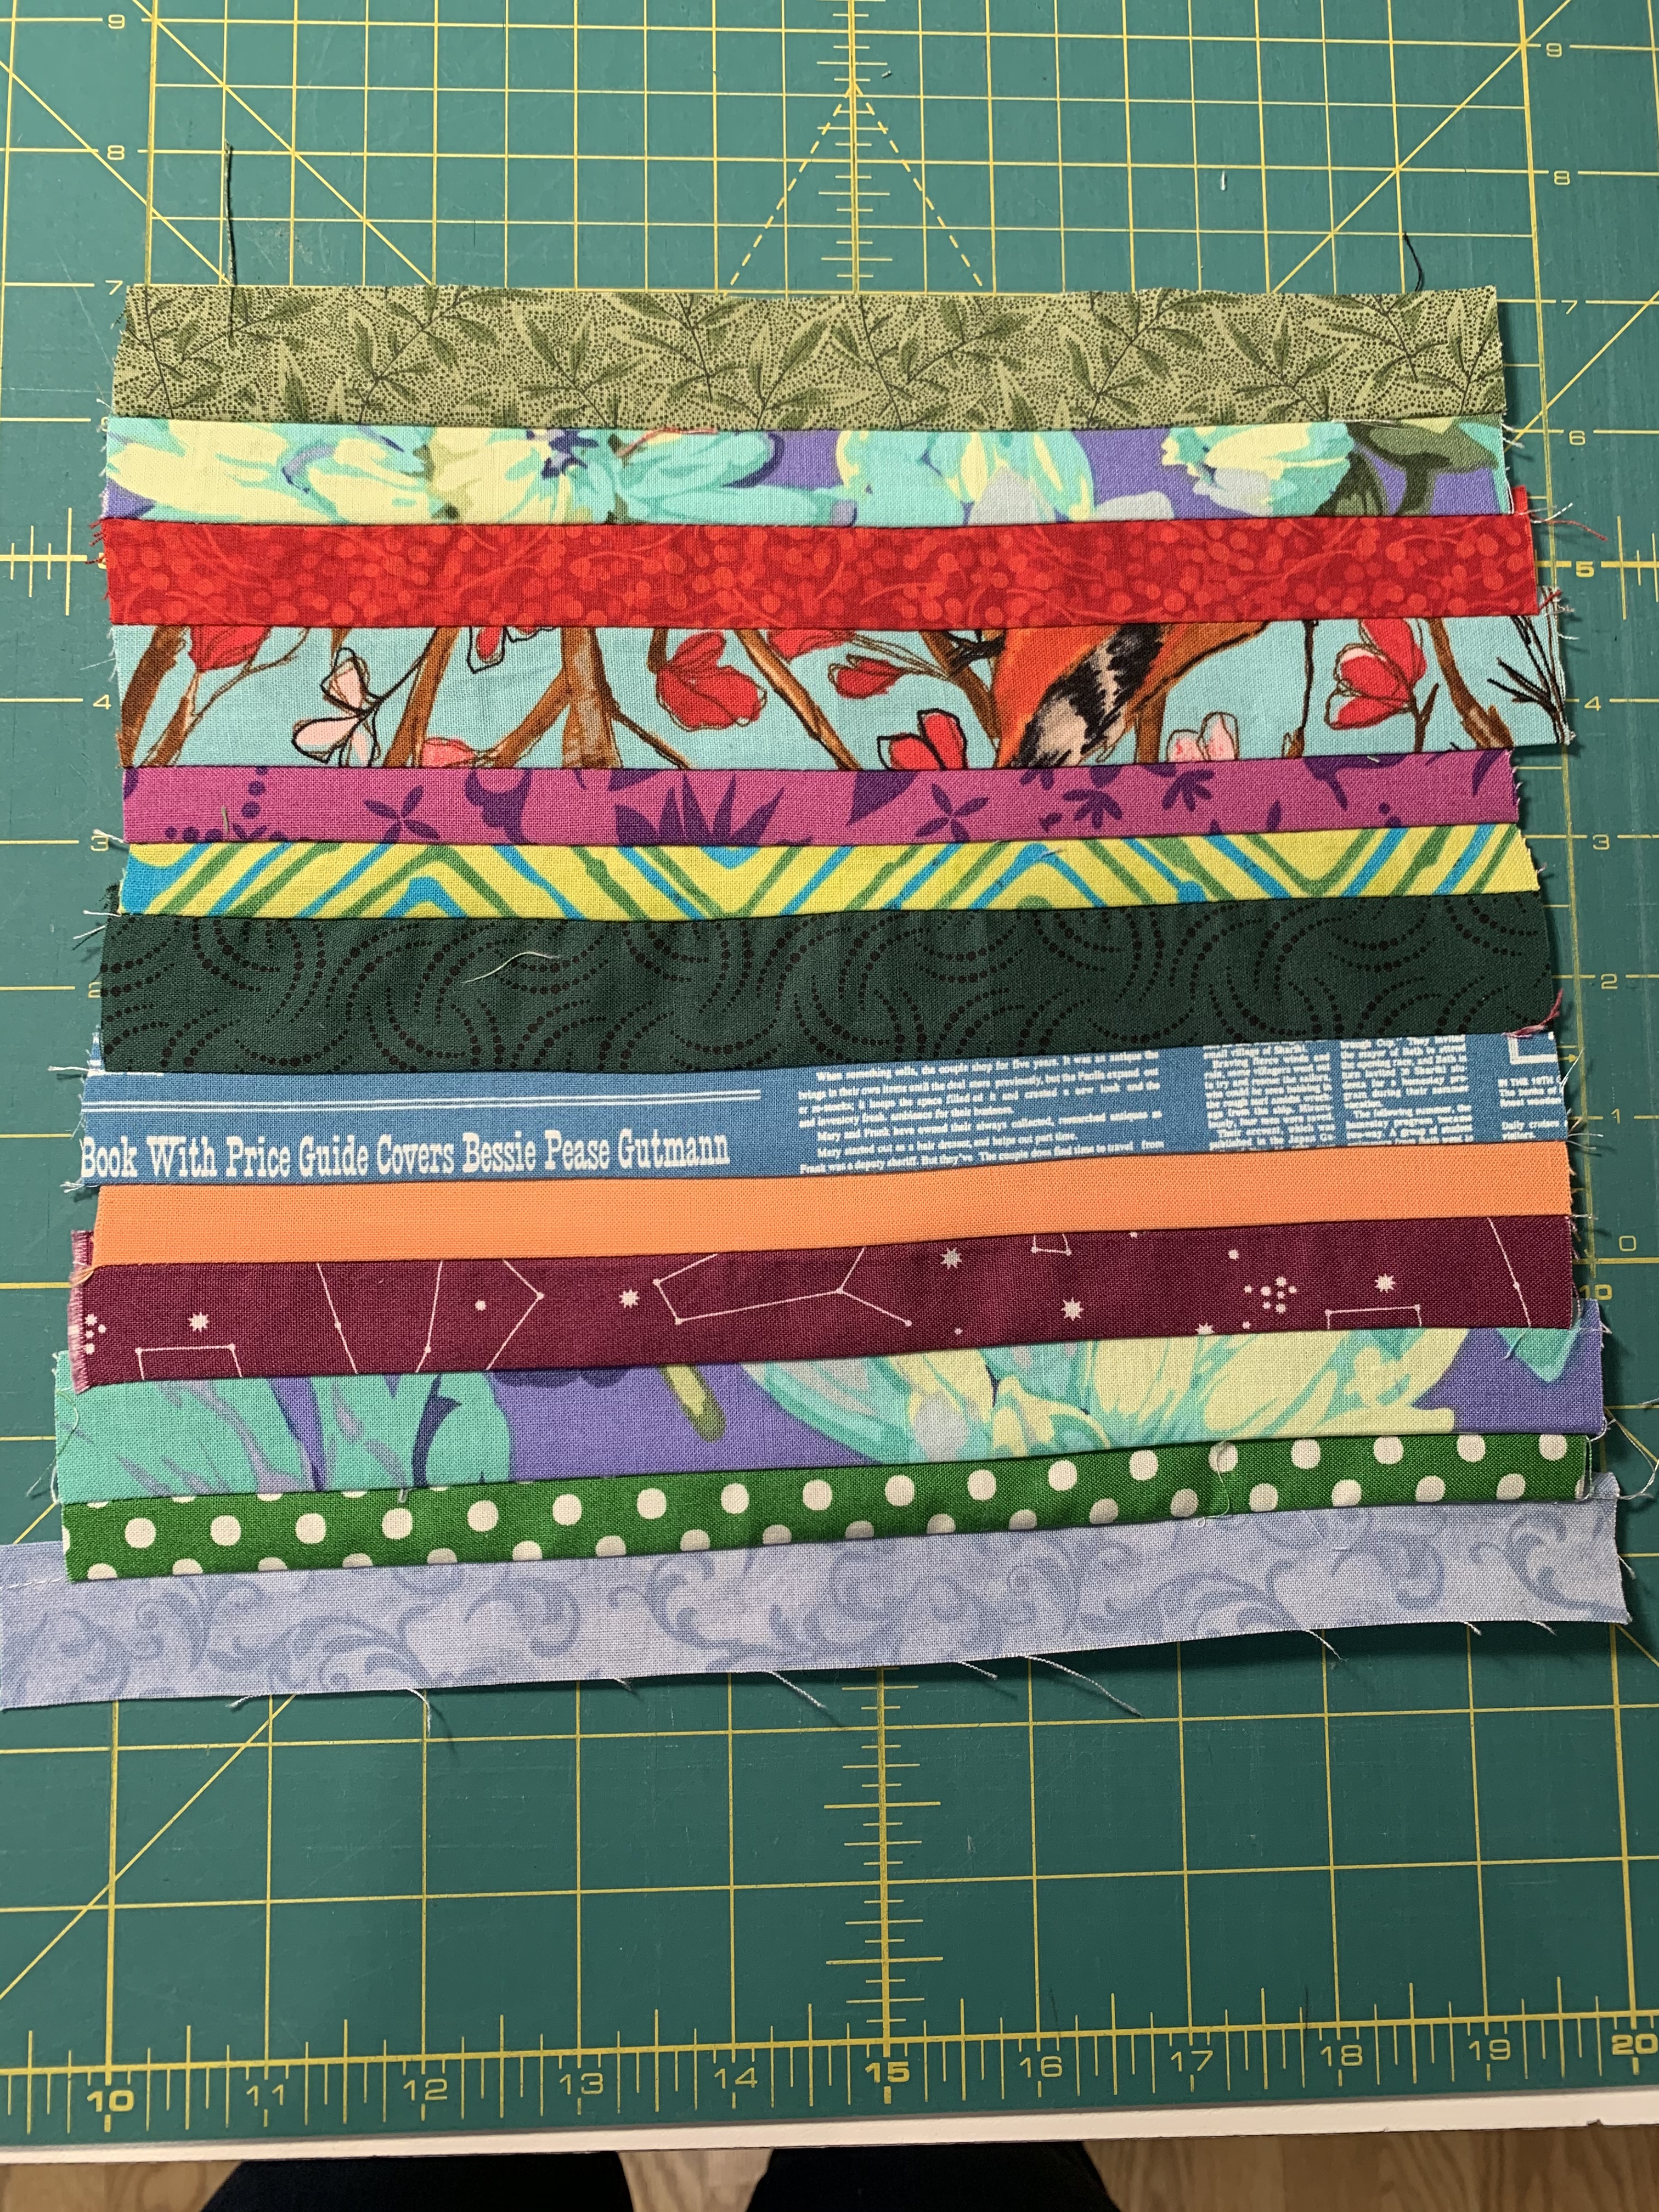
I make my tree trunks so that they will be a bit longer top and bottom—so I can vary now I lay them out in terms of color—by reversing some of the strips. It’s good to make several sets of sewn strips so that you can vary color.
It is easier to sew the strips to the block is you have all the seams going down. Just reiron a strip if you need to.

Here’s my plan for this block. When you sew try to keep the top (pink) edge about the same if possible. You can see here that I didn’t do that as neatly as I like. Lay your strip in, put a pin on the 1/4 inch line, and turn the strip to see if your background fabric is lined up better than here. I don’t worry so much about the bottom edge if this top one is fairly even—since I won’t lose too much fabric on both sides, just one.

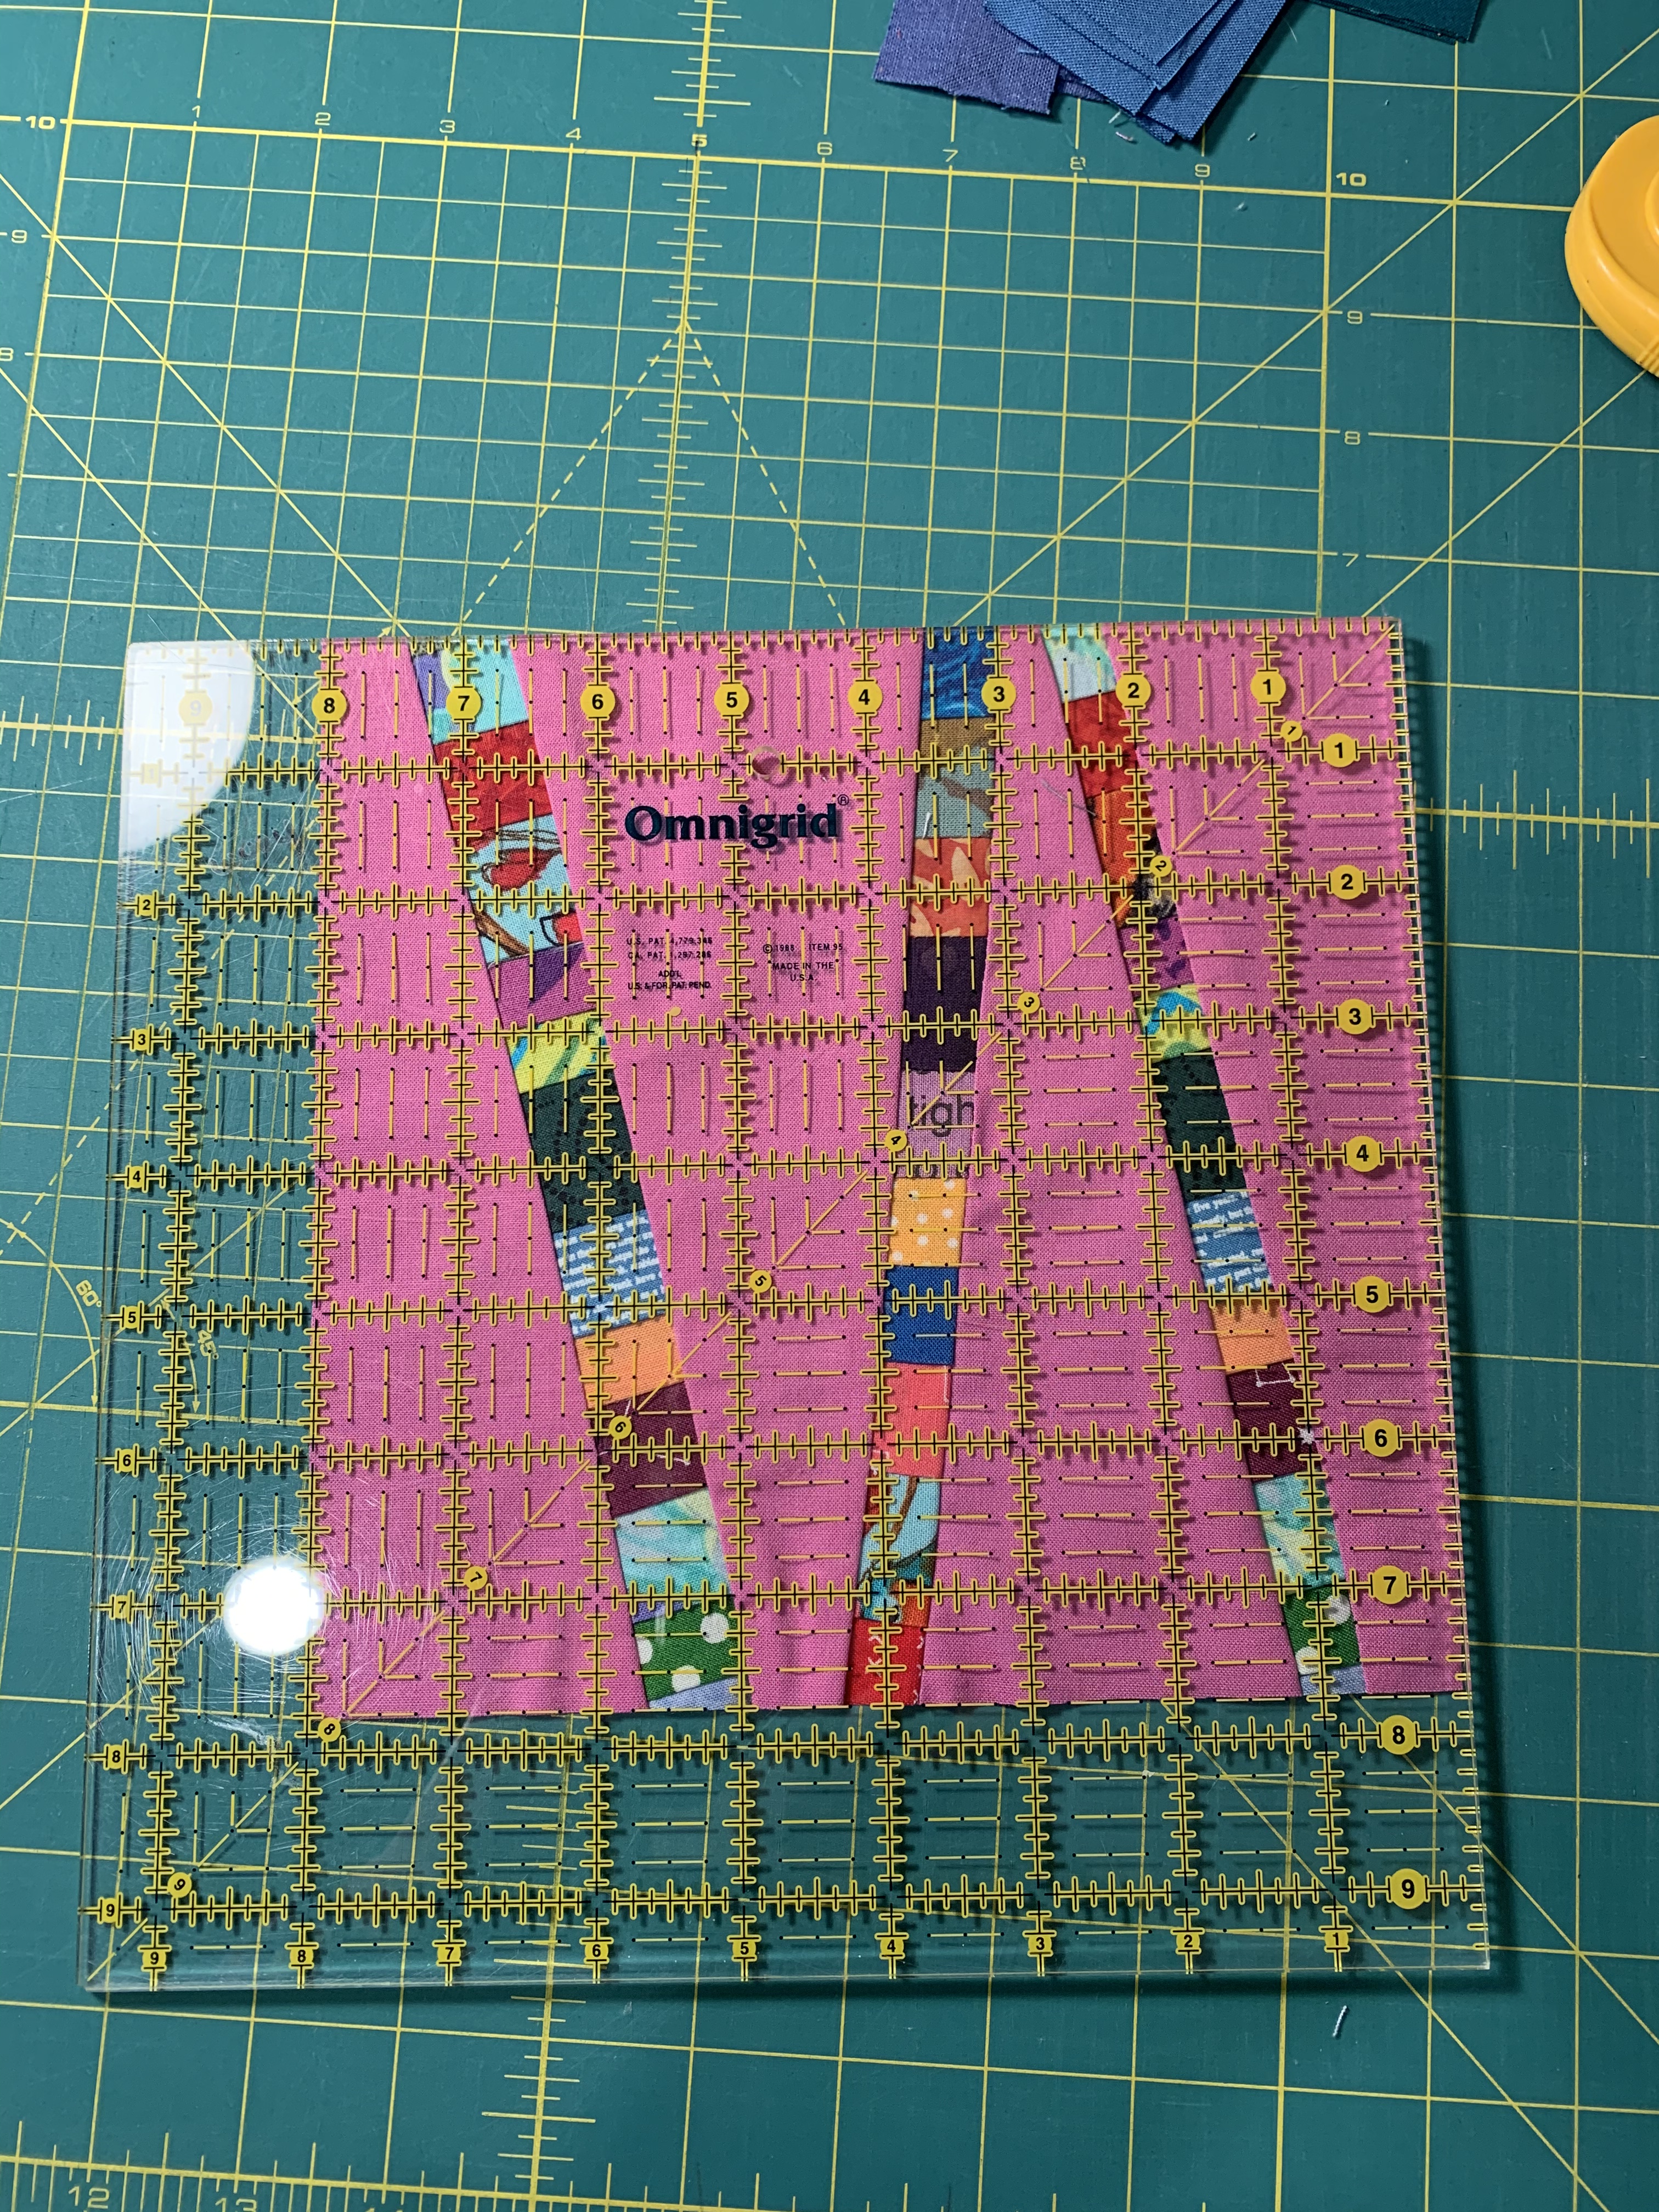
So now it is time to trim to 1/2 inch bigger than your finished block when sewn—so my 8 1/2 will now go to 8 inches square.

A square ruler REALLY helps with this trimming as you can see everything at once that you need to consider and can see how to best trim ALL the sides and if there is some problem with size. Honestly, I use my different sized square rulers a lot. I trim two sides, then flip the block around, line up again, and do the final two sides. (This block is 8 inches and will finish at 7 1/2—the ruler is just a bit high on one side in this picture as I relaid it in for this picture.
Enjoy! This block is very fun to make once you see the best way to proceed.

Thank you for sharing your tree quilts block…I am tucking your idea away for when I can play with my scraps!
Thank you for this fun project tutorial! I’m going to make a few smaller blocks for mug rugs. It’s always great to put our scraps to good use!
Thanks for sharing your personal experiences in making this block. I’ve wanted to try this but it looked like it would be a lot of trouble. Now I feel more confident.
Thank you for your details in explaining your block. So pretty I think I ll give it a try…seemed like I couldn t figure out the background cuts before