This is a picture of what is called a “Gem” magnolia. It stays small and is ideal for planting in subdivisions where one of the big magnolias–which grow very tall and have spreading, big, lovely crowns–would overwhelm small yards. Note that Magnolia blossoms are very fragrant too.
On a big regular magnolia, the blossoms would be bigger. But look at this pretty bloom, which is surrounded by more buds.
This tree of my back neighbor’s was planted 2 years ago, and it is loaded with blooms this year.
Seeing blooming magnolia trees reminds me of way back in the day–I was in high school–when I was maid of honor for a treasured first cousin’s wedding in rural Virginia. I flew from Omana, Nebraska, and was met at Dulles airport in northern Virginia (just west of DC) by the bride’s father, who flew me to their home in Lovingston, Virginia, (near Charlottesville and Lynchburg to the south).
My cousin carried a single magnolia blossom in the wedding that took place in a beautiful and old rural Episcopal church.
I thought it might be nice to give you an update on the bee issue in this tree.
DIL Tami Enright is the co-founder and Director of THE BEE CAUSE. (There is a good online site to that group.) So that’s where I went for information. Tami sent me to a local beekeeper for guidance, after noting that perhaps a beekeeper could use available hormones to encourage these bees to move.
BUT, the beekeeper noted that while that strategy might work, the tree is likely FULL of honey–in a place that is virtually impossible to reach–so other bees would find this site and move into the tree.
So there are two options left to manage this situation.
One is to have a beekeeper, who is dressed for protection, cover the entrance permanently with a mesh that prevents the bees from entering or leaving that space. Yes, the colony would die, but no other colony could get established in that tree.
The other is to just leave the colony alone. And that action will depend on the wishes of the two adjacent homeowners (one of whom are new owners and have not moved in yet) and our HOA. The tree is in the middle of the two houses and likely on HOA-owned land.
The sidewalk is not far away, so other neighbors and neighborhood walkers are afraid of the bees. Note that bees don’t really attack unless someone gets right up close to their nest. I don’t know how close the mowing happens… Or if a curious child might wander too near the bees. So I don’t want to totally discount these fears.
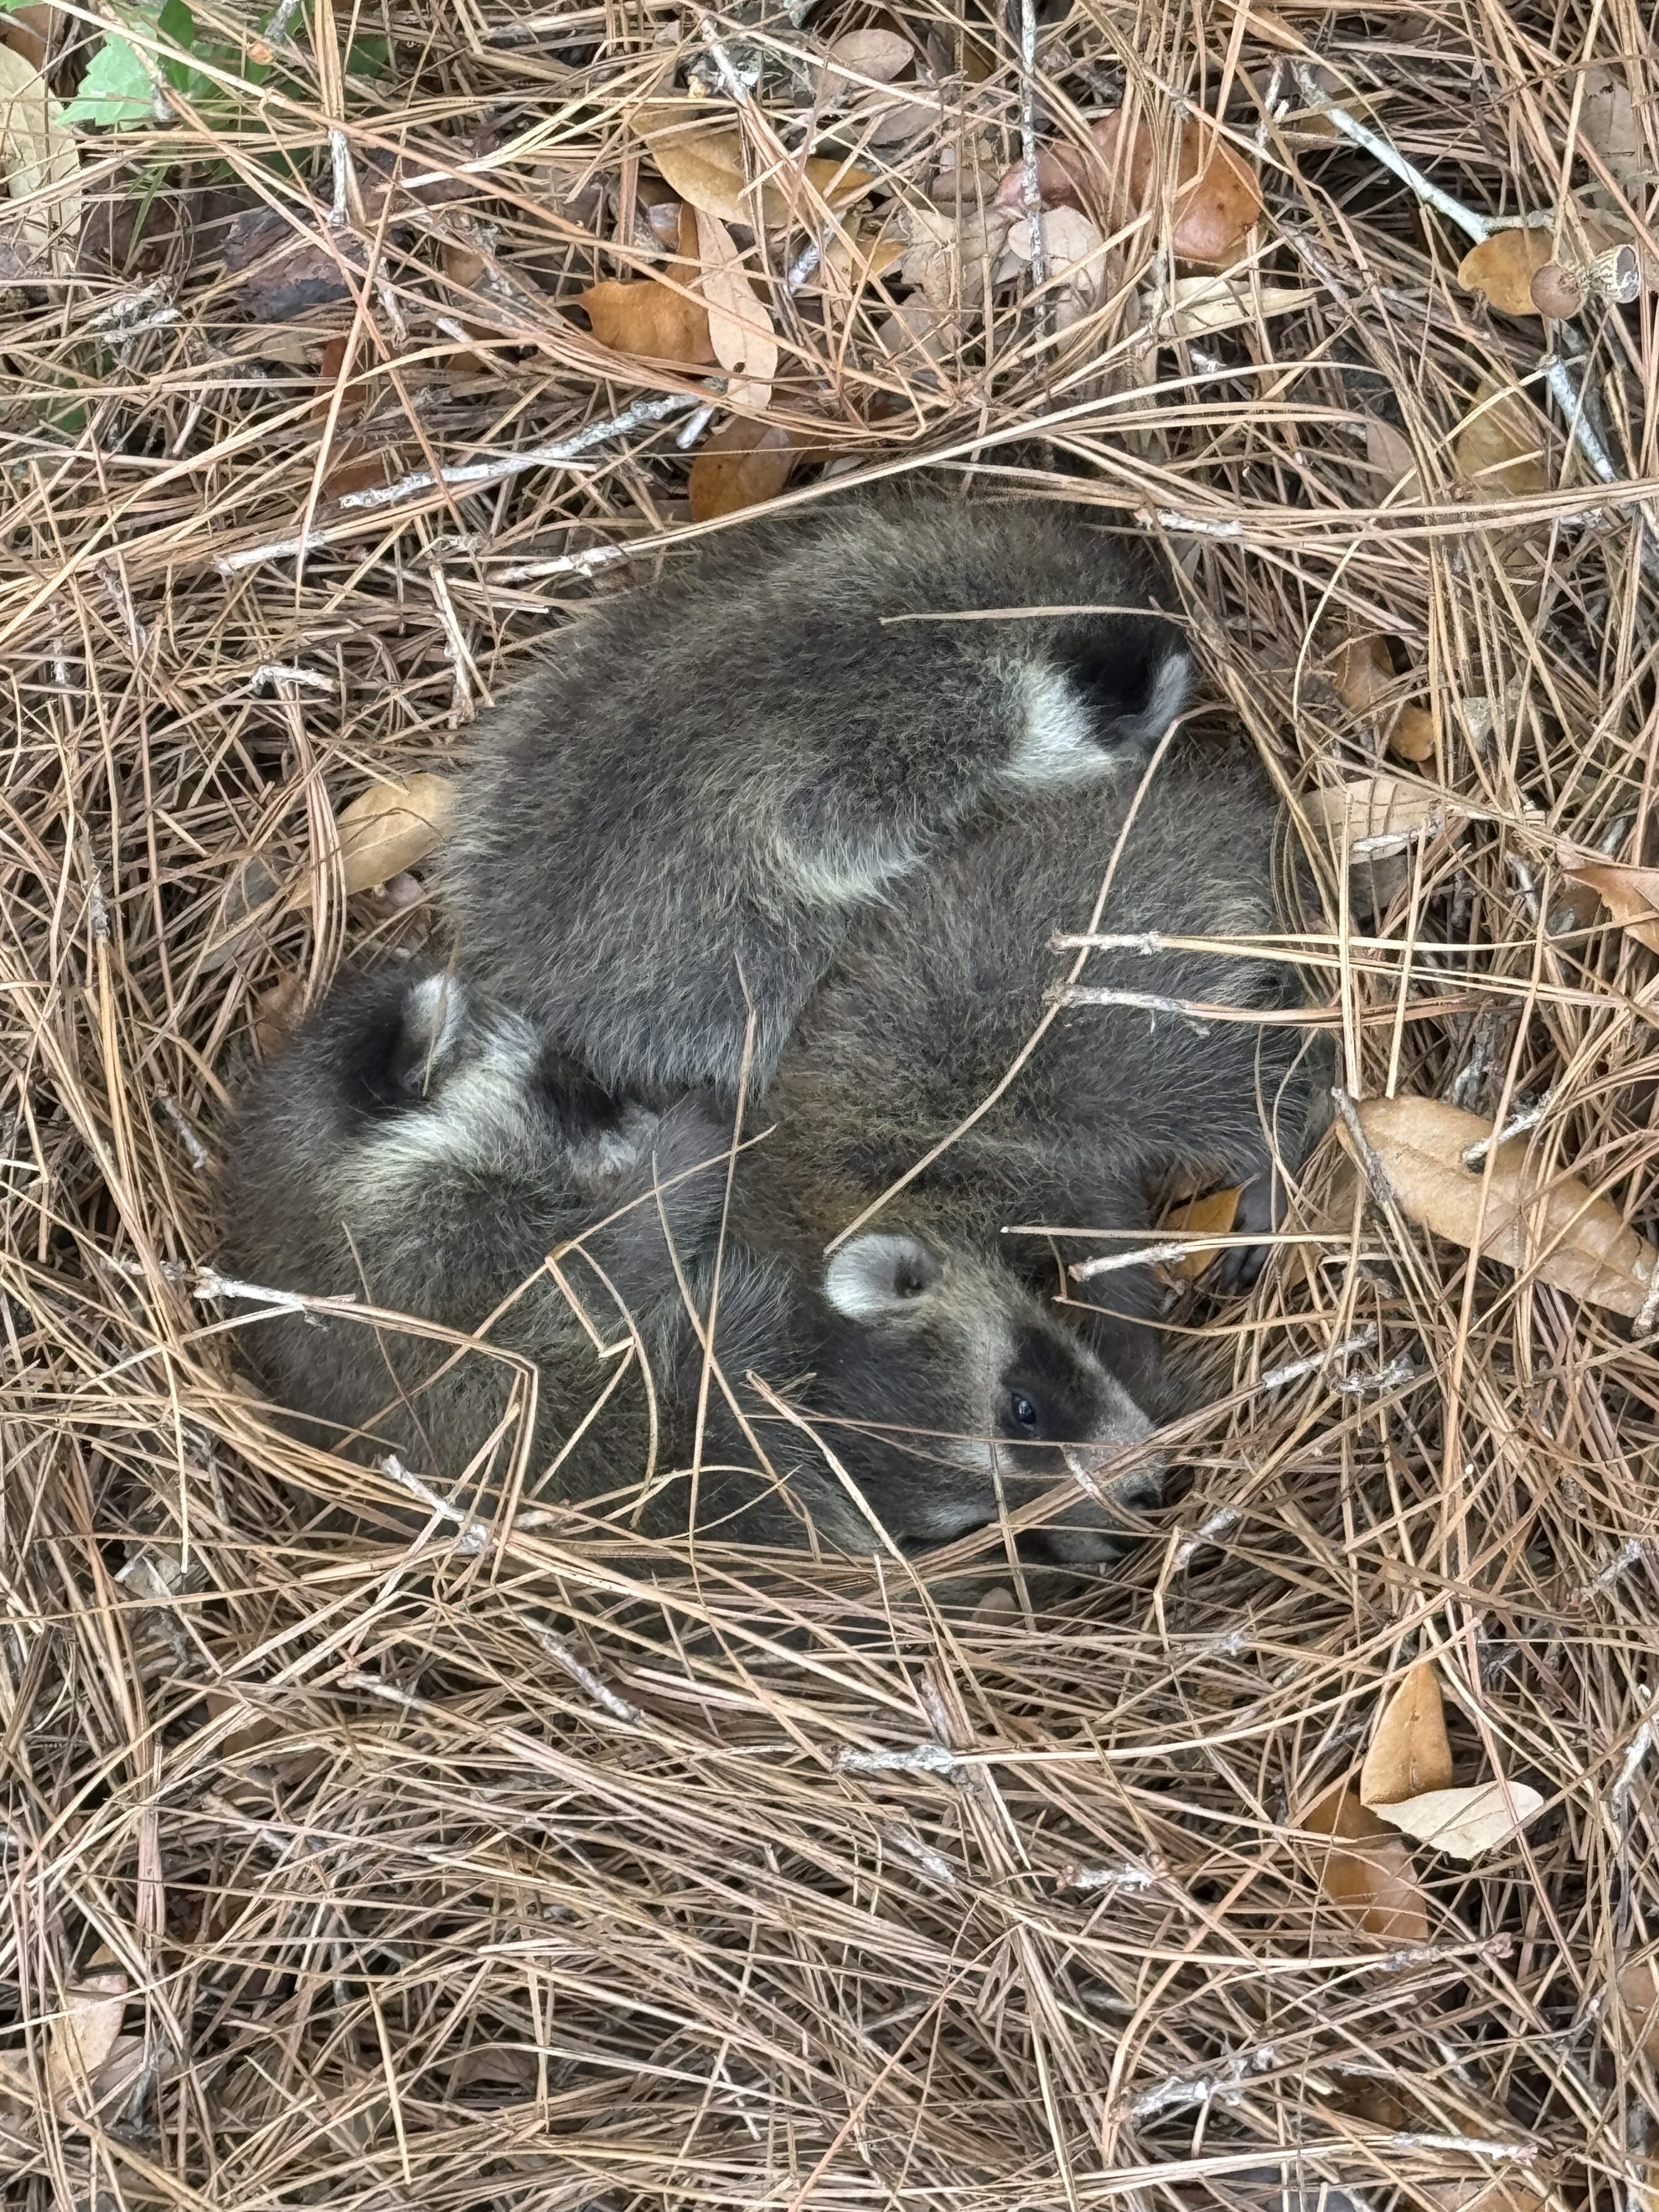
I also don’t know if perhaps that big Live Oak is now hollow and poses a risk. Live Oaks are highly prized here–they are so emblematic of this coastal area, with their huge spreading moss-draped crowns. BUT, my family just this past week had to cut one of these trees as it was hollow and was no longer safe. Inside at the bottom was a racoon nest full of babies!!!
Yes, the babies were relocated gently to a pine-straw nest made in nearby woods, and the mother retrieved them as soon as things quieted down in the area.
My neighbor brought me flowers for my birthday back in March. The beautiful, heavy vase was one of hers, and I thought one that should be returned to her. So on my next trip to the grocery store after these flowers were spent, I brought flowers for her, put them in the vase, and returned all to her.
Some weeks later, she returned the vase to me, chuckling, and said, “well, it looks like we’ll be passing this vase back and forth now.”
Around Easter, I had the vase full of flowers as two of my nieces visited and also brought flowers. My neighbor appeared with a handful of flowers Easter Sunday morning–three of these amazing orange roses with dramatic green centers and a spray or two of tiny white roses–and put them into the vase alongside the flowers already there. These large roses are so, so fragrant. I could even smell them with my bad nose.
I took a picture of the roses and showed it to my DIL later that day, and a friend of hers found out what they are:
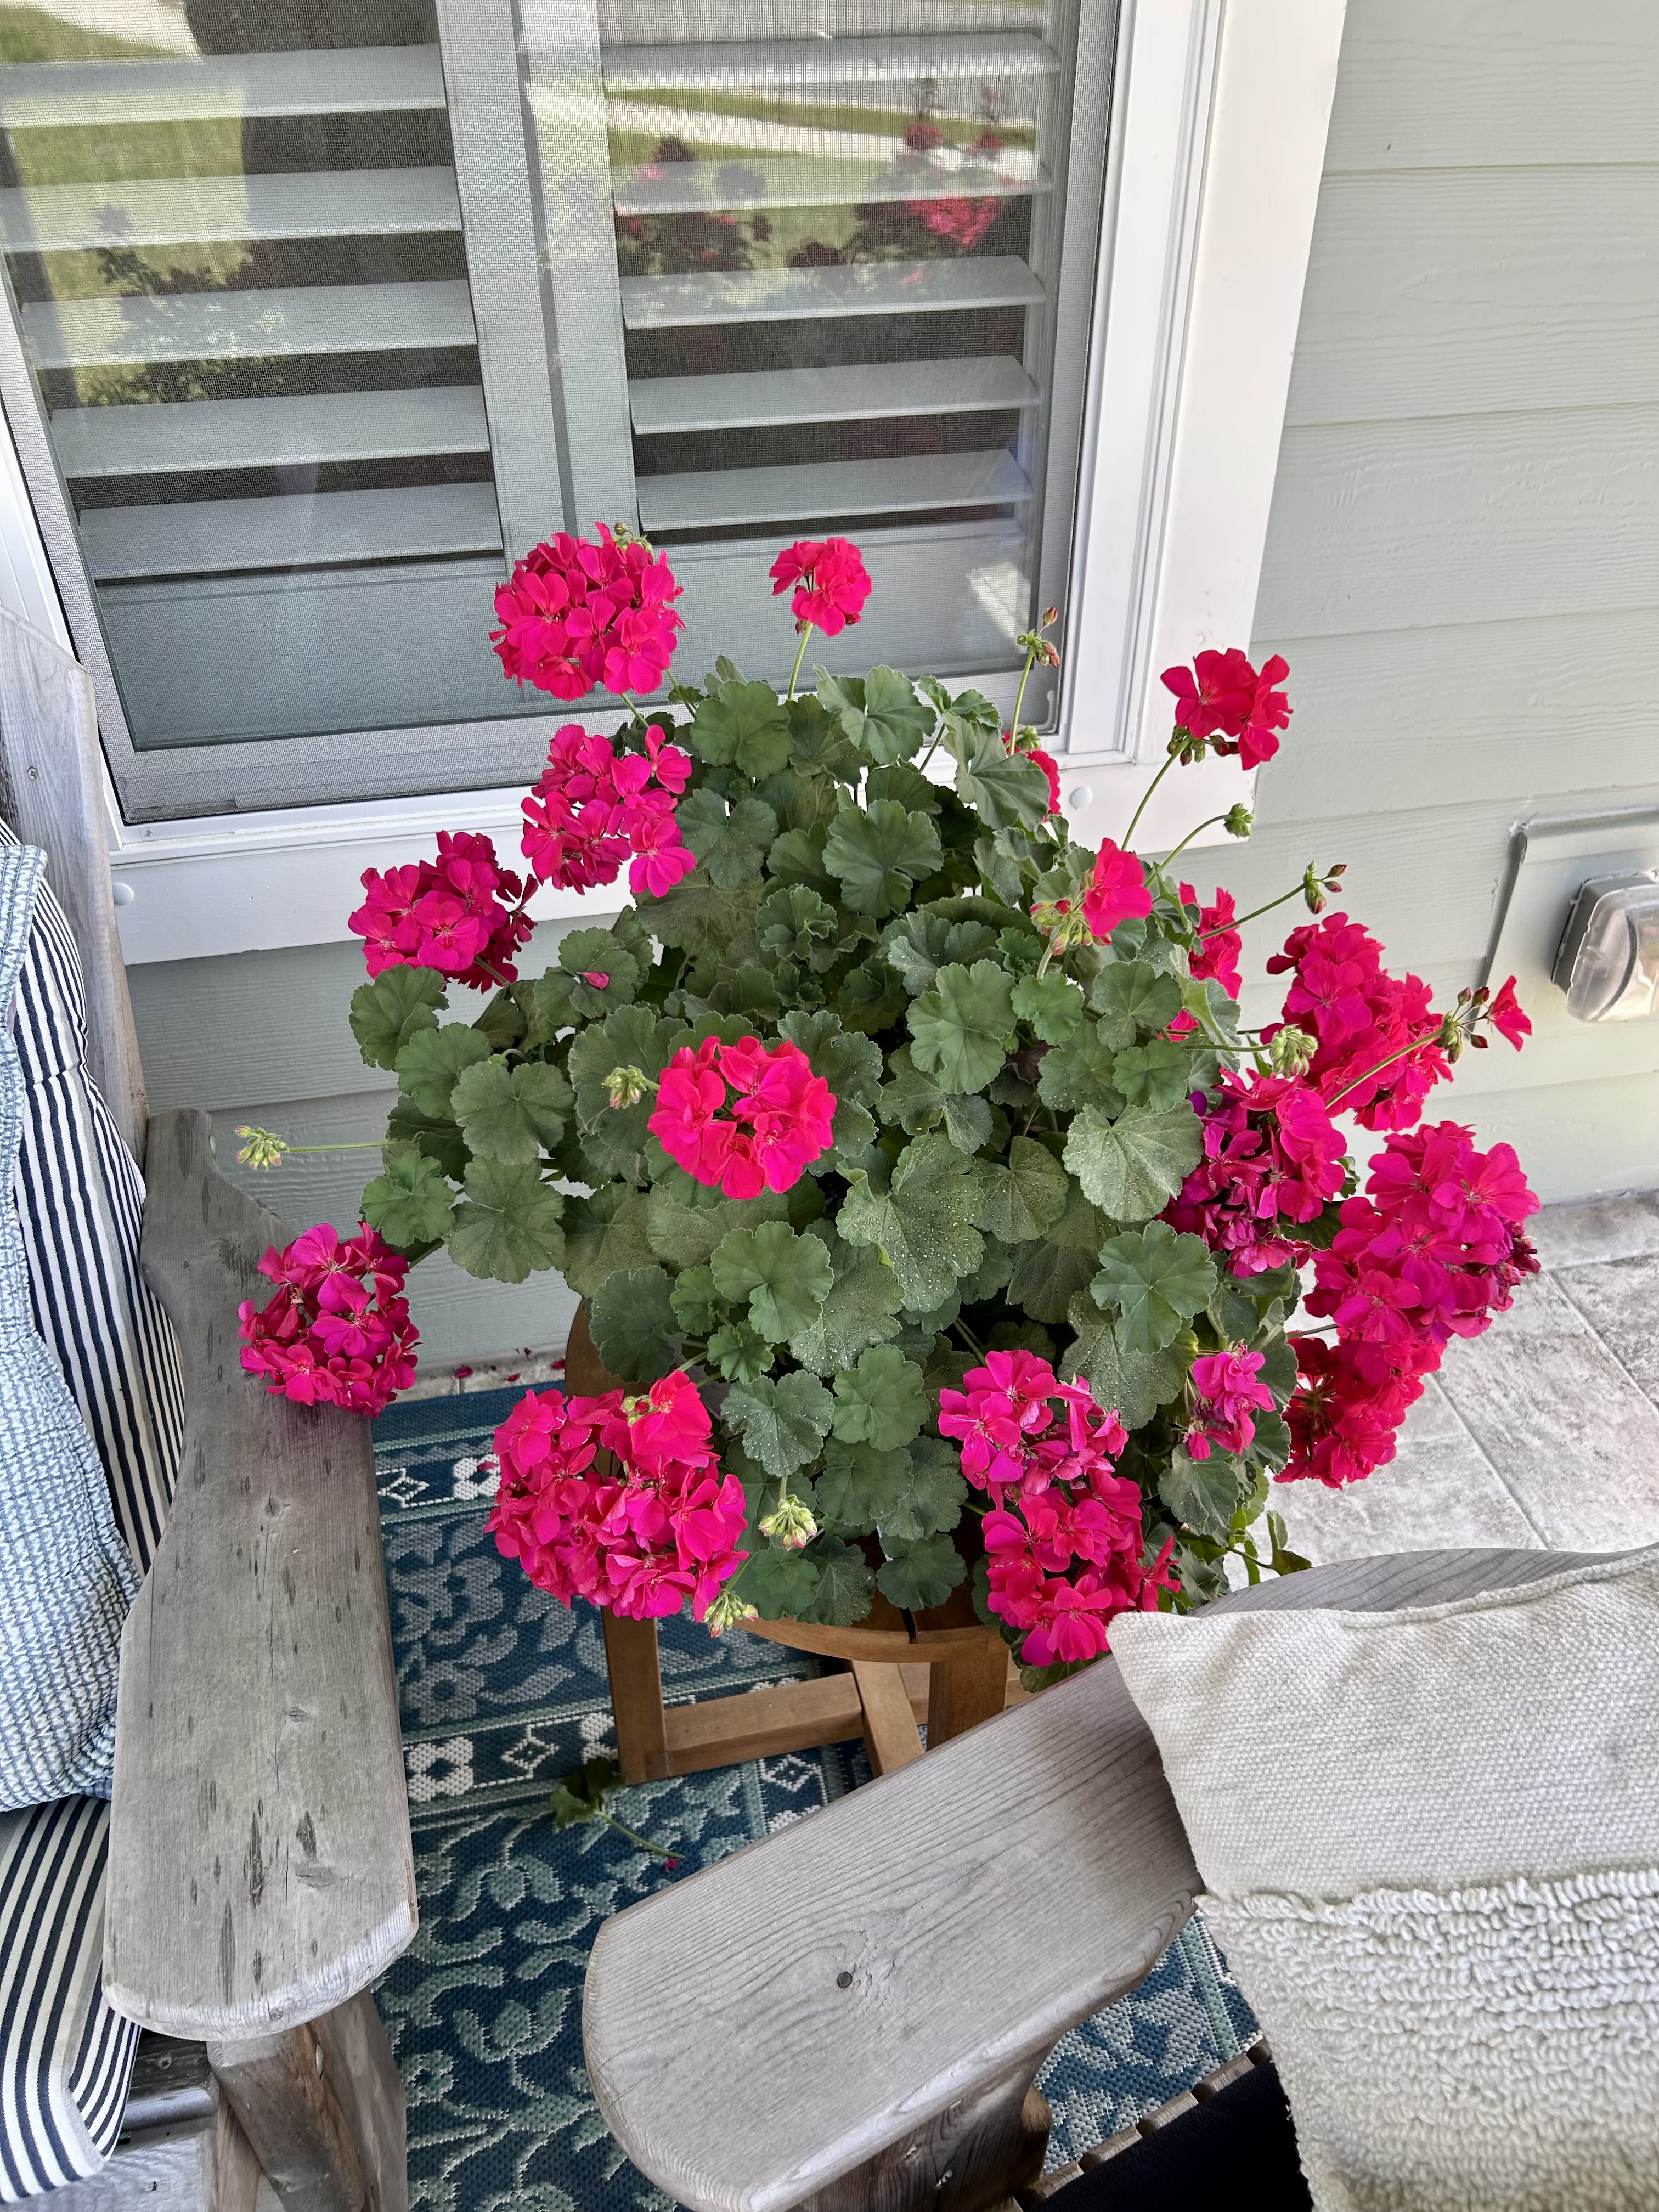
Meanwhile, the geranium on my screened porch wintered over and is now FULL of blooms. It loves this cooler spring weather. (I did bring it in for a few days during the worst of the ice and snow last winter.) And it actually managed low 30’s temps just fine.
“Gradations,” the 4th and final quilt in my half-rectangle triangle series, using Latifah Saafir’s Hurty ruler, is on the longarm.
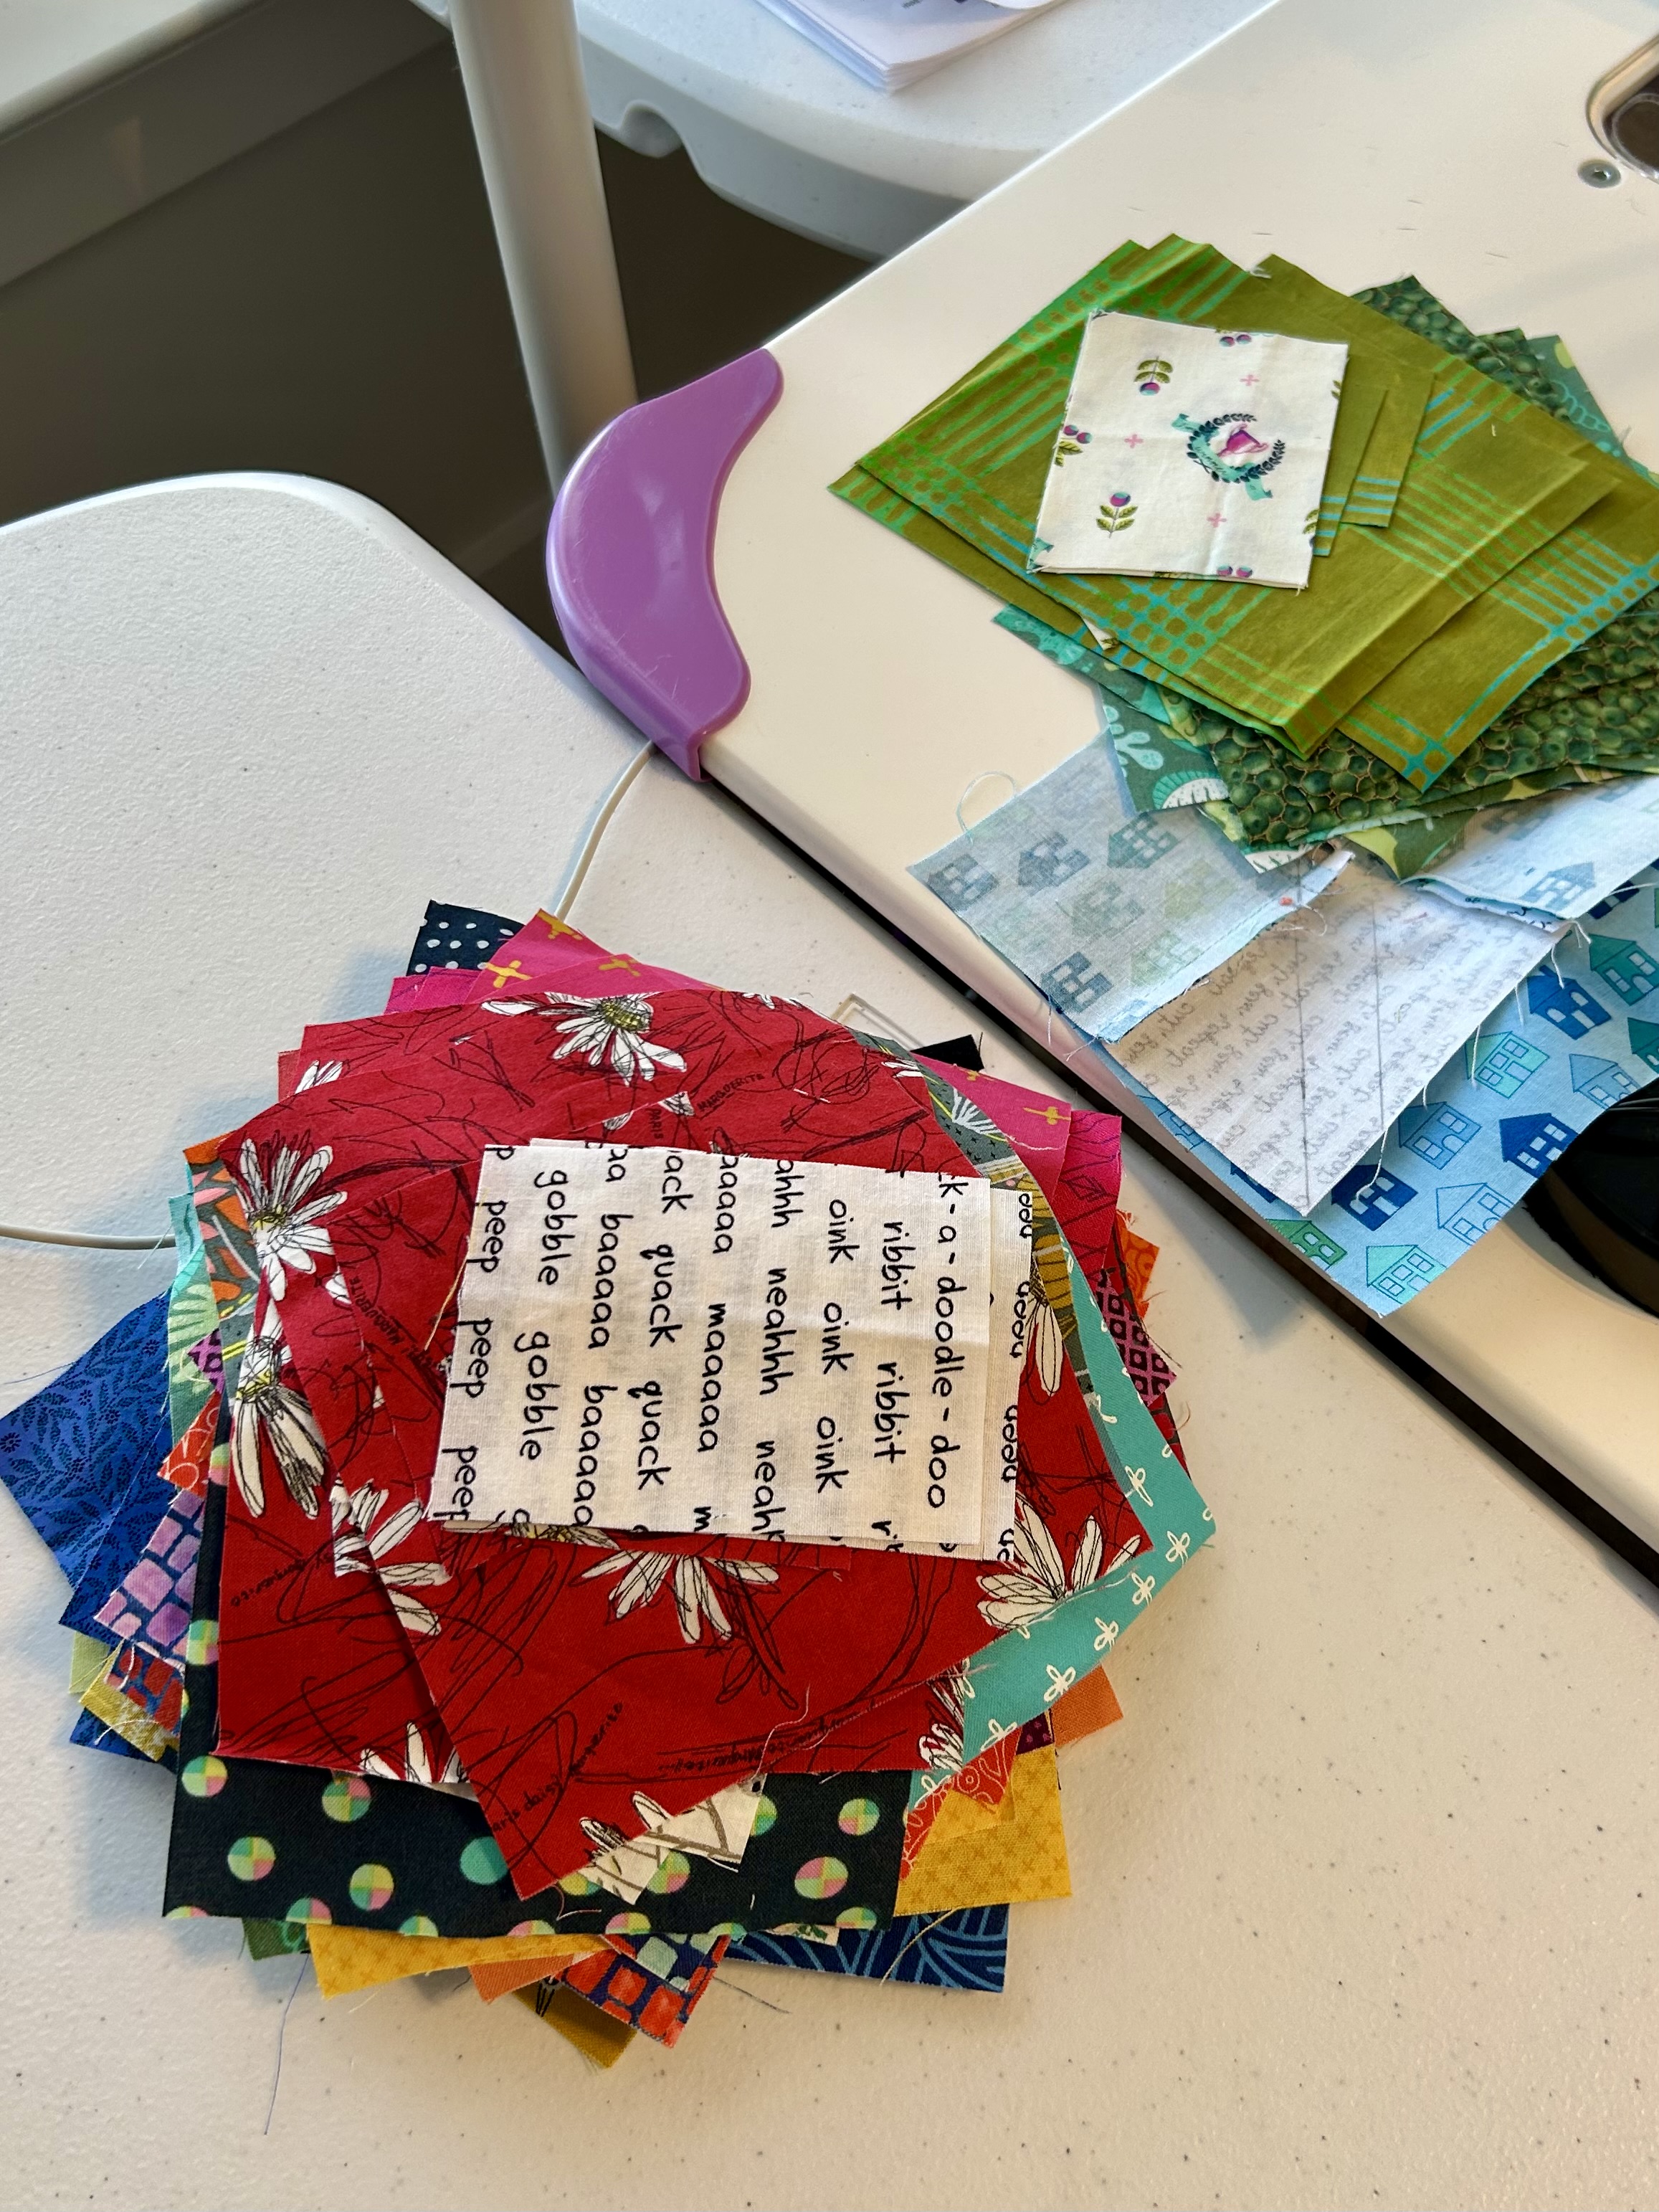
I am sewing the colorful polka-dot binding on “Scrap Cabin” at night and have almost finished the 3rd side. (Rachel Hauser’s online sewalong in January, Stitched in Color blog.) Sewing binding is soothing, but for me, slow. I must sew tinier stitches than other people do??? I shared this quilt with Patchwork Gals this past week. Boy did it eat up stash fabric in my strip bins.
Here’s my design wall yesterday. “Big Slice” is folded on the left as it is all ironed and is waiting for its turn on the longarm. These two in-process quilts are being made with the Cat’s Cradle ruler. The left-side one is a 4-inch block made with the smaller ruler. The right-side is made with the larger ruler and is an 8-inch block, so will finish at 64 by 64. All the large blocks are done, but I’ll let this big-block quilt simmer for a few days before sewing the blocks together–in case I see something I want to switch.
There are many ways to set this Cat’s Cradle block, including one that makes a star. But I fell in love with the diagonal rows of little blocks and the rows that form with this setting and with this color placement in the block.
This big-block quilt is going to be a donation to the new Tunnel To Towers project here in Charleston, SC, that will house 98 local homeless veterans. (Tunnel to Towers started after 9-11 in New York city for those first responders who were injured. Now it is a national project for mostly homeless vets. (https://t2t.org/homeless-veteran-program/). They have asked the local quilt community for quilts for each bed, and we will do that work with pleasure.
Here is the smaller 4-inch block quilt. The 40-inch center has been webbed, leaving the horizontal rows unconnected, but so that the blocks stay in proper order. Now I’m adding blocks to the top and sides. I will need 16 by 18 rows in total to make this quilt a rectangle at 64 by 72.
When I pulled fabric pieces from my stash, I cut blocks from each piece of fabric for both quilts. The big blocks are done, but I now have to sew the 4-inch block parts I cut. And I will need to cut more along the way. It is a fun block to cut and sew though, so I don’t mind. And, again, ALL of these winter projects have been made from my stash fabrics–exept for some backings.
I am feeling really good about using up so much stash fabric this winter. It feels like making the fabric load much lighter. There is a balance for a scrappy quilter between keeping a stash of many colors and prints/solids and having an overload of fabric.
It has been a productive week in the quilt studio.
The 4th quilt top in my series of 4 using the Hurty ruler designed by Latifah Saafir is done. AND, the math on the final border MATHED. I’m calling it “Gradations.”
The backing should come in the mail today. But I have to quilt the quilt presently on the longarm, the yet as unnamed “Scrap Cabin” from Rachel Hauser’s recent online sewalong.
Grandmother duties took me over to Bryan and Corinne’s, where I got a picture of the white camellia now blooming in front of their house. I think a white camellia is in my future. Their pink camellia has been blooming for some time now.
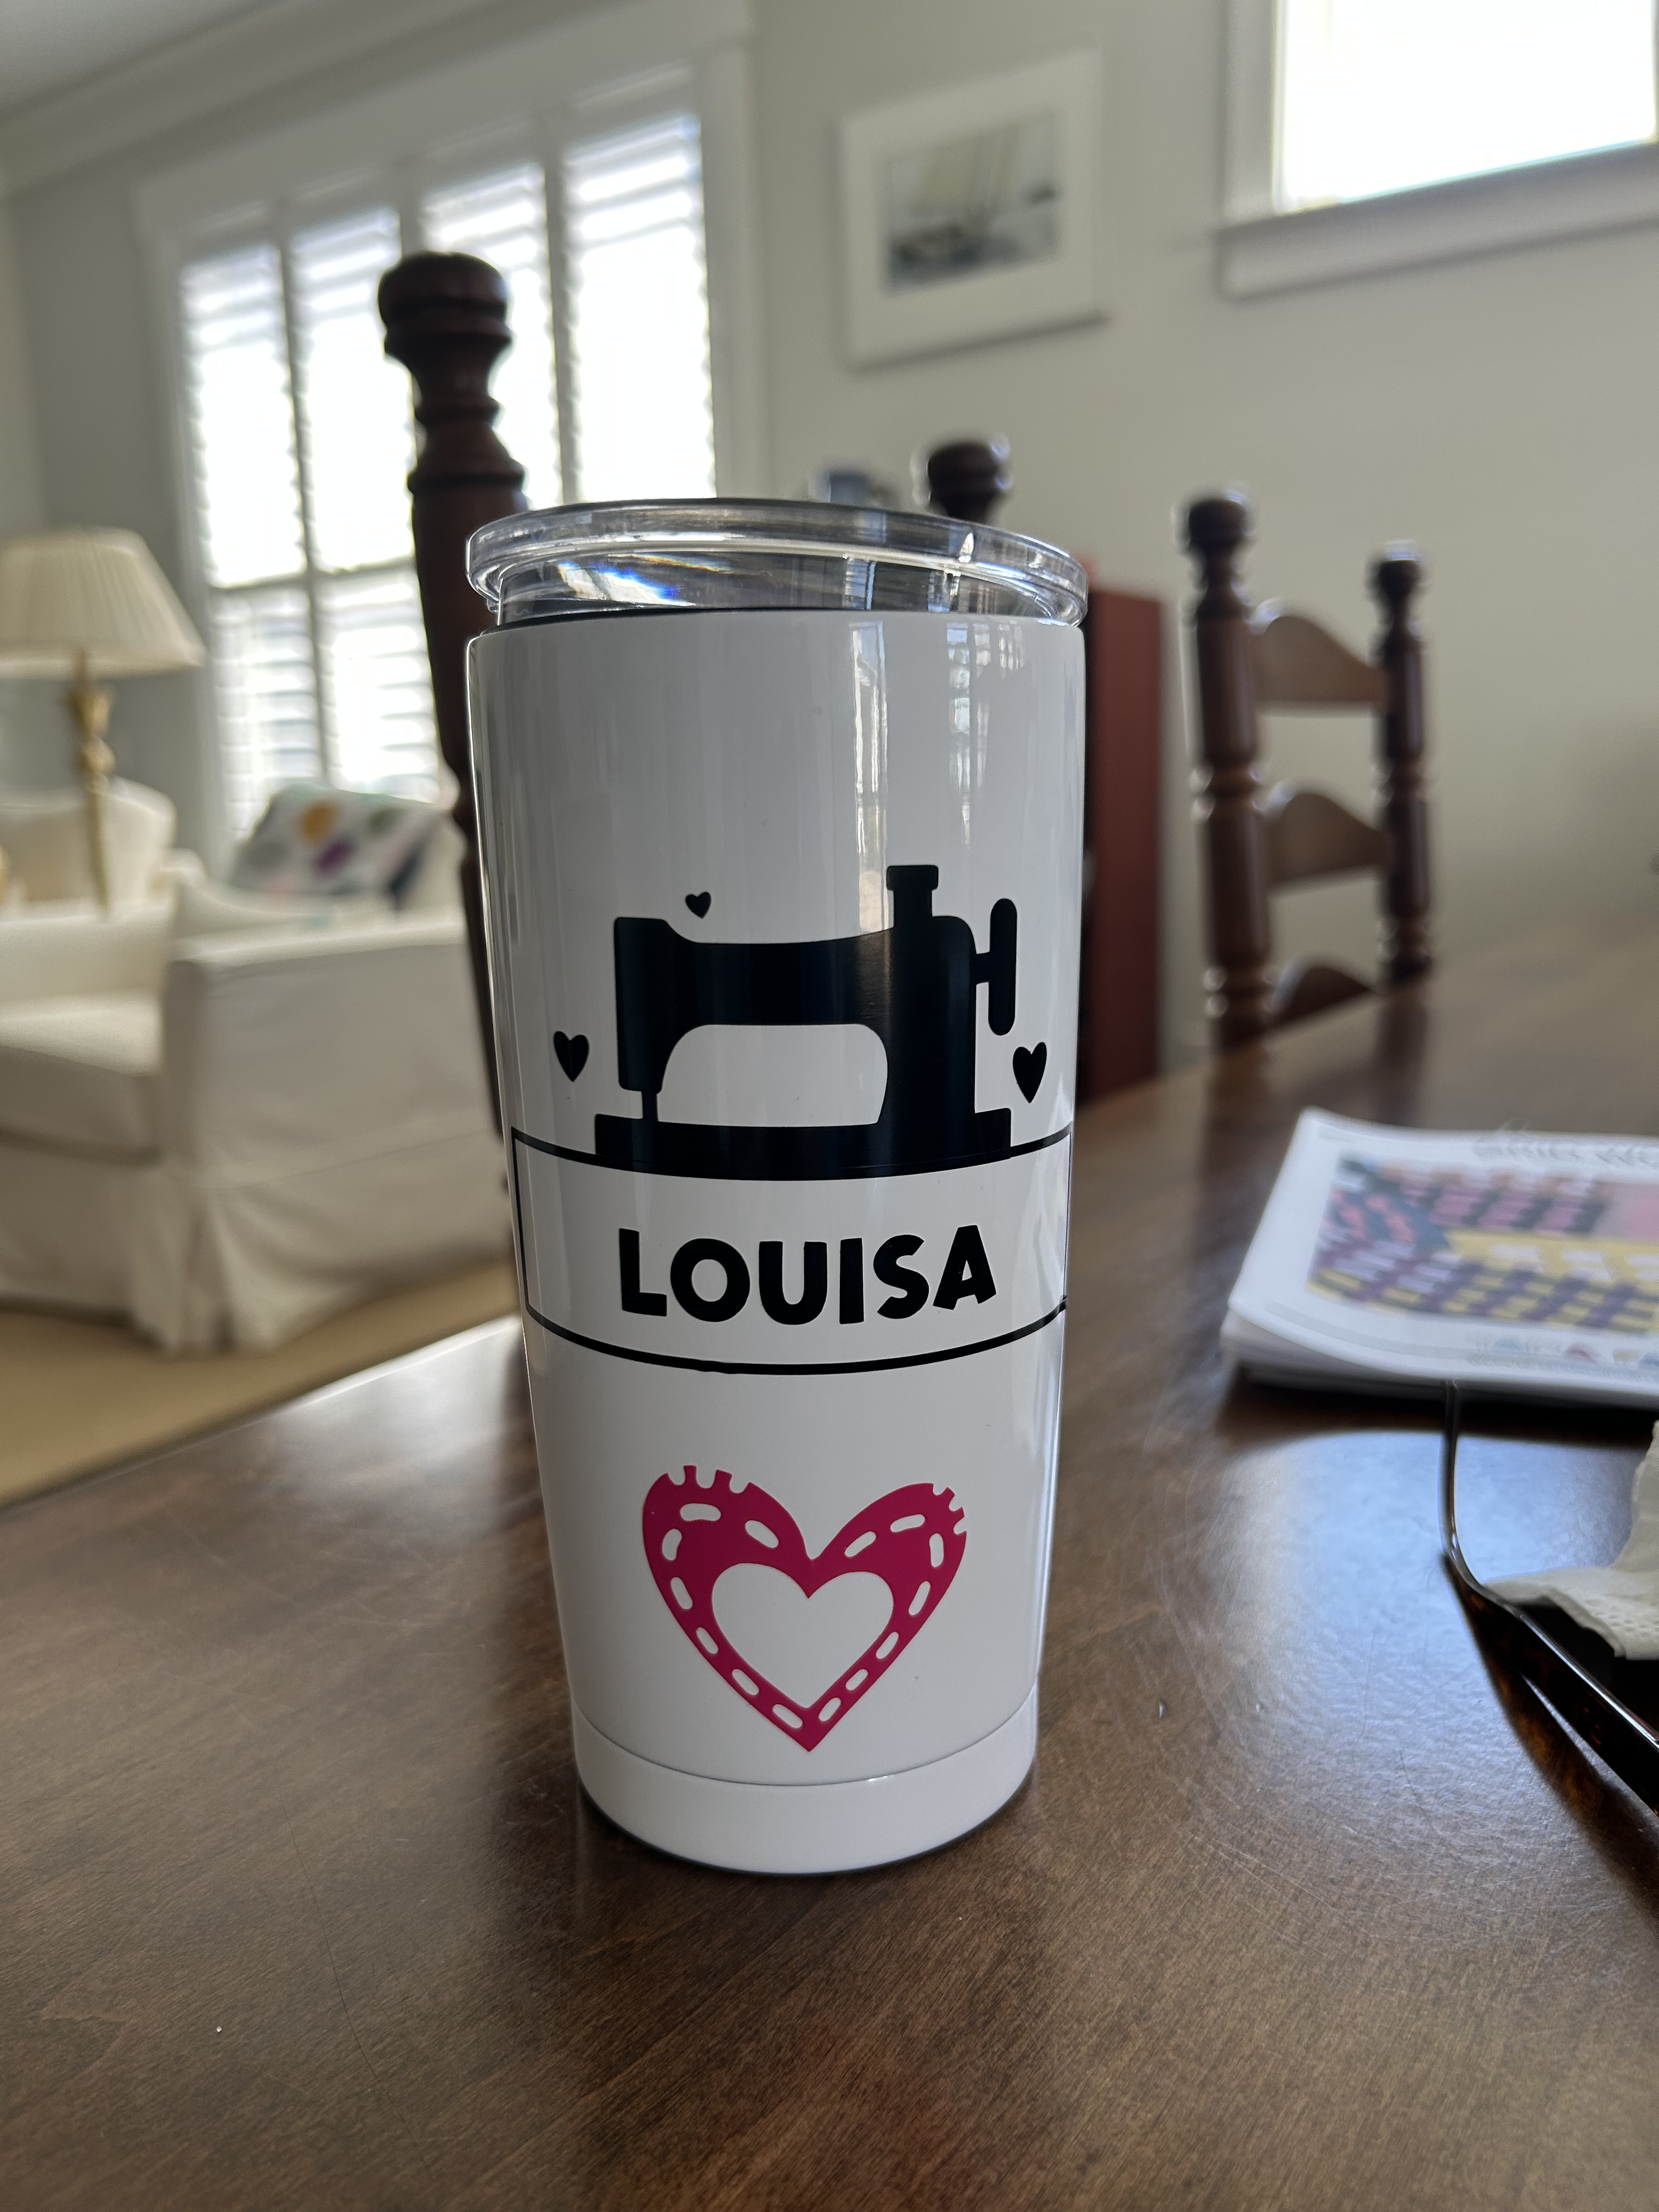
One of our new neighbors stopped by with a little gift for me. They bought a house here some months ago and are exploring this region.
This new neighbor’s mother sews quilts, and my neighbor follows my blog. She made the covering for this mug using a Cricket machine. That’s new technology for me. I can’t even…
What a sweet and thoughtful gift!
It is bright and sunny and cold here, after a big storm front went through earlier this week–significant enough so that they closed the schools. But we got some much-needed rain and escaped the possibility of tornadoes. There have been big fires north and west of us as the state is–or was–very dry. BIG fires.
I have been storing the quilts I’ve been making for my grandchildren for some years now–each grand (of course they all already have quilts from me) will have a handmade quilt from me when s/he is ready to have actual homes of their own. Plus, choices of other stored quilts and from those around the house. And also I have quilts that will be given eventually to family, friends, and various charities here in the Charleston, South Carolina area.
This new house is the first time that I’ve had space to store these quilts where I can see them. The storage area pictured below does not include the quilts I am using or have hung around the house. But you can see that I have whittled down the available quilts for giving away considerably (only a few now in the shelves on the bottom right below)–which feels really good.
Refolding quilts to prevent folding lines in the quilt from folding along the straight grain is an ongoing chore. But recently, I thought I’d explore more about folding these quilts on the bias–so refolding wouldn’t be needed.
Below is a video on how to fold small, medium, and large quilts. It took me a chunk of an afternoon to refold all of mine, but…DONE. It’s EASY, and it is also possible to refold quilts that are at the bottom of beds by just draping the longer ends over the sides–and the diagonal lines of the quilt are interesting to see when the quilt is folded this way.
My wonderful neighbors have helped me with the light situation in my house. The original lights were/are so, so, so dim–which meant that my upstairs quilt studio was really suffering from the lack of good light. Both rooms!
But, LOOK! See all the light in this room (no windows here) with this new light? I don’t have to turn on the longarm light bar now unless I am actually quilting with it.
We put the same light in the adjacent room where my sewing machines, cutting tables, and design wall live. When dusk happens, that room goes really dark despite all my added floor lights. I am so happy and grateful to my neighbors.
I’ve ordered more of the lights–these big ones as seen above and some flat ones that will just replace the very dim lights in other places in the house. Son Bryan is also on hand to help with this big replacement project–and all the new lights are now here and ready to go.
Below see my very FIRST Tilda fabric–bought for the Dancing Diamonds (third in my half-rectangle triangle block series) that is draped over the longarm in the picture above. (And which is now being quilted.). ***(I finished the quilting on Sunday late afternoon–post to follow soon.)
I love this fabric!! I love the print, of course, but I love the texture and heaviness of it. I am sick and tired of all the quilting fabrics that are so thin that it is difficult to work with them. At the same time, the quilt fabrics are more and more expensive. Quilters now are having to use starch to even cut straight lines on these thin fabrics. Bad Quilt Industry! Go Tilda! Go Kona solids.
I’ve got the center of the scrappy long cabin project done. Recall, this January sewalong is the work of Rachel Hauser’s Stitched in Color blog. Rachel Hauser is a VERY creative and fun scrappy quilter. I’m working on that awesome border now–the corners are all made.
At first I thought the blocks with really strong colors had to be maybe balanced with softer blocks–but I’ve changed my mind. The strong blocks are what are making this quilt sing. AND, this whole project is eating up a ton of the fabrics in my scrap bins. I’ve even had to cut some strips from fabrics in my stash to get the colors I wanted. ***(Now I’m making blocks for the awesome border.)
Tara Faughnan sent us a picture of the block for month 5 of our ongoing Blocks2 online class–along with the new fabric palette. I am so excited about this next block and can’t wait to start working with it. I have the fabric palette assembled, washed, and ready to go. February 1st came in due time, of course–and I’ve got all the materials organized, printed, videos watched, etc. But I will curtail my anticipation until I wrap up a few other projects.
I continue to love my air fryer–especially for french fries. Here, the fries, baby bok choy and some red peppers and carrots (also cooked in the air fryer), and some leftover meatloaf. The air fryer works with only a tiny bit of added oil.
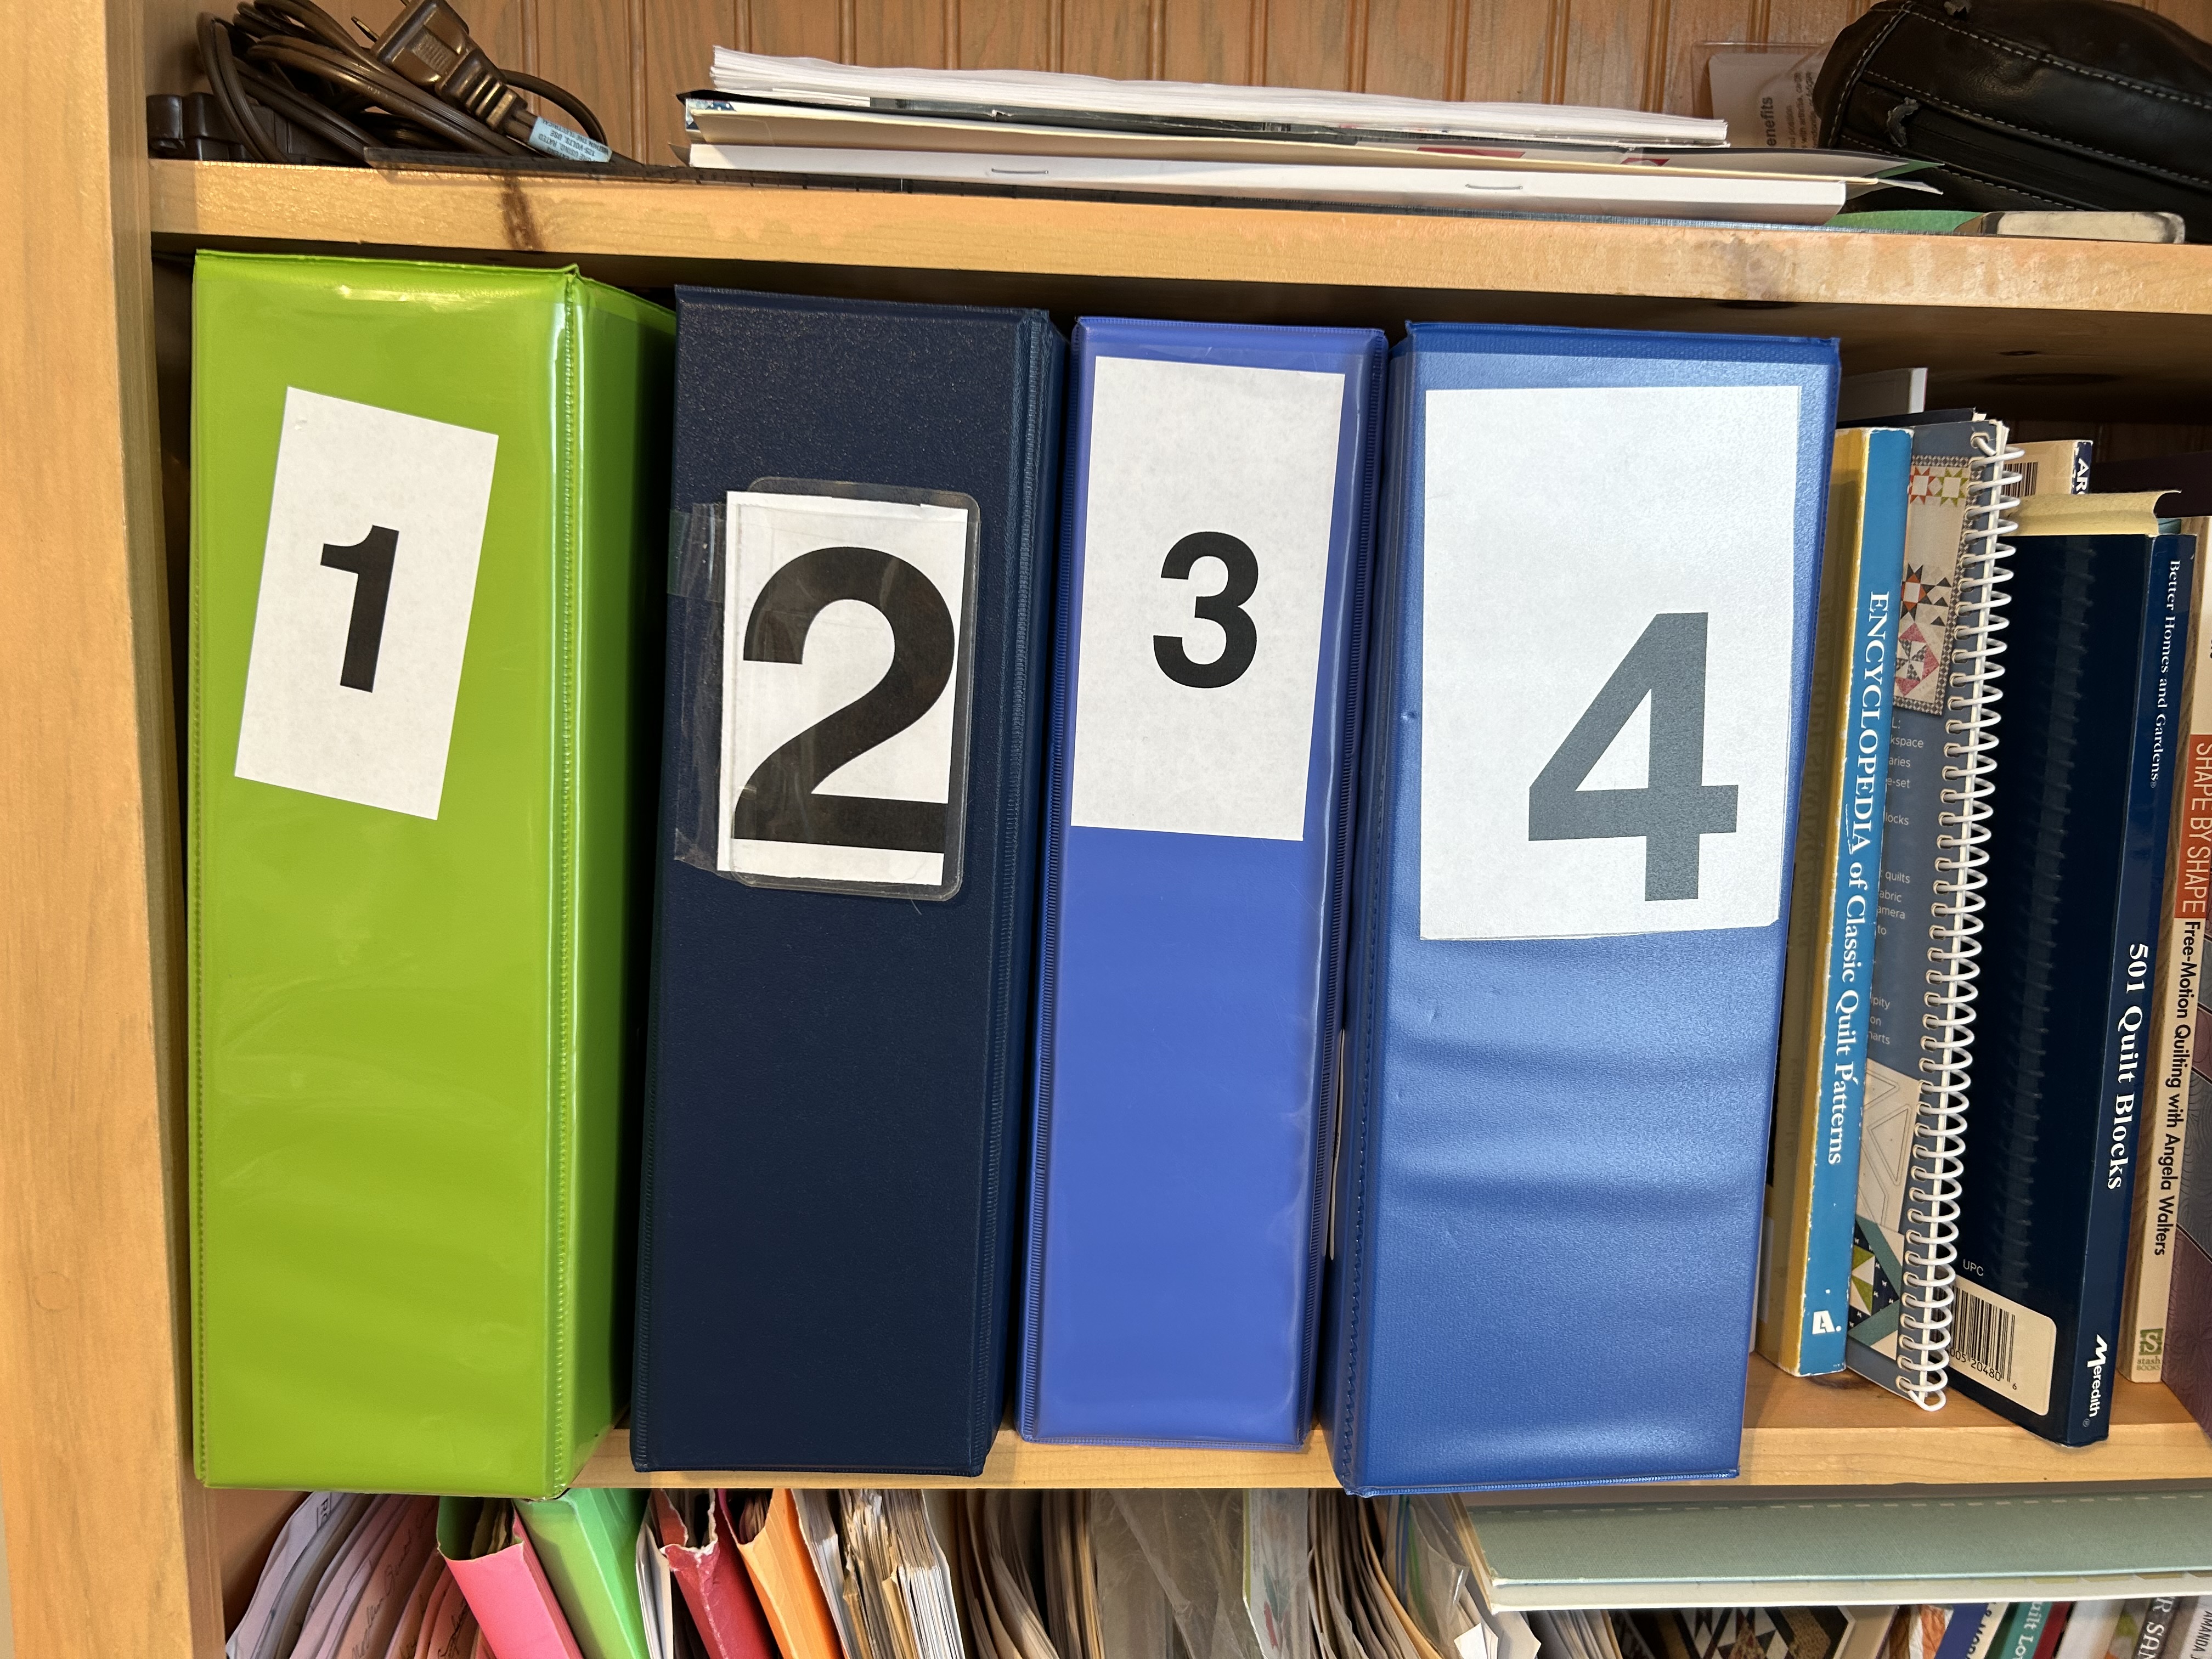
I’ve been actively sewing quilts since about 1996. From the beginning I’ve archived information on every quilt I’ve made. And I can’t believe how many times I’ve gone back to check on some detail about a finished quilt.
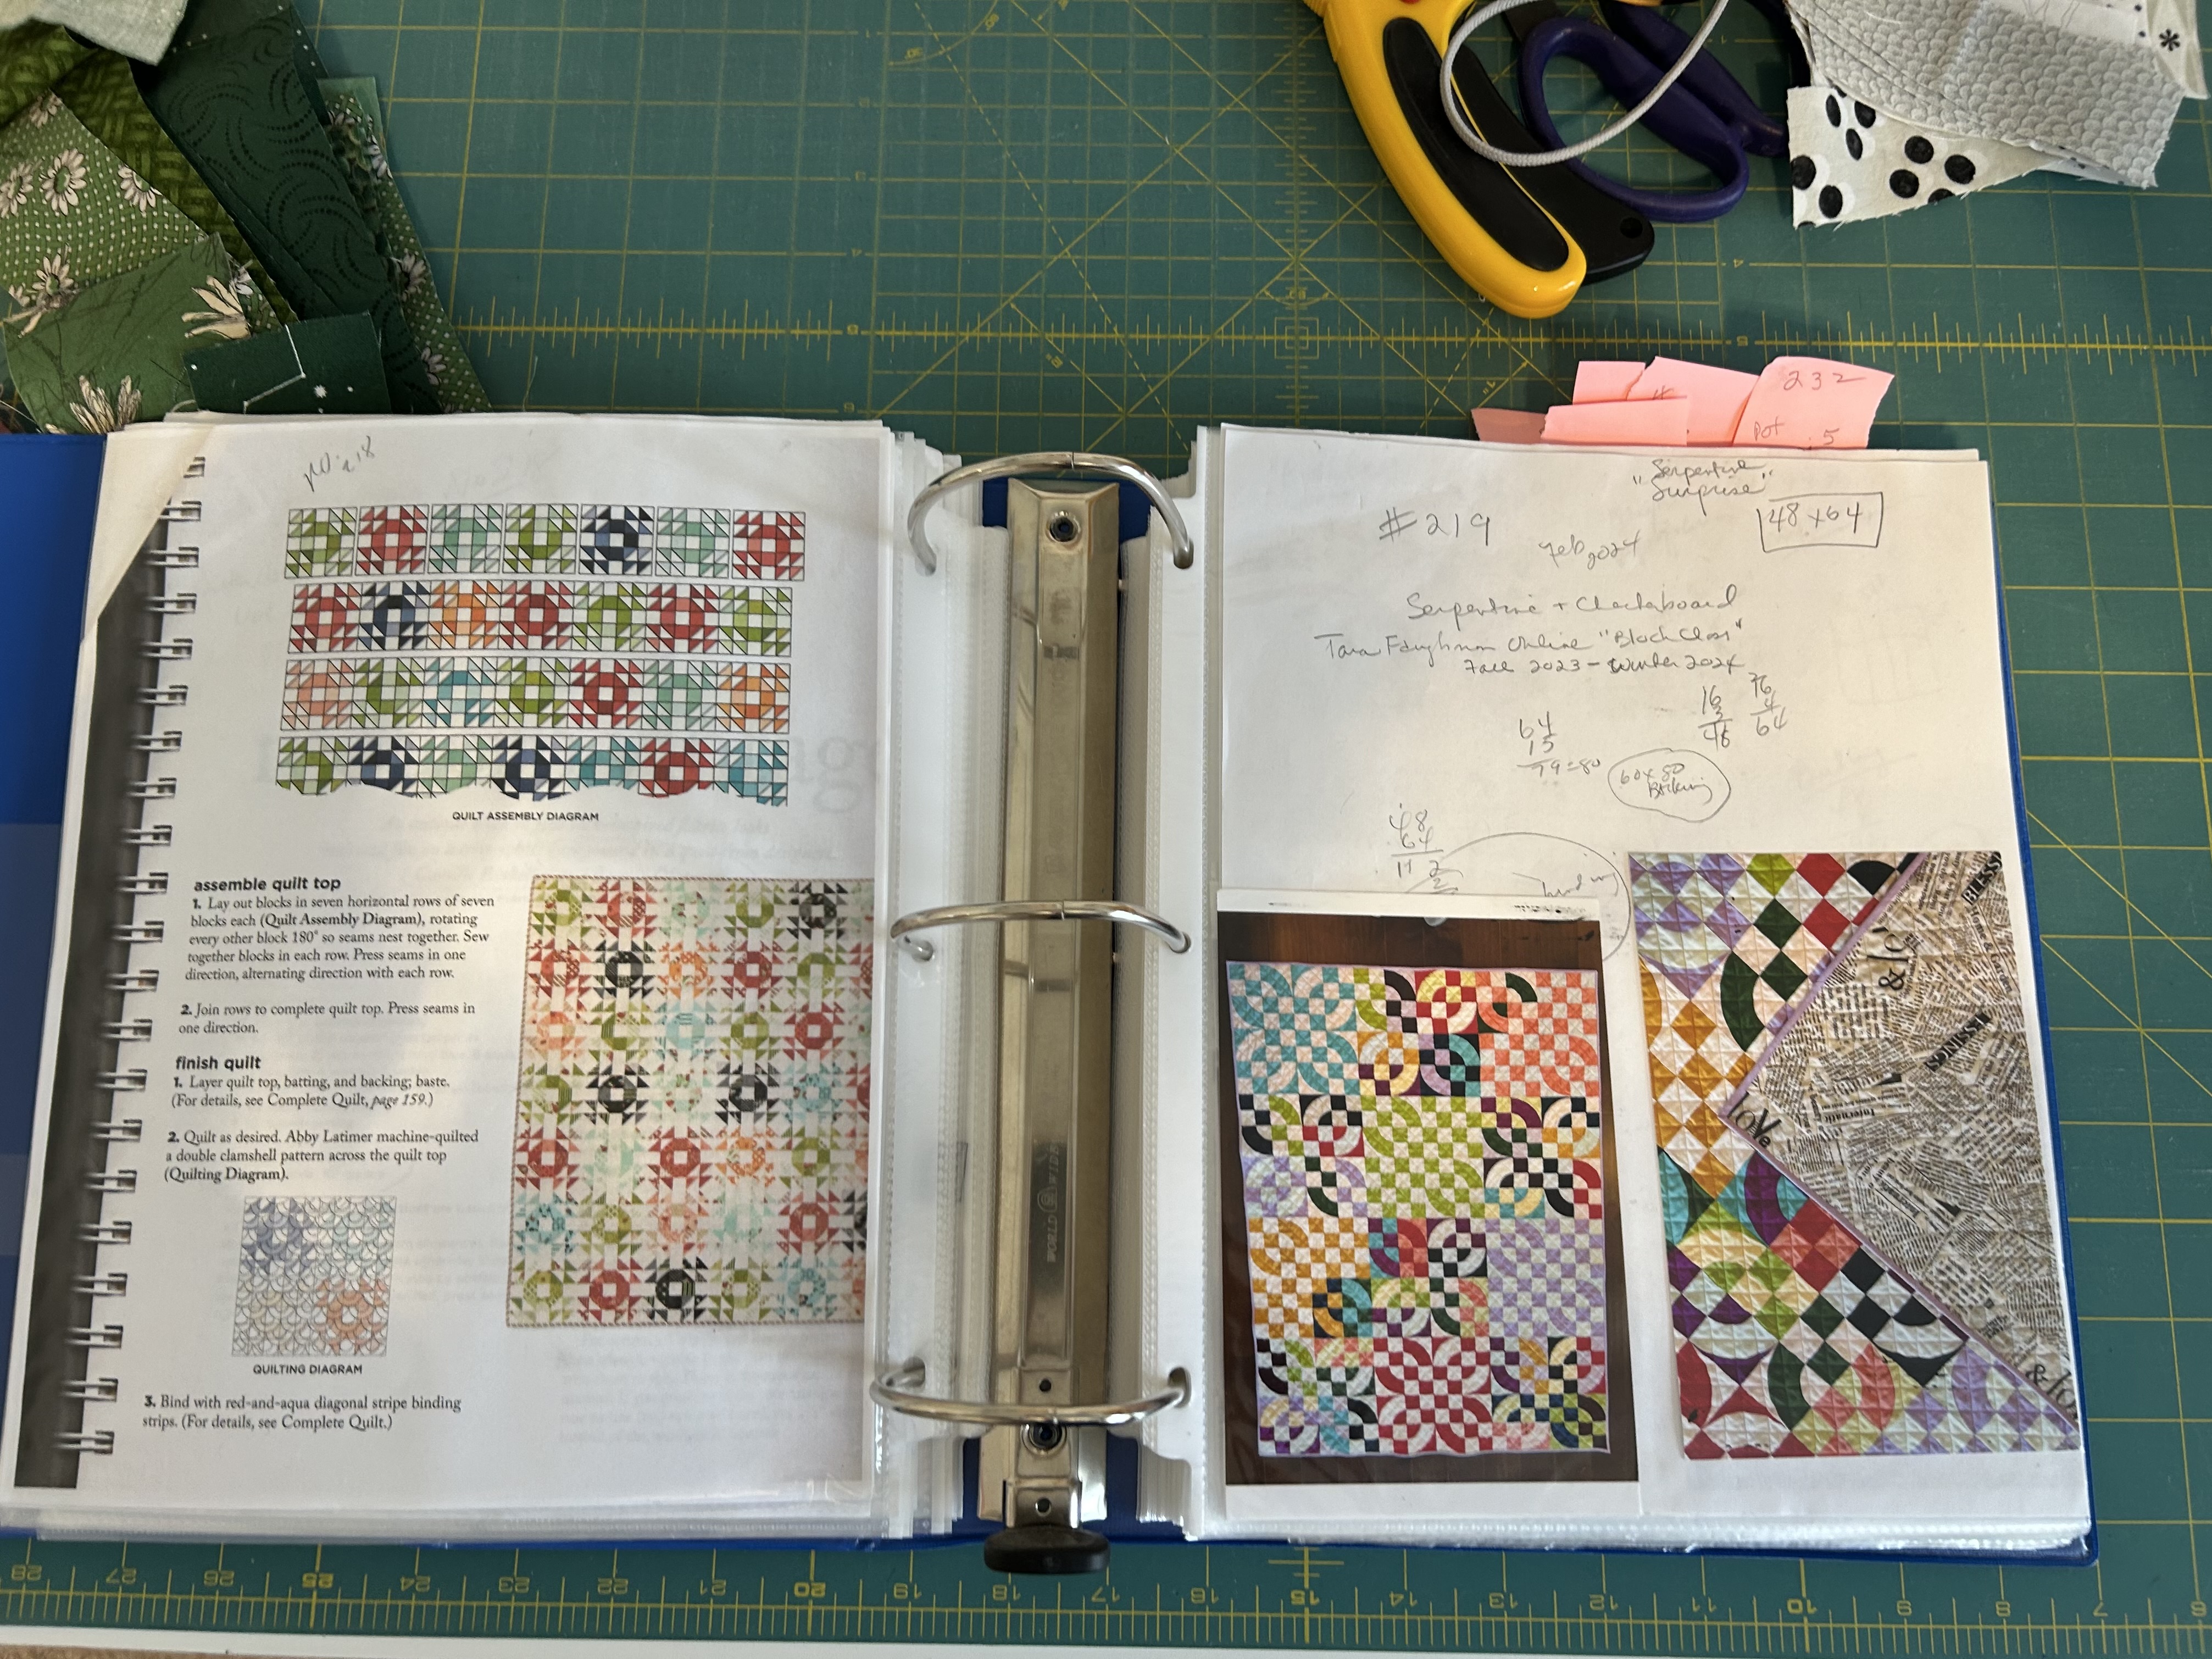
I use big notebook binders, and inside the binders I use plastic sleeves that will hold my quilt information and that open on the top only. The pictures below are from volume 4.
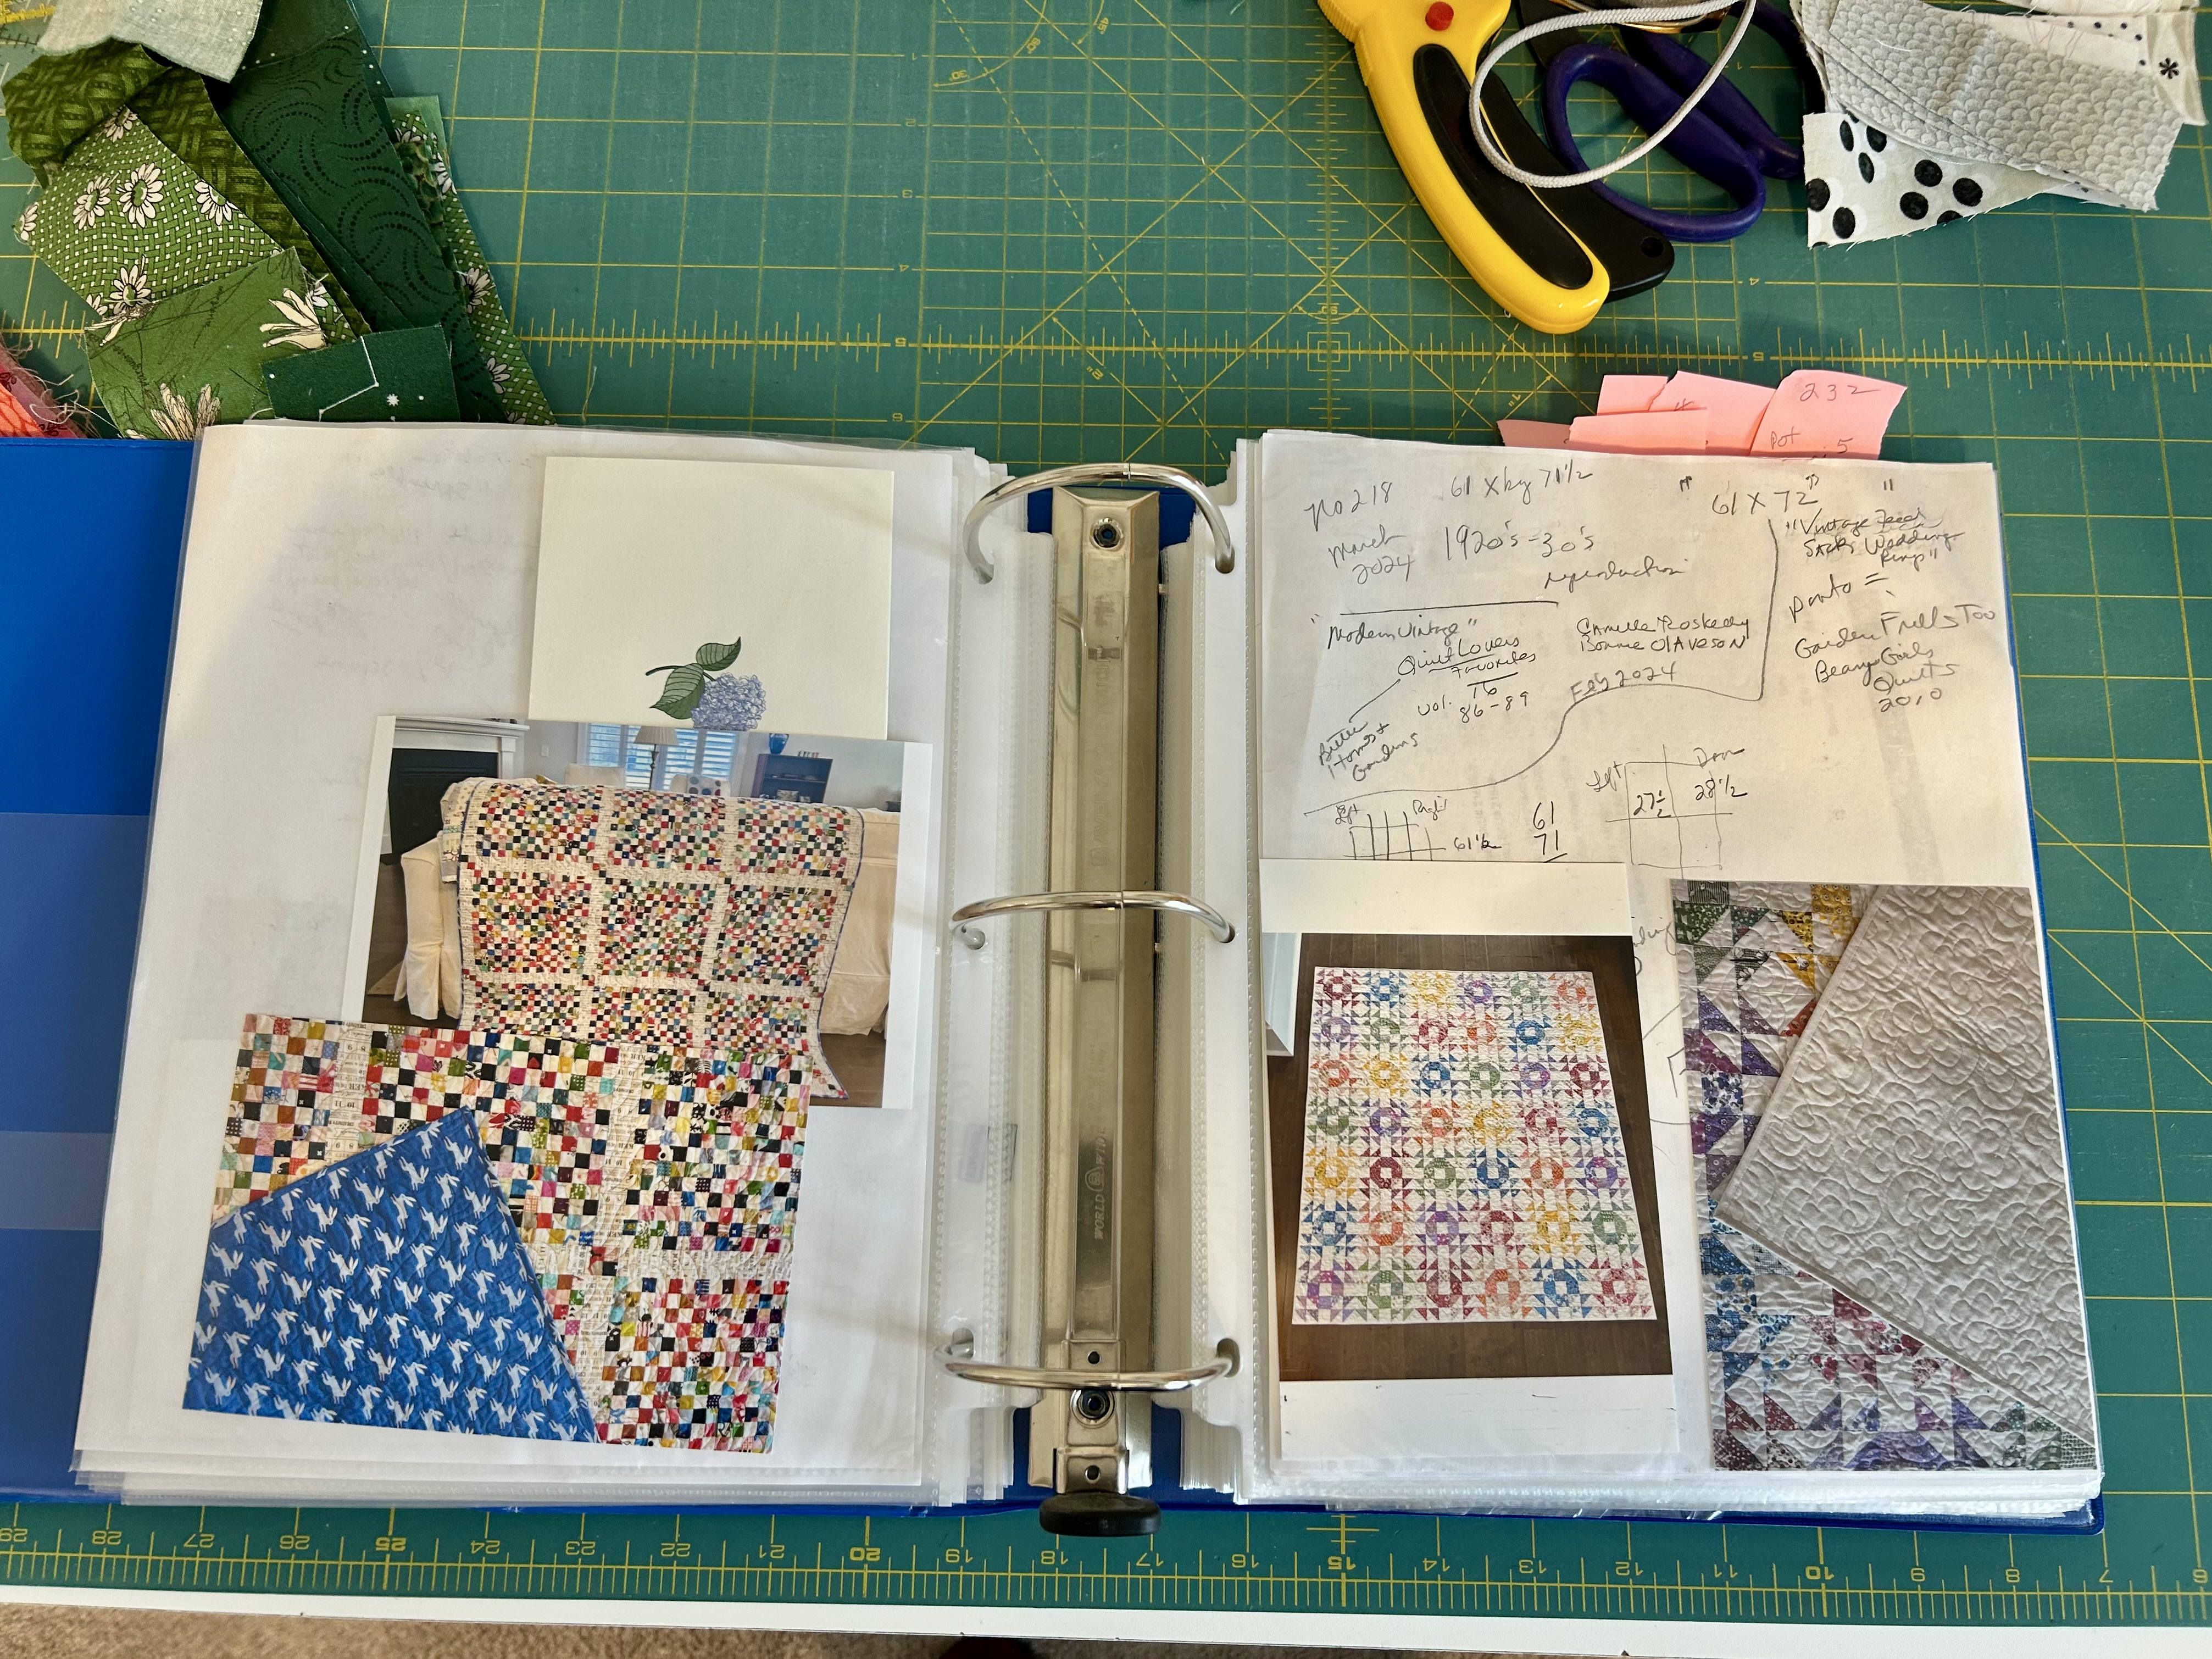
What do I record? EVERYTHING about a quilt I might need to know down the road. Always, I include pictures, the number of the quilt in the completion lineup, the completion date, the patterns involved (sewing, quilting), the size, the backing fabric, information on the front fabrics if needed, to whom I gave the quilt or why I’ve kept it (quilts saved for grandchildren), thank you cards or pics sent to me by recipients, and so on.
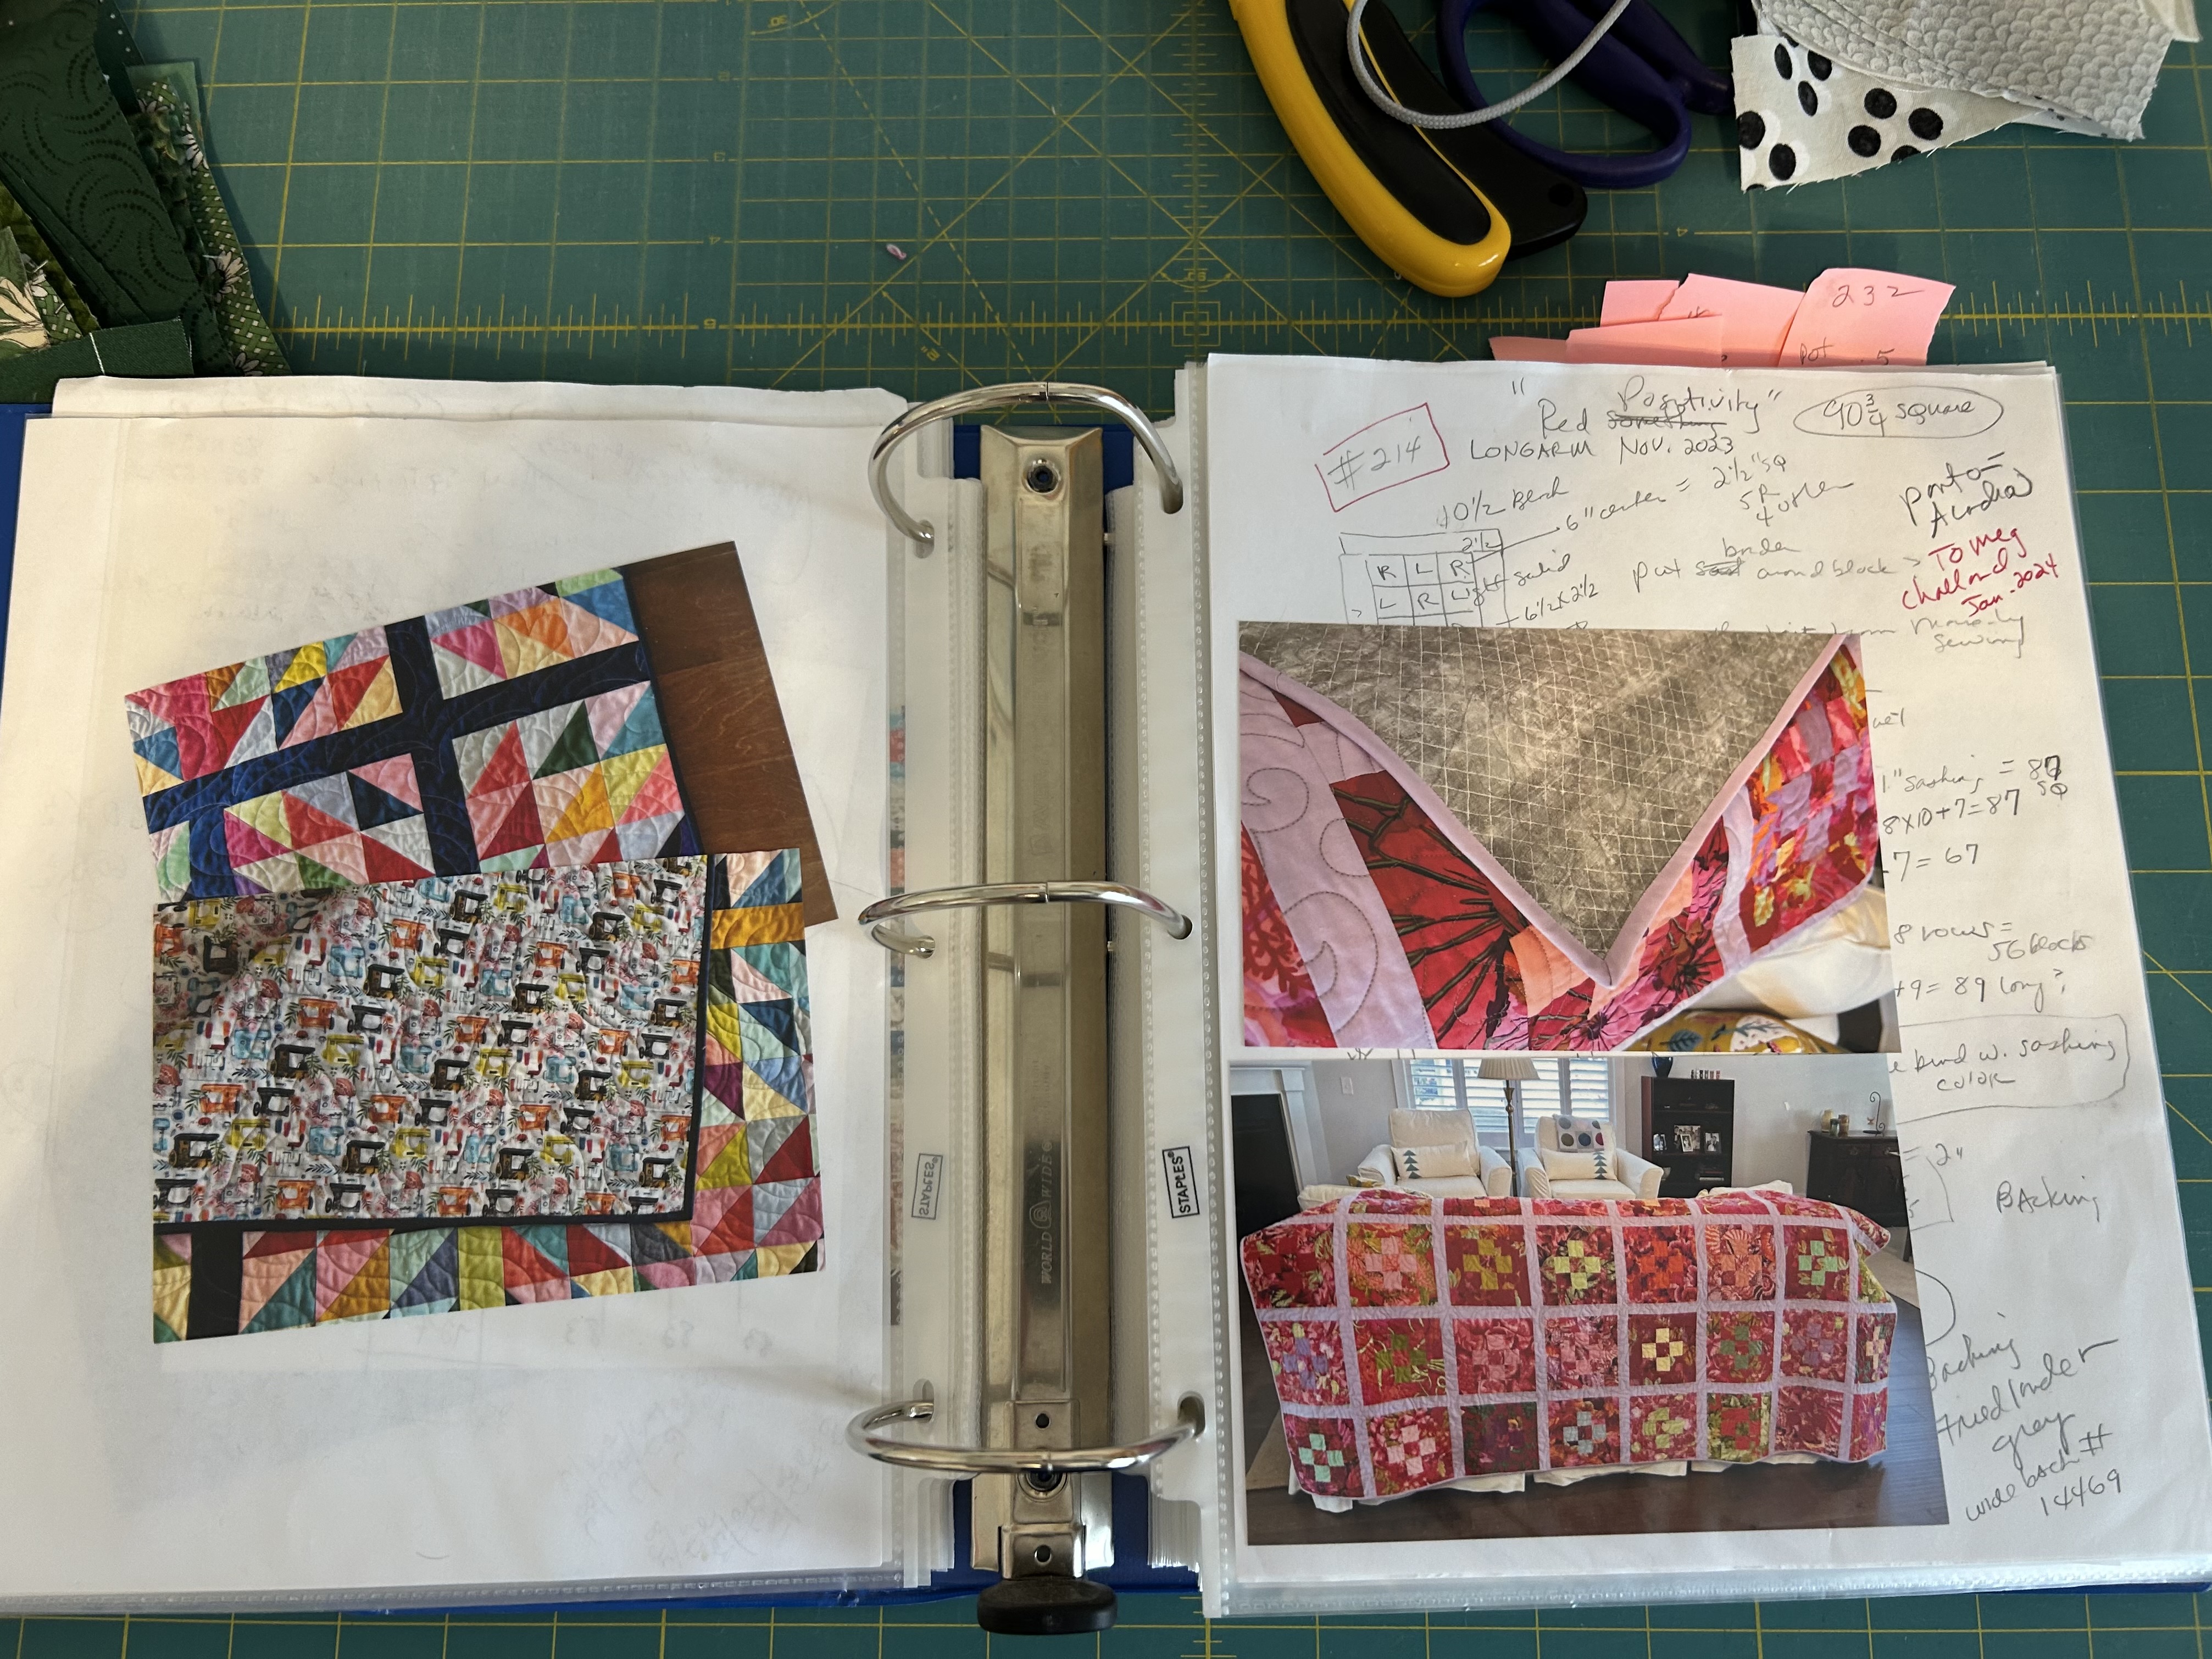
Below, the left page is more information about the quilt on the front side of that sleeve, and the right side is the first info for that particular quilt. On the left you can see there is a thank you note included. You can see each quilt has a page where I take notes as I work on the quilt.
On the left below you can see I included the pattern for the quilt on the front side. On the right side you can see the backing of that particular quilt.
Another set of pages:
The back side of the right page above:
In the book I reserve pages for quilts under construction–so I keep all the numbers in correct order for when I create a quilt’s label.
I hope this post encourages the quilters who read this blog to start archiving your own quilt work and/or other sewing projects. YOUR work is important.
I’ve been making more rope bowls in these past few days. Once I set up the machine for that work, I tend to not stop with one bowl. These bowls will be gifts, of course.
Thanks to Rick Sanchez whose video on YouTube has helped me so much. I finally tried the little rosettes to end a bowl–also thanks to the help he gave our modern group’s November Sit and Sew meeting.
I use 1/4 inch thick rope, and Rick uses a slightly lighter version. My machine is not happy with sewing a line across the rosettes to hold them in place with my thicker rope–and I don’t want to use a glue gun and glue to install those rosettes. What I learned is that if I put in a bigger needle (16 inch) and go very slowly, that works, though there are complaints. If I use a zig zag stitch, you don’t even notice where the installation sewing line is. Aren’t they cute? I think they are cute.
I am getting much better at this whole rope bowl process, though I have not yet tried a rectangular shape. Hold on to your hats–I’ve got some Rit dye and will try dyeing rope in early 2025–with likely the help of my sweet neighbor. I want to do it all outside as that dye stains everything except stainless steel. Cold water from the hose can set the finished rope–and my neighbor has a plan for how to discard the spent dye water so neither of us ever has the dye in the house. (I can boil water inside to take outside.) There are no laundry sinks here. I’m going to use two colors–one on each end of the rope hank. This plan got hatched after, again, Rick Sanchez did some beautiful rope dying.
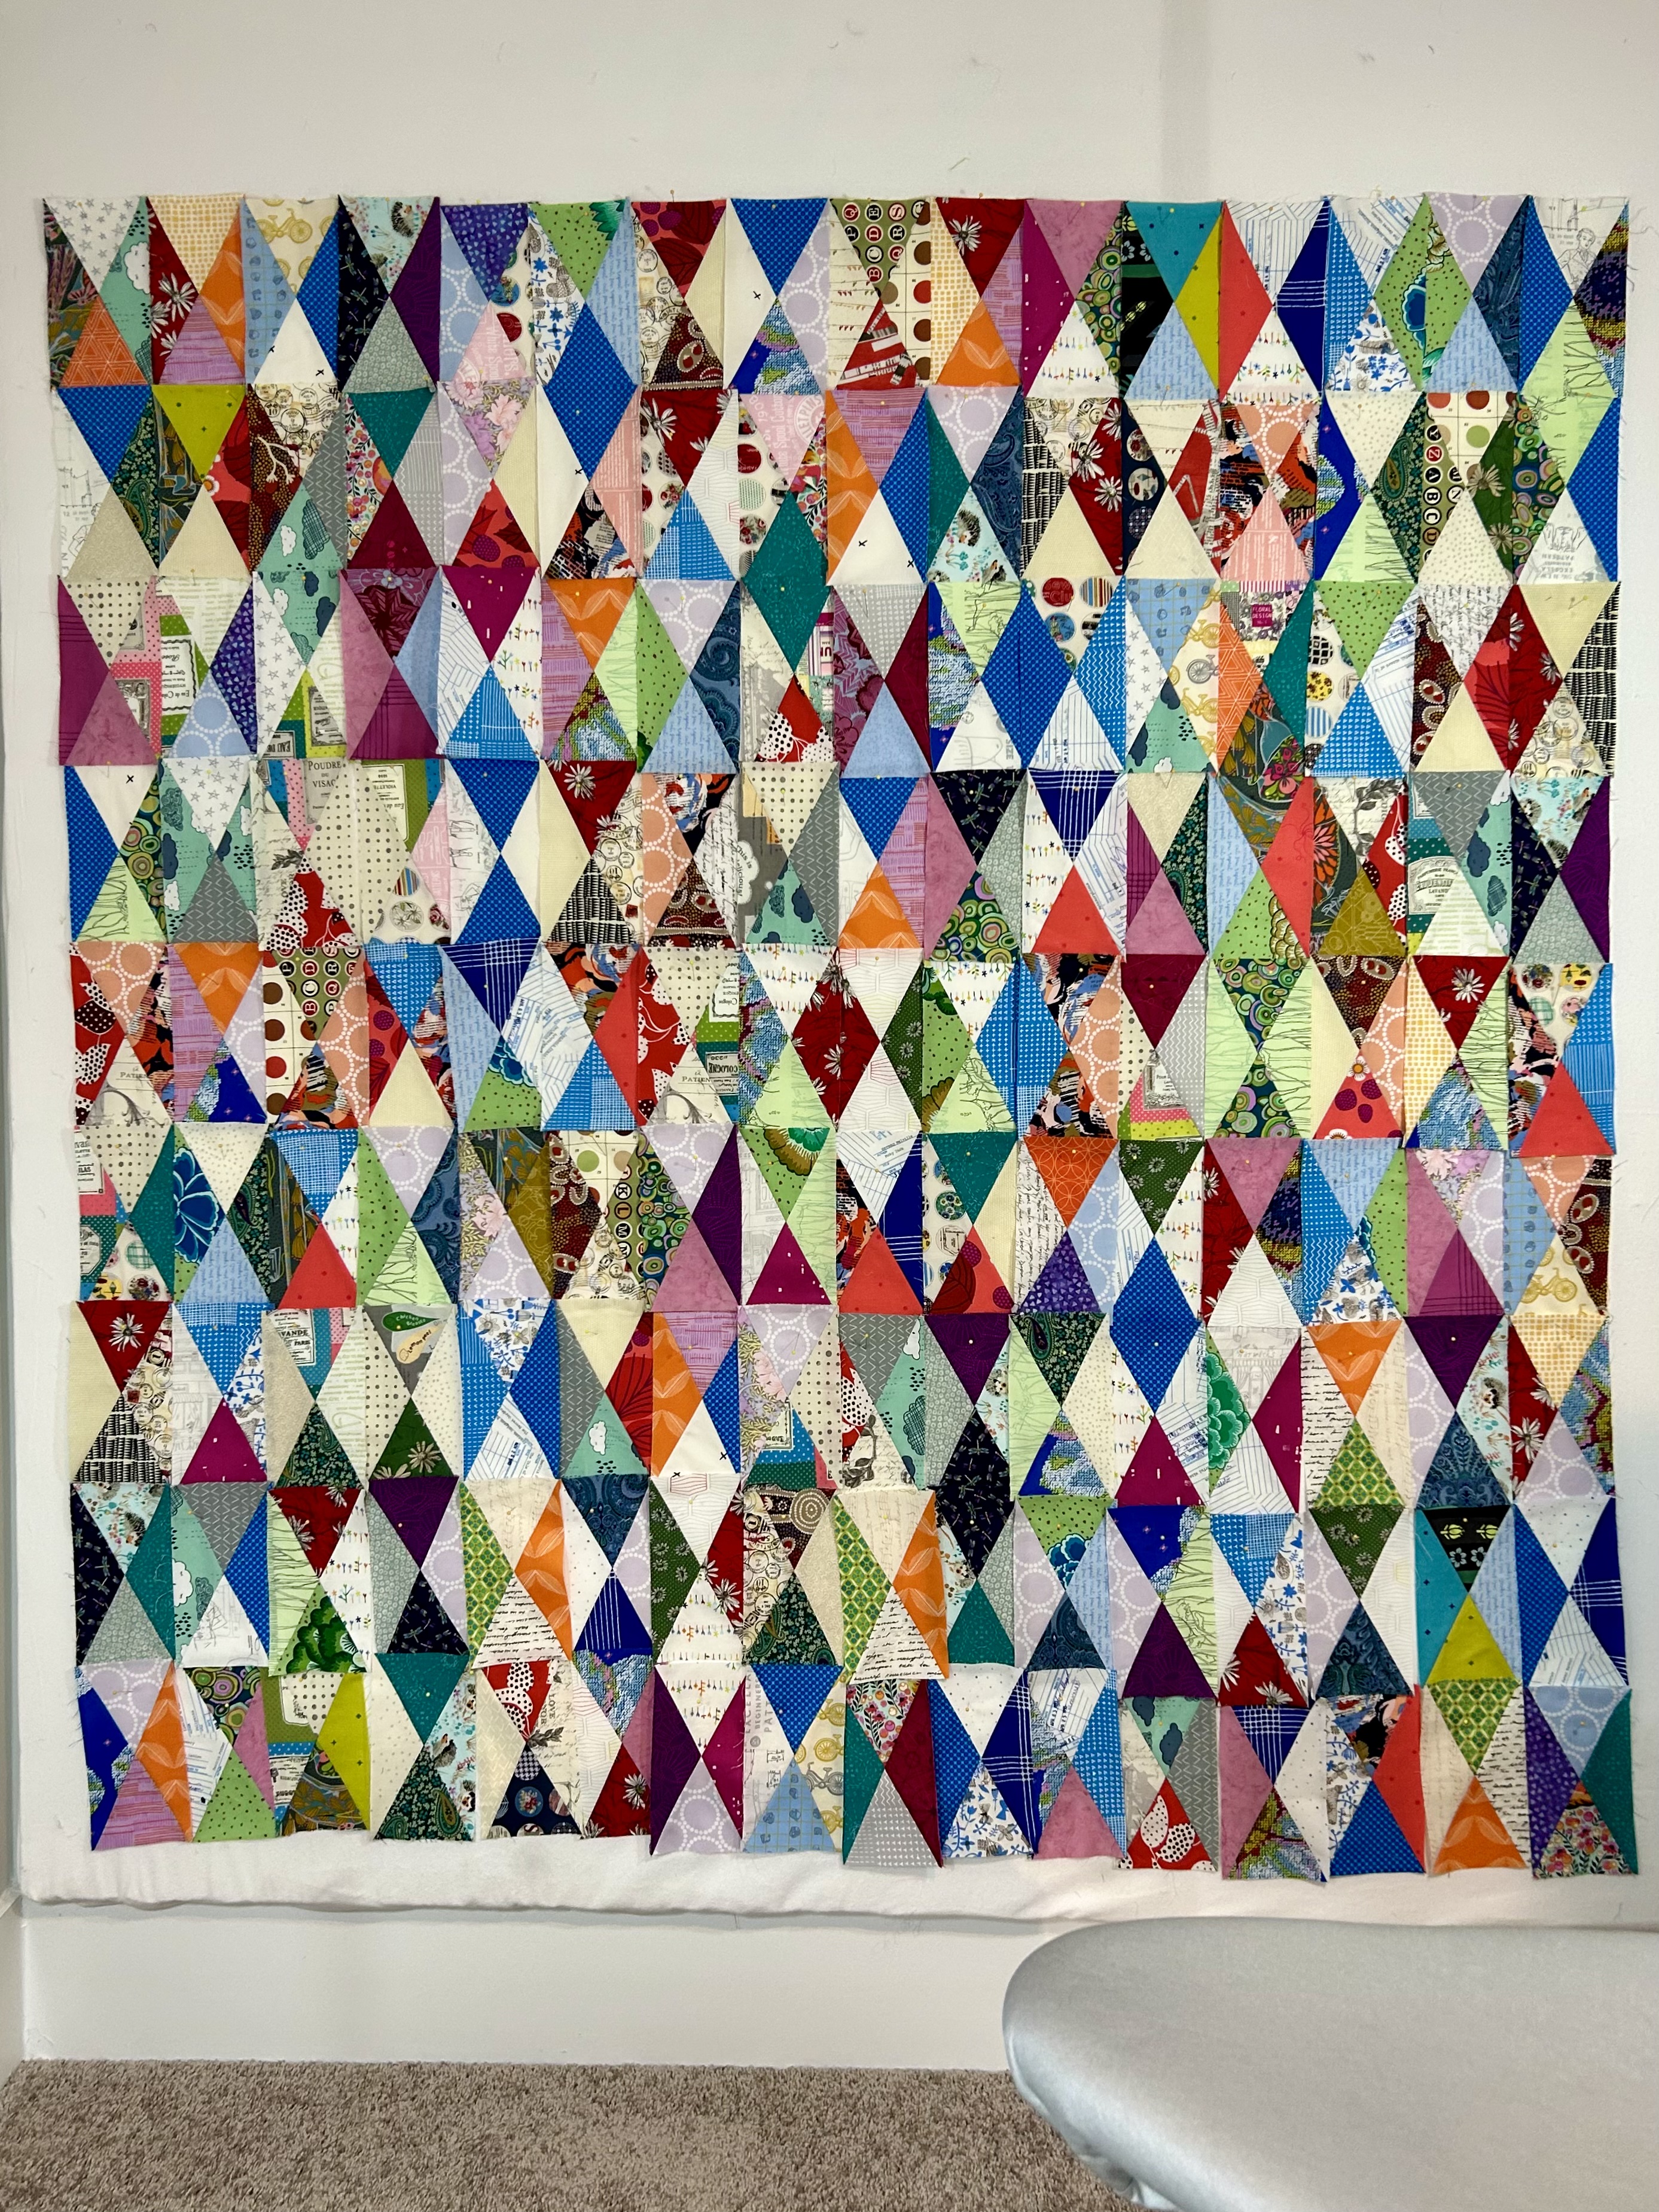
The blocks for the THIRD quilt in my half-rectangle series are done and on the design wall. This one uses the “hourglass” half-rectangle triangle block we recently used in Tara Faughnan’s online Block 2 class. I’m sure I’ll move around these blocks for some time while I work on other projects. Seeing this picture helps a lot. But how fun is this one??? It makes diagonal lines of smaller triangles and there are secondary patterns all over the place–some just hints that your eyes try to make happen. (I have its backing and binding ready to go when needed.)
On the other side of the design wall, the FOURTH quilt in this series is trying to happen. This one will probably end the series. The next diamond (graded down in size) will be this light blue–with perhaps a busier low-volume fabric. I’m not crazy about how plain the light blue fabric is, but I’m on a mission to use up stash with this project, so…
That orange fabric below the line of scrappy log cabins will likely be the next color–but who knows. I don’t.
I have to stop and get the crosses quilt on the longarm because I have no hand sewing for nightime sewing in front of the tv. So I’ve just been pulling from the random small fabrics in my little bin of scraps and making the long cabins and other blocks at night–hand-stitching and hand-cutting the pieces together. I have NO IDEA where this is going…but my hands are happily busy at night. I do square these blocks up when I think they are “done.”
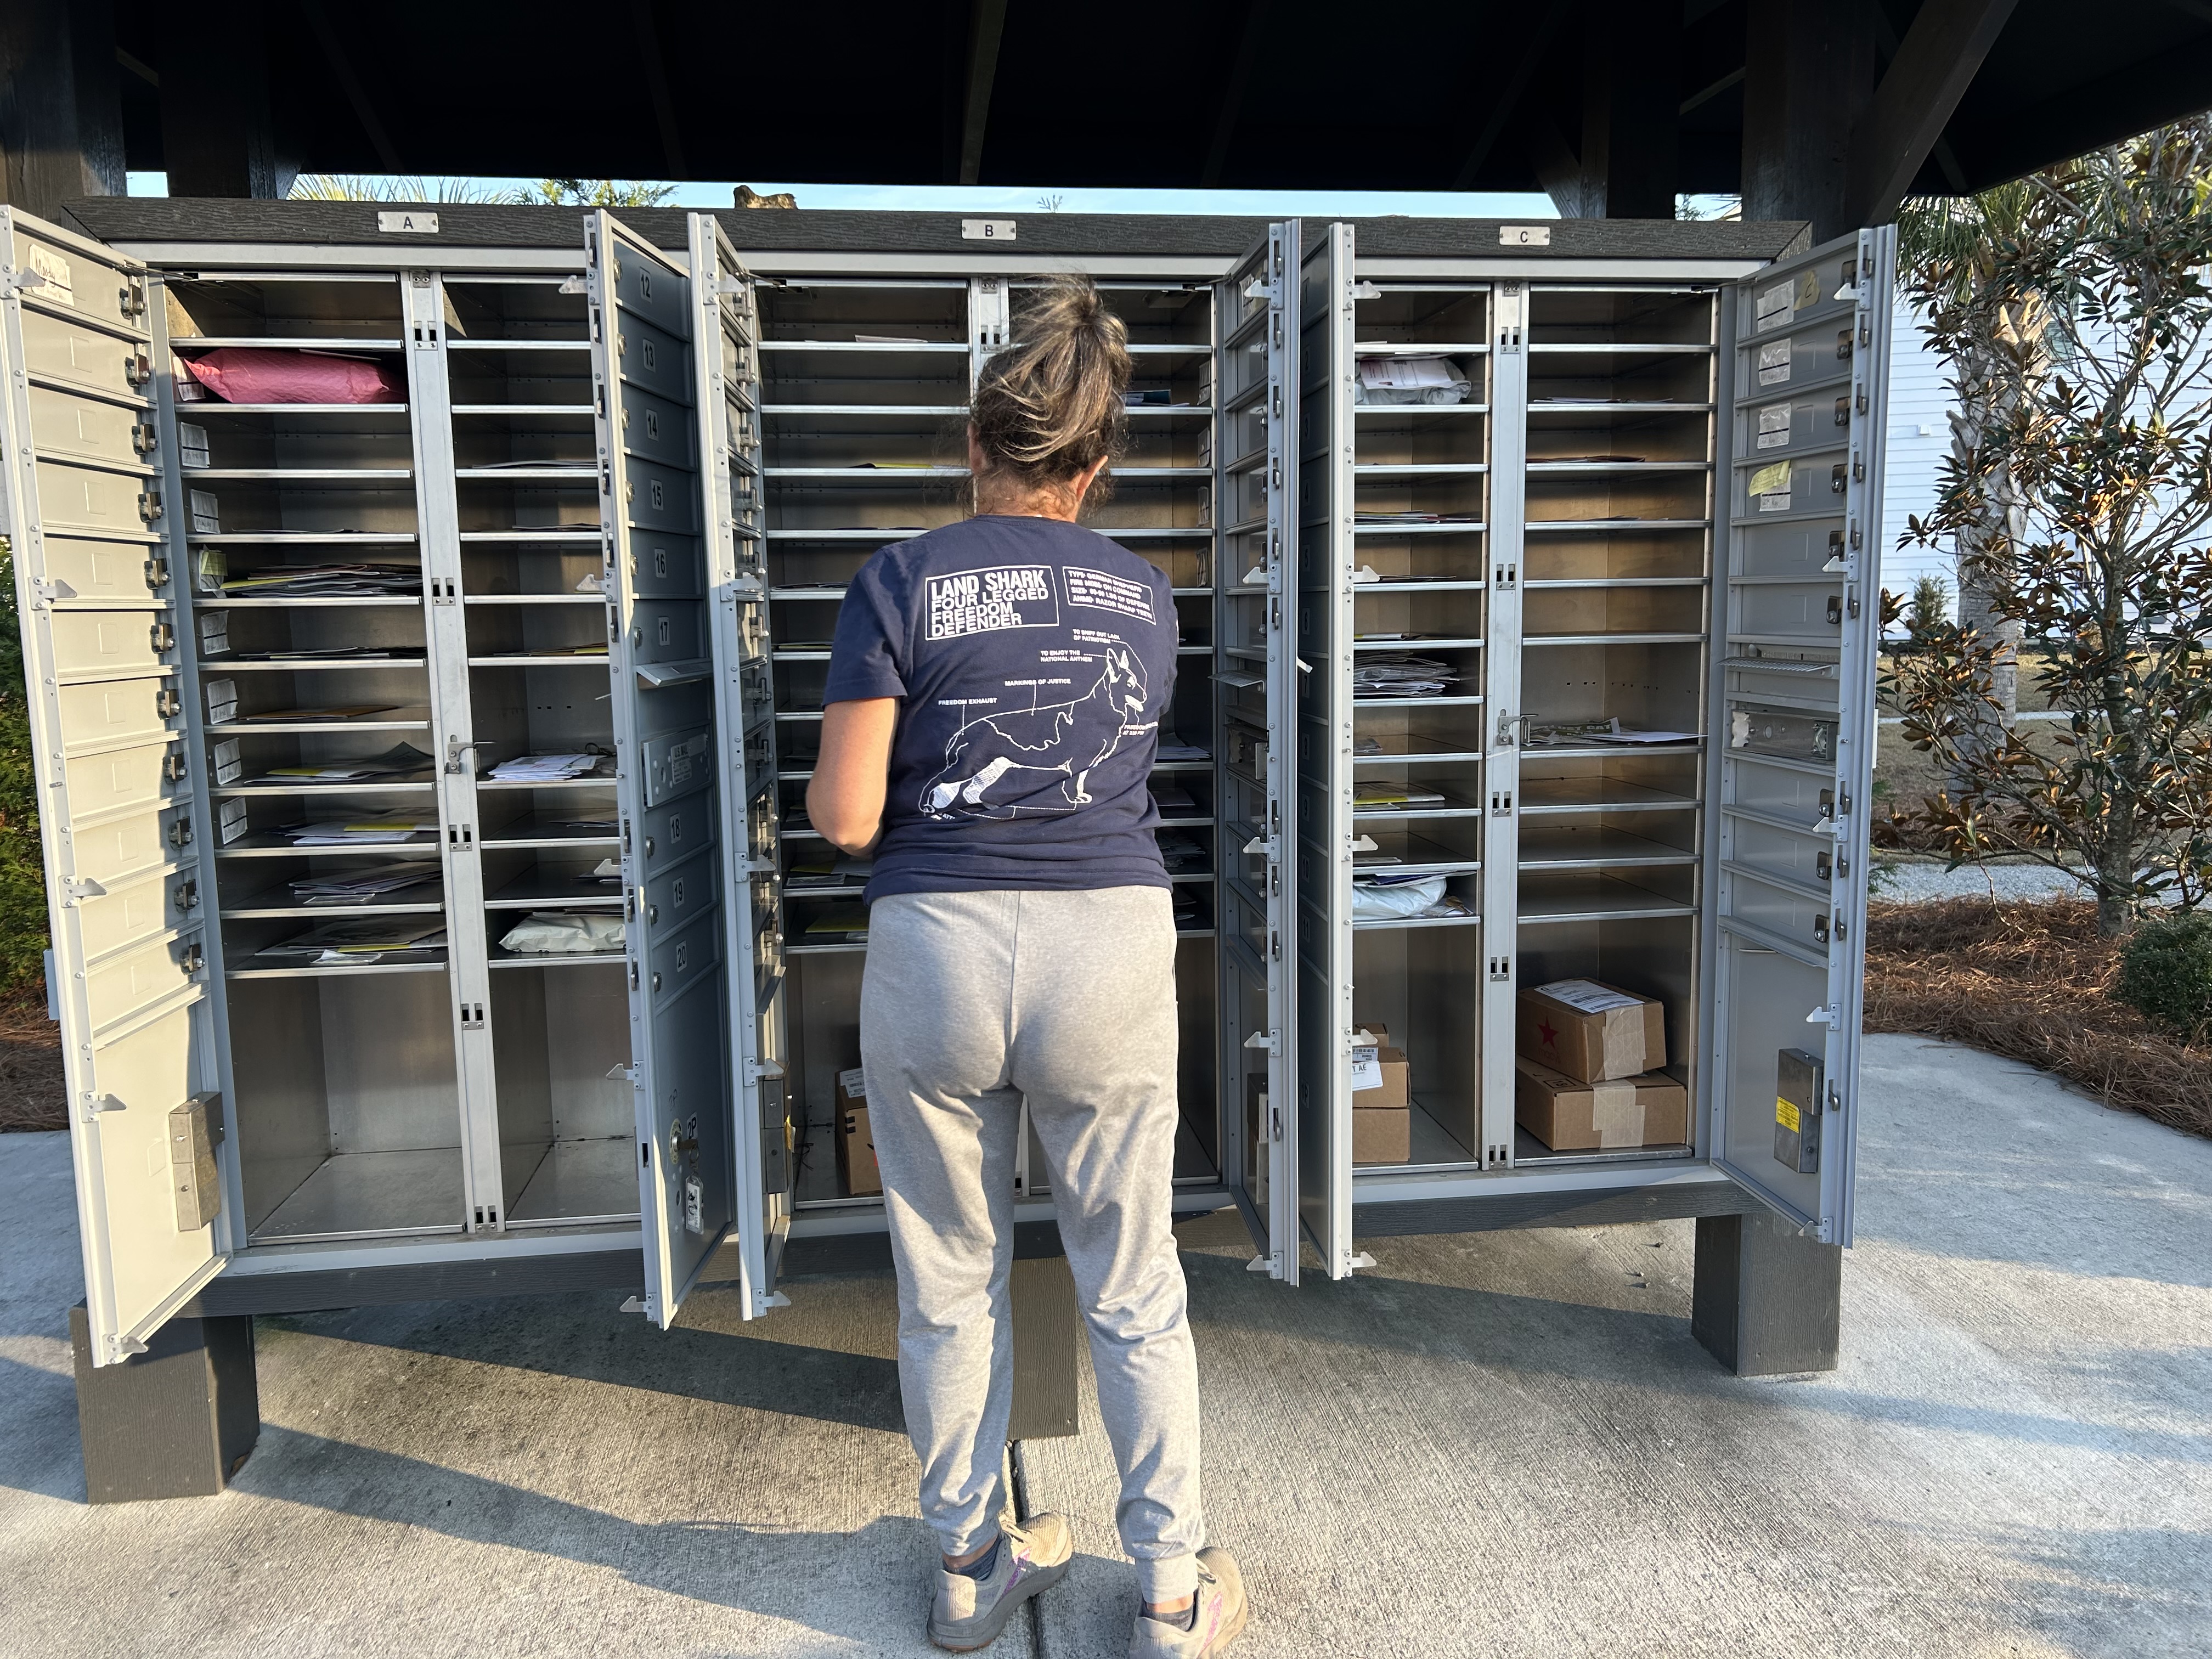
Our little kiosk is up and is slowly gathering books. (That big roof is on the mail kiosk–and does not overhang the library box–it’s a camera illusion.). But isn’t the kiosk adorable?
I went down the other day to check for a mailed package–and found the mail person with the whole kiosk open–and I thoght that was pretty interesting. When we get a package that won’t fit into our narrow “box,” it goes into ONE of the bigger bins below–and we get a key to open that box in our mailbox. Once in the bigger box and the door is open, the key cannot be extracted. The mail person said that for packages that don’t fit, she has to drop them off at our houses. (Can I just say that sometimes that takes several days to happen!!!!)
There is a storm system swirling around, but so far, we’ve gotten only very light rain off and on from it. Maybe tomorrow. I wrapped my outside faucets against the freezing weather (and now it is warmer again), so I watered the two camellias that are blooming or about to bloom with the big watering can–after removing the tarps and grocery bags I put on them to protect them from our recent freezing nights.
Kalenchoe is inside and covered with blooms. When my neighbor gifted me these plants (three of them in the container) last March, they had huge single heads made up of tiny flowers all massed together. There must have been a process to make that happen. Here, these plants are just “doing their own thing.”
Have a great week everyone. Maybe dial back any Christmas stress and just enjoy the season. That’s my wish for you anyway.