It’s Monday Again

How did that happen?

The last Churn Dash quilt is off the design wall–and I spent some of the weekend prepping it for the longarm: backing and batting are sewn and ironed, and binding strips and label are cut.

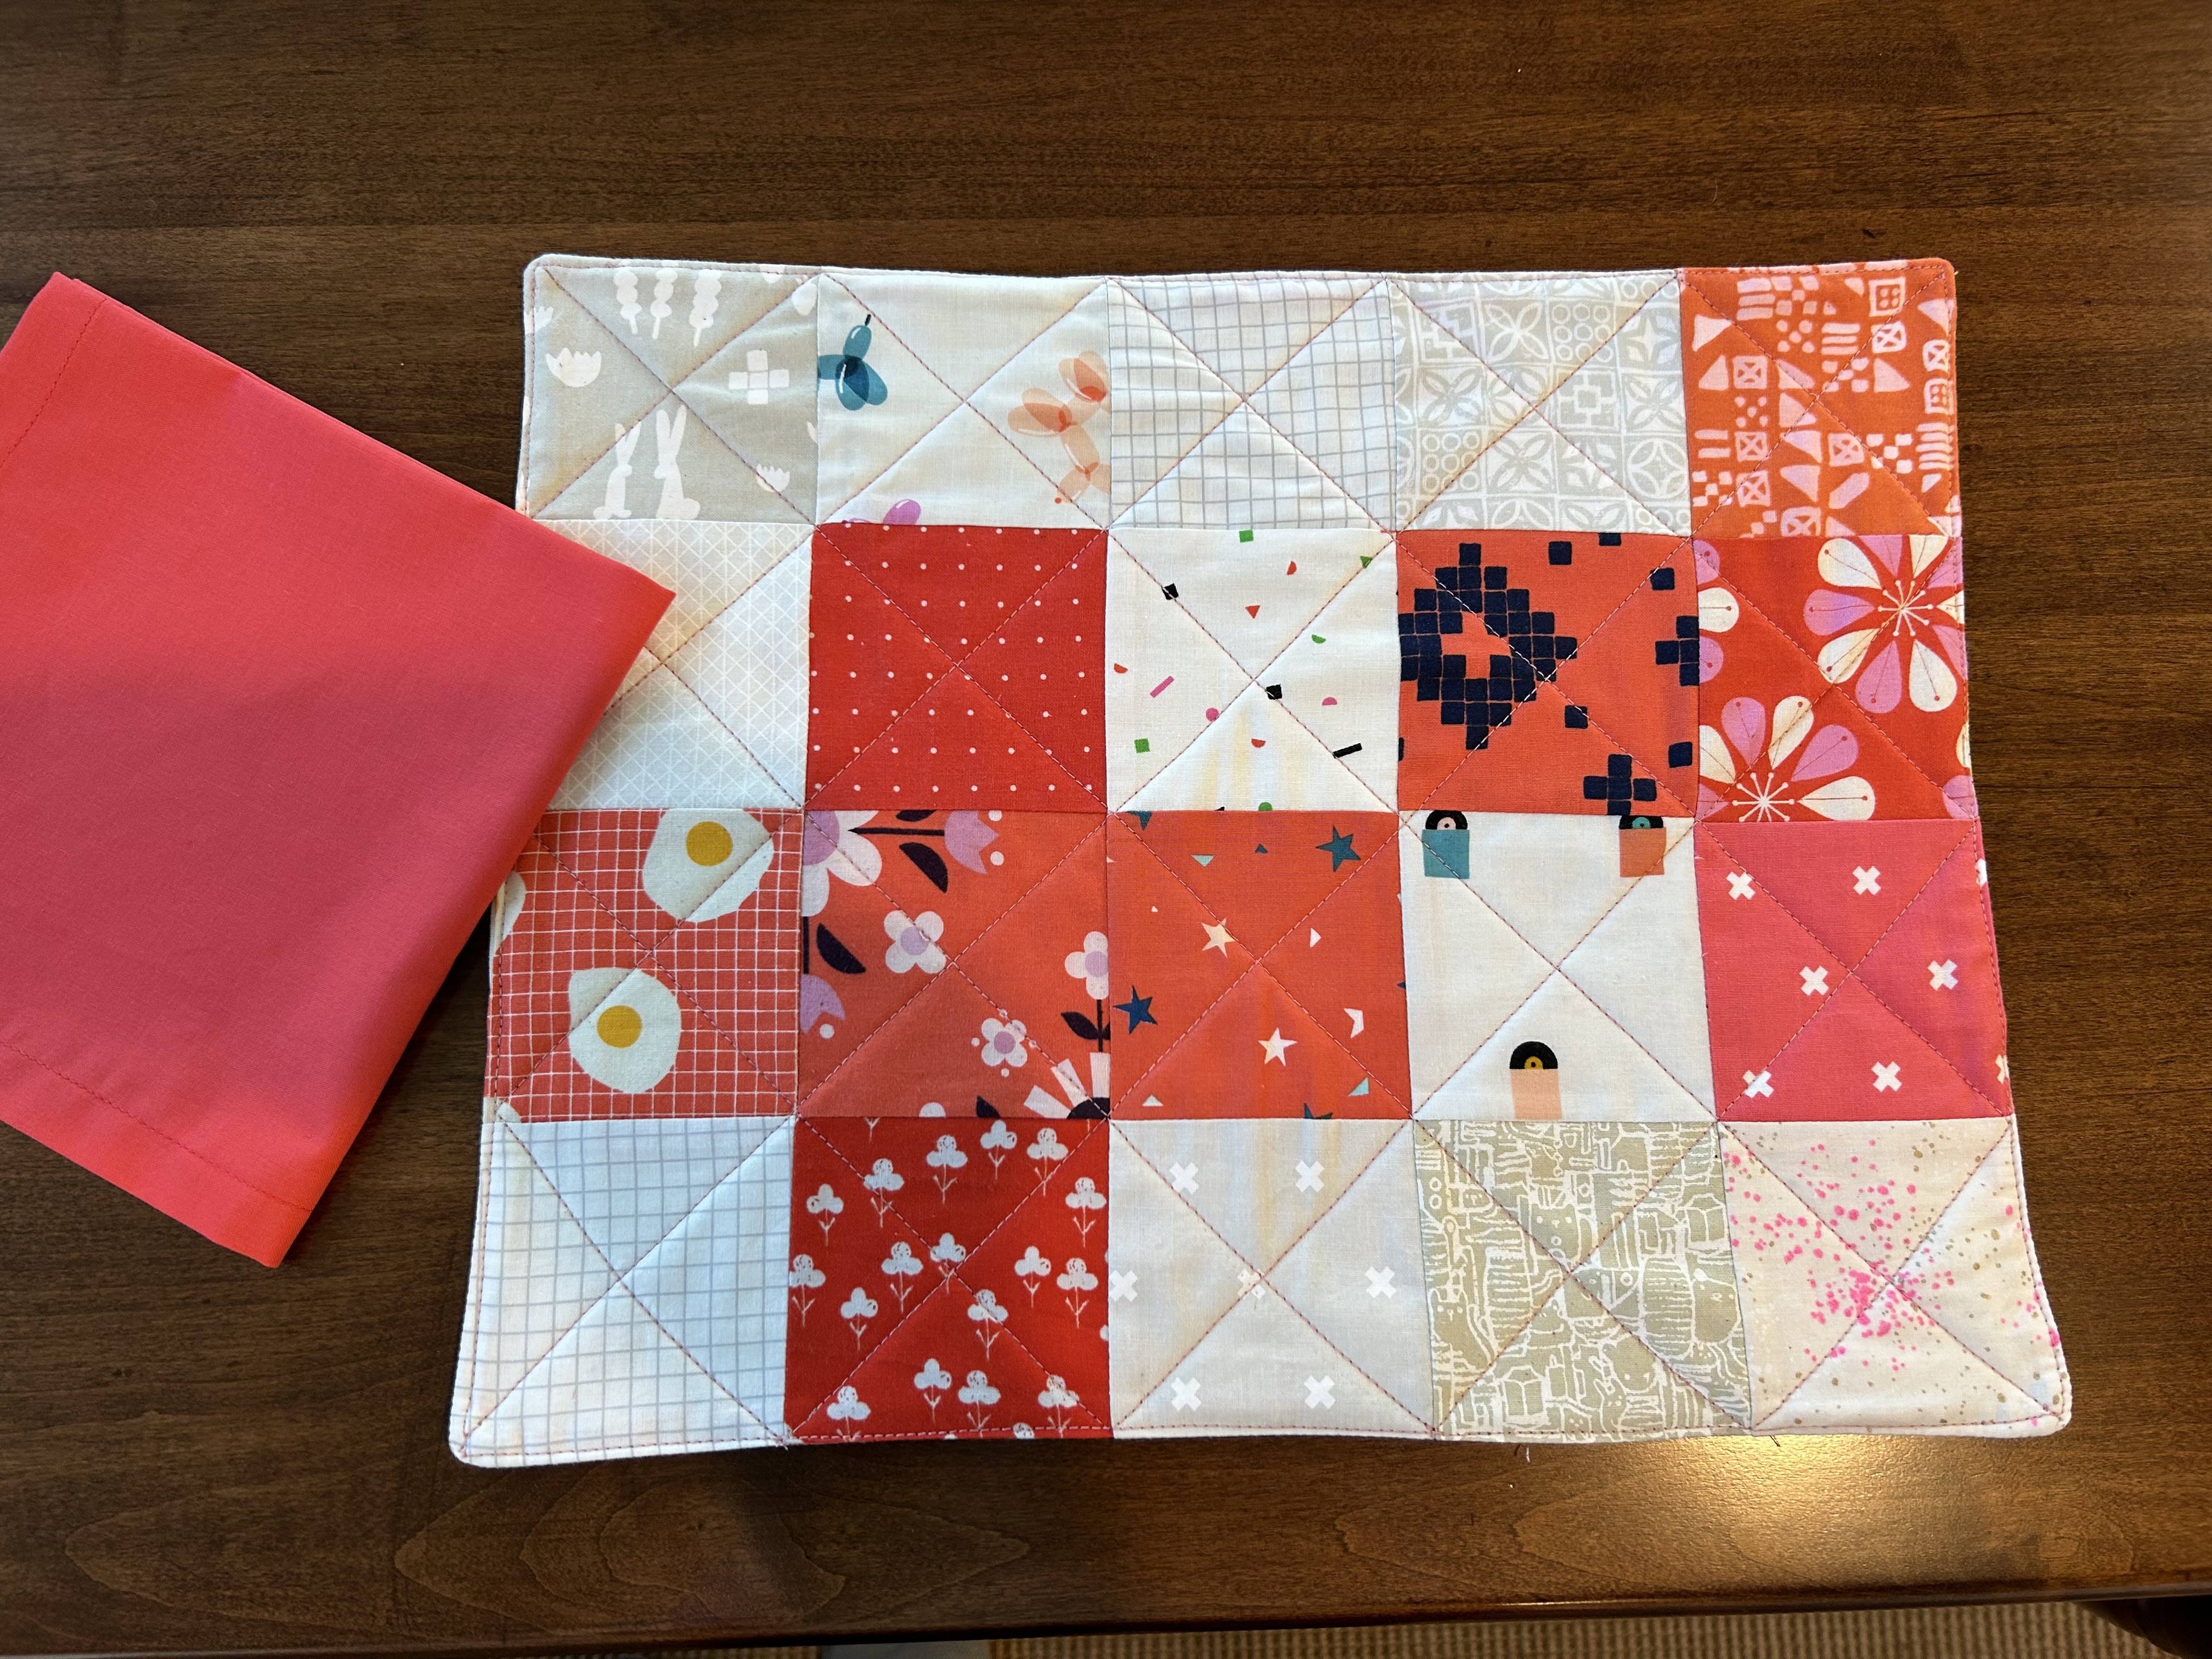
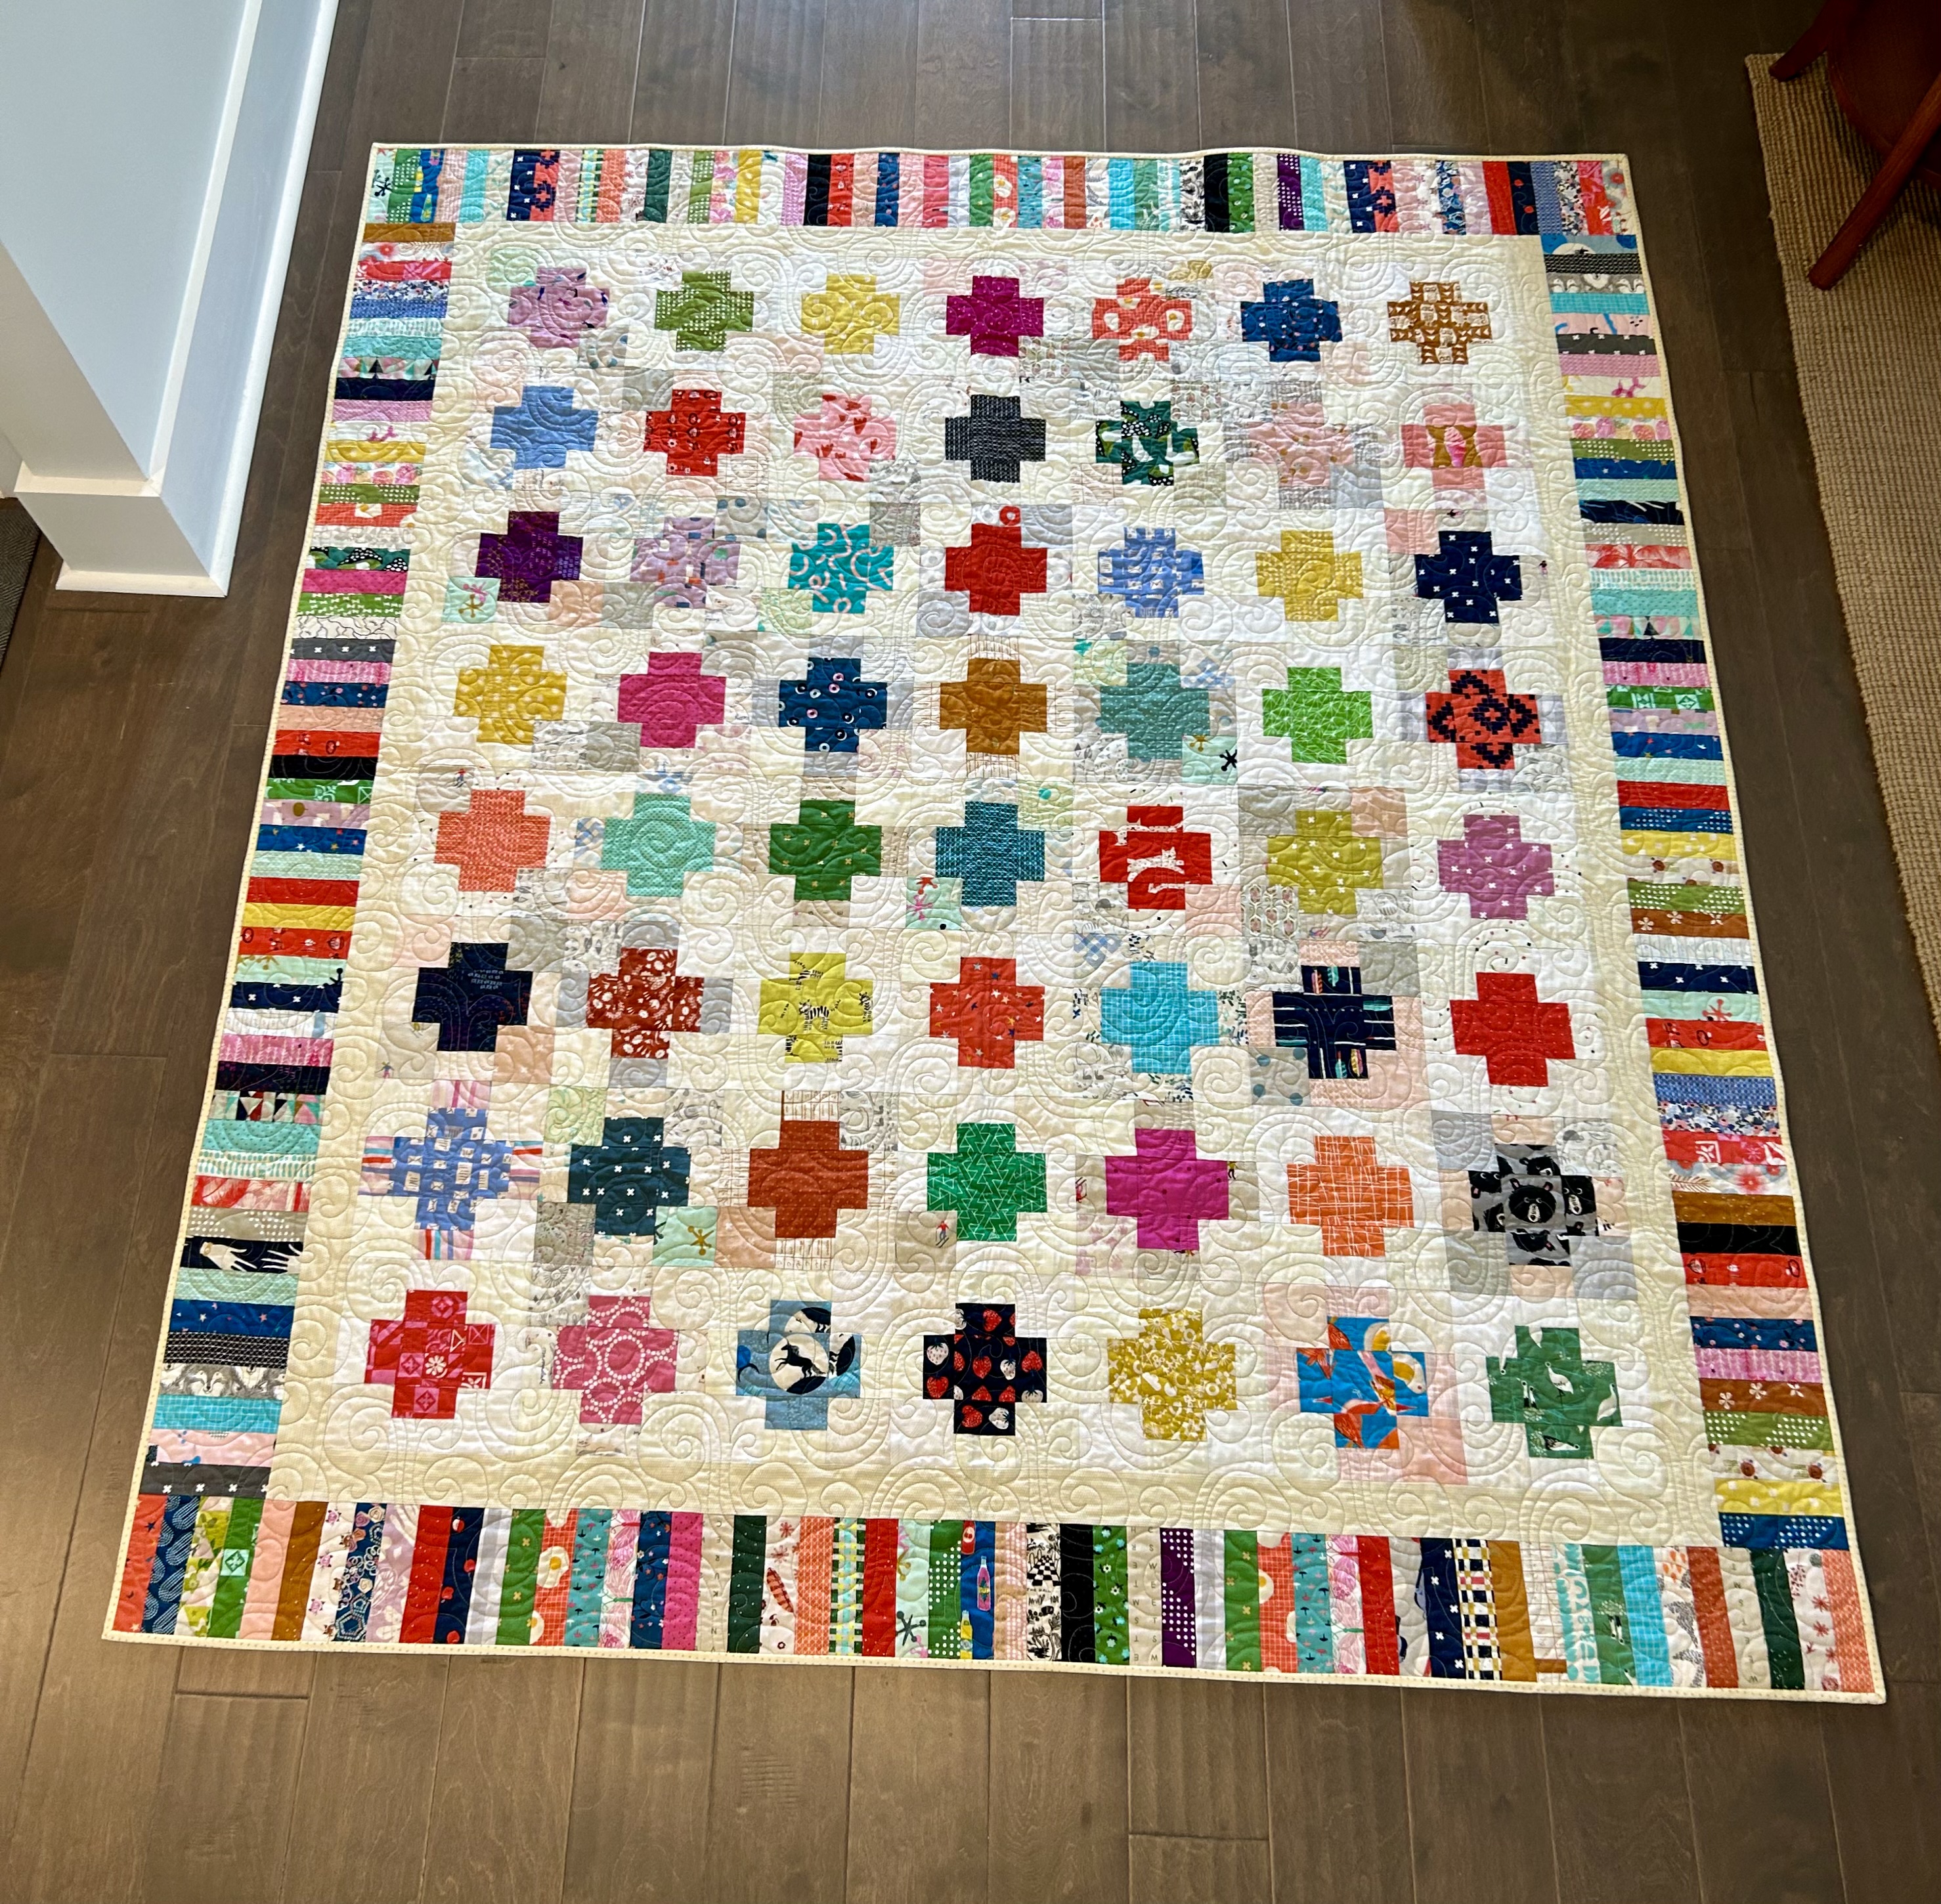
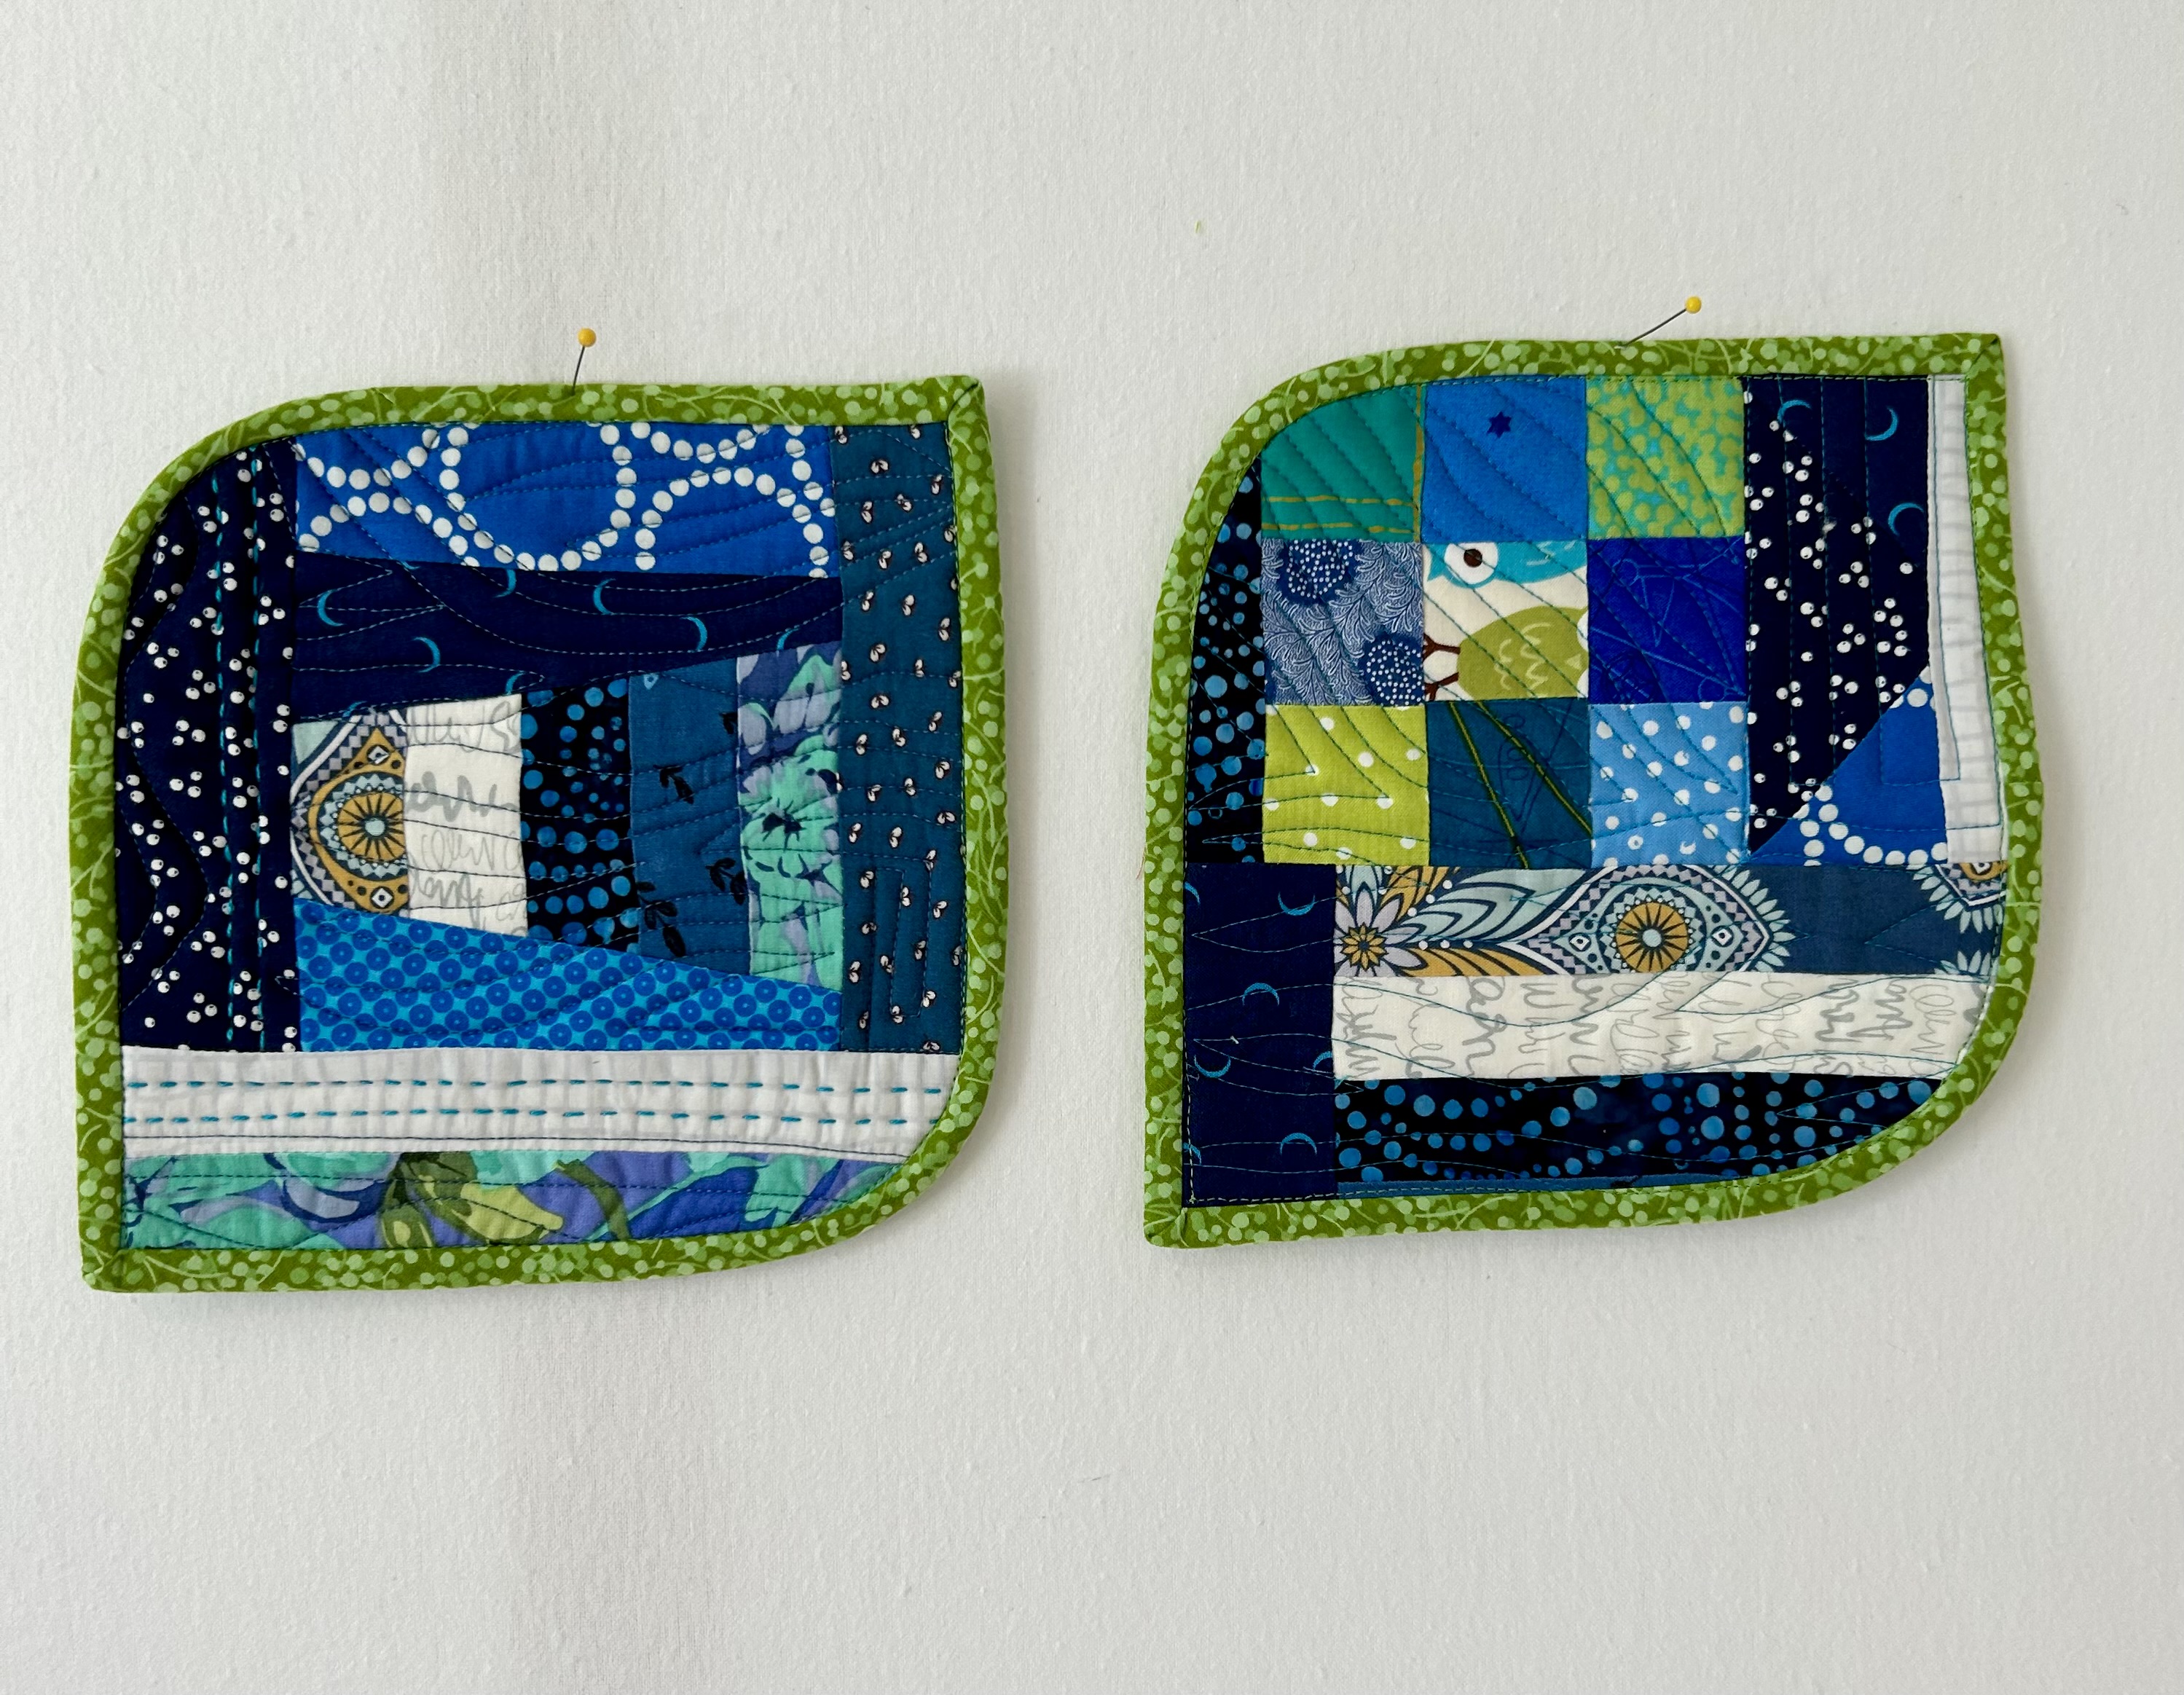
It’s scrappy cute–made 99% from the Cotton+Steel/Ruby Star Society project of the last three years–information which I seem to be repeating endlessly here. It’s a good thing this quilt is the last big project made with these fabrics.

I threw the finished rows of the Traverse BOM project up on the design wall–Tara Faughnan designer–without much of an attempt to line up the rows. I have the fabric to finish this quilt now, so will start sewing the remaining rows this week.

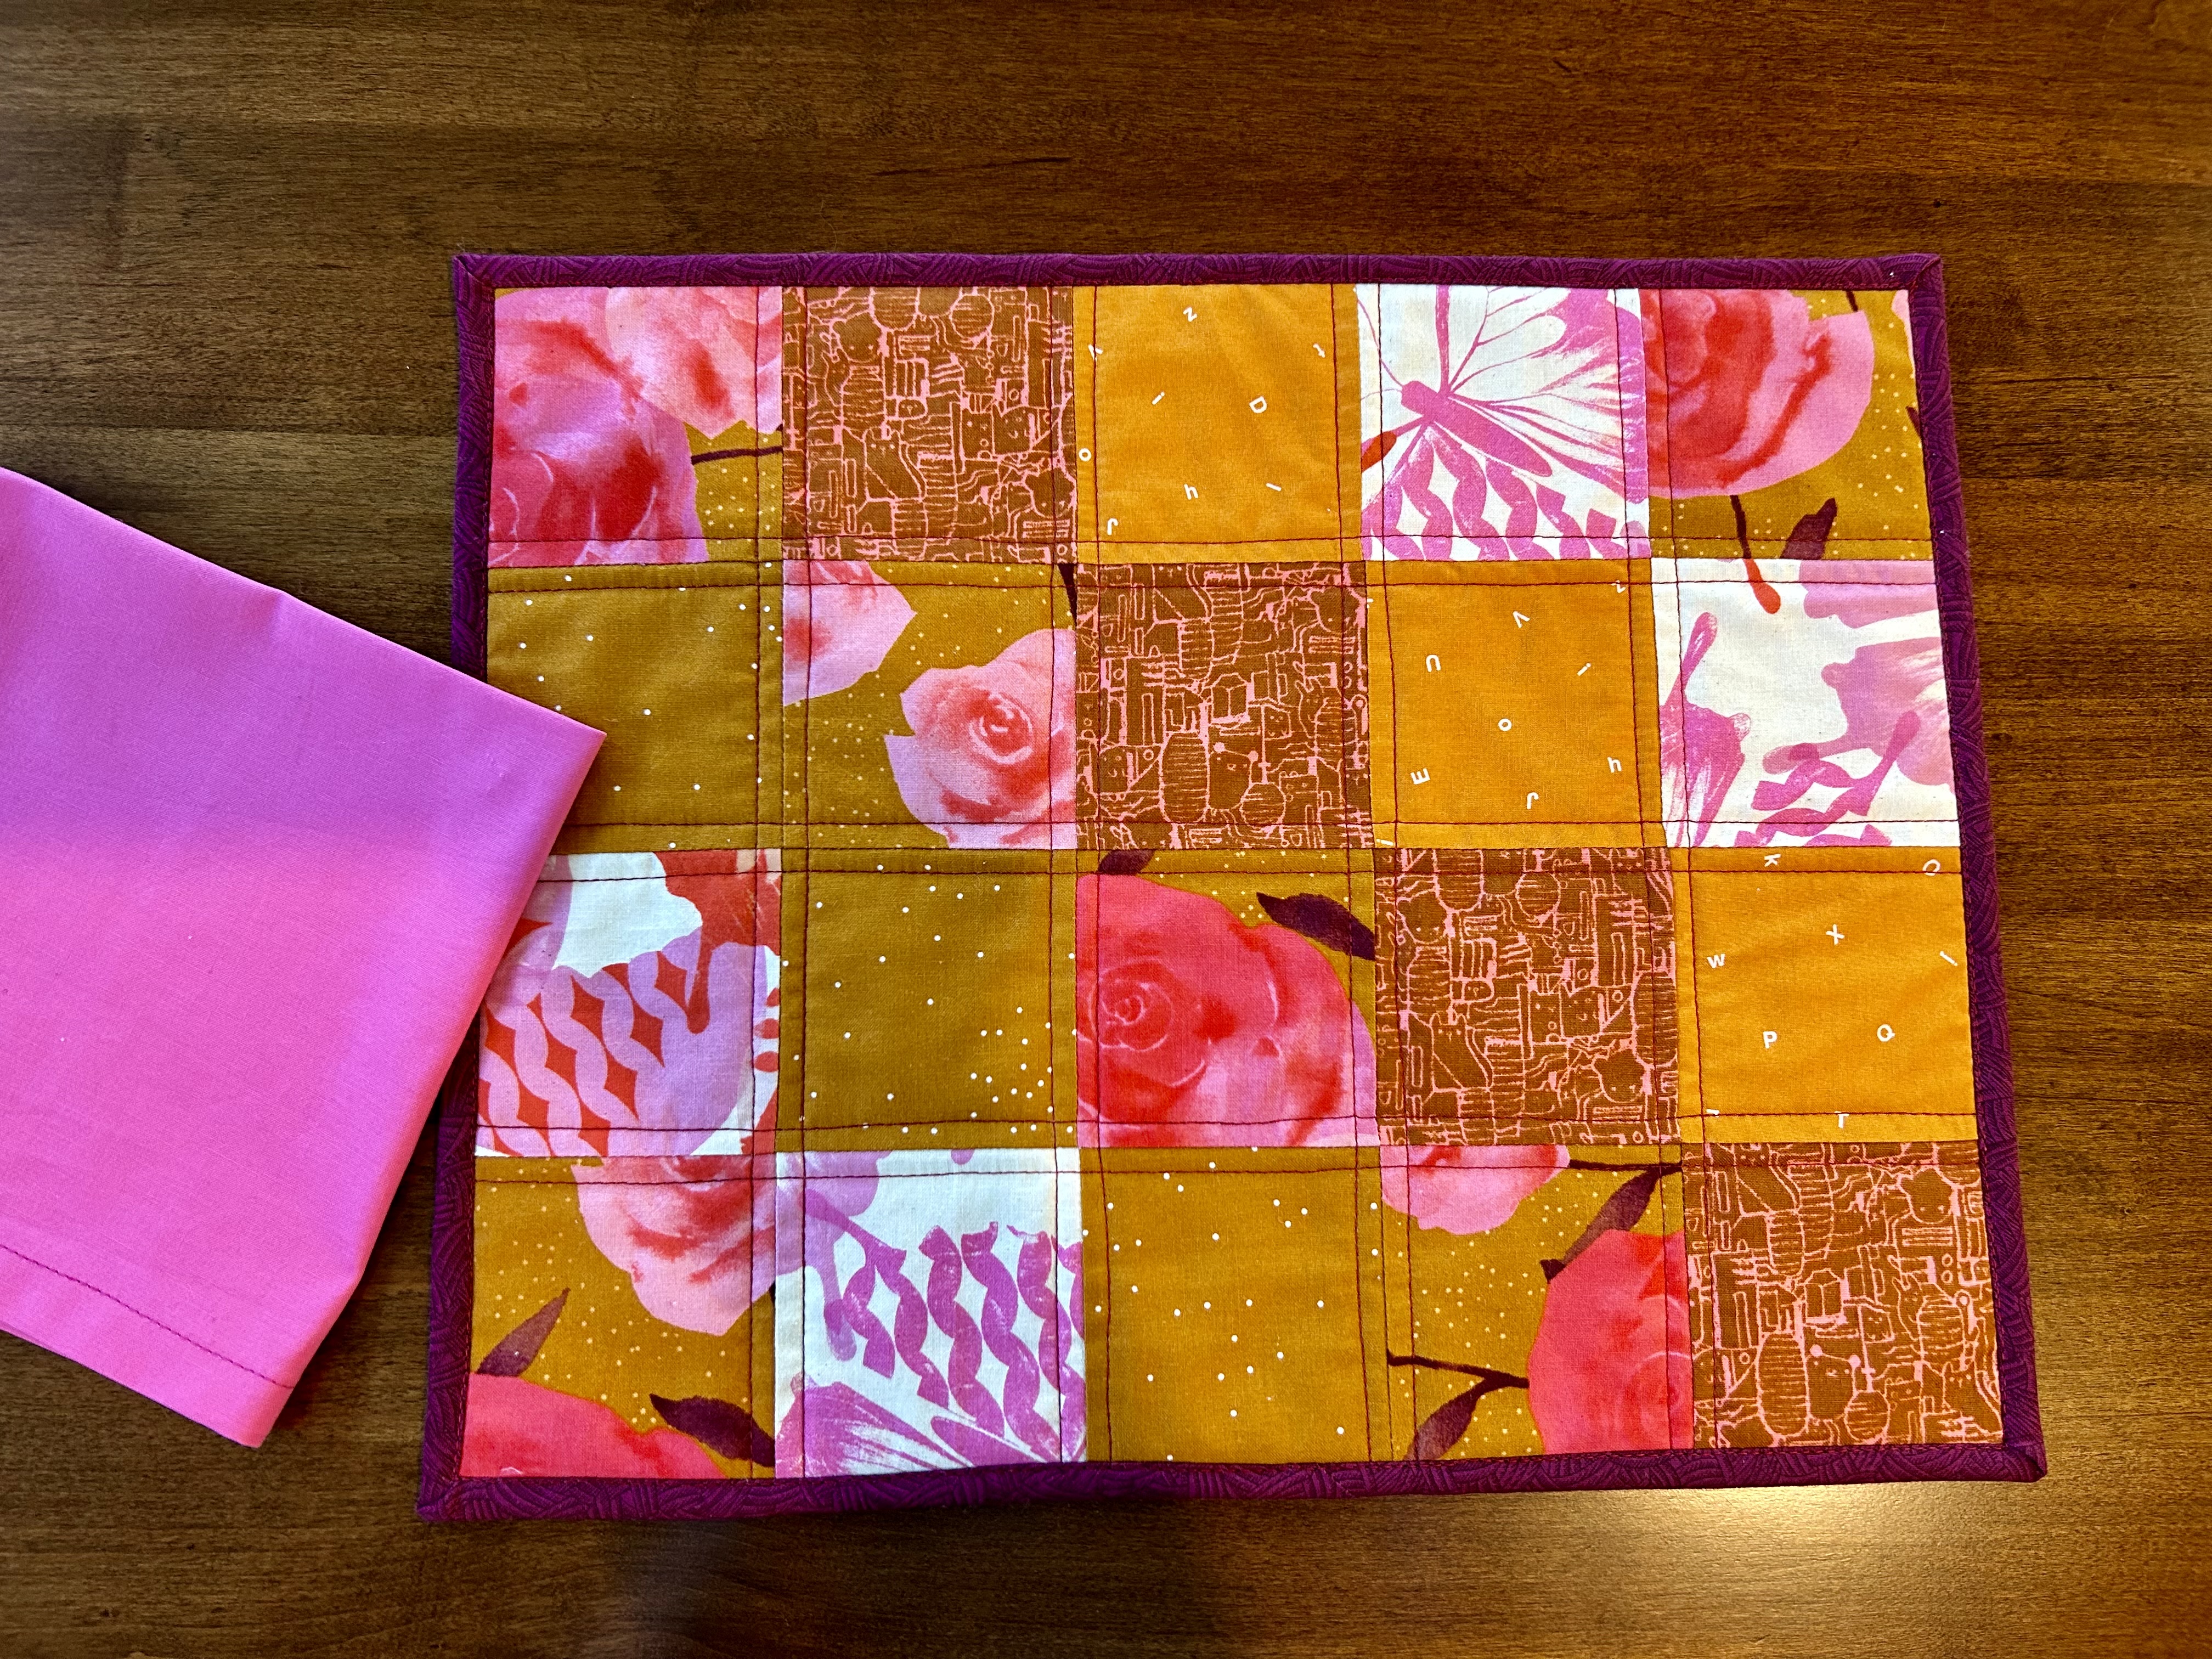
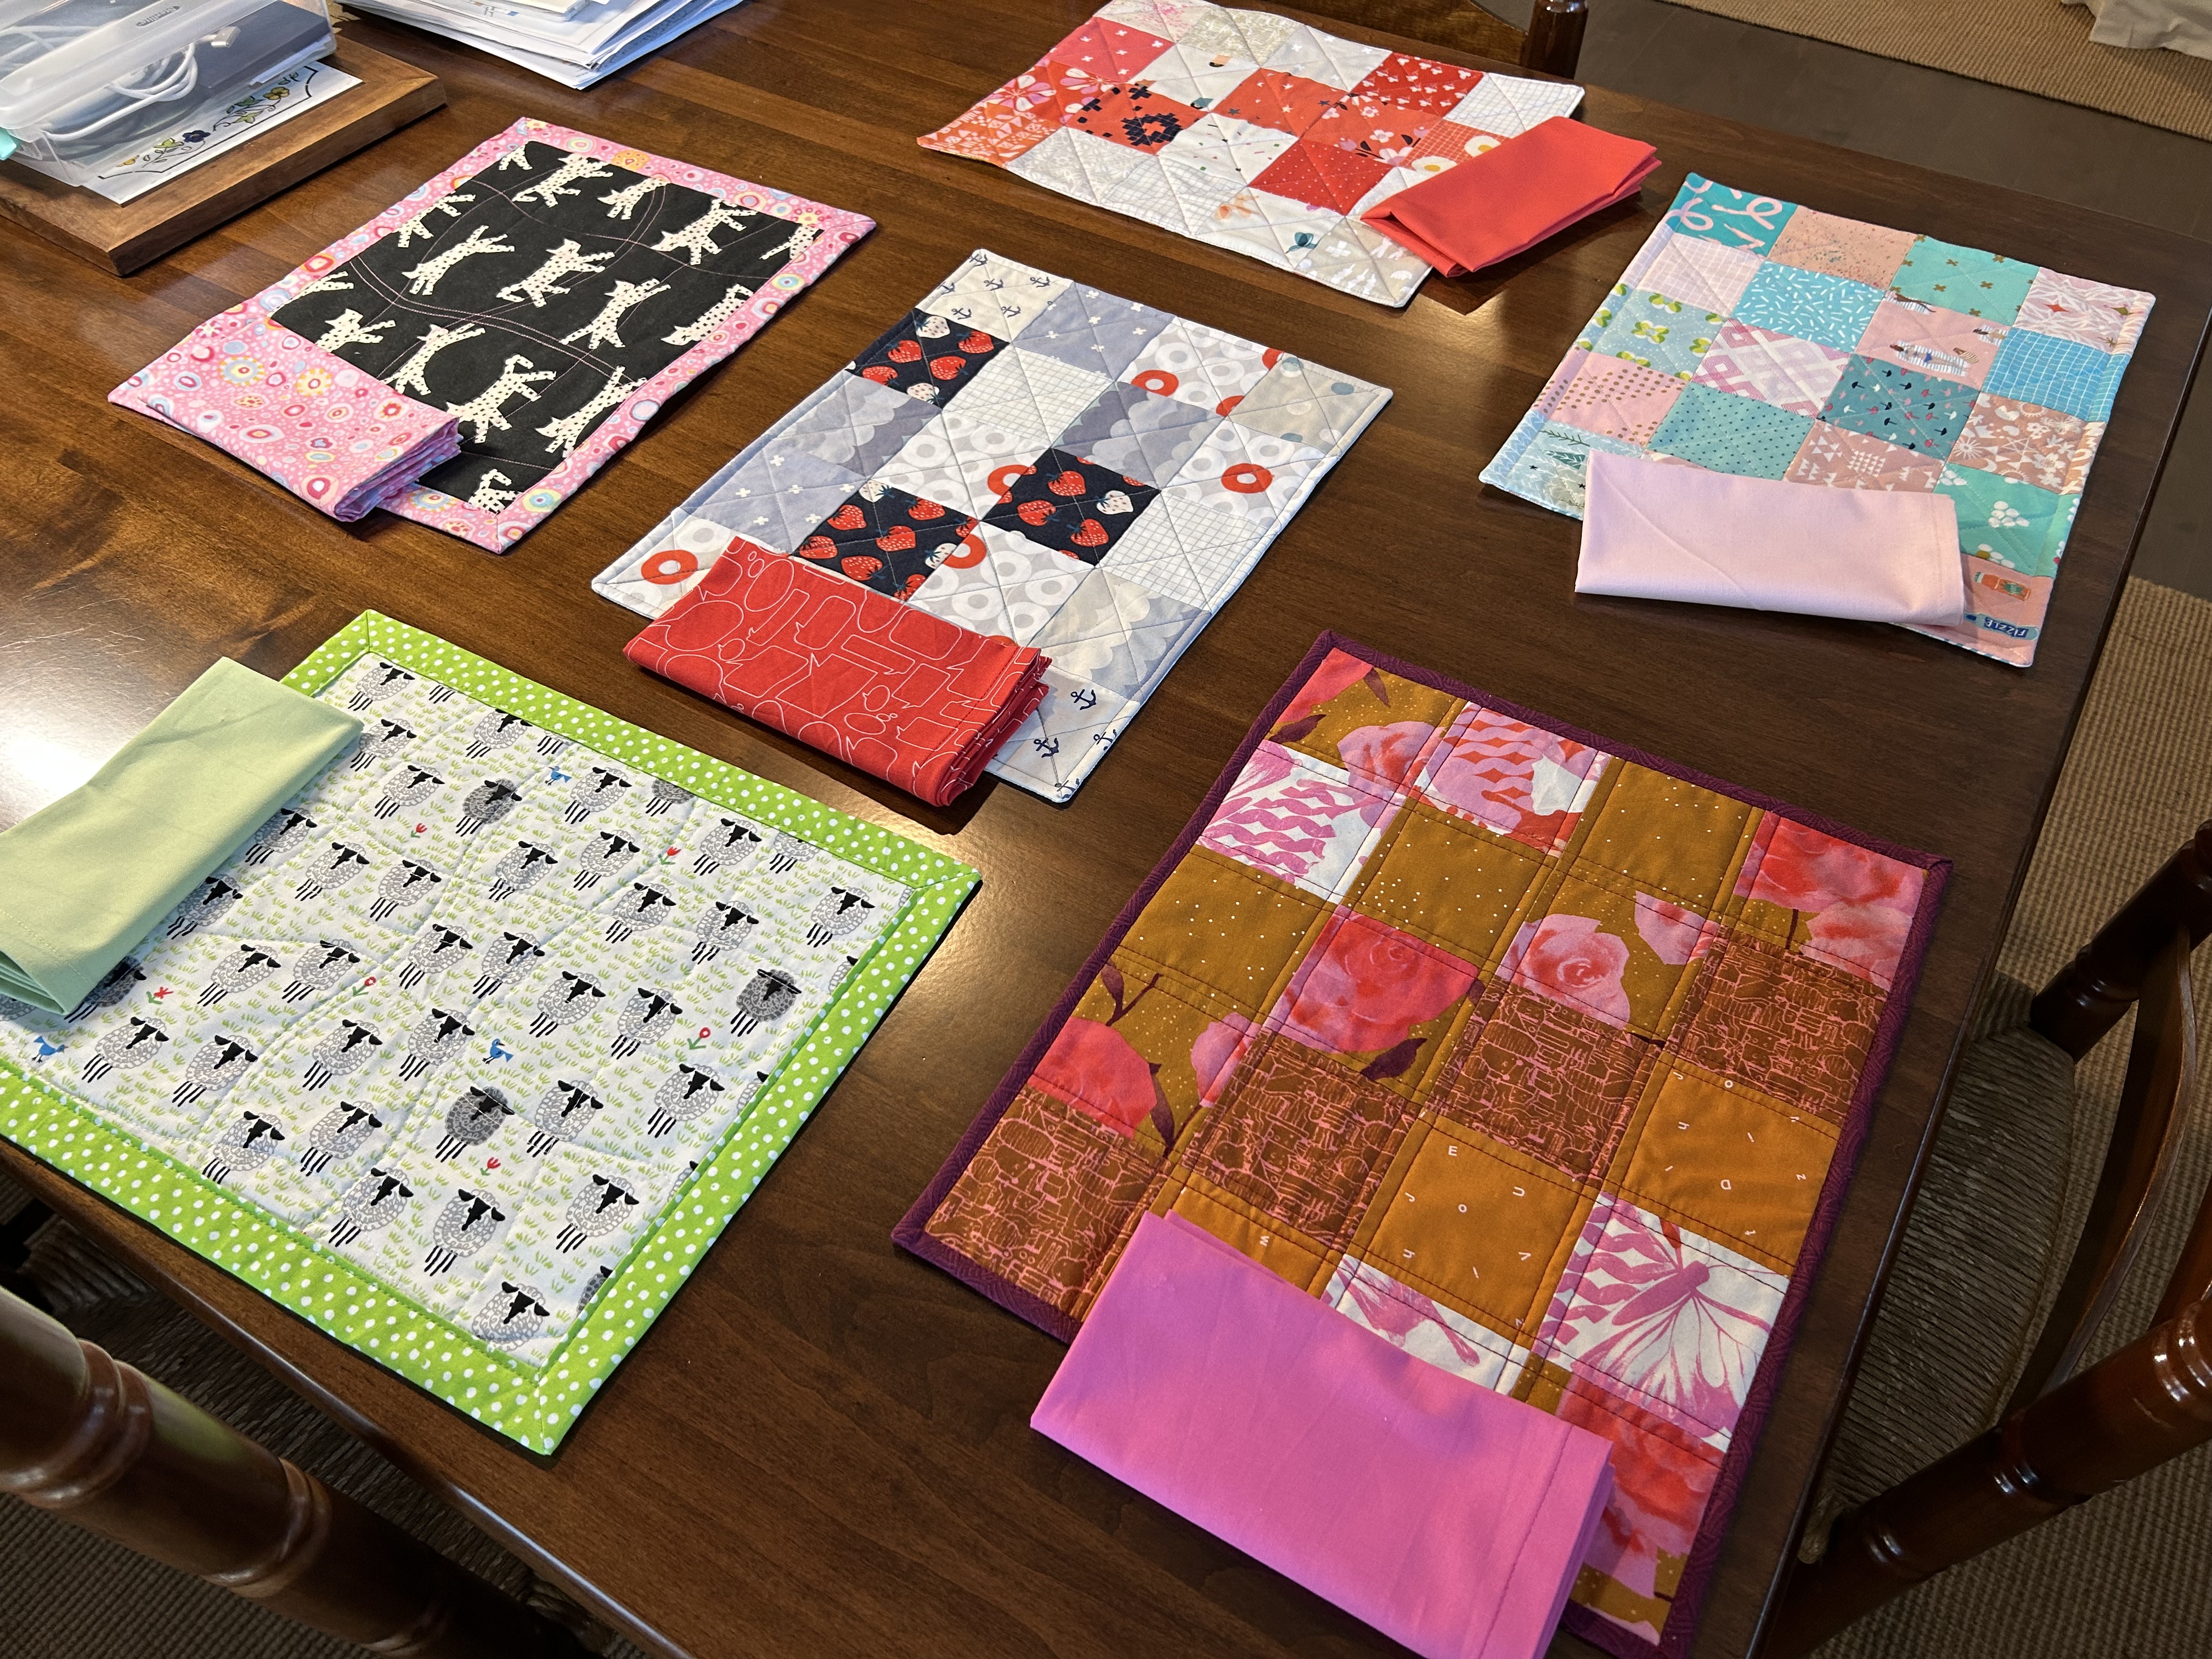
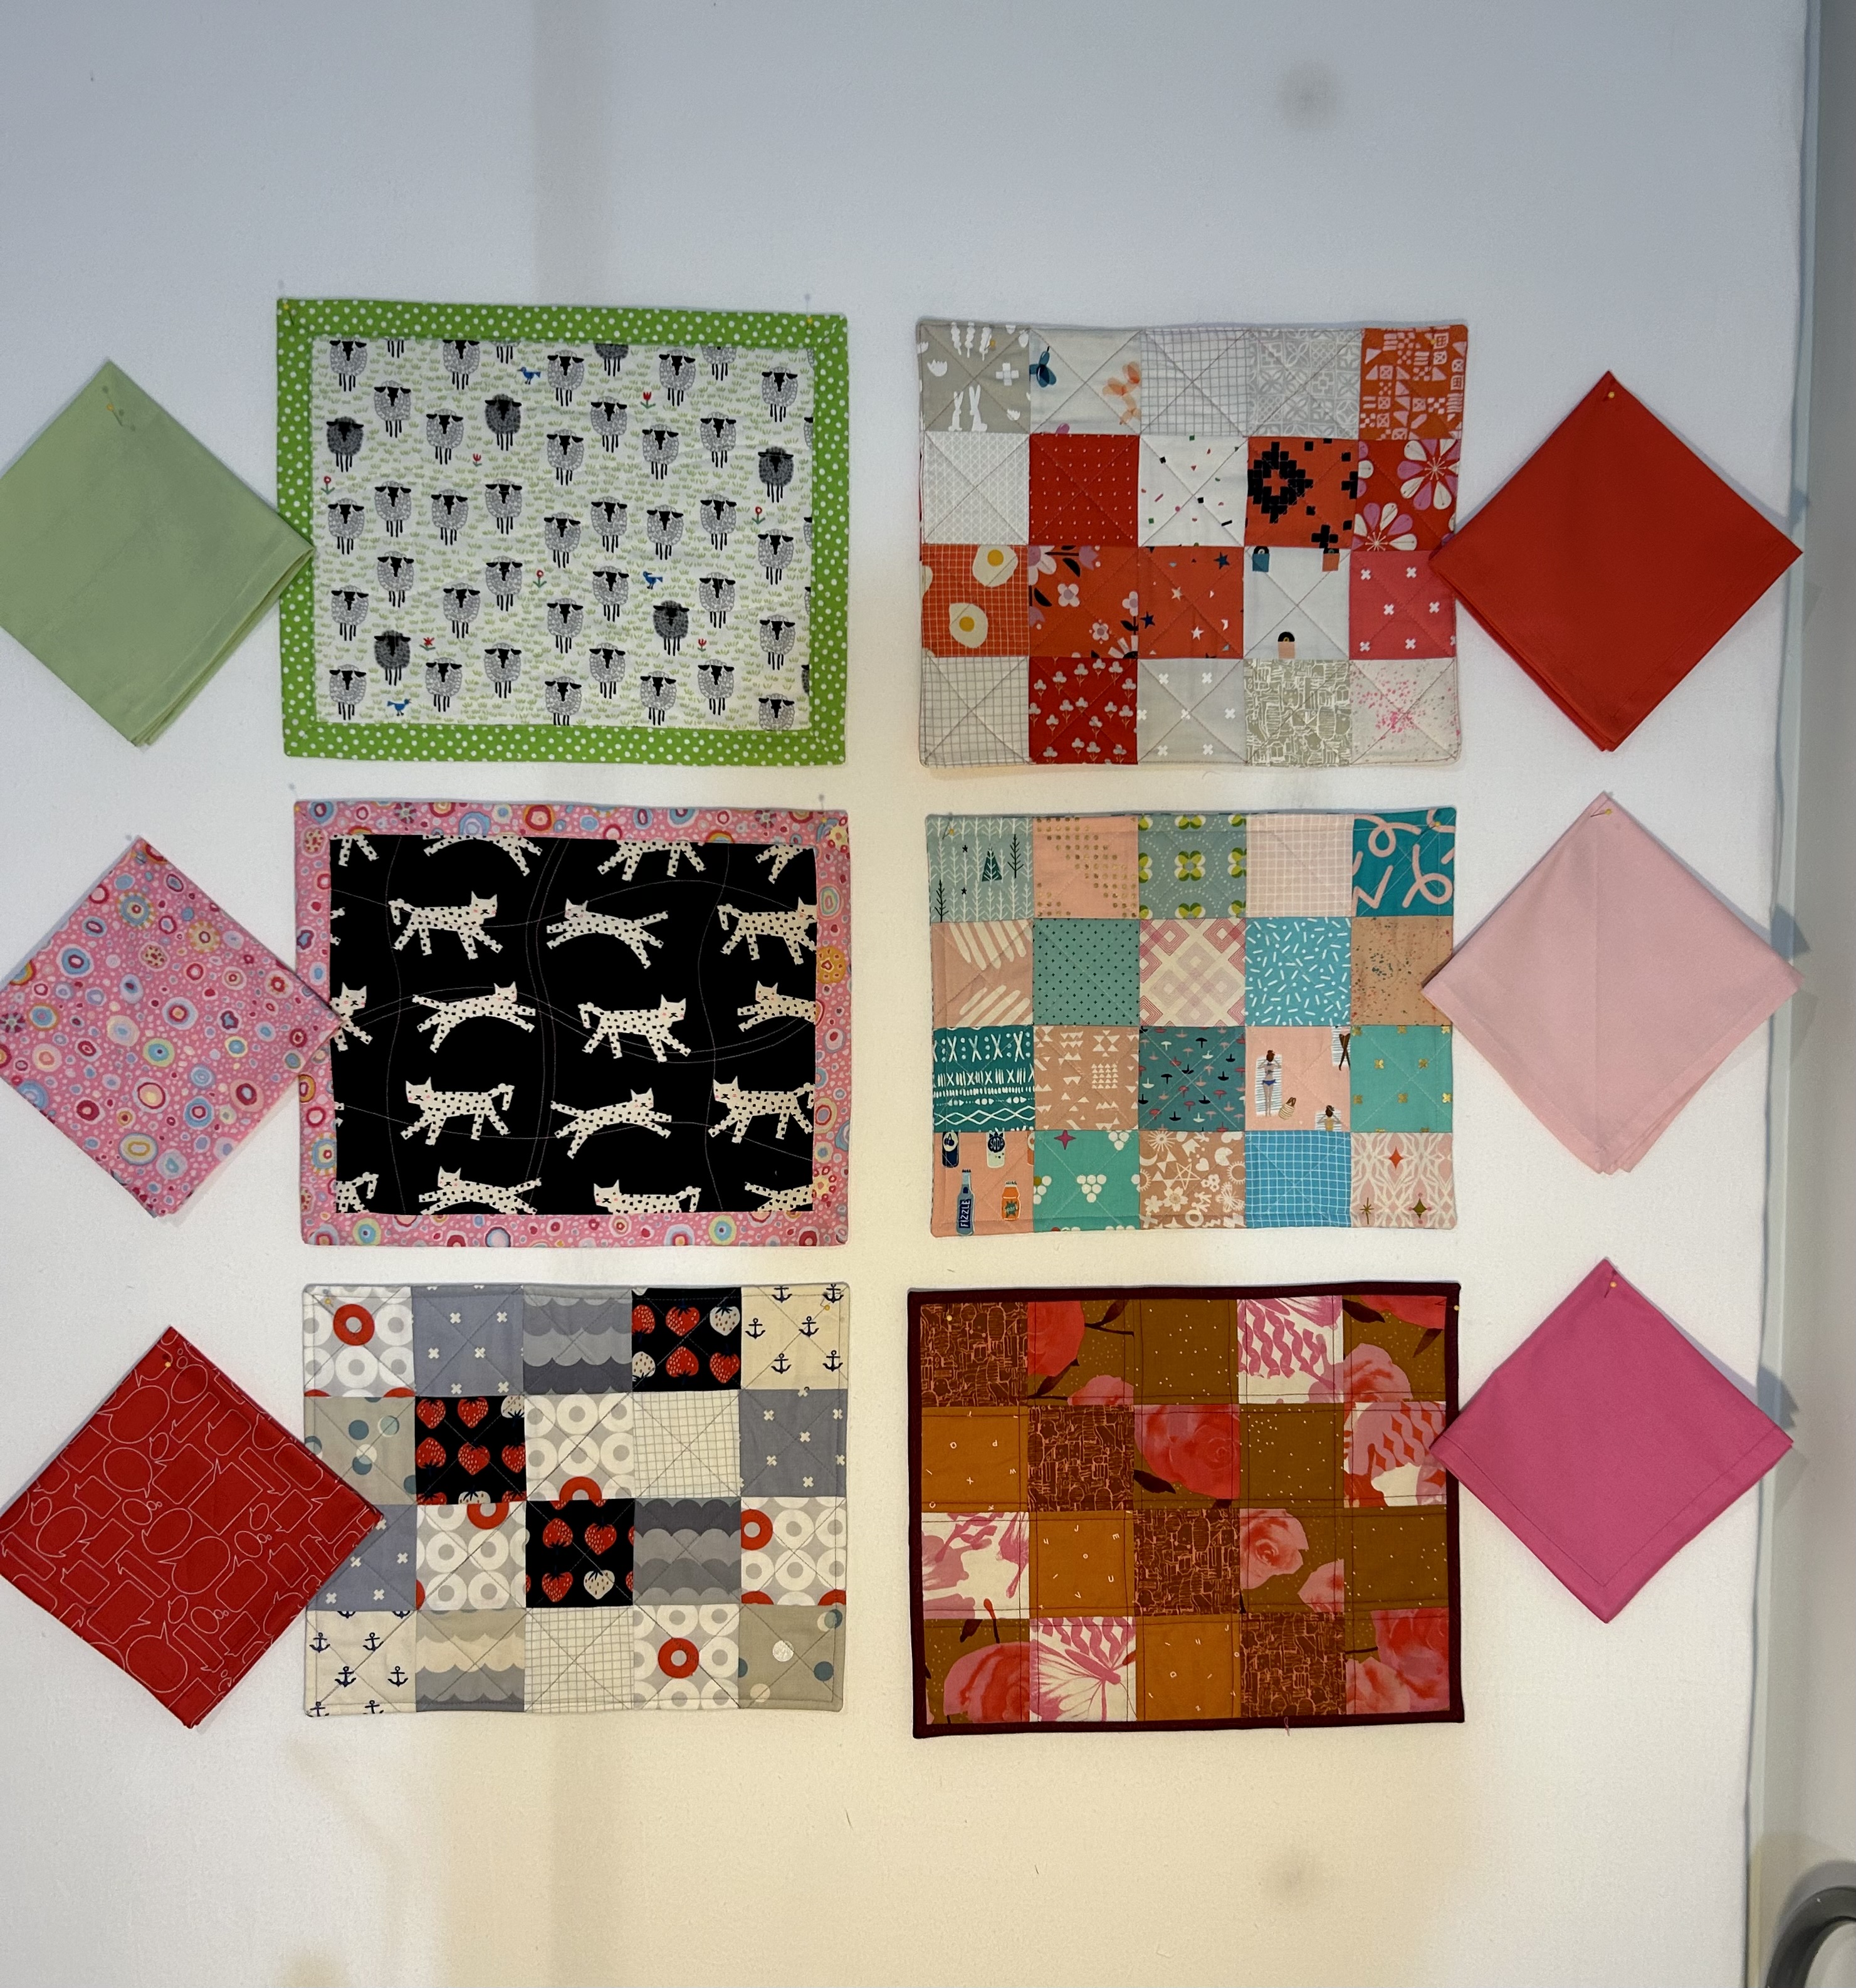
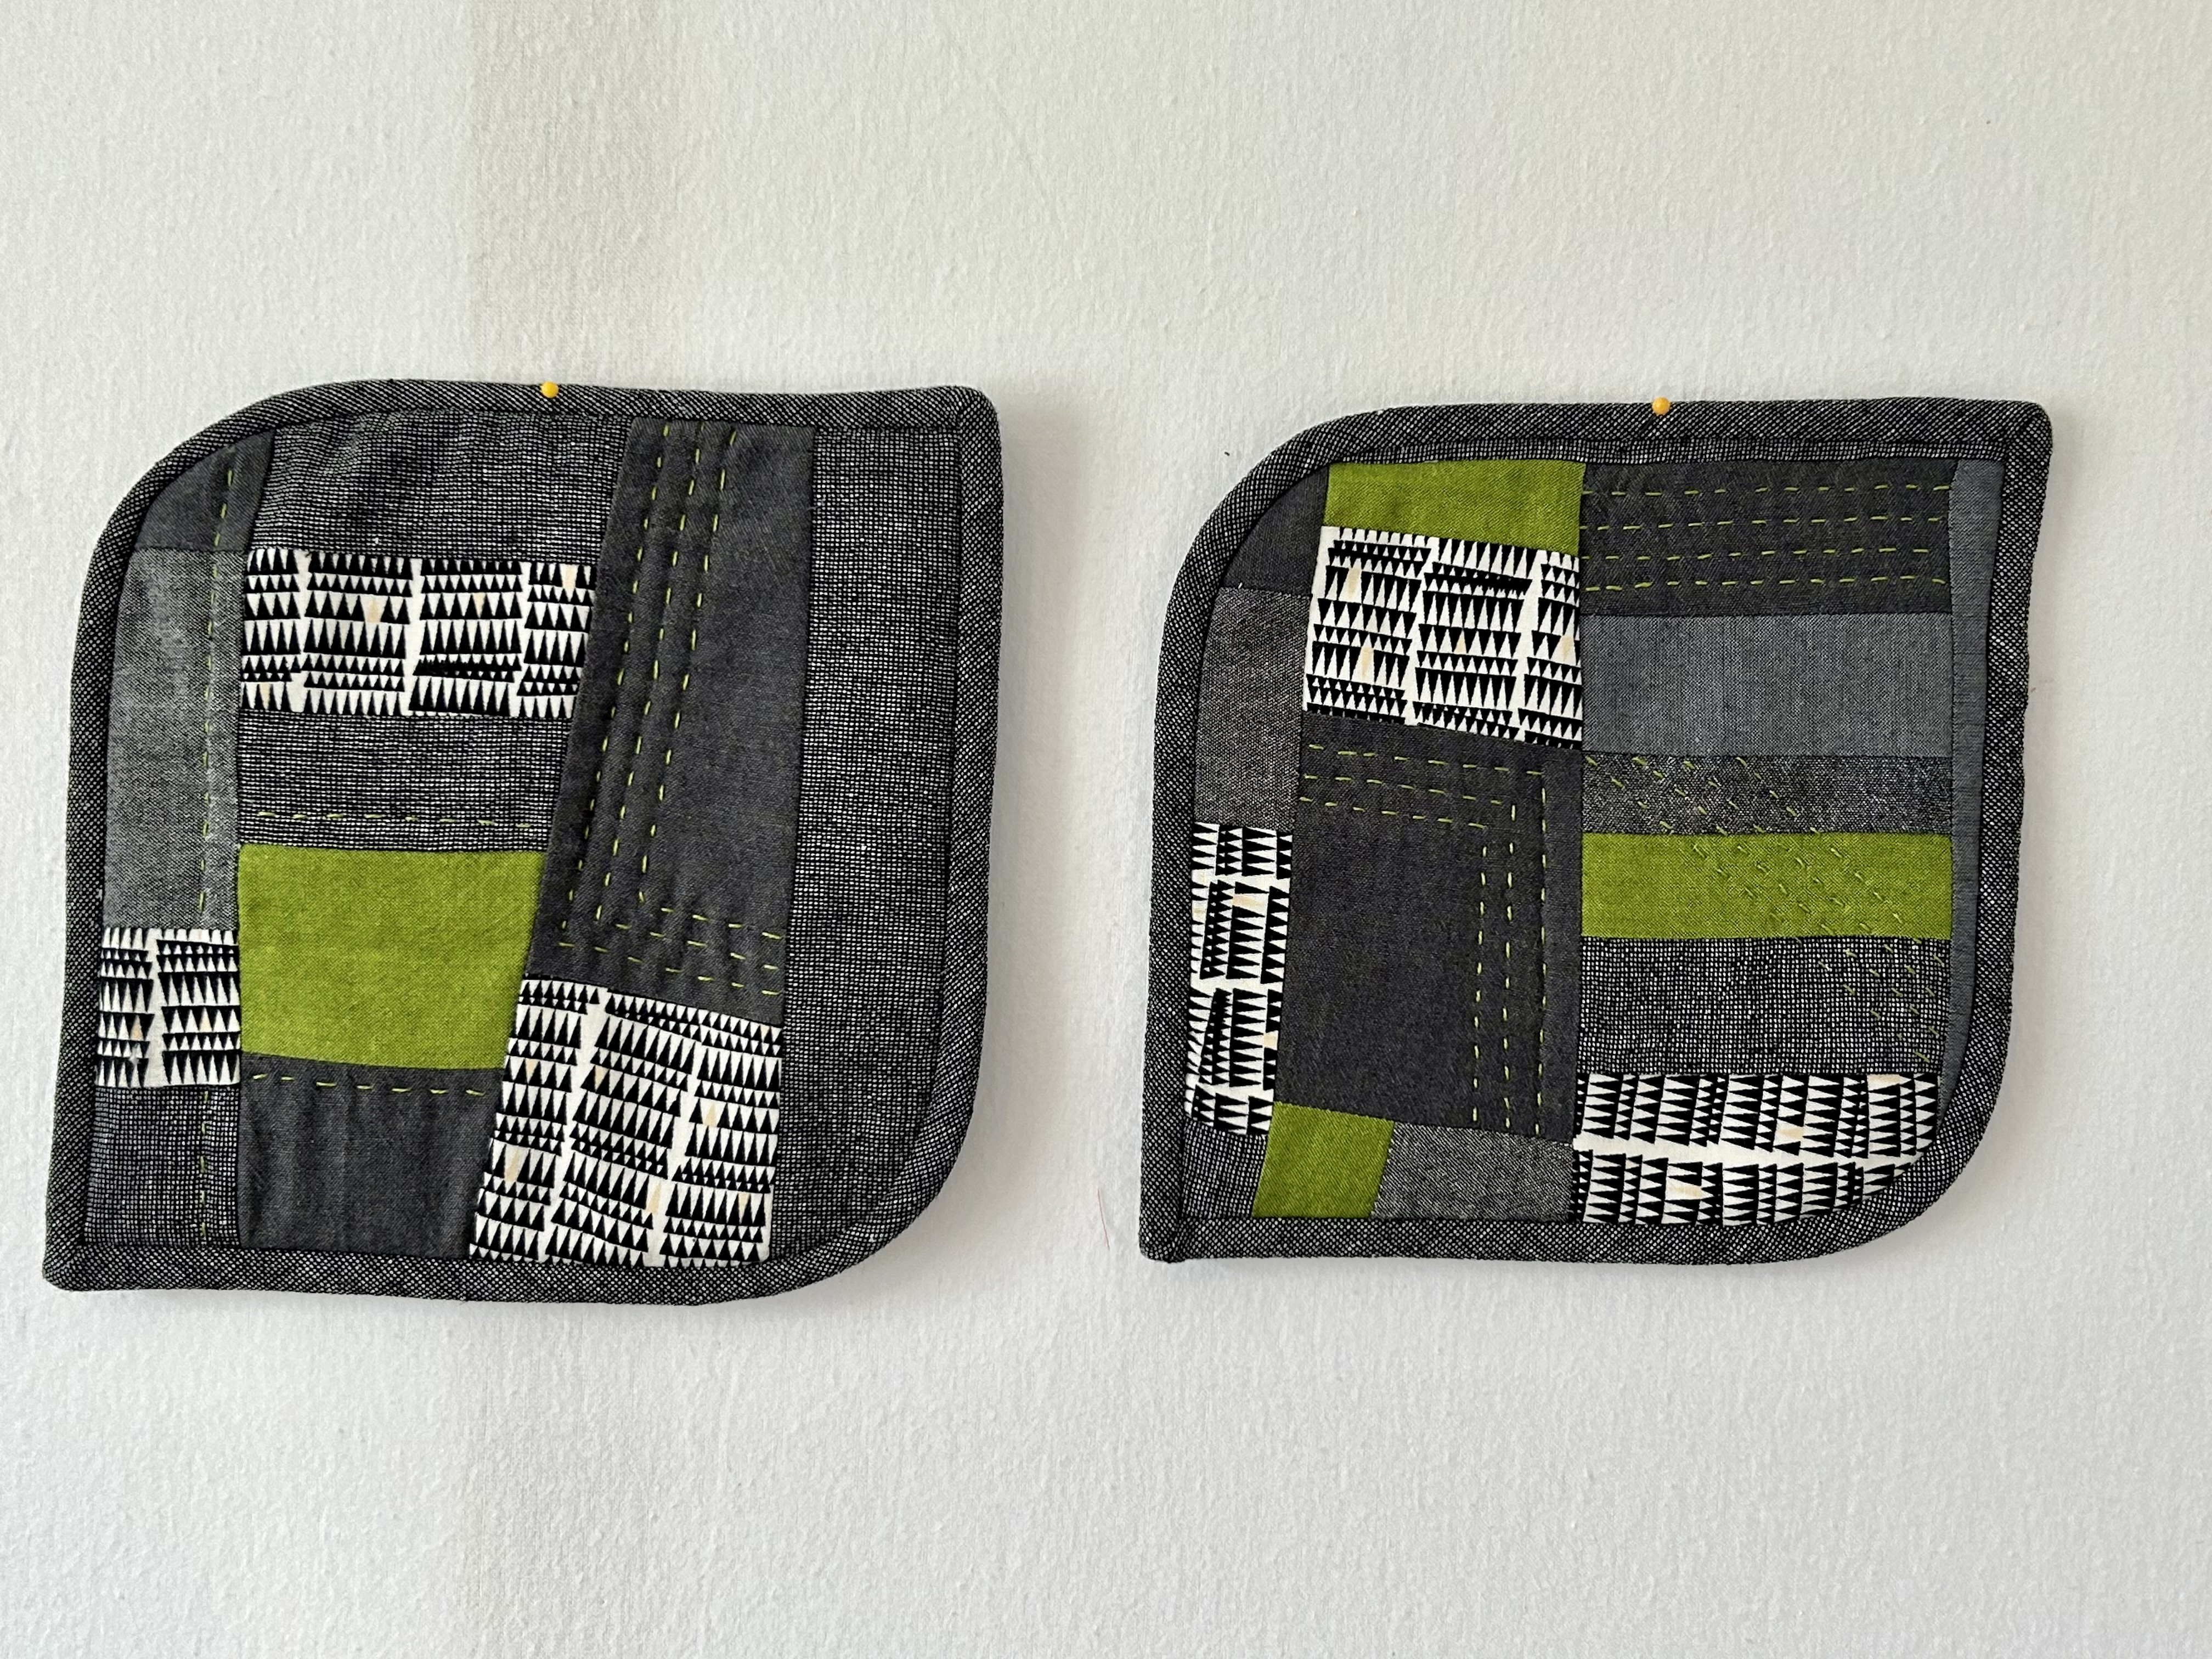
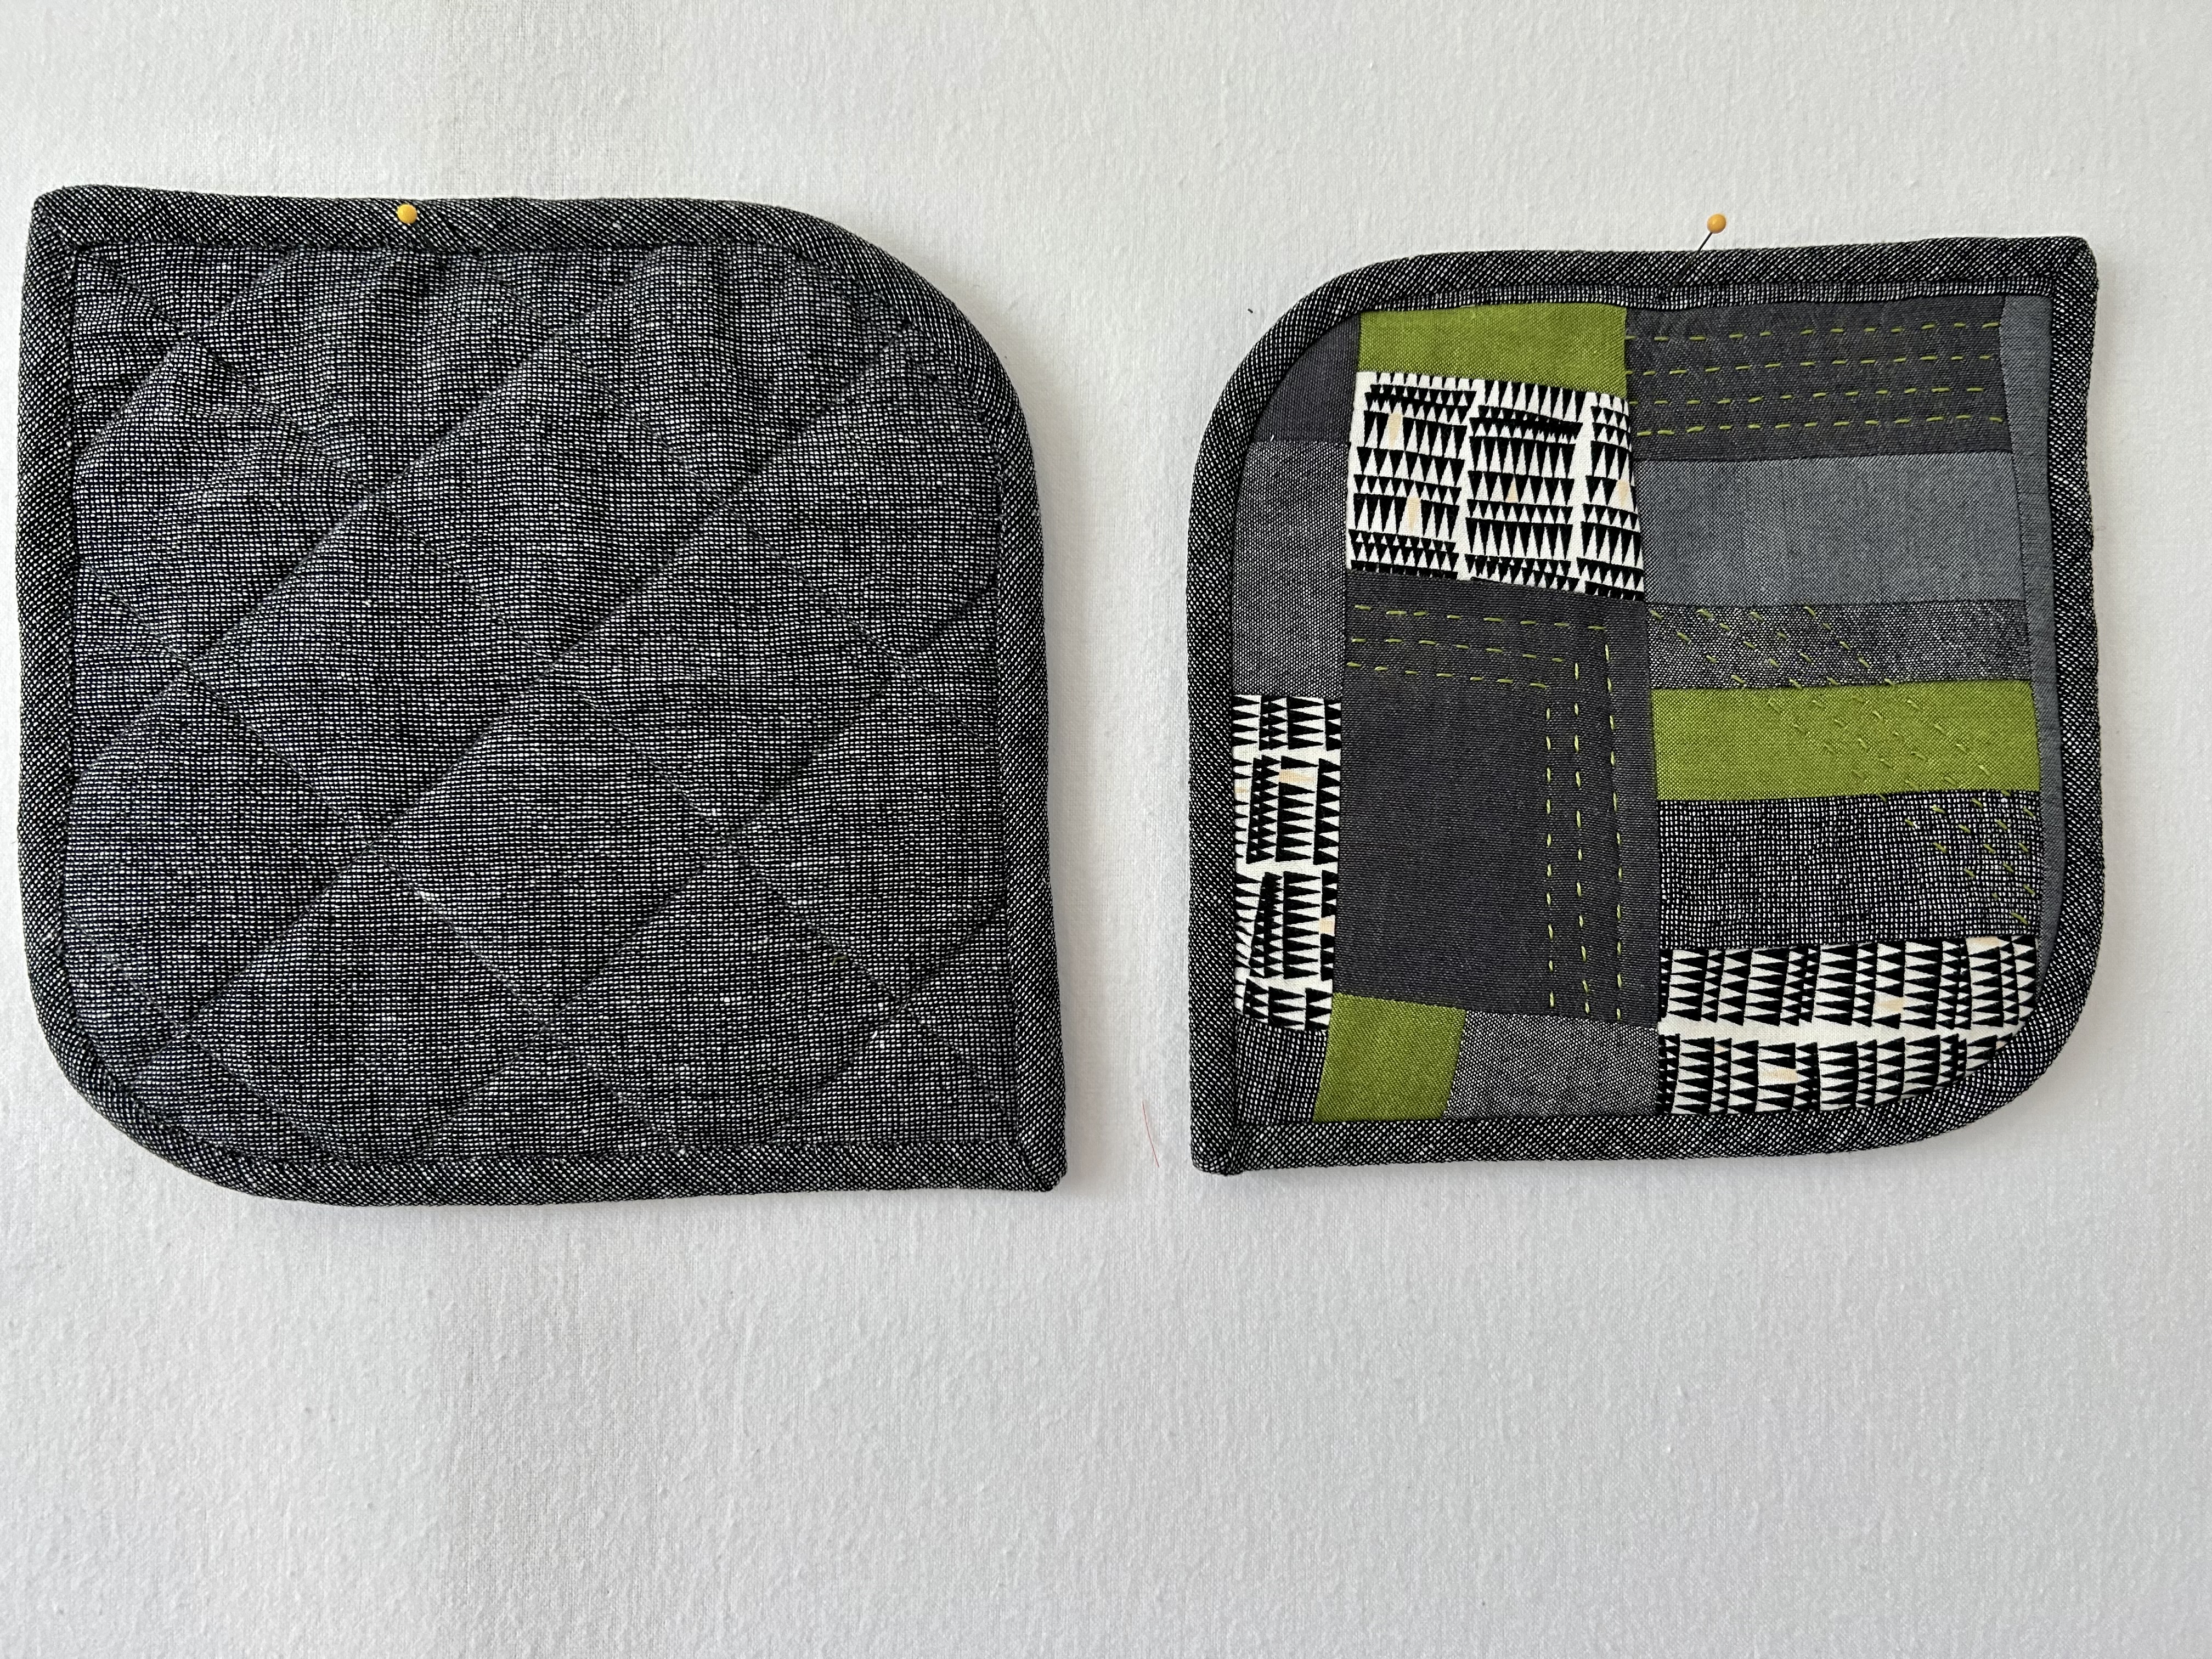
And, I will play more with placemats, using the blueberry fabrics I unearthed from the stash. Gosh it feels good to be tackling the stored sewing projects/fabrics now. I feel like I’m making real progress on whittling down the stash. Having some small projects to work on here and there is gratifying, as one sees immediate results.

My kitchen lights came–and with family help they got put together and installed Saturday. That was a true labor of love, let me tell you, as there was a switch issue and a ceiling hole issue. Plus, the lights are up over the kitchen bar, so one can’t reach them easily from a ladder. One has to get on the kitchen bar.

The lights are beautiful.

And another view:

As you can see in the picture, two of the holes in the ceiling were cut too big for the standard 4 1/2 inch ceiling plate. So there will have to a solution for that problem. And the switch that activated the hanging lights WAS activating the under-the-counter kitchen light dimmers. And the far right junction box up in the ceiling is not stable–so the far right light is not hanging straight.

These lights will also dim, but that’s above the family pay grade. So this morning I asked a local electrician–recommended by the light store and who did connect with me last week–to come and sort out the junction box, the switches, and to make sure the lights are ok. Maybe he’ll be able to connect one of the available switches to dim the hanging lights too. AND, maybe he’ll have some sort of cosmetic plate to conceal the ceiling damage–otherwise the builder will have to repair it. In any case, the family helped so much by putting the lights together and figuring out how low to hang them.

Life is part glorious and part messy, isn’t it?

Today is cooler, but meant to be pleasant with sun and clouds. So I’ll probably take my hanging-light worries to the beach. Mid-low-tide will happen around 3 pm.

The Placemat Project

It started with the notion that one of the granddaughters who likes to sew might want to make more placemats. She had made some and had a good time, and the family loves using what she made. So they made the suggestion that my granddaughter and I make more placemats.

So I started researching simple ways to carry out such a project with a new sewer so she wouldn’t get frustrated. That meant NOT using binding methods, for starters.

The first idea was to perhaps use the 3 1/2-inch Cotton+Steel/Ruby Star Society squares I had already cut up. AND, to use the method she already knew. Along the way of this placemat journey of recent weeks, I also researched and found an easy way to make single-layer napkins with beautiful mitered corners. Thus the napkins you see in the following pictures. Paige Handmade had a method I really like:

Tara Reid, “The Fastest Way To Sew A Placemat without binding,” is where I started, which was a good refresher for me.

That produced this placemat. It’s ok, but I wanted…something more…something that didn’t need to be sewn AFTER the placemat was turned and ironed.

Next I found Kim Jameson Hirst of Chatterbox Quilts, whose video teaches how to make a placemat where the backing comes forward to the front AFTER using her method to make nifty mitered corners before turning. These placemats were the result–and this method works best with a front that is not pieced with squares as they would be partially covered on the front.

Before turning the backing to the front, you can go back and add a line or two of quilting to hold the back down firmly. Note that these added lines would just show double on the front, as you can see with the cats.

This link should work if you click on it: quilted placemats without binding

Geta Grama, a Romanian quilter, gave me the best method to use with my squares I think, because I could maintain the integrity of the squares–as in not cutting off any of the outside squares AND creating an opening in the center back of the placemat so I didn’t need to worry about turning the placemat and closing up the hole on the side in a way that didn’t make a straight line.

These placemats were made with that method. For the top one I sewed over two lines so the back would be anchored to the front. And on the bottom I just sewed two extra lines alongside existing lines, about 1/4 inch apart. I was careful to start and stop my seams along the outside sewing line and to tack them down well so I could trim off the threads easily.

Finally, along the journey I did make a placemat with a binding–which allowed me to quilt all three layers at one time, of course. And of all of the placemats, I do prefer this one for myself. I tried something one of you suggested when I was playing around with potholders–I used 1/4 inch fusible tape to glue down the binding on the back–then I sewed (with my walking foot) the binding down from the front. I should have put on the binding with the fold coming to the front–that would have worked really well too, as long as the binding is held very stable with the fusible tape.

And, here is the back of one of the napkins–it’s a print, so the back is not as attractive as the front, as it would be with a solid fabric or a batik. But, you can see how nice Paige Handmaid’s method is–and it’s easy.

The placemats all look really cool on my dining room table. Surprisingly so.

They look so much better than they did on my design wall, LOL. I ordered some wooden napkin rings to go with them–having failed to find any napkin rings locally.

You’d think I’d be done, right? Oh no. In the middle of quilting on the longarm, sewing together the Churn Dash quilt on the design wall, and now hand sewing the binding on “Wyoming Stars,” I pulled out the stack of Maine blueberry fabrics that has been sitting in my stash for 18 years. And I cut another placemat and napkin out.

I’m clearly crazy.

I Was Out of Veggies

So there was a quick trip to the grocery store first thing this morning.

I wanted to grill a whole cut-up chicken for dinner (noon for me), and I needed veggies to go with the chicken.

I came home with full sacks, and set about grilling the chicken and prepping the veggies (more of the little gold potatoes boiled and set into raw butter and fresh dill and sautéed rainbow chard).

While cooking the chicken (low and slow), I made fresh blender drinks (celery, red bell pepper, carrot, cucumber, apple, peaches, cherries, blueberries, cranberries, and a tiny bit of maple syrup). Now I’ll have a healthy dessert after supper tonight. I forgot the ginger, but the drinks are still delicious. Note: Most of the mixture is veggie, not fruit. I just use bits of fruit–maybe 1/4 of the mixture. Too much fruit sugar causes inflammation and sends the body into an energy pattern that goes up and down rather than holding long and steady.

I took my full plate to the outdoor room with my book. I didn’t eat all these potatoes I cut up–too much–so they went into the roasted veggie container alongside the rest of the rainbow chard–and I’ll have that container with some chicken for supper.

I made a nice dinner yesterday too: Baked haddock, okra (yes!), a medley of roasted veggies, sliced cucumber, and a glass of local raw milk.

“Wyoming Stars” is off the long arm, trimmed, bound, and is downstairs in the tv room where I am sewing on its binding at night. Here it is fresh off of Innova.

I am still marveling at the beautiful, beautiful stitch Innova makes–front and back.

“Wyoming Mountain Crossings” Quilt is Done

And is is so, so cute!

It just fits into the hallway, so I can get a good picture of it.

To remind, this quilt’s crosses and border are 99% Cotton+Steel/Ruby Star Society fabrics, and it is one of the last projects of the past three years now of cutting up these fabrics in my stash. The neutrals are more mixed with other fabric lines.

This pantograph is new to me, and it has such lovely texture. Plus it is swirly and girly, and this quilt is going to a great niece in Wyoming. The pantograph is “Lovely” by Denise Schillinger and is sold by Urban Elementz. This quilt is my 210th quilt.

The scrappy back has some really fun fabrics–which helped further clean out my fabric stash.

I was hoarding this fox print by Tula Pink and the one below which is Cotton+Steel.

The bright green below on the upper far right is not C+Steel, but all the rest of the blocks are.

Owls and ice cream cones and crosses–what I love about the C+Steel/Ruby Star Society is the sophisticated whimsy they create. And I like and appreciate their plain and neutral fabrics too.

AND, “Wyoming Stars,” meant for my Wyoming great nephew, went on the longarm yesterday and got basted. Two passes are done. I will do more today.

And the journey continues…

Happily.

Odds and Ends

It’s a very pretty Sunday morning here.

And we had more rain in the night. My grass is finally coloring up to a deep and healthy looking apple green. Maybe it will start to spread into the few problem patches now. The scant fertilizer application is working. I’m just taking out the few glaring weeds by hand for the most part as I don’t like and won’t do grass herbicides and insecticides. Those products are NOT safe for humans, and especially not for children.

I am moving from one fun sewing project to another. Happily moving, too. And will likely post more pics later in the week.

I’ve been experimenting with making placemats and single-layer napkins with mitered borders. It’s astonishing what you can learn online. This project got started with my curiosity about the best way to work with a granddaughter who wants to sew placemats for the family. She’s so busy, but I got hooked on trying out different methods. There will be a post when I finish all 6 placemats–with links to the videos that helped me so much.

I finished one of the two Wyoming quilts I started back in Maine. The last stitch into the binding happened late last night. The other Wyoming quilt is all ironed and the back is on Innova–that will get sewn this coming week. For sure, as I love to work with my sweet longarm.

I’ve been hunting for pens with colored ink that stays put in the wash. I use them for quilt labels. The ink from these pens did well in the wash. I would iron whatever I wrote to make extra sure before washing. And look at all the colors. Note: some pens seemed a bit dry–so I’m storing them with the caps down to see if that helps. I just tested the bright colors I might use. These pens would work on garment labels really well–so ownership of clothes get marked, for instance. I’m alway leaving my raincoat behind, so I have my name on its label.

Slowly, the last Churn Dash–which is totally scrappy–from the last of the Cotton+Steel scraps–is coming together on the design wall. I like how the narrow sashings and small cornerstones are working. And I was surprised by how effective these blocks are when one just combines interesting colors and prints. It is so full of lovely energy. Note: the next row to be sewn is on the table next to my sewing machine. It will be 8 blocks wide and 9 rows long, and the blocks finish at 7 1/2 inches. AND, I’ve moved any leftover strips and squares into the appropriate bins that hold cut fabrics ready to be used.

So, I’m declaring the COTTON+STEEL and RUBY STAR SOCIETY project made with stash fabrics FINISHED. (I continue to love these designers, however, who are now Ruby Star Society.) I’m forgetting the two FULL bins of 3 1/2 inch squares separated into colors and neutrals however. And the blocks I’ve made from some of the small squares. Still…

Here’s the 6th and last placemat I’ll make–from the 3 1/2 inch squares.

The last of the fabrics for the Traverse block-of-the-month project came this past week. I have three more rows to make. Tara Faughnan designed Traverse, and Sewtopia hosted the project–though I can see from online comments that other quilt shops hosted this project as well. Traverse will go on the design wall when the Churn Dash (“Eye Candy 5”) comes down. To remind, here is a pic of where I am now:

I spent Friday day and night over at my older son’s house as they were away. I took the quilt from hell with me and got two of the 6 blocks needed for the 6th and final row done and sewn to rows 4 and 5. Later when I got home, I organized the 3rd block for that row. So…progress.

Whew! I’ve run on here way too long. I appreciate your patience.

Have a great day and a great week next week.

Part 1: How I Make A Bias Binding and Install a Bias Or Straight Binding

I always make bias bindings for my projects that require bindings. The only time I don’t cut bias bindings is when I don’t have enough fabric for a bias binding that I really want to use, but I can cobble out a straight-cut binding from that desired fabric.

Why bias binding? Bias binding wears better over the long haul. And, yes it is easier to install. Straight-cut bindings have only one to three strands at the fold line, whereas bias binding has cross-hatched threads at the binding fold.

I use the same method I use for bias binding to install a straight-cut binding on to a project. Why? The bias seams are less bulky. Way less bulky. Often you don’t even notice bias binding strip joins.

Note: I’m not going to talk about how to sew the binding to make nice corners on your quilt–but here’s a video from Jenny Doan of Missouri Star that covers everything, including how to do the corners. I learned several things I’ll try from watching the video. My method is a bit more “fiddly” than Jenny Doan’s but it works really well for me. Also, my final seam joining is different from hers, but maybe I’ll try it too.

To cut bias binding, press your fabric and place it on your cutting board–it doesn’t matter if it is right side or wrong side up. Line up your long ruler on the left side of the fabric on the 45-degree angle mark. (You will later cut off the points to join the fabric strips you cut–but make sure the 45-degree line does line up with the grid on your cutting mat. Or make sure you have a clear straight line on the left.) *Note that I just pulled this fabric to show you how to line it up and I didn’t iron it. I would not cut it without pressing it.)

Draw a marking line down the ruler if you are going to need to move the ruler further down to reach the right side of the fabric. Cut along that line–you will now have two pieces. Put one aside, remembering you can return to it for long strips if needed. The less strips, the less seams in the binding.

If you want a smaller, shorter cut, you can also line up the 45 degree line on your ruler at the TOP of your fabric. Again, make sure it is on a strait edge–the fabric or the lines on your cutting mat. Here’s a pic with a piece of paper to illustrate:

I cut my bindings at 2 1/4 inches as that makes a plump, tight binding for me with no loose floppy space at the binding fold.

Cut the points off of your strips before joining them right sides together. Line them up like this photo shows. Make sure the right sides of the two strips line up together. Mark the place on the top piece where the bottom piece ends and line up your ruler from that mark on the bottom to the top. Make sure the top of the ruler will let your pencil touch the point and is on the bottom the mark you have made. Draw a line and sew on it. I will pin the top right corner to keep it stable while I sew.

When you have all the strips sewn together, trim the seams at 1/4 inch and press them all to one side.

Then press the strips in half, lining up the raw edges. Note that in the pic below I have not yet ironed the left side of the strip.

On one end of your strips–the end you’re going to start to sew on to your quilt, open up your strip and cut a 45-degree angle–so that the point is at the TOP and when refolded the fold is at the bottom.

Now you are ready to install your binding. So go to Part 2.

She’s Home

Innova arrived yesterday–brought to her new home by the capable hands of Rob Engime of Olde City Quilts in Burlington, NJ, where Judy Engime held down their store while Rob traveled to me. It was a 12-hour trip for Rob.

It took many trips up the steep stairs for Rob to bring in all Innova’s parts. I helped with some of the lighter pieces, but, truthfully, Rob did most of the trips up the stairs. The first step was putting the base frame together.

The second step was to install the much-needed new light bar. I had great light in my quilt room back in Maine, but only one small ceiling light in the bonus room here.

Oh my heaven’s. It is perfect. Let there be light! There will be no need for secondary light sources with this light bar in place.

Next, the table pieces get inserted. Note that Innova’s front faces the wall quilts–and we put her on a slight angle so I will have plenty of room to walk around the machine, to load quilts, and to quilt from the front. Having the back facing the room is awesome because I can easily trim quilts on the machine’s back counter. Innova is in a permanent position now; I won’t have to move her.

Innova herself is now on her sliding platform, and the roll-up bars are in place.

After Rob left, I installed the overlay grid I use on the back counter for pantographs and slid the pantograph I want to use next in place. The grid allows me to mark on it with wet-erase markers. The scrappy backing I made 7 months ago, back in Maine, is now loaded.

And I spent late yesterday and into the evening setting up and basting the first quilt to be quilted on Innova in South Carolina. It is one of three final quilts of the Cotton+Steel project of these last two years–three if we count these last three quilts. Oh wait! there are the blocks I made back in Maine from the small squares leftover from other C+S projects that I pieced together while waiting for the house to sell.

Suffice it to say that this morning I’m feeling so happy. And I savoring all that I learned from Rob yesterday–which was a lot.

I love my Innova, and I’ll be eternally grateful to Rob and Judy Engime for packing up Innova back in Maine, storing her for me all winter, and bringing her to me here in South Carolina.

Today I’ll begin quilting this quilt, going slow to get acquainted with Innova again, and I will sew together the binding pieces as a break, and will, maybe, sew the last three Churn Dash blocks for the quilt on the design wall.

And, yes, I’ll break for a long walk with my music.

Yes, The Grill Did Come Assembled

Some of you asked…

And, yes, I’ve been using it.

It lives in the garage, where it is protected from weather.

It’s easy to roll it out to the driveway.

I am LOVING having an attached garage–the grill is mere steps from the kitchen.

I made two more pot holders yesterday. It’s hard to quit, but I have moved on now after these two. But I have fresh freezer paper patterns should the need arise, LOL.

And the back.

I have my old Janome, which is going strong, set up with a walking foot attached, so it is easy to move over to it when a walking foot is needed–like for this walking foot quilting and the binding.

These potholders are thick–with two inner layers (Insul-Brite and batting) and the two outer layers. And the funky shape makes installing binding a bit more tricky at the join. And the thickness means the binding has to wrap around a lot of thickness–so I should be using 2 1/2 inch binding rather than the 2 1/4 inch I usually use. Single fold bias tape doesn’t cut it for this thickness. The stitching on the binding on the last one was the best so far, but it wasn’t perfect. And, I like perfect.

Needless to say, this project has been a learning curve for me.

And I like learning curves, too.

This pair is going to son Bryan.

I did sew a few Churn Dash blocks yesterday for the quilt on the design wall. They are so fun to make and sew up quickly. But tomorrow I will return to the quilt from hell as I’ll be staying with my two older granddaughters while their parents make a quick trip to see Old Miss with grandson Kelly–one more time before a final decision is made. So, hand-sewing will be needed.

The longarm light bar is due in New Jersey tomorrow. Its trip from out west took forever as the shipping company clearly has been short-handed–which is a common story these days. So, the delivery plan now is next Friday.

Potholders and Hot Pads

I BADLY needed a break from the quilt from hell. So I gave myself a few days to play with a new project. OK, two new projects, actually, but I’m resisting so far making more churn dash blocks for the quilt on the design wall. I need to fill those holes–it’s under 20 blocks.

I have been watching friend Betsy Maislen make adorable pot holders in recent months–and she had fun playing with her machine’s decorative stitches for the quilting. And a year ago, I was also tempted by Debbie Jesse’s post on her A Quilter’s Blog when she made a whole slew of color-dedicated, scrappy potholders using a funky shape from Hannah Haberkern: https://hannahsews.com. Recently Debbie Jesse returned to this funky potholder project–and added a matching mitt. She made these two items, and I fell in love:

I have put links to Debbie Jeske’s posts below this post. And here’s a picture of Hannah Haberkern’s initial funky potholder. Isn’t it fun? She used her walking foot for the quilting.

The insulating product most used for potholders is Insul-Brite–which contains a needle punched fluffy fiber with a poly layer. The product repels both heat and cold.

Info on the package recommends two layers, poly side out, with an inner batting layer that will absorb condensation. So, that’s 3 layers, plus the two outside top/bottom layers. Various people writing about how to use this product also recommend additional batting layers for really good heat control, so I did add one more for the hot pad I also made.

You also need bias binding–which I always do anyway–but many use single-fold bias tape for the binding–and I will try to do that when I get a chance to buy some in colors I like locally.

Confession: I’ve never been able to properly sew down the free edge on binding with my machine and always hand sew the free edge. BUT, I need to rethink and learn to do a good job so that the back and fronts both look nice. I suspect using a glue stick and/or clips would help.

So, here’s what went home with son Mike, who REALLY needed some fresh potholders. And, a big counter hot pad for hot dishes coming out of the oven. Word is he’s already used them and likes them.

I used some Essex Linen I had in my stash as my focal point, some peppered cottons in grays and the one green, and a Carolyn Friedlander print. I made my bias binding from the linen.

I made TWO LAYERS first–doing the front and back layers separately and then combining them. The front layer had the top and the Insul-Brite; the bottom had the back, the Insul-Brite, and a batting layer that would land up in the middle of the potholder. Before quilting each package, I sewed the edges with a bigger basting stitch. Also, before installing the binding, I, again, sewed around all the edges. *Also, I released the foot pressure to handle this thickness. (The linen binding was super stretchy, which made hand sewing the back edge pretty easy.)

Here’s the back.

Here’s the BIG trial counter hot pad–which has 4 inner layers as I added an extra batting piece. I’m also experimenting with this kind of binding where a larger backing comes around to the front, but haven’t quite “got it” yet–in that it’s width is chopping off blocks. It works really well, though, if the top doesn’t contain pieced blocks that need only a 1/4 inch seam. Also, I used my machine to stitch additional lines of quilting here and there as hand-sewing into this thickness was hunt and peck. And, slow.

I could not resist playing with scraps before putting these fabrics away–so I have this hot pad for myself–but with only 3 inner layers. Thus, I can test out how heat protective it is.

The other project is trying out various methods to make placemats from the 3 1/2 inch blocks I have from the Cotton+Steel project where I cut up the whole saved stash. Son Bryan’s family needs new placemats–and granddaughter Ailey is going to help me make some for them.

Next on the potholder project, I’ll try using just two inner layers (Insul-Bright and batting) and bought single-fold bias tape. What a great way to play with scraps and to have some gifts on hand.

Here’s the recent post from A Quilter’s Table:

https://aquilterstable.blogspot.com/2023/03/bombazine-and-more.html?m=1

Here’s the link to Debbie’s scrappy potholders from last year:

https://aquilterstable.blogspot.com/2022/03/scrappy-potholders.html?m=1

One More Row

Yesterday I finished the last block center for the “36-Ring Circus” English Paper Piecing ((EPP) wedding ring quilt I’ve worked on for YEARS now. And, that I’m now determined to finish.

I had these centers all prepped back in March 2022, but did not sew them together. Now, I realized I wanted to make sure that I understood how they would each fit into the last row of the quilt–taking into consideration the placement of the centers in the whole quilt.

I laid out the finished top three rows and lined up the finished bottom two rows. Hmmm. It is interesting and kind of funky with the Cotton+Steel fabric centers.

How these bottom blocks of the 6th row get placed depends on WHAT one is looking in one moment–which is always true of quilt block placement. I can already see blocks I might want to switch around, but then also see “but wait, it would be too close to `that block.'” I am going to switch out the far right two blocks though–even though the corner block will be close to the red mushroom block above it. The lighter aqua block is too pale to hold down the corner.

At some level, it just is what it is…

But, I’m seeing other issues that are not working for me while looking at this picture–which is why taking a picture is a really good idea. I need to split up the blocks with the strong blue in them.

I still have to make and sew the templates that will square off this quilt. They are larger and might go faster. I’ll use all dark solid fabrics. And I might need to add some additional borders–a narrow one and a wider one. Thank heavens as they would be done on a sewing machine.

I took a moment yesterday to finish off the edge of this cotton kitchen towel hand cloth used to dry wet hands–made from cotton balls I had on hand for grandchildren, but which didn’t get used to teach them to knit due to no visits to Maine during covid. These balls became my hand work at night while I packed up in Maine. And, later, while I was waiting to get into my new home.

I had fun playing with patterns along the way–and explored a moss stitch in one of these hand cloths. A plain old garter stitch is sturdy for this kind of use too.

The cloths sit in a dish given to me many years ago by another Enright “outlaw” wife during a visit to Maine: Judy O’Connor.

The outdoor room blinds are being installed as I write this morning.