Turkey Tracks: Celtic Solstice Quilt Update

Turkey Tracks:  December 7, 2013

Celtic Solstice Quilt Update

The first “clue” for Bonnie Hunter’s 2013 mystery quilt, Celtic Solstice, came out November 29th, the day after Thanksgiving.  Following “clues” will come out each Friday.

Bonnie Hunter is a scrappy quilter, so if, for instance, one needs “blue” for a task, one gets many shades out of one’s stash.

We were to make 188 (for the 75 x 75-inch quilt–there are many more units for the king-size quilt Bonnie made) block units that will form a star.  About half of the blue stars have a scrappy  orange background and half have a neutral background.  I put four together of each so you can see what will happen eventually.  We will obviously be making the center of the star at some point.

Celtic Solstice, first clue

I finished these 188 units Friday night.

The new clue came out early Friday morning–and the email traffic on the Facebook group dedicated to this project has been humming.  As have sewing machines.

The new block is a chevron of green, yellow, and neutrals.  One hundred of them.  My patches are almost cut out now…  And I’m going straight to the sewing machine after I’m done with the blog.

You should see some of the beautiful blocks, and also different color combos than Bonnie used, people are making.

Inspirational!

If you’re interested in making this quilt, go to quiltville.com, click on the blog button, and in the masthead, click on “Celtic Solstice Mystery.”

Turkey Tracks: Mystery Quilt–Celtic Solstice!

Turkey Tracks:  November 22, 2013

Mystery Quilt:  “Celtic Solstice”

Well, I seem to have backed into doing Bonnie Hunter’s annual mystery quilt–named this year “Celtic Solstice.”

Bonnie’s mystery quilts are gorgeous.  I’ve admired them–and all the variations that people have done–for some time now.  Among them are “Easy Street,” “Orca Bay,” and one I truly love, “Roll Cotton Boll.”  The latter is on my wish list to make.  So many quilts, so little time…

Doing a mystery quilt is so far out of my comfort zone that of course I have to stretch myself in this quilting way.  And, especially, since you may recall that John was 100 percent Irish.  And, our one trip to Ireland, so many years ago now, was a wonderful experience.

And it’s especially a stretch yet again when you see the initial color choices.  Only, remember that Bonnie will choose all kinds of colors in a, say, blue range, from her stash.  You can see that in her instructions.

Take a look?

Quiltville’s Quips & Snips!!: 2013 Mystery Time! Introducing Celtic Solstice!.

This is fun, too.  Take a look at the map of people who signed up for the Facebook page set up for this mystery.  You can see my pin there on Mid-Coast Maine:

https://www.zeemaps.com/map?group=732958&add=1…I

I’ve been picking up some extra neutrals that are more on the white side–as they can’t fight with the yellows–which means I won’t want to use neutrals that are too far over to the paper-bag tan side.

Of course I needed some of each of the bright versions of the green, blue, orange, and yellow.

I will have color variations in my stash–which I cut into strips all last summer.  But I have to wait until the first clue comes out on the 29th to see what strip sizes Bonnie will be using.

Oh my…

An adventure…

Turkey Tracks: I’m Obsessed: Hand Sewing

Turkey Tracks:  November 18, 2013

I’m Obsessed

with

Hand Sewing

It’s official.

I’m obsessed with hand sewing.  I have one project going and two more planned.  And I can’t wait for dark to fall so I can settle in and hand sew while watching something fun on the television.  Though just at the moment I’m hand-quilting the clam shell quilt which is, as yet, nameless, but not homeless.  And, I’m putting the binding on the Winding Ways/Wheels of Mystery quilt which I’m naming “Earth.”

I think my obsession all started with Bonnie Hunter’s numerous posts on her hexie projects.  Hexies are all the rage in quilting these days, which I’m sure most quilters know.  And these projects are NOT your grandmother’s flower garden variety.

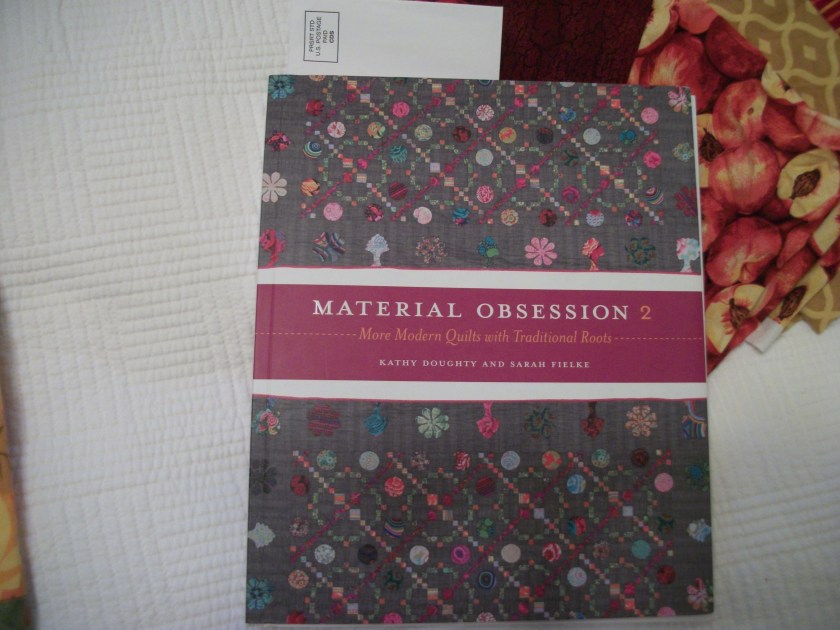
Or, maybe it was seeing the gorgeous quilt that Rhea Butler of Alewives quilting, in Damariscotta Mills, Maine, from Kathy Doughty and Sarah Fielke’s MATERIAL OBSESSION 2 book.  (Those gals are from Australia, the home of fantastic quilting.)

I did a hexie project a while back–a challenge to depict a grocery store product–I chose Green Hive Honey, a local raw, unheated honey.  That quilt was called “A Thousand Flowers” since that’s what it takes to make a ridiculously small bit of raw honey.  (You can search for it elsewhere on the blog.)  I found sewing the hexies tedious–especially the whip stitching that joined them.  And the stitches showed in a way I didn’t like.

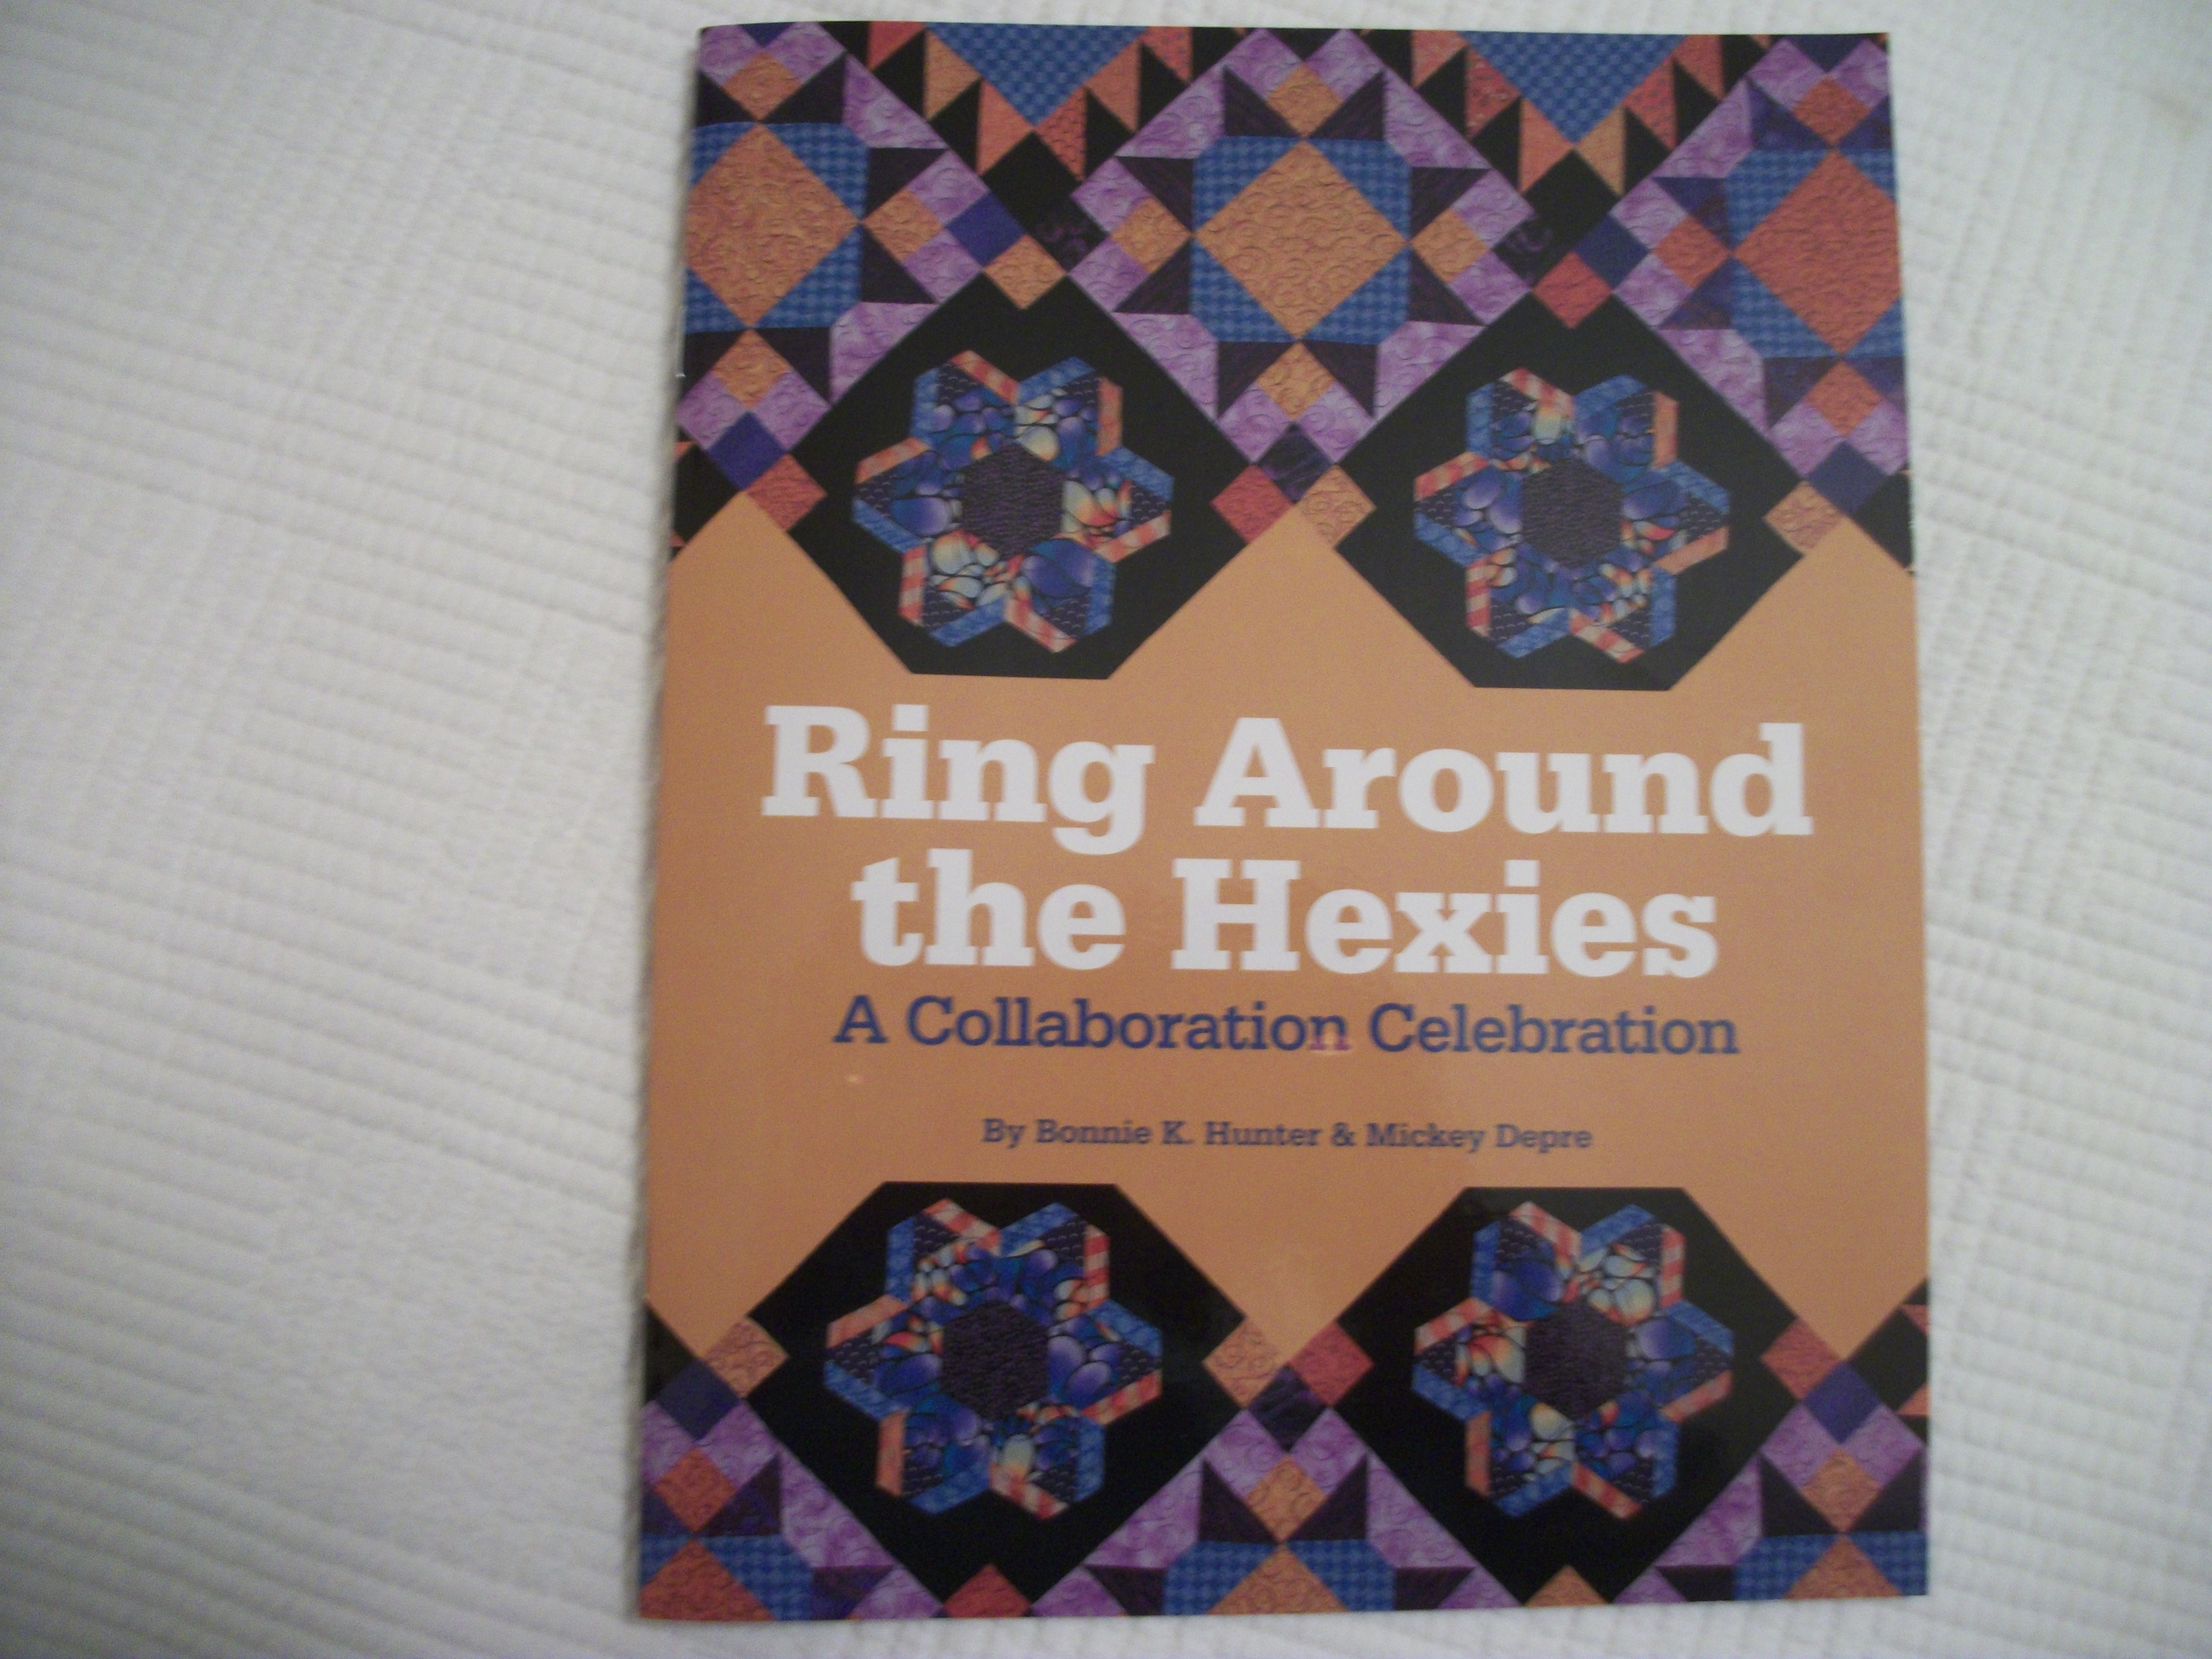
BUT, But, But!  There is a better way to do this whole process.  And I began to discover that only recently with Micky Dupre and Bonnie Hunter’s book, RING AROUND THE HEXIES:  A Collaboration Celebration.

Hexie blocks

You can English Paper Piece the hexies and then the way you join them is NOT with whip stitching.  I’m posting a video from Leah Davis that’s a close-up of her hands piecing hexies in the “new” way in a separate post.  (Ask and you shall receive from the universe.)

So, Bonnie makes a pieced quilt, leaving, in the above case, blank black squares on-point.  Micky pieces a hexie formation–and she manipulates the hexies to get interesting color changes–and appliques her arrangement onto the quilt.  They are beautiful.  The resulting quilt is beautiful.

But, I think my own obsession stemmed from Rhea Butler’s quilt from MATERIAL OBSESSIONS–hanging in Alewives.  And somehow I did not take a picture of the whole quilt.

Kite Block book

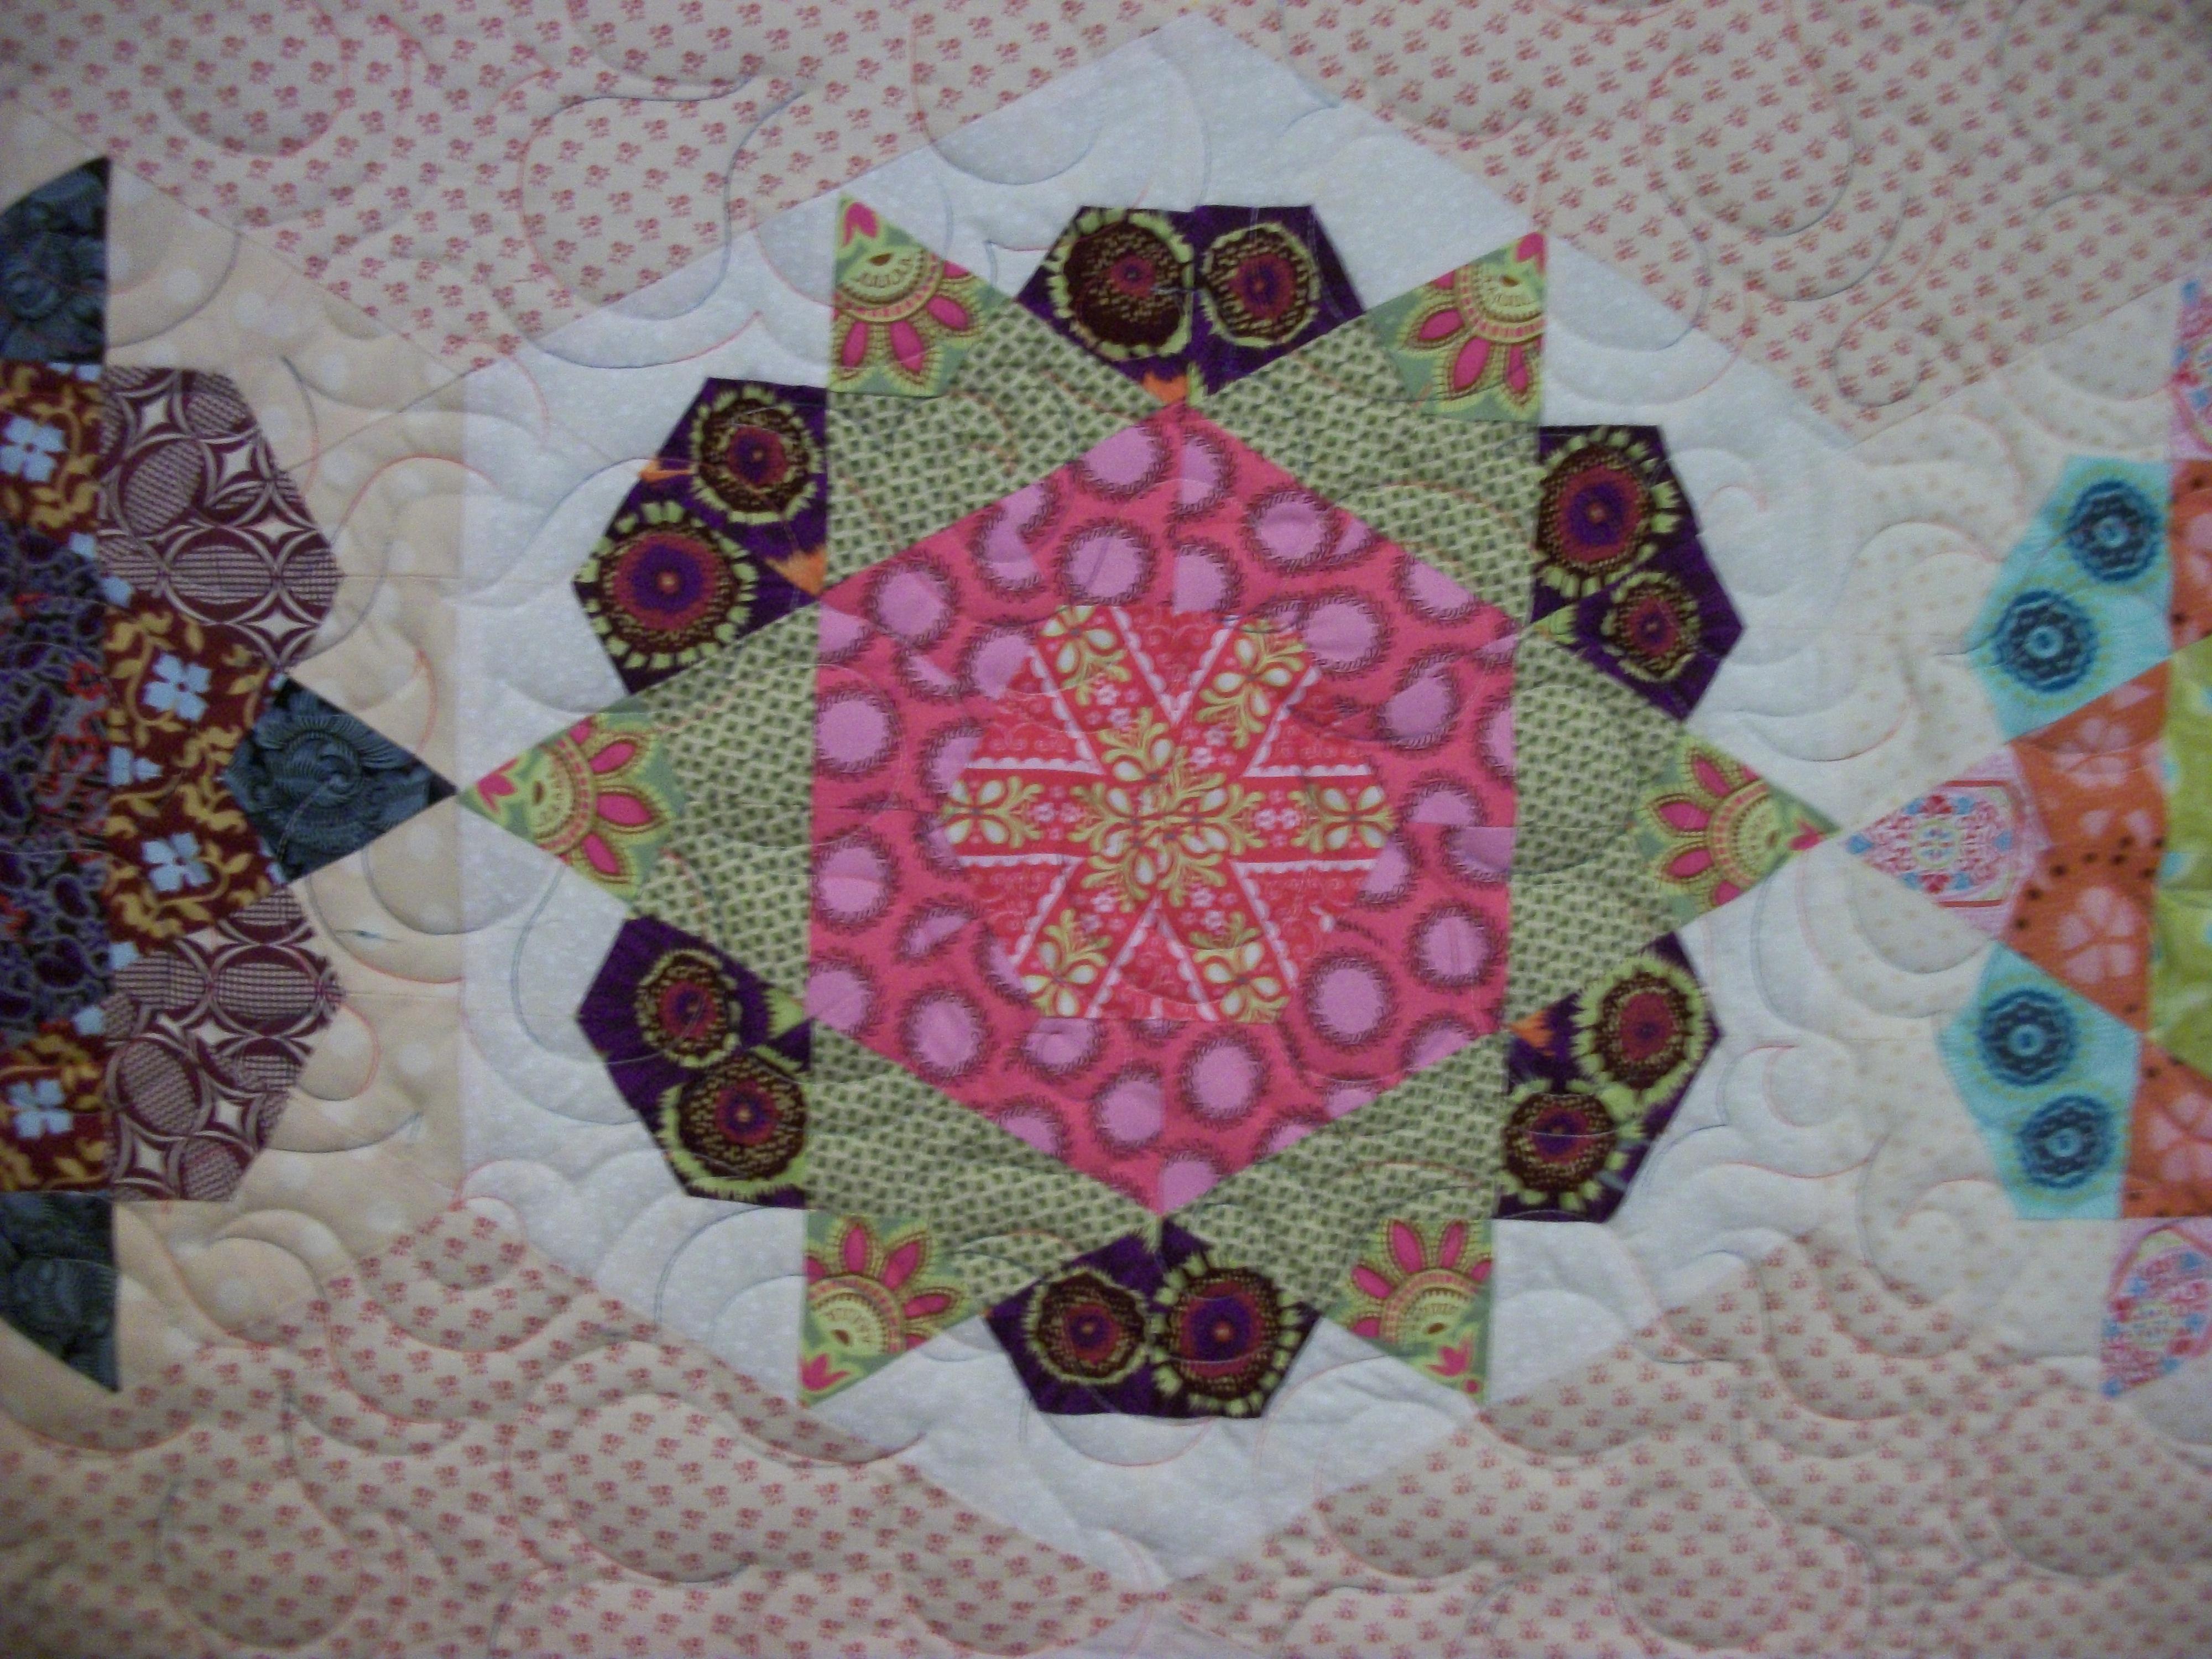
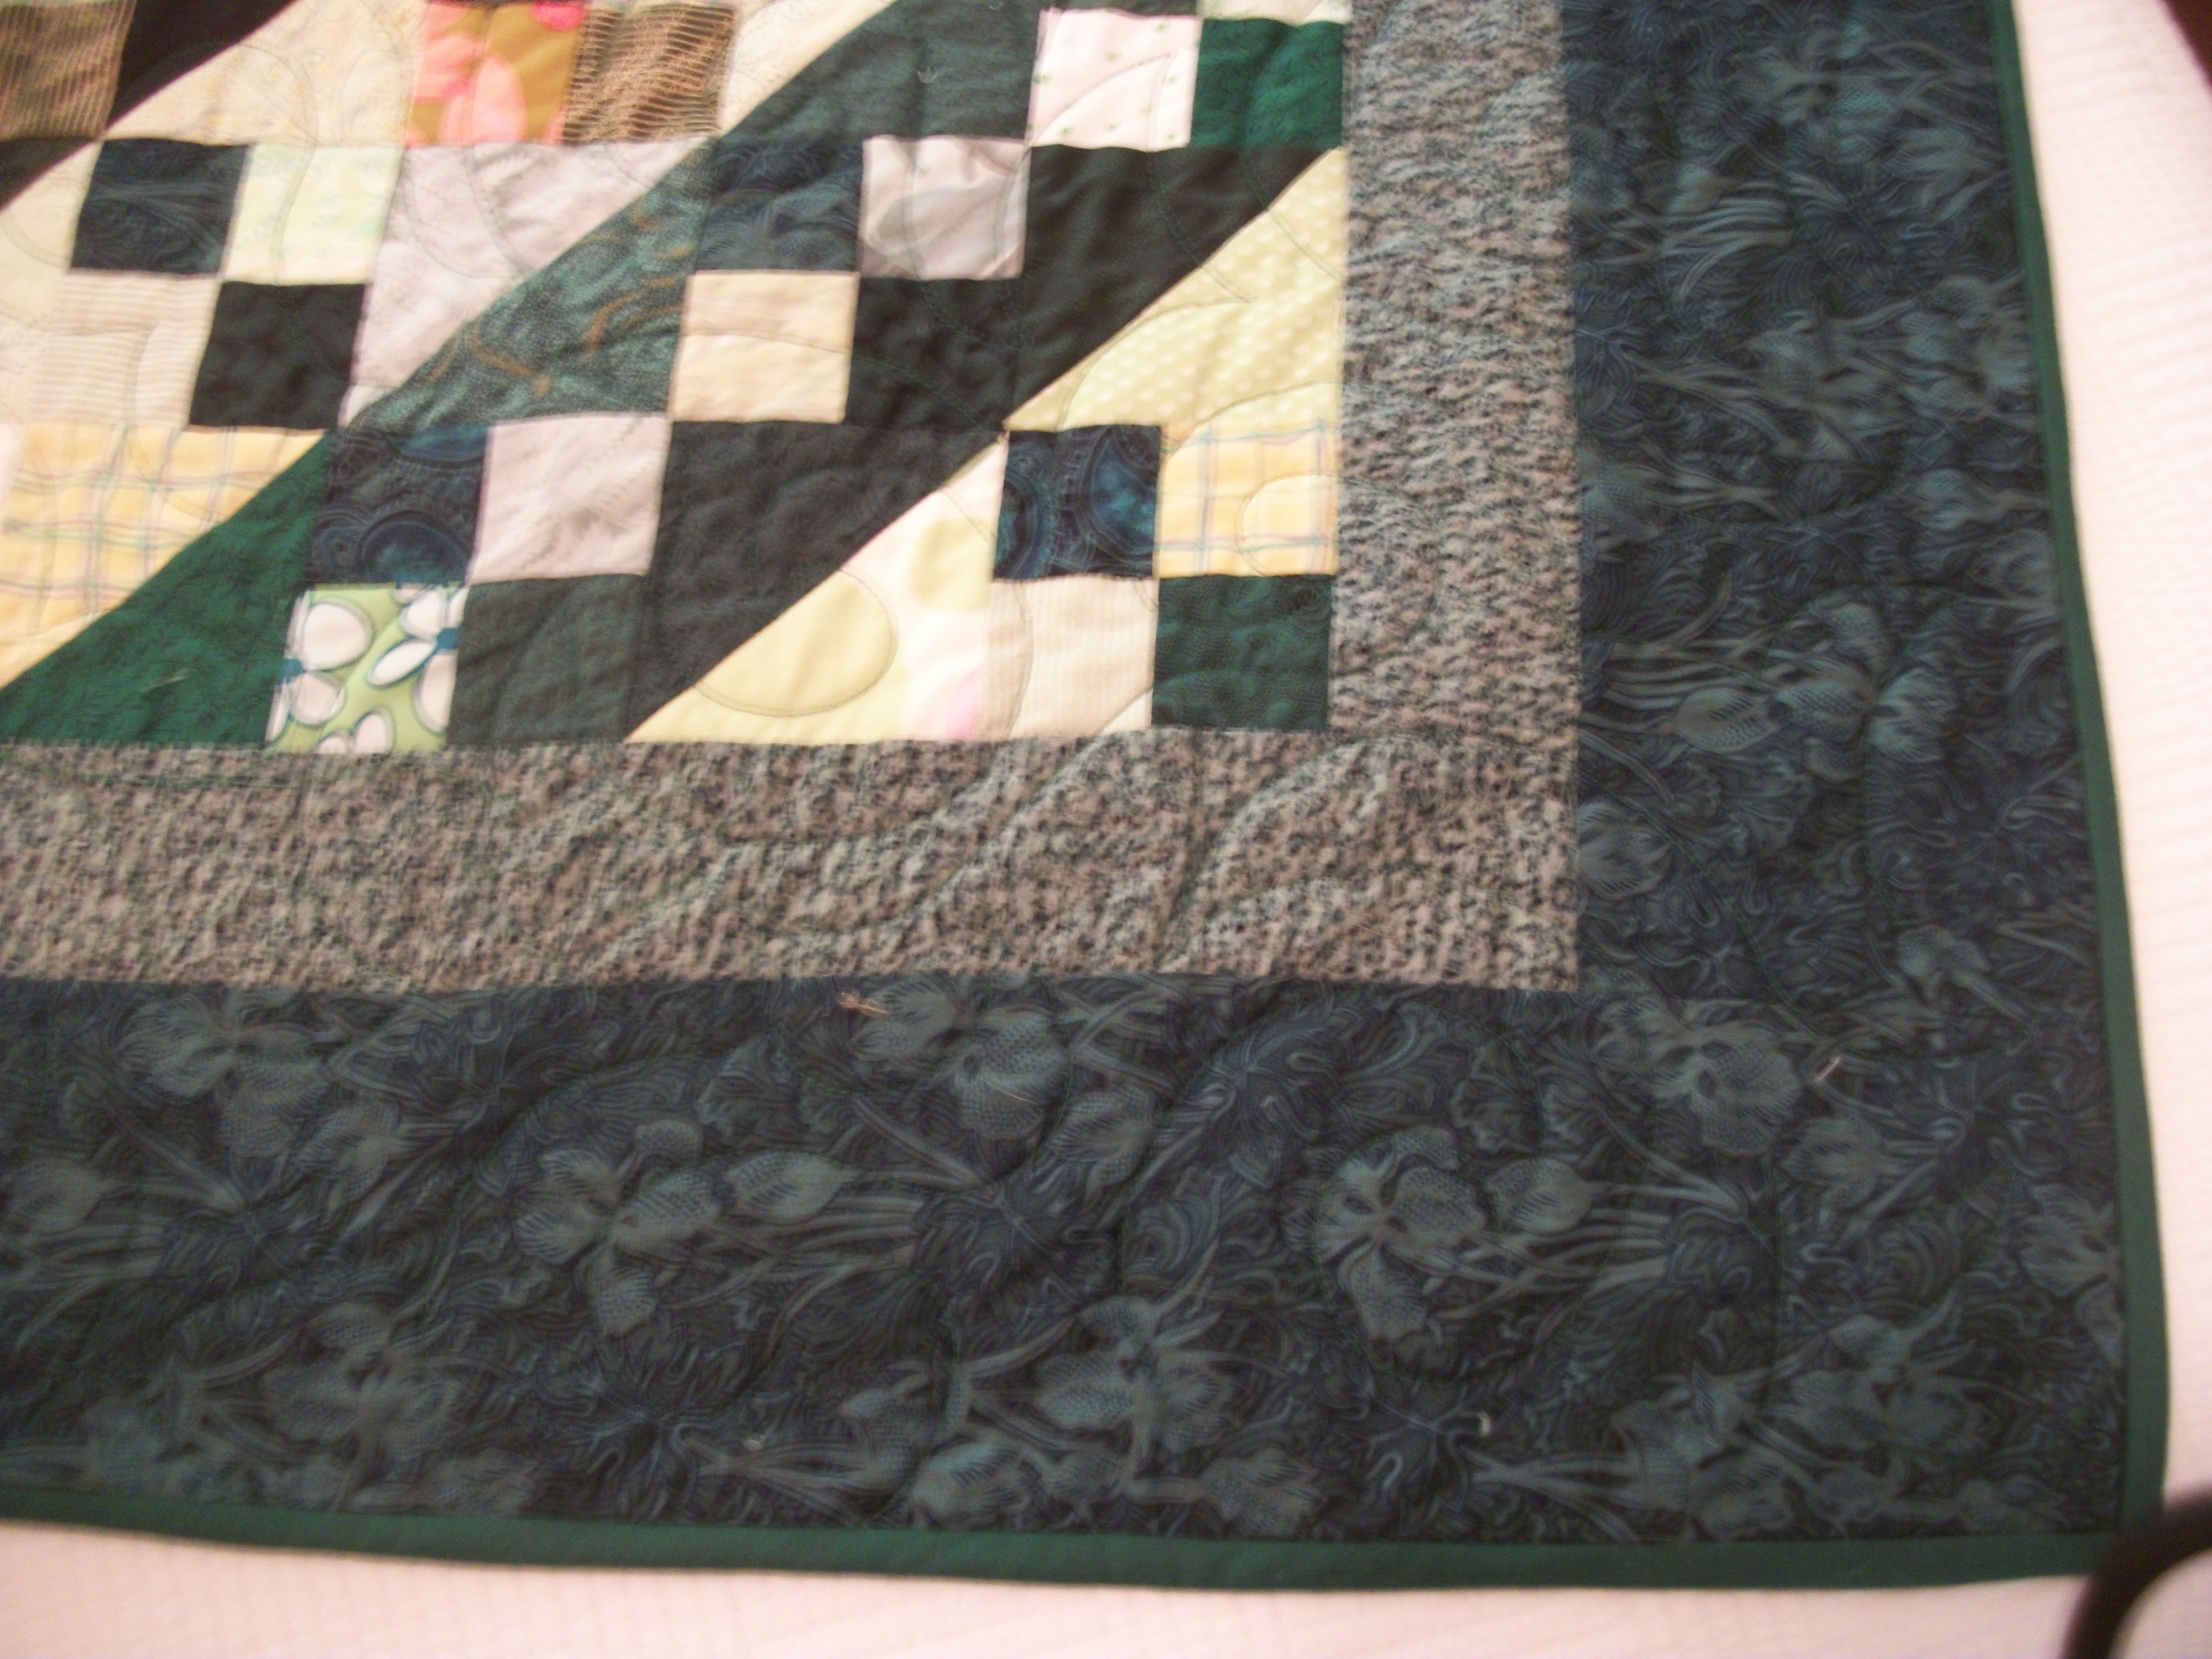
That quilt is made of large hexies–all constructed from a kite-shape (a quadrilateral) that when combined forms a hexie.

Here are some examples of those bigger blocks.  You can see the “kite” in the dark, outer prints with circles–it takes two “kites” to form that dark patch.  The outer neutral fabric is also made of the “kite” shape.  The red dotted fabric is used to link a line of blocks together–it’s a large diamond shape.

Kite Template block

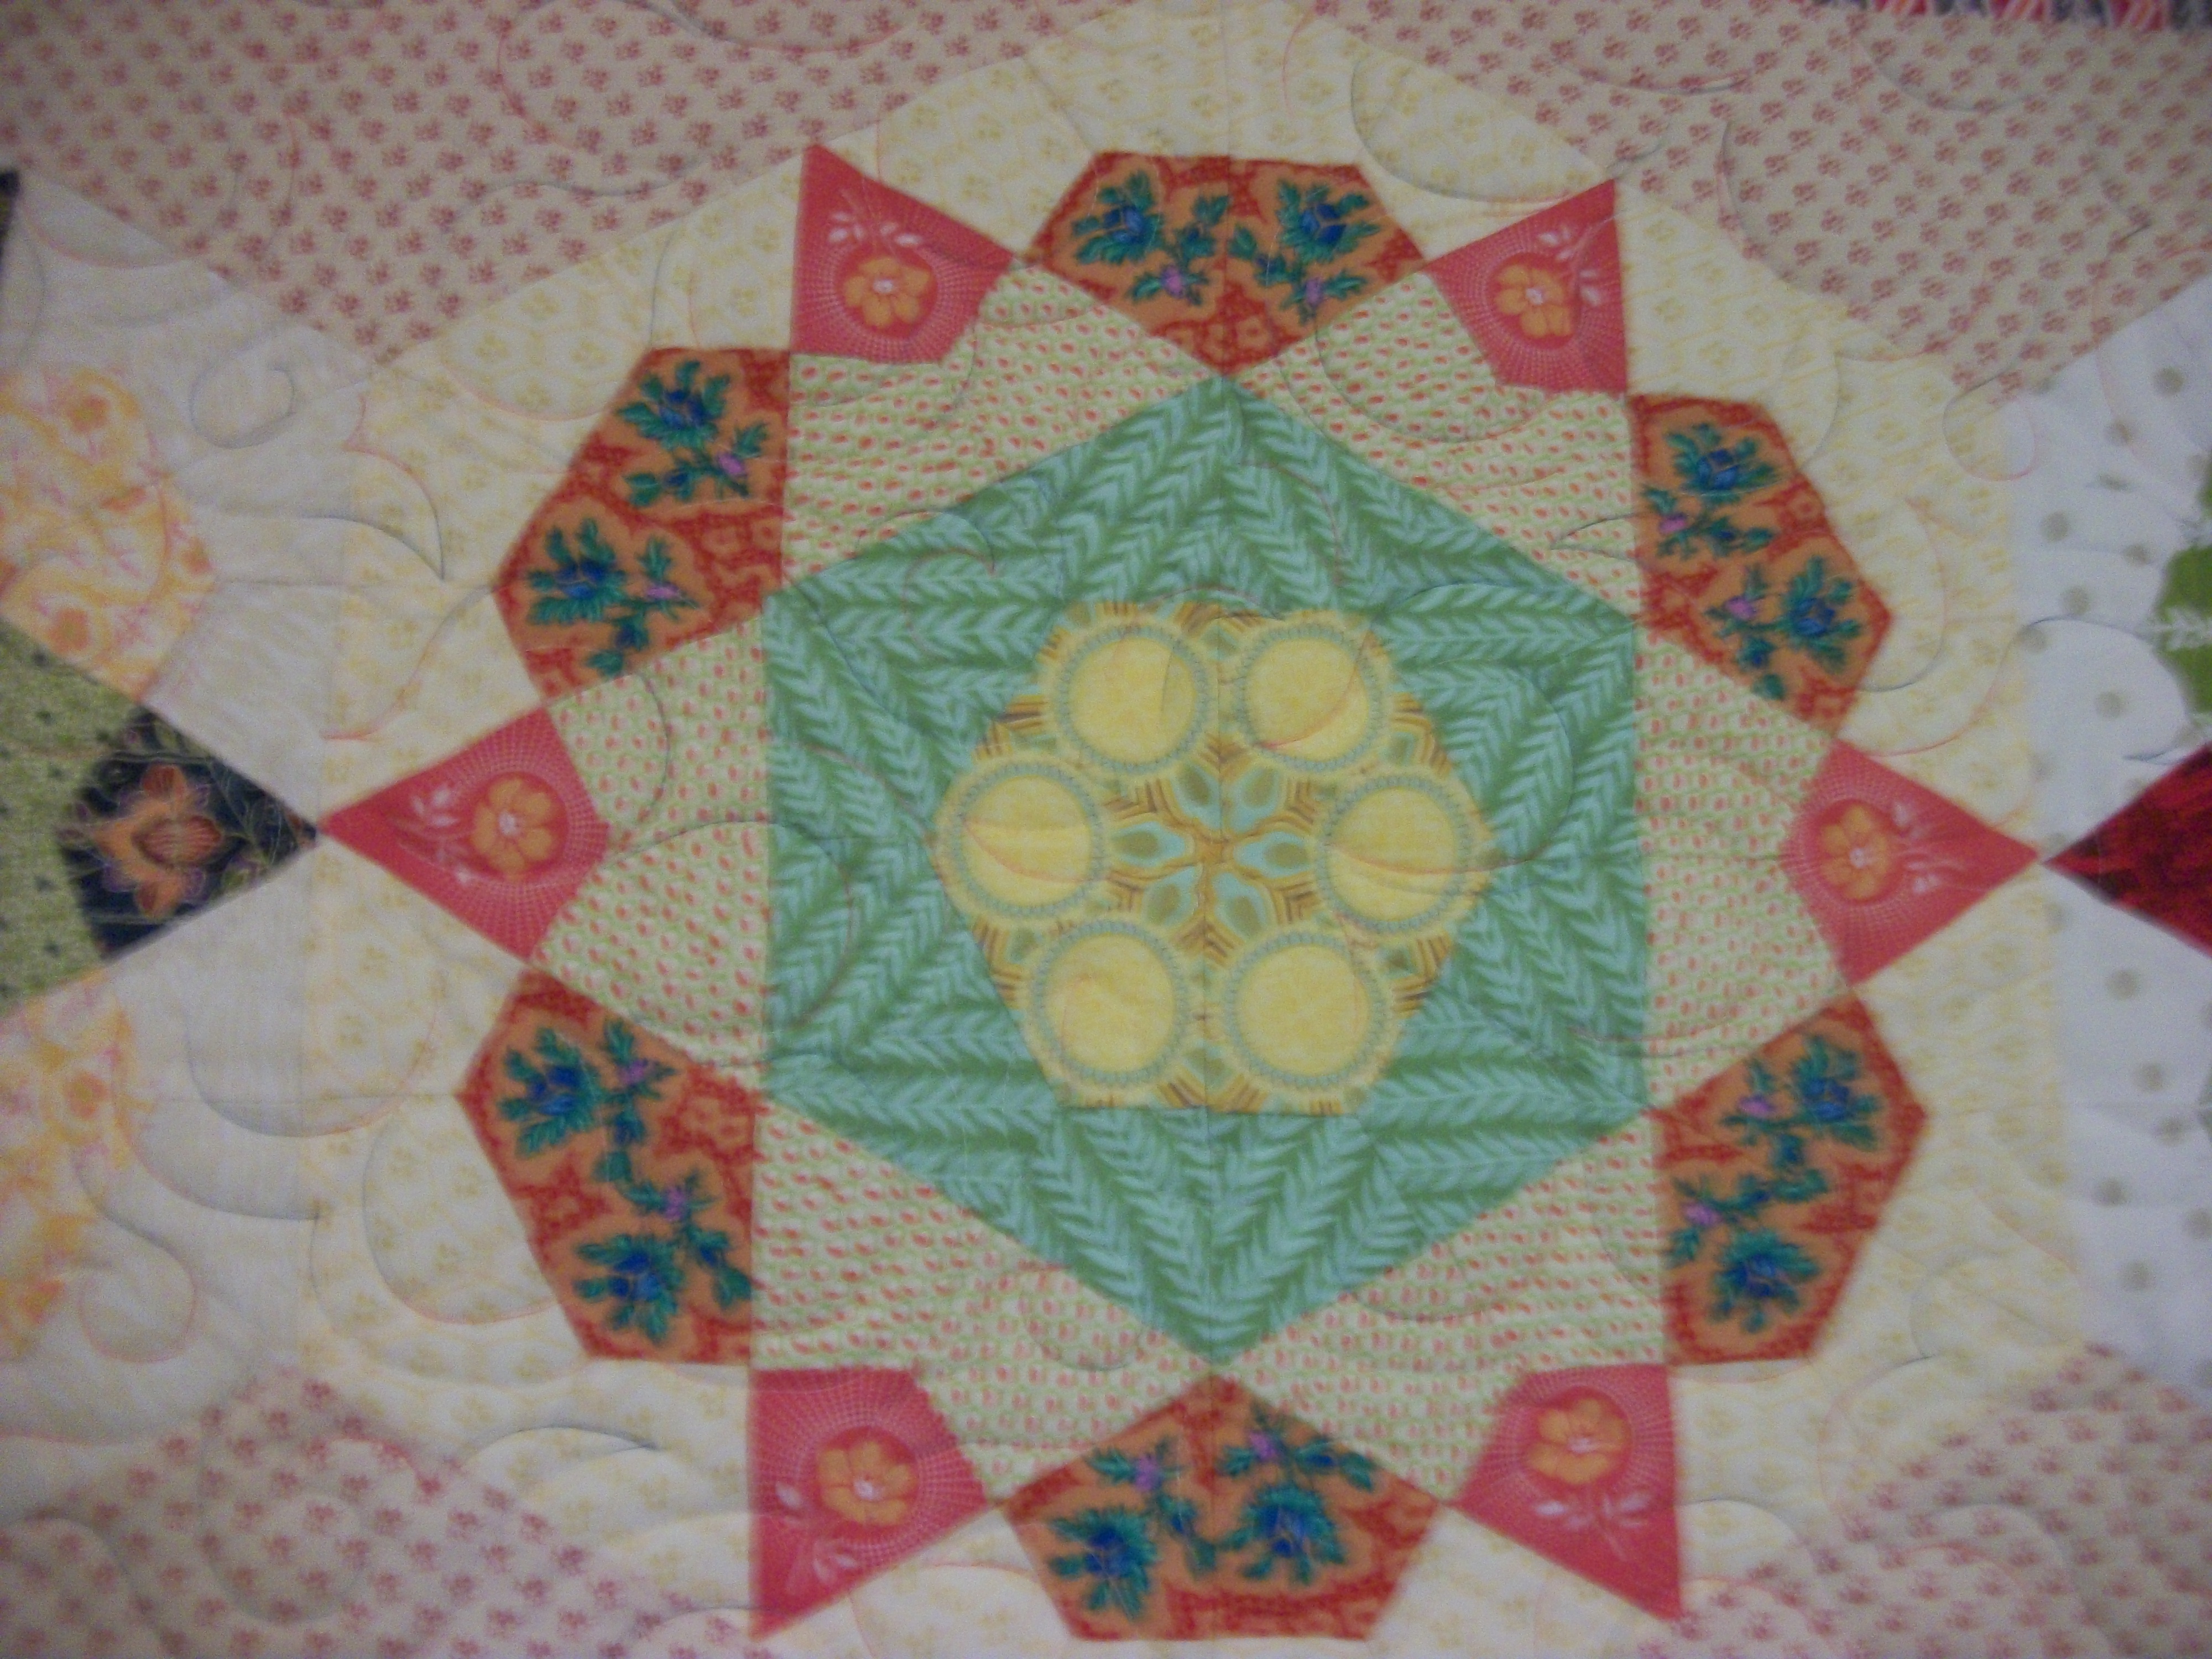
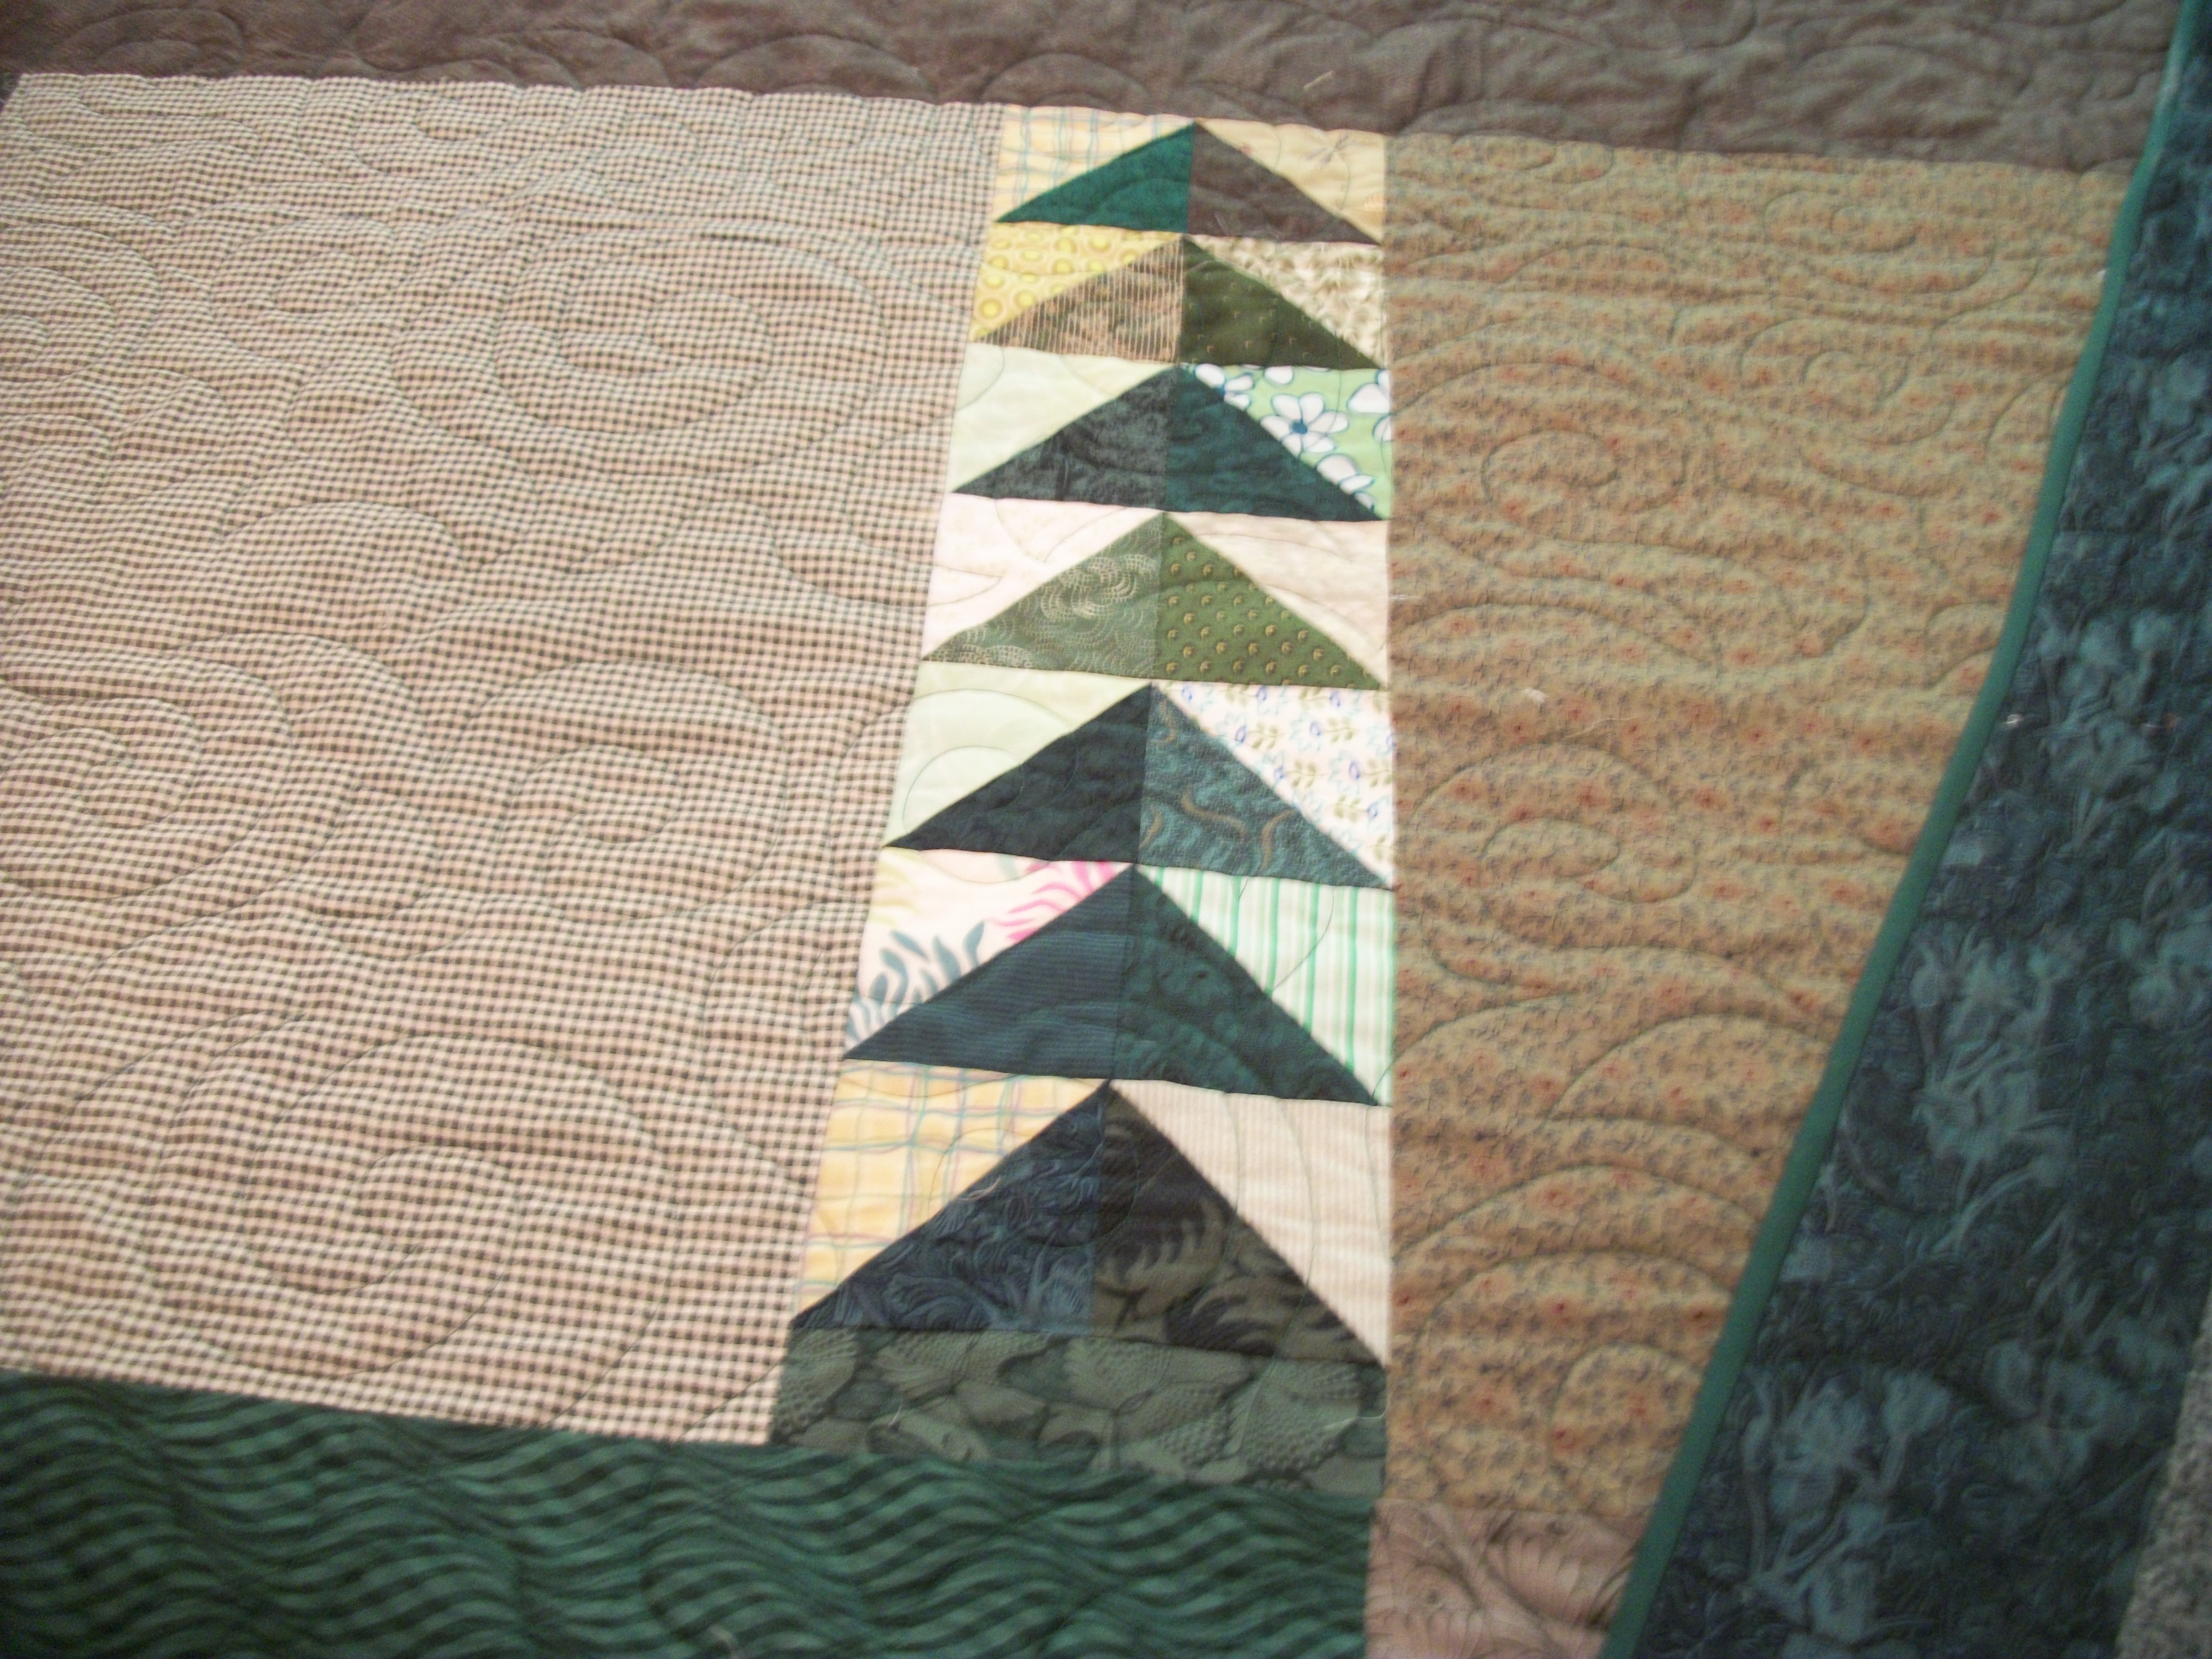
And, here hyou can see the kite shape a bit better:

Kite block 2

These big hexies are joined with interesting geometric shapes and lavish, BIG borders from contemporary fabrics.

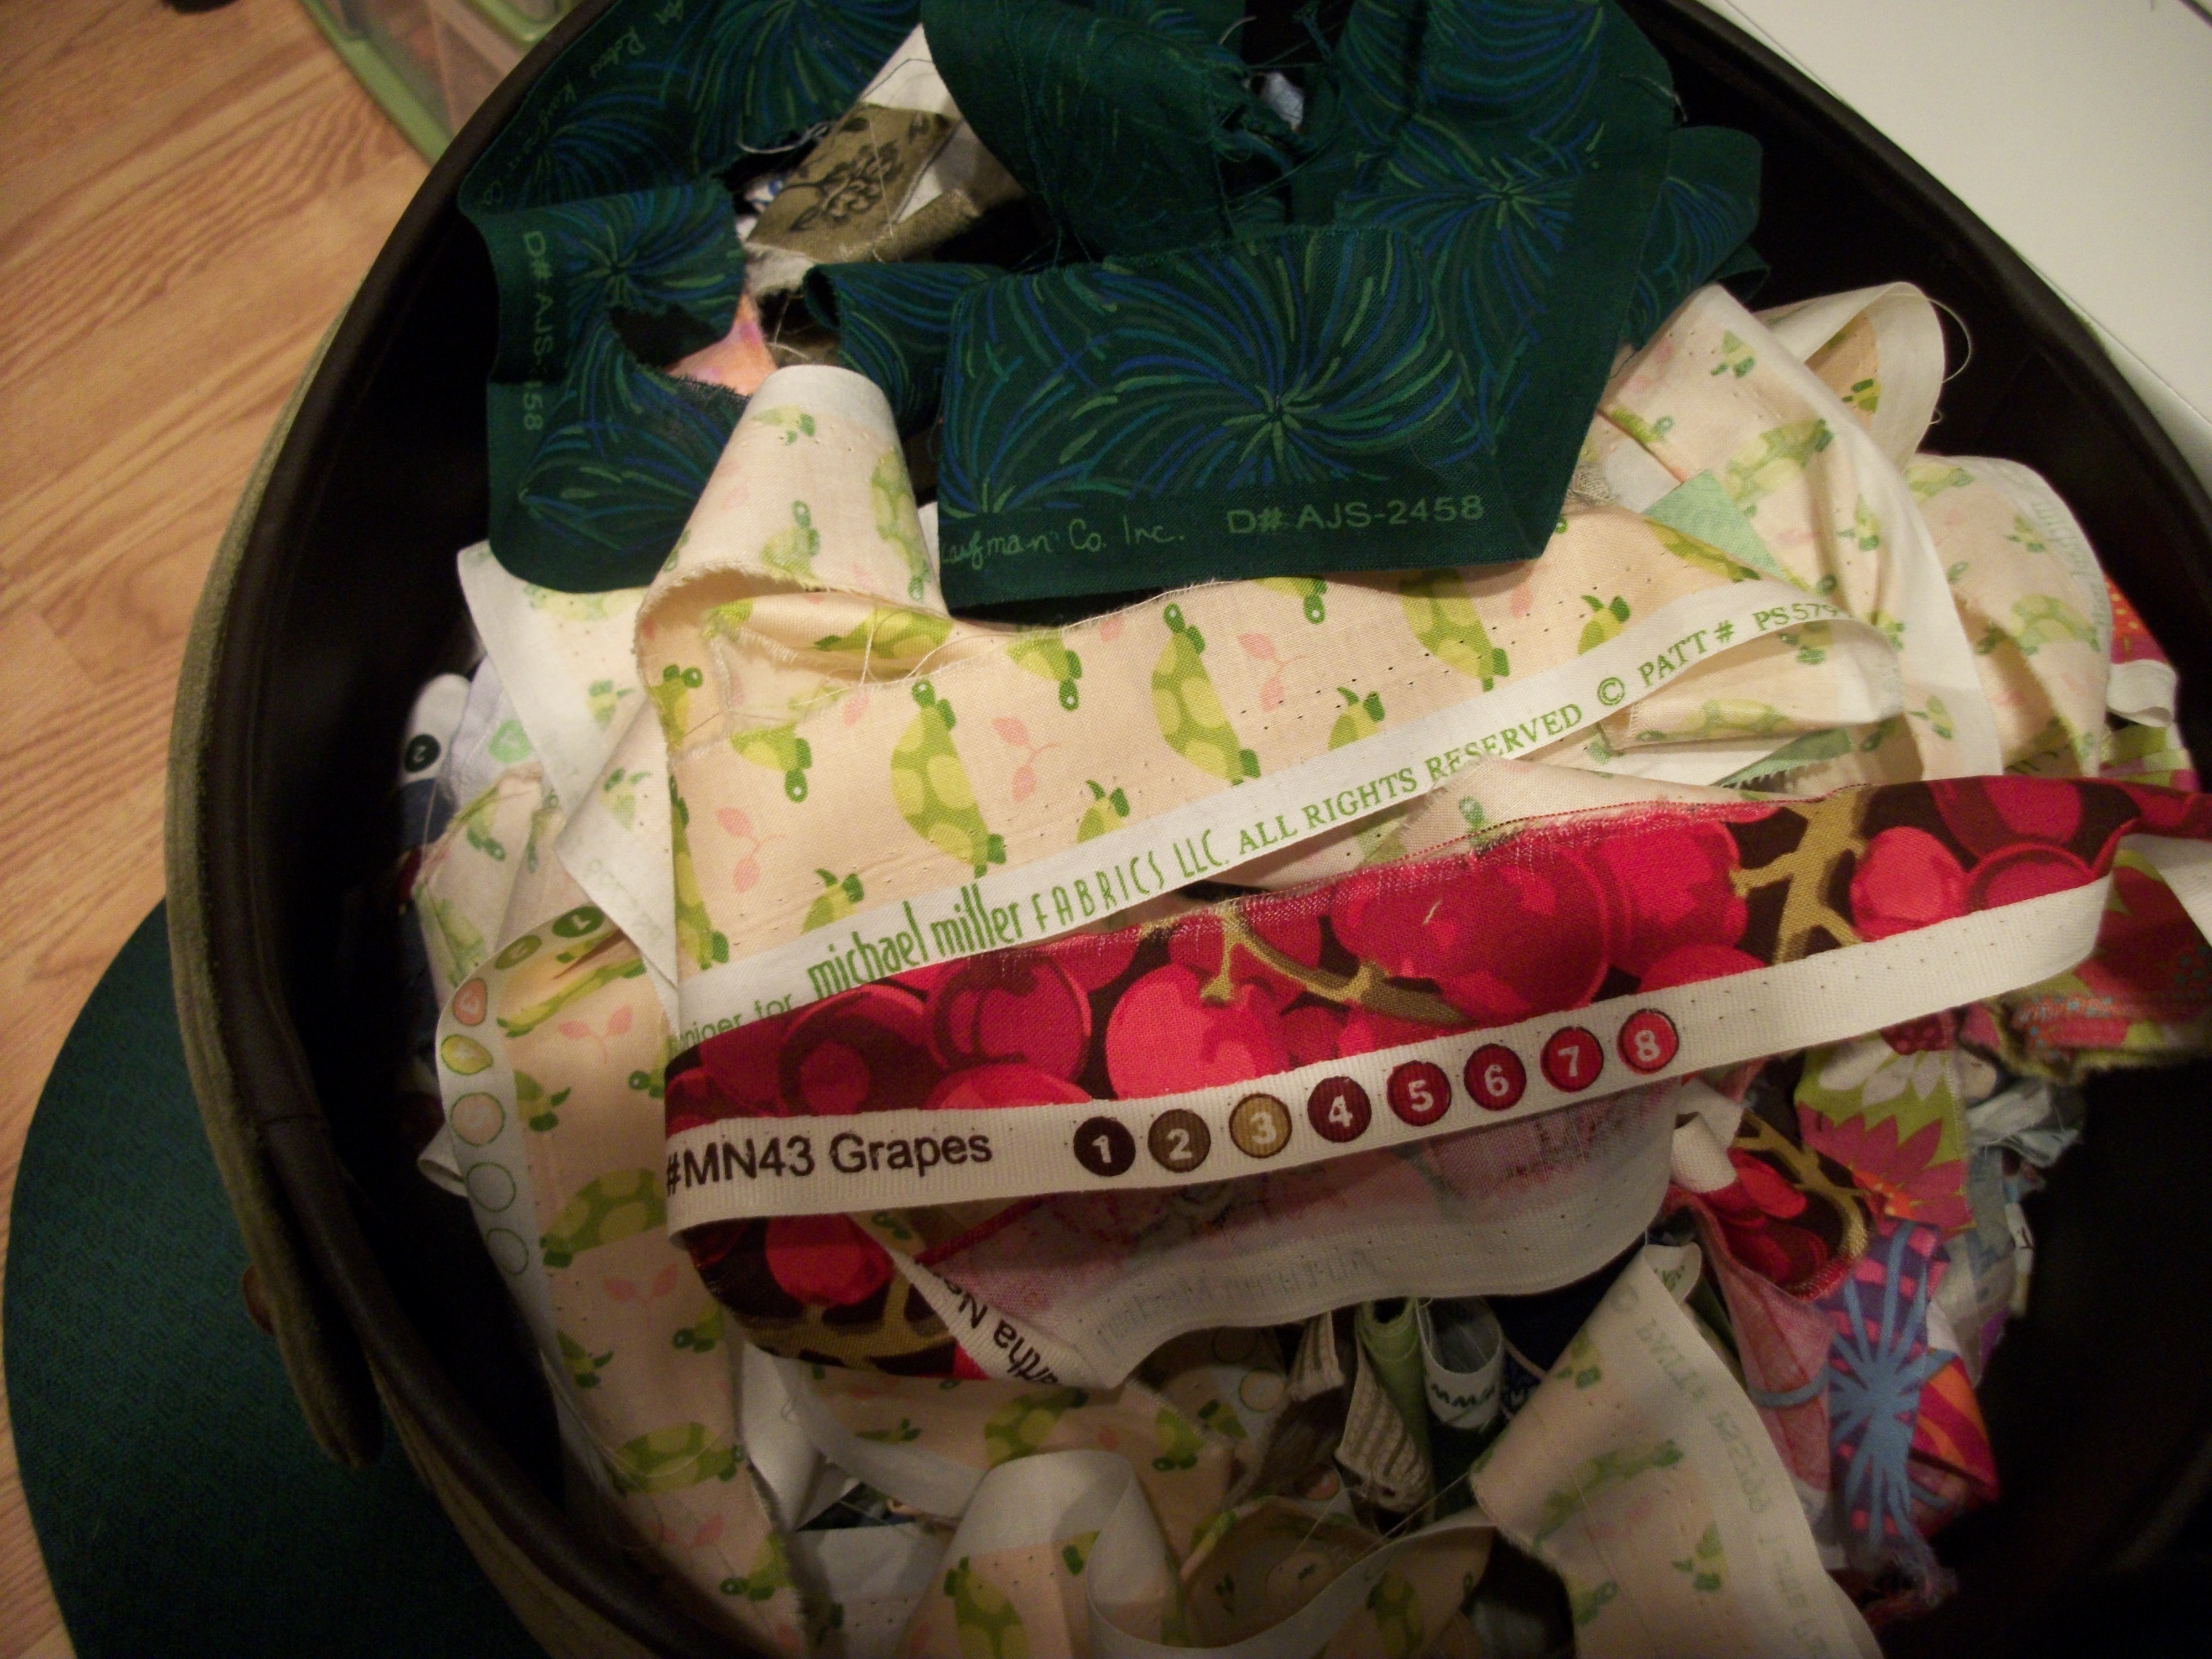
Here’s fabric for my first try at these blocks–and you can see the kite template.  The dark fabric will be used on the outer ring.  I suspect the peach fabric will form the inner ring.

Kite Block fabrics

I was going to do these by hand, but Rhea says they sew well on the machine, too.  So, I’ll play around.

BUT, if I’m not going to hand-sew these, what is going to occupy my fingers?

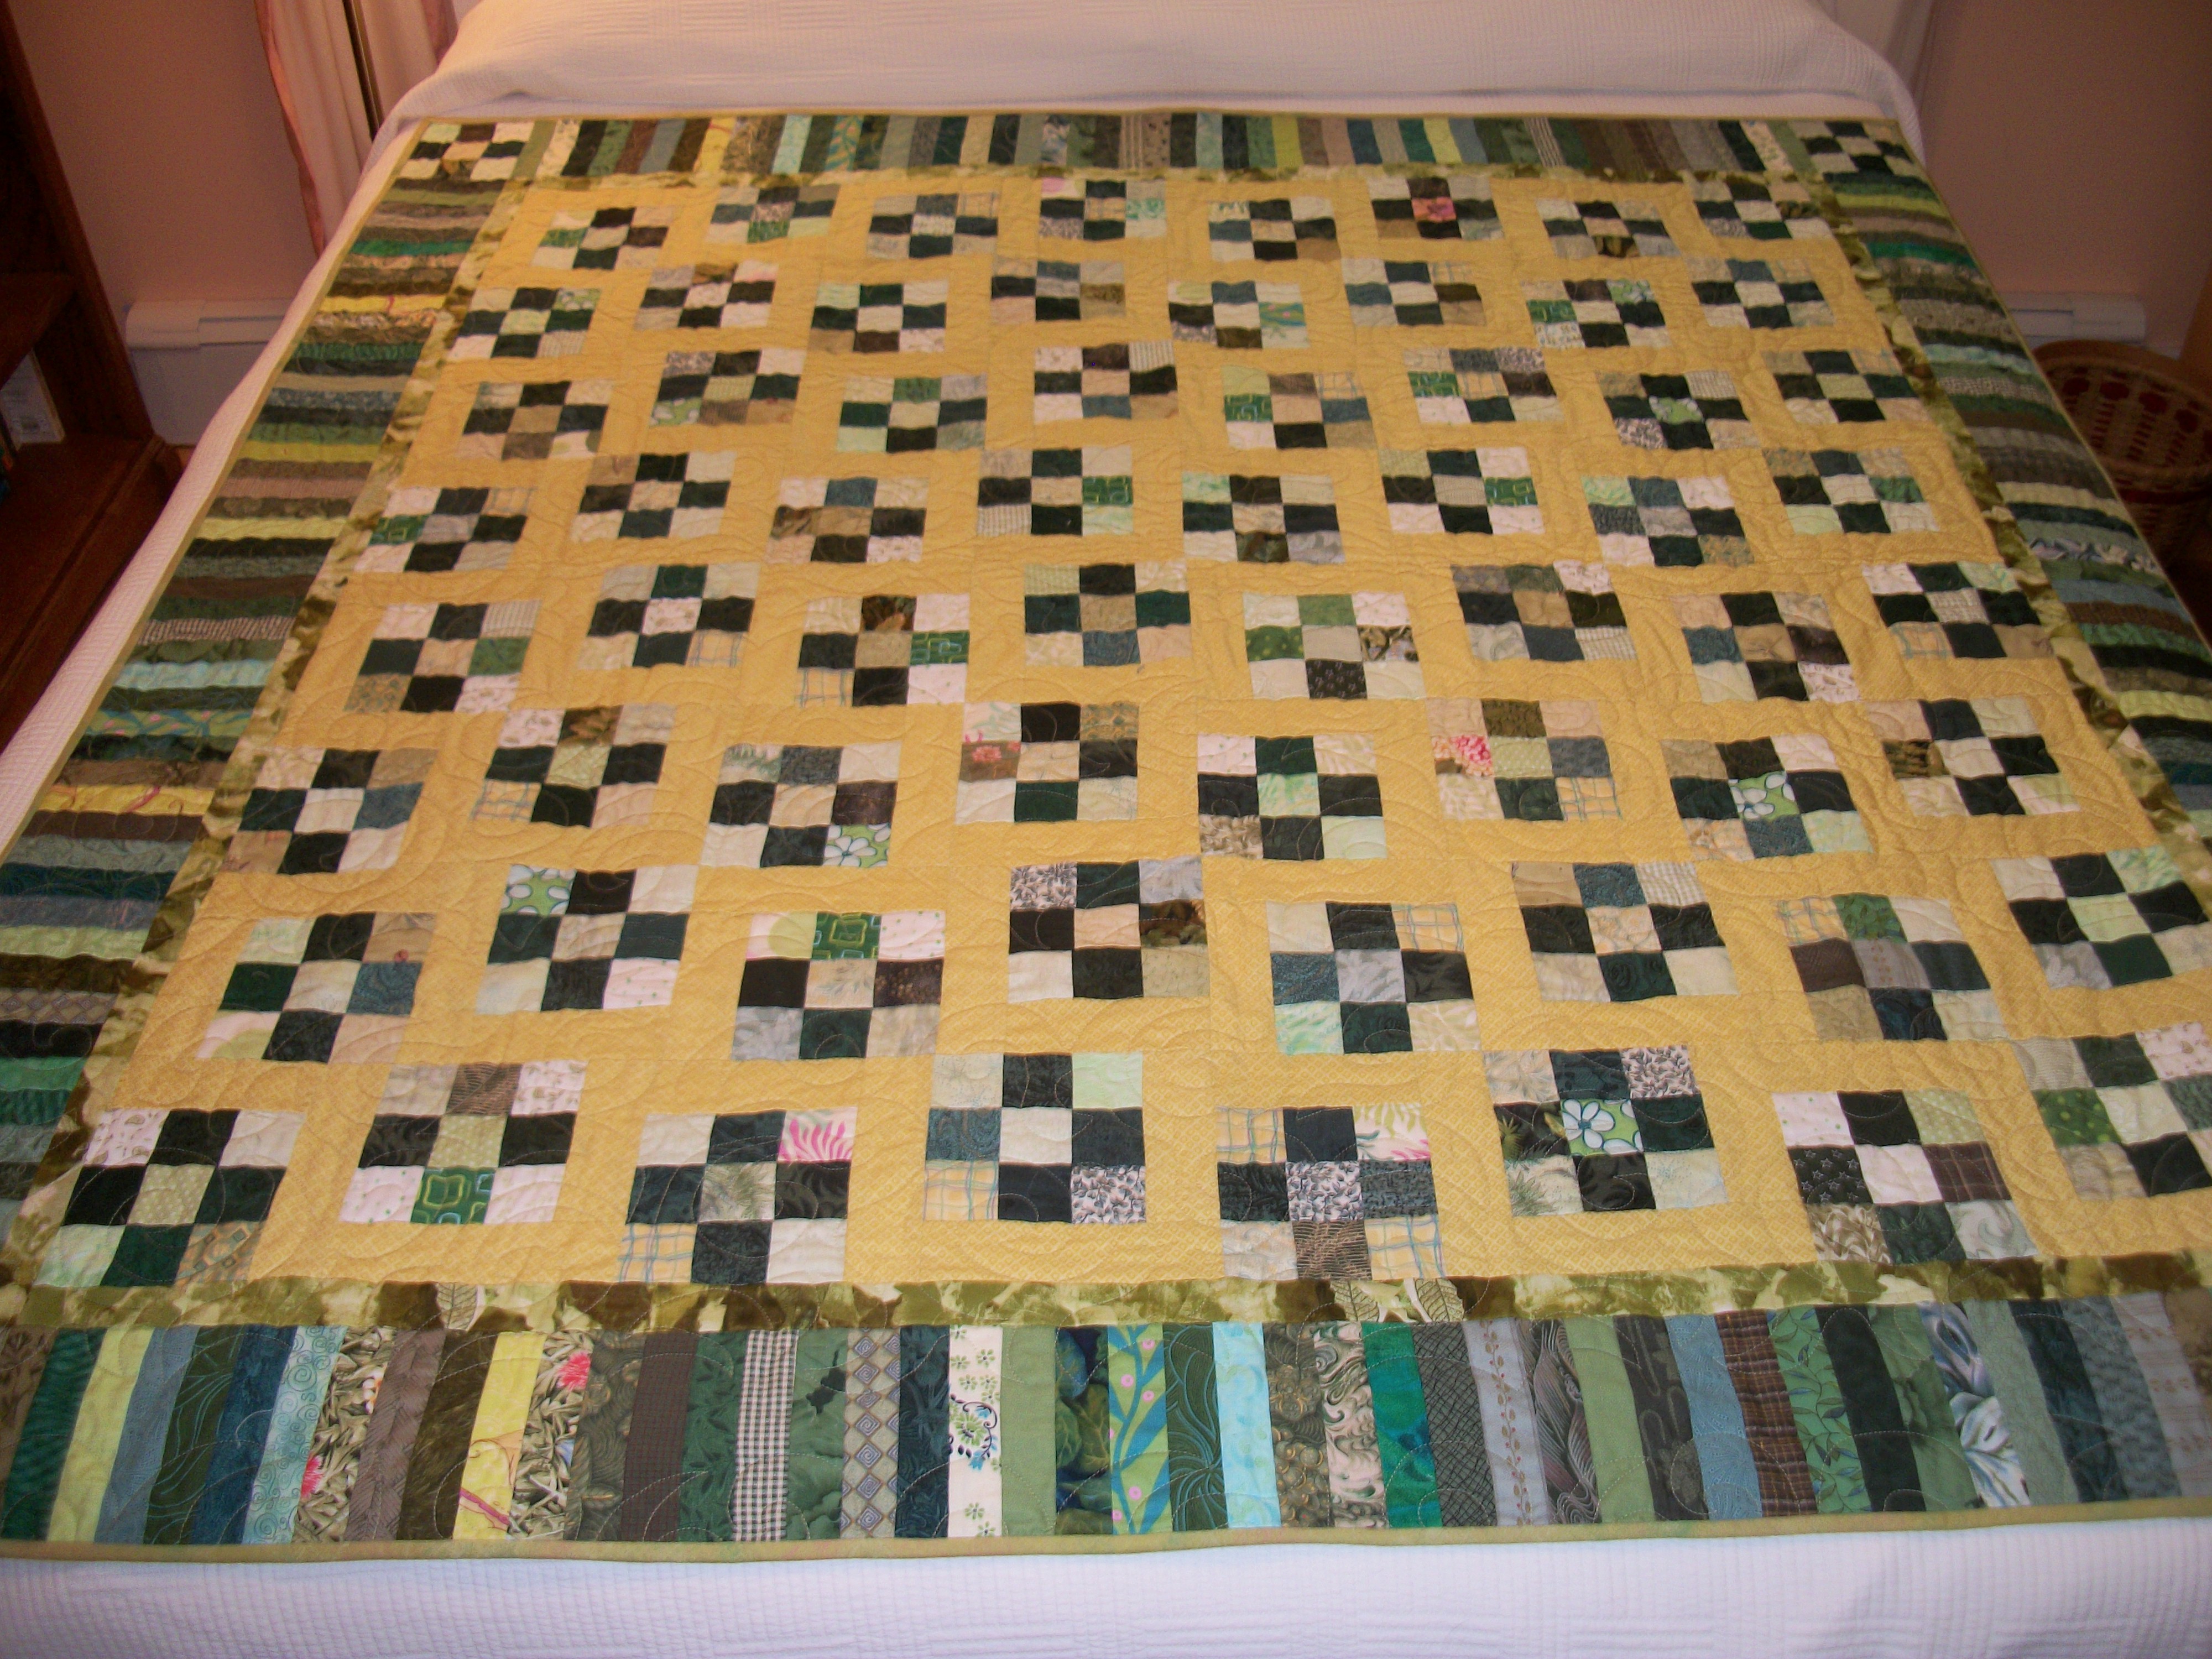
This project I suspect:

Take a hexie and pull out the sides, and you get a “honeycomb” hexie.  And back in the day in England, a woman named Lucy Boston used that shape to construct the most amazing quilts.  Rhea Butler was already playing with this honeycomb hexie when I saw her last.

Here’s the book, done by Linda Franz, and a packet of honeycomb papers.  One varies the block by varying the fabric color within the block.

Honeycomb blocks

Whatever I do I’ll pull from the stash.

So, on to Leah Day’s excellent video.

Turkey Tracks: “Sunshine and Shadows” Quilt

Turkey Tracks:  August 23, 2013

Sunshine and Shadows Quilt

I’m addicted to my scrappy project–Louisa Enright’s Scrappy Project–and have been for the past two years.  I’m determined to use my stash and to get it into some sort of useable condition.

As part of my addiction to scrappy quilting, I had started saving Bonnie Hunter’s columns in Quiltmaker magazine.  One of my earlier quilts–Spinner–pictured on this blog I’m sure–came from one of Bonnie’s columns.

Then our state quilt guild hosted two workshops by Bonnie Hunter–and that coincided with my getting her book on “leaders and enders”–and then getting ALL the books (she’s a genius with scrappy quilt design)–then finding her blog (quiltville.com), all her free patterns (more genius), her Facebook page, and QuiltCam, where she sews and talks to those who have put aside the time to sew and visit with her.   That led to the quilt “Green Camden Hills Beauty”–a green version of her “Blue Ridge Beauty”–which is in one of the books and which I also found in my “ideas” file when I cleaned it out recently.

On several QuiltCams this spring, Bonnie worked on two quilts for two family babies that she called “Dancing Nines” because the nine-patch blocks are offset so they “dance.”  She used old shirting materials from these babies grandfathers’ old shirts.  I had a whole bunch of “leader/ender” four-patch green blocks from working with my green stash–so they were easy to make into nine-patches.

And, here’s “Sunshine and Shadows”–a Bonnie Hunter “Dancing Nine” quilt.

Note that the sashing fabric is NOT yellow, but a green/yellow that blends beautifully with the blocks.  I love the piano key border.  And it’s a bit different in size than Bonnie’s since I was using strips that I had already cut.

Sunshine and Shadows quilted

The narrow inner border also works best with this quilt.  I had this perfect fabric in my stash, but it was TERRIBLE in a wider version.  I should have trusted Bonnie’s eye to begin with.

Here’s another view–but that sashing still looks yellow…

Sunshine and Shadows quilted 2

Like Bonnie, I used the pantograph “Deb’s Swirls”–but I can’t tell if Bonnie used the small or medium version.  I have both the medium and the large and have been using both a lot.  I think it’s funny that I had it already when Bonnie mentioned it…

Sunshine and Shadows blocks quilted

Here’s a close-up of the inner border:


Sunshine and Shadows top 2

And one of the binding and backing–the backing is like our forests in spring–all greens and yellow and golds.  It works really well with the front.

Sunshine and Shadows binding and backing

This quilt is so versatile.  It’s a great scrappy project with a lot of visual interest.  It can be made large or small, bright, dull, contemporary, sweet, bold, whimsical, and on and on.  I know I’ll be making it again.

Best of all, the only thing I had to buy for this quilt was the backing.  And I could have pieced a back, but since the quilt was smaller, and meant for a baby I know, I thought one piece of fabric would be best.

Turkey Tracks: Green Turtles Quilt

Turkey Tracks:  August 13, 2013

“Green Turtles” Quilt


Just before Mike and my grandsons came in mid-July, I mailed my newest granddaughter, Cyanna Mel Enright, her baby quilt.

Called, “Green Turtles,” the pattern is from People, Places, and Quilts in Summerville, SC, which is just west of Charleston, SC.  They call the pattern “Happy Turtles”–and they are.

I hand appliqued the turtles and used scrappy fabrics for the borders.  I quilted with “Deb’s Swirls”–the medium version.


Green Turtles

In choosing scraps from my stash, I was reminded of other quilting projects.  Carrie and Fiona–you’ll see the pink plaid from Fiona’s baby quilt.  The stripe is from a purse project with Karen Johnson of The Community School.  Lucy Howser Stevens, one turtle is wearing the backing to your quilt of last year–the daisy floral on acid green.  There’s a fabric in here from my very first quilt, which went to JJ Viarella, who is now entering high school!!!  It’s the green on the bottom row, far right.  There is a blueberry fabric from my oldest grandchild’s baby quilt–Bowen Enright, who will be 10 in a few weeks.  And a green and pink floral/leaf that backed my niece’s quilt of last year–Mary Chandler Philpott.  And on it goes…

Here are some of the blocks:

Green Turtle block Green Turtle block 3

Green Turtle block 2

I love Bonnie Hunter’s method of putting on a label.  If you haven’t yet found Bonnie’s web site and blog, it’s http://quiltville.com.  She does a daily entry most days and highlights the work of her students all around the country–so sign up for her FB page as well.

The green turtle fabric came from People, Places, and Quilts on my April trip this year.   It seemed really fitting to find this fabric at the store that made the pattern.  The plain pink binding also came from my stash.

Green Turtles label

Here’s how the corner borders worked out.  I love the green and blue polka dot border.

Green Turtles borders

Here’s the backing and binding on the quilt top.

Green Turtles backing and binding

It’s a cute quilt, and I enjoyed the hand work.

Turkey Tracks: Green Camden Hills Beauty: Thanks Bonnie Hunter

Turkey Tracks:  July 13, 2013

Green Camden Hills Beauty:  Thanks Bonnie Hunter

Look at this beauty!

I think it’s one of the prettiest quilts I’ve ever made and its ALL from my green stash.

I saw Bonnie Hunter’s “Blue Ridge Beauty” in her ADVENTURES WITH LEADERS AND ENDERS and started piecing four-patch light and dark green patches as a “leader and ender” project fed into the machine when I needed to remove blocks from another project I was working on–that way, you never break your sewing thread and are working on two projects at once.  (You can read more about this method on Bonnie’s web page, www.quiltville.com.  You can get to her blog from the main site if you want to–and I have to say I love getting her posts.)

Green Camden Hills Beauty, 2

Of course, I had to piece some of the half-square triangles just to see how the block looked.  And then I had to see how multiple blocks were going to look.  Soon, I was piecing this quilt and NOT working on my original project.  I became, quickly, obsessed with this quilt.  And of course, I needed to sprinkle in some blocks that had green, yes, but also had some orange, some pink, and some blue.  They effect is very pleasing, as if there are polka dots scattered across the top.

It’s a BIG quilt–easily king size–and I didn’t make it quite as long as Bonnie did.  She took the pattern down one more row for the length.  I could make the quilt this wide since son Bryan helped me put four more feet into my long-arm–so now I have the full 12 feet.

Green Camden Hills Beauty

Here’s a close-up for you.  I quilted it with “Deb’s Swirls” in the big version.  (I smiled when I saw that Bonnie Hunter was also using this pantograph on her “Dancing Nines” project.)  I’ve later also gotten the medium version for smaller quilts.  It’s a very nice all-over swirling pattern.  I used a dark teal thread, which is pleasing to the eye I think.  We have such dark greens in our forests and on the hillsides in the spring–all mixed up with every shade of green imaginable.

Green Camden Hills Beauty blocks

Here’s a close-up of the border and a corner–that greenish stone-looking fabric has been hanging around my stash for years.  It’s PERFECT in this spot–echoing all our granite and rocky ledges on the Camden Hills–which are very old  mountains.

Green Camden Hills Borders

The back is all taken from my stash–which used up yards and yards of, again, green fabrics hanging around without a purpose.  I mixed in some orphan blocks that were going nowhere–and it all works really well for a scrappy quilts.  That saved me probably $80.  Or, used $80 that I’d already spent–however you want to think about it.  This backing works well for this scrappy quilt.

Green Camden Hills Beauty back

I pieced a line of the three-inch half-square triangle blocks to see what they might look like in a bar quilt.  They’re nice–and I might have gone that direction a year ago.  But after finding Bonnie Hunter’s work, I know there is a more complicated, complex way to use those blocks.  I’m piecing more of them as a leader ender project now…

Green Camden Hills Beauty back detail

This project has been so much fun for me!  And I really love this quilt.

Turkey Tracks: Refreshing Water!

Turkey Tracks:  June 30, 2013

Refreshing Water!

I follow Bonnie Hunter’s blog.  She’s an amazing quilter who specializes in scrappy quilts with an eye toward using up your quilting stash, finding cotton materials to reuse–as in cutting up cotton shirts–and using vintage sewing machines.  Periodically she holds “Quilt Cam” where she mounts a camera in her basement sewing room and as she sews, shows viewers what she is doing, and chats with them online.  She is sharing her own sewing time and urging those of us who can to join her in a sewing session.  When I can’t make a current Quilt Cam with her, I always replay her archived sessions and sew along in that way.

On a recent Quilt Cam, a friend of hers had just visited and made “the most refreshing water.”  Bonnie lives in North Carolina when she isn’t traveling and teaching, so it gets HOT and one gets THIRSTY.

The water is simple and absolutely delicious.  Take a gallon jar, slice a lime really thin, slice a cucumber really thin, throw in a handful of mint (especially if you have it in your yard as I do), fill the jar with water, and refrigerate it overnight.

Delicious!

This picture isn’t great, but you can see what mine looked like before I drank half of it.


Refreshing water

You can keep adding water until the lovely light taste is gone.  Then start over.

Cucumber juice is supposed to be really healthy.  But I don’t see why one couldn’t try other citrus and herb mixtures.  Orange with what?  Thyme?  Basil?  Rosemary?  Lemon with…   Grapefruit with…

Thank you Bonnie and Bonnie’s friend!

Turkey Tracks: Play Quilting

Turkey Tracks:  January 15, 2013

Play Quilting

I’ve been working really hard on sorting through my quilting stash–all the fabrics a quilter starts to accumulate–and cutting up all the smaller pieces into useable, accessible strips, blocks, or rectangles.  Those of you who follow this blog know that getting my stash under control has been going on for over two years now.  It’s just way too easy to keep buying new fabric for a new quilt without using up leftovers from previous quilts.

I am now using Bonnie Hunter’s coping strategy of keeping only large pieces for the stash and processing everything else.  Out of the greens, I’ve already made a gorgeous green scrappy top and backing–using up a ton of fabric that was just sitting around.  That top is ready to go on the long-arm, so I’ll return to it here when I’ve finished it.  I LOVE it.  It’s a green version of Bonnie Hunter’s “Blue Ridge Beauty” that I’m calling “Green Camden Hills Beauty.”  You’ve seen pieces of this top in earlier posts, and Bonnie’s version is on her web site, quiltville.com.

So, the green part of the stash is under control–dare I say?  And, I’m making good headway on the blue now.  I had already been working at the blue fabrics over the past two years, but I’m astonished how much of it I still have.  So many small pieces that are just lying around doing nothing but taking up space.

Yesterday, I could see that I was close to finishing cutting up the blues, so I let myself “play” at the machine for two hours–jointly working on two different types of projects.  I made myself quit about 8 p.m. last night because I could have gone on and on…

First, in Bonnie Hunter’s system–which you can explore in her four books and on her excellent web site, quiltville.com–NOTHING gets wasted.  The small bits of fabric she calls “crumbs.”  She throws them into a basket and uses them to “make fabric.”  Here’s an example:

Making fabric

These 2 1/2 by 8 1/2 strips will make really cute borders on a quilt when I have enough of them.  Bonnie Hunter uses old paper–phone book paper is the best as its thin and easy to tear away–as a backing.  It’s so much easier and lighter than the muslin I had been using for string-pieced blocks.  You could also use used printed paper from your printer, though that is heavier.

This “making” of fabric is growing in popularity these days.  In addition to Bonnie Hunter’s work, you can see the fun of making and using fabric in OUT OF THE BOX WITH EASY BLOCKS:  FUN WITH FREE-FORM PIECING, Mary Lou Weidman and Melanie Bautista McFarland and 15 MINUTES OF PLAY:  IMPROVISATIONAL QUILTS, Victoria Findlay Wolfe.  Weidman and Wolfe both have blogs as well.

I had some string-pieced blocks left from projects last year and have been throwing strips into a basket for when I wanted to make more of them.  I had only been throwing in strips that were at least 1 1/2 inches.  BUT, after making the border strips above, I can see that strips just under 1 1/2 inches are useable in both the string-pieced blocks and with the crumbs.  Really, the clear 1 1/2 strips should go into a separate box to be used for, say, nine-patches with one-inch blocks.  Or, piano keys borders.

Here’s my string basket, which is getting alarmingly full:

Basket of strips

Only there is a twist:  I’ve been tearing away also selvages with writing or colored dots with a little extra fabric in the strip.  I LOVE writing in a quilt and have become more and more intrigued with thinking how one might use selvage edges that are interesting.  So, here are examples of the kind of strips sith writing and/or dots I’ve been saving:

Basket of strips 2

Here are two blocks I made yesterday, hanging with one I already had.  I was playing with using the strips with writing on them:

Strip Piecing 1

Here’s a close-up:

Strip Piecing 2

And what the blocks might look like if I put them on point with sashing between…

Strip Piecing 3

Bonnie Hunter has lots of ideas of how to combine blocks when you have enough of them.

Meanwhile, it was really fun to let myself have a little “play” time–even though I have a quilt loaded on to the long arm and the BIG green quilt ready to be long-arm quilted.

Turkey Tracks: Rainy Day!

Turkey Tracks:  May 20, 2013

Rainy Day!

Finally, a rainy day!

My apologies for not posting sooner, but I have been OUTSIDE for days in this glorious spring, putting the garden back into order.

I’ve been in a planting frenzy, actually, and have really needed this rainy day.  With the generous and kind help of David Hannan, many tasks have been completed:  putting up the chicken fence and the vegetable garden fence, bringing out all the outdoor furniture from the top of the garage, putting away the boarding walk, rebuilding the rock wall on the drive where the snow plow folks couldn’t see where the rocks were, bringing out all of the container pots (I think there are at least 25) and filling them with dirt and planting them, mulching, mowing, weeding, pruning, edging, seeding, and planting a now-shady bed with shade plants and, in the sunny part, an herb garden that I hope will be more permanent.

Electrician David Dodge came and fixed the back outdoor plug and installed a new plug at the front door–which will make mowing with an electric mower and a LONG cord much easier.  And once he showed me how to take out the prong-plug expensive halogen bulbs in an under-the-counter kitchen light, I got new bulbs and replaced them.  I’m afraid I had to touch the bulbs though–the oils from your fingers can make them blow–but they were too tiny and slippery to grip and get into the two out of four right holes.   Anyway, right now, it’s working.

I’ll take pictures soon.  Meanwhile, here’s how the green scrappy quilt is coming along.  I’ve been quilting in the late afternoon through the early evening, and that’s been so relaxing.  This quilt is a green copy of Bonnie Hunter’s “Blue Ridge Beauty,” in her book LEADERS AND ENDERS.   I’m calling my version “Camden Hills Beauty,” and right now, the trees on the Camden Hills are so fluffy and are so many greens that I know this quilt is well-named.  The block is a traditional Jacob’s Ladder block, but I love Bonnie’s method of combining color with neutrals.  I used light greens, but Bonnie uses true “neutrals” in her quilts and just mixes them all up.  I LOVE this quilt!

Camden Hills Beauty top taking shape

Here’s a close-up of some of the blocks.  You can see I’ve mixed in some color–bits of pink and orange.  I like the way they are working in the quilt.

Camden Hills Beauty blocks

I started sewing together rows in the last few days–and realized I need 14 rows, not 12!!!  So, it’s back to piecing more blocks.  But that’s ok as I’m really enjoying this project.  AND, my green stash is diminishing, diminishing–which is a lovely feeling of usefulness.

At night, in front of the tv, I’ve been appliqueing the “Green Turtles” quilt turtles for new granddaughter Cyanna.  I am on the eighth turtle–of nine.  So as soon as I get the Camden Hills quilt off the design wall, up will go the Green Turtles.  You can see some of the blocks on the left side of the first picture.

The 14 rows will mean the quilt will have the DARK line predominant, which is better visually I think.