Creative Food Leftovers

Part of my cooking that I love is creating fun and enticing dishes from leftovers.

When my SIL visited recently from Boston, we cooked a BIG boneless leg of lamb roast. Sure we could have eaten it all in a few days, but I didn’t want either of us to spend her limited time together with just lamb. So, I chopped up the “leftover” piece and froze the chunks–including the juice.

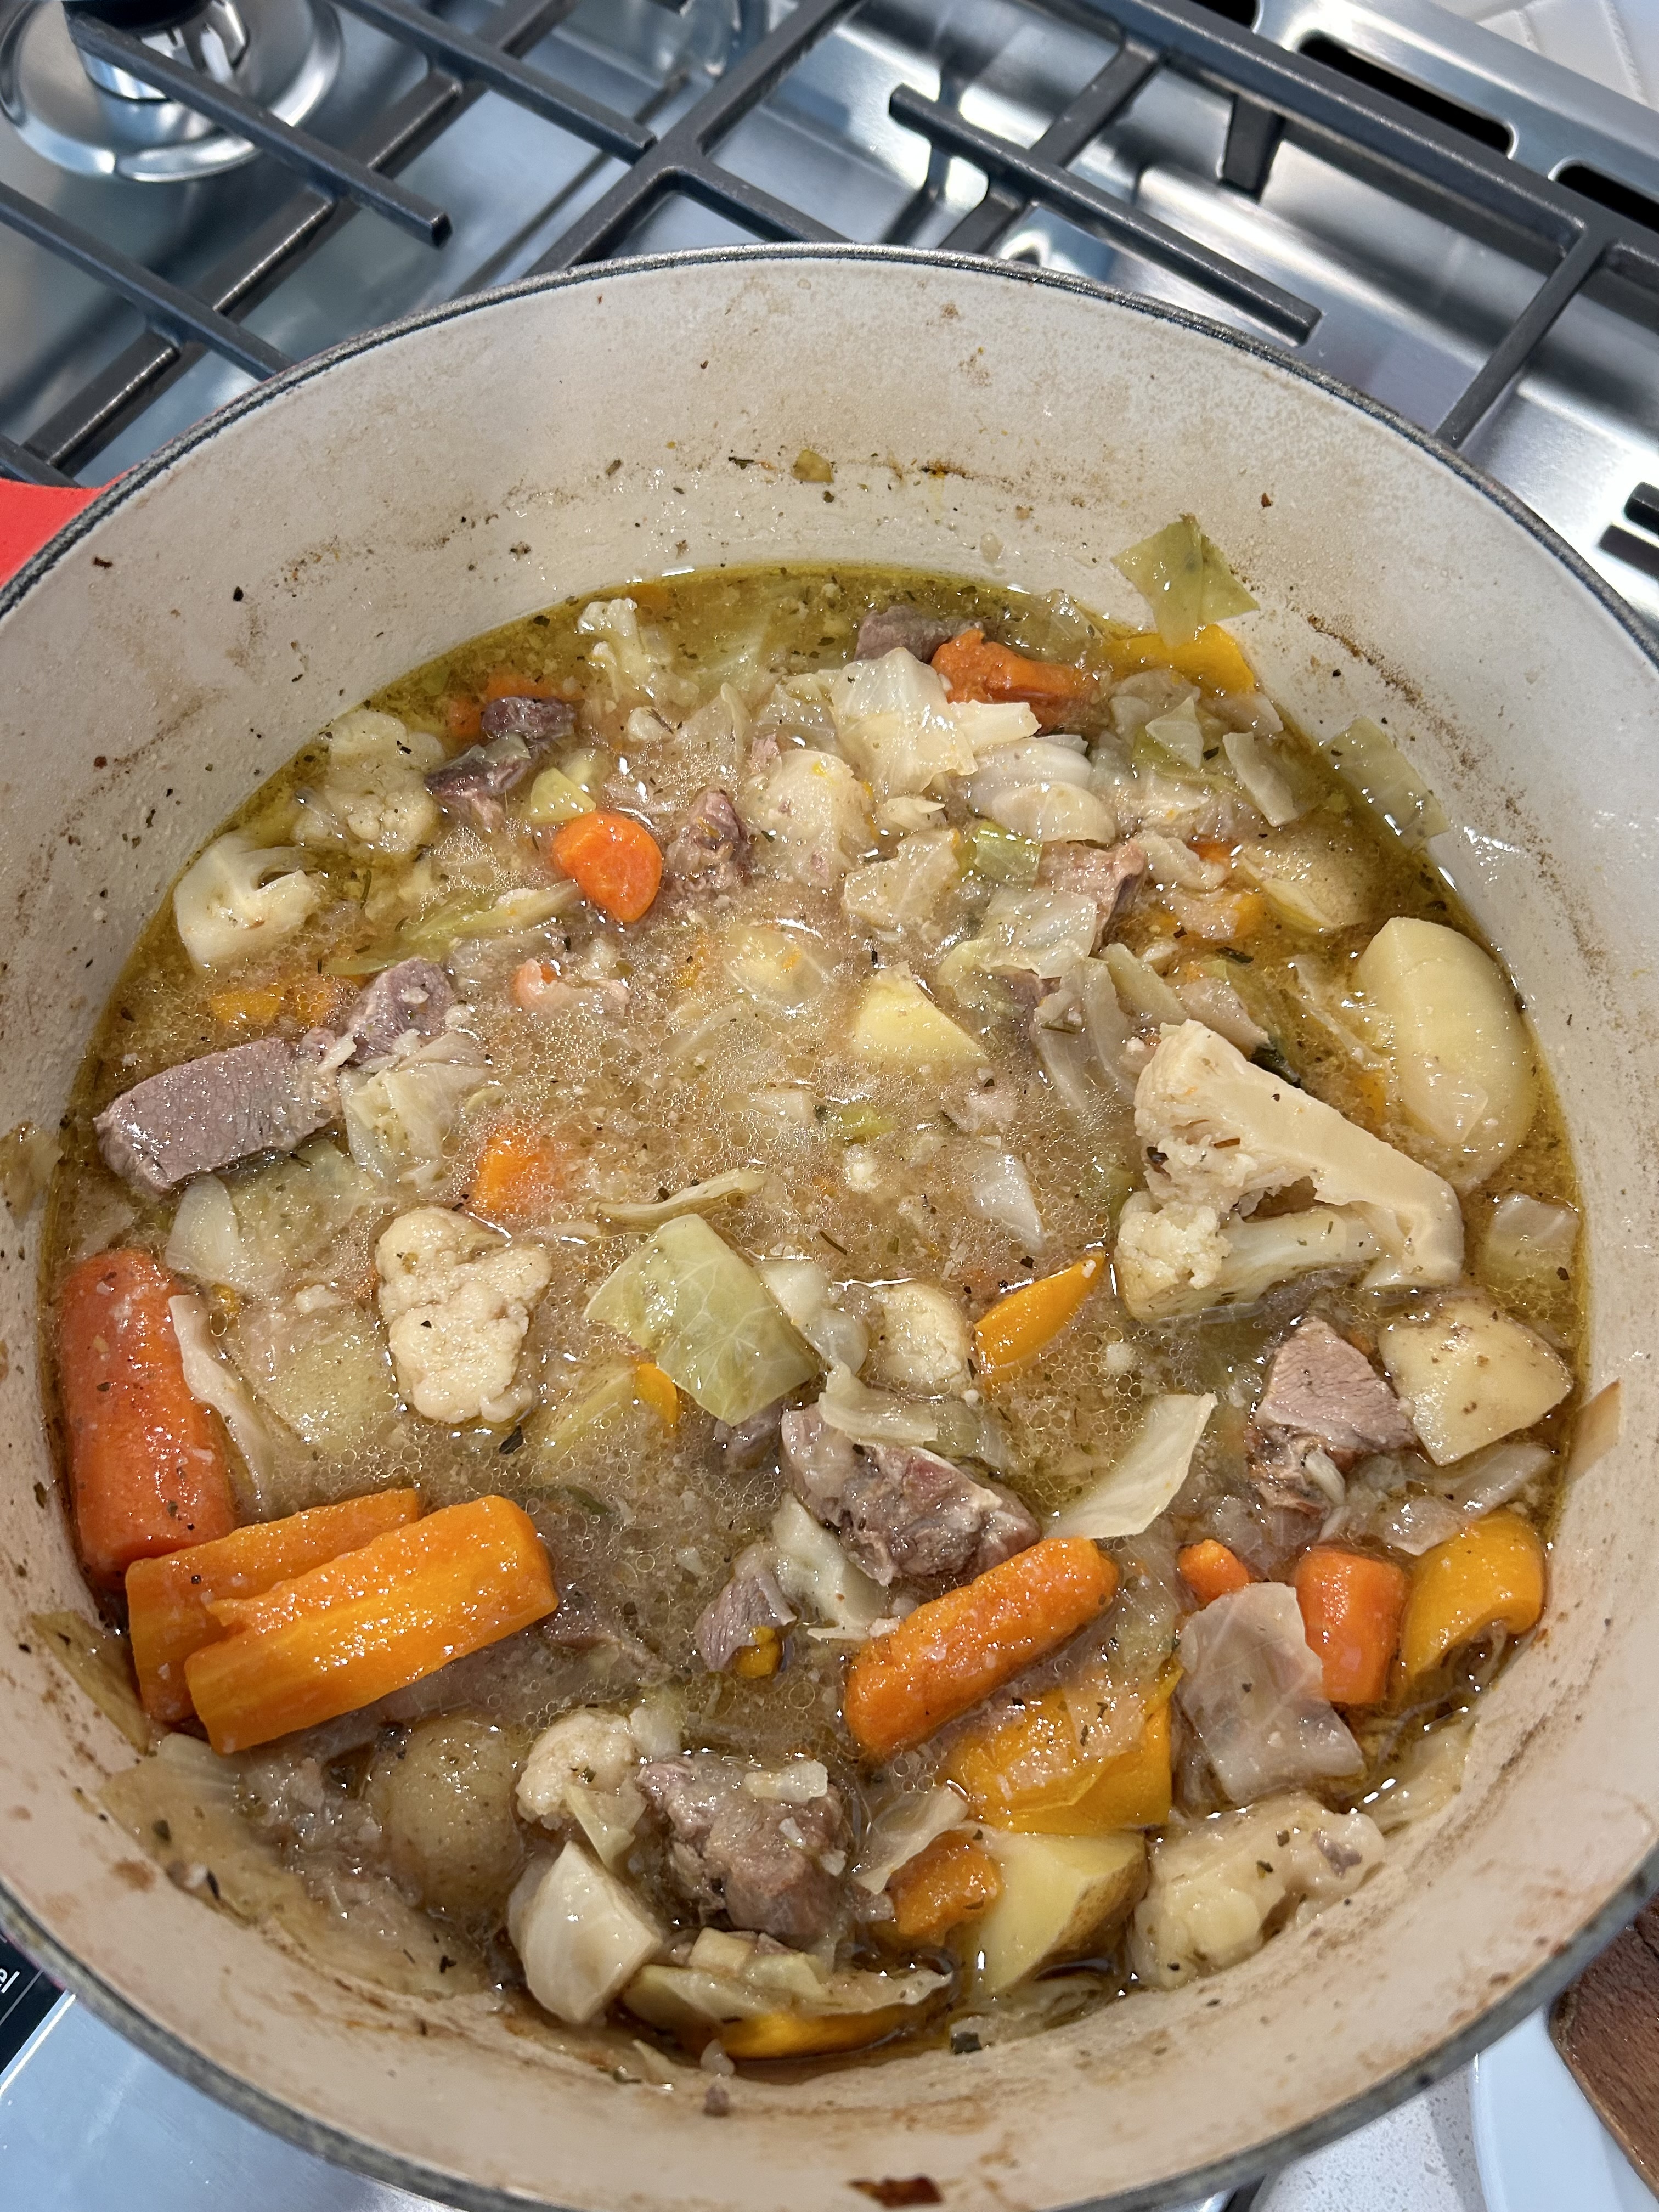
I pulled out the package the other day and thought to make a stir fry. But somehow, that didn’t feel quite right for this meat. So I dragged out the big Creuset cast iron pot and began sautéing all sorts of veggies. I’ve shown many times now that caramelizing veggies in a heavy pot is what gives a soup or stew its rich, lovely flavor. A good bone broth also helps, but a broth was not available for this endeavor.

I used beef tallow for the fat and started chopping veggies: onion, carrots, little potatoes quartered, cauliflower, orange bell pepper, cabbage, and garlic. I start with the heftier veggies (onion, carrots, potatoes) and add the others as the first veggies start to wilt down really well. The cabbage and garlic goes in last. I threw in salt early on and some dried herbs from a common “oregano” mixture, some fresh rosemary from the pot on the back porch, and fresh mint from my developing herb garden. The mint would add a very quiet sweet tone to my stew. The cooked meat gets added when the mixture in the pot needs cooling as the caramelization is starting to get too dark.

Next, I sprinkled rice flour (you could use flour) on the mixture and stirred it in well before adding some water to cover the mixture. I brought the pot to a hard simmer on the top of the oven and then popped it into the oven (350 degrees and in the middle of the oven) and cooked it for 40 minutes–at which point the smell clearly told me it was happy and ready to come out.

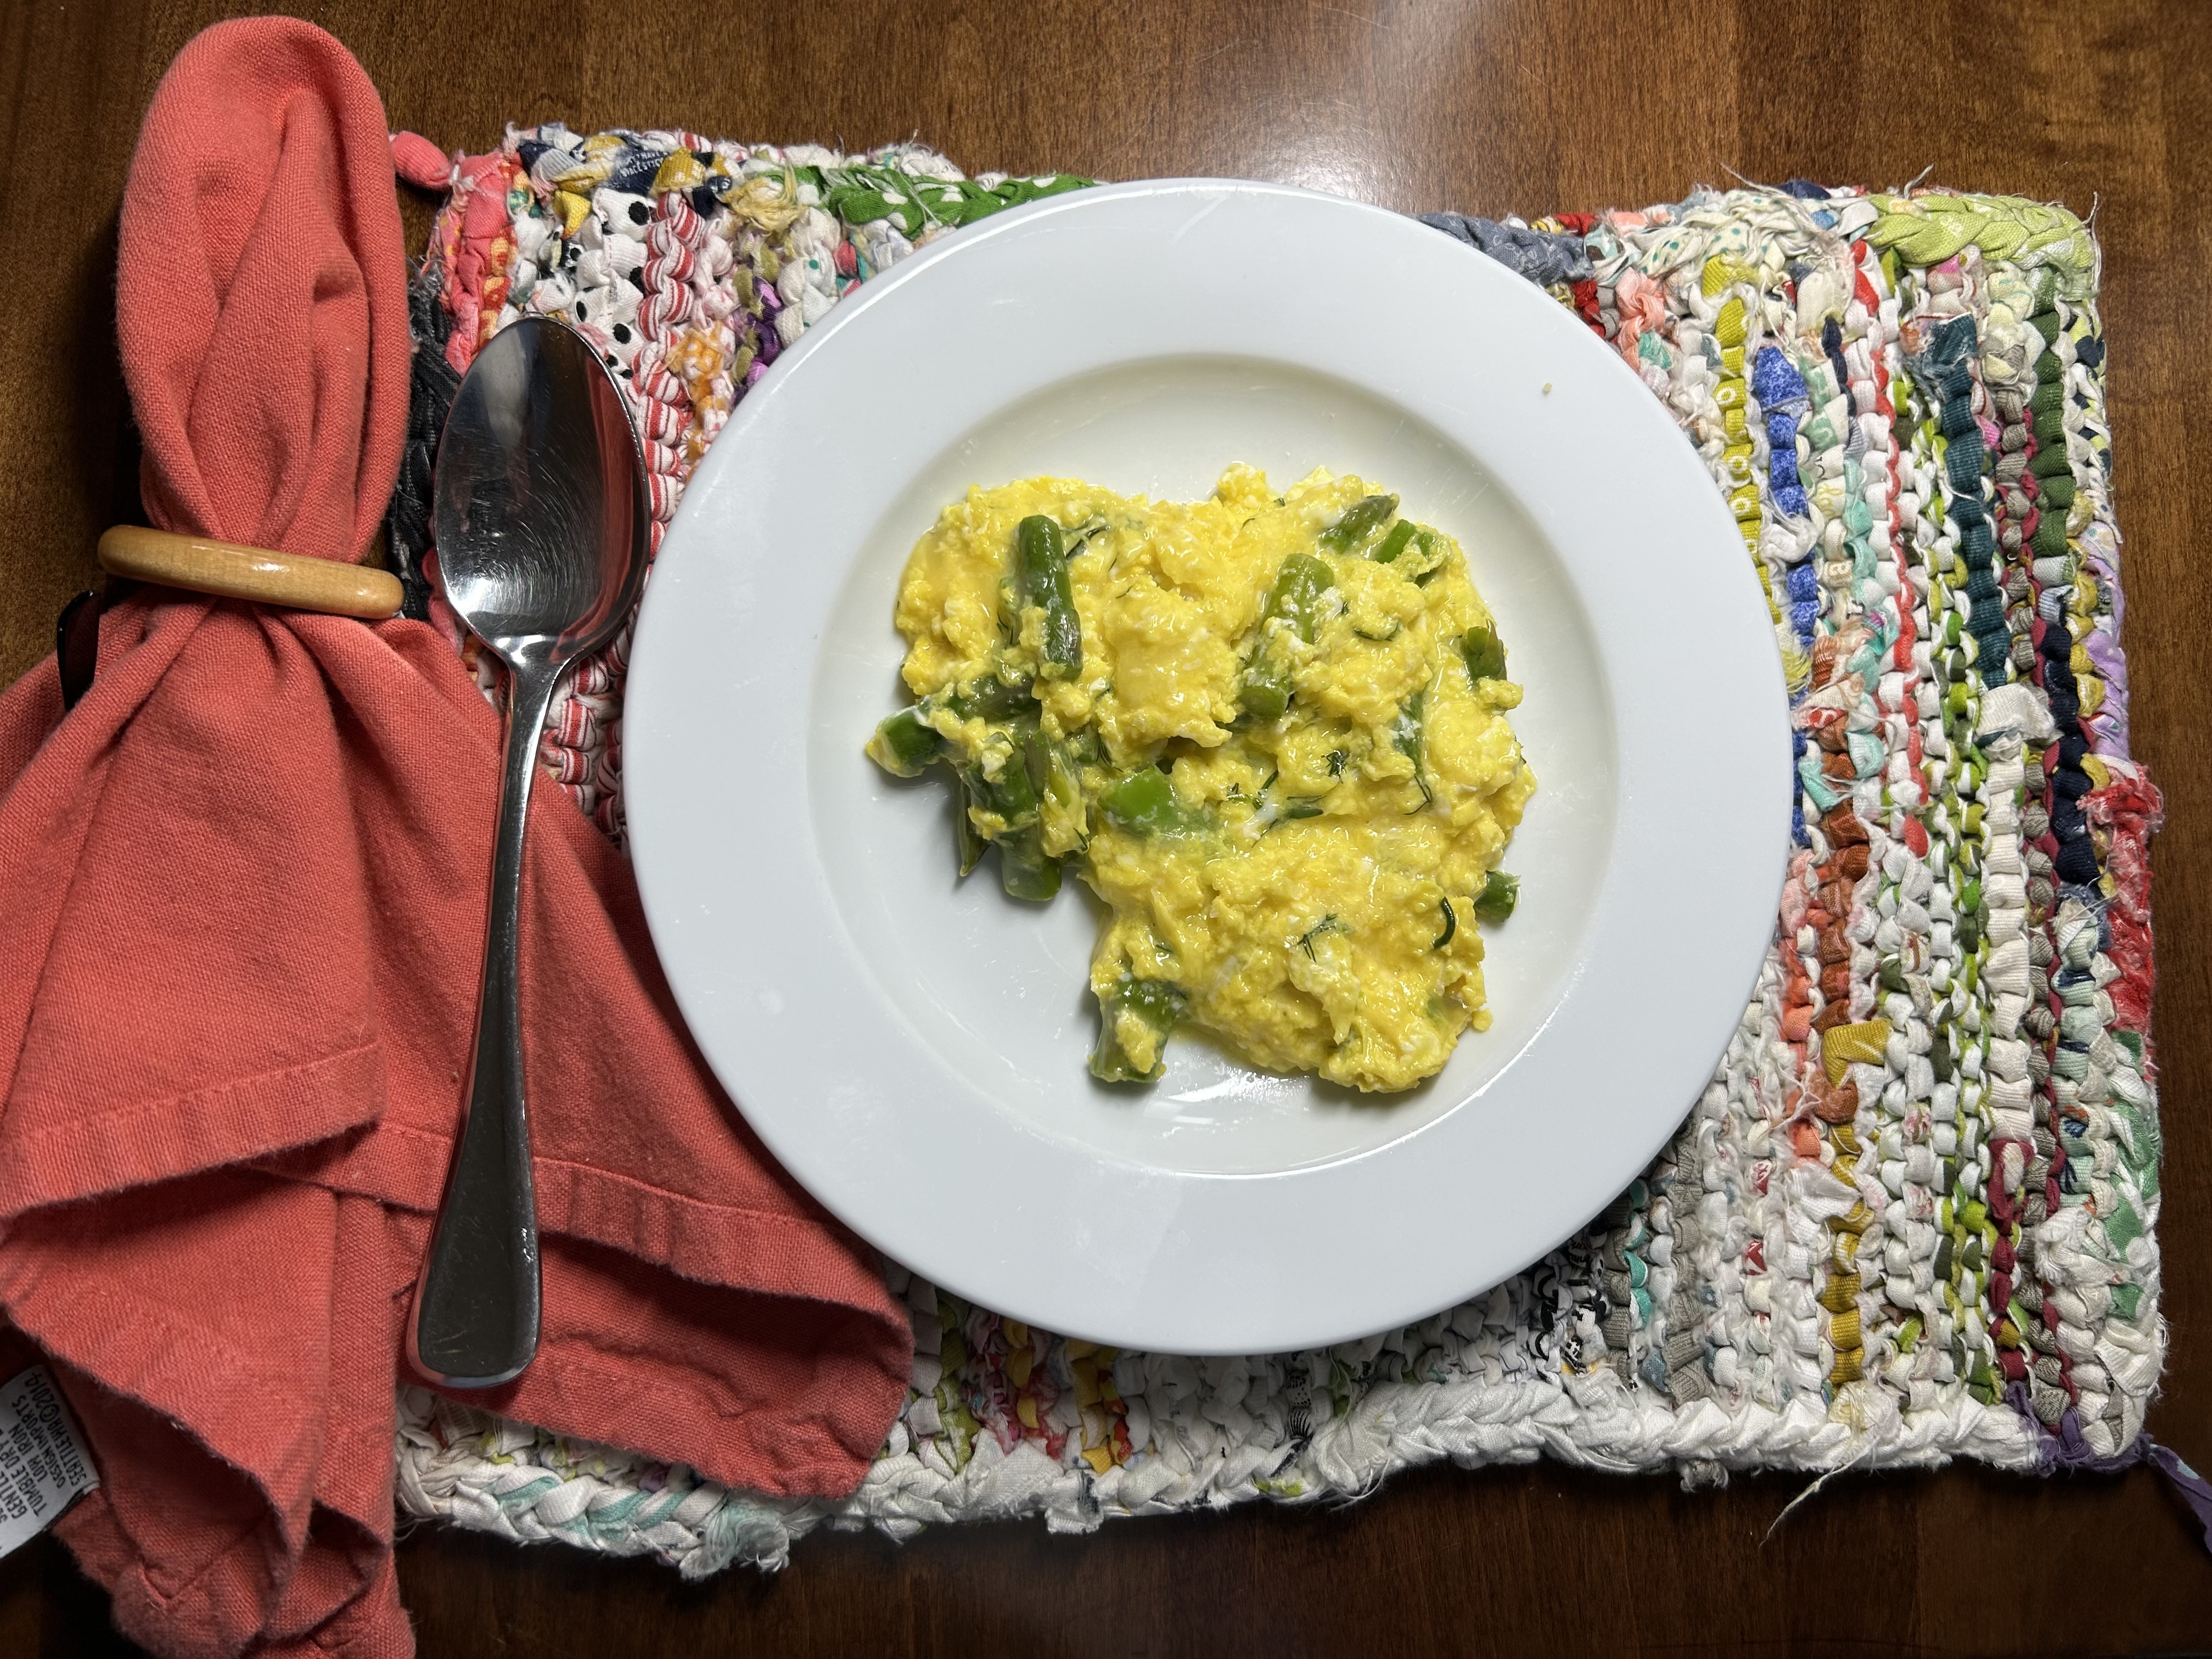
I had a lovely lunch on the porch. And when I remembered I had some very thin and tender asparagus in the refrigerator, I cut it all up and added a handful to my bowl of still-hot stew.

The flavor of my stew was so rich.

Now these leftovers went into a large bowl in the refrigerator–from which I’ll dip out portions I want when needed. I don’t reheat the whole stew as it would get really soft and gummy. The cauliflower, in particular, will disappear into the broth. I like the texture I have here.

My tummy was so happy afterwards, and the fat in this stew carried me well into the evening hours with steady energy.

When I got hungry again, I heated more of my “leftover” stew–a smaller bowl this time as I wasn’t as hungry as I was at noon.

To me, creative leftovers often have more flavor than the first time around. And having the meat frozen until I want it is an “asset” that I like to have.

Again, I can and do vary the stew by adding other ingredients when I reheat some: cream/milk, cheese on top, leftover other cooked veggies, fresh veggies or herbs chopped fine (spring onions, raw sweet onions, bell peppers, parsley, etc.). YOU could add HOT spicy ingredients. Or, some sour cream or yogurt.

You are only limited by your imagination.

Go for it!

Part 2: How I Make a Bias Binding and Install A Bias Or Straight Binding

Start by placing your strip with the pointed end you just cut on your quilt where you want the end join to happen. I usually do that on the right side of my project. And I start sewing about six inches BELOW the end, so that the end is free/loose.

If I’m putting binding on a big project, I just start sewing. If I realize that I’m going to have a join near a corner, I follow quilter Bonnie Hunter’s method of just cutting and sewing a new join of the strips well above the corner–using the method I showed in Part 1 of overlaying two strips and sewing on the diagonal..

If the project is smaller, I will pin the end to the quilt edge and walk the binding around the project to make sure I don’t have a seam join in a corner area.

Sew down your binding in the usual way that miters the binding on the corners. Stop sewing 6 to 8 inches from the start of your binding with its joining 45-degree cut point waiting for you. You need some space to work with to join the ends.

Lay your top strip, where you have just stopped sewing along the edge of the remaining bare edge, extending it below where your join will be and turning up the end to get it out of the way.

Lay your left had strip with its point over the strip you just laid out.

With a marking tool make two marks on the LOWER binding strip that YOU CAN EASILY SEE. One at the bottom of the LOWER strip and one at the TOP of the fold where the upper strip turns down. You can make these marks without unfolding the strips, but here is the bottom strip unfolded so you can see that you will establishing the 45-degree angle you need in the right direction/angle to work with the top, left strip. After you make these marks, push the left strip out of the way.

With the bottom strip UNFOLDED, Line up your ruler along the marks at the 1/2 inch line (IMPORTANT–1/2 INCH, not 1/4 inch) and with the 45 degree line straight across the bottom. You need the 1/2 inch to compensate for both sides of your seam. I don’t draw a line along my orientation marks and measure from that line as they would show on the binding. I just use the little marks I made.

Here are your marks, taken from the binding on the left–after I cut on the 1/2 inch line. This pic shows how these two angles are organized. Left points to the top; right to the bottom.

Here is the ruler properly lined up, but AFTER your cut. See the 45 degree line on the bottom?

The two ends can now be joined. I line them up and pin on the left end at 1/4 inch until I am sure that the seam is going to be even. (You can also try to match the folded creases on both pieces with a pin.)

This part is fiddly. But you can see below that I’ve got a good join so the two sides will be even after being sewn. I don’t really worry about the right side,

Pin and sew the seam. Sewing this seam with the walking foot attached is tricky, so I use a leader/ender piece to get started.

I keep a wooden roller around for seams like this so I don’t have to go to the iron–as the iron is hard on bias edges and you have to take the whole quilt with you to the iron. You could also finger press this seam.

Then fold the piece in half again and trim off the point that is extending beyond the edge of the binding. The binding should fit into the remaining space on your project perfectly. *You can also see in this picture below the amount of space you want to leave on the side of your quilt to join the two edges and then to sew down the remaining piece of the now-joined binding: it’s 10 or 12 inches.

And now YOU ARE DONE!

Part 1: How I Make A Bias Binding and Install a Bias Or Straight Binding

I always make bias bindings for my projects that require bindings. The only time I don’t cut bias bindings is when I don’t have enough fabric for a bias binding that I really want to use, but I can cobble out a straight-cut binding from that desired fabric.

Why bias binding? Bias binding wears better over the long haul. And, yes it is easier to install. Straight-cut bindings have only one to three strands at the fold line, whereas bias binding has cross-hatched threads at the binding fold.

I use the same method I use for bias binding to install a straight-cut binding on to a project. Why? The bias seams are less bulky. Way less bulky. Often you don’t even notice bias binding strip joins.

Note: I’m not going to talk about how to sew the binding to make nice corners on your quilt–but here’s a video from Jenny Doan of Missouri Star that covers everything, including how to do the corners. I learned several things I’ll try from watching the video. My method is a bit more “fiddly” than Jenny Doan’s but it works really well for me. Also, my final seam joining is different from hers, but maybe I’ll try it too.

To cut bias binding, press your fabric and place it on your cutting board–it doesn’t matter if it is right side or wrong side up. Line up your long ruler on the left side of the fabric on the 45-degree angle mark. (You will later cut off the points to join the fabric strips you cut–but make sure the 45-degree line does line up with the grid on your cutting mat. Or make sure you have a clear straight line on the left.) *Note that I just pulled this fabric to show you how to line it up and I didn’t iron it. I would not cut it without pressing it.)

Draw a marking line down the ruler if you are going to need to move the ruler further down to reach the right side of the fabric. Cut along that line–you will now have two pieces. Put one aside, remembering you can return to it for long strips if needed. The less strips, the less seams in the binding.

If you want a smaller, shorter cut, you can also line up the 45 degree line on your ruler at the TOP of your fabric. Again, make sure it is on a strait edge–the fabric or the lines on your cutting mat. Here’s a pic with a piece of paper to illustrate:

I cut my bindings at 2 1/4 inches as that makes a plump, tight binding for me with no loose floppy space at the binding fold.

Cut the points off of your strips before joining them right sides together. Line them up like this photo shows. Make sure the right sides of the two strips line up together. Mark the place on the top piece where the bottom piece ends and line up your ruler from that mark on the bottom to the top. Make sure the top of the ruler will let your pencil touch the point and is on the bottom the mark you have made. Draw a line and sew on it. I will pin the top right corner to keep it stable while I sew.

When you have all the strips sewn together, trim the seams at 1/4 inch and press them all to one side.

Then press the strips in half, lining up the raw edges. Note that in the pic below I have not yet ironed the left side of the strip.

On one end of your strips–the end you’re going to start to sew on to your quilt, open up your strip and cut a 45-degree angle–so that the point is at the TOP and when refolded the fold is at the bottom.

Now you are ready to install your binding. So go to Part 2.

Asian/Asiatic Jasmine

Son Mike suggested a ground cover plant for my rose bed the other day, but could not remember the name. He said he and Tami loved it in their old house. Tami knew the name: Asian or Asiatic Jasmine.

I found 11 plants at Loews Monday and bought them all: $3.48 each.

This plant is actually NOT a jasmine, though it makes a really fragrant little flower in the spring. It basically is a kind of vine, which will put up tendrils that go upwards about 10 inches in height (and ones that spread) and will cover the ground in sun or shade. One article noted that it can cover a bed in a year, two at the most, and will go right up your leg if you stand still long enough. BUT, that it is not hard to control if one pays attention.

I planted it among the roses, and if it does not work well as an understory plant there, I’ll pull it out and put it along the shaded sides of the house. Facing the house, the long strip to the end of my long house is totally in shade. That bed is now covered with pine straw, which I will keep as grass would struggle in that dense shade as well.

Time will tell…

Happy Easter

My goodness!

I’ve been busy, busy these last few days. So, no blog posts.

Alex, my lawn guy, came Wednesday and put out fertilizer on the Centipede grass. He told me to be sure to water heavily three times–but to water at dusk as it has been about 80 degrees here over the past few days and the grass does not need to be fried by watering it in the full sun.

Everyone’s sodded grass is the promised apple green color now, but it now needs help to grow and spread. Here’s a view from the back of my house.

I have hoses on either side of the house–and went to Lowe’s to get two smaller sprinklers–the big one is harder to control in the back and part of the front so that the water does not go on to neighbors’ lawns. My back door neighbor, for instance, installed an underground system, so her grass does not need MORE water. And water here is not cheap–so I don’t need to be watering anything but my own grass.

The smaller sprinklers that will go in a circle are very tricky. I got totally soaked–TOTALLY–trying to get them to do what I wanted in the mostly narrow lawn spaces I have. Even I had to laugh, though, drenched as I was. And the grass did get watered, though I need some short hose extensions for both hoses–about 10-15 feet I think. And I will say, while laughing again, that I was, also, quite cool, which was welcome.

The master bedroom shower has had a leak under its doors–as the tiles on the ledge did not have the proper angle to make the water drain to the inside of the shower. In the end, the doors had to be removed, the tile redone, and the doors put back after the grout in the tiles dried. The doors went back on Thursday. And the shower no longer leaks! I had a lovely shower yesterday (Saturday).

The gutters were installed on Thursday as well, and now water does not drip off the roof on to my front walk right at the recessed door. And…I watered the grass.

On Friday I was a whirling dervish of energy. I went to Lowe’s to get a drain tube so the gutter drain near the roses did not put its water all on the end rose. A hydrangea hopped into my cart. Then I visited Carolina Lantern and Lights to start the process to get the 3 lights I need over the kitchen bar. Next, I visited a local quilt shop, Wild and Wooly, which is small but very sweet. On the way home I checked out Abide-A-While nursery and came home with plants: a Viburnum and herbs for the little herb garden I want to start.

I took a chance with the grass as we were clearly getting a BIG storm in the night which would provide me with adequate rain for the grass. And, the temps dropped into the 60s. So Saturday saw me outside early morning, between storms, digging holes, adding amendments, and planting the new plants. My soil here is all clay–it is like digging in cement when it is dry.

On the left, in the middle, is the viburnum. It will not get huge and dwarf the windows and will bloom in the spring. On the right is the Limelight hydrangea–a variety that will get about 8 feet tall, bloom white with blooms that turn red in the fall. It will be so pretty against that wall. And I can control it with trimming. The herbs are on the right.

From the upper left, clockwise: sage, chive, lavender, two kinds of lemon thyme, and oregano. The mint went in over by the roses–near the faucet, so it can be controlled better. I am wishing now that I had brought my grandmother’s mint from Maine as I’ve had it for over 50 years–but I thought that I’d likely never garden again. Who knew?

Anyway, I love cooking with fresh herbs, and now I’ll have some.

I had two lovely meals on Saturday. For lunch–I was so hungry after all that digging–I made scrambled eggs (local eggs that are soy and corn free from Local Jo’s Natural Foods ) with raw butter, fresh rosemary from the pot on the porch and fresh dill I bought, and some mozzarella cheese. It was quick, rich and delicious, and perfect.

Having been refueled, I made a quick trip to Loews for extensions to the two hoses. Three little pots of the little mondo grass, a groundcover plant, hopped into my cart as well. When I got home, I made an espresso and went upstairs to sew a little.

For supper I defrosted some cooked rice and made a rice salad, using the last of the roasted chicken, herbs, lots of fresh veggies, and I put it all on lettuce. The Organic Roots olive oil is so delicious in a salad like this one. (I have enough leftover for one more meal.)

I had also defrosted frozen blueberries and peaches, to which I added half of a Honey Crisp apple and a little maple syrup. So, dessert. And after I watched tv while I sewed down binding on the quilt I finished on the longarm.

It’s been a really good string of days.

And I’m grateful.

Palmetto “Bugs” and the German Cockroach

Roaches are nocturnal. And there is nothing more disturbing than at night seeing a 2-inch dark brown bug fly up to a wall if you turn on a light in a dark room. In South Carolina, that would be a Palmetto Bug. Or, equally bad, to turn on a light in the kitchen to see a smaller light brown roach run across the floor or a countertop and duck into a crevice or under an appliance (the German cockroach). Or, in the kitchen, to see large dark brown roaches running very, very fast across the floor to hide (American cockroach)–a sight I remember vividly from my Georgia childhood at my grandparents. (And yes, they sprayed constantly.)

But first, let’s understand more about roaches, as they are a very, very, very old species. And that fact alone warrants my interest. (I probably should have been an entomologist or a zoologist.) The German cockroach, for instance, started out in caves in Asia. Here’s a quote from a 2020 Smithsonian magazine article documenting how old they are:

“Cockroaches—among the hardiest of insects—may be among the species guaranteed to outlive us all. But perhaps even more intriguing than the future of these persistent pests is their unusual past. A pair of 99-million-year-old roaches are now the oldest known animals that unambiguously adapted to life in caves, according to a study published this month in Gondwana Research.”

“The discovery earns the bugs the unique honor of being the only cave dwellers ever described from the Cretaceous, the period spanning 66 to 145 million years ago and the final era of the non-avian dinosaurs.”

https://www.smithsonianmag.com/smart-news/99-million-year-old-cockroaches-are-oldest-known-cave-dwellers-180974284/

When humans started trading spices around the world, these cave roaches went along for the ride. The result is roach history as roaches adapted and survived.

Roaches were not a problem for me in rural Maine. Maybe they are in crowded urban areas in Maine, but I never saw one in my house in Maine. But in South Carolina, roaches are part of the terrain. Roaches thrive here. Steps must be taken to prevent them from taking up abode in one’s house.

There are three major roaches that can be a problem for humans in South Carolina: Palmetto “Bugs” and German cockroaches. The American cockroach is often mistaken for the true Palmetto roach, though it does not really fly.

Palmetto “Bugs”–also known as “waterbugs” or as “smoky brown cockroaches”– are cockroaches, not some other kind of bug. Although closely related to the American cockroach, Periplaneta americana, they are different. They are Periplaneta fuliginosa, and they are a kind of tropical cockroach. Palmetto Bugs come into a house seeking water–they dehydrate easily–and then while seeking water, they might take advantage of something like rotting organic matter in a garbage can or dirty dishes in a sink. American cockroaches, too, live outside normally, but clearly will come inside and stay if they find a habitat there that richly supports them.

The German cockroach (Blattella germanica) is smaller, grows to adulthood much more quickly (60 days), and then breeds like crazy. This roach gets to be about an inch and ranges from a very light to a darker brown. It can sort of fly, perhaps gliding if threatened. It inhabits houses. These cockroaches can’t survive in the wild.

The Palmetto Bug can get as big as about 2 inches. They can fly short distances if needed. They have a TWO YEAR lifespan, but don’t breed until they are about a year old. From wikipedia: “P. fuliginosa can reproduce through sexual reproduction and in some cases through parthenogenesis, which is a form of asexual reproduction.[5]

And, “The smokybrown cockroach is a detritivore and can feed off a wide array of organic (including decaying) matter.[1] Like most cockroaches, it is a scavenger, whereby it feeds on many different types of foods including dry earthworms, pet food, pet waste such as feces and urine, paper, and many types of ripe fruits.[1]

In this way, in its natural habitat, Palmetto Bugs help break down organic matter in the woods, so they have a useful purpose. So, the “smokybrown cockroach may come indoors during daylight hours to look for food and even to live; generally, however, in warm weather, it will move outdoors.[3][2] They tend to lose moisture twice as fast as their relative, Periplaneta Americana, therefore requiring environmental conditions with constant moisture to avoid drying out.[4]?

https://en.wikipedia.org/wiki/Smokybrown_cockroach

So, about a month ago, I saw what was likely a German cockroach on my kitchen counter. It probably came in on a grocery bag, as they don’t really live in the wild.

I consulted my son Bryan and bought a really strong gel bait on Amazon with great reviews. It only takes a tiny, tiny bit of this gel in one spot, but one can’t put the bait in any place where it would get mopped or wiped, or near an appliance that gets hot (oven, dishwasher), or in any place where it would get disturbed and spread so that it could harm a human. So, I baited the very back of the cabinet area under the sink and way back of the garbage pull-out cabinet, around the garage door sides, and in an area adjacent to the back screen door.

I have never left dirty dishes in a sink, so that’s not a problem. And now that I’m not composting, I am not using my super nice composting pail. I don’t think a roach could get into it anyway, but… I do not allow any organic matter or bones to sit overnight in my garbage can: I take the whole bag out to the big cans in the garage. And I double bag all organic matter or meat bones.

I have not seen another roach–and I check at night frequently by turning on the kitchen light.

Time will tell…

Collards!

I LOVE Collards!

I do.

And, really, they are so easy to cook when you know how.

Here’s my go-to method.

First, give them a rinse in your sink–this time I broke each large leaf into two parts with my hands–so they will fit into my pot of simmering water.

Put the leaves into the pot. You don’t want to cook them to death–like folks did when I was growing up. You just want to blanch them until they are limp. Don’t cook them longer than 5 minutes–and usually I simmer them less than 5 minutes.

Pour them into the sink and spray them with cold water to stop the cooking process and to keep them nice and green.

Cut out the central stem with a sharp knife. Or if you want to use the big leaves as a wrap, like a tortilla, leave the stems alone. They are chewy, but that’s doable. Some leaves are big enough for each side to be a wrap. Or you can overlap two sides to make a bigger wrap. You could leave the wrapped package whole or cut it into slices.

Discard the stems. In Maine they would have gone into my compost. Here I don’t compost as I will not have gardens big enough to use compost–and soon we will have a discussion on that ever fascinating creature the roach–and the terrifying South Carolina variant, the Palmetto Bug (which is a roach form).

Roughly chop the leaves. I leave mine in bigger chunks–not chopped fine. These are going to be sautéed in butter later tonight–for a dinner with grilled lamb chops, sprouted brown rice, and a sliced apple.

Collards have a sweet taste. Or so I think.

Anyway, they are chock full of nutrients.

You can just tear up rinsed leaves and add them to a soup, too. How easy is that?

No More Paper Towels Needed

Or very little anyway…

Here’s one big reason why: fabric towels and bowl covers.

DIL Corinne gave me this roll of little fabric towels–they are just rolled around each other. There is a cardboard inner tube, so you can put the roll onto your current paper towel dispenser if you like. The material is so soft–and it is so easy to just throw a dirty towel into the wash. AND, there are different colors and patterns available.

The bowl tops pull tight so easily with the attached cords and come in three different sizes. The largest covers a pretty big bowl. The insides of the bowl covers just wipe off easily–it is a kind of silicon I think. It is definitely not plastic as this company is trying to eliminate the use of plastic. The covers can also be pulled taught to form a kind of little pouch. And the covers can be used over things like cut melons.

There is an online store if you are interested:

https://www.oneworld-zerowaste.com

Here’s a pic from the web site of the bowl covers:

And here’s a pic of my roses all planted now. So far, they seem to be happy.

Now, back to Innova and the quilt she is guarding upstairs until I return to do more quilting.

Big thanks to Corinne.

She’s Home

Innova arrived yesterday–brought to her new home by the capable hands of Rob Engime of Olde City Quilts in Burlington, NJ, where Judy Engime held down their store while Rob traveled to me. It was a 12-hour trip for Rob.

It took many trips up the steep stairs for Rob to bring in all Innova’s parts. I helped with some of the lighter pieces, but, truthfully, Rob did most of the trips up the stairs. The first step was putting the base frame together.

The second step was to install the much-needed new light bar. I had great light in my quilt room back in Maine, but only one small ceiling light in the bonus room here.

Oh my heaven’s. It is perfect. Let there be light! There will be no need for secondary light sources with this light bar in place.

Next, the table pieces get inserted. Note that Innova’s front faces the wall quilts–and we put her on a slight angle so I will have plenty of room to walk around the machine, to load quilts, and to quilt from the front. Having the back facing the room is awesome because I can easily trim quilts on the machine’s back counter. Innova is in a permanent position now; I won’t have to move her.

Innova herself is now on her sliding platform, and the roll-up bars are in place.

After Rob left, I installed the overlay grid I use on the back counter for pantographs and slid the pantograph I want to use next in place. The grid allows me to mark on it with wet-erase markers. The scrappy backing I made 7 months ago, back in Maine, is now loaded.

And I spent late yesterday and into the evening setting up and basting the first quilt to be quilted on Innova in South Carolina. It is one of three final quilts of the Cotton+Steel project of these last two years–three if we count these last three quilts. Oh wait! there are the blocks I made back in Maine from the small squares leftover from other C+S projects that I pieced together while waiting for the house to sell.

Suffice it to say that this morning I’m feeling so happy. And I savoring all that I learned from Rob yesterday–which was a lot.

I love my Innova, and I’ll be eternally grateful to Rob and Judy Engime for packing up Innova back in Maine, storing her for me all winter, and bringing her to me here in South Carolina.

Today I’ll begin quilting this quilt, going slow to get acquainted with Innova again, and I will sew together the binding pieces as a break, and will, maybe, sew the last three Churn Dash blocks for the quilt on the design wall.

And, yes, I’ll break for a long walk with my music.