One of the projects in our Mt. Battie Modern Quilt Guild this past year was to make Temperature quilt during the year, starting in January 2020.
Jan Corson sent me pics of her finished Temperature Quilt the other day. And it is quite interesting and engaging.
Jan and I have been exploring methods and patterns in Jacquie Gering’s book WALK, which uses one’s walking foot to quilt. Jan used the information in the book to quilt her Temperature quilt.
The big “reveal” of several ongoing challenges will occur later this month in the Mt. Battie Modern Quilt Guild meeting. So pics of these challenge projects will be on the Mt. Battie Facebook page some time after the reveal.
Wildlife here in Mid-Coast Maine is often in very close proximity to us.
A friend who lives in town has had at least two Bobcats visiting her property over the winter. She says this one sat on her back steps for several hours the other day. She said it is smaller than another one who has also visited.
I thought you’d enjoy the pics she sent me.
A full grown male can weigh in at 20 to 30 pounds. The females are smaller. A size comparison would be AC doggie, who weights about 26 pounds. So you can see these cats are NOT the size of a housecat.
They eat a wide variety of foods, from large to small, and can take on an animal the size of a deer.
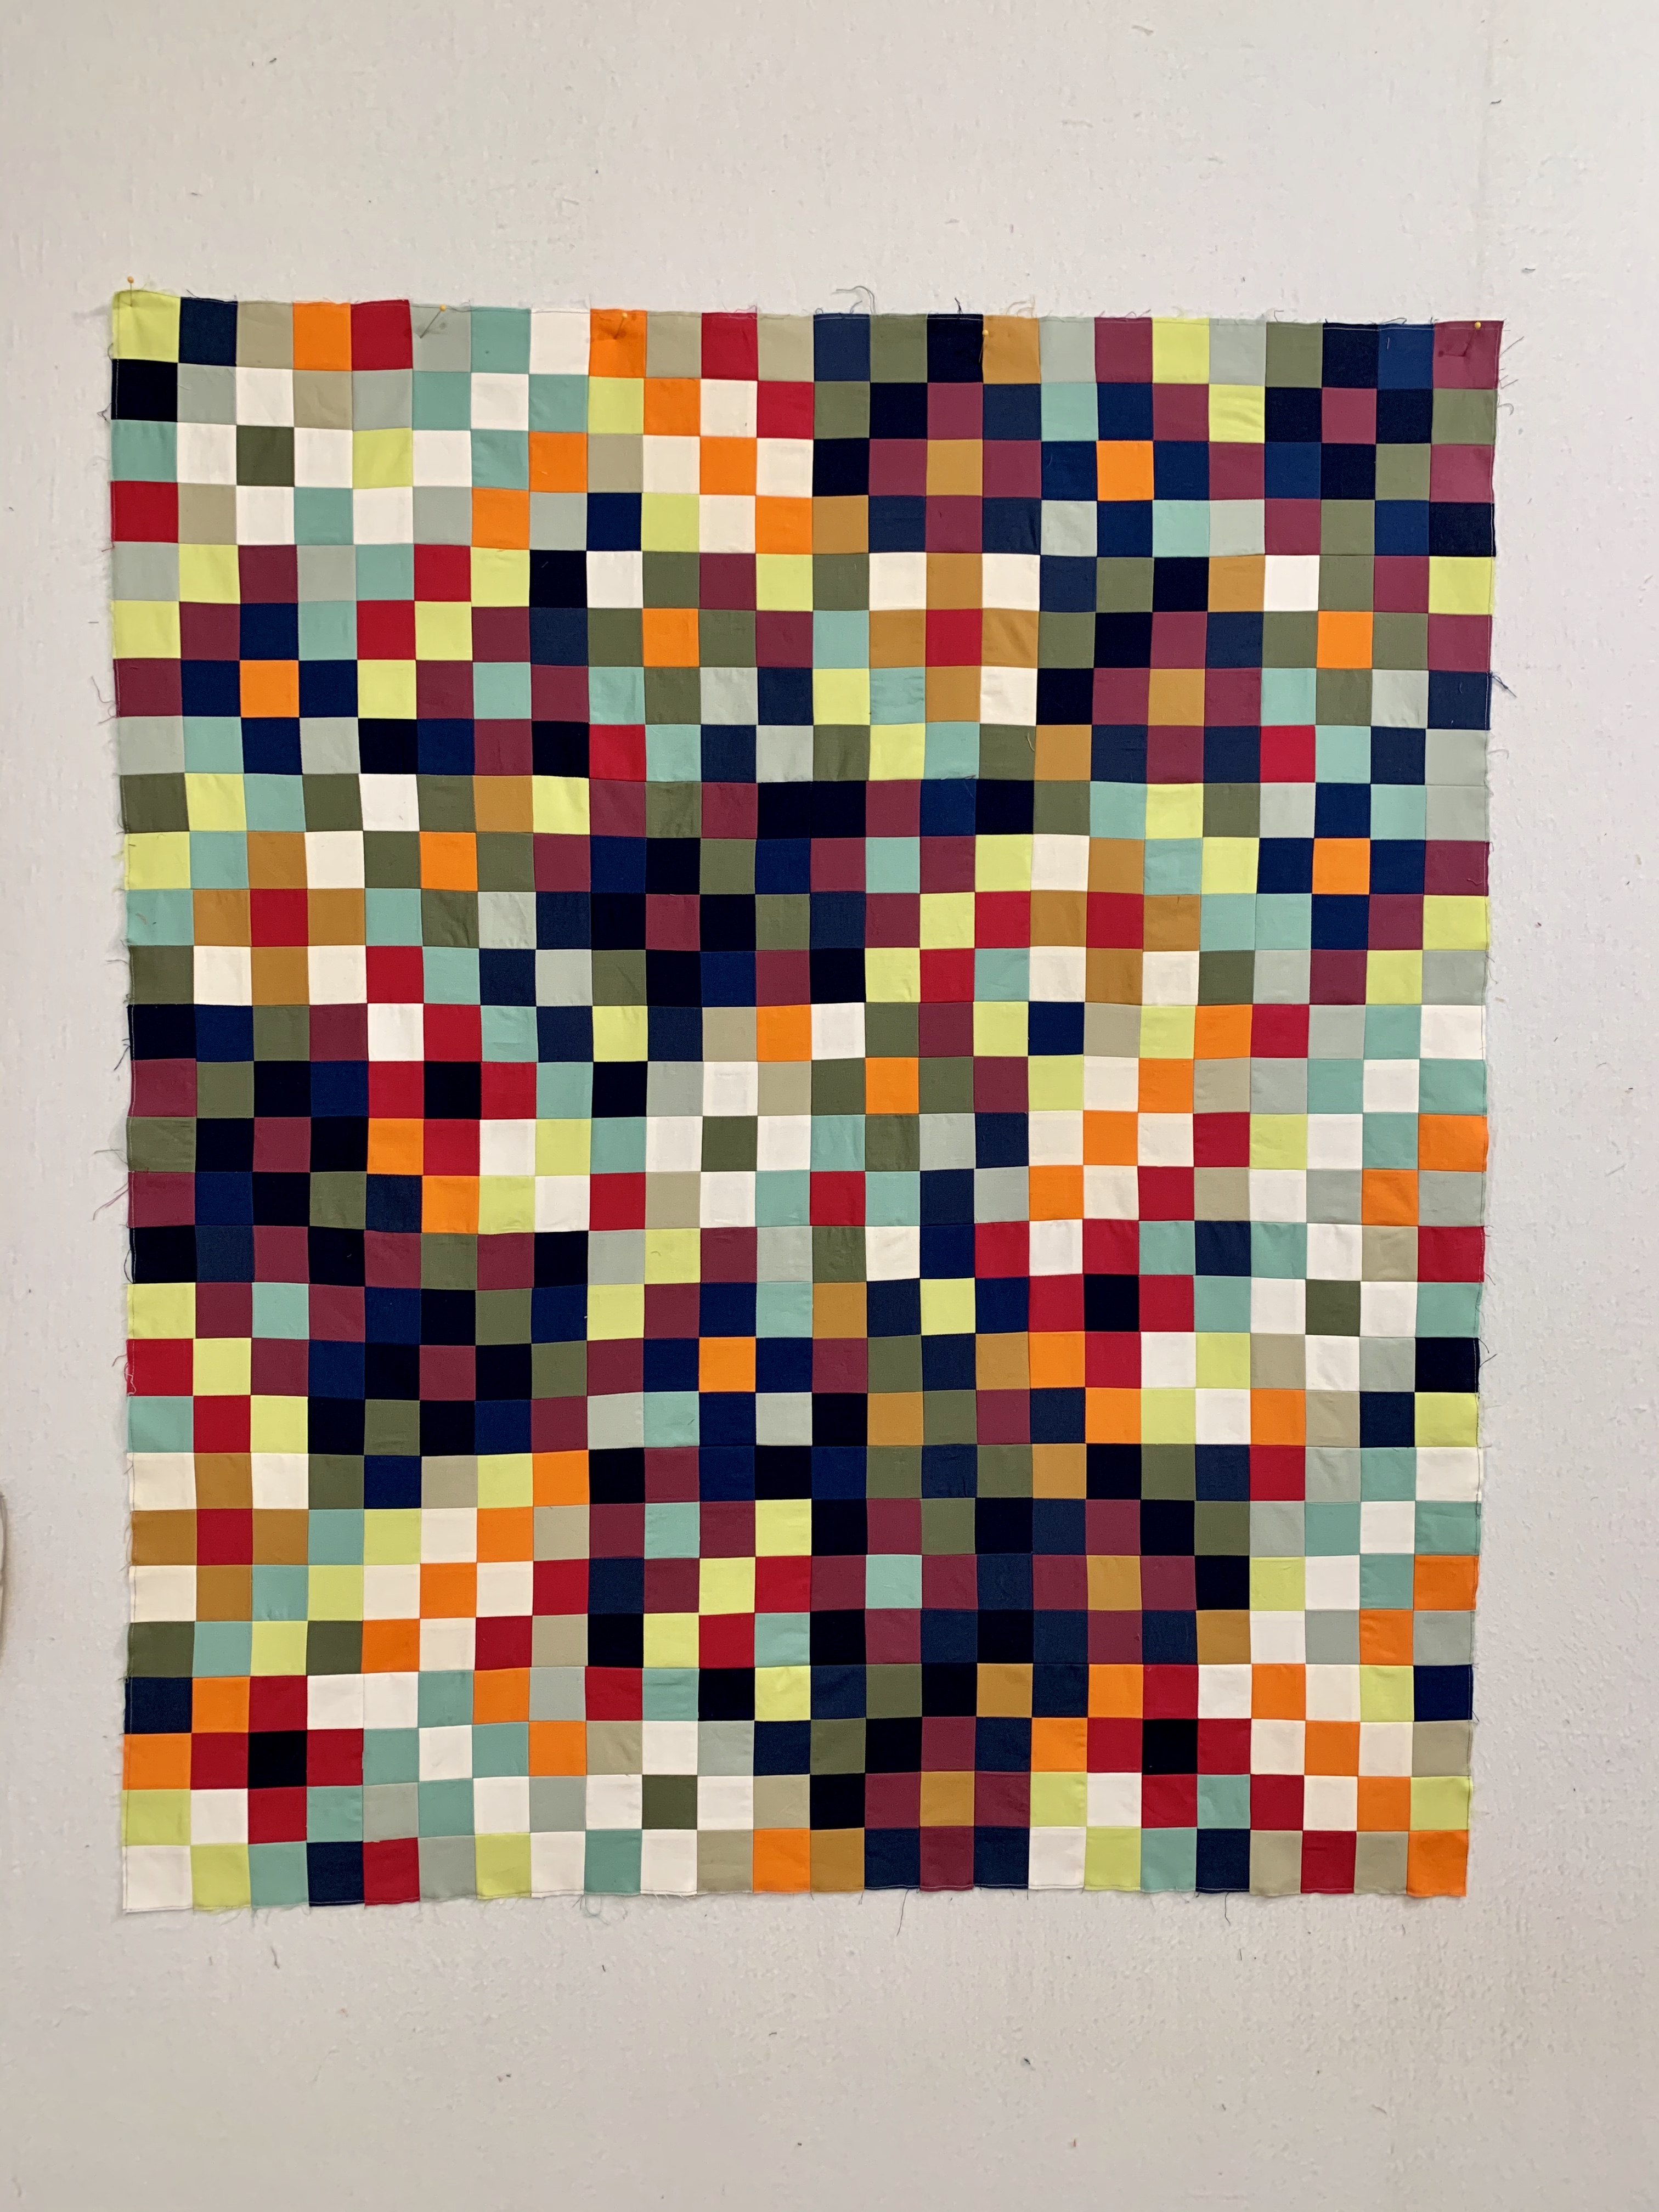
I finished this top last night—it’s 36 by 42. It is the 4th project in my online class with Tara Faughnan, hosted by Sewtopia’s Amy Newbold. Tara called her demonstration quilt “Bokeh.” I’m not going to post a picture of her work as I do not have her permission to do so and could not get a picture of her whole quilt anyway, just parts of it. She will post images of her Bokeh when she is ready to do so.
I looked up what “Bokeh” means and found it is a photographic term for pictures with deliberately manipulated fuzzy backgrounds with a sharp foreground image. Suddenly what Tara was attempting fell in to place for me. And I loved the transferring of that concept to fabric “pixels.”
I don’t think I’m done with this project. I have more fabric and could add more (I added white and cream here). I wasn’t sure how to think about color in the individual blocks, and now I would NOT line up strips of color but would work with light, medium, and dark blocks, but in a way where individual pops of color allow more “twinkling” in all of the blocks. The light blocks could almost always have a pop of dark color and the dark ones could pop with the bright fabrics. In that way the way the colors fall doesn’t necessarily matter. So I may start from a light center and work out to medium and dark blocks—but with patches of light blocks mixed in appropriately. It won’t be a large project. I just want to see if this way of thinking about the colors would work.
I do like my dark patches here—they seem to glow—and I didn’t expect that effect. I think that speaks to how well Tara chose these palette colors. I moved blocks around and moved them around, but still wound up with three places that butted up the same patches. Ugh!
Also, I’m finding that these clips I purchased (and included in a previous blog post), REALLY help with keeping all these seams perfectly aligned for sewing. So a big thumbs up for this product. I sew right up to the first prong and then hold the fabric with finger pressure as I slowly slide out the prong to near it’s end so I can keep sewing without hitting the metal of the prong. I also fold back the fabric to make sure the seams are nested correctly before inserting the prong at each seam.
What a fun project this is. Thank you Tara for this one. It’s been a real distraction from the required social distancing of the pandemic. And a joyful project for winter sewing.
This yearly show and celebration of modern quilts is taking place now, and this post arrived in my email this morning.
How fun to see that many of my favorite quilters were recognized this year: Maria Schell, Shawn Kimber, Amy Friend, and Tara Faughnan among them. This post contains links to others being recognized, like the link to modern log cabin quilts which features a log cabin quilt by Tara Faughnan.
It would be hard for me to pick which one of these two Sugaridoo/Bernina Quilt-Alongs I like the best. Certainly I had fun with picking the fabrics on the Cotton+Steel version. And since I always started each month with the Rainbow version, the C+S version was much easier to make.
As a reminder, here is the solid Rainbow version—with fabrics Sugaridoo chose.
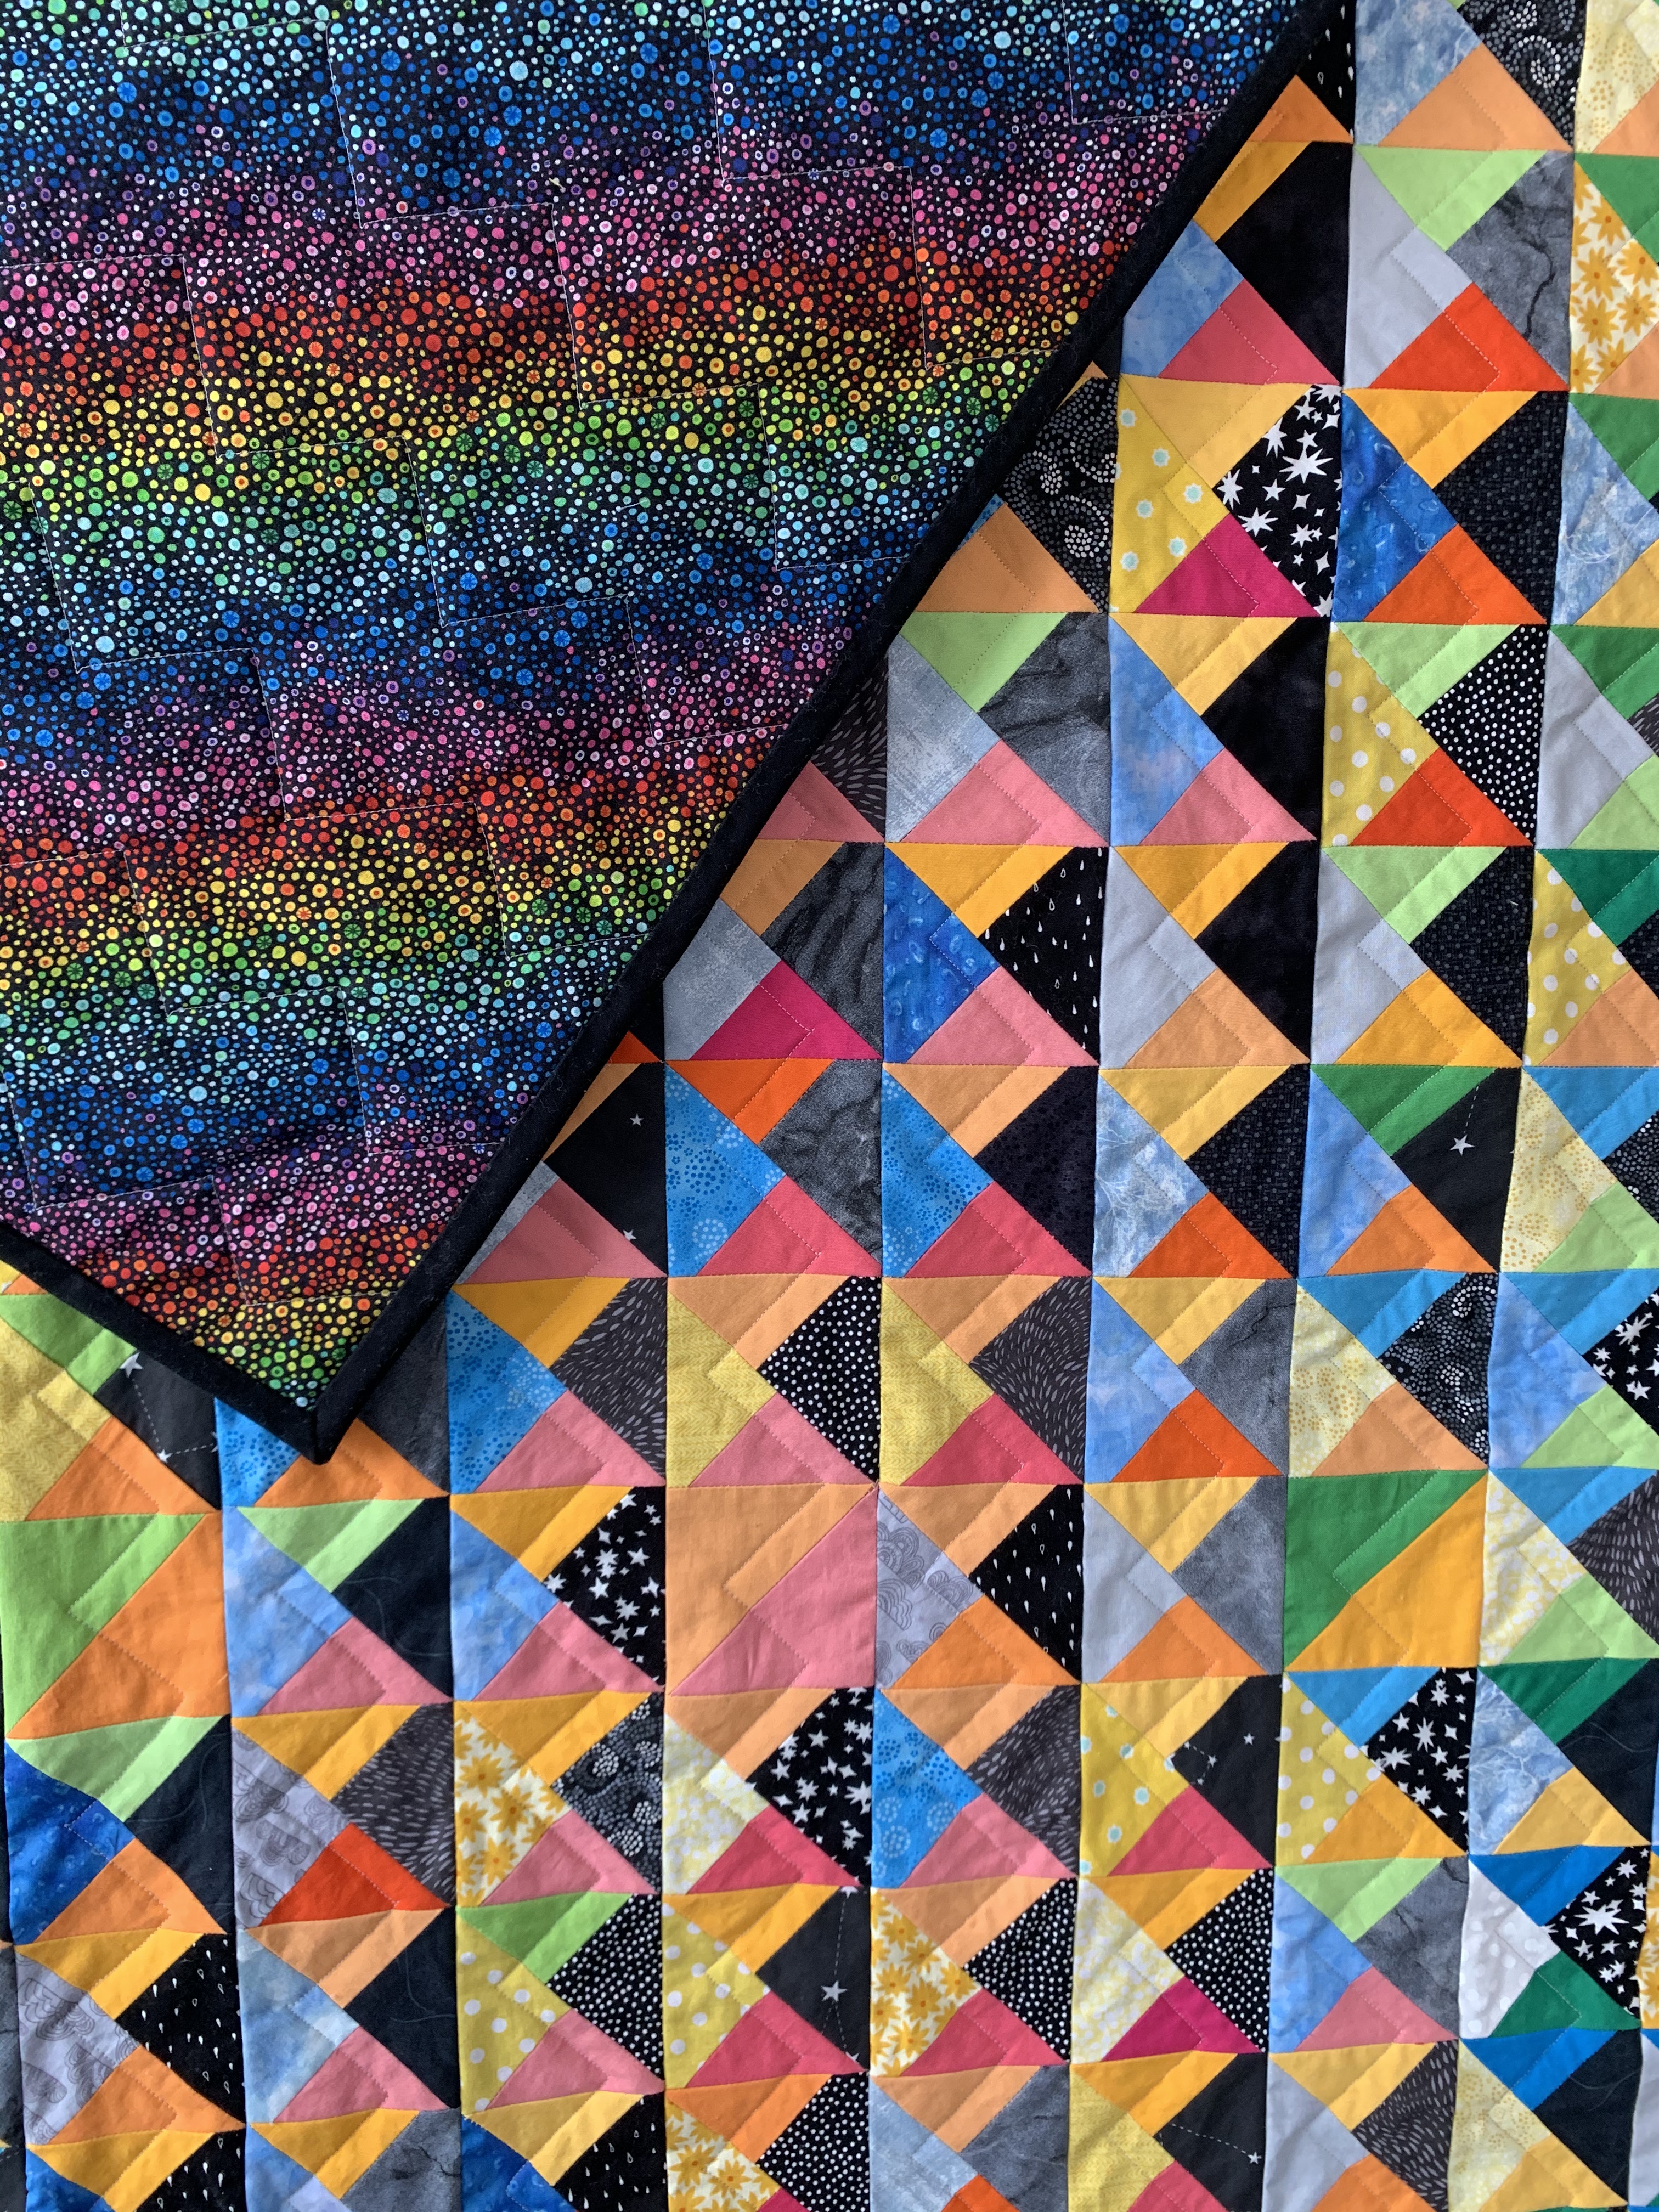
I took a bit of a chance with the wide stripe binding—but I’m really pleased with how it turned out. I cut bindings on the bias, so a bias-cut stripe can work really well with some quilts. There is actually a lot of black in this quilt, so the binding fits right in just right. The first pic below is the bottom, and the second the top.
And, this binding works well for the backing fabric as well.
Here are some close-up pics of various parts of this quilt. Note that I varied the “accent” piece in each row to fit that row.
As noted in the post about the Rainbow version, each row’s pattern offered both a pattern and a learning curve.
It is very satisfying to finish a year-long project, let alone TWO os the same project. I’m still not sure what possessed me to undertake two of the same quilt at once. But I’m not sorry…
And now the promised snow is starting, so I will have another quilty day.
This last week was a busy one for me, so blog postings got put on hold. This coning week will contain several snow storms, starting later today, and that is just fine by me. I have food (or will get what I need this morning), and I have LOTS of ongoing quilty projects.
The “Trees” quilt top is done now. Remember that these quilt blocks were inspired by the work of Amanda Jean Nyberg of Crazy Mom Quilts. Making the tree trunks turned out to be the most time-consuming task in this project. A lot of solid stash went into “Trees” and more printed scraps and cuts from the print stash then I would have thought.
I purchased a new WILD print for the backing—as I didn’t have a backing in my stash that would work for this quilt. It’s a “rainbow” print from Alison Glass and Andover fabrics called “Art Theory Whole Cloth in Day.” It’s WILD, right? But it screams about the abundance in spring/summer flora and the insect world. The colors are perfect though. I don’t know about the binding yet—probably a solid green from my stash. Or maybe that majenta.
The “My Pips” top is now quilted, and I will trim it today and install the binding. This quilt block and these fabrics are a project in season 3 of The Color Collective, Tara Faughnan designer/teacher, on Amy Newbold’s Sewtopia platform. I really, really liked the fabric palette for this project.
After Debbie from A Quilter’s Table recommended WALK, a book about quilting on a domestic sewing machine with one’s walking foot, I scrolled her blog once again to look at her quilting and found this quilt on her “Working Small, ”December 27, 2020, post (https://aquilterstable.blogspot.com/search?updated-max=2020-12-28T08:09:00-08:00&max-results=1&start=5&by-date=false). I include it here to show the lovely curved quilting she did—by starting her diagonal curve lines from opposite corners and working from the center line on each side and working out to the corners of the quilt. And, by the way, right now Debbie is doing a self challenge of 50 small scrap quilts in 50 days, which is inspiring and down right fun to see.
Here’s “My Pips” at this point. I’ve been looking and looking at these great swirls—which remind me of spring winds swirling about and bringing warmth with them. I think I’ve decided NOT to do the opposite swirl pattern on this quilt. I think what is there now is enough. And I am noting that my swirls are an inch apart. Debbie’s seem to be a bit wider, and that, I think makes a difference in the acquired density. The binding will be the Kona “Thistle” lavender fabric you see in this quilt.
Here’s a closer view.
The February Color Collective project in somewhat underway now. The fabrics are washed, ironed, and partially cut. Tara’s improv quilt is called “Bokeh” and is, in part, all about how color relationships work to create certain effects in a quilt. These end-cut squares are going to allow me to figure out how my blocks will look—and I’m already moving around ideas A LOT before I actually sew ONE idea together—maybe later today. (I probably won’t be able to resist). This quilt involves MANY ideas about how blocks function in a quilt, and I think these improv block versions will begin to inhabit a life of their own. Quilts DO talk to their maker if the maker listens.
Here’s one block mock-up to try. I’ll probably change it, knowing me. But once chosen, each idea will make four blocks. And you can see that they can be turned in multiple ways and spread throughout the top. Or, not. I will definitely spread them around. I was thinking of a small quilt, just to try out this method. But I can already see that I’ll get addicted. I usually do to Tara’s projects. And these projects are so much fun when one gets rolling with them.
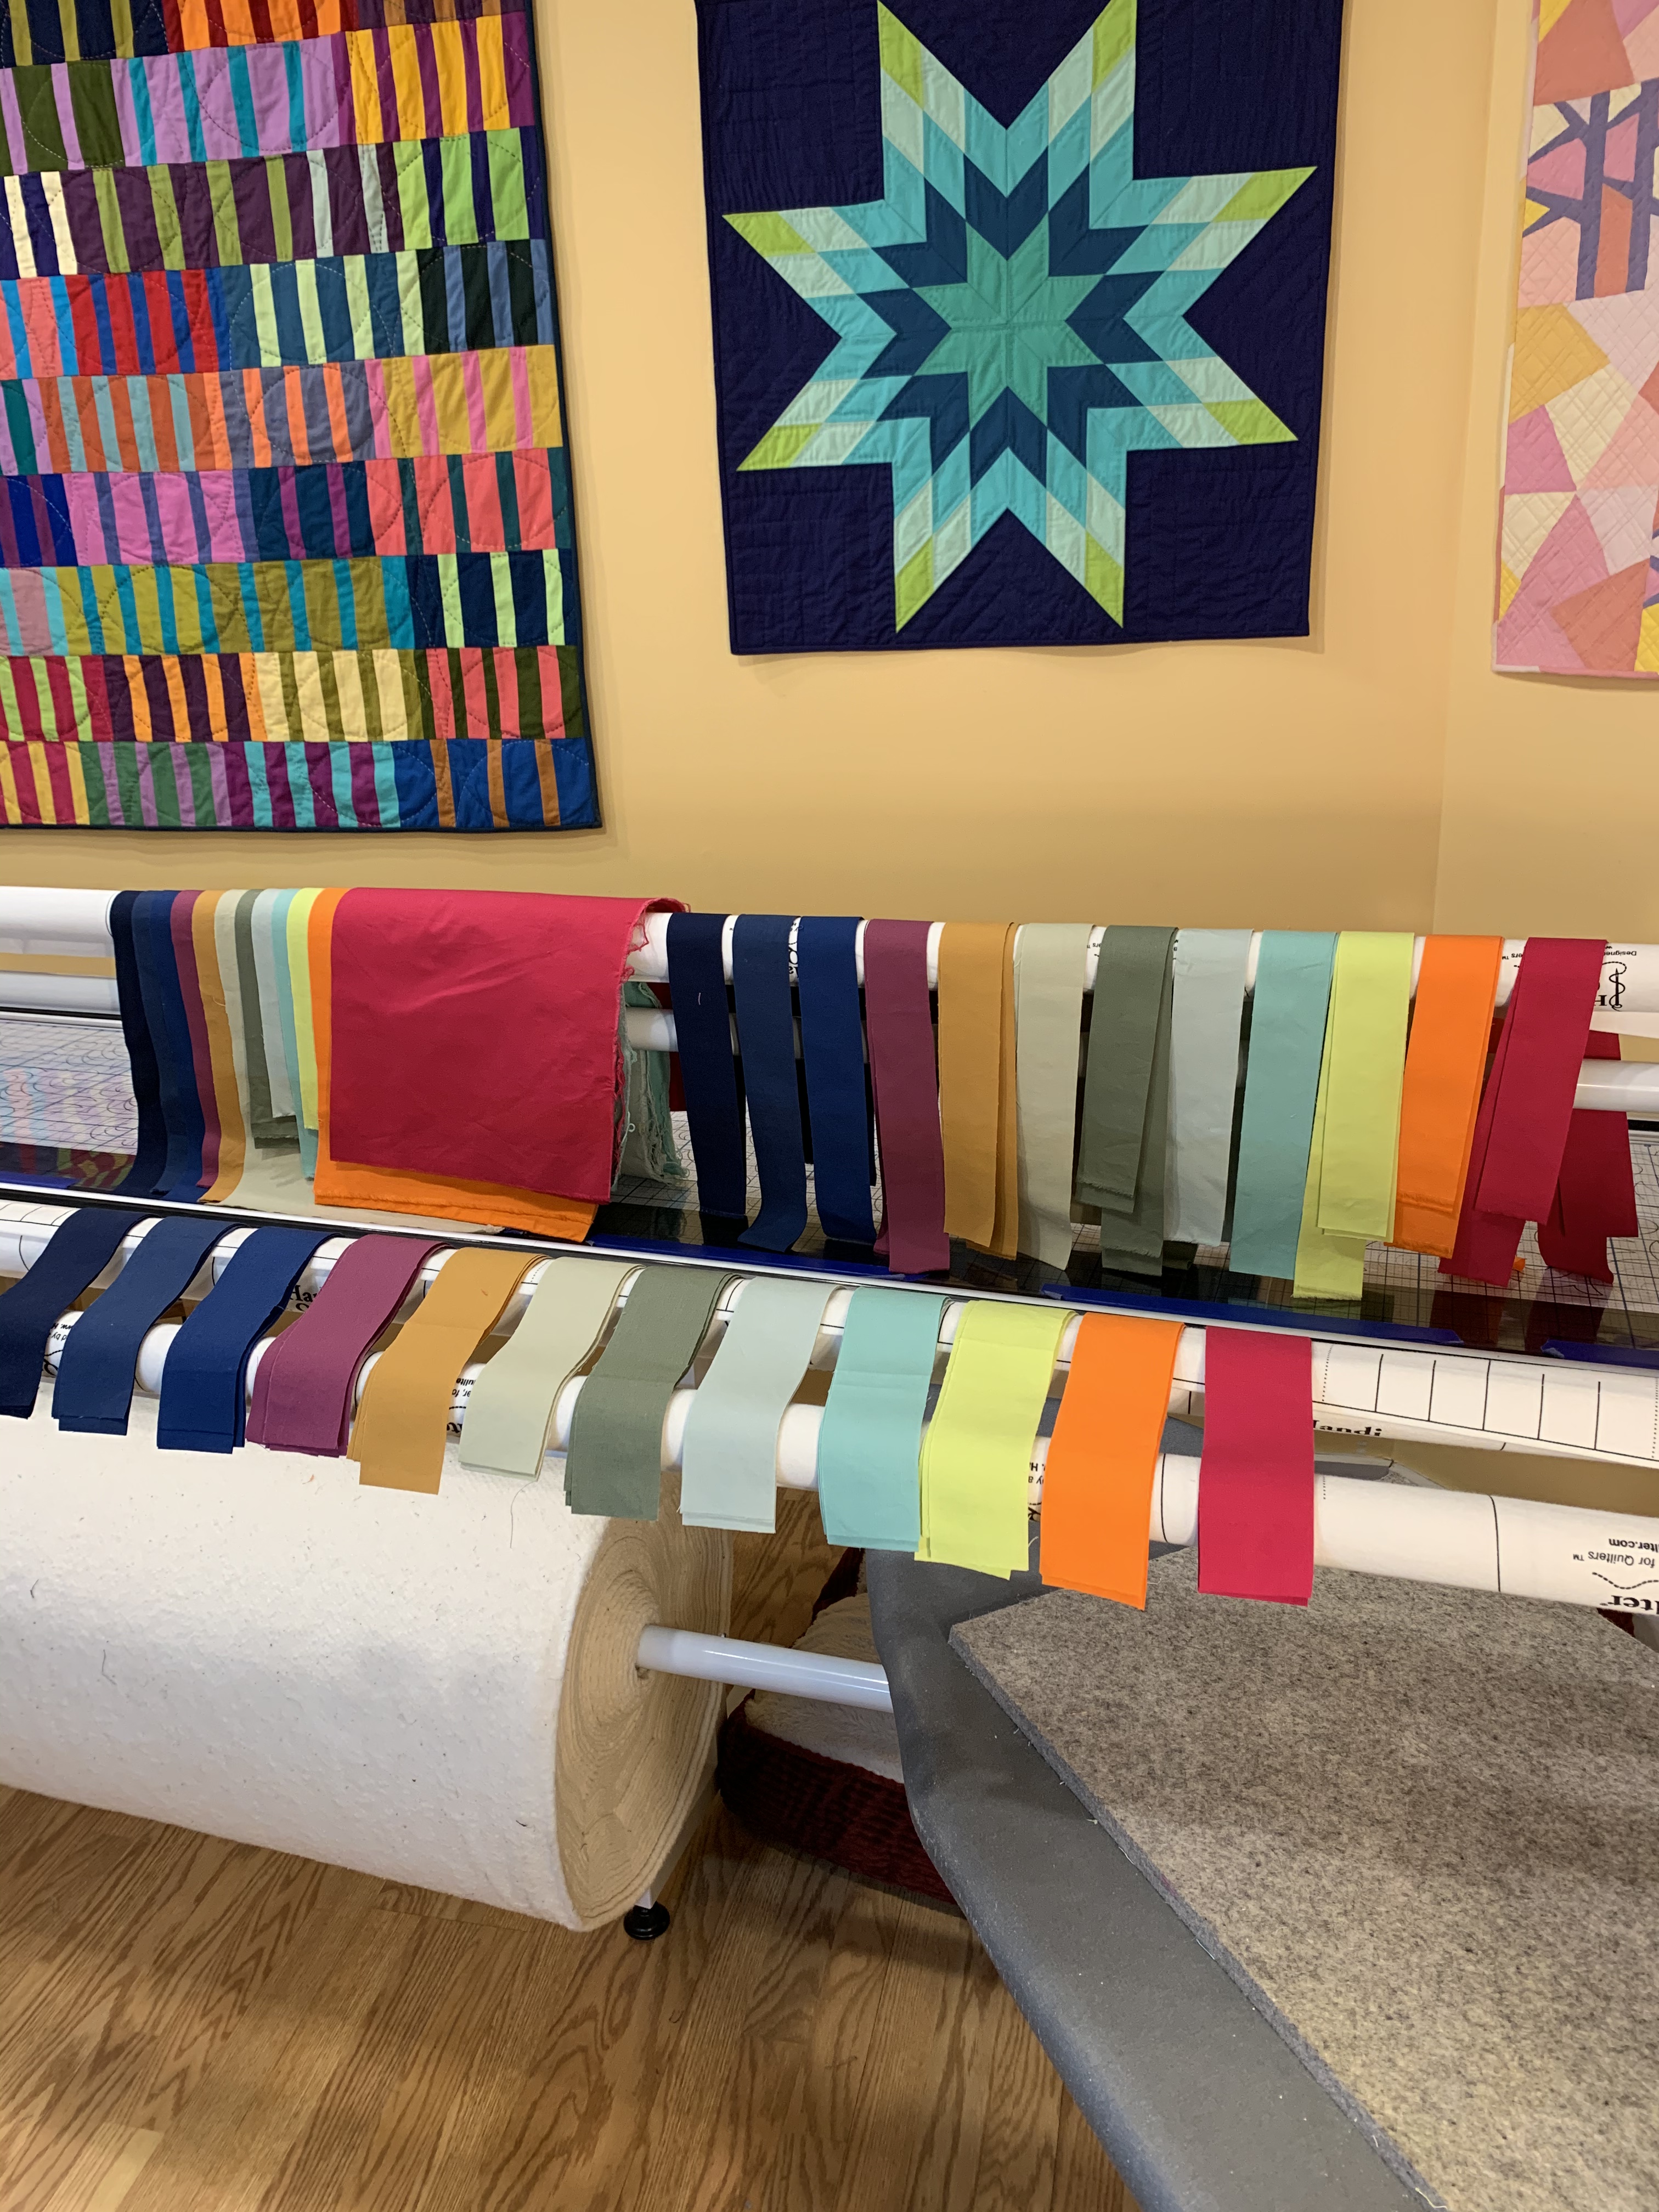
Here’s the palette. There are darks, lights, brights, mediums, cools and warms.
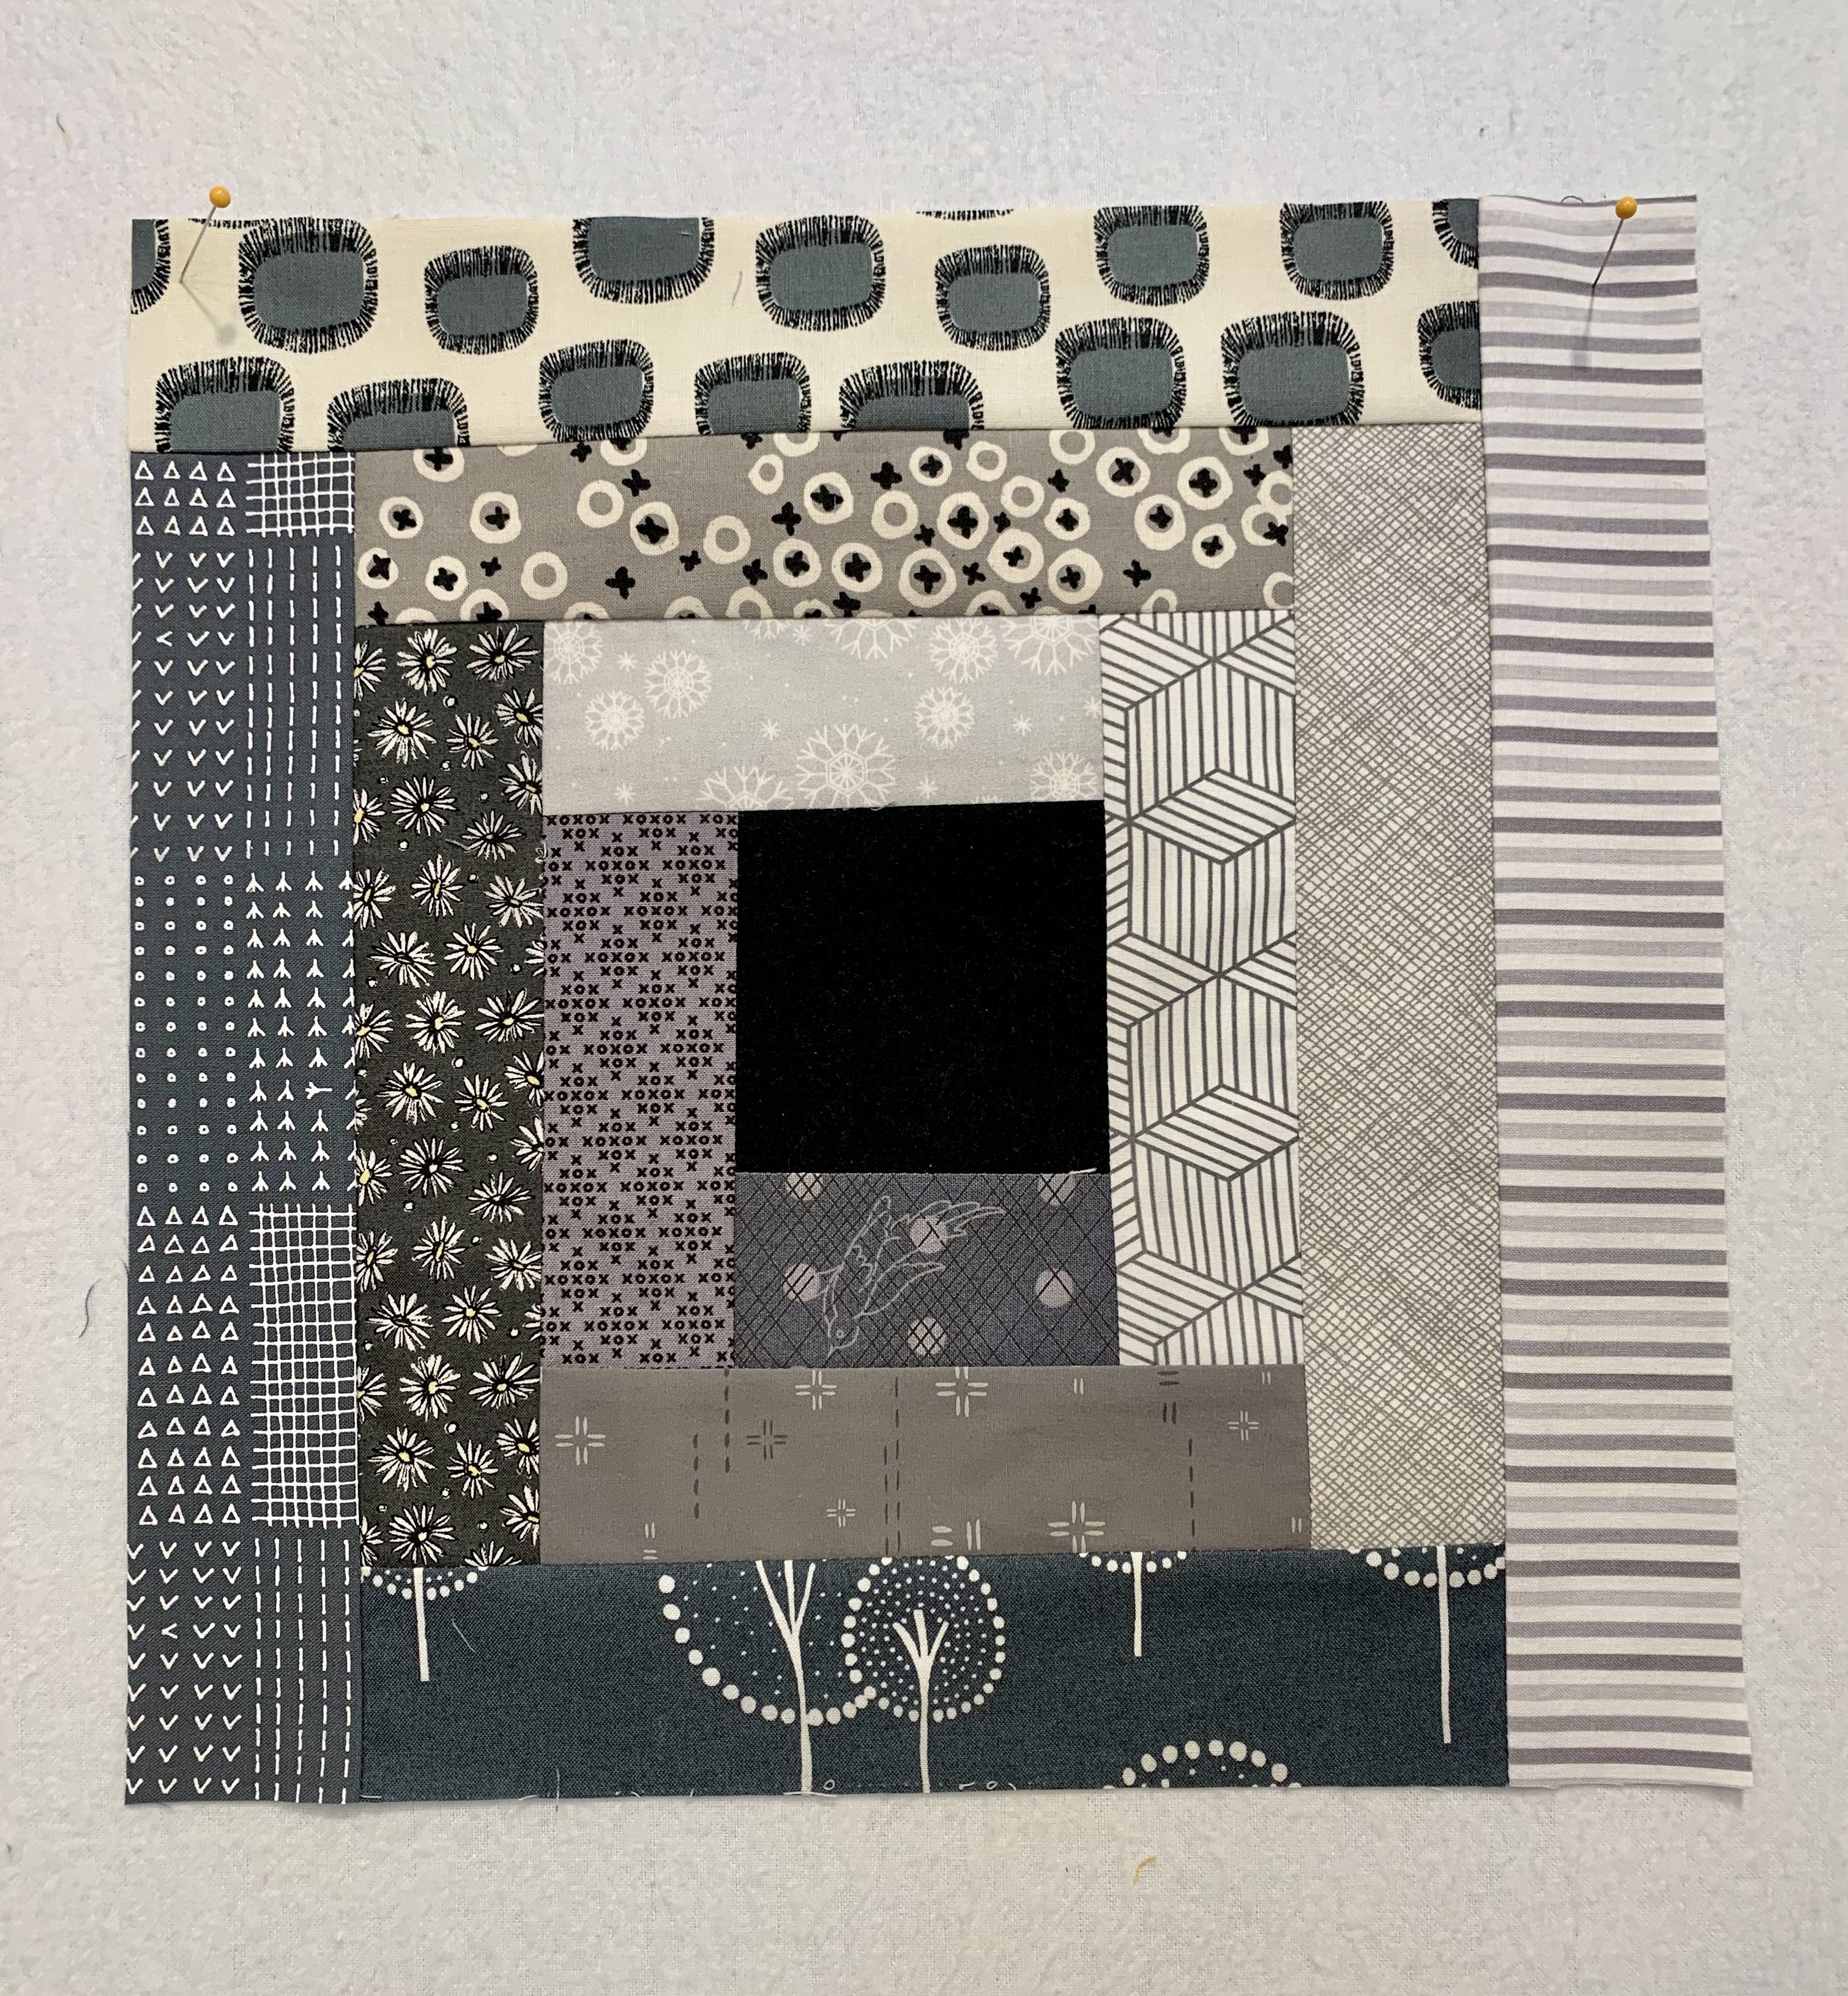
I have been ironing and cutting and replenishing blue and grey fabrics for many days now—for a large log cabin housewarming quilt for a niece out in Wyoming. I played with ideas for block size and decided on a 12-inch block made using a Creative Grids ruler that will also make a 6-inch block. I had one of these rulers in the 8-inch size, but it didn’t feel right to me for this project. I REALLY like these rulers for both log cabin and pineapple block projects as the finish for each block is dead perfect.
With the “Trees” top finished and the design wall vacuumed and ready to go, I made some initial blocks. I don’t know about the setting yet—when I’ve made more blocks my niece will choose the setting she likes. And I’m sure blocks will get moved around. But here are the first blocks. This is the primary quilt project for me now as this family is moving into their new home TODAY.
I’m thinking down the road that I’ll make this quilt in dark and light greys with a black center chimney. So while cutting, I made a trial block, and I really like it. I’ve been wanting to make a grey quilt.
The binding on “Sugaridoo: Cotton+Steel/Ruby Star Society”—the second Sugarisoo quilt—is almost done, and I really love the wider black and cream stripe for this quilt. I will finish it tonight probably, So pics will come soon.
The hand quilting thread for “My Splice” came, so I will circle back to that project after I complete the binding on “My Pips.” I have no idea how I’ll quilt “Trees,” but it will be likely on the longarm as I think it needs curves. Did I just say “curves” after loving the curves on “My Pips.” Hmmmm…
Meanwhile, as you can see, I have lots of fun projects for quilty play and production. And I am noting that I did not cover three projects I would really LIKE to make—OR the assembling of the improv blocks made for me by my fellow “Be Inspired“ prompt challenge members.
There are some quilts I make that just don’t want to go on the longarm. A longarm machine quilts side to side, so any kind of long diagonal line, or, even, a straight line that runs down the length of the quilt, would not work well with my machine’s 18-inch throat.
Jacquie Gering’s book WALK comes to the rescue of how to quilt with your walking foot.
Debbie of her A Quilter’s Table blog recommended this book, and you can see her work with this kind of walking foot quilting in so many of the quilts in her gallery.
What I learned immediately is how to figure out exactly where the needle is when the walking foot is installed—so that it is easy to make clear, precise lines AND to echo curves. Some of the quilting designs are just…amazing.
If you read this blog at all you know that I love learning curves—especially quilty learning curves. So, you will not be surprised to learn that I’m going to quilt “My Pips” with curves made with my walking foot.
It is Friday. And we are getting rain later today, so AC and I went out late morning to run food errands and to make some time for AC to chase his red rubber ball to run out his kinks.
What amazes me is that he knows where we are in the car, and if we are near any of the places where he can chase his ball, he begins to “talk” to tell me he’s so ready to go when we get there. It is a rare day when I don’t take him somewhere to run.
It’s hard to throw the ball and take videos, but here’s what I got this late morning at the Barrett’s Cove parking lot. Look at that happy face and wagging tail as he brings the ball back. If I can get the ball ahead of him, he’ll put on a burst of speed that is so fast. I’ve started wondering if he’s got some greyhound in him somewhere.
For some reason, when he brings back the ball, he rubs all over my legs, going around and around my body.
When he starts to out of breath, I’ll do a few “short” throws where I pound the ball against the surface so it goes high in the air. Most of the time he catches it on the fly, which is pretty darn awesome.
Here’s a picture of Barrett’s Cove. It is just one of my favorite spots winter and summer.
When we got home, it started to snow—not rain. And it is so pretty.
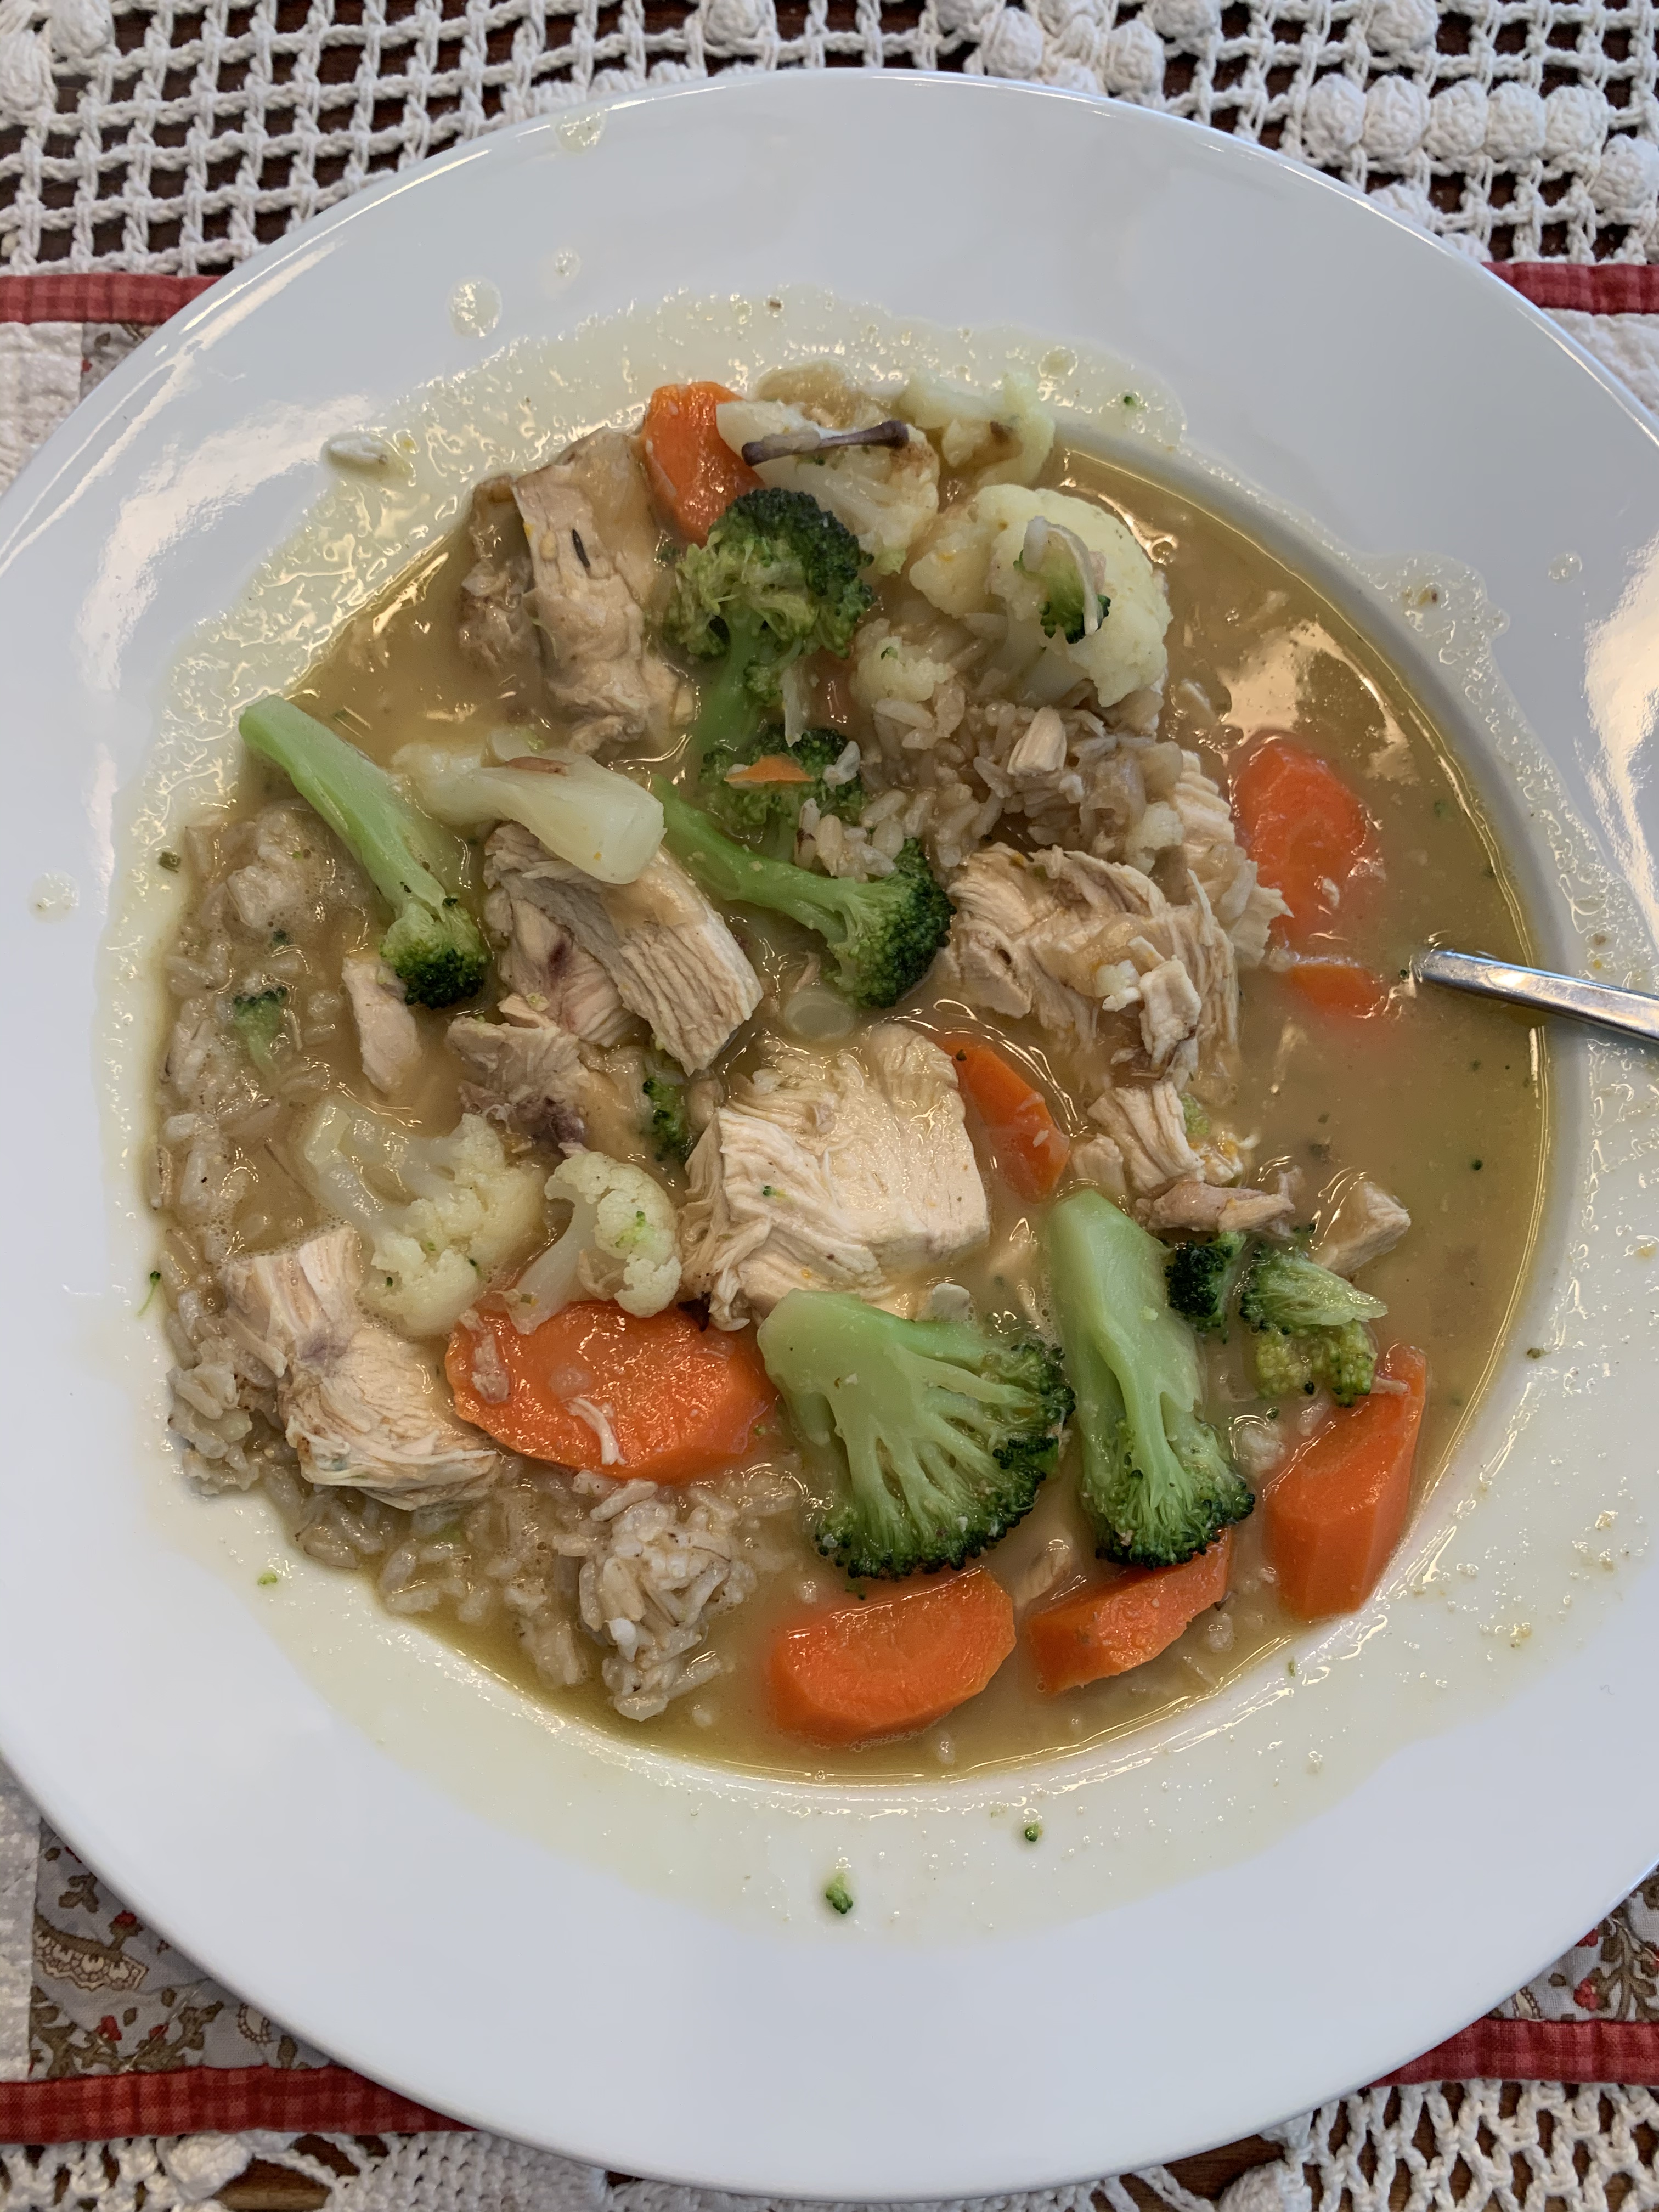
A warm lunch was in order:
I cooked some chicken breasts in 14 minutes in the Instant Pot last night! So I had delicious leftover tender and tasty chicken and a cream-based sauce made with onions sauteed in ghee and with some heavy raw cream, dried herbs, and a bit of mustard added. I added more chicken broth to the leftover sauce after I put away the groceries, and quick-cooked some fresh broccoli, cauliflower, and carrots in the sauce while I got the chicken off the bone. I added the chicken and poured the whole thing over the leftover rice from last night. I cooked a whole bag of sprouted brown rice in the Instant Pot some days back and froze the extra rice in individual portions.
And now I’m going to finish lunch and have some sewing time.
My love of the Tulip Sewing Needles started with the kind of “big stitch” hand quilting I often do that uses heavier threads. I prefer perle cotton size 8 and 12-weight cotton threads. The 12-weight is lighter than the size 8 cotton, but much heavier than a 50-weight thread such as I use with piecing. I prefer these threads to embroidery floss or the heavier perle cottons.
There are multiple manufacturers for these threads, so I am only limited by color availability. Red Rock Threads is a good place to start. Sulky’s 12-weight cotton threads also come in “mini” spools of 50 yards for $1.65 each, which allows one to collect an array of colors. And anyone reading this blog knows I love color in all forms.
I purchased the larger blue and ivory spools years ago—and I have a few of the blue and a lot of the ivory left. I have machine quilted quilt sandwhiches using either of these colors, but they lay down a strong line. I think they are best for grid quilting a quilt—and then decide if you want a strong quilting statement or not.
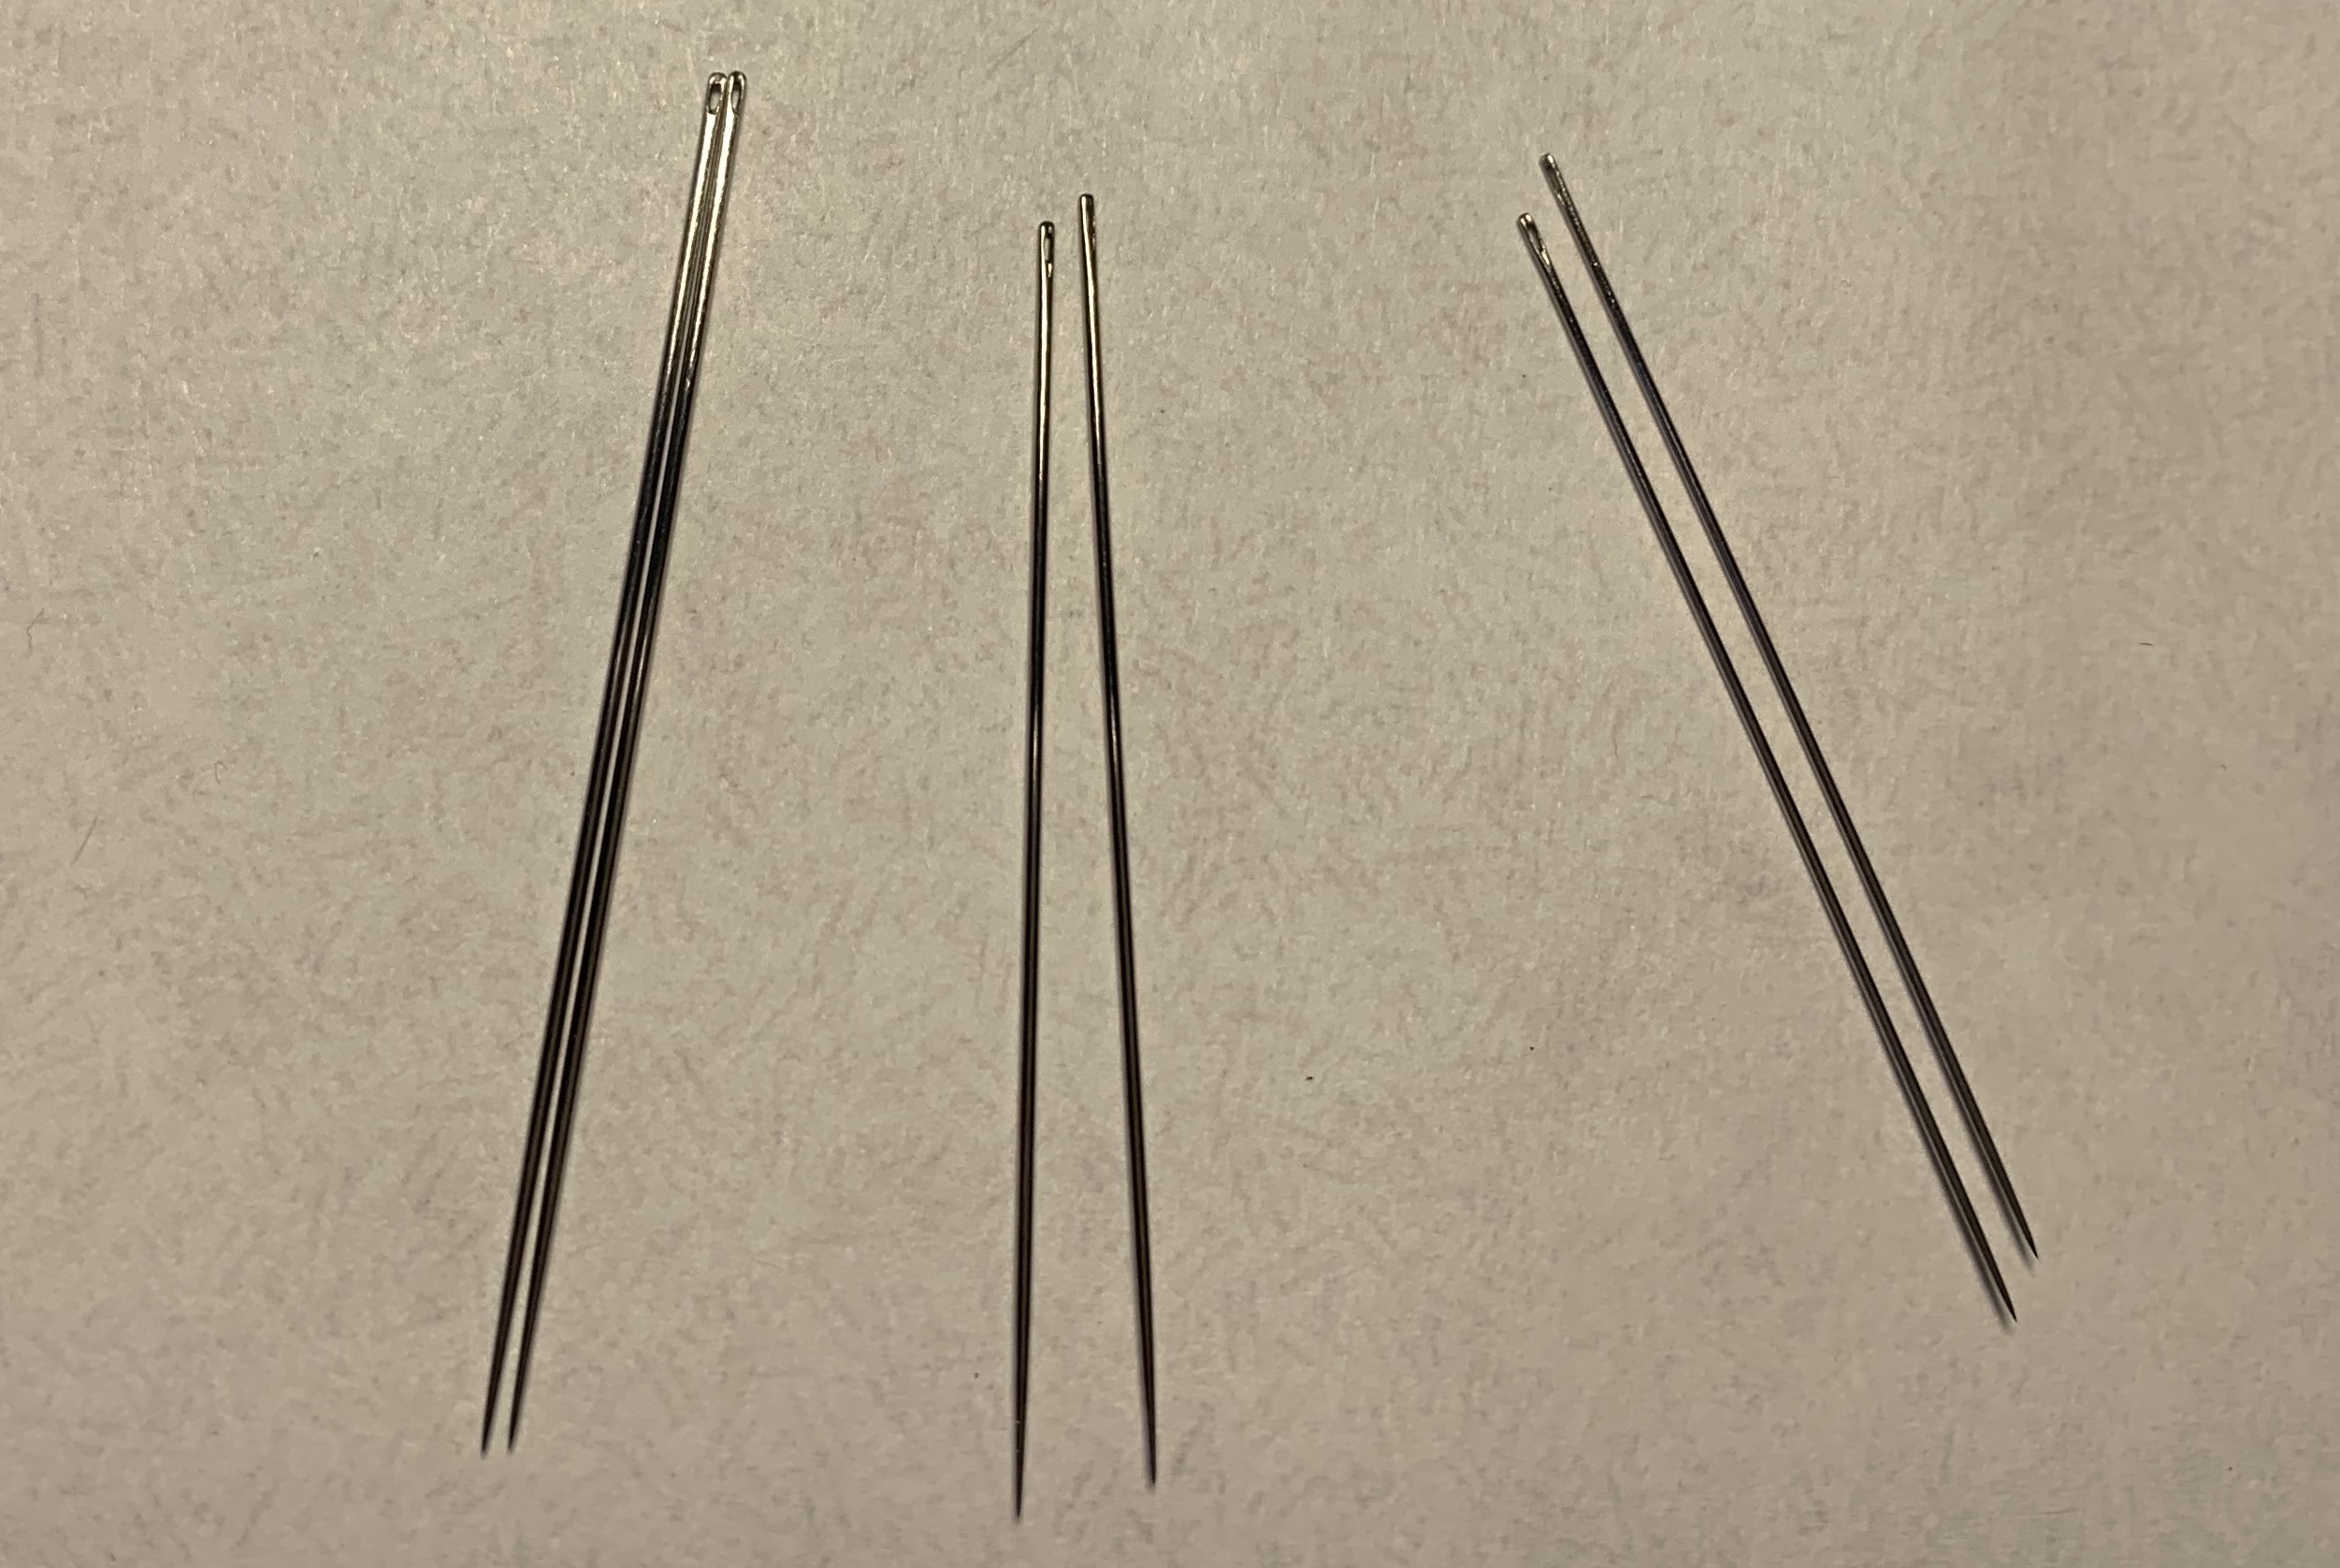
But, back to Tulip needles. My first ones were Sashiko needles. They are NOT cheap—they only come about 4 to a pack. BUT, they slide through fabric like a dream and they don’t bend. And I don’t have trouble threading them. In other words, these needles last. They are “polished” up and down to make them slide through the fabric easily. And they are available in many places online, including Amazon.
Here’s one of my Sashiko needles at work on my “My Splice” quilt with some 12-weight thread. The horizontal lines are from my longarm machine basting lines. I got a bit of a start on this project last night.
This quilt is going to look awesome when the hand quilting is done.
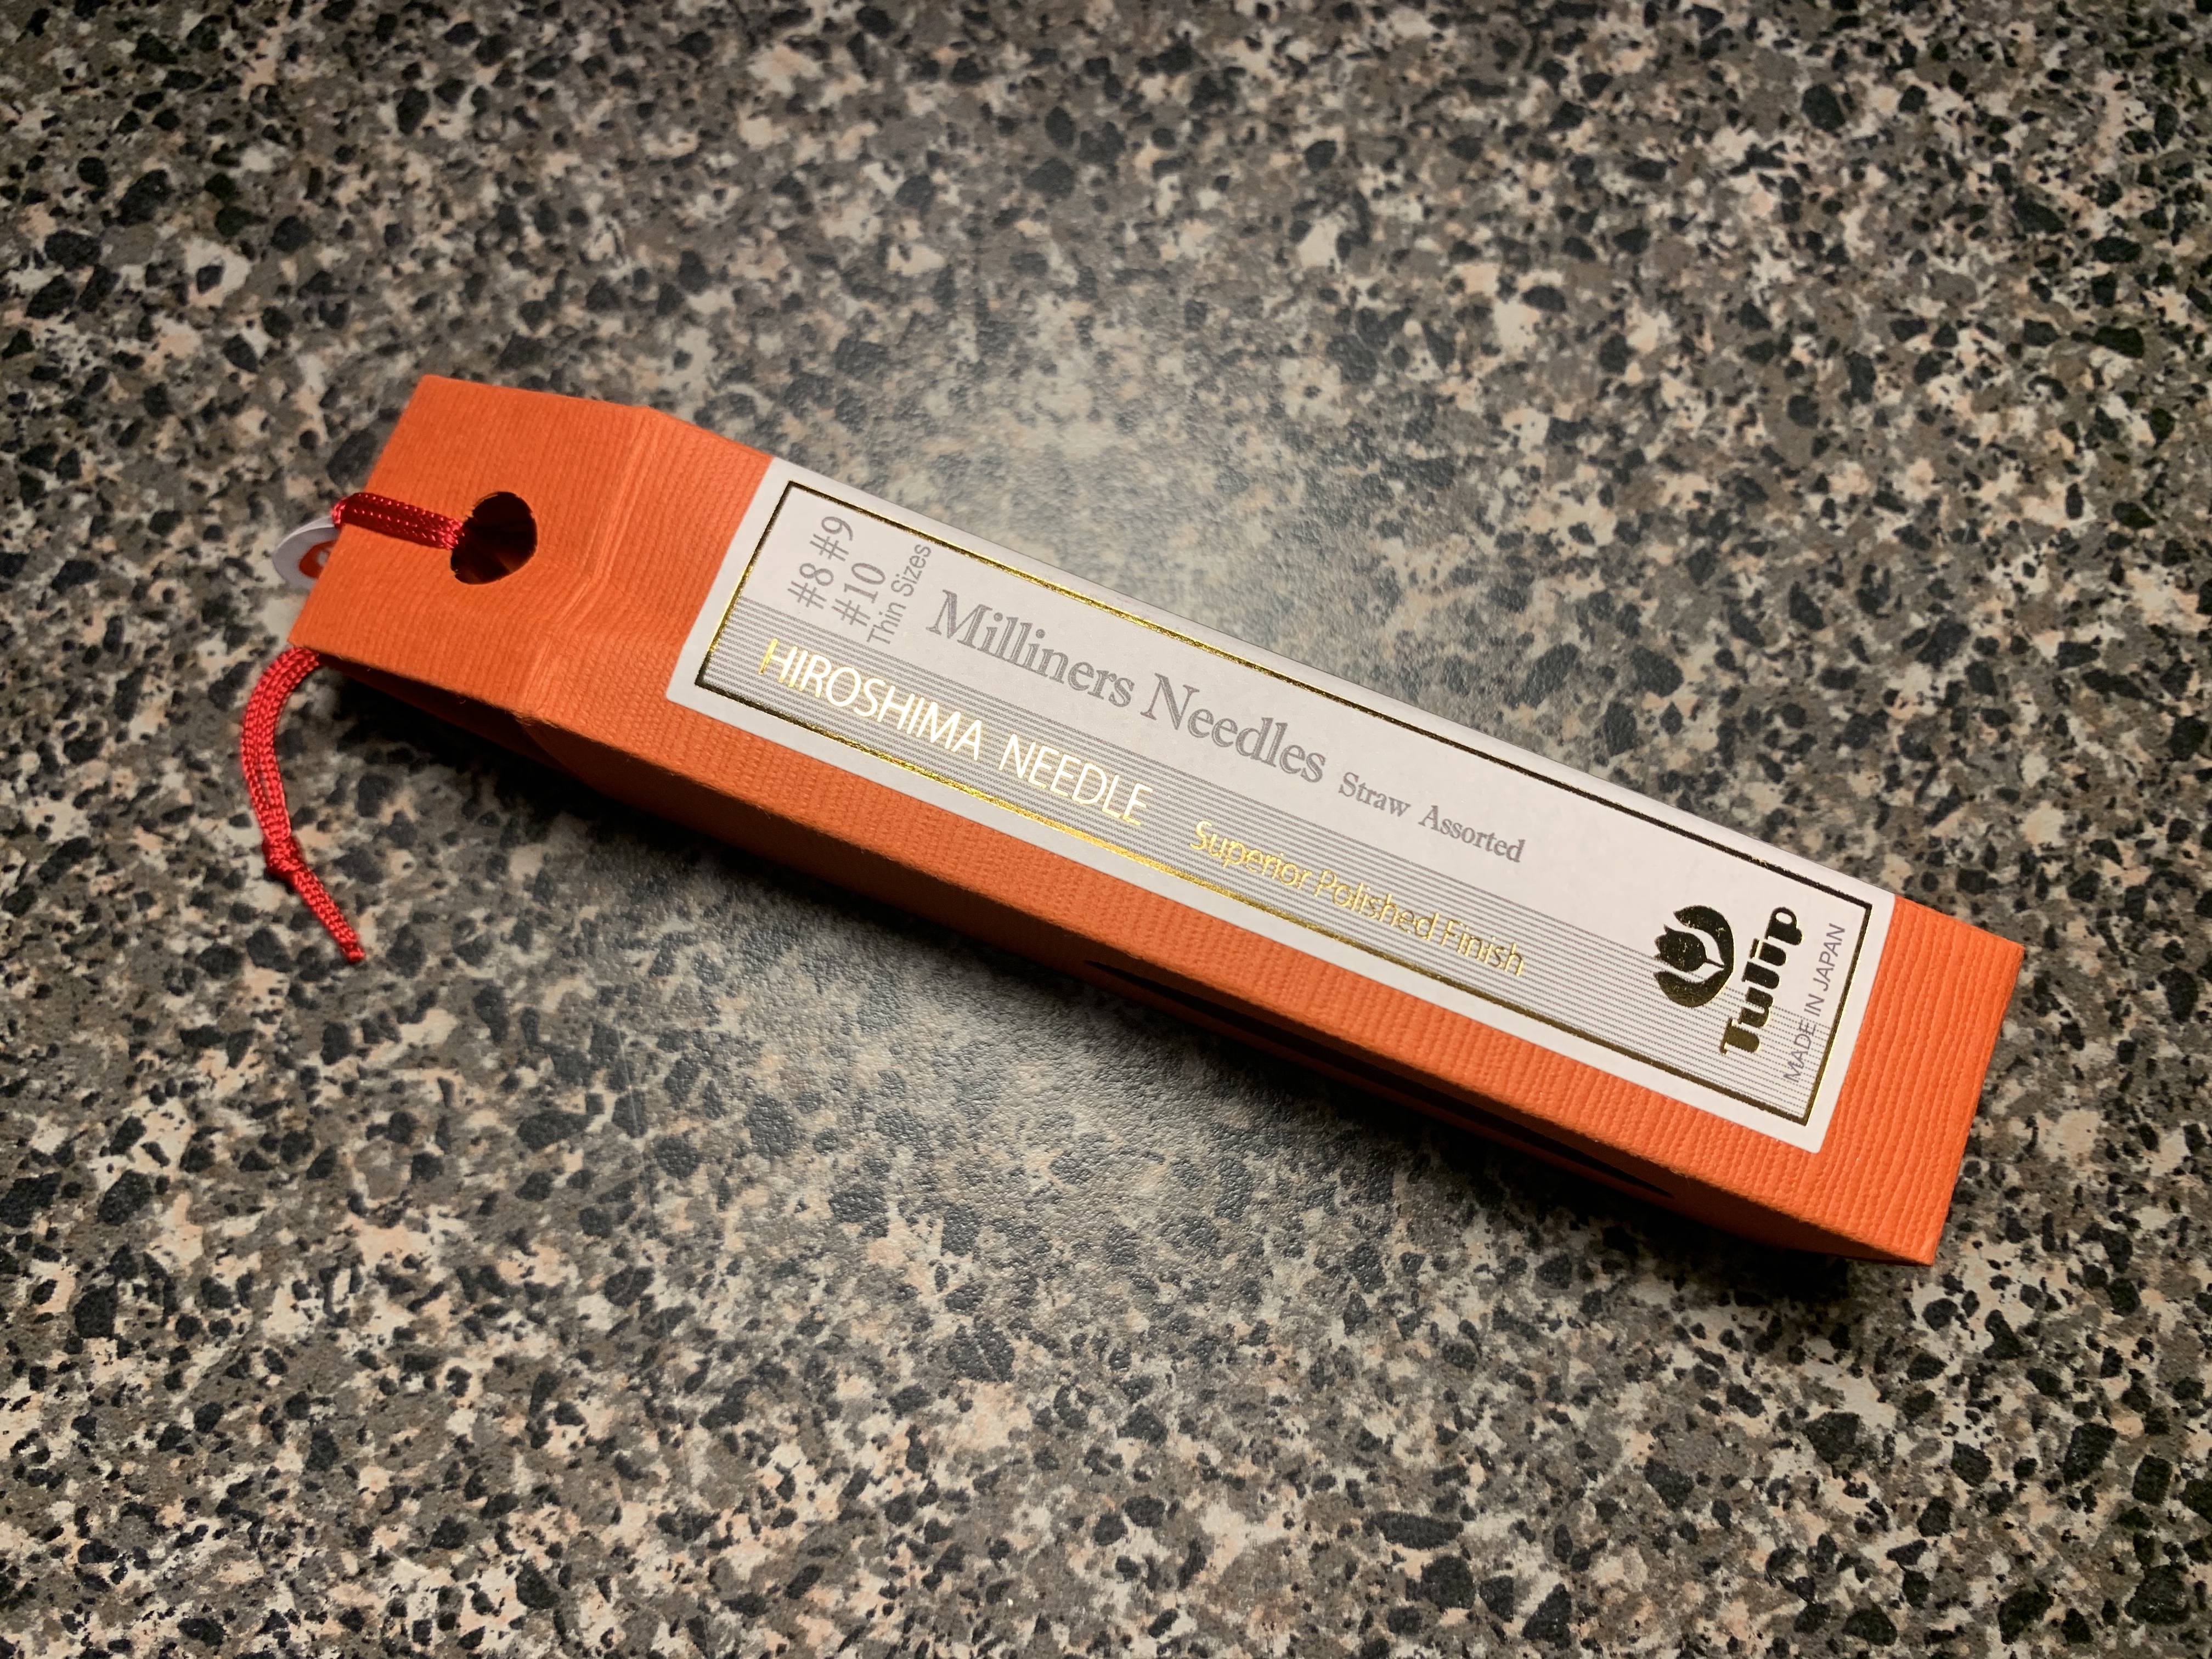
The Tulip needles come beautifully packaged.
Inside, one finds the actual container. This one contains 6 needles, two of each size.
This purchase of an assortment of straw needles was an experiment that I’m delighted to say is a happy one. Remember that the smaller the needle number, the bigger the needle. So, the size 8 is bigger than the other needles. I like all three of these needles. They are super sharp.
I lost one I was using to sew down the binding on Sugaridoo Rainbow a few days back. It fell out of the quilt sometime, likely, when I was finished for the night and folding it up. That led to vacuuming out the couch where I sit at night and then the whole carpet. And under the chair where I hang quilts I’m working on. But I’ve never found it. Lost needles have a funny way of appearing sometimes, so I am hoping this one does. And now I don’t leave the needle lose in my work—I clip it down with one of those little quilty clips we have all grown to love.
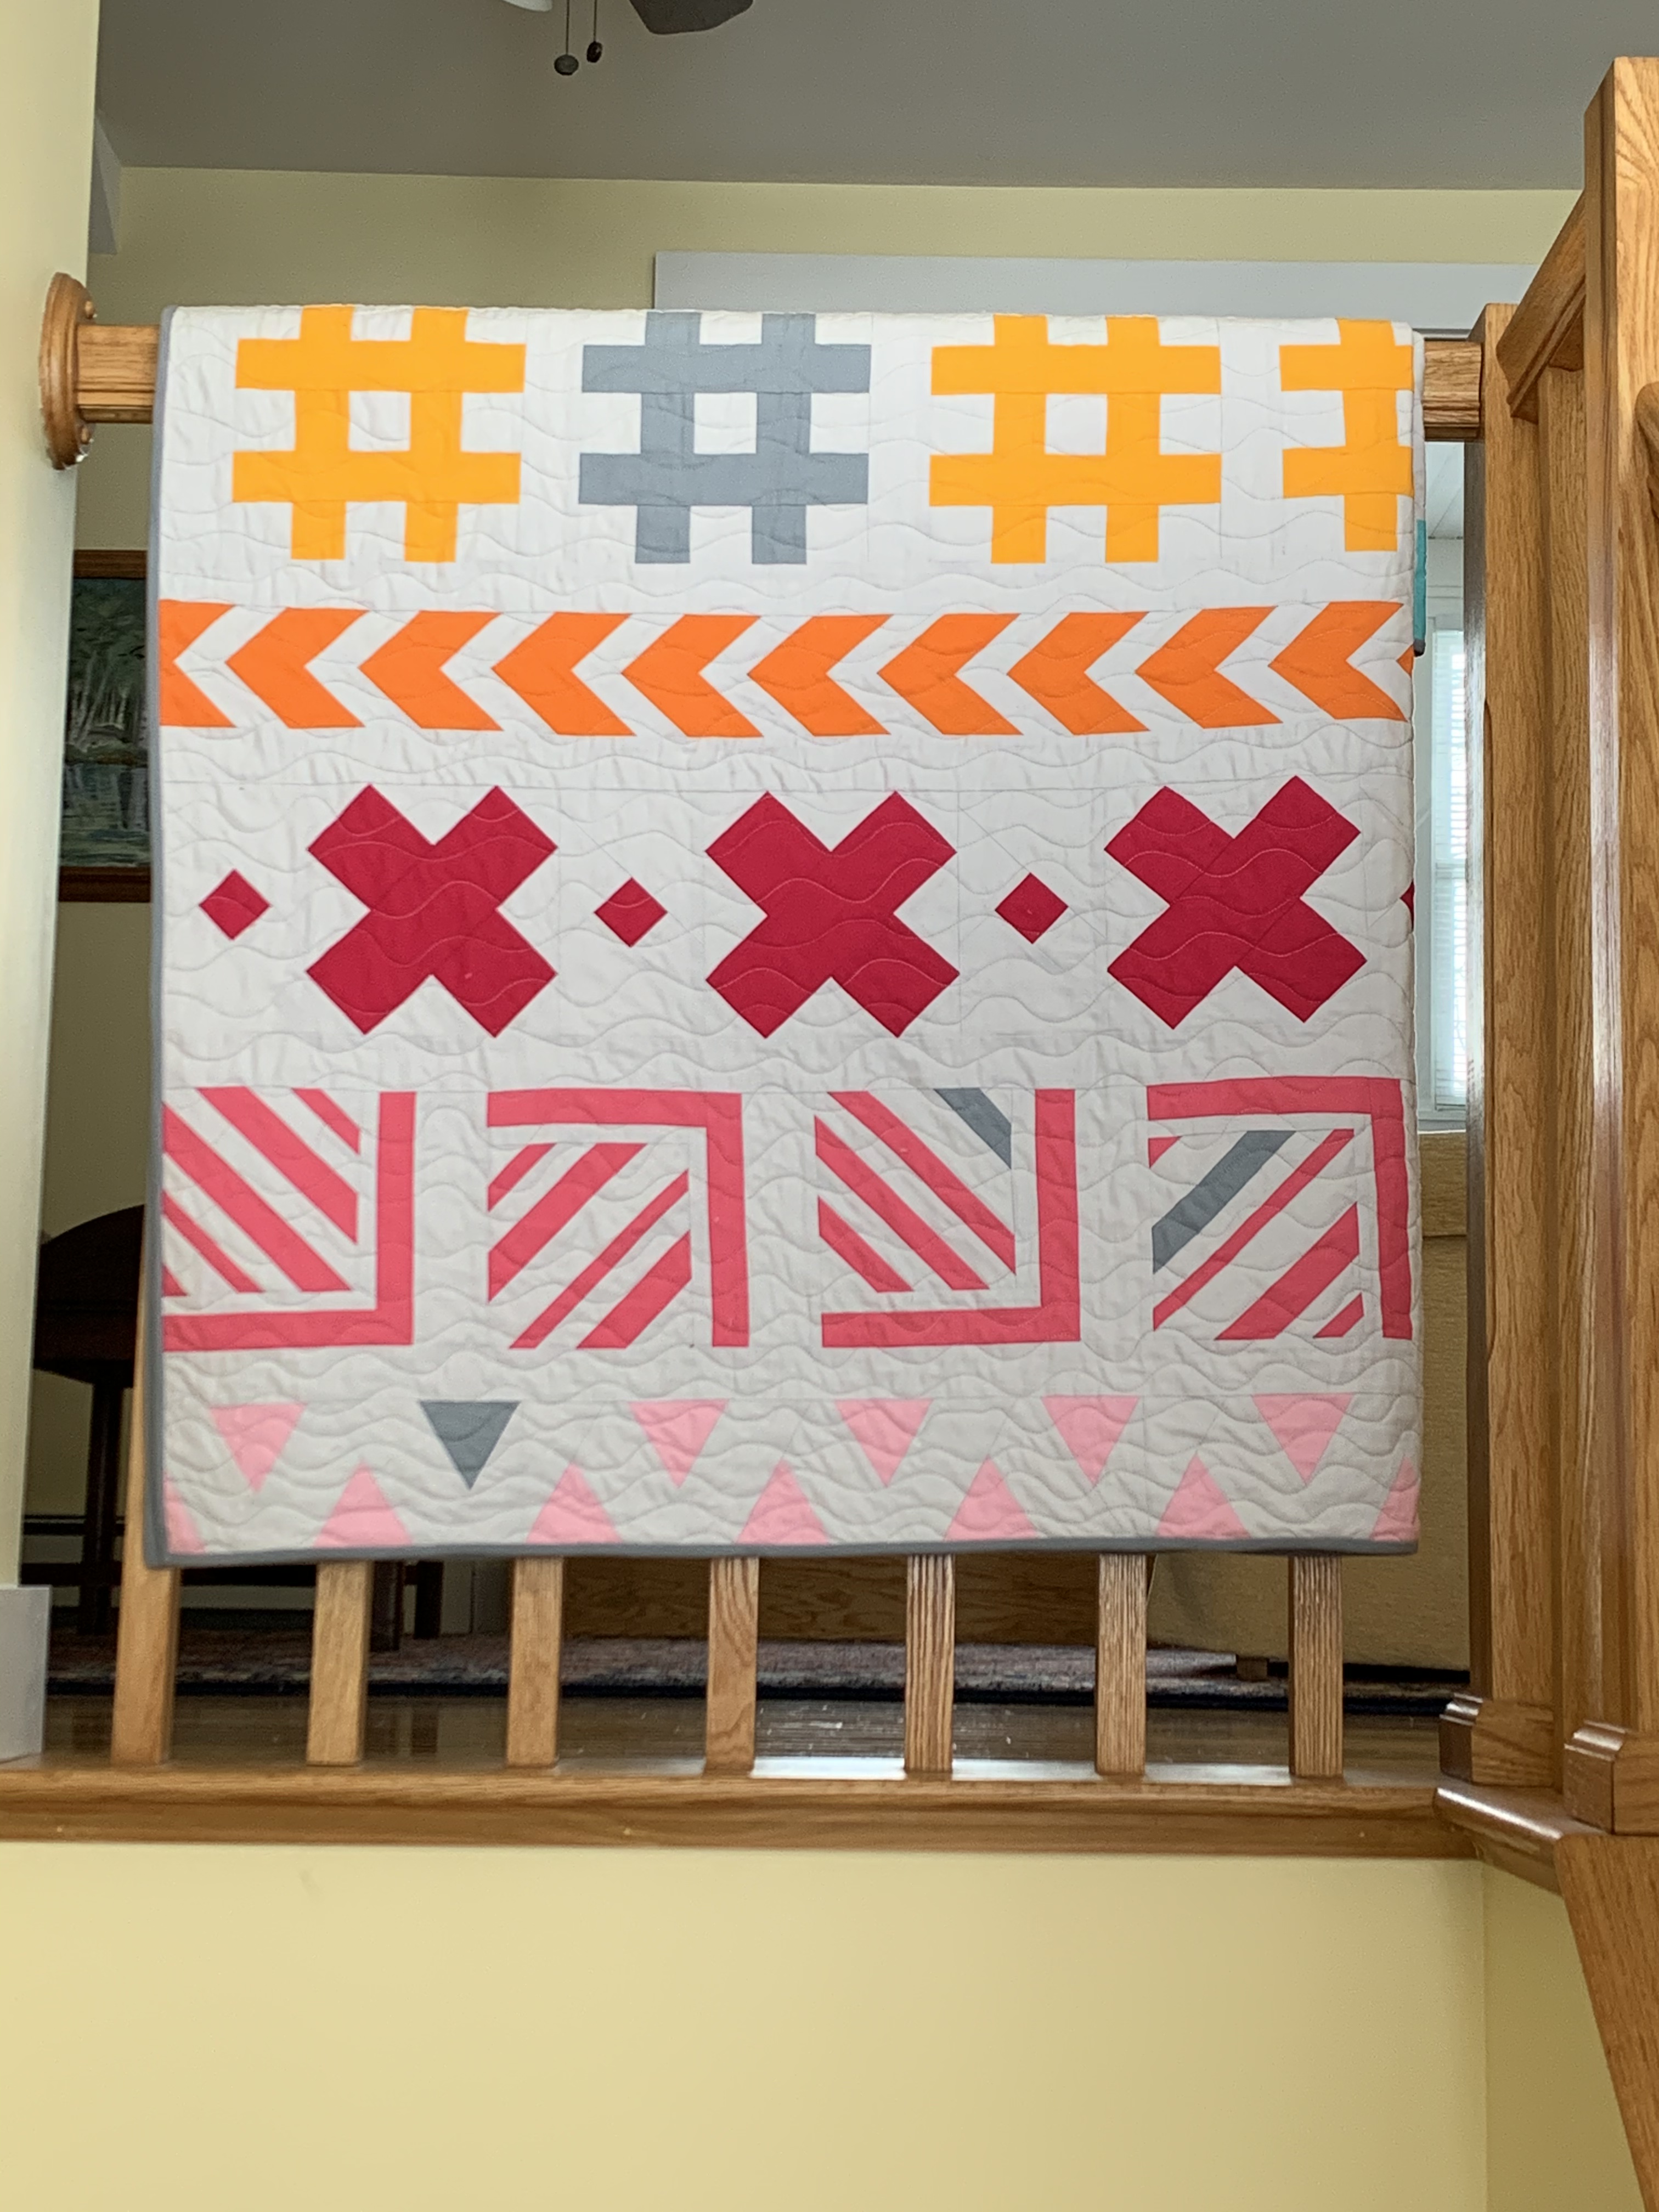
Sugaridoo Rainbow is now living on the stair bannister, and I’m enjoying seeing its happy face when I go up and down the stairs during the day. I will turn it about so I see different colors off and on.
My Tulip needle (a size 9 I think) did a great job with the Sugaridoo binding.
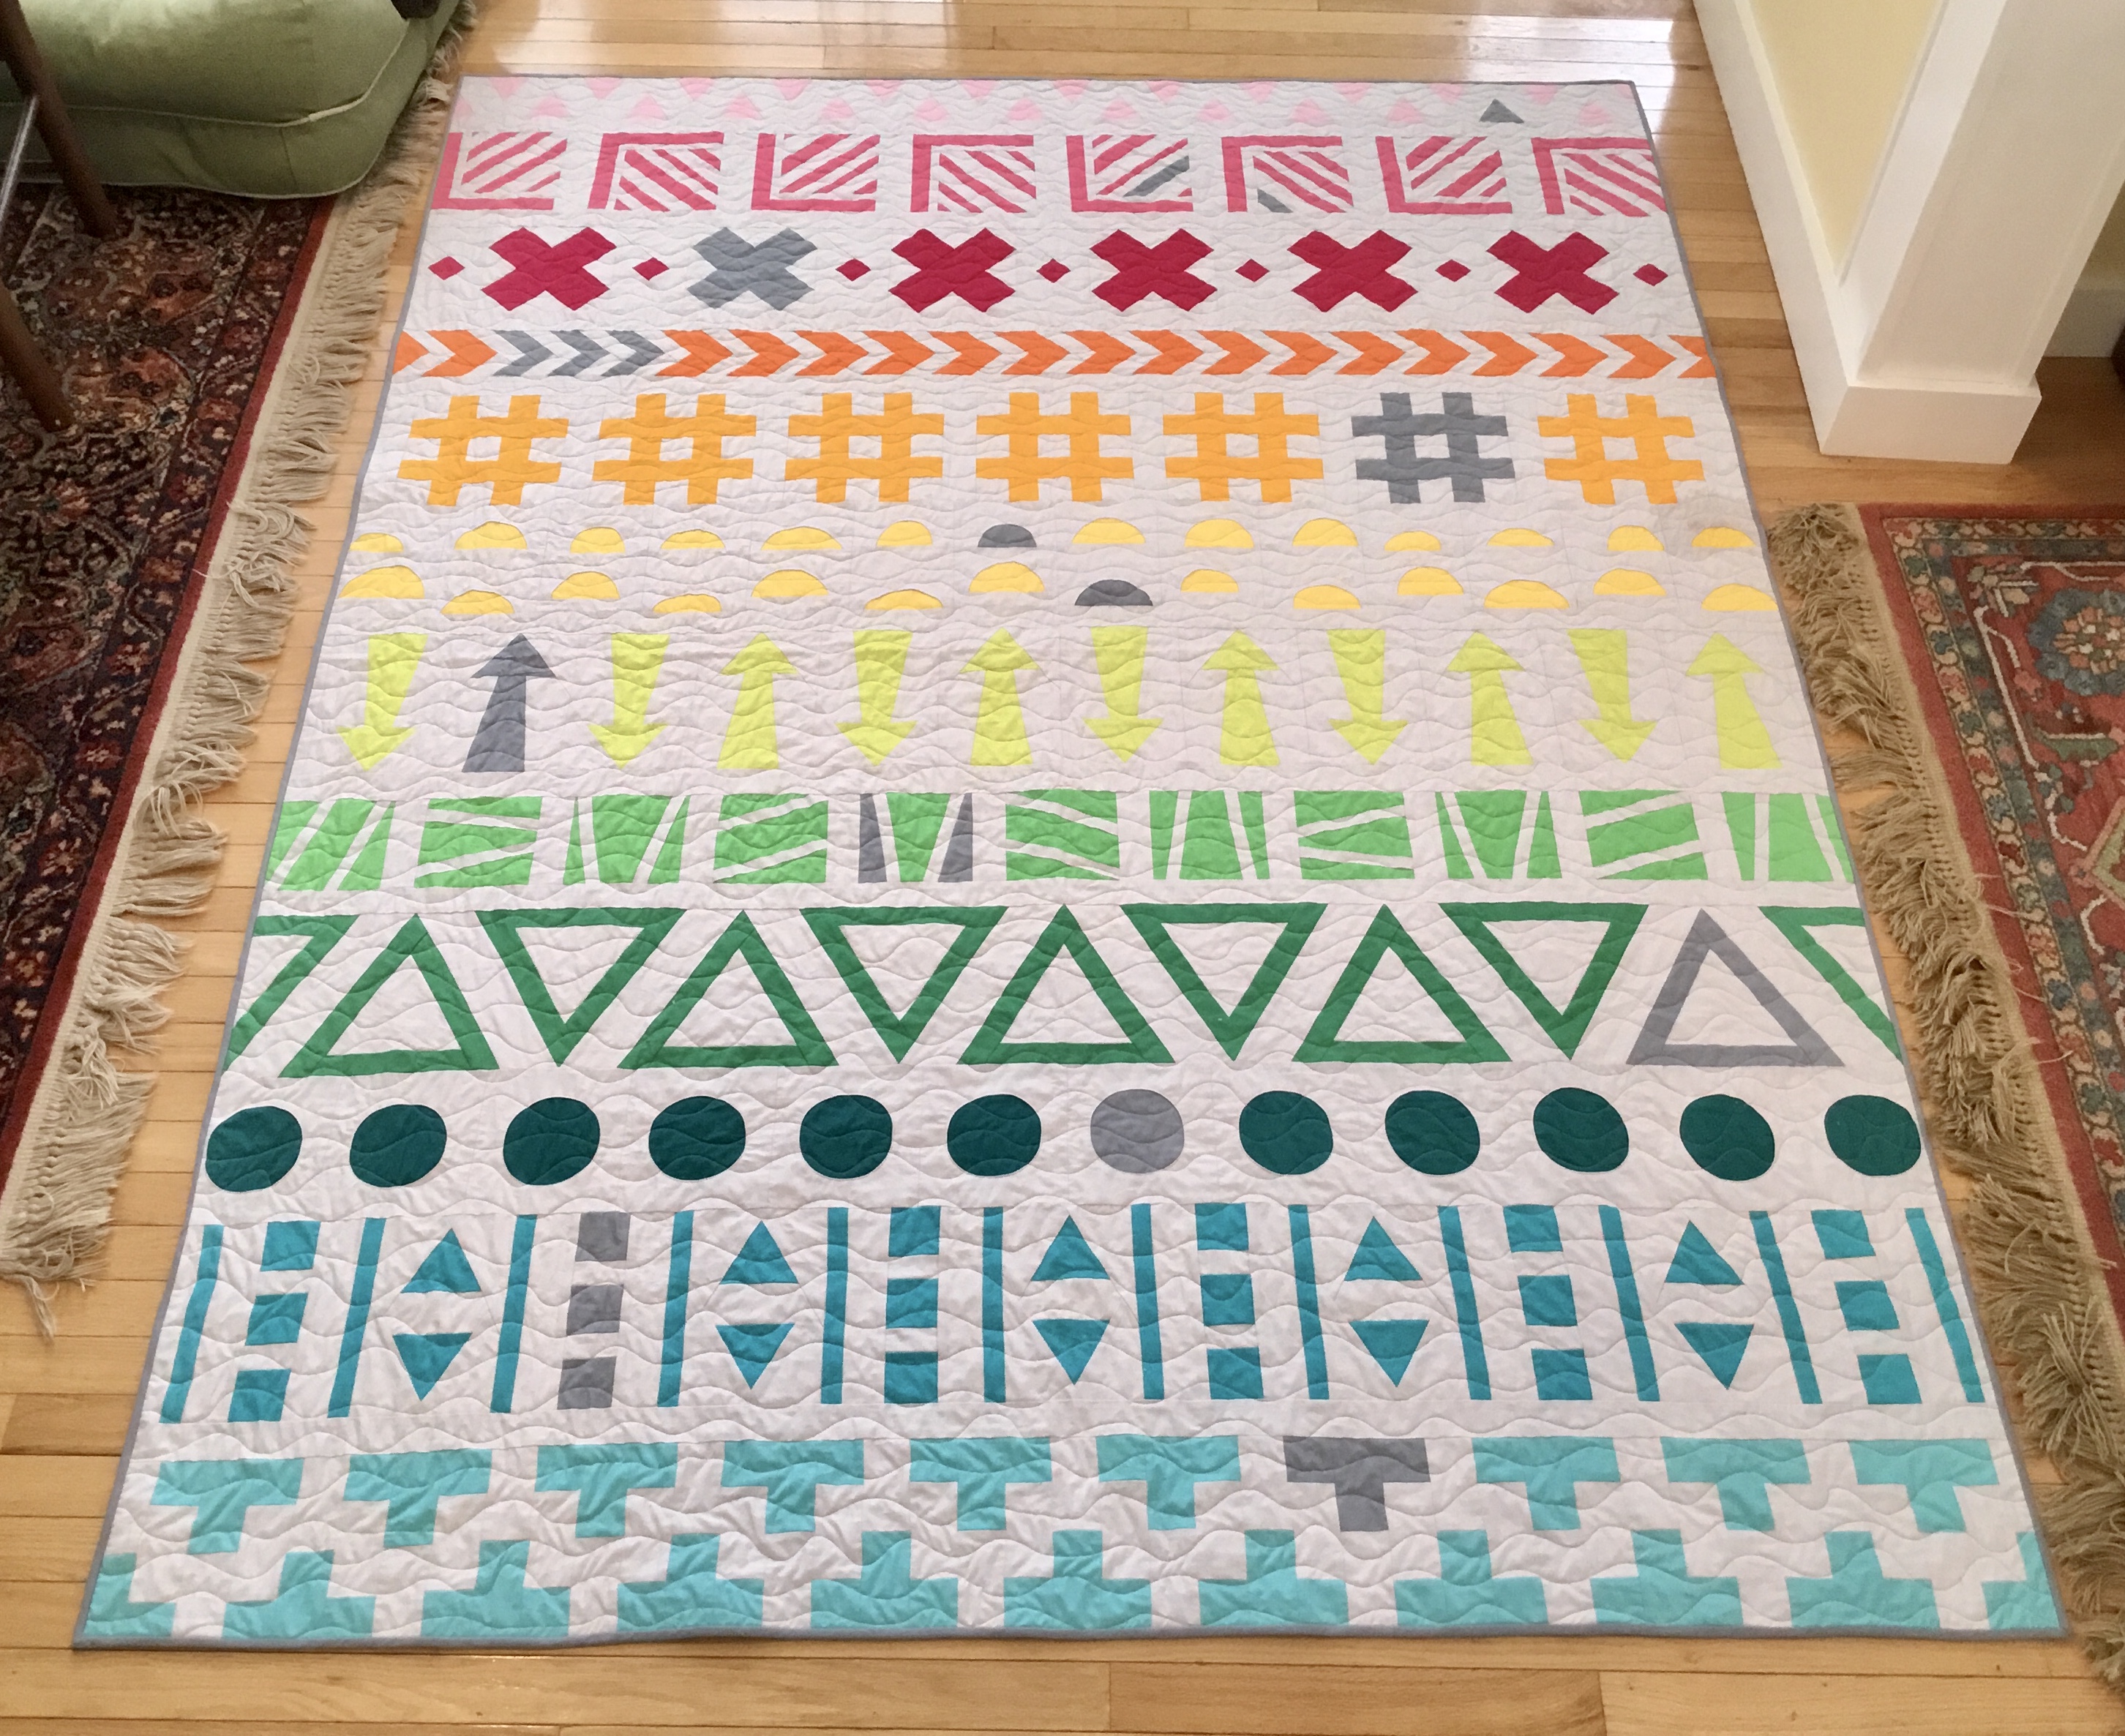
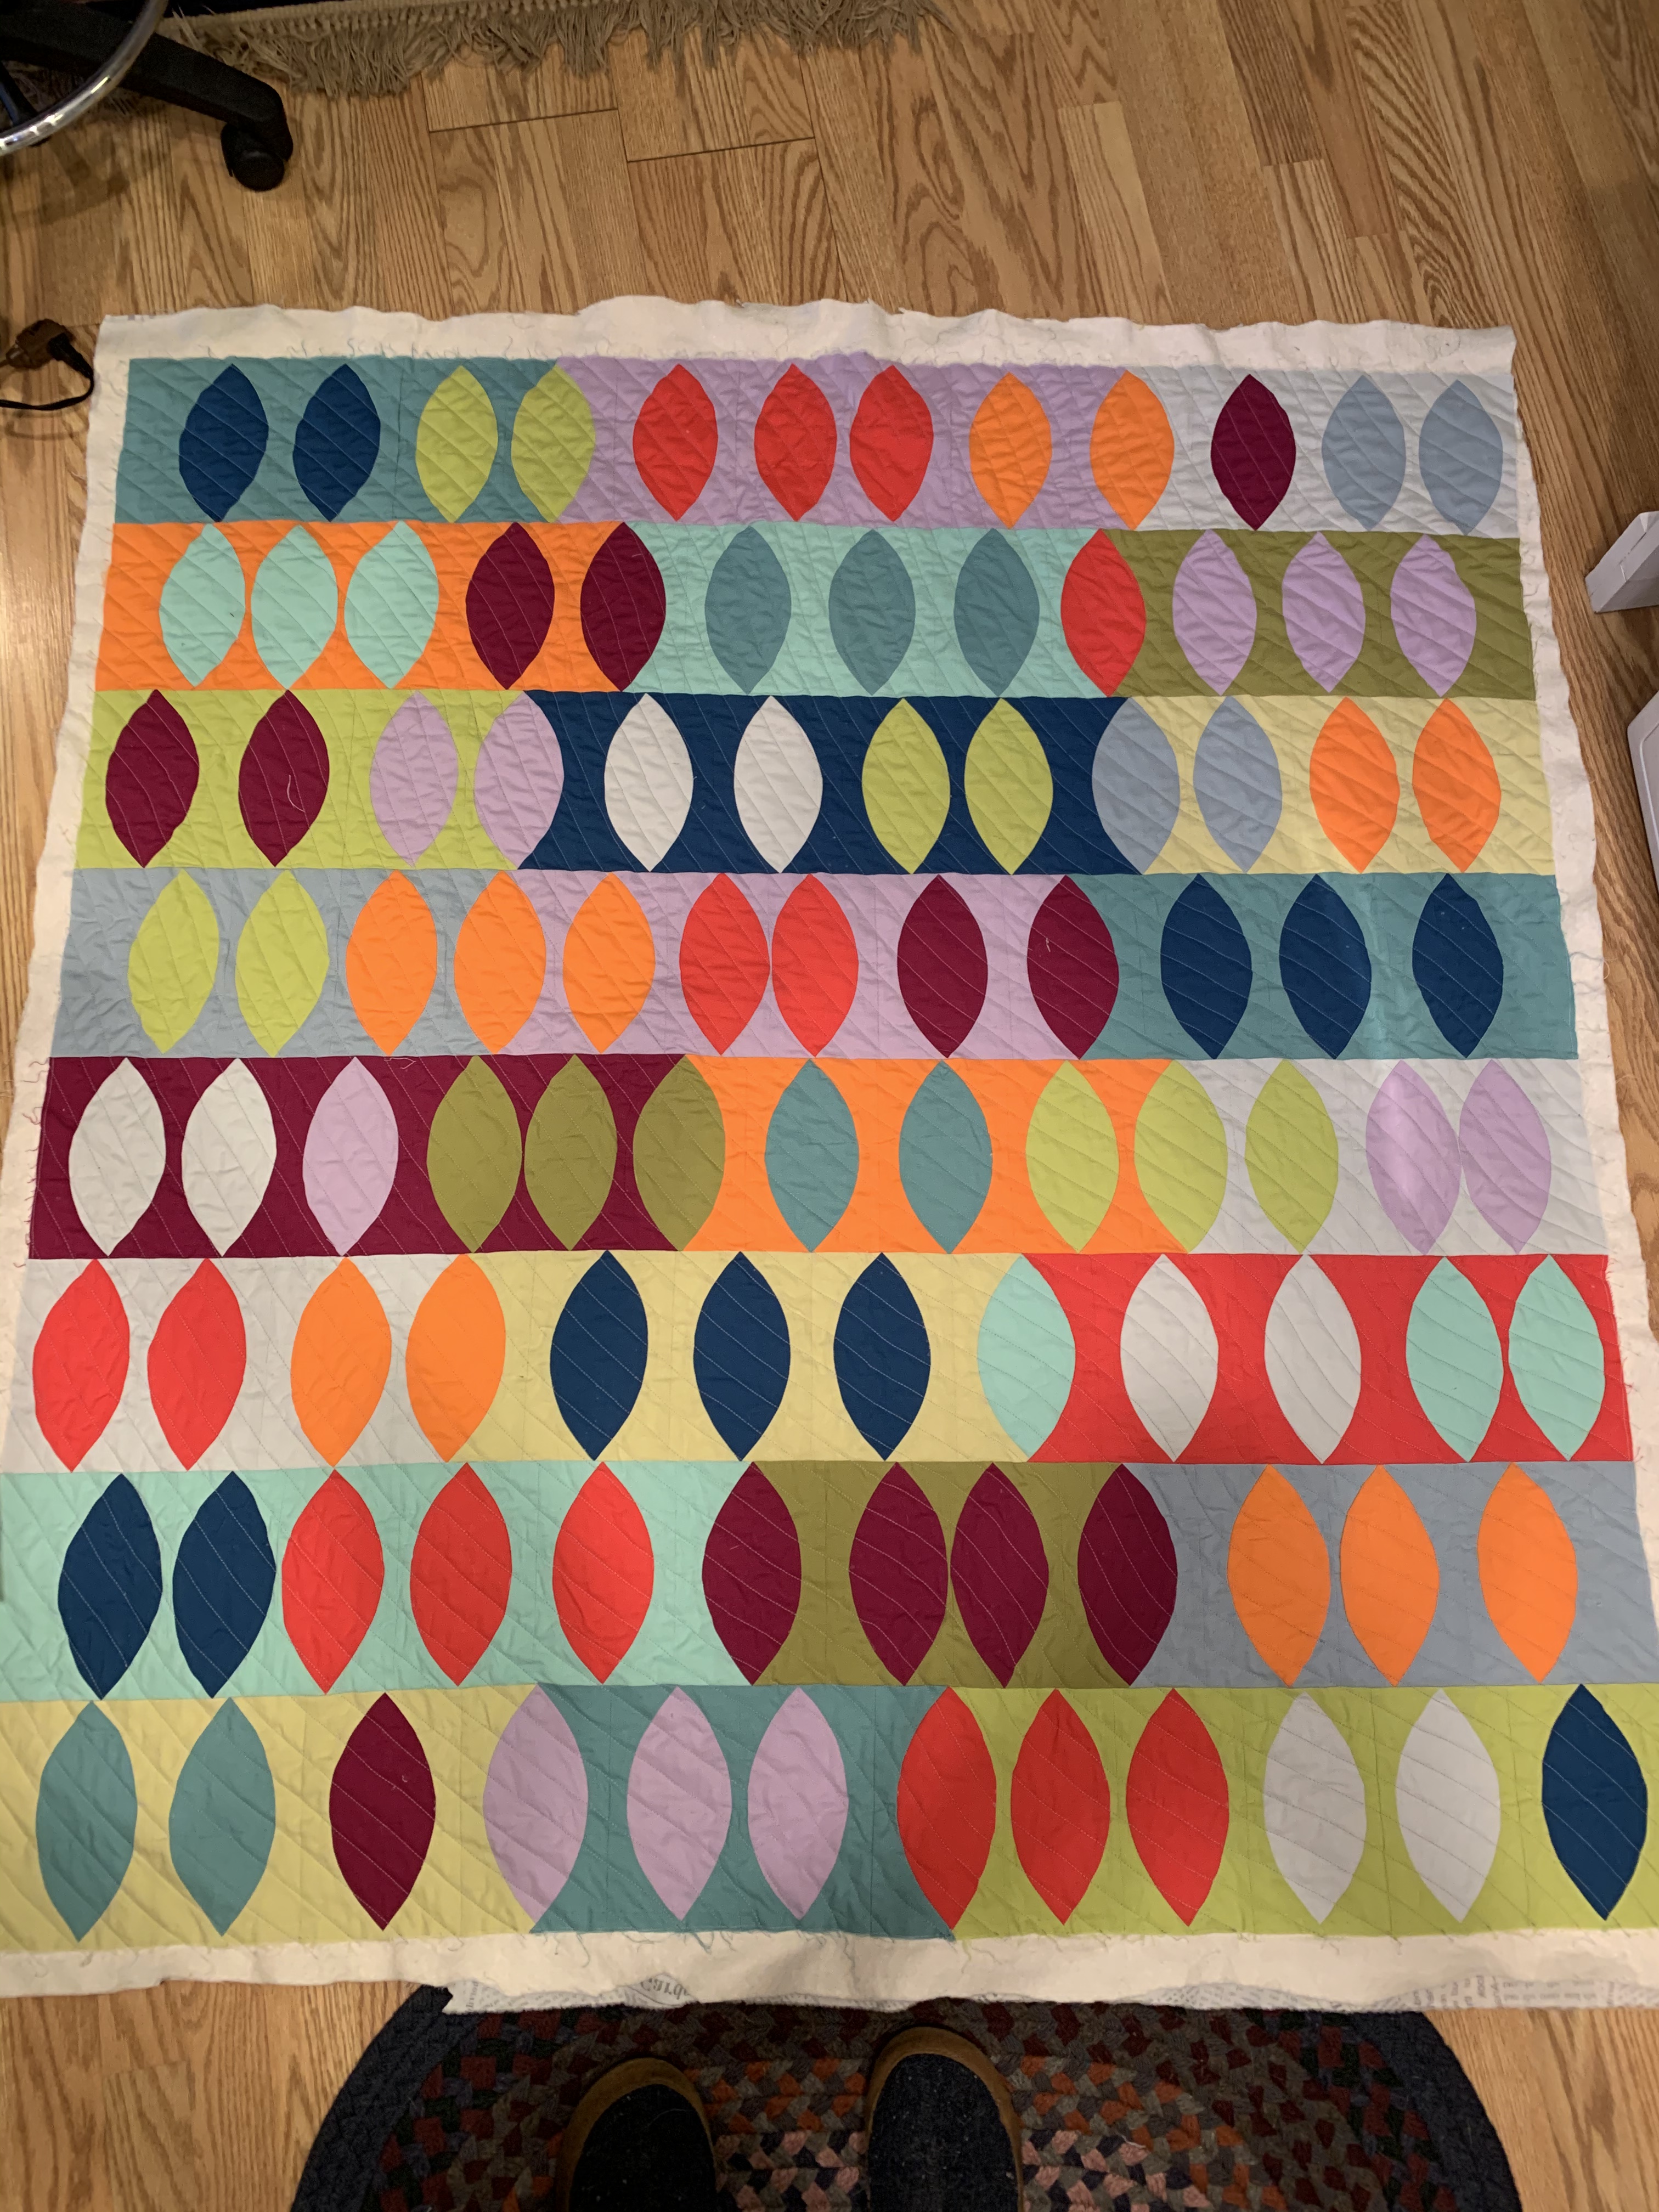
This quilt is the result of the 2019-2020 Bernina Quilt-Along designed and managed by Sugaridoo. I’ve never done an online QAL, and this one was suggested by our leadership in Coastal Quilters (Maine) as a mechanism to learn some new techniques and patterns. We started in, if I remember, November 2019, and we got a new pattern for a new row once a month and the final assembly plan in the 13th month. Videos accompanied each month’s pattern and row release—so I now have these twelve patterns and some learned methods I didn’t know. And I did purchase the rainbow kit that Irene of Sugaridoo put together. I’ve never made a rainbow quilt. (Sugaridoo also included a color scheme that was not rainbow, and I’ve so enjoyed seeing what people who went that route and varied their colors produced.)
Here is another view—this quilt is 70 wide and about90 long. The pale grey background lent itself to using a pale grey thread for quilting. I wanted an extremely simple way to quilt this quilt as I do not do intensive quilting—I don’t have the skills or the patience—and I didn’t want to distract from the graphic nature of this quilt.
I saw many bright and wonderful backing fabrics as people begin to reveal their finished quilts. But I fell in love with this quiet backing fabric which holds the colors of the quilt more or less and just works to make the front brilliance a bit quieter.
I used the darker grey “highlight” (Kona Titanium), and I am happy with that choice.
I’m happy with how this quilt came out, and I enjoyed the year-long journey with Sugaridoo.
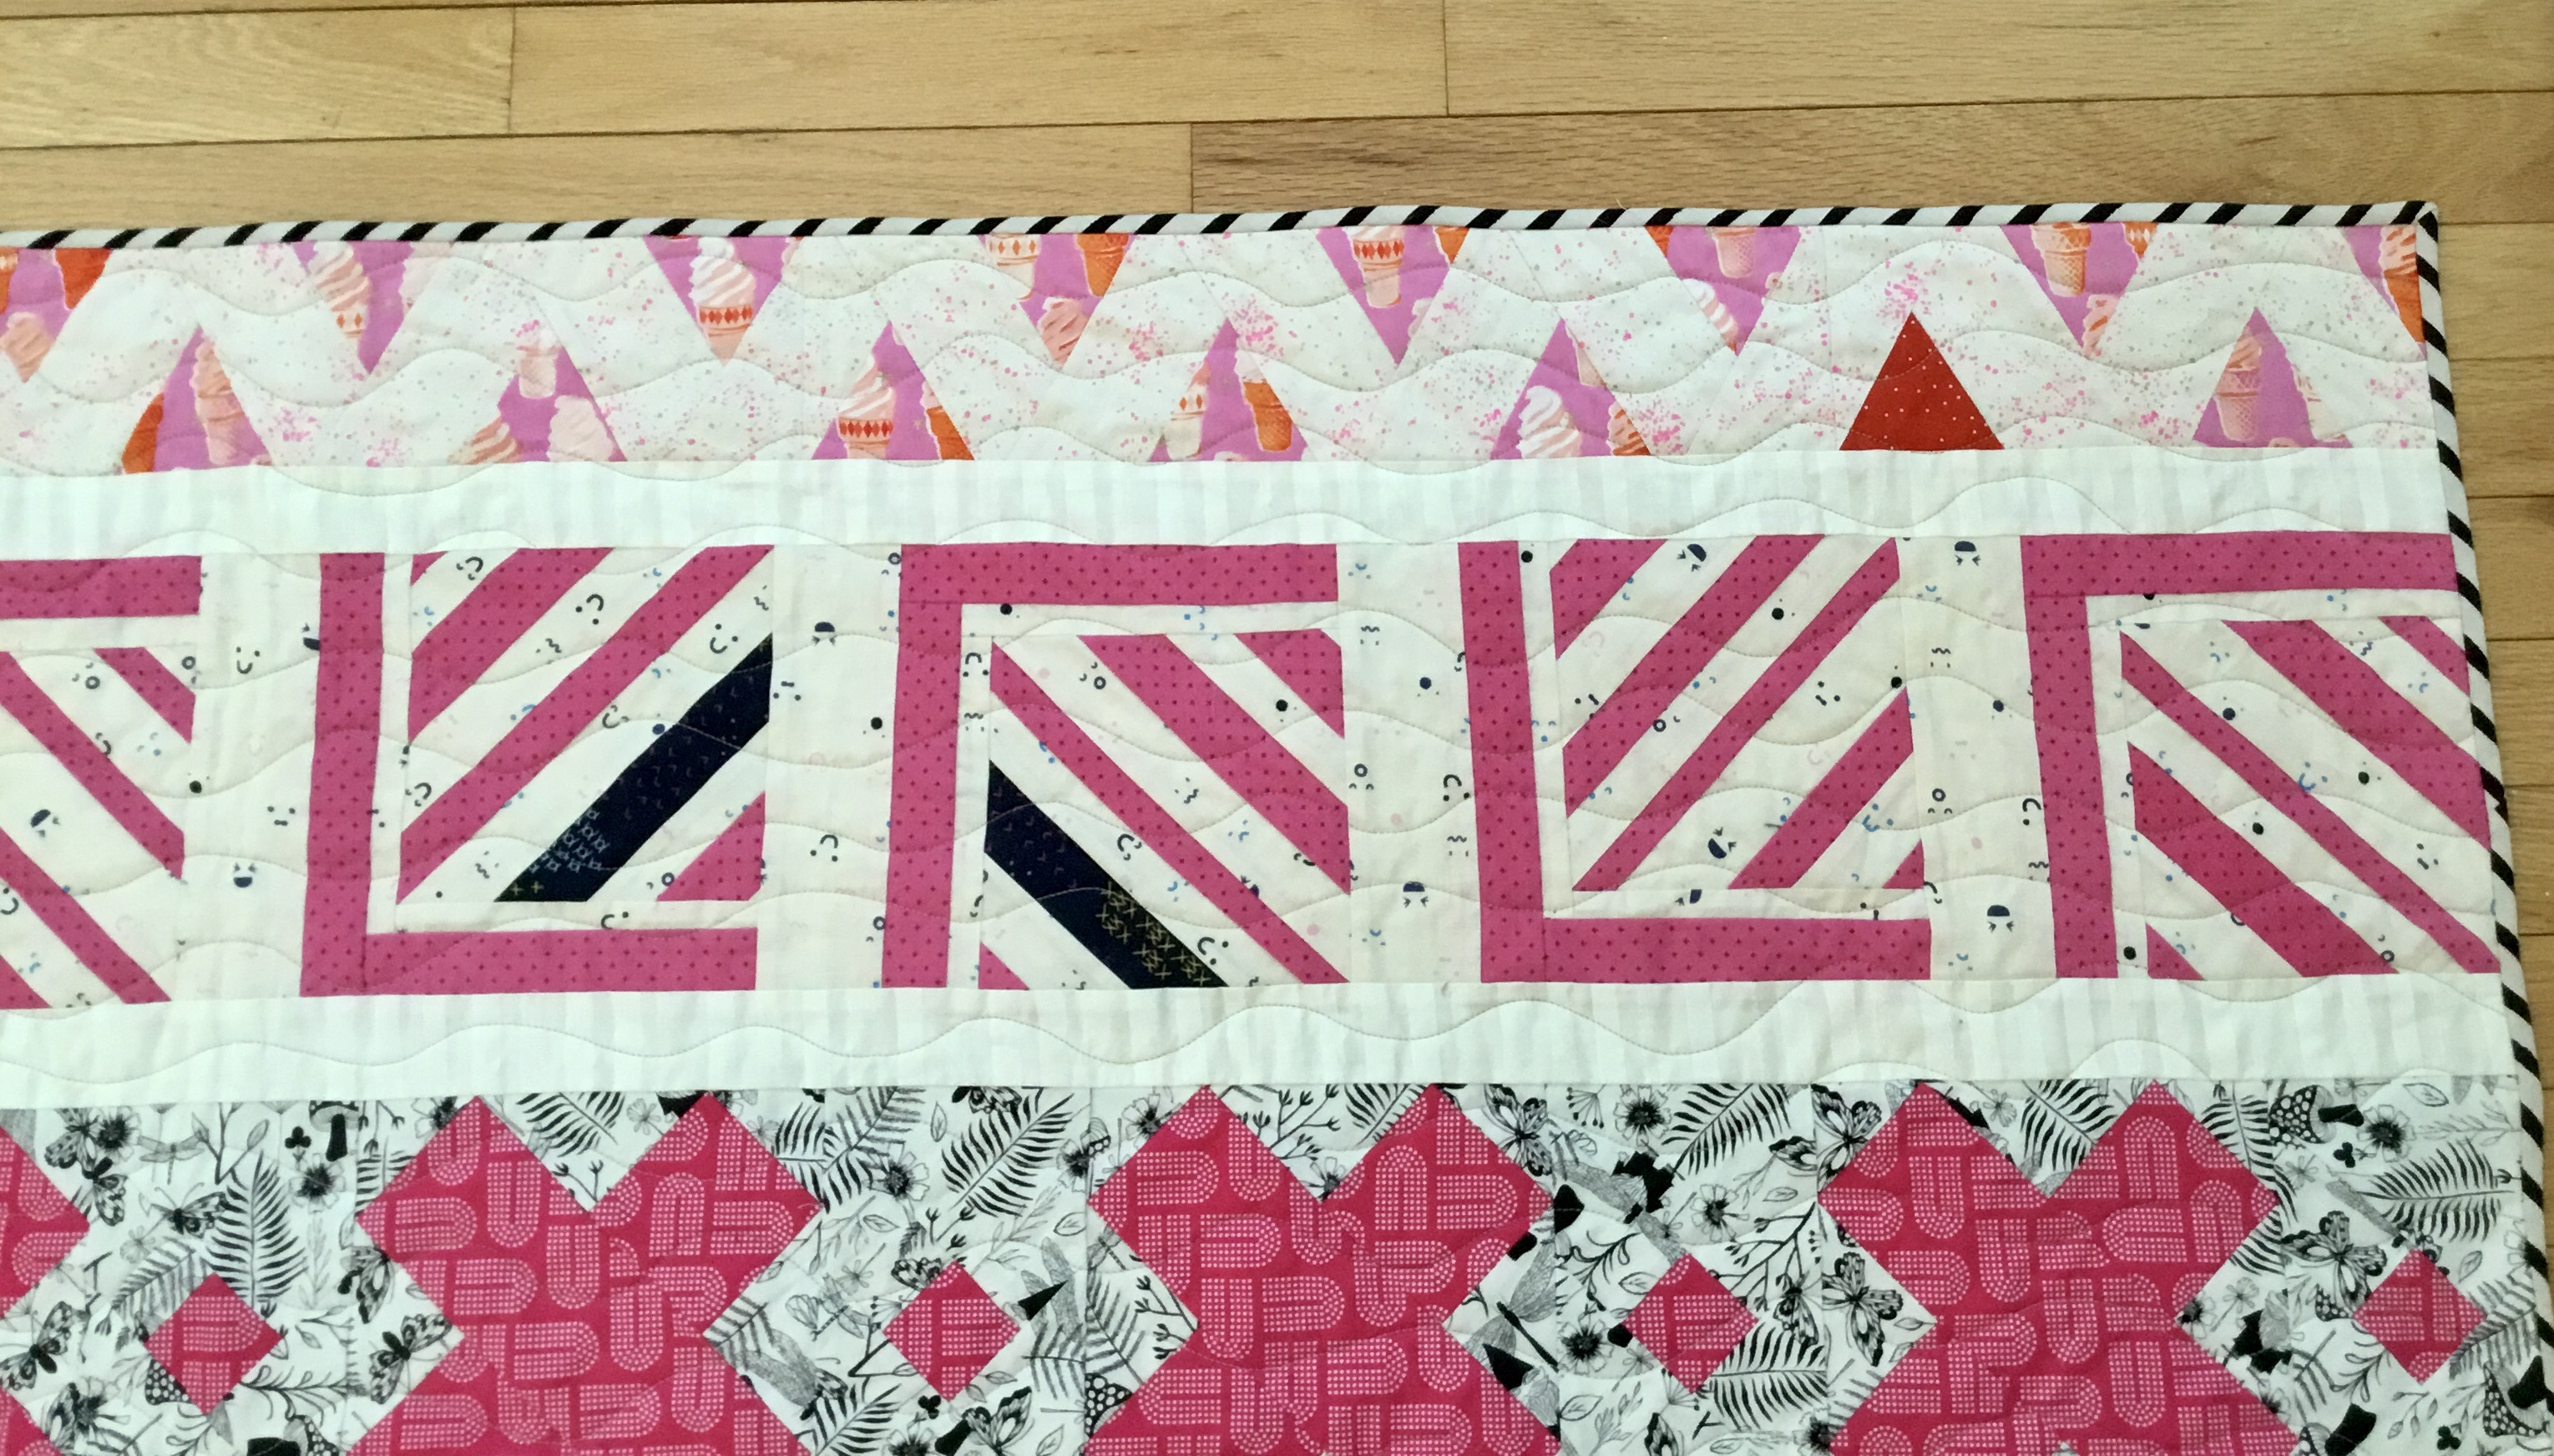
I made TWO of these quilts—as I’m always looking for fun ways to use my Cotton+Steel/Ruby Star Society fabrics. The second one will go on the longarm pretty soon now. All the parts are ready, and I will again quilt it with these simple curvy lines.