Turkey Tracks: April 16, 2016
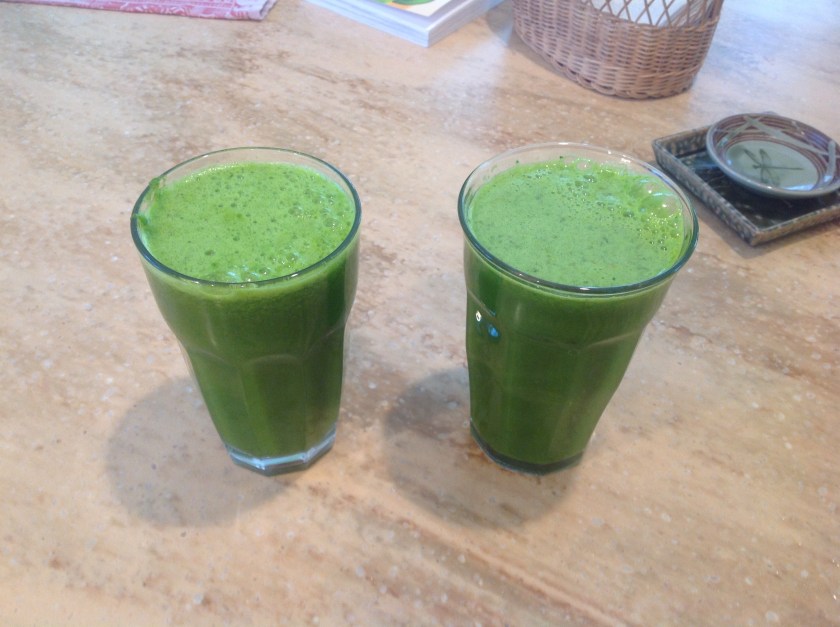
Green Drinks
Kale, celery, cucumber, white carrots, fresh ginger and tumeric roots, apple, lemon…
…so refreshing, delicious, and healthy.
Recipes I use
Turkey Tracks: April 16, 2016
Kale, celery, cucumber, white carrots, fresh ginger and tumeric roots, apple, lemon…
…so refreshing, delicious, and healthy.
Turkey Tracks: April 13, 2016
I’m still juicing.
In the spring I seem to juice about every day.
I juice in the morning and have a glass with breakfast, and I save the other glass for the late afternoon.
Juicing does not take long and the clean-up is quick, quick.
The first long drink from the fresh juice is…sublime.
Here’s how I start. This combo will make a “red” drink:
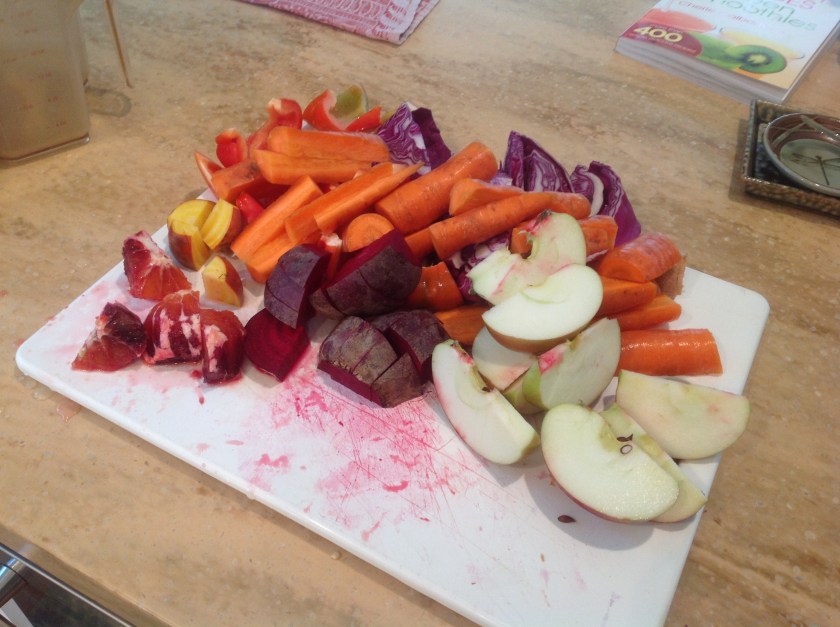
Red cabbage, red and orange beets, red pepper, a blood orange, an apple, carrots, a piece of ginger, a piece of fresh tumeric root, and a lime.
Here are some videos of the process, but note that I was having trouble filming and juicing…
Someone asked me not long ago why not just eat all the veggies. The answer, I hope you can see now, is that to get all these nutrients you would overload your body with way, way too much fiber. Caution: I usually only add ONE fruit to the veggies, usually an apple, as in “an apple a day….” I just happened to have a blood orange in the refrigerator for this batch. Too much fruit is so NOT a good thing to do at this level of juice. It’s the veggie nutrients you want, not all the fruit sugar. I alternate green drink and red drink days. Basically I’m trying to “eat the rainbow.”
Here are today’s drinks:

I recently got “THE juice lady’s” book on juicing to see what I might also be adding to these drinks:

Calbom cured herself via juicing…
My juicer is an Omega VRT350 model. It’s a “slow” juicer so will juice things like wheat grass, sprouts, and so forth.
Turkey Tracks: March 9, 2016
I’ve had a bag of juicing apples bought in the fall and hanging around the refrigerator all winter.
Time to do something with them as they are starting to go bad.
Making applesauce is dead easy.
Dump the chunked apples, peel and all, into a heavy pot.
Add some water so the apples don’t burn.
You could cover the apples and let them render out slowly, but I was in a hurry.
I cooked them down pretty fast, and when they were soft, added a splash of maple syrup and a splash of some Fiore chocolate/cherry balsamic vinegar to the pot. The vinegar, I hoped, would add an interesting layer of flavor. It did.
When the apples are soft, drag out your “boat motor” emulsifier and run it through them. Or use a food processor or a blender.
The good thing here is that all the fiber of the peels stays in this mix, but you don’t taste the peel.

Here’s the applesauce and my boat motor.

I’ve been using it as a topping for the gorgeous raw milk yogurt we get here in Maine. My favorite comes from THE MILK HOUSE, a local business. I top it with a tablespoon of fresh maple syrup and a handful of nuts that I’ve soaked in salt water and dried. BEYOND YUMMY–and healthy!
Turkey Tracks: November 9, 2015
Red juice is YUMMY!

I don’t like to mix red and green veggies when I’m juicing. The juice looks like mud then. Red and green are opposites on the color wheel, so to mix them makes a kind of brown color.
This juice includes the following:
One small beet
Three or four carrots–I love the rainbox carrots
LIME–about half a lime
GINGER–a knob of ginger the size of a…???…whole pecan
Half a red pepper
A chuck of red cabbage
An apple
Green juice is yummy too!

This juice contains the following:
Chard (fresh picked from the garden), but any of the good greens will do.
Cucumber
Celery
Apple
Ginger (always put in a knob of fresh ginger)
Lime
Green cabbage
Kolrabi pieces are a nice addition
Green pepper would be nice in this drink. Parsley, too. Maybe some other herbs.
You can feel the goodness ALL THE WAY DOWN when you make one of these drinks. They are a powerhouse of nutrition for your body.
PS: I have information on my juicer on other blog posts here.
Turkey Tracks: October 12, 2015
The nights have cooled, and the trees are starting to turn. Finally.
Hope’s Edge CSA (Community Shared Agriculture) farm has two more weeks to go.
I will miss going out there weekly so much.
The winter squashes are all coming in now–and they are so bright and pretty:

The long orange one in the back is a pie pumpkin. I’m going to roast/carmelize it and use it in a salad recipe from Jennifer McGruther’s book The Nourished Kitchen. (Search on this blog for more info.) The recipe pairs the sweet pumpkin with bitter greens, nuts, and balsamic vinegar, among other ingredients–as well as I remember.
The funny looking veggie to its left is a rutabega. I cook it like a potato. Rutabegas are great cubed in soups and stews. The flesh is buttery yellow and mashes well.
The oblong squash to the left is a spaghetti squash-one of my very favorites. I cut them in half, seed them, and roast them (cut sides down on a greased piece of parchment paper). Once done, run a fork through the flesh and it breaks into strands. I heavily butter and add salt and pepper. Scoop out the stands and put on your plate. This one reheats well too.
The striped squashes are delicatas. They are so sweet that you don’t need anything in them but a bit of butter. I bought some one fall in Charleston, SC, and they were bitter and bad. This squash may need more of a New England climate to develop its sweetness????
The tan squash is a butternut. Mild and delicious. You can eat the skin on both delicatas and butternuts. I’m going to put it cubed into a stew with black beans, hamburger, and Indian seasonings–in the crock pot.
How did that banana get into this picture? Mercy!
The orange squash in the middle is a “Sunshine” and has a heavier, sweeter flesh. I’m going to cube it and roast it with garlic, rosemary, small potatoes, red onions, and chunked green tomatoes. It’s a dish to which I look forward every fall. I’ll make it while sister Susan is here next week.
That’s likely the last large tomato to come out of the garden. I”ll get some Sun Gold cherry tomatoes though.
The garlic crop is great this year. I’m loving all the fresh garlic in the kitchen.
I’m missing a Blue Hubbard squash, which is a great keeper. I’ll pick one up though.
That’s the last bit of annual flowers I’ll cut from the garden behind the squashes.
I cut these Panculata Hydrangeas this morning for the dining room. Hope they dry nicely.

It’s a BANNER year for apples in Maine this year. Every tree is loaded down–even old trees that have had significant storm damage:

Local folks are making apple sauce, apple butter, drying apple slices, and making lots of apple pies.
The girly dogs and I have been walking every day in this glorious fall weather. Sunday afternoon I drove by a friends Harry and Marsha Smith’s house to see their gorgeous fall yard.

What a treat this view was!
Turkey Tracks: August 17, 2015
HELLO HELLO EVERYONE!
It’s deep summer here in Maine, and I have been hosting my son Michael, DIL Tami, four grandchildren, and SIL Maryann.
What fun we had before this group headed home.
The garden is glorious–but it’s been dry, and I have to water every day. And, weed…
So, there has not been much time for the blog.
BUT, I have wanted to put up this recipe for a flank steak marinade–which comes from Rachael Ray: “Surf and Turf Salad,” which I printed out back in 2005.
I don’t do the turf part.
Flank steak is a favorite in my family: it has so much flavor.
Here’s the marinade, which you don’t have to put on for very long–only 10 or 15 minutes.
2 large cloves garlic, minced
1-inch fresh ginger root, peeled and minced or grated
3 Tablespoons Tamari (you might use the wheat free version)
1 teaspoon ground coriander
2 teaspoons ground cumin
1 teaspoon tumeric
1/2 teaspoon ground cayenne pepper (but not for me with my hot pepper allergy!)
1 Tablespoon grill seasoning–she recommends McCormick Montreal Seasoning–but I think after recent reading that I’d look long and hard at the ingredients. Seems many of the commercial spices today have a lot of additives that are…questionable…and are labeled “natural”–which often means the neurotoxin MSG is present.
1 lemon zested
2 Tablespoons extra-virgin olive oil
If you have not grilled flank steak, you only need a few minutes each side on a hot grill. Maybe 3 and then 2 for the other side??? Then let the meat sit for a full 5 minutes where it will continue to cook. Slice the meat with a diagonal/slanted cut–not straight through the meat–into think slices.
I hope you’ll buy grass fed beef. And that you are enjoying YOUR summer.
Turkey Tracks: July 6, 2015
Where did June get to?
I cannot believe that it is already July 6th!
This summer is fffffllllllyyyying by so fast I am dizzy.
One of my very favorite things to do these days is to have a coffee some time after lunch.
And not just any coffee-something involving espresso. Two shots. Vanilla. Steamed whole milk. A latte…
Nothing replaces the espresso that comes from a big industrial machine. But… My budget needs help on this one. And I’m not crazy about the sugar in commercial vanilla flavoring. Even though I dictate “not too sweet,” the sugar level does not feel great.
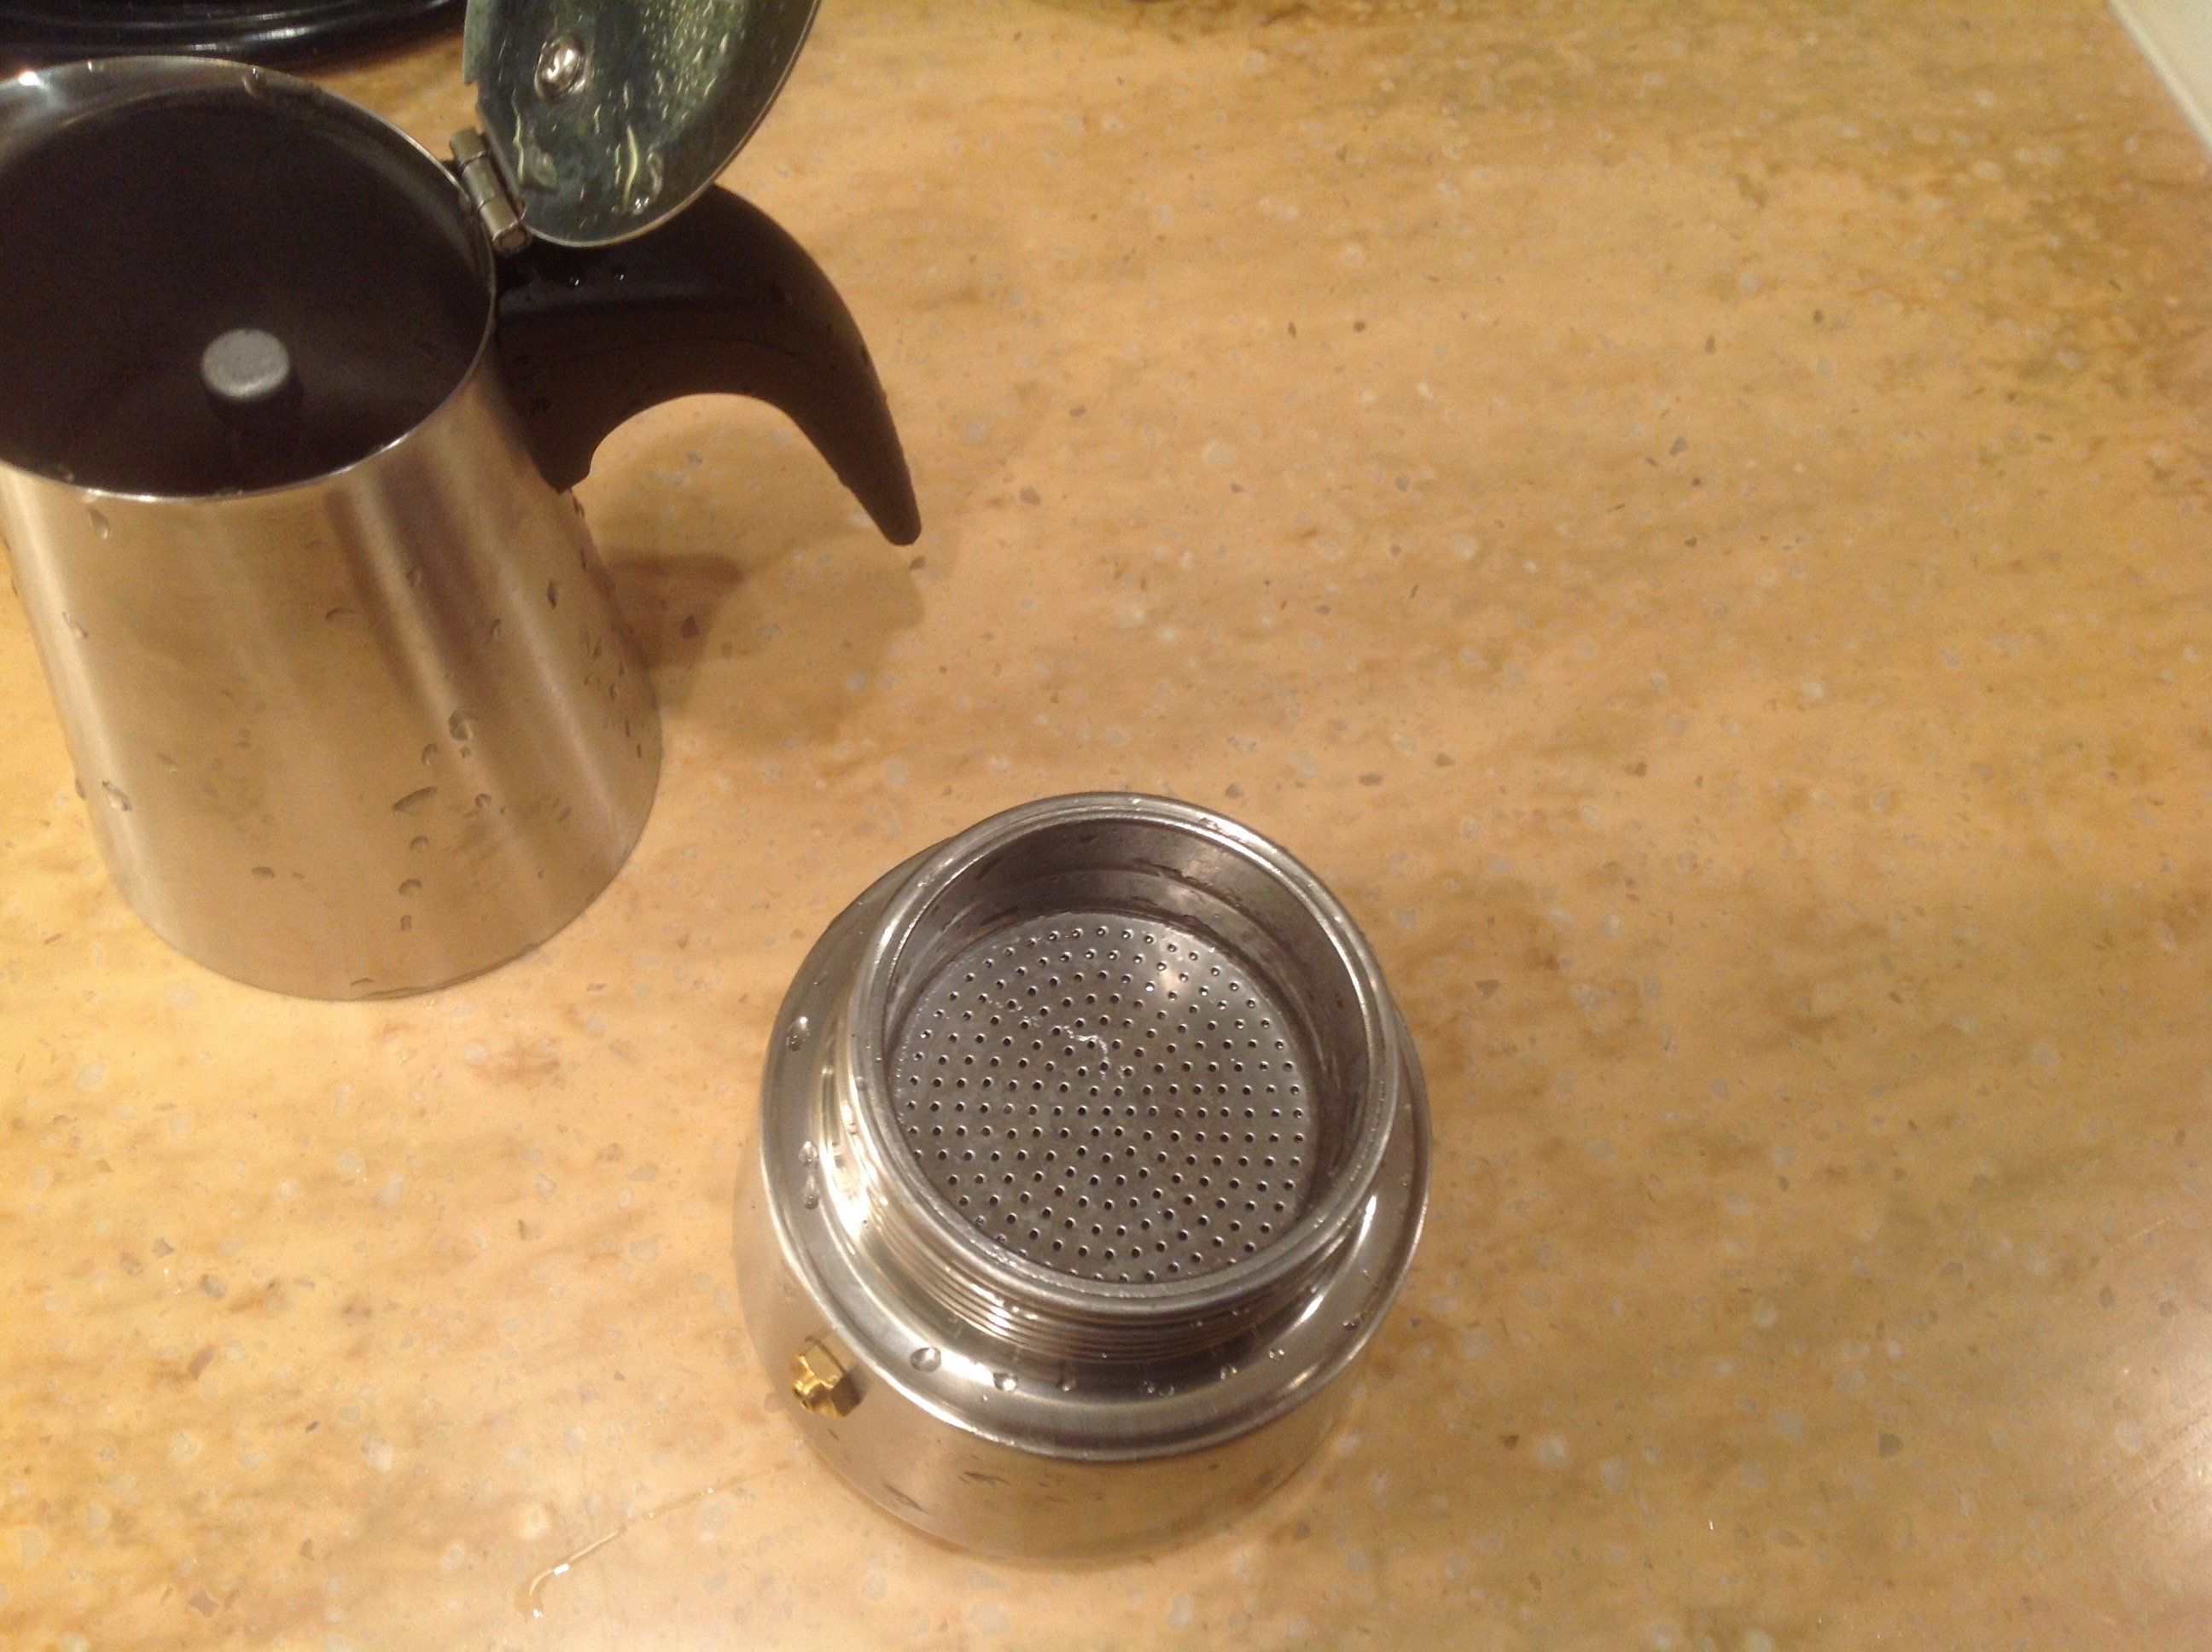
A friend told me about Moka pots–which can make espresso on your stove top.
The resulting espresso is pretty darn good. Especially as I can use my whole raw milk and local wild honey.
I found a STAINLESS STEEL Moka pot at Amazon: Chefs Secret. It costs between $11 and $16, depending upon Amazon’s mood. (Do NOT buy an aluminum pot: aluminum is toxic.)
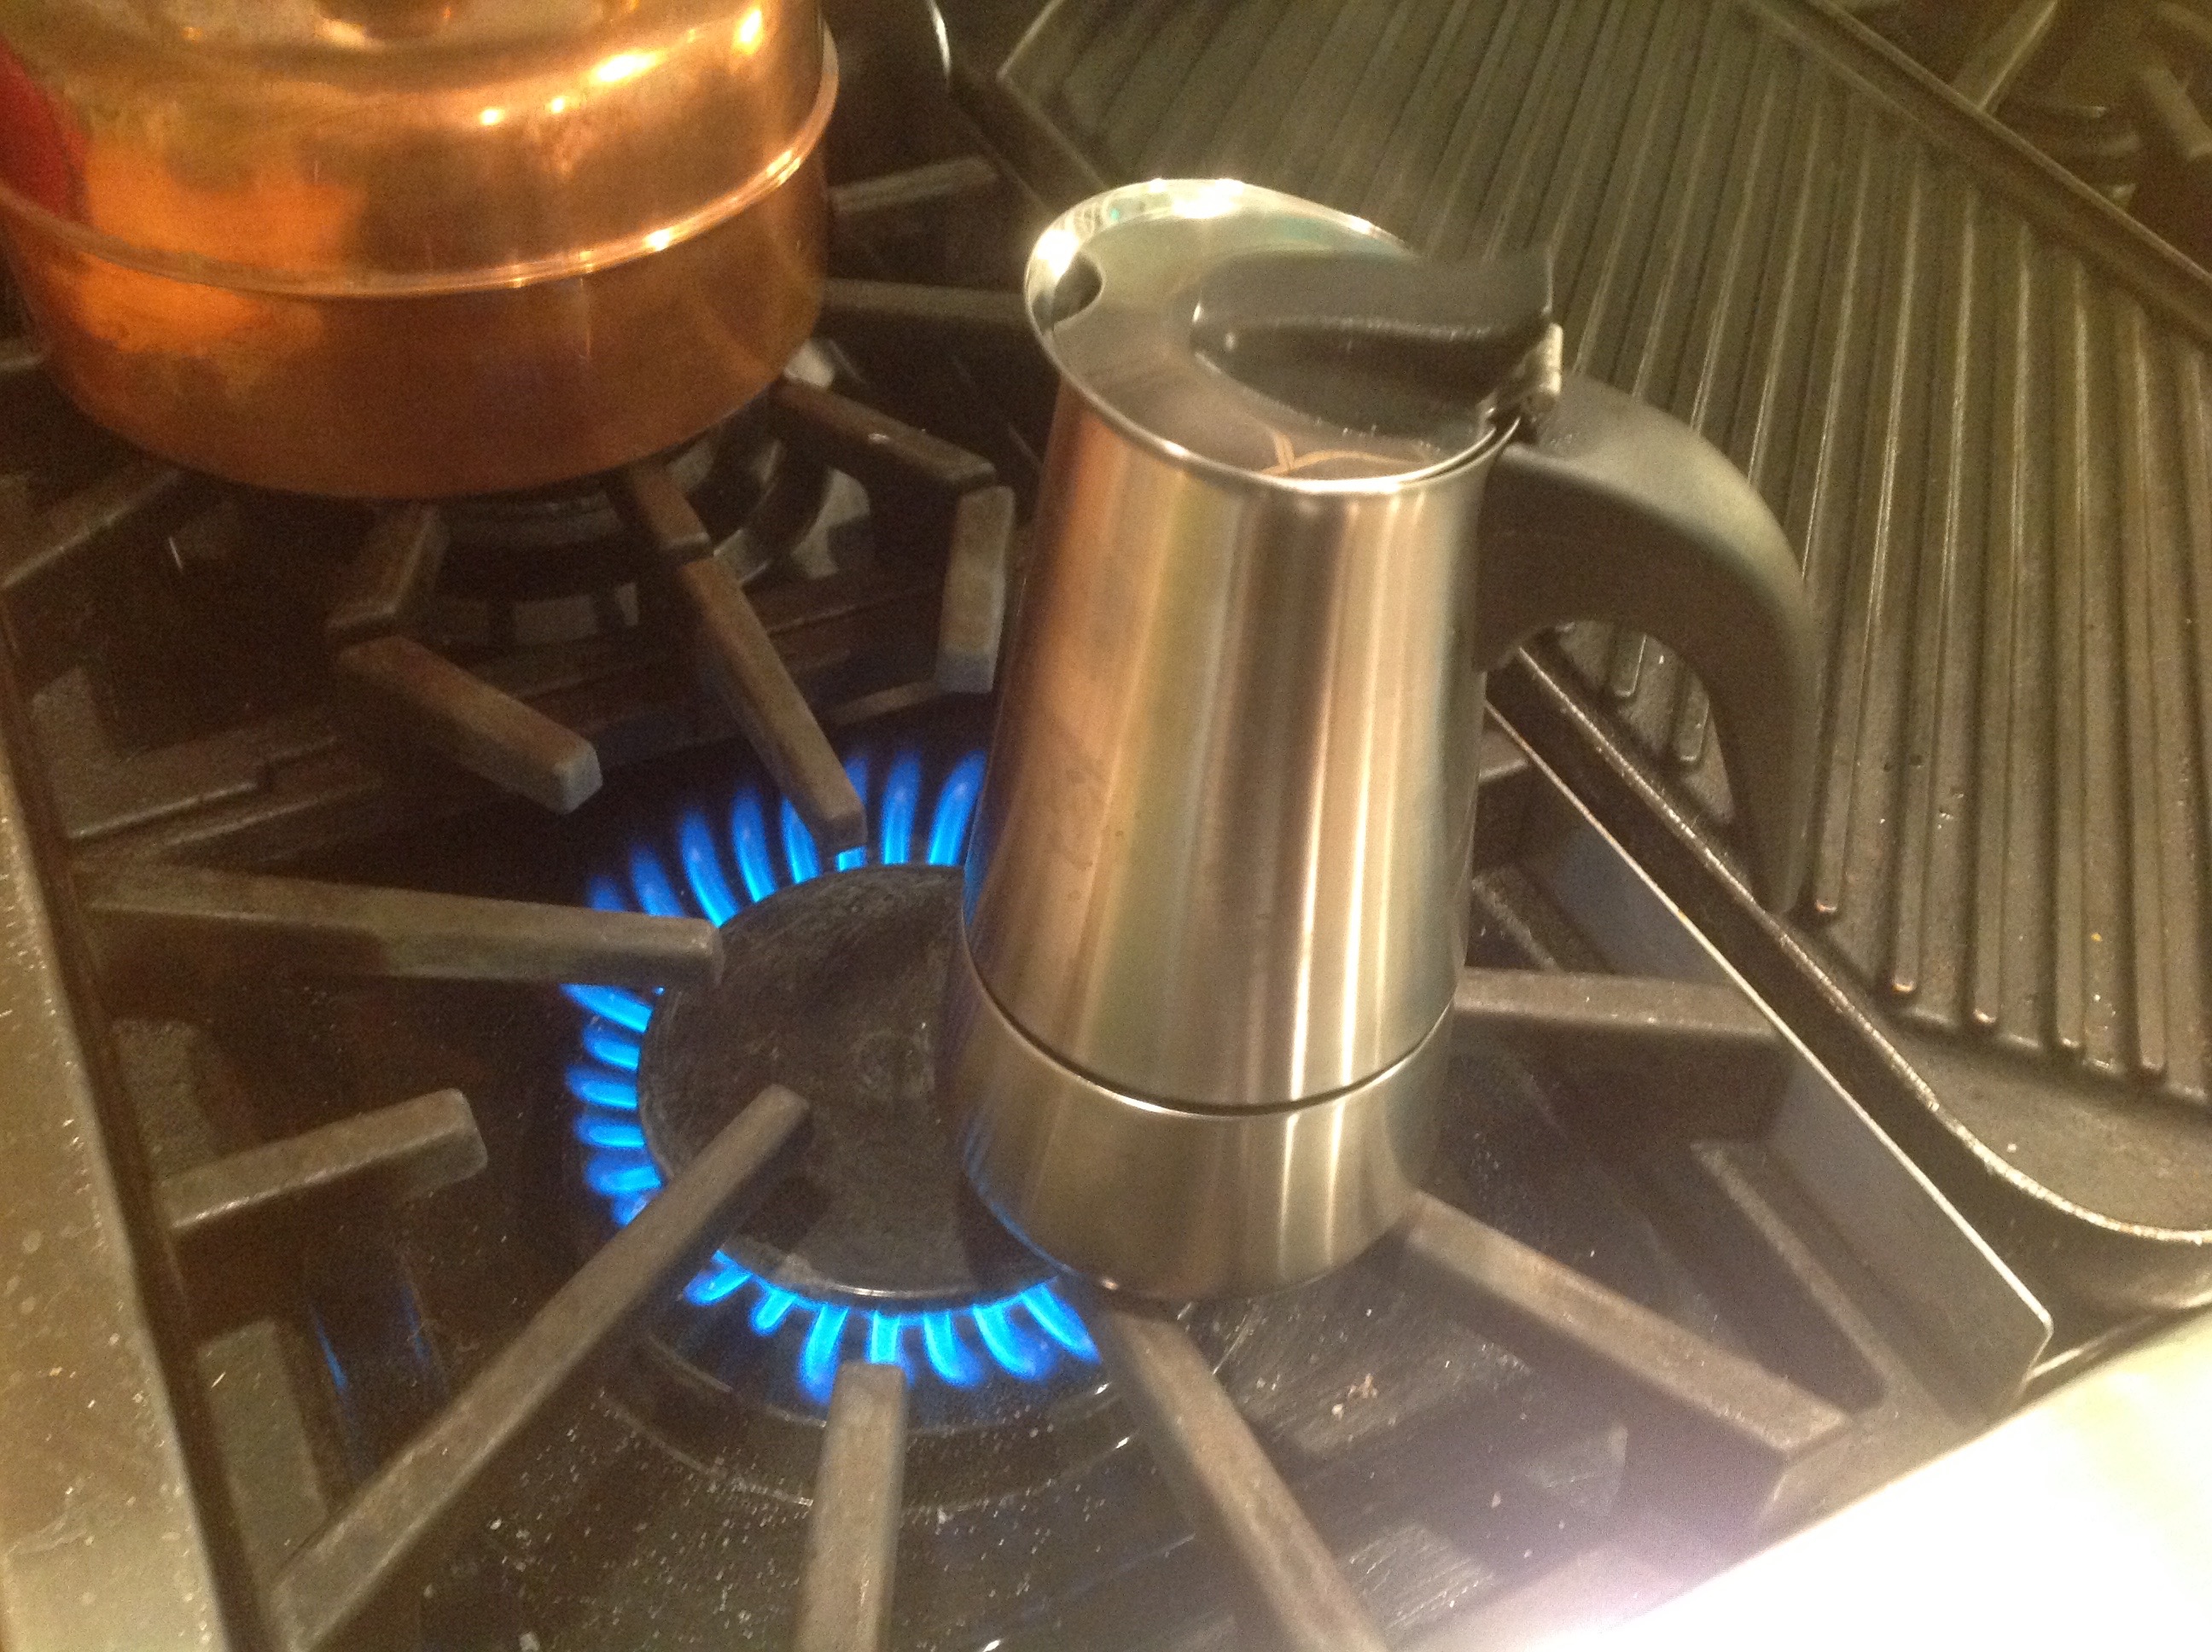
This little pot holds 6 ounces of water–so is a good amount of espresso for my BIG coffee cup.
(Note that this 4-cup pot means espresso cups, which are TINY–just a little over an ounce.)
Here’s how the little pot comes apart.
The base has that little gold valve–and you fill the pot WITH HOT WATER (or it will take forever to heat). I measure the hot water into a measuring cup (6 ounces) as it’s hard to see where the valve is on the inside of the pot with the hot water steam getting in the way.
Then you drop in the espresso cup–filled with coffee. Do NOT tamp it down. And you’ll have to experiment to see how fine to grind your coffee. Too thick, and the coffee is too diluted. To fine, and things get clogged up. And, screw on the top–you’ll need a hot pad to hold the now-hot base.

Here’s how the coffee part fits into the base.
Put the little pot on the heat and it will start gurgling. When it finishes, which only takes a few minutes which pass quickly as the pot is singing to you, remove it from the heat and let it sit for about 45 seconds. (I don’t know why; that’s just the advice given online.)
NOW I’m going to up the ante.
Years ago, I bought a frother to make heated frothy milk.
I LOVE this frother.
While the pot sings to me, I let the raw milk SLOWLY get warm. And while the silent pot sits, I froth up the milk.

VOILA! My homemade latte espresso coffee treat.

I sent immediately for a second pot so I can make a cup for a friend as well.
Books/Recipes: April 14, 2015
The “nourishing” genre of food/cookbooks has been enriched by one: Sally Fallon Morell and Kaayla T. Daniel, PhD’s NOURISHING BROTH.
You may recall that Sally Fallon Morell wrote NOURISHING TRADITIONS with Dr. Mary Enig, who fought the good fight to show how dangerous trans fats and vegetable oils are and how good for you saturated fats from healthy animals are. And you may recall that Jennifer McGruther recently published NOURISHING KITCHEN and has a great web site that is a constant resource–as is the Weston A. Price Foundation’s web site.

So, you cannot read this blog for long without knowing I am a big fan of and great believer in real, homemade bone broths. Of course I ordered this new book anyway–and it is chock full of the science of bone broths, of why they are so good for us. And, of course, the book tells you all the ins and outs of making bone broths and how to use them in all sorts of soups, stews, sauces, gravies, and so forth.
After reading the book, I have been defrosting my stored bone broths and heating a cup full for breakfast–instead of drinking tea. I add raw milk and salt if needed, and am thinking of adding a beaten raw egg, such as you might find in a Chinese or Greek egg soup. I am finding I have no need for coffee/tea after this gorgeous drink–one that feels good right down to my toes. And look, ma, no sugar/honey in the morning. Many cultures drink a hot bone broth soup for breakfast–while we are eating and feeding our children a nutrient nightmare of sugared cereal. It didn’t take me but one morning to realize what I had been missing.
One of the many things that Morell and Daniel point out is that with the advent of fake bouillon cubes (which have no meat in them and are the beginning of the dangerous excitotoxin MSG), we lost the nourishment we were getting from bone broths that were the base of much of the food we ate. Bone broths build…bones. Bone broths are full of gelatin (if made right) and lots of minerals and good fats–all mixed up in a hearty hot broth.
So, in a restaurant, if you encounter a “homemade soup,” ask if the soup is made from bones/meat in the kitchen or if a “base” is used. Avoid the base soup as it is all made from fake products.
Here’s a little video of Kaayla T. Daniels talking about bone broths and bones:
Turkey Tracks: February 9, 2015
The snow has stopped!
And the sun is very weak in the cloudy sky, but one can feel its warmth and see the brightness.
I went out this morning and had no problems getting out to Hope to pick up chicken food, mealy worms (my chickens are ecstatically digging for them out in their coop and cage), and more black-oiled sunflower seeds. (The turkeys are totally famished in this desert of snow.)
I don’t have to cook today because I cooked yesterday, so I will be able to get Bonnie Hunter’s mystery quilt on the long arm and to start quilting it.
I made a winter stand-by–a beef bone broth soup. Look at the color and jellyness of this broth which I made earlier in the week. Remember that I cooked this broth with the bones and added carrots, onion, garlic, a bit of celery, some salt, and a dollop (1/4 cup) of vinegar which helps leach the minerals out of the bones. (If I had leftover wine, I would have used it.)

I removed the solid layer of fat (beef tallow) from the top of the cooled broth–it all came up in one round piece. I rinsed it, warmed it in a pot, and poured it into a jar. While I cooked, the tallow softly jelled, and I spread some on a piece of toast, salted it, and YUMMO, what a treat. (It jells a creamy white, and I had some this morning too.) People used to routinely save the fat drippings from a roast and spread them on toast for breakfast or lunch. It’s delicious and good for you. I will eat it and use it as an oil to sauté…whatever.

I have been yearning for a French onion soup, but decided to upgrade that a bit. I started with 6 or so BIG onions–sautéing them SLOWLY in my enamel/iron pot in a mixture of coconut oil (UNREFINED–I get my oil from Wilderness Family Naturals) and raw butter. I also added two whole garlic heads–after I smashed and roughly cut the cloves. (Garlic is a GREAT immune system builder, and both onions and garlic contain sulfur, of which we all need more.)
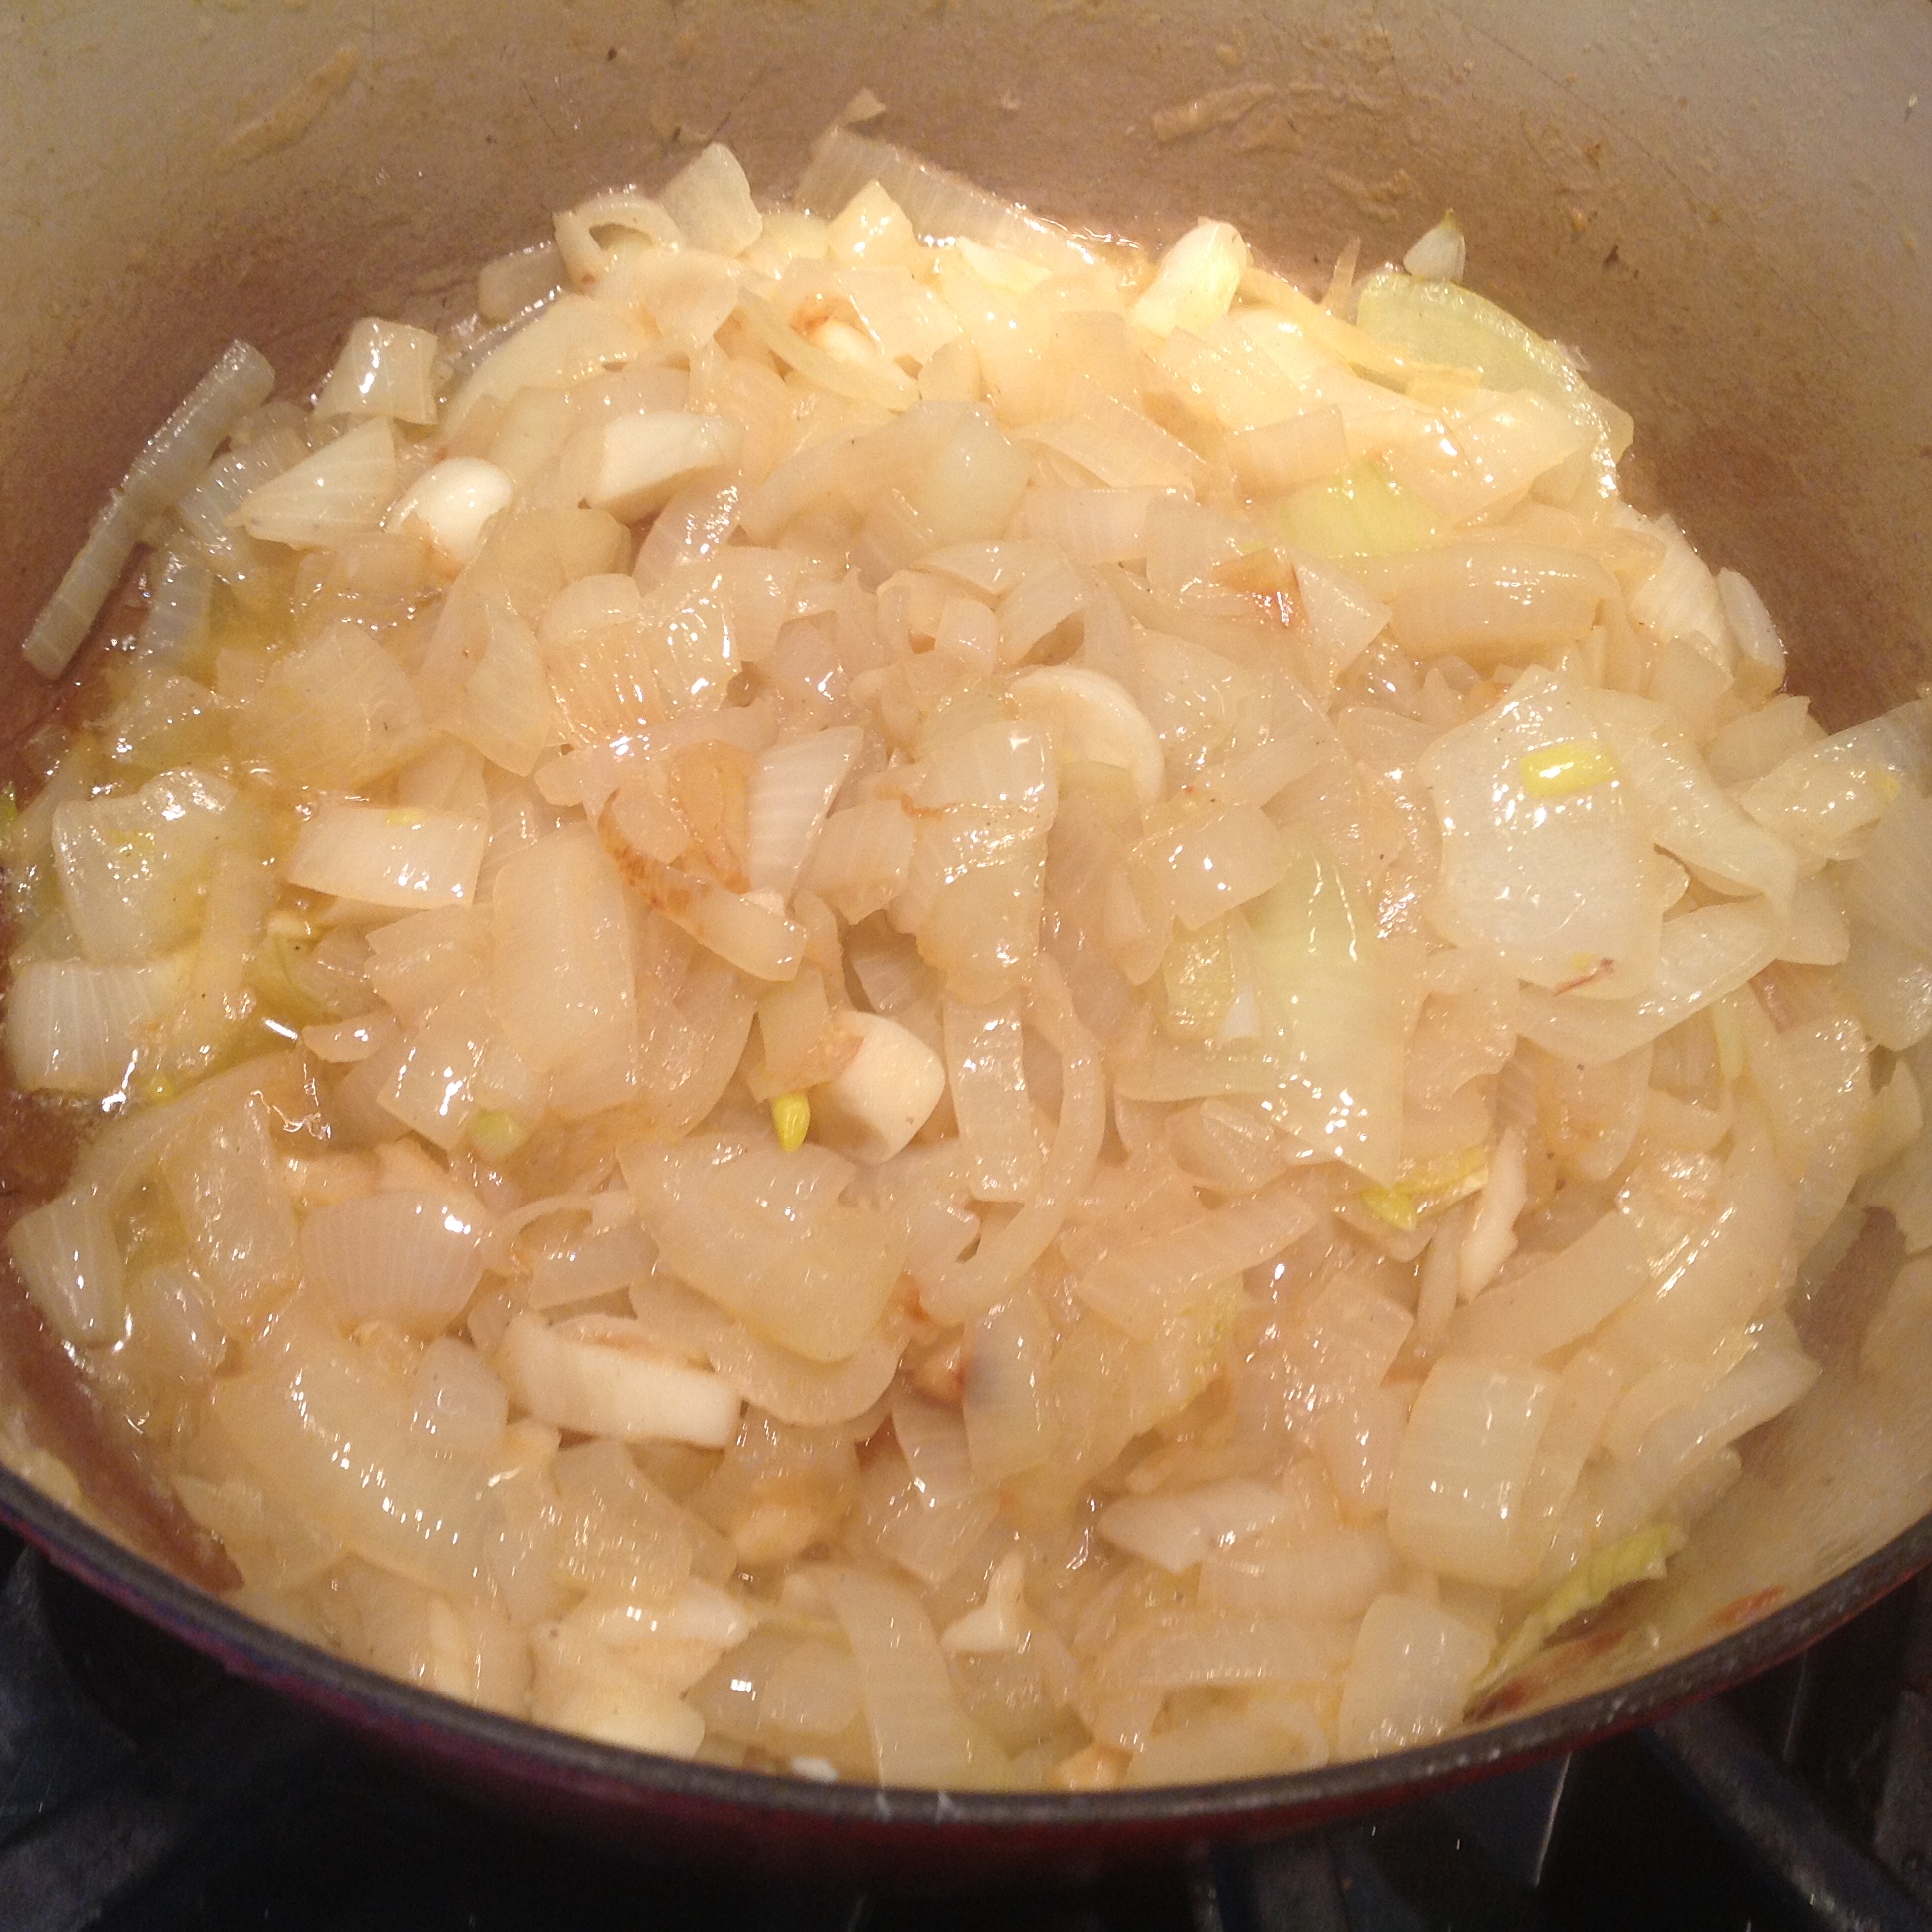
I cooked these onions for about 40 minutes on low heat–until they were golden and the onions were starting to stick to the pan. At the end you have to lower the heat and watch and stir often. If they start to burn, add the broth immediately.

After adding the broth, I threw in several handfuls of the kale I dried all last summer and stored in Mason jars:

Taste now to see if you need more salt. I used a local salt dried in Maine in hoop houses–it comes in different coarseness. This one was fine. I keep different kinds of good sea salt–some are coarse, some are flaky, some are lovely colors of pink or are grey and moist–depending from where they have come.

I wanted a bit of thickening, so I added two handfuls of short-grain organic rice. (My pot was rather large so this isn’t too much rice–it will swell to about 2 cups when cooked.)

I let the broth with the rice simmer slowly for about 30 minutes to cook the rice, then turned it off and let it sit UNCOVERED on the stove. It’s not going to spoil in the few hours before I ready to eat dinner. If you cover it, that’s trouble as the trapped heat can grow bacteria.
Meanwhile, I made a meatball mixture using the defrosted grass-fed hamburger I keep in my freezer.
I added two of my eggs to one pound of hamburger:

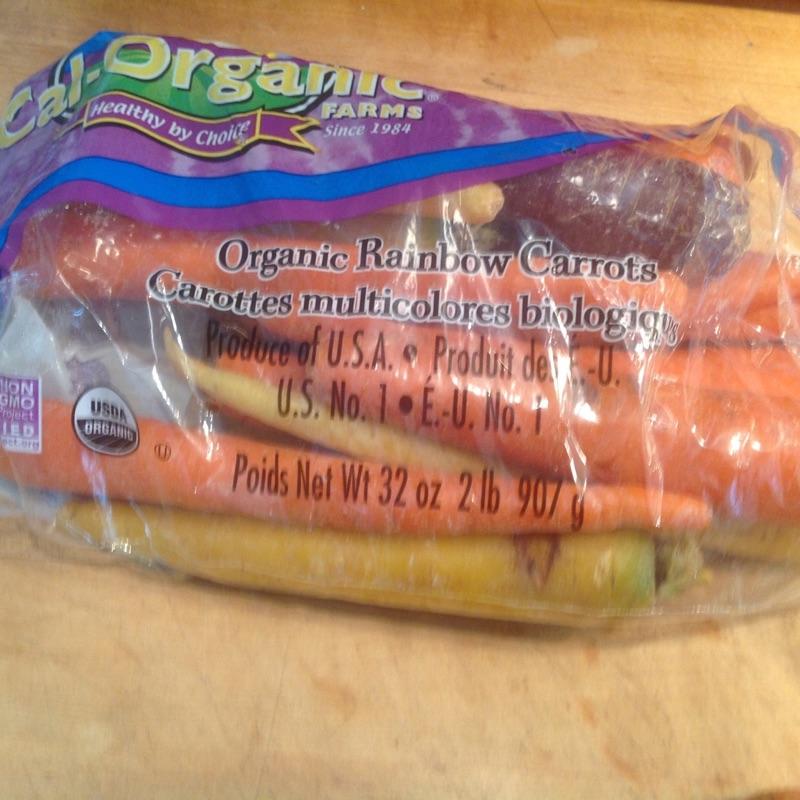
I grated a carrot into the mixture. Look at these pretty rainbow carrots. They are so sweet.
I tore up some of the gluten-free bread heels I had leftover, added some salt, added some Penzy’s herbal spice (a Provencal mix I keep on hand), and made meatballs.

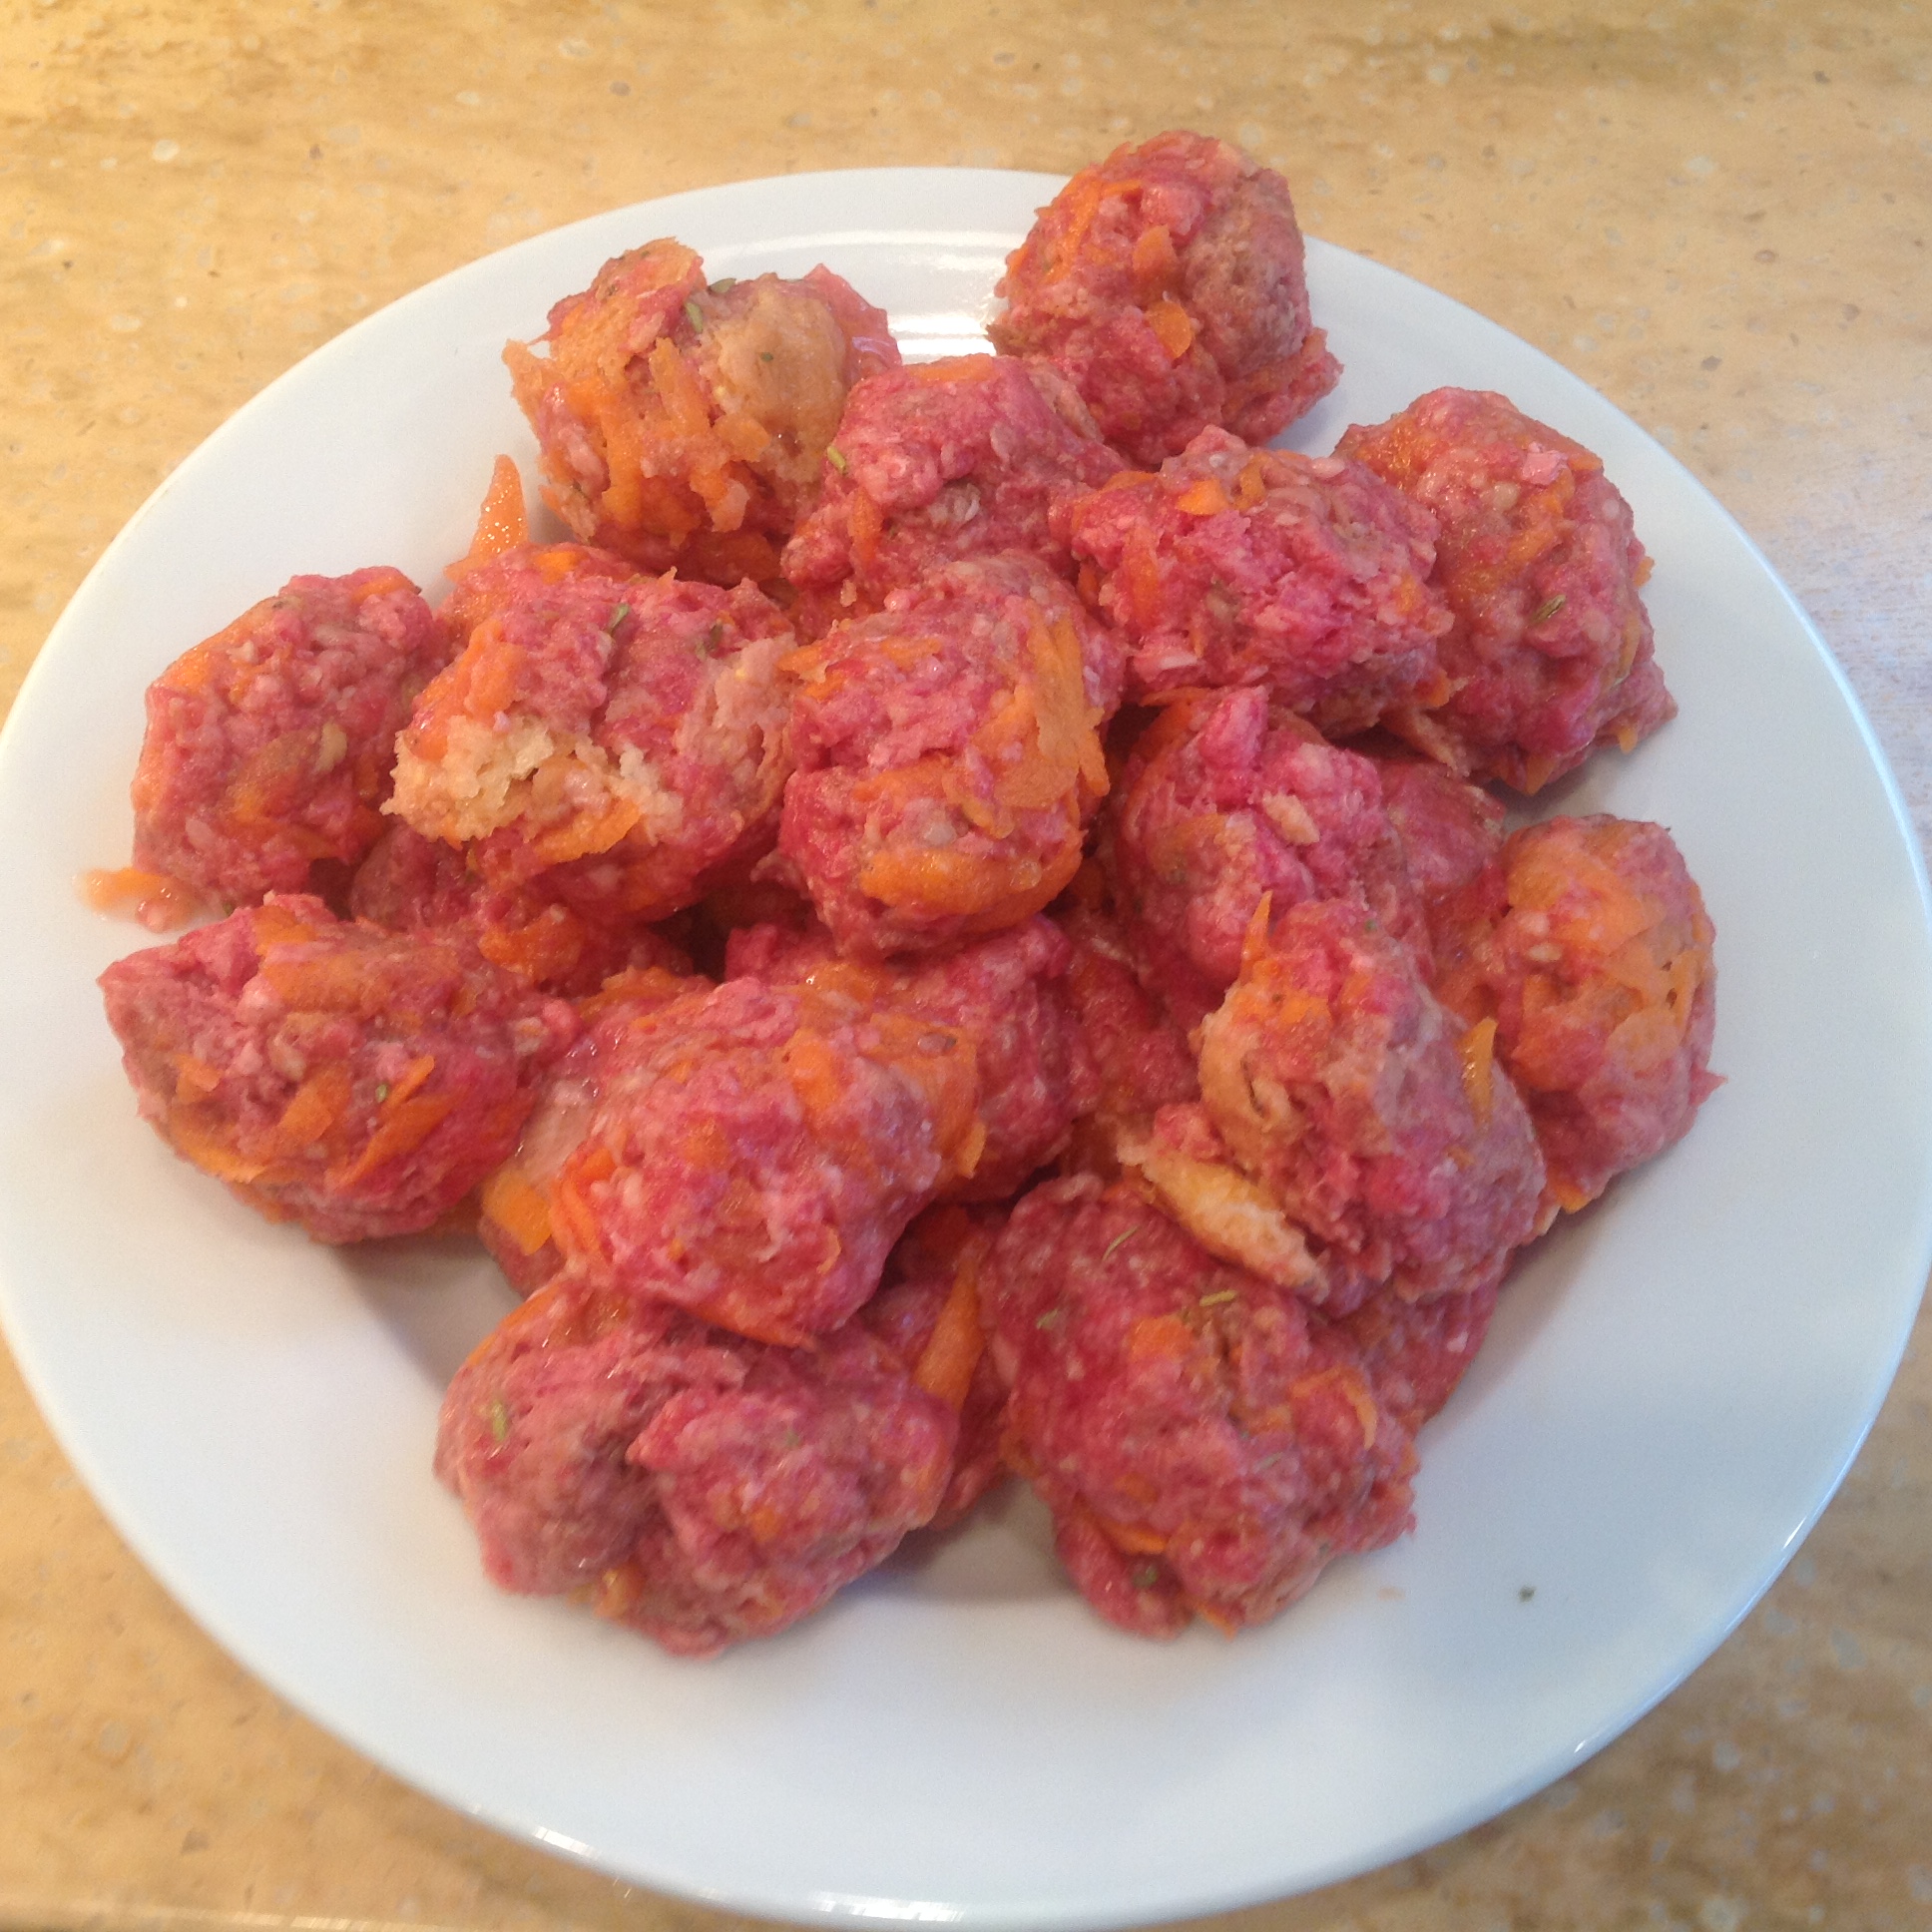
I put the meatballs in the refrigerator–not even bothering to cover them–until I was ready to reheat the soup gently. The meatballs cook in the hot simmering broth in about five minutes. Don’t boil them please. They float to the top when done.
I grated some raw milk Swiss cheese and put it in the bottom of my soup bowl, where the hot soup melted it. I could also have used a cheddar or somesuch and added it to the meatballs instead of in the bottom of the bowl. But I wanted the French Onion Soup feel of the cheese melted into the soup.

It was a delicious dinner–eaten with a few crunchy organic, GMO-free tortilla chips.
The broth just screams healthy, healthy, healthy, and it goes down so, so easily.
You cannot, cannot, cannot get the taste and health of this soup using a boxed or canned broth.
And today I don’t have to cook!
Tonight I will add some of the lacto-fermented sauerkraut on the top of the soup as a condiment, which will add some lovely probiotics and enzymes for digestion.
Turkey Tracks: February 8, 2015
A crock pot, that is…
With a crockery liner…
…and I have no idea if this crock pot liner has lead or will leak lead or not…

WHY? Did I do it…
Because I had another near miss with leaving the bone broth soup pot on low while I forgot it and left the house for several hours…
I got home about 10 minutes before the water level would have dropped to burning everything up…
Which would have meant…
Smoke…
Mayhem…
A mess…
Stupid!!!
One of the worst feelings ever is driving home after several hours and remembering, remembering, remembering that you did not turn off the low flame under the bone broth soup pot.
Now, I keep a bone broth soup in the refrigerator almost all the time, especially in winter.
It takes a good 24 hours to leach all the minerals out of the bones, so it’s actually not all that hard–especially if there are multiple things going on–to…forget it…
So, I’ll risk the lead and save the house.
You can see this big pot (it holds EIGHT QUARTS) is perking right along with a bone broth. This one has a chicken carcass and all the roasted veggies from the chicken, a lamb leg bone, and the lamb rib bones from the lamb I got this year.
Bone broths are incredibly medicinal, especially in the winter.
