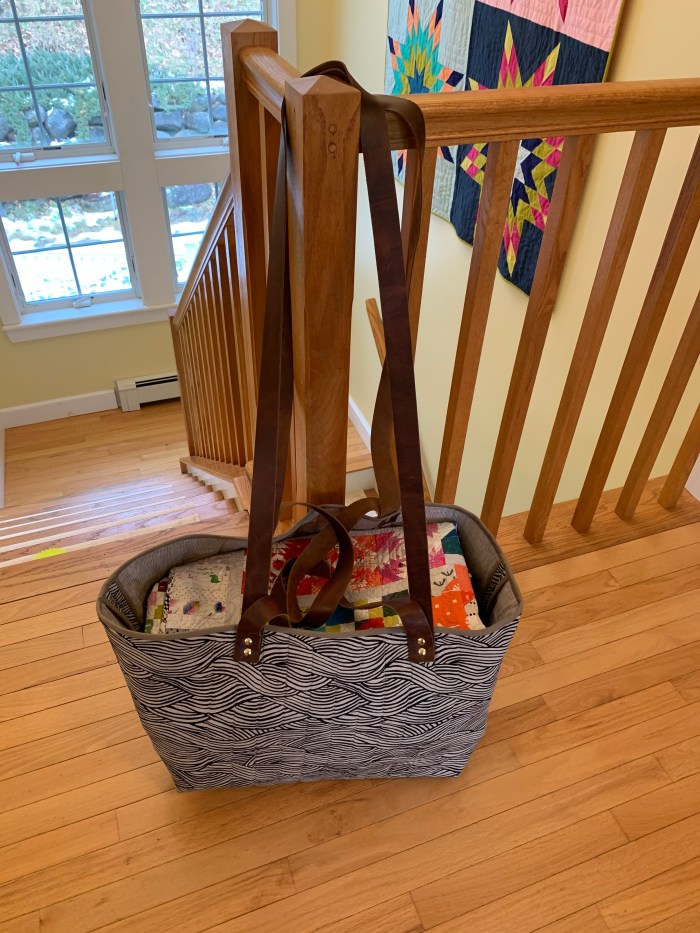
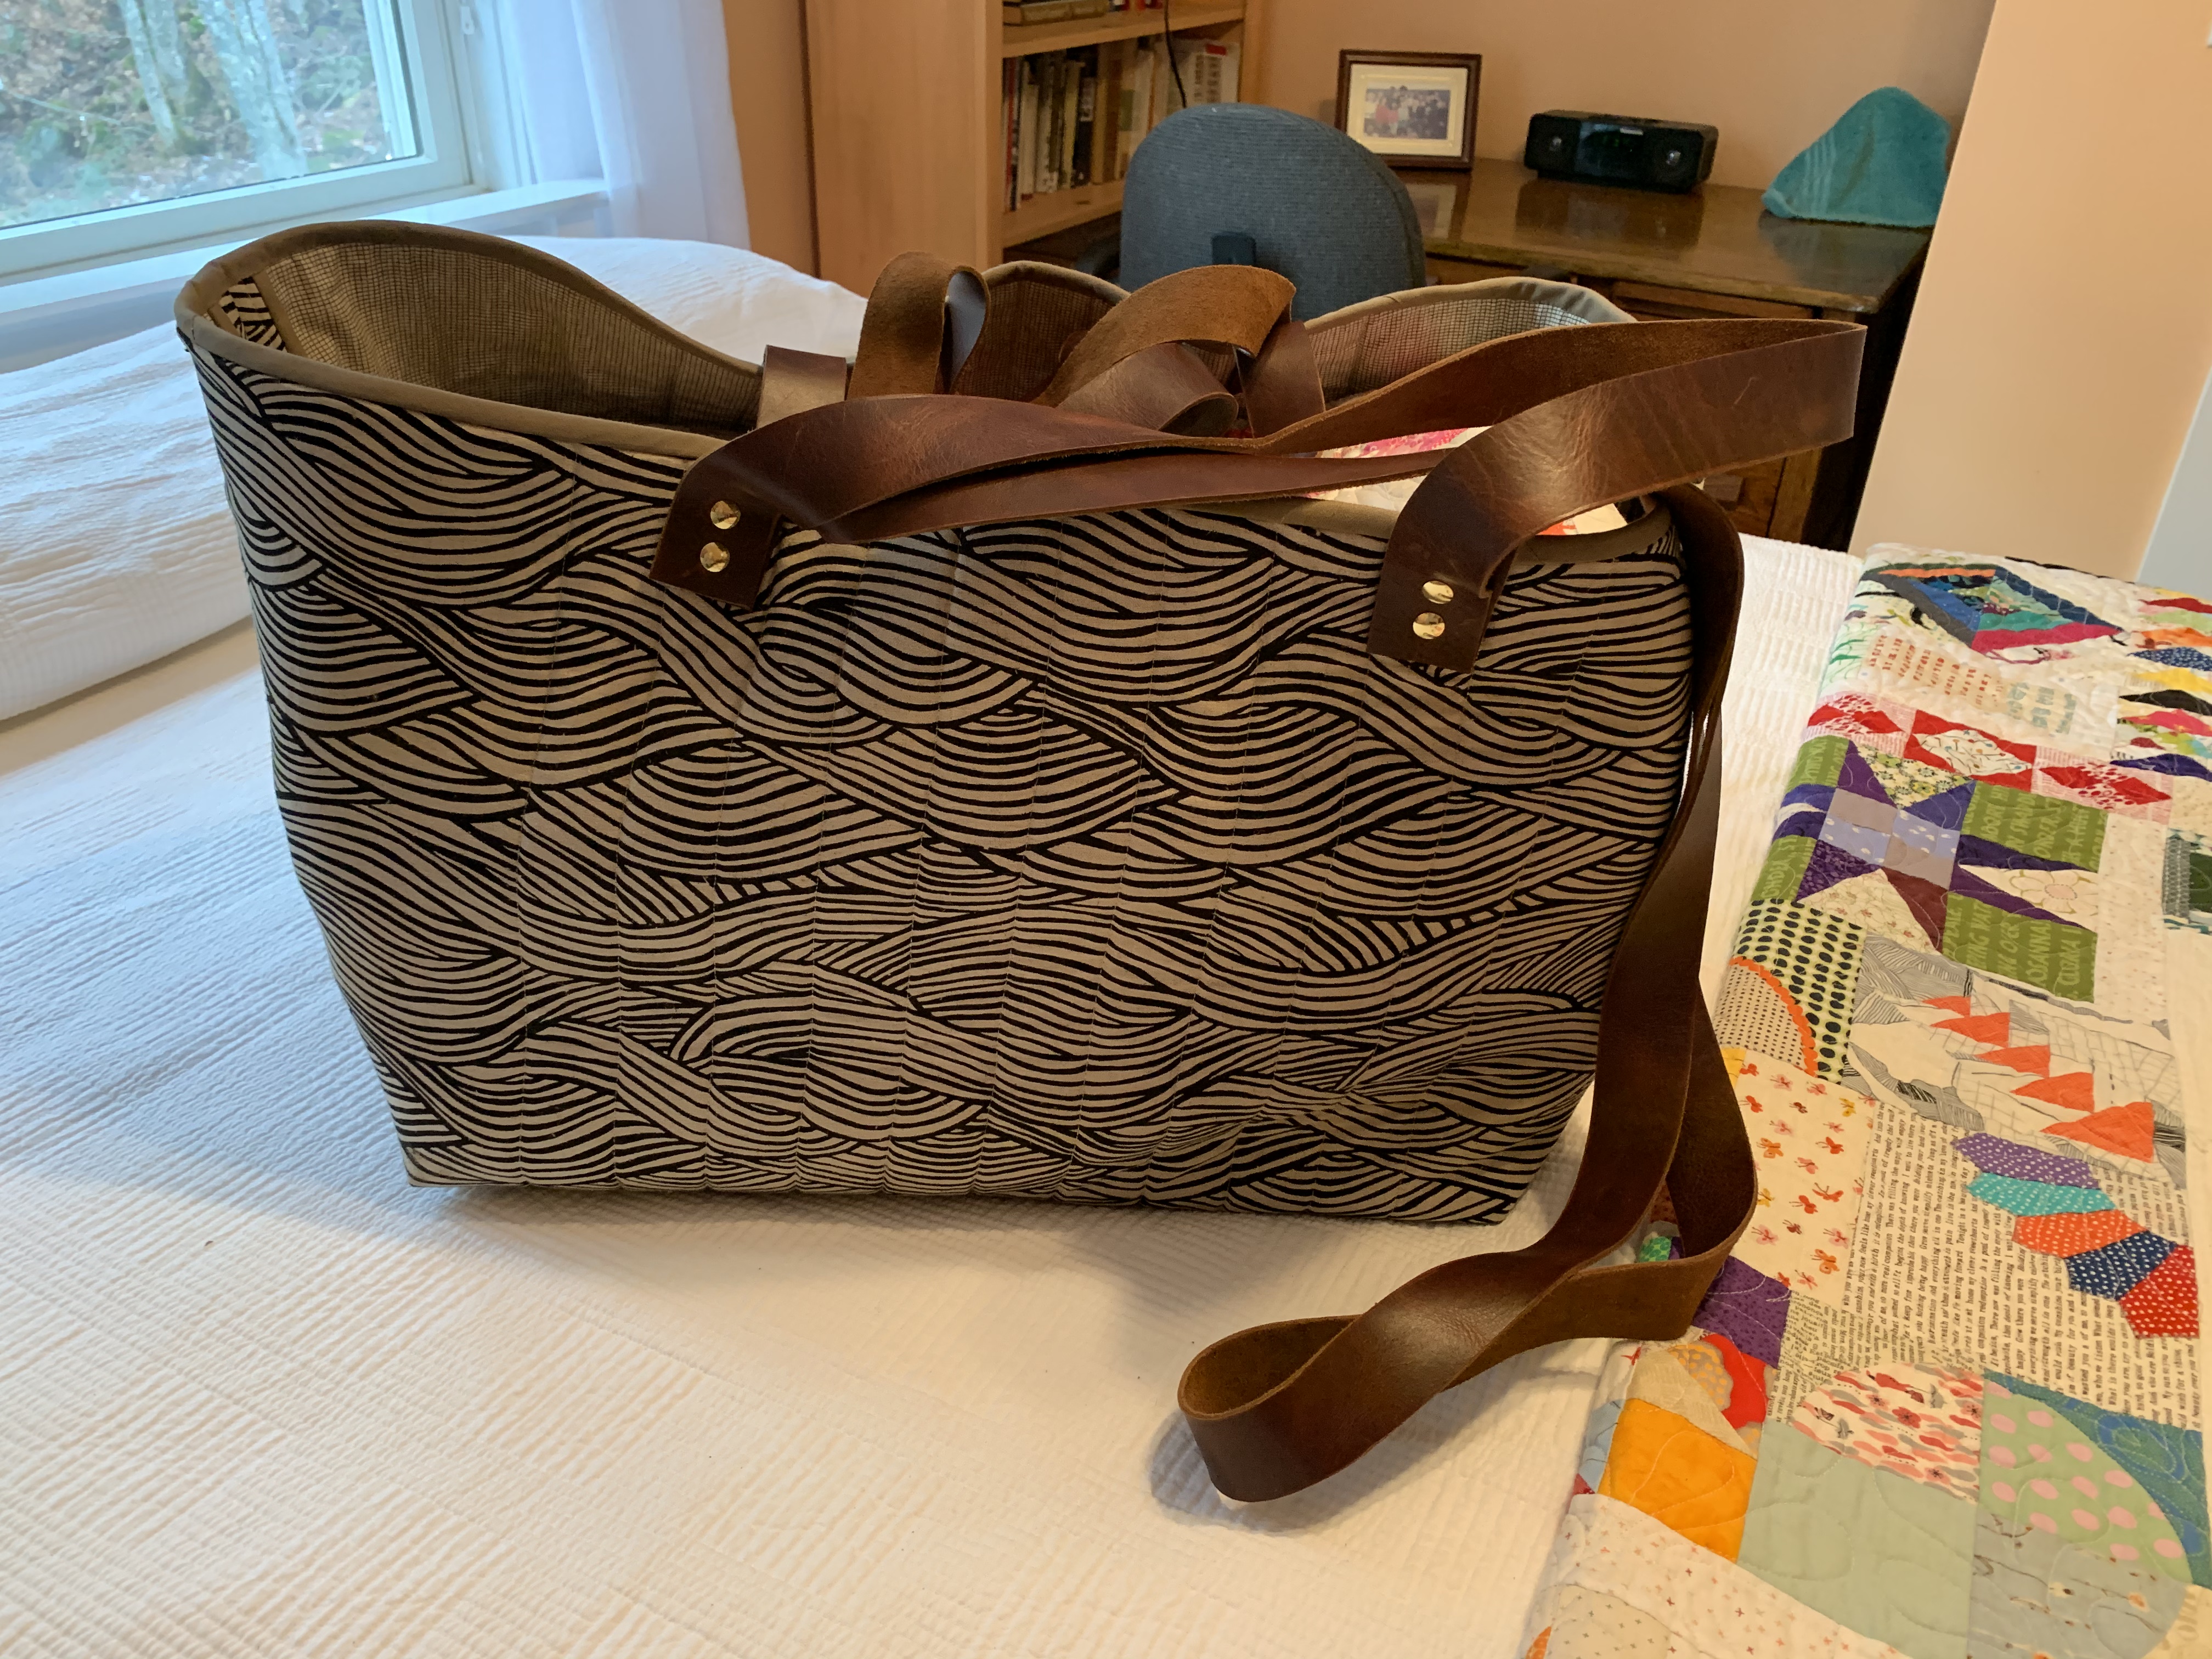
I finished this bag the other day. It’s the little version of Kelly Lautenbach’s Not Your Basic Blue (Ikea) Bag. Two of these will fit into the big bag, which I did some months ago.
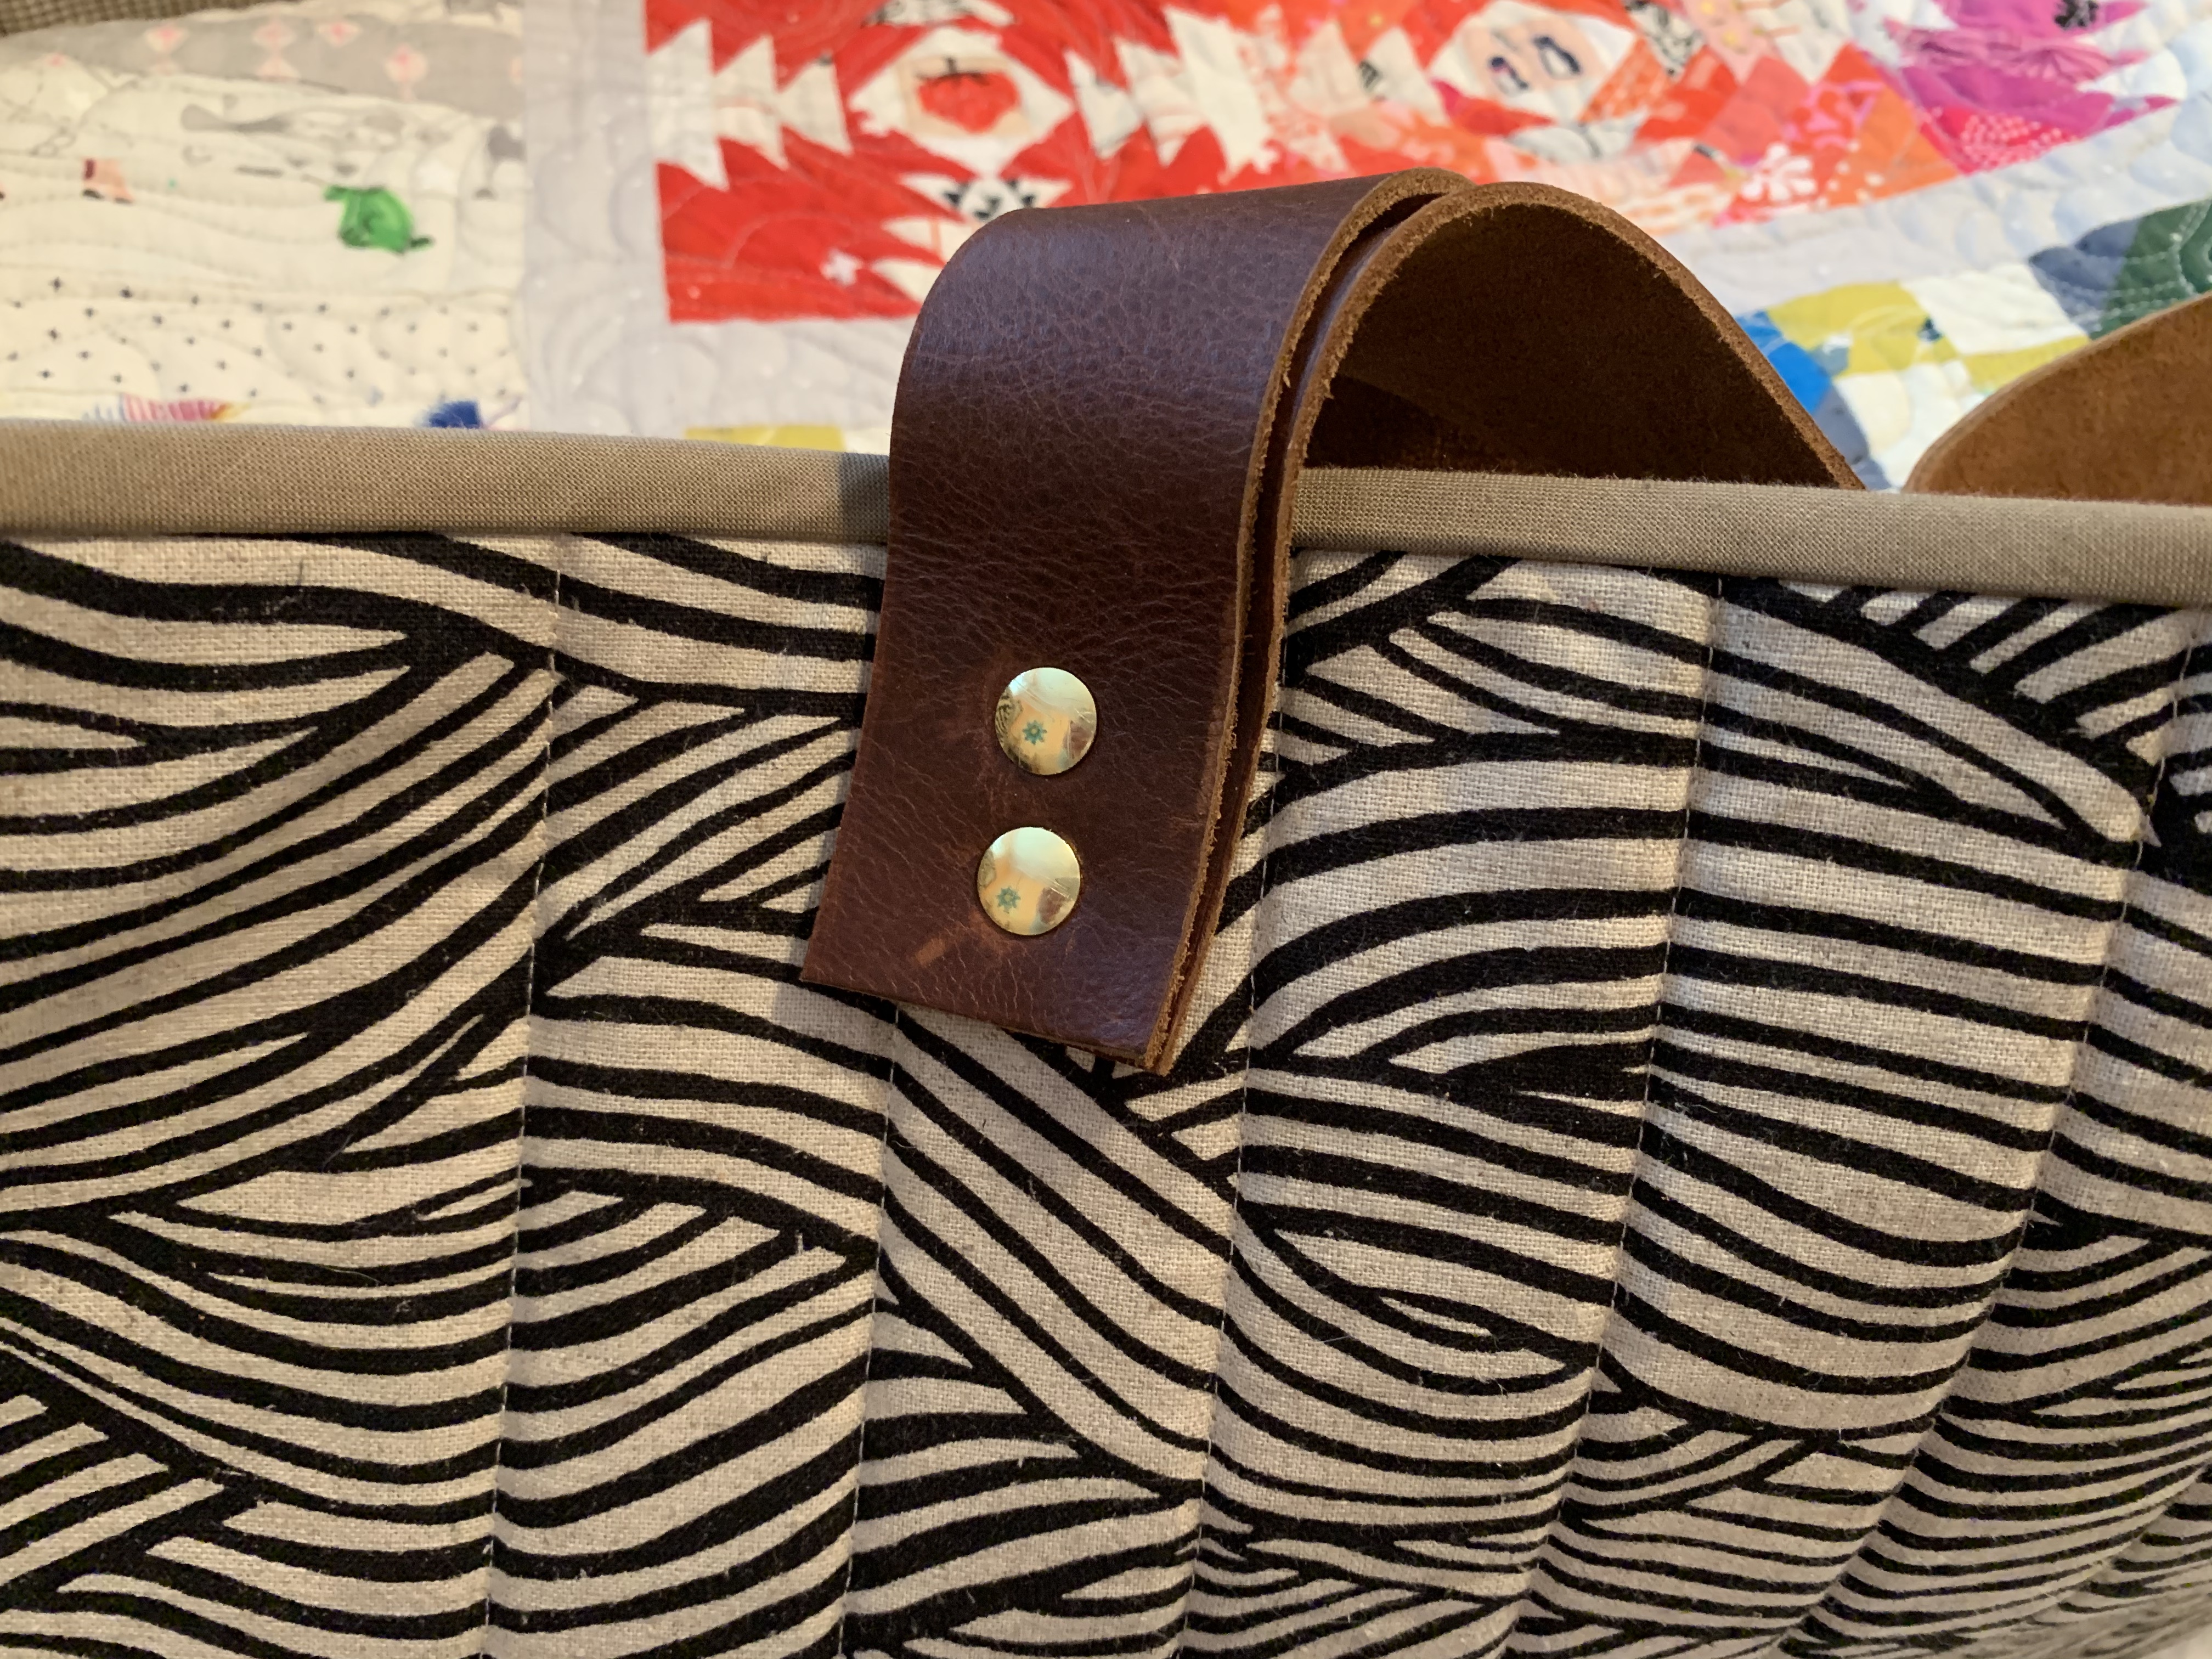
I used the basting spray (505 is less smelly) this time, and that worked REALLY well. The fabric did not walk away from the Soft and Stable inner layer while I quilted the bag layers. And I have LOVED learning how to install leather straps.
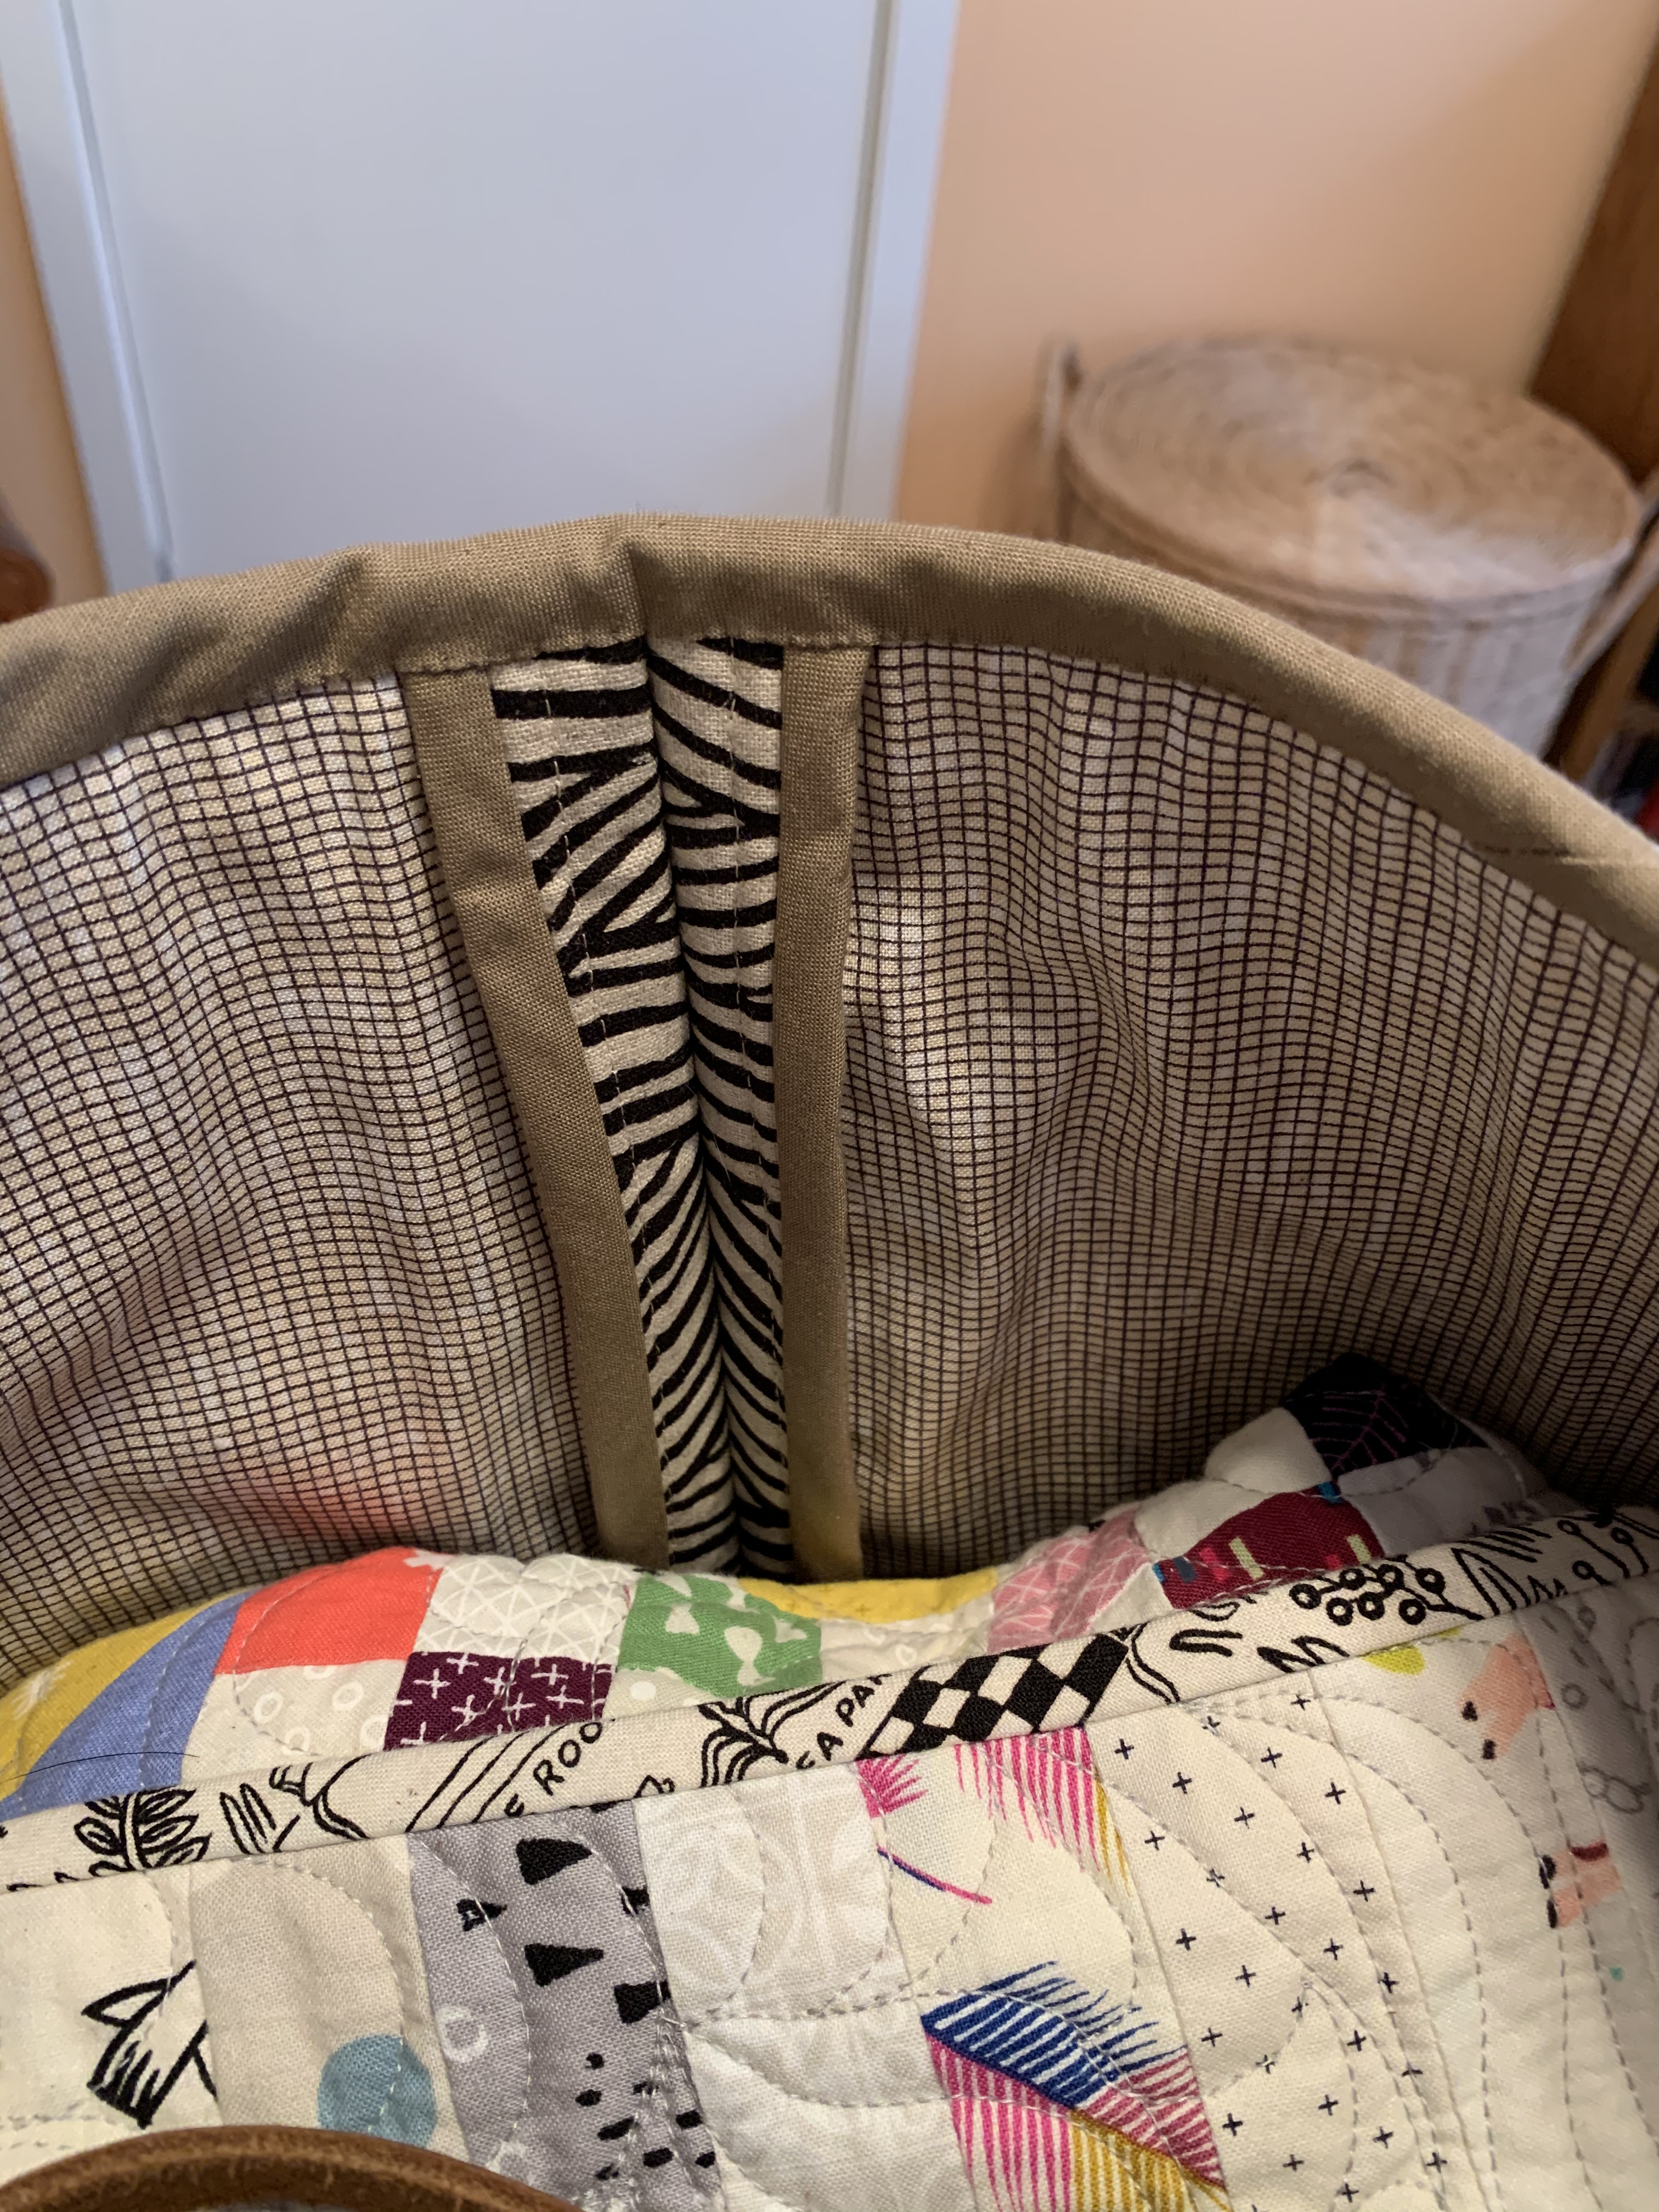
Here’s how the inside of the bag looks. Lautenbach’s method of construction is really fun to make. I do hand sew the top binding down, as I would a quilt, as I am somehow unable to machine sew a seam like this so that it looks neat.
Here’s a close-up of the strap mechanism. The screws have two parts that screw together, and I use a little of the blue screw lock liquid to insure that they don’t come loose. The handles can be removed if one wants to wash the bag at some point.
You can see the size of the big bag here—it will hold three full-size quilts and has double straps to help lift and carry it—the longer size goes over one’s shoulders, and the smaller ones are for hands to help.
I think that I have enough carrying power now, don’t you? The grey bag is the Market Bag” from Noodlehead. But there is a middle-sized bag possibility for the Lautenbach bag…
It isn’t ideal, but it is vastly better than nothing. And, the Zoom meetings have meant that we can continue our progress on our current challenge: Bee Inspired. Each participant lays out what s/he wants, and other participants strive to make something creative within those parameters.
In the Zoom meetings those who are participating in “Bee Inspired” AND who were on the Zoom meeting revealed the blocks they had made for two members.
SARAH’S CHALLENGE
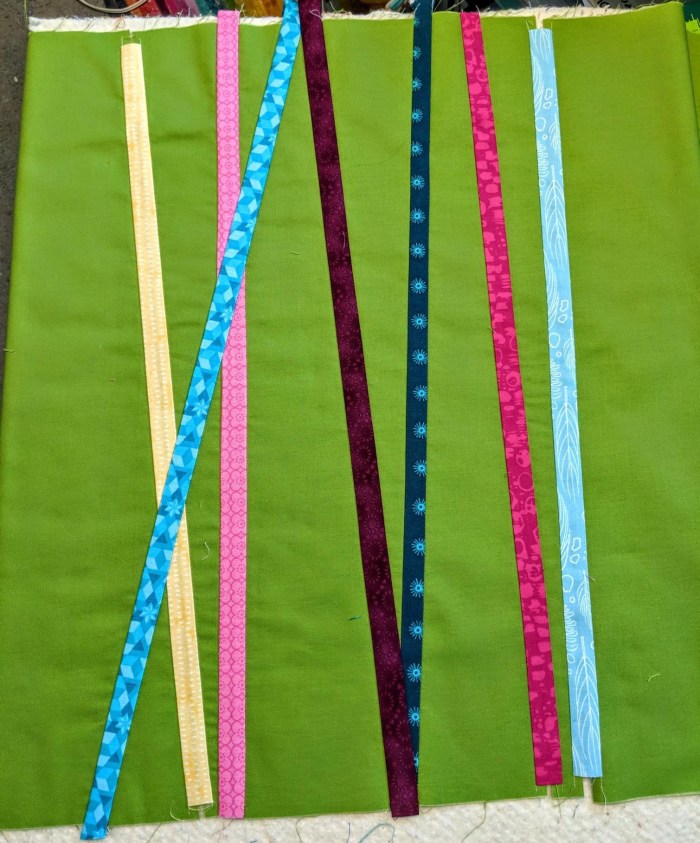
Sarah wanted us to make “circles and sticks,” and she did a great job of giving us color samples that would provide what she wanted, including gifting us with the shades of background greens she wanted. Here’s what a “stick” block looks like—and I am not sure which member made this one. Sarah plans to alternate the “stick” blocks with the “circle” blocks.
You can see some of the blocks we finished on the Mt. Battie Modern Quilt Guild Facebook page. When Sarah has all the blocks, she will decide the layout, how to trim blocks, etc.
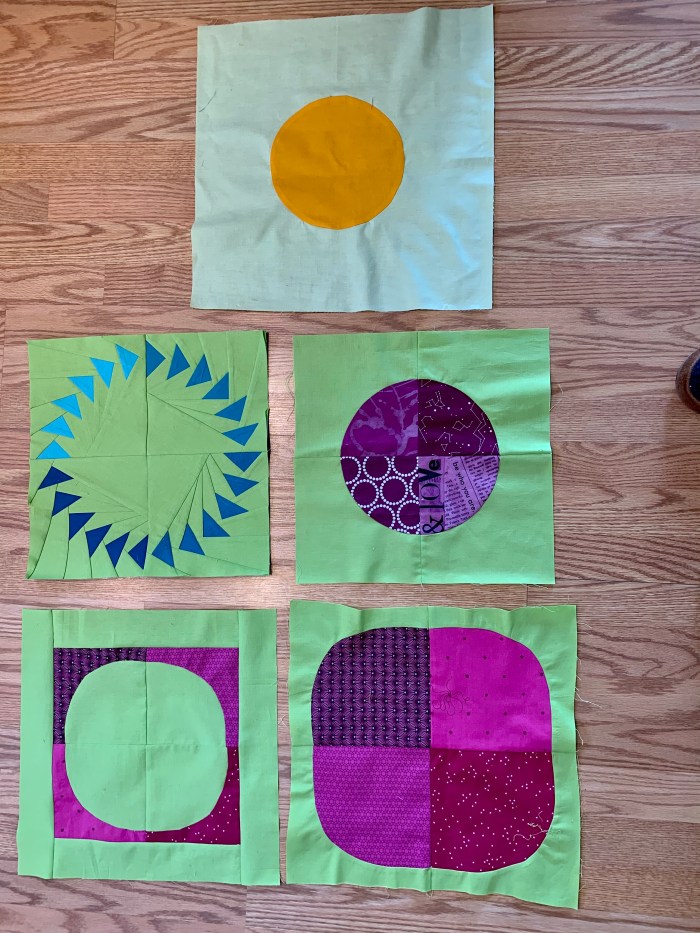
I chose to make circles, and I had a lot of fun experimenting with different circle forms. The top, yellow circle is 8 inches, and I made it with Latifah Saafir’s “The Clammy” ruler. This ruler is very nifty—and comes in various sizes. One cuts the backing as well as the circle, in two different cuts, and Saafir has videos to show one how to sew the circle into the hole created in the square. I left this piece big as Sarah, if she uses it, may want to trim it so the circle is off-center. Of course, LOL, when one cuts out the yellow circle, one has a yellow square left over with a hole in it, which begs for being used. AND a green circle left over from the green square cut, which begs to be used. It could be a never-ending process. Especially for someone who likes to use up leftovers…
One thing I found is that it is hard to find methods to make LARGE whole circles. Although I suppose that the cardboard method Tara Faughnan taught us in season 1 of the Color Collective would work, now that I think about it. And, the reverse machine applique method Irene of Sugaridoo used recently in her Bernina Quilt Along (we are now on row 8 of 12 rows) could work as well.
There are MANY circle of geese patterns online, and many are free. I saw this one from #jeliquilts on Kelly Lautenbach’s #itsjustsew Instagram gallery. She was using it for a temperature quilt where each circle has geese representing temperatures for the days in a month. Tia Curtis just recently posted pictures of Kelly’s quilt while she was quilting it. I really love this block. I was able to use four of Sarah’s blue choices to make the circle.
The purple circle on the right is, I think, 10 inches. There are all sorts of sizes of Drunken Path rulers online. And I was able to find the magenta/purples Sarah wanted from my stash.
The bottom two blocks are probably so NOT what Sarah wanted, but I had fun trying to hand cut the Drunken Path forms and then sewing them. The encouragement came from Sherri Lynn Wood’s book THE IMPROV HANDBOOK FOR MODERN QUILTERS. AND, I am getting much better at sewing free-hand curves on the machine. They are fun.
As always, I told Sarah to use or not use whatever she wants, to cut up blocks, to discard them, etc.
JAN’S CHALLENGE
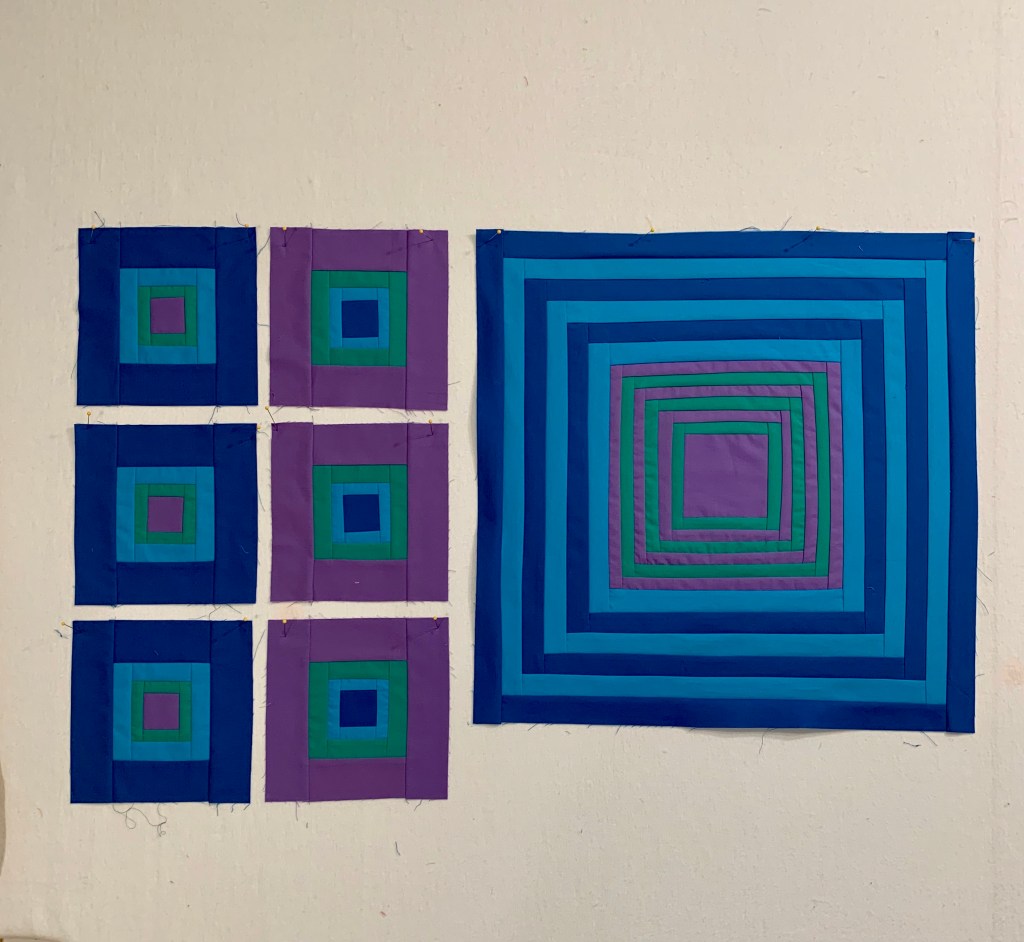
Jan’s challenge was “squares.” We just did this Zoom meeting last Thursday, so these blocks are not yet up on our Facebook page. Jan received some really nice blocks, and it will be fun to see them again online and to see what Jan does with them.
Jan asked for blues and greens, with one other added color of our choice. And, we could use neutrals if we wanted.
I made her Tara Faughnan’s Radiating Log Cabin block from season 1 of The Color Collective. I chose the blues and greens and had my favorite color pop of a warm coral. Then I noticed that I was not stopping to make the blocks because I could not figure out the color order. I wanted the coral to be the center square and radiate outwards, but it was just so not working. When I switched to a softer purple, which I knew Jan liked, I was able to cut and sew the block.
I made some smaller blocks in the colors I chose so she could spread the color around if she wanted. Again, I told her she could NOT use whatever did not work for her, cut up blocks, trim them back, or whatever.
I love how these blocks came out, and it was fun to make them. Tara Faughnan’s use of this Radiating Log Cabin format makes a really handsome block.
Our next challenge reveal will be in September, so I guess I better start thinking about it.
I saw modern quilter Kelly Lautenbach’s BIG bag in the recent Simply Modern (#19) magazine’s article on her work.
I fell in love!
There are three sizes, and the BIG, original one is HUGE—big enough to hold 3 or 4 full-size quilts or, even, two of the small bag version. There are leather straps (2 sets if you like and I did for a bag this big that could be really heavy) attached with 1/4 inch Chicago Screws. I bought a hand-held leather hole punch set from Amazon for roughly $20 (Pro-Master Leather Hole Punch Set) which I really like. As suggested in the article, I got the leather straps from Springfield Leather and the 1/4-inch Chicago screws from Tandy’s Leather.
NOTE: the pattern cover page has a math error in that the finished width of this big bag is 32+ inches, depending on the width you use of Annie’s Soft and Stable. I used the standard kit size of Annie’s 36 wide and was careful when quilting not to go below the 36 inches. The pattern suggests 38 wide Annie’s S&S as the fabric layers will shrink with quilting, but you do trim to 36 by 42. I did not want to buy 2 yards of Annie’s to get these extra 2 inches as the bag is plenty wide.
I would also use the spray baste product the pattern suggests if I ever make this bag again. The bag is made from one BIG piece, which means there is lots of room for layers to shift easily when you quilt. I just ran lines down the width and called it a day. Use a walking foot for sure!!!
And note that the bag, when full, makes a big rectangle. Also, sometimes the pattern is referred to as “Not Your Basic Blue Ikea Bag.”
The really cool thing about the Chicago screws is that they can be removed if you want to wash the bag. I did use the screw lock (blue or purple) liquid on my screws to insure that they don’t jiggle loose down the road—which happened to the tiny, tiny screws on the Turn Lock on the Noodlehead Explorer Bag I made last fall. I can get them open again; it just takes a bit more beginning muscle and a pair of pliers to hold the back of the screw in place while you turn the front.
I ordered 1 1/2-inch leather straps for this big bag. I think they work well at that width. Right now, this bag holds three full-size quilts and there is room for a 4th smaller quilt. For a smaller bag, I’d drop back to the 1 inch leather strips.
The pattern suggests cutting some backing pieces to stabalize the screw holes on the inside of the bag. I agree that’s a good idea, and it looks so nice.
I worried about the 1/4-inch screw working with FOUR layers (3 leather and the bag), but they did.
I love the way Kelly bound the inside seams—to avoid having to lay in the lining separately and turn the bag, etc. Next time I will sew the binding on the right side in the ditch—so the seam line does not show on this side. The pattern calls for that, but I was squeamish about catching the back, folded piece for sure. I’m not good at that. No one would care about seeing this seam line really. It just looks like more quilting lines.
I loved the Chicago screws so much I took apart the handle I hand-sewed on my Noodlehead Market Basket and used these screws. Steel-colored ones might have been classier, so I’m ordering both brass and steel screws next. It takes 8 screws per bag.
And, again, I put reinforment leather on the inside.
Oh boy! I am feeling the urge to make the smaller bag—maybe for a gift…
Ok, maybe for ME.
The pattern is available on Etsy. Note that I blacked out the 22-inch figure for the original bag, which is wrong. It is more like 32 or more—depending on the width size of your Annie’s Soft and Stable. And I added in black text the correct size on the image. The other long sizes on the pattern are a big off as well.